• HOME
  • {A}’s Chipmunk Training Archives

 Homepage

  • The Homestead
    • Home Projects
    • Home Improvement
    • Home Decor
      • Seasonal Home decor
        • FALL Home Decor
        • WINTER Home Decor
        • SPRING Crafts and Creations
        • SUMMER Crafts and Creations
    • Our Chickens
    • Gardening
    • Organization
    • Re-Purposing
    • Furniture Refinishing
    • Budget
  • Crafts & Creations
    • Seasonal Home decor
      • FALL Crafts and Creations
      • WINTER Crafts and Creations
      • SPRING Crafts and Creations
      • SUMMER Crafts and Creations
    • DIY (Do-It-Yourself) Project
    • Kids Arts and Crafts
    • Homemade/Handmade Gift Ideas
    • Holiday Crafts
    • Fan Pulls
    • Free Printable/Downloadable
    • Sewing Projects
    • Giveaways
    • Business Features
  • Recipes/FoodFun
    • Breakfast
    • Lunch
    • Main Dish
    • Sandwiches
    • Appetizers
    • Slow Cooker
    • On The Grill
    • Side Dishes
      • Soups
      • Salads
    • Baking
      • Breads, Rolls and Muffins
    • Snacks
    • Treats
    • Desserts
    • Drinks
  • Homeschooling
    • Elementary Homeschooling
      • Elementary Homeschooling READING
      • Elementary Homeschooling MATH
      • Elementary Homeschooling LANGUAGE ARTS
      • Elementary Homeschooling SCIENCE
      • Elementary Homeschooling HOME ECONOMICS
      • Kids Arts and Crafts
    • Middle School Homeschooling
      • Middle School Homeschooling SCIENCE
      • Middle School Homeschooling HOME ECONOMICS
    • Language Arts
    • Math
    • History / Social Studies
    • Geography
    • Foreign Language
    • Field Trips
    • Games
    • Nature Study
  • The Big Picture
    • Life In General
    • Celebrations
    • Faith
      • Into the Light; The Series
    • Giveaways
    • Reviews & Sponsors
  • Photography & Lettering
    • Photography
    • truck lettering
    • vehicle graphics
    • Newborns
    • Kids
    • Engagement
    • High School Senior Pictures
    • High School Senior Pictures Sneak Peeks

French Toast, My Way. (The Best Thing Since Sliced Bread.) | Recipe

September 15, 2011 By Laura 8 Comments

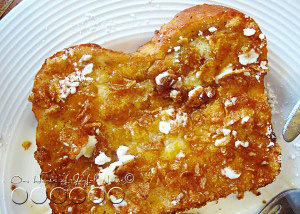
fried-french-toast-recipe-4

Recently, a very special breakfast was in order.  It was our triplets’ 9th Birthday, and we always have a special breakfast on birthdays in our house.  Usually, it is my husband’s specialty of ‘Birthday Number Pancakes’, which we have blogged about many times.  But this time, I had plans.  I really wanted to make French Toast, and just like the kind I had had so many times growing up, at a particular restaurant. The crazy thing is, I cannot for the life of me (yet) remember, what restaurant that was! It’s one of those questions I’d love to ask my Mom, but can’t, because she is gone now.  : (  I know she would know. I have searched recipes all over the net, trying to find a recipe even close to the kind I had had, to no avail.  Alas….I decided, “What do I need a recipe to follow for? I can figure this out as I go!”  I decided I believed in me.

And what became of that fearless leap, is the best French Toast, we have ever had. (Quite equal to the mystery restaurant’s French Toast, if I do say so myself. Except their’s was like, a 1.5 inch thick slice of bread, cut corner to corner into a triangle.  The crust sides were the best.)

It’s important to note, I am pretty health conscience, for my family. But this French Toast was to be deep fried, which of course is why it is SO good. And it’s a treat! On special occasions, one needs to indulge. Still, I wanted to make this recipe as healthy as I possibly could, while still making it taste exactly like I wanted.   So, while we never really have white bread, we did for this.  The oil I was deep frying in, was the healthiest possible (I think): Canola Oil.  It’s what we always use to make donuts and such as well in the Fall. And as you read the few steps here you’ll find I had a few other tricks that made me feel better about the whole health thing in my mind.  You are going to need a deep fryer, for this particular how-to recipe. Ready?

Participating Ingredients, to have on hand:

(*Amounts depending…)

  • Bread Slices (I used thickest white slices I could find.)
  • Corn Flakes Cereal
  • Eggs
  • Milk
  • Vanilla
  • Cinnamon
  • Canola Oil

For Table:

  • Butter
  • Confectionery Sugar
  • Syrup

***

*I say amounts depending, because it really depends on how many French Toast you need to make.  If you need more of a batch of anything, you just get a little more as you go.  No big deal.   Also, to keep things moving and producing quickly, it’s helpful to have a helper. {A} and I were a great team in the kitchen this particular morning. (And will be a gain soon. ; ).  So, the following is stations you want to have prepared before you actually begin cooking.

Dipping Mixture:  In a shallow dish, crack 3 eggs.  Add 3/4 cup of milk,  a few drops of Vanilla Extract, and a dash or 2 of cinnamon. Whip it up with a fork.

Bread/Toast: A key ‘trick’ here, to making your French Toast as good as it can be, is to pre-toast your bread. Trust me, it makes all the difference, as to not soak-up the mixture into the bread, but rather coat it as intended.  So for us 6, I covered 2 cookie sheets with tin foil, and put the bread slices in the oven at the lowest setting. Just watch them, until they are toasted a bit. Flip them if you’d like. Both sides don’t need to ‘look’ toasted, but just feel toasted on the surface.  Once they are all toasted, pile them all onto one sheet and cover the emptied sheet with a layer of paper towel.

Deep Fryer:  Fill fryer with Canola Oil to recommended level. Heat to 350 degrees.

Crunch Coating:  In a shallow dish also, have Corn Flakes cereal crushed up.  Little flakes are fine.  Don’t crush it to dust.

Now…..here goes the assembly line routine, which you can sort of see in the 2 photos coming up:
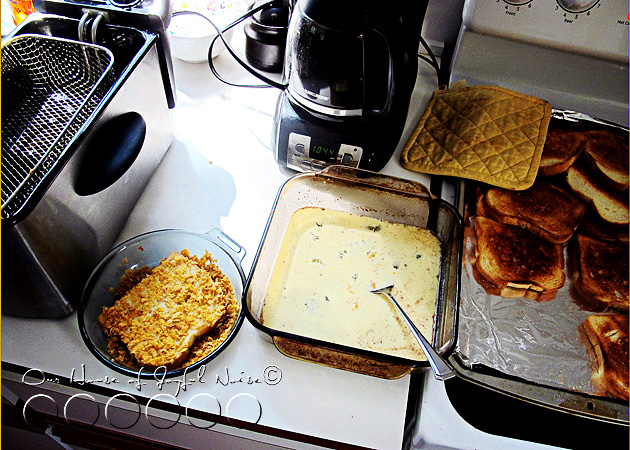
001 1) Put a piece of toast into the egg mixture, flip it over quickly with a fork to coat the other side, and take it out right away using a forl. Let it drip off as it hangs from the fork, and then lay it in crushed Corn Flakes dish.

2) Press the toast slice down a little into the flakes, flip over, and press again.  Neither side has to be completely covered with the flakes.  You just want some on there.

3)  Move the coated slice from the flakes, and lay it in one end of the deep fryer basket.  Then do a 2nd piece the same way:  Quickly coat both sides in egg, let drip, coat both sides in flakes, and lay in  free area of basket.

4) Now lower basket into oil, and immediately start counting to 1o.  The toast will float.  So when you get to 10, flip them both over, and count to 10 again.  Bring the basket up, and hook on the side.
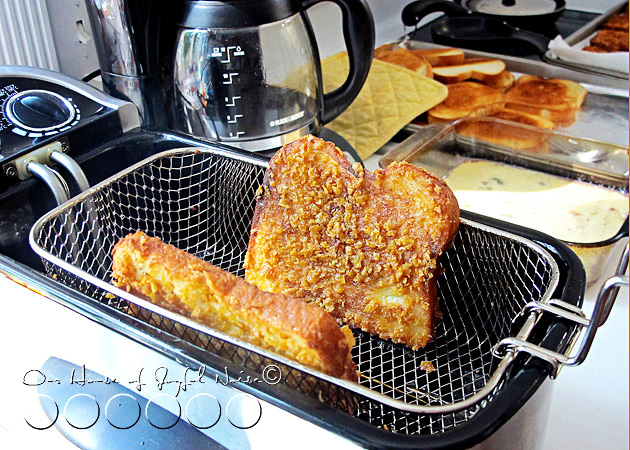
fried-french-toast-recipe Enter Trick # 1: I had to stand both pieces up after each set, as shown above.  In my mind, it best helps any excess oil drip off, instead of soaking into the toast.  And ultimately, makes it crispier. Then….I would put onto the paper-towel covered cookie sheet in the still warm oven.

Repeat sets of toast until you are done. We only had to make a little more egg mixture once, and crush up some more Cornflakes a few times.
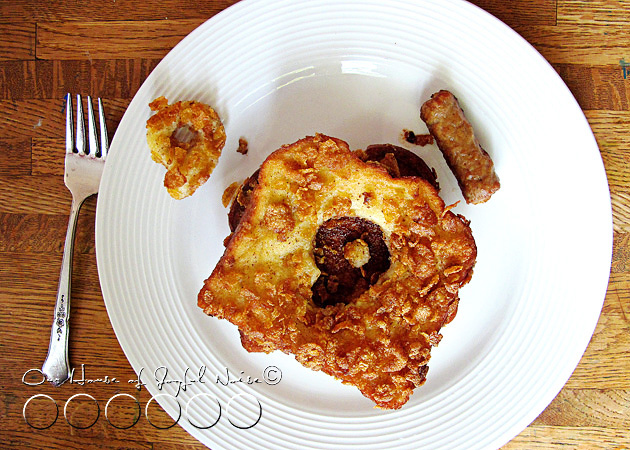
fried-french-toast-recipe-1 Now, this was our Trio’s Birthday Breakfast, and so we had traditions to stick to. I managed to cut 9’s out of the top French Toast on each of their plates, and put it on the side. Of course, this was before we added the wonderful toppings! (Coming up.)
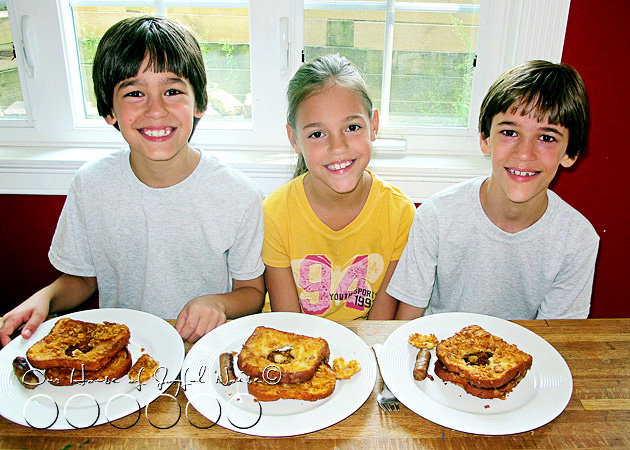
fried-french-toast-recipe-2 The Happy & Hungry, 9 Year Old Triplets!!

For topping, I just lightly butter, sift a little confectionery sugar on,  and then drizzle on the syrup.
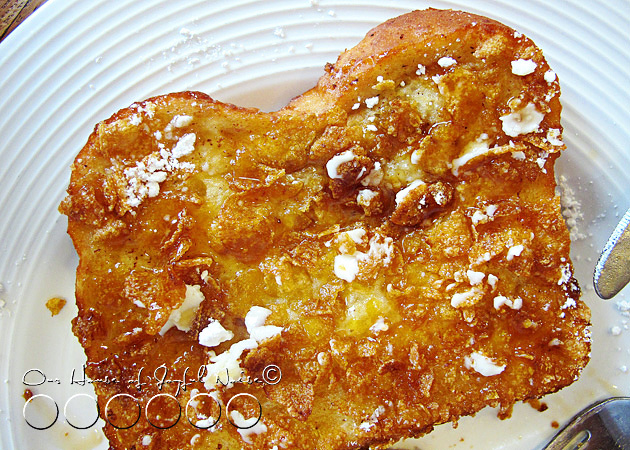
fried-french-toast-recipe-3 I can’t even explain how delicious this French Toast is. My family was loving every bite. It’s filling, for sure. But it’s not heavy in your mouth or stomach, in the oily ‘ugh’ kind of way. It tastes light, and sweet, and it’s nicely crispy on the outside. Add some sausage or bacon on the side, with juice or coffee, and it’s a special breakfast, that’s worth the little production effort for sure. Consider trying it this weekend, and letting us know how you liked it!

I think we might be having it again ourselves.  😛


Save

Filed Under: Breakfast, Recipes Tagged With: birthday-number-breakfast, breakfast-recipes, Catholic-blogs, Catholic-families, deep-fried-french toast, deep-fryer-french-toast, french-toast, french-toast-recipes, fried-french-toast, recipes, triplets

Striped Cucumber Salad | Recipe

August 26, 2011 By Laura 4 Comments

cucumber-salad-recipe-4

It’s a wonder, that our children have not turned into cucumbers, this summer. They love them, and our gardens have been so generous with them, that the kids have happily eaten them many days for lunch, dinner, and sometimes even as a snack.  They’ve had them as spears, sliced the long way and added to their tomato sandwiches, chopped up in a garden salad, and as this Cucumber Salad, which we are sharing with you today.

We know. It’s not the most inventive recipe, if we can even call it that. The ‘recipe’ is actually more about the dressing it’s in.  It’s one that I imagine has been around a long time, as my mother used to make it while I was growing up.  Recently we were at our friend’s house, getting our families together, and they made us the most de-li-cious dinner.  Part of that meal was a simple romaine salad with sliced fresh strawberries, and a dressing very similar to this one. So as you take note of this dressing, keep in mind the various or creative ways you can use it for, too.  This dressing, and this salad, is a perfect summer-side, to a light meal.

Striped Cucumber Salad


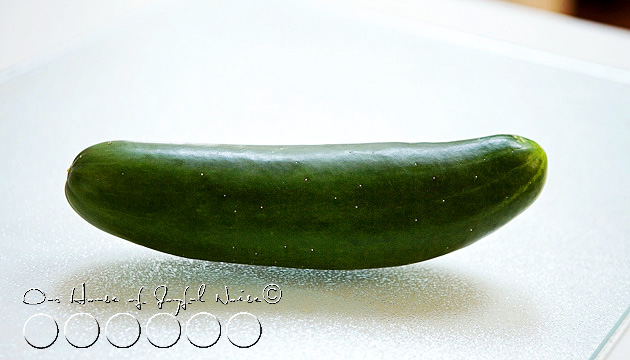
cucumber-salad-recipe Our Cucumber Salad begins with a fresh organic cucumber, from our own gardens.


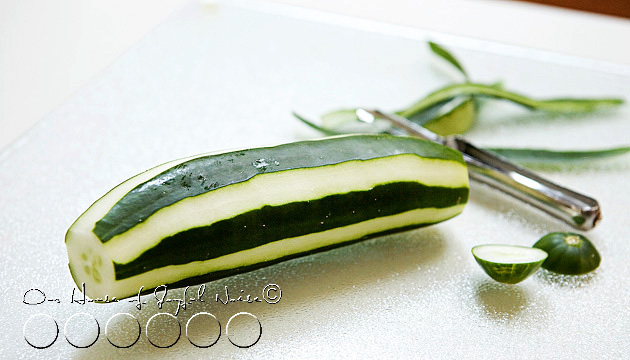
cucumber-salad-recipe-1 I have always, peeled cucumbers in stripes.  But there have been 2 separate reasons I have done so.

In the off-season, I have peeled the grocery-store bought cucumbers this way because, as we all know, the majority of the vitamins & minerals are in the skin, and I want to get all I can into my kids/family. But also, before we ate organic, the cucumbers from the store were usually waxed.  Man I hated that! I couldn’t stand the feel of it trying to wash them, (the wax never came off), and the funny feeling it left on my hands too. Also, we just weren’t partial to eating wax. You?  😕 So, peeling the skin in stripes, was a compromise, of sorts.

But even when the cucumbers are organically right from our gardens, I think the stripes just make them fancy & pretty.  So I chop off the ends, and stripe peel them.

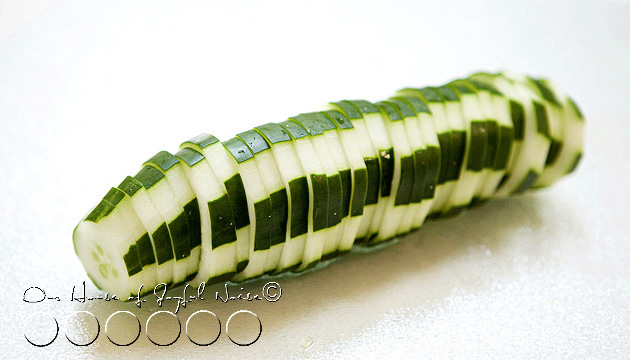
cucumber-salad-recipe-2 And then I slice it.


cucumber-salad-recipe-3  

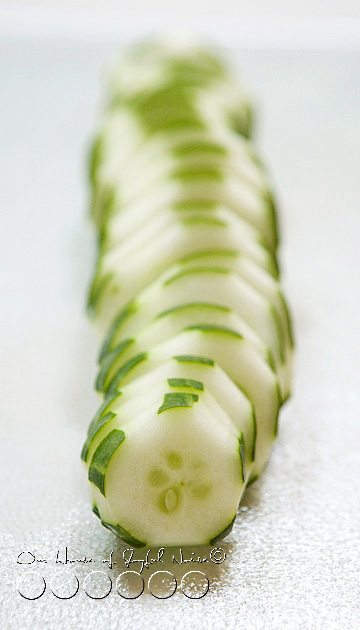
And maybe I’ll have fun taking photos of it. It’s a cucumber caterpillar!!

So much for not playing with my food.

Now I know this is silly, but, I didn’t take photos of making the dressing.  It would have been boring, and unnecessary.  It’s so simple though, and there isn’t actually ‘correct’ amounts of any one ingredient. It just matters more of how thick you want the dressing, and how much you like this or that ingredient.  All to your preferred taste.  But this is generally my winged recipe, I mix in a bowl well, with a fork.


Cucumber/(Salad) Dressing

  • 1/2 c. mayonnaise (Hellman’s Real, for us)
  • 1/4 c. white sugar
  • 4 tsp. distilled vinegar

dashes of:

  • dill weed
  • seasoned salt
  • black pepper

Of course….all of these amounts will vary with how many cucumbers you cut up.  I like it to just coat the cucumbers. My mother made enough, that it was more of a soup, that the cucumbers sat in.  She made a lot! LOL


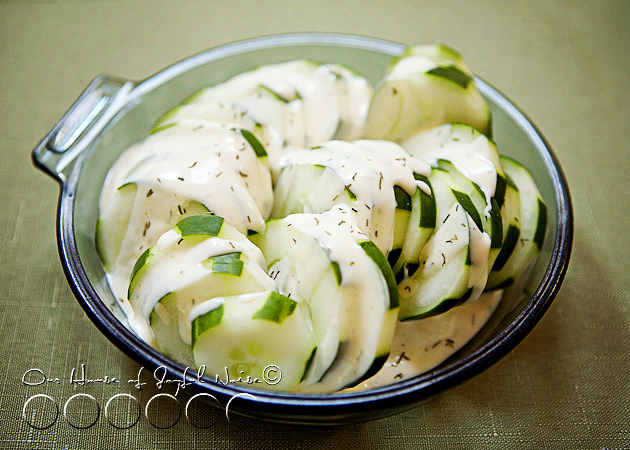
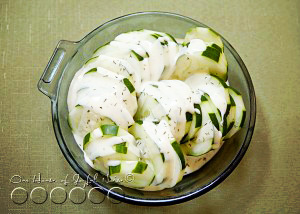
cucumber-salad-recipe-5 In my antique blue Pyrex dish (missing the handle), that was once my grandmothers, I arrange all of the cucumber slices, and drizzle the dressing right over it.  Then I throw another dash of dillweed on top. This dish is light, tangy, sweet, with a tad of salty.  All at once.  More importantly, it’s FRESH, light, delicious, easy, and well……COOL!  It’s a perfect side for summer grilled dinners, etc.

I’ll warn you, with the same wise words my mother-in-law once warned me with, and of which I shared with my kids recently, and they have found absolutely hysterical, and love to say it now every time they have cucumbers:

“Be careful now. Cucumbers tend to repeat on you, later.”

From what I can tell, no one minds repeating around here, except me.  ; )


Save

Save

Filed Under: Recipes, Salads, Side Dishes Tagged With: cucumber-recipes, cucumber-salad, dressing-recipes, light-dressing, light-salad-dressing, light-salads, light-side-dishes, recipes, summer-salads

Frozen Banana Bites – Such a treat! | Recipe

August 22, 2011 By Laura 2 Comments

frozen-banana-bites-recipe-4

I don’t remember exactly the last time I had a frozen chocolate covered banana, but I do know that I had one or 2 when I was a kid, and I loved them.  I thought of making them many times since I’ve had kids of my own, but never quite got to that.  So when a reader linked us up with this simple recipe for ‘Frozen Banana Bites’, I knew we had to try them.  Not exactly the same as frozen chocolate covered bananas, but close enough.  They were absolutely delectable!

*The actual recipe called for peanut butter, but with one of our kids having a severe peanut allergy, we substitute everything that calls for peanut butter, with Sunbutter.

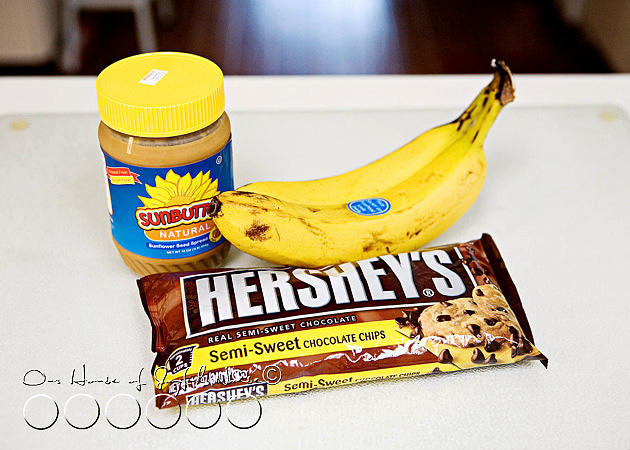
frozen-banana-bites-recipe Participating Ingredients: Bananas, Hershey’s Semi-Sweet Chocolate Chips, & Peanut Butter or *Sunbutter

Naturally, you can make as many Frozen Banana Bites as you would like. But for the sake of giving you a recipe to follow, just use the following measurements per 2 bananas, and then make as many batches as you would like. We made 2 batches, 1 at a time, considering not wanting the slices bananas to brown, or the sauce to cool too much as we worked.

  • 2 bananas
  • 1/4 Hershey’s Chocolate Chips
  • 1/4 Peanut Butter or Sunbutter

frozen-banana-bites-recipe-1 Cover a cookie sheet with some waxed or parchment paper.

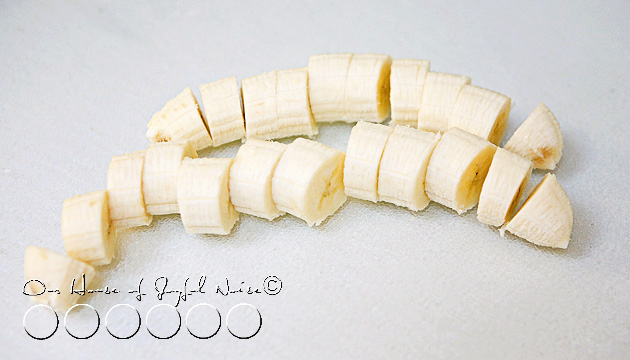
Slice the bananas into bite sized pieces.

We have big mouths.   😀

Put the measured chocolate chips and Sunbutter in a microwave safe bowl, and microwave for 20 seconds or so, mix, and keep putting back in for 10-15 second interval until it’s all melted, combined & smooth.

Tip:  I stir with a wooden spoon handle, and I stir rapidly, just as you would tempering chocolate.

frozen-banana-bites-recipe-2
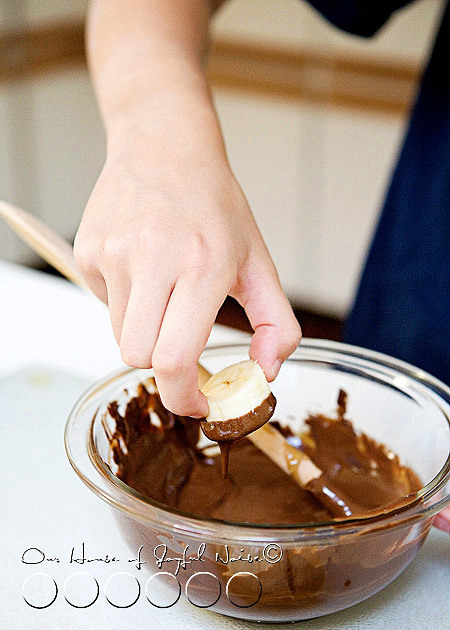
With your sauce all warmed and ready, take each chunk of banana, and dip the top of it into the sauce.  Let it drip off as much as possible.


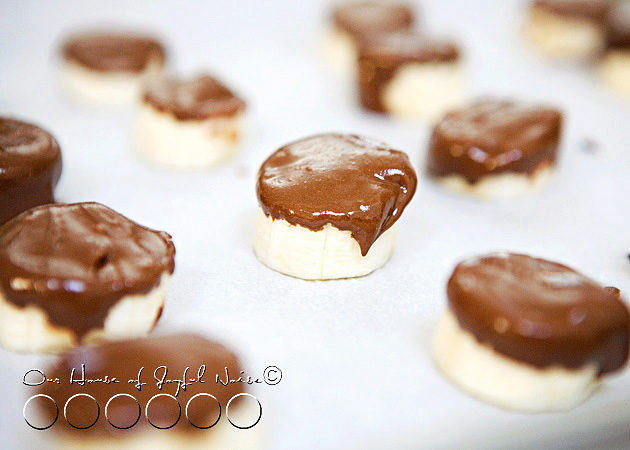
frozen-banana-bites-recipe-3 Place on the cookie sheet, sauce side up.

Optional: If desired, you also can roll the chocolatey side in chopped nuts as well, and then place on sheet.

Repeat until they are all done.

~ It’s a bit of a messy process, and there isn’t much way around it. ~

Place the sheet of Banana Bites into the freezer, and let freeze completely.

Note:  Freezing time varies, depending on how many times you your kids open the freezer door, to see if they are frozen enough to eat, yet. : )

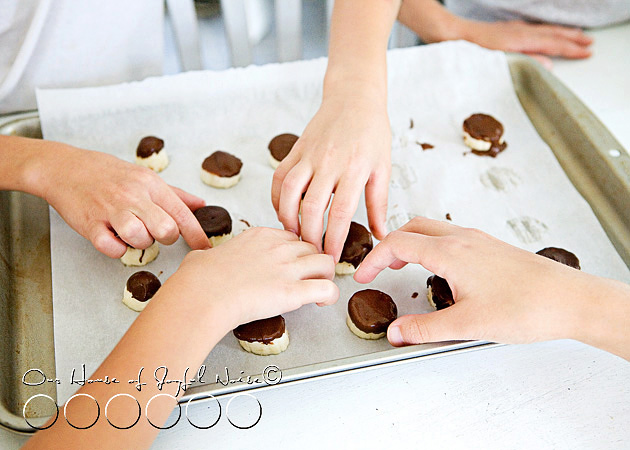
frozen-banana-bites-recipe-5 Once our first sheet was frozen, the kids and I just took them out, and had at them right away. 😛

  frozen-banana-bites-recipe-6

frozen-banana-bites-recipe-7

These guys’ expressions and sound effects are always so animated, when it comes to food.

Especially treats.

Any frozen leftovers, can be thrown in a ziplock-style freezer bag, for later enjoyment.

Hope you find them worth the small mess. ; )  We did!

***


Save

Save

Filed Under: Fun Food, Recipes, Treats Tagged With: banana-recipes, banana-treats, frozen treats, frozen-banana-bites, recipes

7 Layer Salad, with Sides – Summer Light & Just Right | Recipe

July 18, 2011 By Laura 3 Comments

7-seven-layer-salad-recipe-5

If you live in a climate where summers can be hot & humid, than you probably have days like me when you can’t even think of cooking dinner, in a hot kitchen.  You’re looking for a meal that is cool, light, and delicious.  We probably all have our regular stand-bys, but I just discovered a new favorite, and I’m here to share it with you!

One of the best parts of having link-up party on Tuesdays, has not only been the simple home decor or craft ideas, but the recipes shared!  This ‘7 Layer Salad’ was a link-up, and I thought it was so enticing, we made it right away, and then featured it! >  Because our whole family loved it!  As I said in the feature, even the kids were ‘scoffin’ & commentin’ through the whole meal, and were thrilled to have leftovers the next night.  (Honestly, they cheered.)

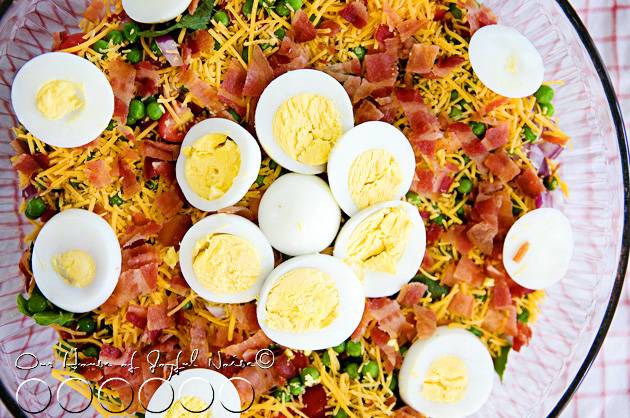
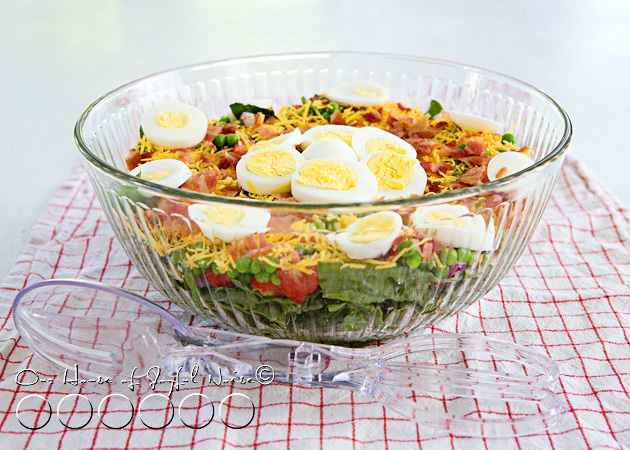
7-seven-layer-salad-recipe I think the name alone, 7 Layer Salad, is FUN, and sound enticing.  And the great thing is, if you don’t care for one of the ingredients/layers, you can substitute it with something you prefer, and still call it 7 Layer Salad! But we made it just like the recipe called for, and it was a hit in our mouths, and our bellies.

Here’s the recipe, layer-by-cool & easy-layer:

7-seven-layer-salad-recipe-1 7 Layer Salad

*In order that ingredients are put into the bowl, building bottom to top:

  • 6 cups fresh, washed Spinach
  • 2 cups Grape Tomatoes, halved (Cherry Tomatoes would work too.)
  • 1 cup Red Onion, chopped
  • 1-1/4 cup frozen Peas, thawed & drained
  • 1 cup Cheddar Cheese, shredded
  • 6 slices Bacon, cooked & chopped*
  • 3 Hard-Boiled Eggs, quartered or sliced

* Use microwavable bacon!  Remember, we not cooking tonight! ; )

Then, I added a few perfect sides, still keeping the meal cool & light:

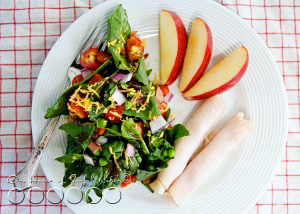
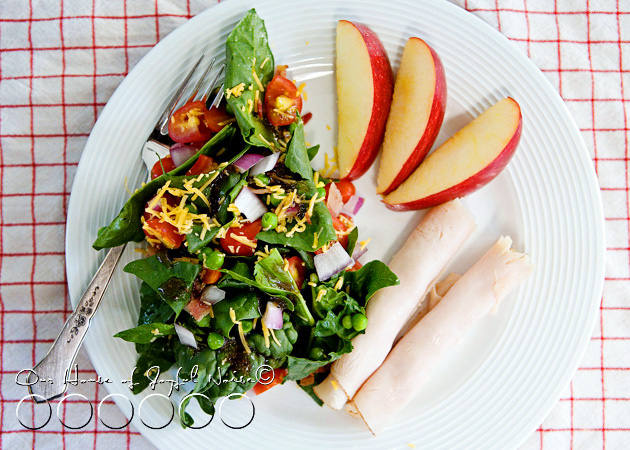
7-seven-layer-salad-recipe-4 Some fresh and cold rolled-up Turkey meat & Apple slices.


7-seven-layer-salad-recipe-2

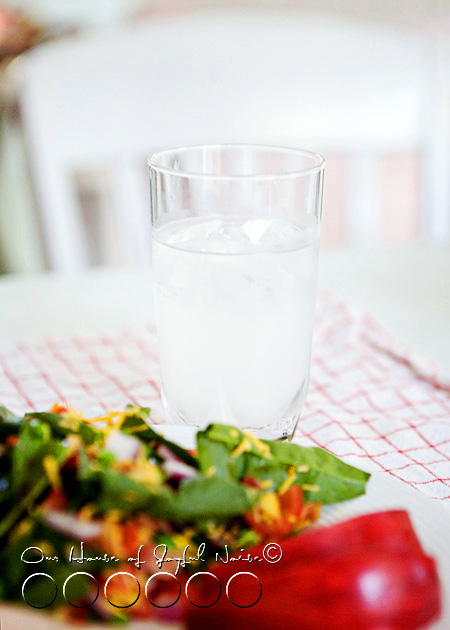
Serve with a tall glass of cold lemonade, and you have yourself a perfect and light summer meal!  Lunch or dinner!

(OK, that particular glass in the photo, happened to be my Mike’s Hard Lemonade. But, you know, can do Country Time if you’d like!)

As a salad dressing, consider Balsamic Vinegar, or a Raspberry Vinaigrette.  My kids love both, but yours may prefer their regular favorite.

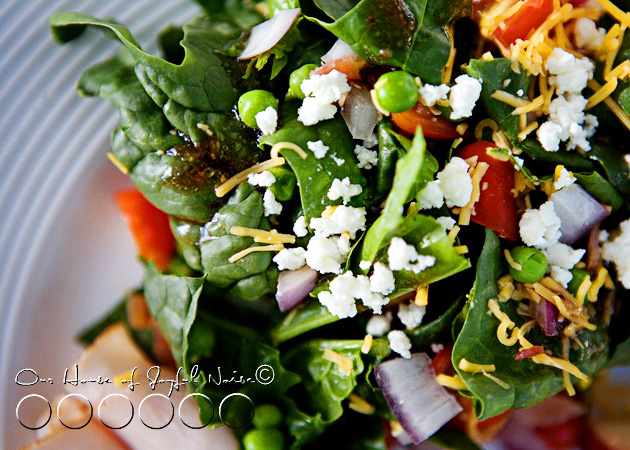
7-seven-layer-salad-recipe-3 As if this meal wasn’t perfect enough to me, I added my favorite topping.  Most every salad is ‘betta, with Feta’.

Scrum-de-licious!

Of course, you have the option of swapping out any ingredient layer you don’t care for, and swapping in one you do!
What changes might you make to your layer salad?


Save

Save

Save

Save

Filed Under: Lunch, Main Dish, Recipes, Salads, Side Dishes Tagged With: 7-layer-salad, light-summer-meal, salad, salad-recipes, seven-layer-salad, summer-dinner, summer-salad

Camp Site Eclair | Getting Creative with Fondant

June 12, 2011 By Laura 22 Comments

fondant-art-fathers-day-dessert-14

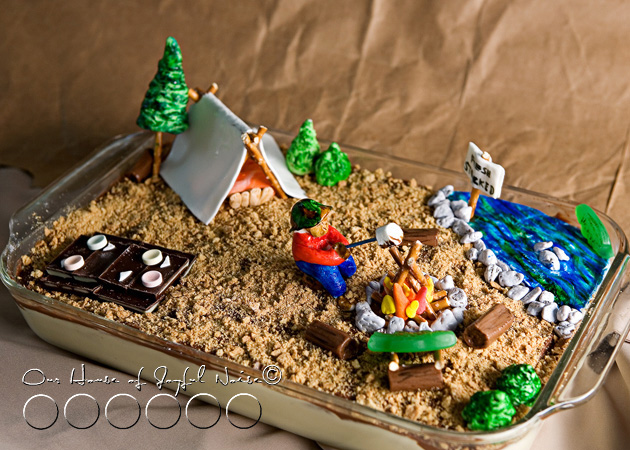
I was brainstorming about a good dessert to have for Father’s Day coming up,

when I came up with this idea:  A Camp Site Eclair Dessert.

fondant-art-fathers-day-dessert I know the Daddy in our family, loves camping, fishing, and marshmallows! So this whole dessert was going to make him very happy, because there is a whole lot of marshmallow fondant involved! And as a bonus, there are other surprise treats everywhere!

I decided to make it ahead of time (with a little help from the Daddy in celebration, and our kiddos.)  Thankfully, we can save all of the decorations on top, make the dessert again next week, and redecorate.  Because I wanted to be able to share the idea with you all, our blog readers, in case you’d like to replicate the idea, or let it spark an idea of your own in some way.

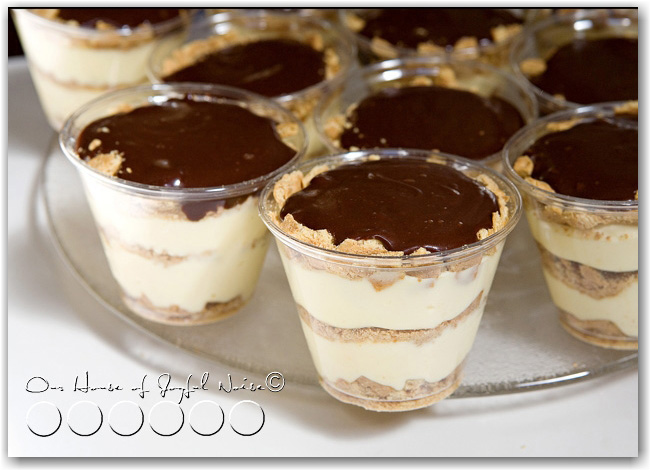
So this decorated dessert is the pan variation of No Bake Eclair. You may remember we shared this recipe before, as individual cup servings, that looked like this:

fondant-art-fathers-day-dessert-2 You can find that recipe and directions for the cups version here.

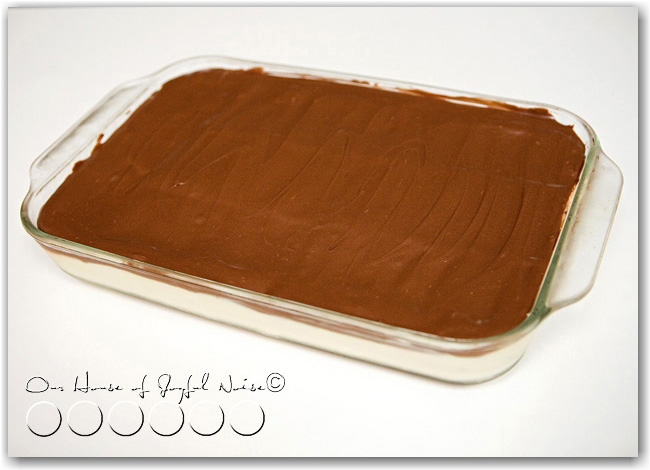
fondant-art-fathers-day-dessert-1 This is what our No Bake Eclair Dessert originally looked like, before covering with crushed

graham cracker, for a nice dirt ground effect, to set the scene for our camp site.  Here is the easy, no-bake

recipe for it. You can whip this part up ridiculously quickly!

::::::

No Bake Eclair

Participating Ingredients:

  • graham crackers
  • 2 boxes instant vanilla pudding
  • 8 oz. cool whip
  • 1 can of chocolate frosting and 2 tbsp. milk
  • 3   1/2  cups of milk

Directions:

Mix the pudding and milk with the blender- let it get a little thick. Add the cool whip in.

Butter a 9X13 in. cake pan. Place WHOLE graham crackers in the bottom of pan. You will need to break some though.

On top of graham crackers add 1/2 of the pudding/cool whip mixture.

Put on another layer of crackers and then the other half of the pudding mixture.

Place last layer of graham crackers on top.

In a separate bowl empty the frosting and add 2 tbsp. of milk. Mix so the frosting is creamy and easy to spread.

Frost the crackers and enjoy!

 ::::::

Now to share as much as I can, about how we decorated the pan of No-Bake Eclair:

fondant-art-fathers-day-dessert-5 The ground as I said, is the top frosting layer, covered in lots of very crushed graham cracker.  On top of that, everything is made out of marshmallow fondant, various kinds of candy, and little pretzel sticks.

Now please keep in mind, we are no fondant artists, yet! This is our very first time working with the stuff.  This is actually marshmallow fondant, which is made so easily with mini marshmallows, confectionery sugar, and water.   Then of course, we used some food dye. (Not food coloring, but food dye, used for coloring icing.)  I very easily found 2 videos on making marshmallow fondant, and coloring it, just by Googling. I will put them at the end of this post, for your convenience.

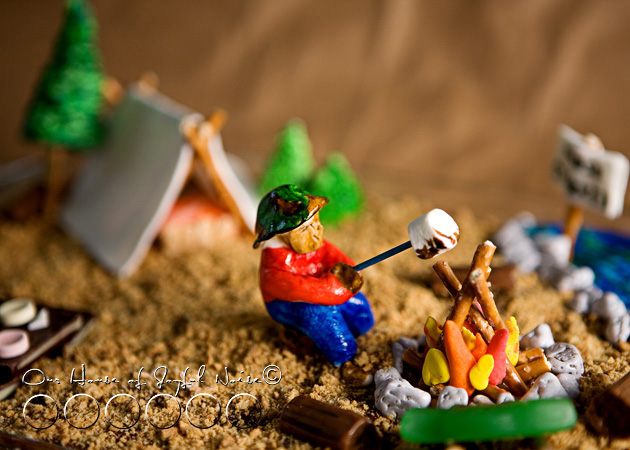
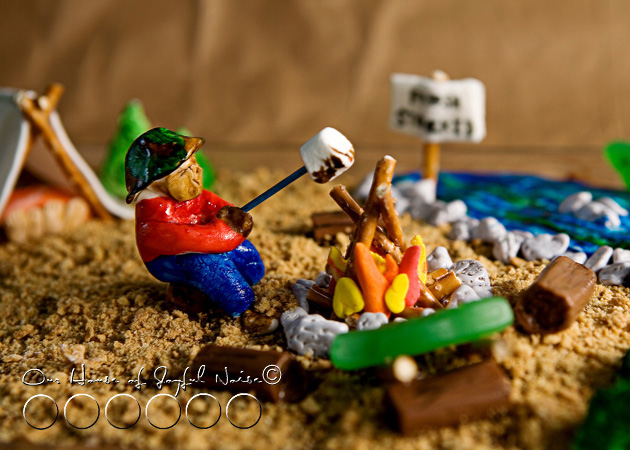
fondant-art-fathers-day-dessert-4 Don’t mind the father’s face, lol.  We really didn’t expect it to show much. It was just quickly smushed together. lol
But we’re not sure we could have done much better, if we tried. LOL

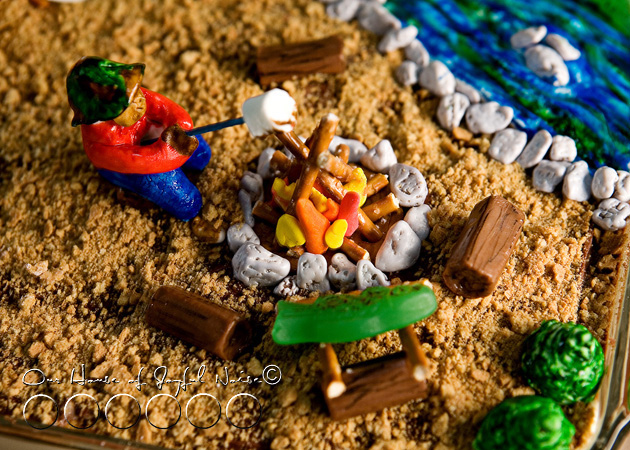
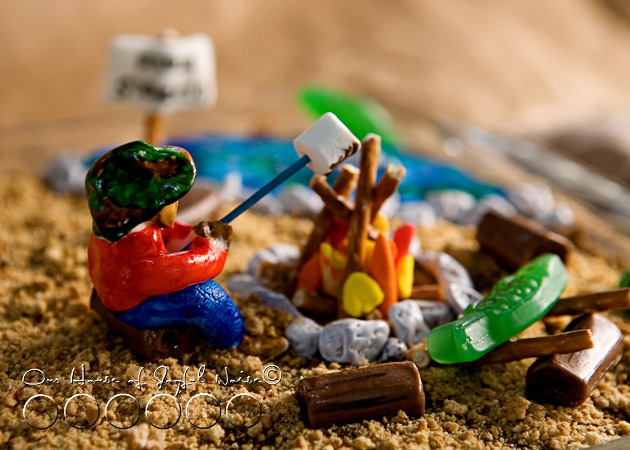
He is completely made of white/uncolored marshmallow fondant, and then painted with food dye and a brush.

fondant-art-fathers-day-dessert-5 The camp fire is made of colored fondant for the flames, pretzel sticks, and chocolate rocks that we found in the cake aisle of Michael’s Arts & crafts.

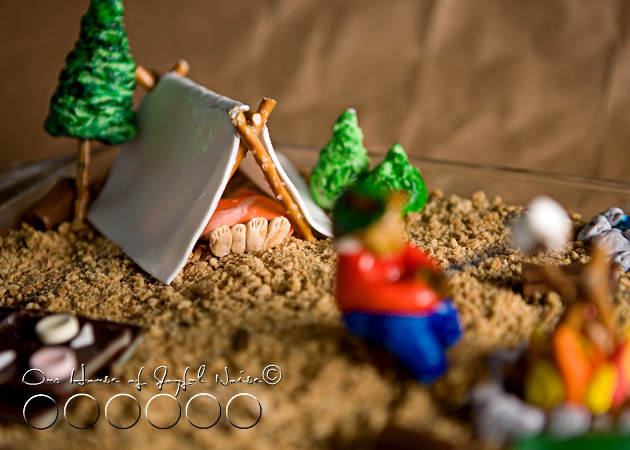
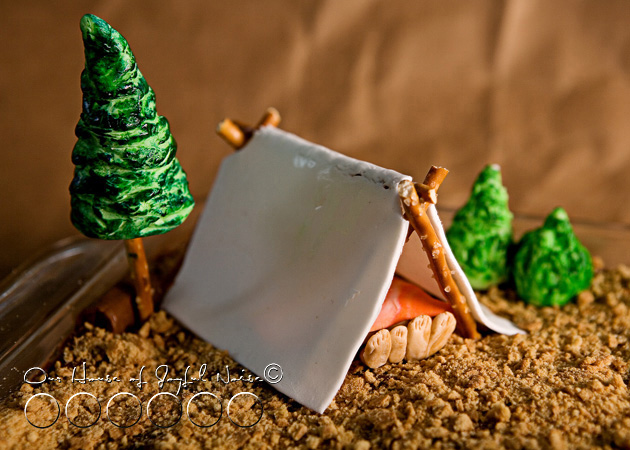
fondant-art-fathers-day-dessert-6  The tent and family feet are also all fondant, and pretzel sticks to hold the tent up.

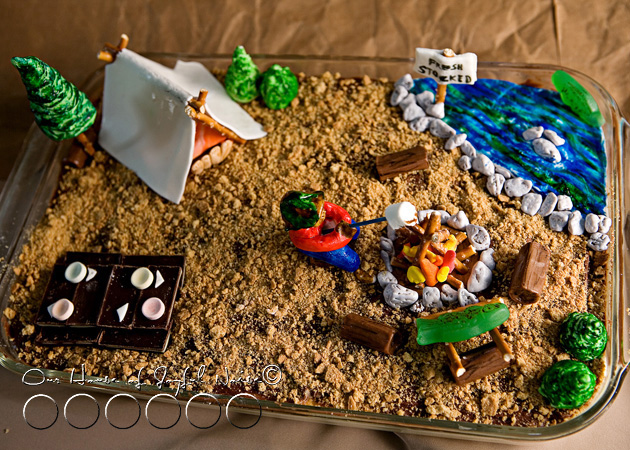
fondant-art-fathers-day-dessert-7 Here’s a helicopter view.

The trees and bushes are green dyed fondant, molded around Hershey Kisses, and then more green dye painted on the trees & bushes, for texture.  The pine tree uses a pretzel for the trunk.

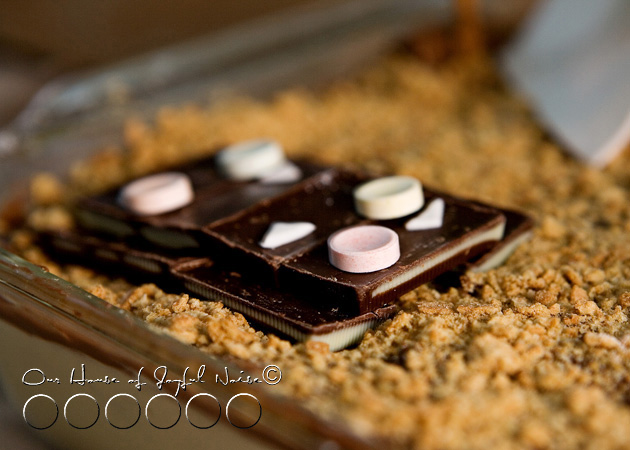
fondant-art-fathers-day-dessert-8  This is a set picnic table.  The table top probably could have been another layer higher.  But the table and bench seats are made of Andes Candies, the plates are Smarties Candies, and the little triangle napkins is plain marshmallow fondant.

fondant-art-fathers-day-dessert-9 All of the logs you see here and there, are Tooties Rolls, with a little edible black writing pen to show some grooves and bark.

fondant-art-fathers-day-dessert-10 The 2 fish on the scene are Swedish Fish.

The marshmallow on a stick is actually fondant, but we could have just used a mini marshmallow, since we had plenty left from  making the fondant.

fondant-art-fathers-day-dessert-11

fondant-art-fathers-day-dessert-12 The water is plain fondant, painted with blue and green dye.

The sign face is fondant, with a pretzel stick, and more chocolate rocks. (Love those!)

fondant-art-fathers-day-dessert-13  The tent, and the family dirty feet, is my favorite part!

It was so fun to make, and we thought it came out pretty good!!

Between shopping for the goods, and making it all, it was almost a day project, but a fun family one!

We wanted to note too that, while fondant and the colors are all edible, we don’t really eat artificial colors. But it is all SUPER fun to get creative with, as decorations.

Please tell us you are a at least little impressed with our work, even if you aren’t. 😉   Either way, hope you find yourself inspired to play with some fondant, and get creative with food, too!!

::::::

*(Love this post? How about subscribing to our blog in the sidebar, ‘Liking’ our Page on Facebook, or following me (Laura) on Twitter? Or all 3? 😀

Making Marshmallow Fondant

Coloring Fondant


Save

Save

Filed Under: Desserts, Fun Food, Holidays, Recipes, Treats Tagged With: cake decorating, coloring fondant, fathers-day-dessert, fishing-camping-scene-dessert, fondant ideas, fondant-art, getting-creative-with-fondant, marshmallow fondant, no-bake, no-bake-eclair

  • « Previous Page
  • 1
  • …
  • 4
  • 5
  • 6
  • 7
  • 8
  • …
  • 17
  • Next Page »

We are wicked happy to have you here! We hope you find much inspiration, help, humor and enjoyment here.


Archives


POPULAR POSTS

* * * * * *

SUBSCRIBE to House of Joyful Noise blog! Every new post, delivered right to your email box!


Privacy Policy

Amazon Affiliates

Never at any additional cost to you, we may earn a small commission for our endorsement, recommendation, testimonial, and/or link to any products from our website. Your purchase through our links helps support our family, while sharing with you the products we authentically use and recommend, for various ideas, and letting you know where you can purchase them. Thank you for your support!

[footer_backtotop]

Copyright © 2026 HouseOfJoyfulNoise.com · Genesis Framework by StudioPress