• HOME
  • {A}’s Chipmunk Training Archives

 Homepage

  • The Homestead
    • Home Projects
    • Home Improvement
    • Home Decor
      • Seasonal Home decor
        • FALL Home Decor
        • WINTER Home Decor
        • SPRING Crafts and Creations
        • SUMMER Crafts and Creations
    • Our Chickens
    • Gardening
    • Organization
    • Re-Purposing
    • Furniture Refinishing
    • Budget
  • Crafts & Creations
    • Seasonal Home decor
      • FALL Crafts and Creations
      • WINTER Crafts and Creations
      • SPRING Crafts and Creations
      • SUMMER Crafts and Creations
    • DIY (Do-It-Yourself) Project
    • Kids Arts and Crafts
    • Homemade/Handmade Gift Ideas
    • Holiday Crafts
    • Fan Pulls
    • Free Printable/Downloadable
    • Sewing Projects
    • Giveaways
    • Business Features
  • Recipes/FoodFun
    • Breakfast
    • Lunch
    • Main Dish
    • Sandwiches
    • Appetizers
    • Slow Cooker
    • On The Grill
    • Side Dishes
      • Soups
      • Salads
    • Baking
      • Breads, Rolls and Muffins
    • Snacks
    • Treats
    • Desserts
    • Drinks
  • Homeschooling
    • Elementary Homeschooling
      • Elementary Homeschooling READING
      • Elementary Homeschooling MATH
      • Elementary Homeschooling LANGUAGE ARTS
      • Elementary Homeschooling SCIENCE
      • Elementary Homeschooling HOME ECONOMICS
      • Kids Arts and Crafts
    • Middle School Homeschooling
      • Middle School Homeschooling SCIENCE
      • Middle School Homeschooling HOME ECONOMICS
    • Language Arts
    • Math
    • History / Social Studies
    • Geography
    • Foreign Language
    • Field Trips
    • Games
    • Nature Study
  • The Big Picture
    • Life In General
    • Celebrations
    • Faith
      • Into the Light; The Series
    • Giveaways
    • Reviews & Sponsors
  • Photography & Lettering
    • Photography
    • truck lettering
    • vehicle graphics
    • Newborns
    • Kids
    • Engagement
    • High School Senior Pictures
    • High School Senior Pictures Sneak Peeks

Chicken Italiano | Slow Cooker Recipe

June 8, 2011 By Laura 6 Comments

chicken-italiano-slow-cooker-recipe

 
As slow cooker meals go, this Chicken Italiano is definitely a family favorite!  We are sharing the complete recipe with you here today, and if it sounds good to you, we’ve got a printable recipe at the end that you can take with you. We are also sharing with you one of our favorite cookbooks, which is an affiliate link.

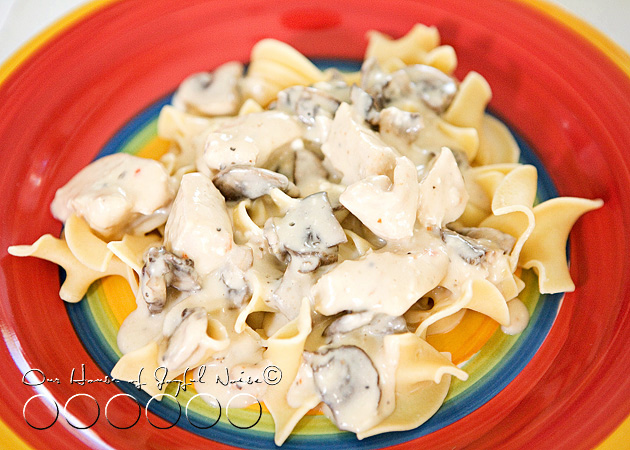
Chicken Italiano.

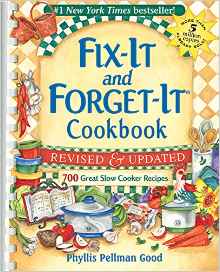
It may not be the most colorful meal, but don’t let that deter you from trying it, or you’ll be missing out! It’ll likely become a favorite of your families as well. It is creamy, rich, and so delicious, with the tender flavorful chicken chunks, and a rich cream cheese based sauce with mushrooms.  It’s a perfect slow cooker meal, that is easy to make, and makes the house smell wonderful! All slow cooker meals are fabulous in the colder months. But really, we are happy to make it & eat it year round! It’s that good. Everything we eat in the warmer months, can’t be cold food. Right? There are days year-round, that we need something super easy, super good, and ready at dinner time! So you get it going in the morning, and there is little to do before sitting down to eat.  This is one of those meals, and I got the recipe from one of my favorite slow cooker cookbooks:
fix-it-and-forget-it-cookbook

The Fix-It and Forget-It Cookbook
(*Now Revised and Updated)
(aff)

*The Updated and Revised version is all that is available now, and I have the original. Therefore I cannot guarantee that Chicken Italiano is in this one.
However, I imagine the collection of recipes is even better in this book now, and you can print out the Chicken Italiano recipe right from this post.
–

Here’s how easy it is to make this creamy, rich & delicious dinner, with such tender chicken chunks!  Most times, we double this recipe below, and have plenty left-overs another dinner or two!

Participating Ingredients:

  • 4 boneless, skinless chicken breast halves
  • 1 envelope dry Italian salad dressing mix
  • 1/4 cup water
  • 8 oz. pkg. cream cheese, softened
  • *10-3/4 oz. can cream of chicken soup
  • *(When we double recipe, the 2nd can of soup we use is cream of celery)
  • 4 oz. can of mushroom stems and pieces, drained
  • 1/2-3/4  1lb.bag of wide egg noodles

Directions:

1) Place chicken breast halves in slow cooker

2) Combine dry salad dressing mix and water.  Pour over chicken.

3) Cover.  Cook on low for 3 hours.

3a) As soon as the chicken is cooked through, if we’re home, I break up the chicken breasts into chunks, and return to the pot, so it can absorb the seasoned liquids. (I’ve just  broken it up while in the pot, with a wooden spatula too. The chicken is so tender, it’s no problem. Just be sure you’re not damaging the bottom of your pot.)

4) Combine cream cheese and soup until blended.  Stir in the mushrooms.  Pour over chicken, and mix it up.

5) **Cover, and cook 1 more hour.

**Note: If the chicken was cut into chunks much earlier, and so you are sure it is cooked through, it is ready as soon as all of the cheese & soup is heated, smooth and blended together.

6)  While the slow cooker contents is in it’s remaining time, cook egg noodles according to the package directions.

Serve the Chicken Italiano over hot egg noodles, and enjoy.
chicken-italian-slow-cooker-recipe_03
Be prepared to serve seconds.  : P

Chicken Italiano | Slow Cooker Recipe
 
Print
Prep time
30 mins
Cook time
4 hours
Total time
4 hours 30 mins
 
A creamy, rich, and delicious slow cooker meal, with the tender flavorful chicken chunks, and a rich cream cheese based sauce with mushrooms. It's the perfect savory slow cooker meal.
: Fix It and Forget It Cookbook / House of Joyful Noise blog
: Main meal | Slow Cooker
Cuisine: Italian
Serves: 5
Ingredients
  • 4 boneless, skinless chicken breast halves
  • 1 envelope dry Italian salad dressing mix
  • ¼ cup water
  • 8 oz. pkg. cream cheese, softened
  • *10-3/4 oz. can cream of chicken soup
  • *(When we double recipe, the 2nd can of soup we use is cream of celery)
  • 4 oz. can of mushroom stems and pieces, drained
  • ½-3/4 1lb.bag of wide egg noodles
Instructions
  1. Place chicken breast halves in slow cooker
  2. Combine dry salad dressing mix and water. Pour over chicken.
  3. Cover. Cook on low for 3 hours.
  4. - As soon as the chicken is cooked through, if we're home, I break up the chicken breasts into chunks, and return to the pot, so it can absorb the seasoned liquids. (I've just broken it up while in the pot, with a wooden spatula too. The chicken is so tender, it's no problem. Just be sure you're not damaging the bottom of your pot.)
  5. Combine cream cheese and soup until blended. Stir in the mushrooms. Pour over chicken, and mix it up.
  6. **Cover, and cook 1 more hour.
  7. **Note: If the chicken was cut into chunks much earlier, and so you are sure it is cooked through, it is ready as soon as all of the cheese & soup is heated, smooth and blended together.
  8. While the slow cooker contents is in it's remaining time, cook egg noodles according to the package directions, and strain.
  9. Serve the Chicken Italiano over the hot egg noodles, and ENJOY!
3.4.3177


******


Save

Save

Save

Save

Save

Save

Save

Filed Under: Main Dish, Recipes, Slow Cooker Tagged With: Chicken-Italiano-recipe, cold-weather-meals, crockpot-recipes, easy-slow-cooker-recipes, fix-it-and-forget-it-meals, Italian-recipes, main-meal-ideas, printable-recipes, recipes, recipes-with-chicken

Josh’s Double-Chocolate Biscottis Recipe

May 15, 2011 By Laura 1 Comment

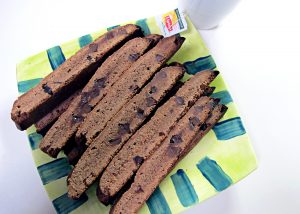
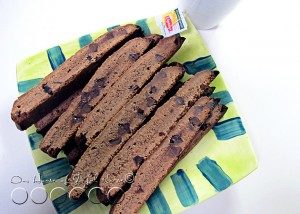
A friend of ours baked our family these double-chocolate Biscottis, and we enjoyed them so much, we asked him for the recipe. (So we could have some more!).  He very kindly sent the recipe to us, and he also suggested it as a blog post.  We thought it was a great idea!  It’s just not nice not to share, Italian cookies this good

bis·cot·ti

Definition of BISCOTTI :  small rectangular twice-baked cookies, typically containing *nuts, made originally in Italy.

*We omitted nuts, as one in our family has a serious allergy to nuts.


Josh’s Double Chocolate Biscotti Recipe
Recipe


Participating Ingredients

  • 1 cup of butter, softened
  • 1 1/3 cups of sugar
  • ½ of a cup of unsweetened cocoa powder
  • 4 teaspoons of baking powder
  • 4 eggs
  • 3 ½ cups all-purpose flour
  • ½ cup of white chocolate pieces
  • ¼ cup milk, semisweet, or dark chocolate pieces

Preheat oven to 400 degrees. Lightly grease 2 or more cookie sheets. Beat the softened butter with an electric mixer on medium/high speed for 45 seconds to a minute. Add sugar, cocoa powder, and baking powder. Beat until combined. Beat in the eggs until combined. Beat in flour, “If you can’t beat in all the flour, just stir it in.” Stir in the chocolate pieces.

Divide the dough in fourths: shape into four loaves and put them on the cookie sheets, adjusting the thickness and length of them to fit in the cookie sheet but not bake into each other.

Bake for 23 to 28 minutes or until wood toothpicks inserted near the centers comes out clean. Cool the loaves on cutting boards for 1 to 4 hours. (They slice easier if you let them cool longer and become more firm.)

Preheat oven to 350 degrees. Use a serrated bread knife to cut each loaf into slices, you may cut them as thick or thin as you like. Bake them for 12 to 15 minutes, turn them over on their side, and bake them for another 12 to 15 minutes.

Cool, and enjoy!

Origin of BISCOTTO

Italian, biscuit, cookie, from (pane) biscotto, literally, bread baked twice

First Known Use: 1946


Josh's Double Chocolate Biscotti Recipe
 
Print
Prep time
30 mins
Cook time
35 mins
Total time
1 hour 5 mins
 
A delightful double-chocolate biscotti cookie recipe, with a dash of facts about biscotti cookies, to further enjoy.
: House of Joyful Noise blog
: Baking
Cuisine: Italian
Serves: ~48 cookies
Ingredients
  • 1 cup of butter, softened
  • 1⅓ cups of sugar
  • ½ of a cup of unsweetened cocoa powder
  • 4 teaspoons of baking powder
  • 4 eggs
  • 3 ½ cups all-purpose flour
  • ½ cup of white chocolate pieces
  • ¼ cup milk, semisweet, or dark chocolate pieces
Instructions
  1. Preheat oven to 400 degrees. Lightly grease 2 or more cookie sheets. Beat the softened butter with an electric mixer on medium/high speed for 45 seconds to a minute. Add sugar, cocoa powder, and baking powder. Beat until combined. Beat in the eggs until combined. Beat in flour, “If you can’t beat in all the flour, just stir it in.” Stir in the chocolate pieces.
  2. Divide the dough in fourths: shape into four loaves and put them on the cookie sheets, adjusting the thickness and length of them to fit in the cookie sheet but not bake into each other.
  3. Bake for 25 to 28 minutes or until wood toothpicks inserted near the centers comes out clean. Cool the loaves on cutting boards for 1 to 4 hours. (They slice easier if you let them cool longer and become more firm.)
  4. Preheat oven to 350 degrees. Use a serrated bread knife to cut each loaf into slices, you may cut them as thick or thin as you like. Bake them for 12 to 15 minutes, turn them over on their side, and bake them for another 12 to 15 minutes.
  5. Cool, and enjoy!
3.4.3177

Be sure to grab the printable recipe, before you go! Hope you enjoy, too!


Save

Filed Under: Baking, Desserts, Recipes, Snacks, Treats Tagged With: biscotti-recipe, chocolate-biscotti-recipe, chocolate-cookies-recipes, double-chocolate-biscotti, Italian-cookies-recipe, recipes

Earth Day Cupcakes

April 15, 2011 By Laura 2 Comments

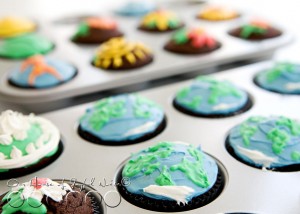
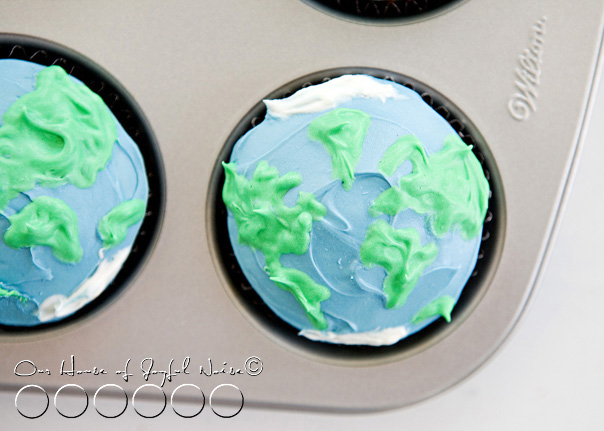
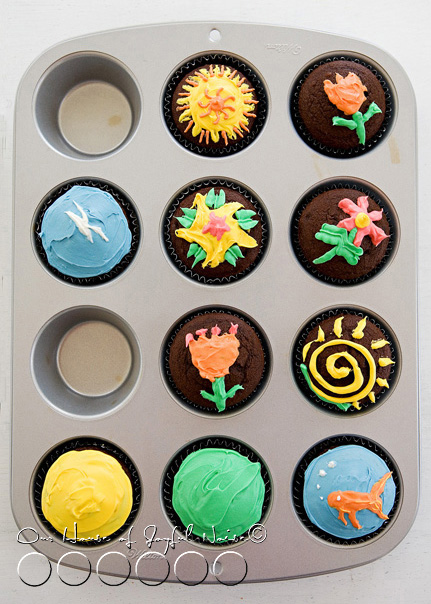
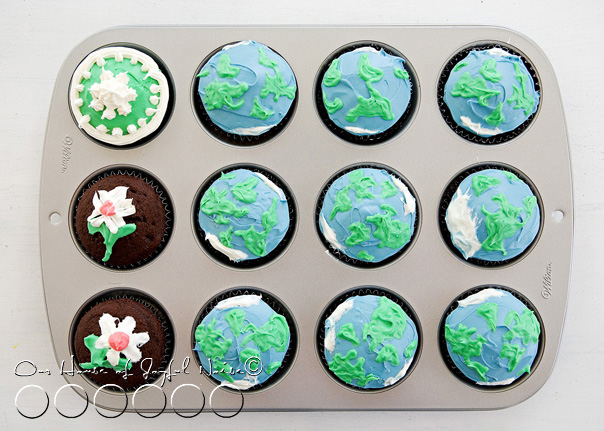
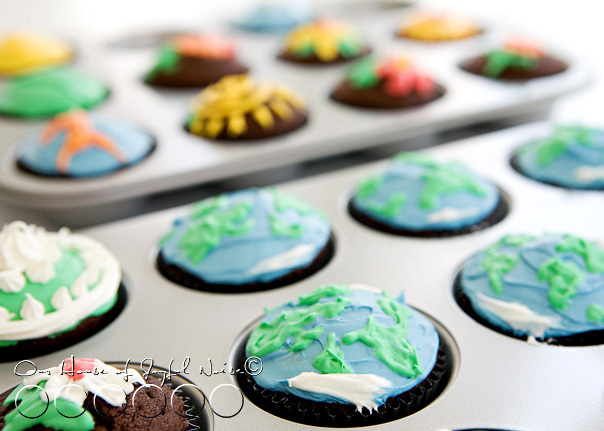
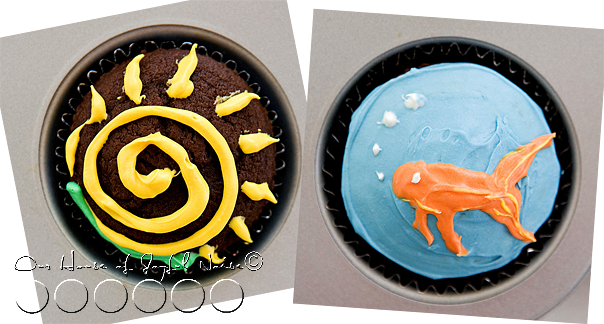
We are so smitten with how our Earth Day cupcakes came out, we like to keep on sharing them with you all.

Earth Day ideas

There are times that the things we creatively do as a family, or the ideas we have, happen ON a holiday or special calendar day. So naturally they do not get blogged until after the fact.  Since we like our readers to have the opportunity to take our ideas and find creative inspiration from them, or flat out borrow the ideas, I like to try and share (or re-share) those ideas the following year, so that you all can have time to use them if you’d like, while that day is upcoming once again.

Here in the Recipes section, I thought it would be nice to (re-) share just the photos of the Earth Day Cupcakes that we had so much fun making with the kids last year, on Earth Day following our neighborhood and beach clean-up we did.   For any new readers, if you’d like to visit our family’s Earth Day 2010 blog post, you can do so HERE. It was a great day, and I took lots of photos of the kids and our activities that day, so I think you would really enjoy it.

These are simple boxed chocolate cake mix cupcakes.  Using canned white canned frosting, we split it up into separate little batches, making various colors with drops of food coloring.  The blue ocean base of the earths we just spread on, but most of the rest of the designs were piped on.  We are no cake decorating pros, but we sure had fun, and we think they came out cute!

Earth Day ideas

Earth Day ideas

Earth Day ideas

Earth Day ideas

Earth Day ideas

Hope you find yourself inspired!!  If not to decorate some cupcakes for Earth Day, at least to eat some!
And to give love and care to our Earth, all year round.


Save

Filed Under: Baking, Desserts, Recipes, Treats Tagged With: creative-cupcakes, earth-day-cupcakes, Earth-Day-ideas, Earth-Day-recipes, homeschooling, inspiration-for-Earth-Day

Banana-Fanna-Fo-Fanna…Fe-Fi-Fo-Fanna…Banana.(CHIPS!) | Recipe

February 2, 2011 By Laura 7 Comments

There’s nothing like a snack you can give your kids, and feel good about!
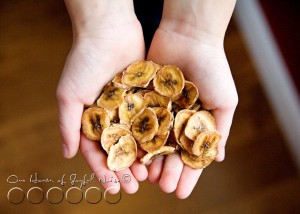
So today, we’re going to show you how to make a simple, healthy and natural snack – Banana Chips!

banana chips recipe

Like most recipes, there are always a few variations or different ways to go about preparing a food.  Banana chips can either be fried, or baked.   We try to opt for the healthy options first.

Making baked banana chips really couldn’t be any simpler.

Get this:

Participating Ingredients:

  • Bananas!

Need I say more?   Maybe.  Some may want to know exactly what to do with them.  But I am willing to bet, this is going to go just about how you think it is.

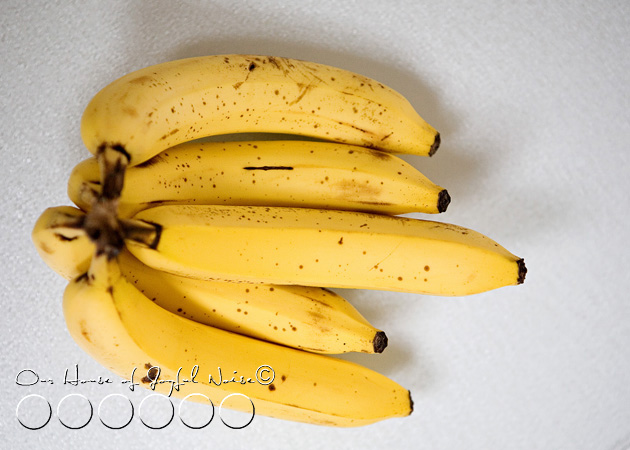
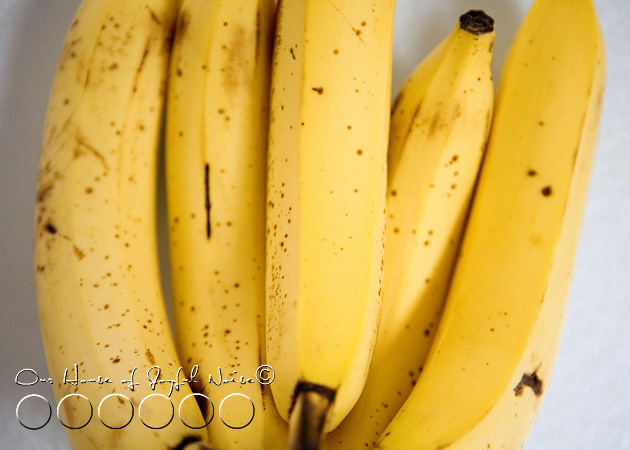
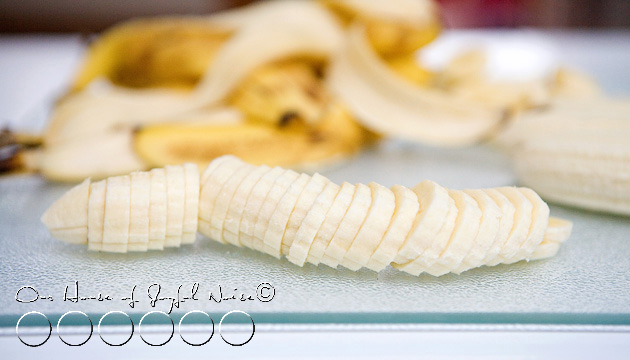
bananas The main thing you need to make banana chips, is a bunch of bananas.

bananas-1

But really, if you want a bunch of banana chips, you might want to go with two bunches of bananas.  Because they shrink up to nothing, and you may find yourself asking in the end, “That’s all we got?  Seriously?”     Much like mushrooms, or onions…..you start out with a big pile, get cooking them, and wonder where it all went!

banana chips recipe

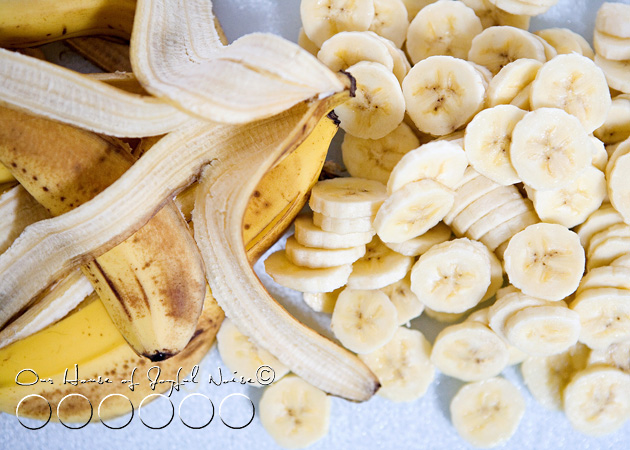
So, you’ll want to peel and slice the bananas to about 1/8″ thick.  Now…above, is a little thicker than that.   I went thinner after this one.  (And after I already took the photo.)

banana chips recipe

But either way….if you cut them or like them a little thicker, you’ll just bake them a little longer, and I’ll get to that.

banana chips recipe

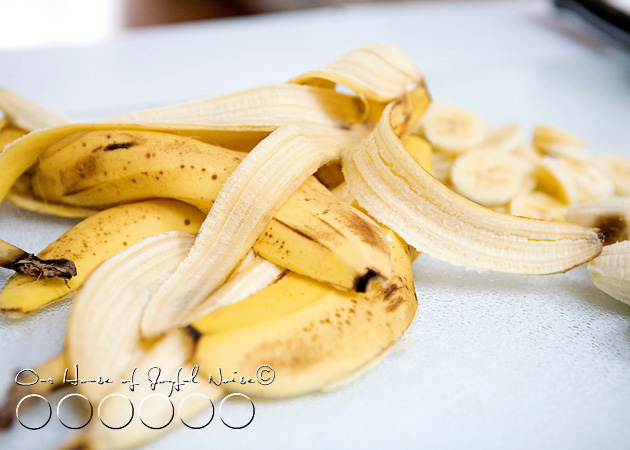
If it’s gardening season, and you garden, remember…..banana peels are a wonderful organic compost ingredient!  They are a great source of potassium for the soil.  That means excellent nutrients for your producing plants.   When burying peels near your rose bushes, you’re bound to get bigger blooms too!

But right….we were talking about banana chips.

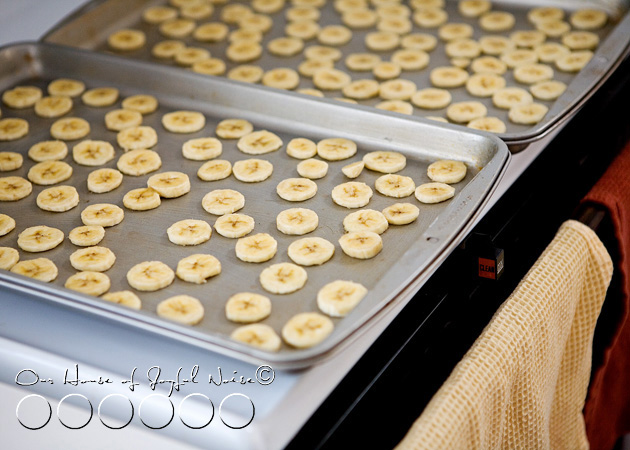
Preheat your oven to ~150 degrees for thinner slices, 200 degrees for thicker.

Then, you can lightly grease your pans, or spray oil on them.

Spread your banana slices on the cookie sheets, not touching.

healthy-banana-chips-recipe-3

Now, if it’s important to you that the banana slices maintain their color for the most part, and don’t turn too brown, you can spray them with lemon juice.

We didn’t care, and I was afraid I would taste the lemon juice.  (Not a lemon fan.)  So….we skipped that.

How long you bake them, depends on how thick you sliced them:

1/8″ : 2-3 hours, turning over every 30 minutes or so.

(The temp is so low, I used a spatula the first time, but used me fingers after that.)

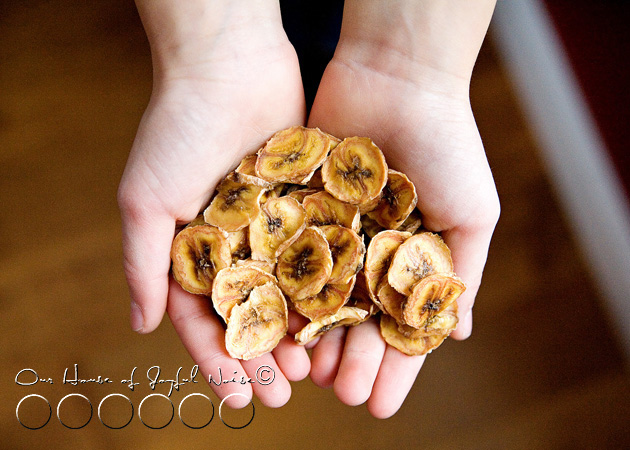
When they are dried out and nice and a little golden brown, they are done.

Thicker than 1/8: Bake an hour, turn over and check if they are dehydrated yet.  If not, put in a little longer.

Really……when they are chippy, they are done.  You can’t do it wrong,  People. (Unless they are still mushy, or burnt. ; ).  After that, just leave them out to harden a little more.   Then put them in a storage container to keep fresh.

banana chips recipe

Ours came out crunchy at first bite, and then a little fun and chewy.

They can be eaten alone, or added to a trail mix.

A couple of other Fun Banana Facts!:

1)   Bananas make you HaPpY!!   They contain the natural chemical found in prozac.

2)  Bananas, eaten raw, do not make me happy. Well, they used to make my mouth happy.  But then I found, they do not make my stomach happy.  After several bouts of excruciating stomach pains, on different occasions, I had always asked myself what I had recently eaten.  The common consumption?  A banana.    I’ve come to the conclusion that my stomach can digest anything under the sun, except raw bananas.  Which is a bummer, because I love them.  So I make myself feel better with, banana chips!….banana bread…..banana muffins…..banana pancakes…..banana-fanna-fo-fanna….you get the idea.

008_

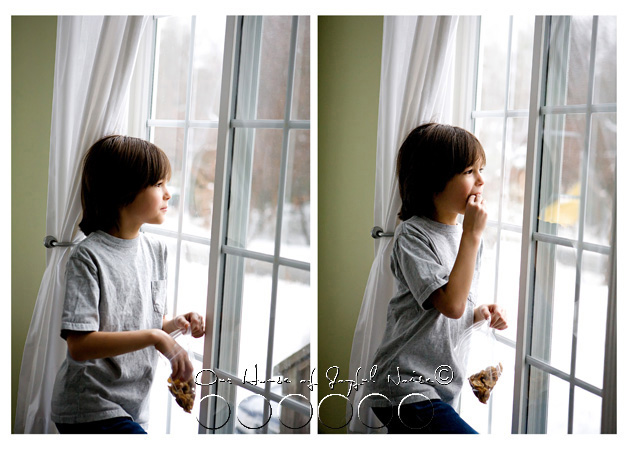
Banana chips (baked)  are a healthy, organic snack for the kiddos too!  So be sure to share!


Save

Save

Filed Under: Recipes, Snacks Tagged With: banana-chips-recipe, banana-snacks, healthy snacks, how-to-make-banana-chips, kids-snacks, snack-ideas

Midnight Snaps (Festive Cookies for New Years Eve)

December 30, 2010 By Laura 20 Comments

New Year's Eve clock cookies

My kids and I were trying to come up with some themed food for New Year’s Eve, and {JM} came up with this great idea, right off the bat:  Cookies that are designed like clocks! (Oh, to have his quick, 8 year old brain!)

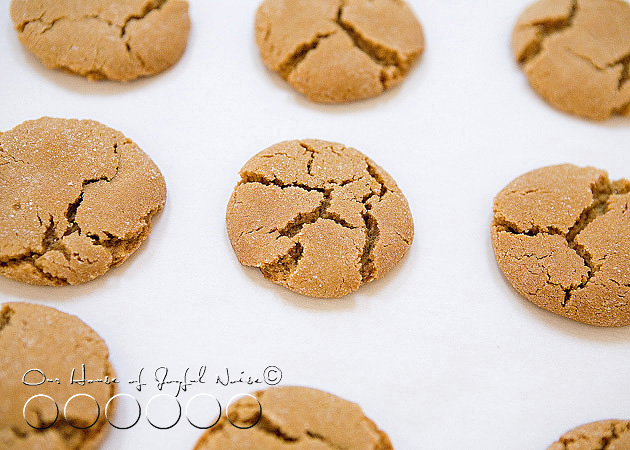
Right away I started trying to figure the details, and decided to start with homemade Gingersnap Cookies.  To design them, we went with a white icing that hardens, and a bit of chocolate art.  The design process does involve some intricate detail work, but if you enjoy the creative process and have a little patience to work with, they are worth the effort!  Your party-goers will be impressed with these festive cookies, you made!

First, I’m going to start by giving you this basic Gingersnap Cookie Recipe.  This post is not featuring how to make the cookies, with step by step photos, etc.,  but how to turn them into clocks.  So, using the recipe below, bake some cookies and let them cool before getting to designing.

Participating Ingredients for Gingersnap Cookies:

  • 3/4 shortening
  • 1 cup white sugar
  • 1 egg
  • 1/4 cup molasses
  • 2 cup all-purpose flour
  • 2 teaspoons baking soda
  • 1/2 teaspoon salt
  • 1 teaspoon ground cinnamon
  • 1 tablespoon ground ginger

Preheat oven to 350 degrees F.  Grease cookie sheets.

In a large bowl, cream the shortening and sugar. Add the egg and beat until light and fluffy, then stir in the molasses.  In a separate bowl, mix together the flour, baking soda, salt, ginger and cinnamon.  Add to the egg mixture, and stir until well blended. * (See foot note below). Roll bits of dough into 1 inch balls.  Dip each ball into sugar and place on cookie sheet, sugar side up, about 2 inches apart.

*Now, being the first time we made these, we did indeed use 1 inch balls of dough.  However, we found that the cookies were pretty small to work with, and it was difficult making such tiny chocolate numbers!  So……we advise that you make cookies twice the size, using 2 inch dough balls, and putting a little further apart on the cookie sheets.  That way, your chocolate numbers can be made larger, and it will all be easier to do.

Bake for 10-12 minutes, until cookies have spread, and cookies have cracked.  Let cool on wire rack.

New Year's Eve clock cookies They are delicious straight and plain, for sure! Crispy on the outside, a little softer on the inside, and amazingly good!  Surely no one would notice, if just one, was missing. ;  )

New Year's Eve clock cookies

Again, these are small cookies, and we recommend having bigger ones to work with.

Now, once they are cool, you’ll need to whip up some icing.   I am going to guess some of you already have a recipe, and I am sure there many variations out there.  This one below is the one I started with. BUT, I really needed to add a lot more liquid than it calls for, being careful to keep it a very pretty thick consistency.  Really, this is one of those recipes where you need to tweak as needed, depending on how yours is looking.

Note:  You’ll probably want to at least make a double batch of this icing.

Participating Ingredients for Cookie Icing

  • 1 cup confectioner’s sugar
  • 2 teaspoons milk *
  • 2 teaspoons light corn syrup
  • 1/4 teaspoon of preferred extract (called for almond, I used vanilla, frankly, because I hate almond. )

* I probably had to add at least 2 tablespoons of milk!  But gauge for yourself.

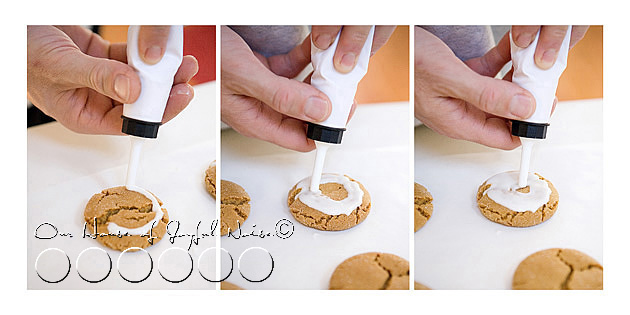
New Year's Eve clock cookies Using a piping bag, we outlined a circle around the edge of each cookie, and filled it in, using the tip to push the icing around some, to help get it all covered.
–

New Year's Eve clock cookies

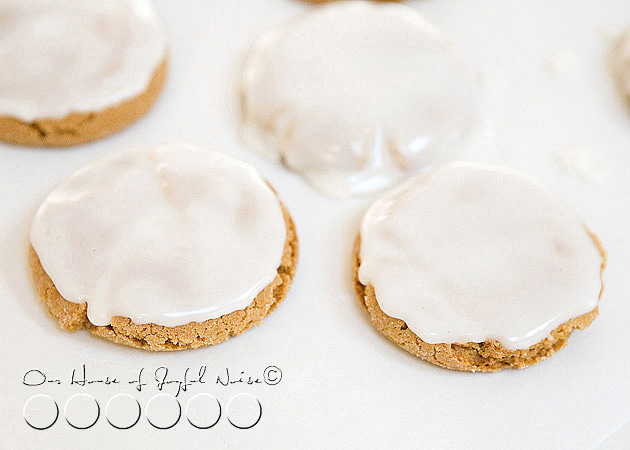
The icing is bound to drip a little sometimes, but if you try not to be close to the edge where the fall-off is, you should do o.k.

At the back of the photo above, you can see where we experimented with seeing if covering the whole cookie would be easier.  It was just too much icing.  So we stuck with our original icing plan.

Allow the iced cookies to set, so that the icing can harden.

*****

Now you’ll need to melt some chocolate to work with, otherwise known as tempering.   I should do a post just on this process at some point, but you’ll need to know it for this recipe! So I’m going to share with you a quick tutorial. Now, you may have used the double-boiler method of melting chocolate before, but we’ve never had much good luck with that.  Then, we learned a quick and easy trick to tempering chocolate, from Barefoot Contessa – and I am going to share it with you right now:

You’ll need: some milk chocolate -shaved or chips (we used  Hershey chocolate chips, which as chips are easier to melt), a glass measuring cup, a wooden spoon, and a microwave.

In the glass measuring cup, add about half of the amount of chocolate that you’ll need.  Microwave it for about 15-20 seconds. Take out, and with the handle/ butt end of the wooden spoon, mix the chips rapidly.  It will likely need more melting, so put it in for 10 second increments, and stir with the end of the wooden spoon very rapidly after each time, until the chocolate is all melted smooth and glossy.  Now, just as the remaining half of your chocolate, and stir rapidly some more.  You really want to mix it hard and fast – the more you do, the shinier your chocolate will be.

Now that’s a tip we can all use for life!!  Thanks Contessa!

***

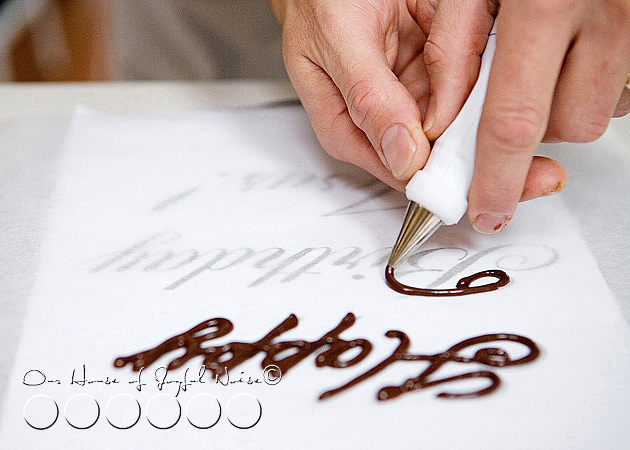
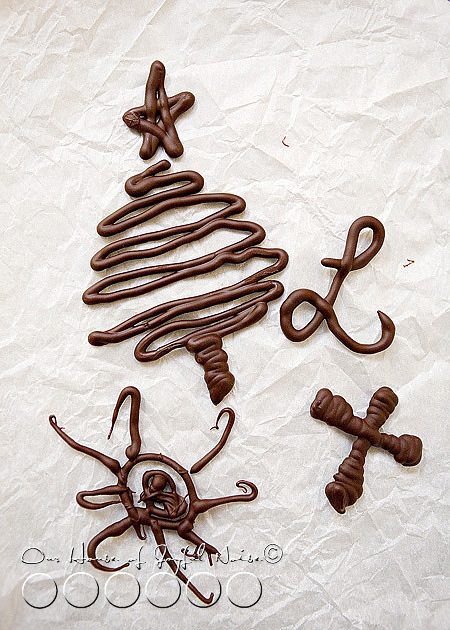
Now below is some writing with chocolate tips.  Since I didn’t photograph making the teeny-tiny numbers, here below I am using the photos of when we made the words for Jesus’ Birthday cake on Christmas.

We printed out the words on a piece of paper, having laid out the size we wanted, in the font we wanted.   Then we slipped that ‘stencil’ to trace, under a piece of parchment paper.  Using a fine tip on a piping bag filled with the melted chocolate, do your writing or designs!

New Year's Eve clock cookies

New Year's Eve clock cookies

As the chocolate cools, it will harden.

Our words came out nice, and when they were hardened, we just placed them on our cake!

New Year's Eve clock cookies

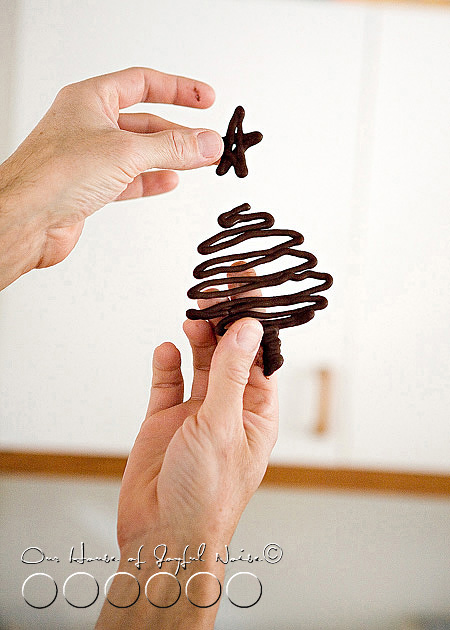
Michael and the kids had chocolate left in the bag, and they just couldn’t stop themselves from playing with chocolate some more.

New Year's Eve clock cookies
See how you can just pick it up?

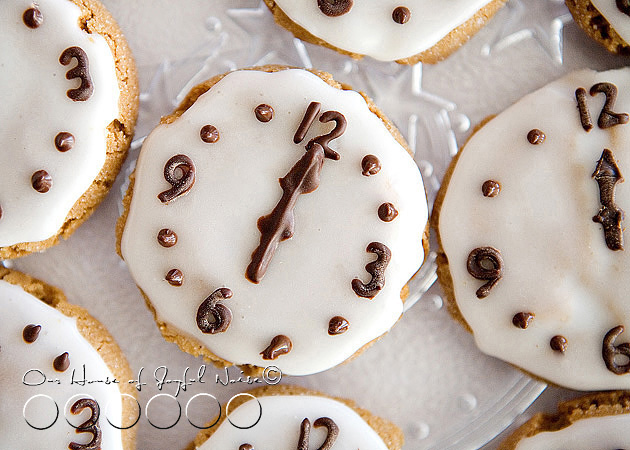
So this is the method we used, to make tiny little number and click hands. They were probably only 3/8ths of an inch, so you can imagine it was a tad difficult.  Bigger would be easier.  This way, doing the chocolate work on parchment paper first, if something comes out awful, you didn’t ruin a cookie or a cake.  You just start a new one on the parchment paper, and use the ones that came out best.

If the icing on the cookies is hardened, then use a bit more icing to apply the numbers and dots to the cookie.
Otherwise they won’t stick and stay put.

New Year's Eve clock cookies

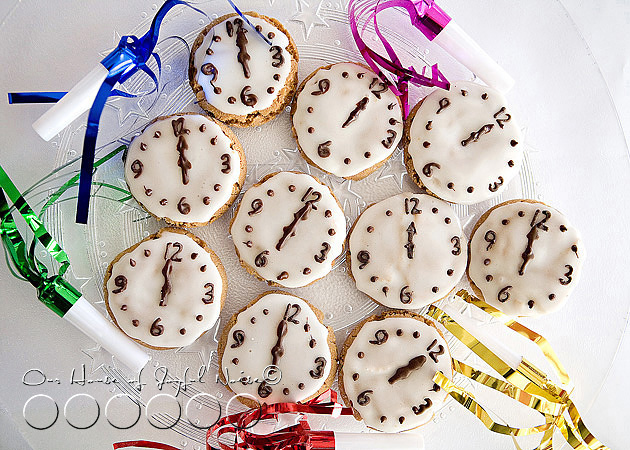
So here is how our Midnight Snaps came out!!  Not perfect by any means.  But we think they are imperfectly cute!

New Year's Eve clock cookies

Now I realize I am giving you this grand idea, pretty last minute.  (lol….lol….).  So I wouldn’t blame you, if you went out and tried to find some large, store bought gingersnap cookies, or maybe even molasses cookies, to just bring home and decorate.  That would be a time saver for sure.  ; )

May you all rock around the clock on New Year’s Eve, (or at least until  midnight) and may we all have a Happy New year!

Filed Under: Baking, Fun Food, Holidays, Recipes, Treats Tagged With: chocolate-art, clock-cookies, cookies-for-New-Years-Eve, how-to-write-with-chocolate, midnight-cookies, new-years-eve-menu-ideas, new-years-eve-treats, tempering chocolate

  • « Previous Page
  • 1
  • …
  • 5
  • 6
  • 7
  • 8
  • 9
  • …
  • 17
  • Next Page »

We are wicked happy to have you here! We hope you find much inspiration, help, humor and enjoyment here.


Archives


POPULAR POSTS

* * * * * *

SUBSCRIBE to House of Joyful Noise blog! Every new post, delivered right to your email box!


Privacy Policy

Amazon Affiliates

Never at any additional cost to you, we may earn a small commission for our endorsement, recommendation, testimonial, and/or link to any products from our website. Your purchase through our links helps support our family, while sharing with you the products we authentically use and recommend, for various ideas, and letting you know where you can purchase them. Thank you for your support!

[footer_backtotop]

Copyright © 2026 HouseOfJoyfulNoise.com · Genesis Framework by StudioPress