• HOME
  • {A}’s Chipmunk Training Archives

 Homepage

  • The Homestead
    • Home Projects
    • Home Improvement
    • Home Decor
      • Seasonal Home decor
        • FALL Home Decor
        • WINTER Home Decor
        • SPRING Crafts and Creations
        • SUMMER Crafts and Creations
    • Our Chickens
    • Gardening
    • Organization
    • Re-Purposing
    • Furniture Refinishing
    • Budget
  • Crafts & Creations
    • Seasonal Home decor
      • FALL Crafts and Creations
      • WINTER Crafts and Creations
      • SPRING Crafts and Creations
      • SUMMER Crafts and Creations
    • DIY (Do-It-Yourself) Project
    • Kids Arts and Crafts
    • Homemade/Handmade Gift Ideas
    • Holiday Crafts
    • Fan Pulls
    • Free Printable/Downloadable
    • Sewing Projects
    • Giveaways
    • Business Features
  • Recipes/FoodFun
    • Breakfast
    • Lunch
    • Main Dish
    • Sandwiches
    • Appetizers
    • Slow Cooker
    • On The Grill
    • Side Dishes
      • Soups
      • Salads
    • Baking
      • Breads, Rolls and Muffins
    • Snacks
    • Treats
    • Desserts
    • Drinks
  • Homeschooling
    • Elementary Homeschooling
      • Elementary Homeschooling READING
      • Elementary Homeschooling MATH
      • Elementary Homeschooling LANGUAGE ARTS
      • Elementary Homeschooling SCIENCE
      • Elementary Homeschooling HOME ECONOMICS
      • Kids Arts and Crafts
    • Middle School Homeschooling
      • Middle School Homeschooling SCIENCE
      • Middle School Homeschooling HOME ECONOMICS
    • Language Arts
    • Math
    • History / Social Studies
    • Geography
    • Foreign Language
    • Field Trips
    • Games
    • Nature Study
  • The Big Picture
    • Life In General
    • Celebrations
    • Faith
      • Into the Light; The Series
    • Giveaways
    • Reviews & Sponsors
  • Photography & Lettering
    • Photography
    • truck lettering
    • vehicle graphics
    • Newborns
    • Kids
    • Engagement
    • High School Senior Pictures
    • High School Senior Pictures Sneak Peeks

No-Bake Eclairs | Recipe

November 9, 2010 By Laura 6 Comments

No-Bake Eclairs

No- Bake Eclairs

I’m going to be quite honest with you here:  This dessert of no-bake eclairs is quick, easy, and sooooo good.

I’m going to be even more honest than that:  It’s not quite like real eclairs.   It’s more of a…. fun spin-off, of real eclairs.  But you know, everyone is going to eat them all up, just like that, anyway.  So does it really matter?

I’m thinking, ‘not really’.  So here we go….
–

No-Bake Eclair(s)
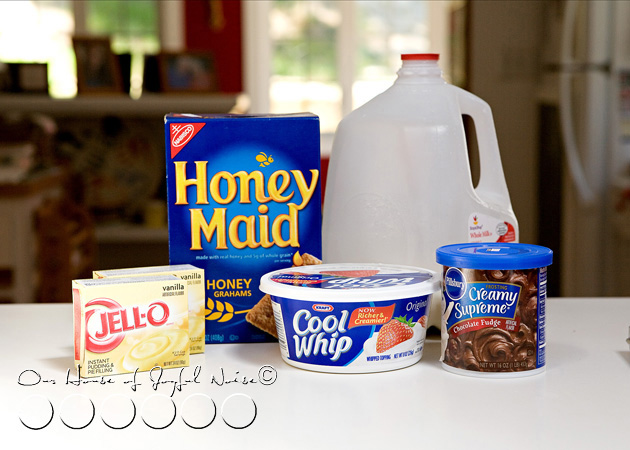
002 Participating Ingredients:

  • *Graham Crackers

* The kind we actually prefer is the Nabisco  Grahams Original, in the red box.

  • 2 boxes Instant Vanilla Pudding
  • 8 oz. Cool Whip
  • 1 can Chocolate Frosting (Milk Chocolate of Chocolate Fudge), and 2 Tbs. Milk
  • 3 1/2 cups Milk
  • (tad of Butter, if making in cake pan)


Now there’s 2 ways you can make this no-bake eclairs dessert.  It’s all just layering of pudding mixture and cracker until the topping, either way.
  No- Bake Eclairs

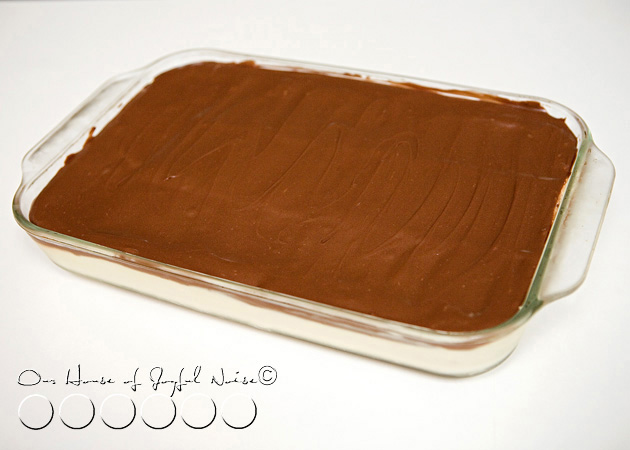
The original recipe I got was made in a 9″ x 13″ cake pan.  This is the easiest and fastest way to make it.  If you make it this way, just coat pan with a rub of butter first.

But we had another idea that we are sharing with you here. It takes a bit more time, but we didn’t mind.

We wanted to make cute little individual servings, in the 4 oz hard plastic clear cups.

First step:  Mix all of the pudding and the milk with the blender in a good sized bowl, let it get thick.  Then add the container of Cool Whip in and mix.
 

003

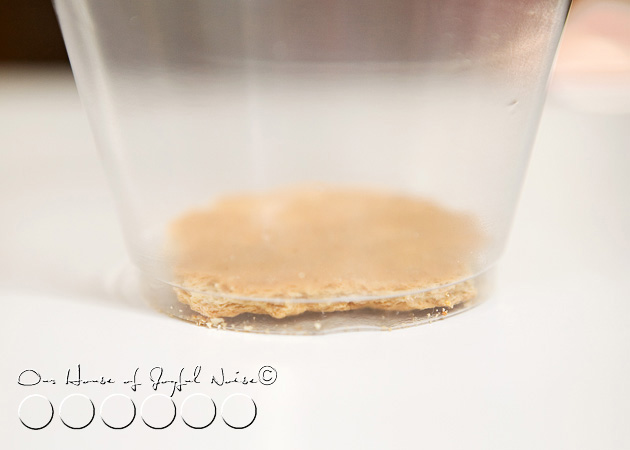
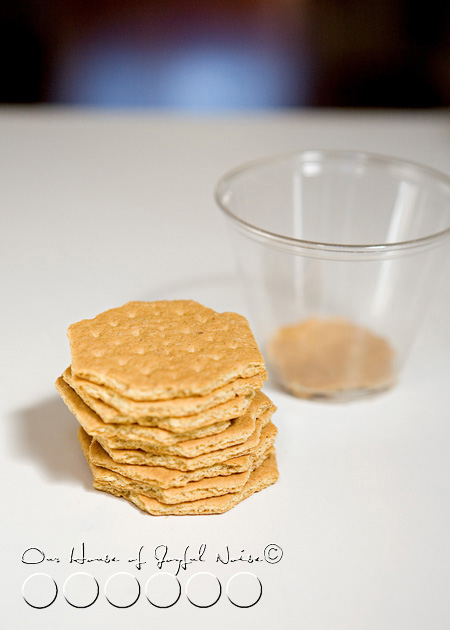
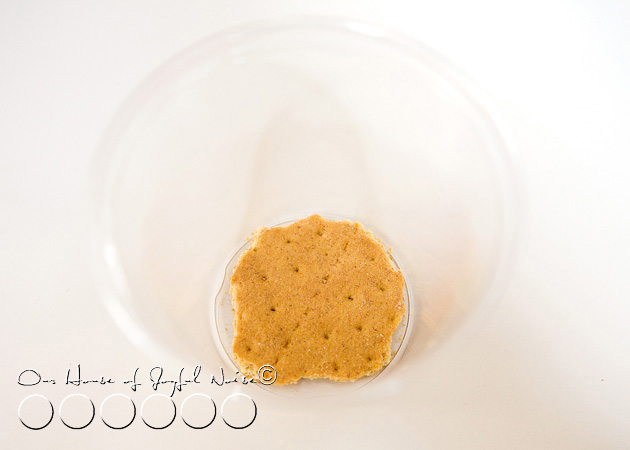
Over a little bowl, break graham crackers into roundish pieces, to fit the bottom of about 11 4 oz cups.
004
They don’t have to be perfect.
–

As you do this, save the crumbs and little pieces you are breaking off. They will not go to waste!
(You need ’em….so don’t eat ’em!)
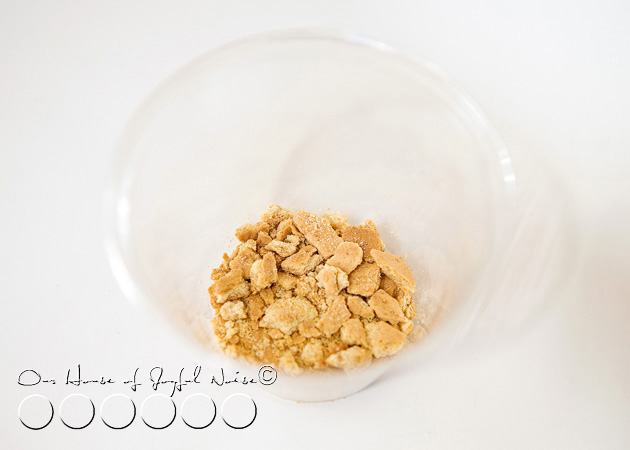
006 ….because you are going to put them on top of that cracker circle, like this.

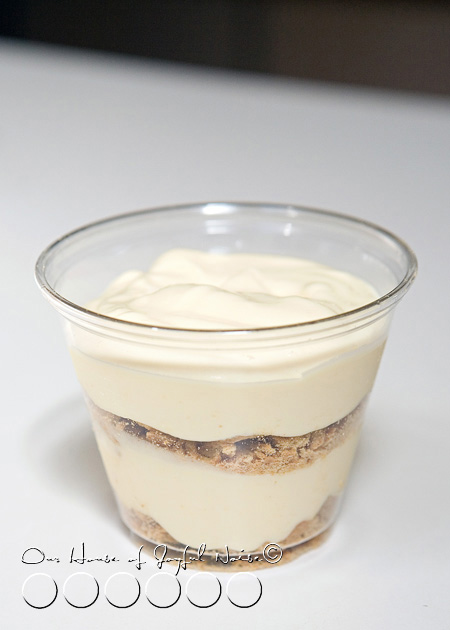
Next, on top of the crumbled crackers in each cup, add a few plops of pudding/Cool Whip mixture to less than half way up the cup…
007

….and then add a good layer of just crumbled graham crackers.

Then more pudding/Cool Whip mixture.
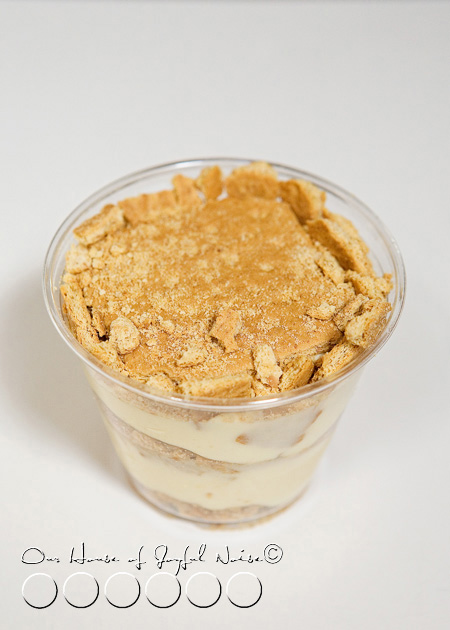
008

For the top layers, you do want to use another circle of graham cracker fitting for the larger tops, and then just use up the crumbled cracker you have to put on top and fill in the sides, etc.

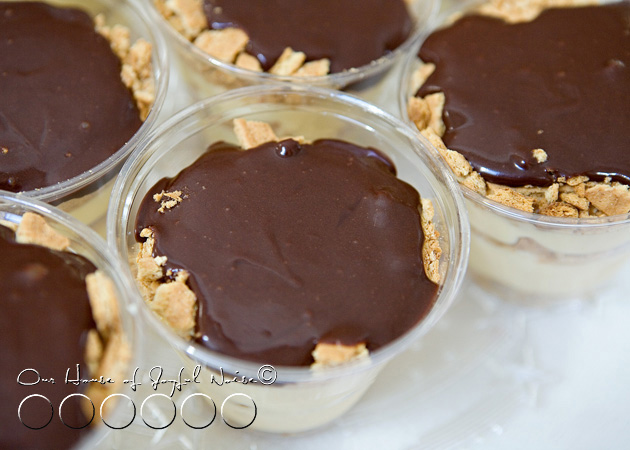
Now in a separate little bowl, add the chocolate frosting and 2 Tbs. of milk, mixing it all together to make it nice and creamy, and easily spreadable.
No- Bake Eclairs

Using a spoon, carefully put some on the tops of every cup, and spread it around a little.

Now if you wanted to make the cake pan version, it can be a lot easier and faster.  The layering is all the same, but any crumbling is really not necessary, since there is not a lot of custom fitting to do with the crackers!  So you just lay crackers in a single layer, all over to cover the bottom of the pan, and start your layers.

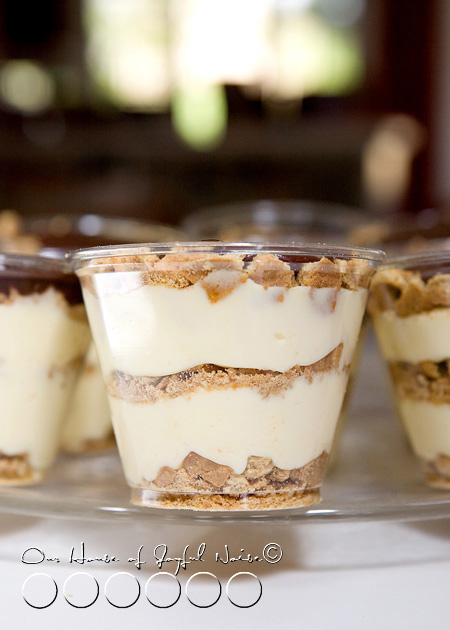
So whether the cups or the pan, the layers go as follows, with the 1st layer being at the bottom:

  • 6th layer – frosting (w/ 2 Tbs milk)  mixture
  • 5th layer – graham cracker
  • 4th layer – pudding / cool whip mixture (the rest of the mixture, for the pan)
  • 3rd layer – graham cracker (flat in pan, crumbles only in cups)
  • 2nd layer – pudding / cool whip mixture (about 1/2 the mixture, for the pan)
  • 1st layer – graham cracker (& crumbles in cups)
No- Bake Eclairs

The layers look really nice in the clear cups. When the cups are all filled, put them in the fridge to chill and set a little, until you are ready to serve them.
No- Bake Eclairs

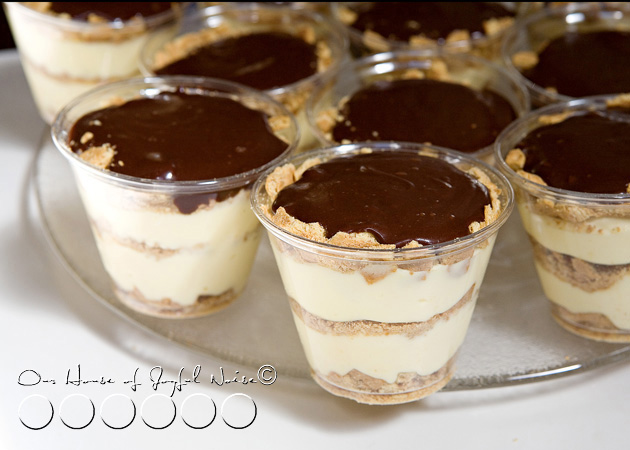
They are ready to serve and enjoy!!

(Go ahead and lick the cup when you get to the bottom.  We won’t tell. ; )
Save

Save

Save

Save

Filed Under: Desserts, Recipes, Treats Tagged With: cup-desserts, cup-treats, dessert recipes, dessert-ideas, Desserts, eclair-recipes, eclairs, no-bake-desserts, Treats

Beef Stroganoff | Recipe

October 7, 2010 By Laura 1 Comment

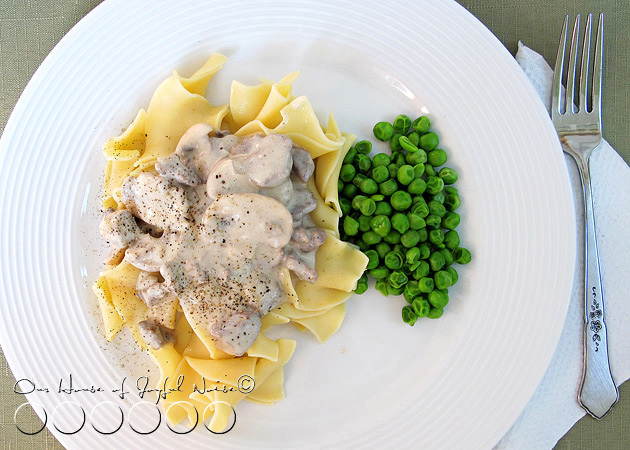
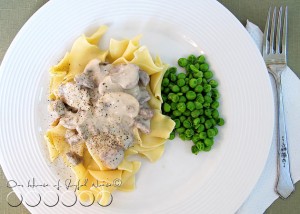
beef stroganoff over noodles with peas

Beef Stroganoff is a meal we had only made once before, in our married years here, years ago. As I recall, too, it didn’t come out quite as we had hoped. I believe the issue was that the meat came out a little too tough.   So I guess we decided we weren’t good at making that meal, and we didn’t make it again.

That is, until a few weeks. I found myself dreaming of, and really craving, some Beef Stroganoff.  Day, after day, after day.  Finally, I decided I just had to have some, and set out to find a new recipe.   I found one. This is it.  And I can assure you…..we’ll be making this a little more regularly now!  It was DE-LICIOUS, and it sure satisfied my craving. But only for that day, because now we all want it again, a.s.a.p. So count this recipe as tried, true, and definitely approved! (And that counts the kids!)

beef-stroganoff-recipe
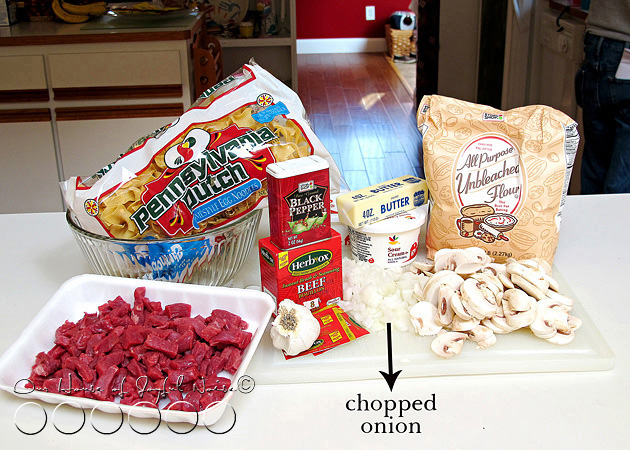
Participating Ingredients:

  • 12 ounces boneless beef sirloin steak
  • 1  8-ounce carton dairy sour cream
  • 2 tablespoons all-purpose flour
  • 1/2 cup water
  • 2 teaspoons instant beef bouillon granules
  • 1/4 teaspoon black pepper
  • 2 cups sliced fresh mushrooms
  • 1/2 cup chopped onion (1 medium)
  • 1 clove garlic, minced
  • 2 tablespoons butter or margarine
  • 2 cups hot cooked noodles

Directions:

1. If desired, partially freeze beef for easier slicing. Trim fat from meat. Thinly slice meat across the grain into bite-size strips.

–

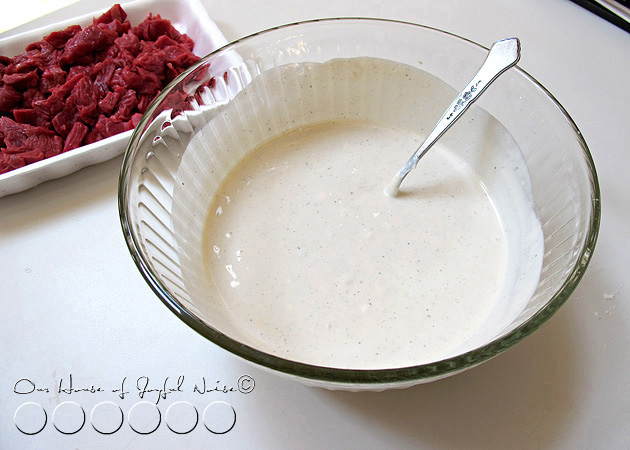
beef-stroganoff-recipe-2 2. In a small bowl stir together sour cream and flour. Stir in water, bouillon granules, and pepper; set aside.

–

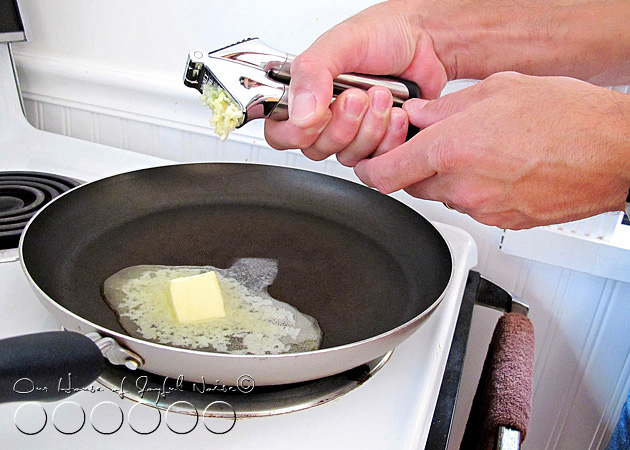
beef-stroganoff-recipe-1 3.  In a large skillet, melt the butter, and then add 1 glove of minced garlic.
–

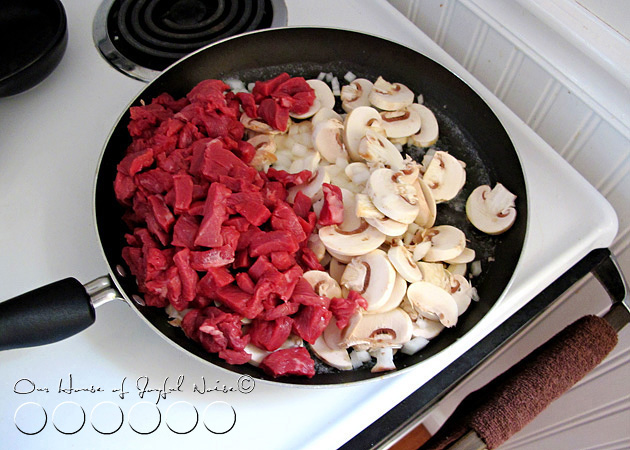
beef-stroganoff-recipe-3 4. Cook and stir the meat, mushrooms, and onion, in the hot butter with garlic over medium-high heat for 5 minutes, or until desired doneness. Drain off fat.
–


beef stroganoff
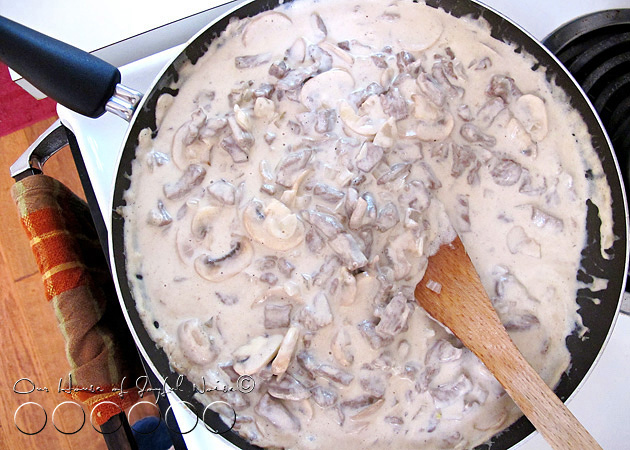
5. Once the meat is cooked to your satisfaction, along with the mushrooms and onions, stir in the sour cream mixture into skillet. Cook and stir until thickened and bubbly. Cook and stir for 1 minute more.
–

*Now interestingly, whenever I have thought of Beef Stroganoff, I’ve always imagined it in my picture-mind, with a dark rich brown gravy.  As you can see, that’s not how it comes out here. And why would it, with the sour cream we’ve added?  Suddenly, I realized that the darker brown gravy I was recalling, was from the Beef Stroganoff hot school lunch menu, that I got in my elementary years.  Now, I have to wonder what that stuff really was.   Hmmm.

beef-stroganoff-recipe-5 6. Serve over noodles.

And have seconds, while you can.

Yes, your peas too!  ; )

Makes 4 servings

Nutrition Facts:

Calories427, Total Fat (g)23, Saturated Fat (g)13,  Monounsaturated Fat (g)7,
Polyunsaturated Fat (g)2, Cholesterol (mg)119, Sodium (mg)575,  Carbohydrate (g)29, Total Sugar (g)6,     Fiber (g)2,  Protein (g)26, Vitamin A (DV%)0, Vitamin C (DV%)3, Calcium (DV%)9, * Iron (DV%)23, Starch (d.e.)2, Lean Meat (d.e.)3, Fat (d.e.)2, Percent Daily Values are based on a 2,000 calorie diet

Save

Filed Under: Main Dish, Recipes Tagged With: beef stroganoff over noodles, beef-stroganoff-recipe, main-dish-ideas

Bruschetta (Bread Topping) – Recipe

September 11, 2010 By Laura 1 Comment

bruschetta-

Here’s another delicious little something, to make with some of those fresh summer tomatoes!

Bruschetta!!

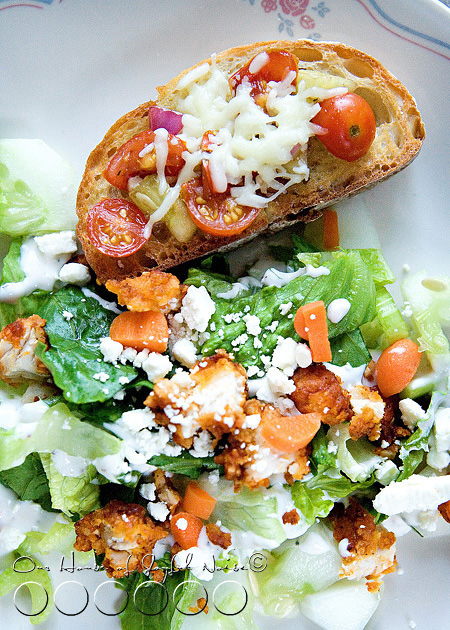
Bruschetta topping on toasted bread, is a perfect side to a nice salad (as shown here), or an appetizer for luncheons or cocktail parties. (Well, I’ve heard.  I haven’t been to a cocktail party in…..well, I actually can’t think of a time I have ever been to one, come to think of it. Or, maybe I’m not sure what one is.  But I know what bruschetta is!)

‘Bruschetta’ is an Italian word (Tuscany, to be exact), that means to ‘toast or burn’.  I prefer to toast my bruschetta.  ; )  There are many variations that can be made to this recipe, so don’t be afraid to experiment on your own!  That’s generally what I did when I made this bruschetta this evening a couple of weeks ago. My father, with his ever-discerning tongue, was here for dinner, and he gave it all gold forks. (He loved my salad too. He’s a natural born food critic. Ask anyone who has ever sat down and eaten with him.)

No complete step by step this time photos for the directions this time, but it’s easy enough to follow.  I kind of winged it, with loose measurements, adjusting by eye. You can do that….have no fear. Here’s how (generally) I made it:

Participating ingredients:

  • Ciabatta bread; (can be found at bakery), sliced thick.  French baguette loaf can also be used
  • 1 Garlic clove peeled, and cut in half once.  (Optional)
  • ~ 2 cups chopped tomatoes ( I used Early Girls > It’s what I had on hand.)
  • ~ 1/4 cup finely chopped red onion
  • ~ 1 cup chopped cucumber
  • 2 Tablespoons of Balsamic Vinegar
  • 3-4 Tablespoons of Extra Virgin Olive Oil
  • Shredded Mozzarella Cheese
  • Salt & Pepper to taste.

1) Put all chopped vegetables into a small to medium mixing bowl.

2) Add olive oil and vinegar, salt and pepper if you choose, and mix well.

3) Place mixture in fridge or just on counter to all sit together in the bowl, while you prepare the rest.

4) Per-heat oven to broil (My oven requires a temp, so I set it for 375)

5) Line cookie sheet with tinfoil, or whatever you use to protect sheet.

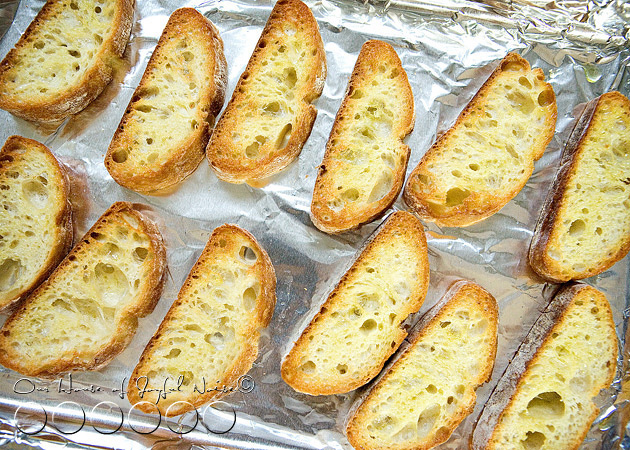
6) Place breads on sheet, spaced evenly.

01_bread

7) Place in oven, and toast for 1-2 minutes, until you see they start to brown or turn golden. (Shown in photo above.)

8) Remove sheet from oven, and brush each bread piece with the olive oil.

9) Rub each piece with the halved garlic clove for added flavor, if desired. (I desired.)

bruschetta
10) Mix mixture in bowl again, and then I drained all of the excess liquid in the bottom.

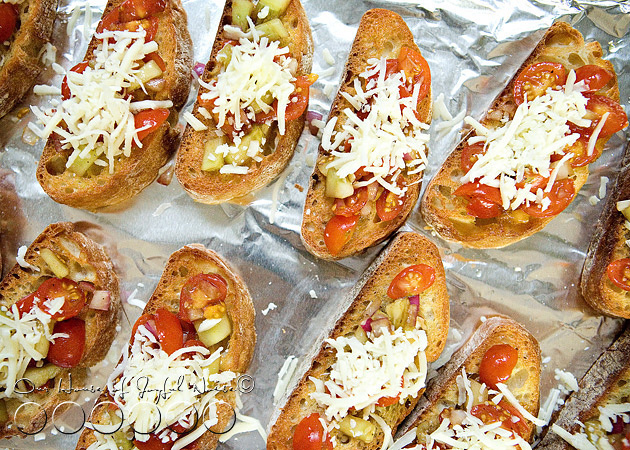
11)  Spoon tomato/vegetable mixtures onto bread slices.

12) Top with some shredded mozzarella. (Show with all toppings on bread, in photo above.)

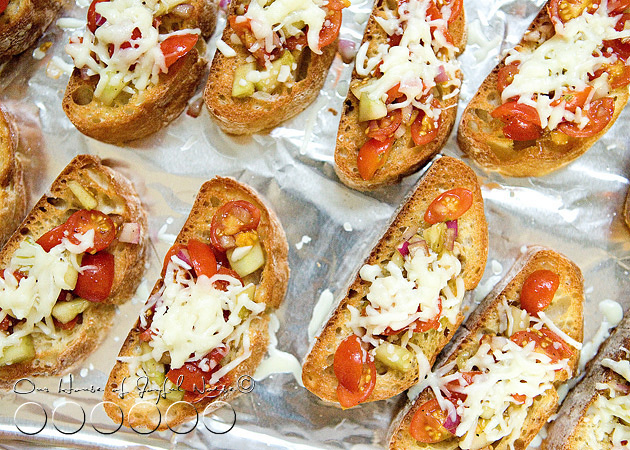
bruschetta
13) Put back into oven for a minute or so, watching closely, just until cheese is melted, and remove.

04_bruschetta-with-salad
Serve up, and enjoy!!

Save

Filed Under: Appetizers, Breads, Rolls and Muffins, Recipes, Side Dishes Tagged With: bread-topping-recipes, bruschetta, bruschetta recipe, recipes, tomato recipes

A Garden Tomato Sandwich

August 28, 2010 By Laura 5 Comments

tomato sandwich

It’s been said that some of the best things in life, are the simple things.

I’ve certainly found that to be true, when it comes to the enjoyment I find in the fruits of my own gardens.

To be able to just walk out my front door, to my own little garden beds, and pick something I need, fresh right off the vine, brings a satisfaction you could have never convinced me that I would relish in one day.
But I really do.

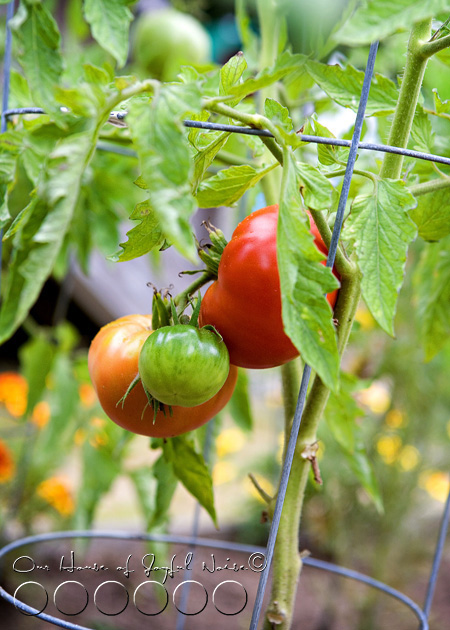
tomatoes-on-the-vine

Ripe, brilliant red, fresh tomatoes, are often what I am after.

And a simple tomato sandwich, is often on the immediate menu.

One can hardly call it ‘a recipe’ I guess. But before you think “Oh brother’, try one!

And try it my way.

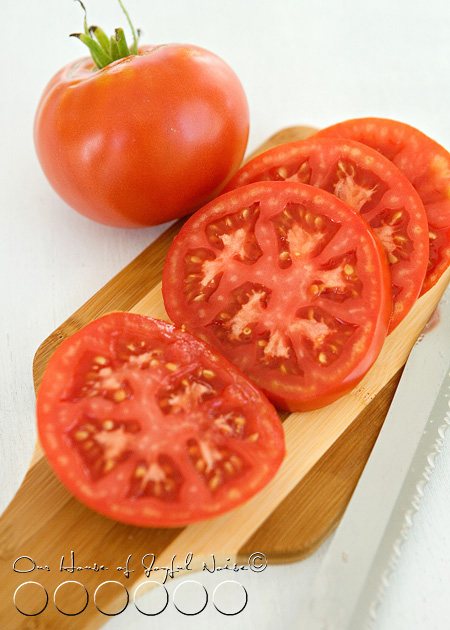
sliced tomatos

Start with a fresh garden tomato. This is an Early Girl.

Slice it up about a 1/2 inch thick.

Now toast up 2 slices of your favorite bread. I like multi-grain.

Once it pops, butter just one side, very lightly.

Then load both sides, with Hellman’s Mayonnaise.

Just go ahead. You deserve it.

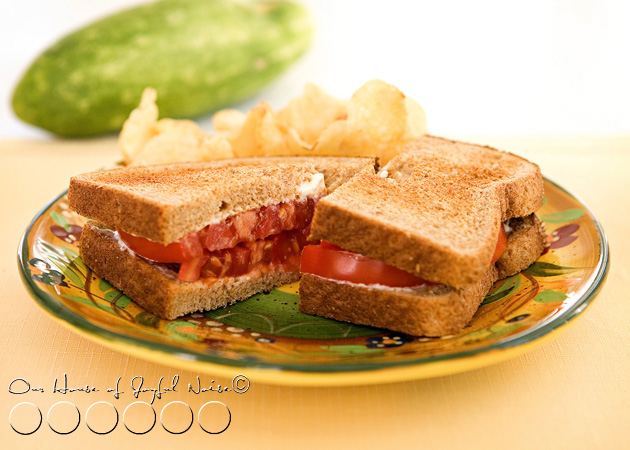
Layer on a couple of tomato slices (depending on the width of them), and dash on some black pepper!

Cut in half, and enjoy!

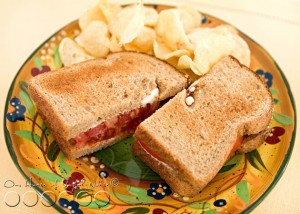
tomato sandwich

It’s my favorite summer time sandwich.

In case you are wondering, those are Sea Salt & Vinegar Cape Cod Potato Chips with my sandwich here.

I deserved those too, this day. ; )

Sometimes, I add some fresh cucumber slices in my sandwich, cut the long way.

That’s how the kids and I had them the other day.

If you follow me on Twitter, you may have heard that my son said to me while eating lunch that day, “Mama, I can taste the love in this tomato and cucumber sandwich!”.

Save

Filed Under: Lunch, Recipes, Sandwiches Tagged With: garden tomatoes, simple sandwiches, summer-light-lunch-ideas, tomatoes-off-the-vine

Scallops and Grilled Zucchini | Recipe

August 1, 2010 By Laura 5 Comments

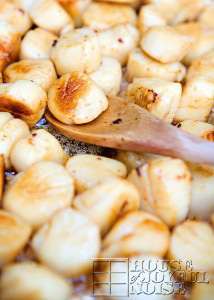
11_carmelized-scallops_300

Here’s something you may or may not know about me.

I am not a mother that takes some time for herself now and then. I don’t go away, or even take a day, for myself, here and there. Most times, I don’t even just go shopping, without taking some or all of the kids with me. I just don’t care to be away from my kids. I like their company. I understand some mothers do like to go away, or take a break from their kids now and them. I’m betting that is normal, and I know there is nothing wrong with that. But it’s just not what I do.

But the other day, I went to visit a good friend. She is only one of a few real-life friends I have.  I only see her once in a blue moon, and I hadn’t seen her in way too long. She lives very close by, so you would think I’d be able to see at least a little more frequently, even as busy as I am.

But you see, every single time we have ever gotten together for ‘just a cup of tea’, it has pretty much turned into an ‘all day affair’.  She is SO down to earth, so funny, so easy to talk to, and listen to, that the hours always seem to just slip right away. Literally.

So we met the other day at her house, just for a cup of tea, or a glass of wine, at 1 p.m. in the afternoon.

I got home at 9 p.m.

It’s pretty much a pattern now.  Complete with Michael’s phone call somewhere in there, asking, “Is my bride ever coming home again?”.  At the end of our visit, we stood in her front doorway for another hour+, chatting some more.  It’s ridiculous.  I love her to death.

So what does that have to do with food and recipes? You came to talk about FOOD, right?  Well, the link is that of course I stayed for dinner, at my friend’s.  She said she was having scallops.  I had brought her a summer squash and zucchini from my gardens. ; ) I learned she calls scallops ‘sea candy’. She showed me how she prepares her scallops, and zucchini.  Both, on the grill. I was intrigued.  The dinner, was DELICIOUS.

This is pretty how she prepared the dinner.  But her reference of the scallops as ‘sea candy’, gave me the idea of adding a little ingredient.

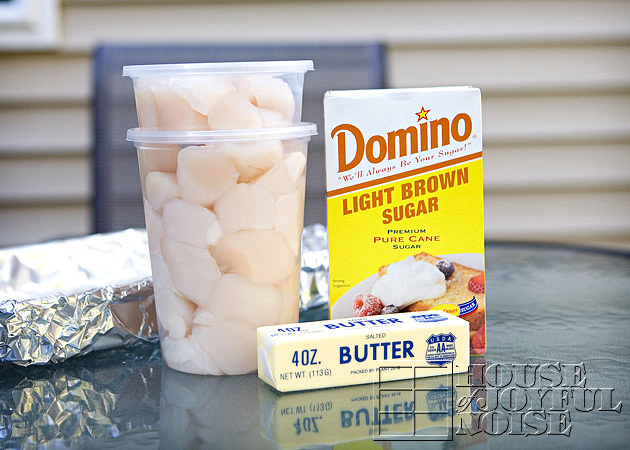
01_ingredients The scallops participating ingredients:   fresh sea scallops (easy to find here on this shore), 1/2 stick of butter, and some light brown sugar.


02_butter-sugar

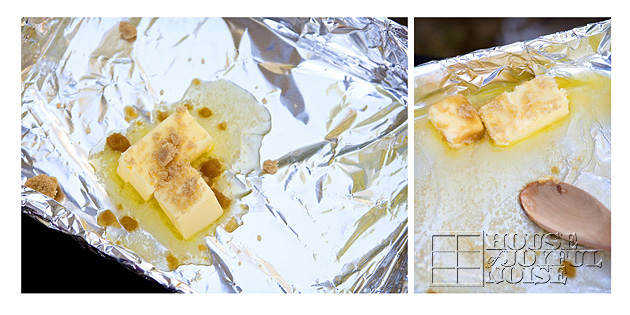
In a foil lined tray on the grill set on about medium heat, we threw in a 1/2 stick of butter, since we had 2.5 pounds of scallops. Actually though, we threw in 3/4’s of a stick (seen above), and then took 1/4 back out. lol. (It was too much.) Then I threw in an unmeasured amount of light brown sugar.  (As it turns out, Michael secretly added more when I was not looking.  He is my ‘Sugar Boy’.  This is different than ‘Sugar Daddy’.)

–

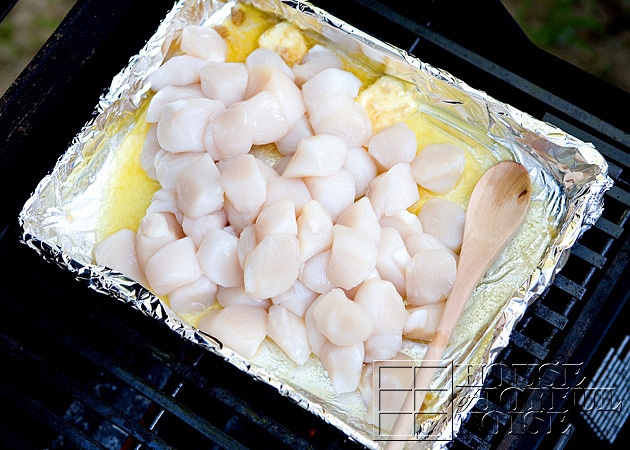
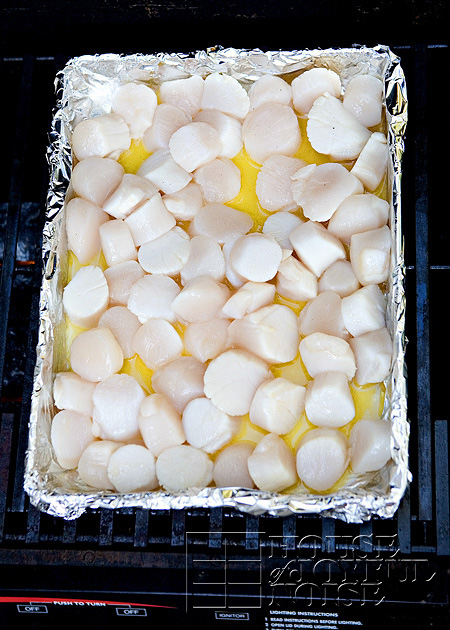
03_raw-scallops When the butter is all melted, dump in the fresh raw scallops.


04_raw-scallops
Spread them all out evenish in the pan, and close the cover.

Get in there and stir them up now and then, turning the scallops over as you can. or even spinning the pan around to ensure even heating.  But the goal is to get the butter and sugar caramelizing, and that really takes a little bit of a while.

–

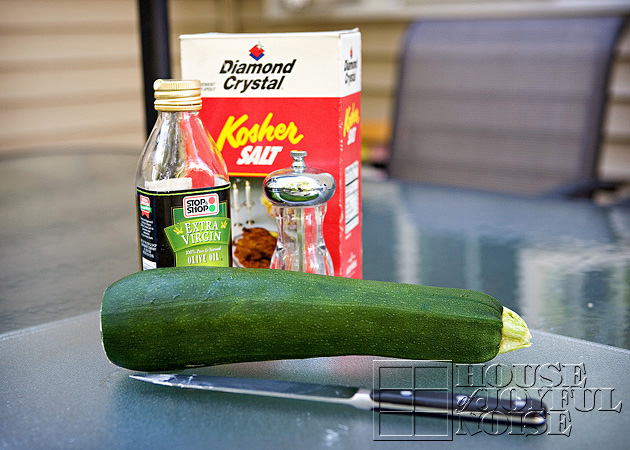
05_ingredients Then we started preparing a side dish.   Participating ingredients:  a garden-fresh zucchini, virgin olive oil, kosher salt and pepper.


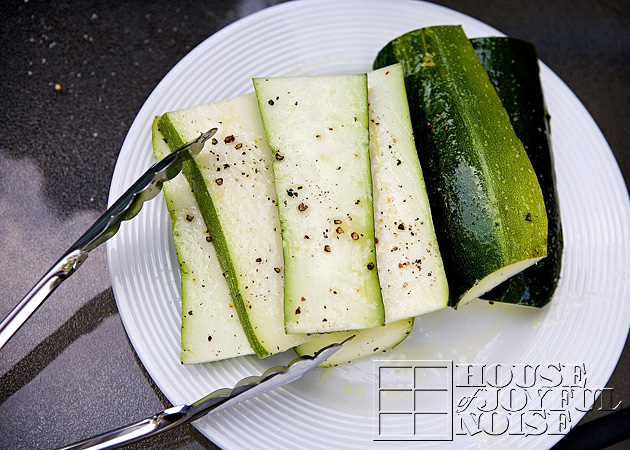
06_sliced-zucchini

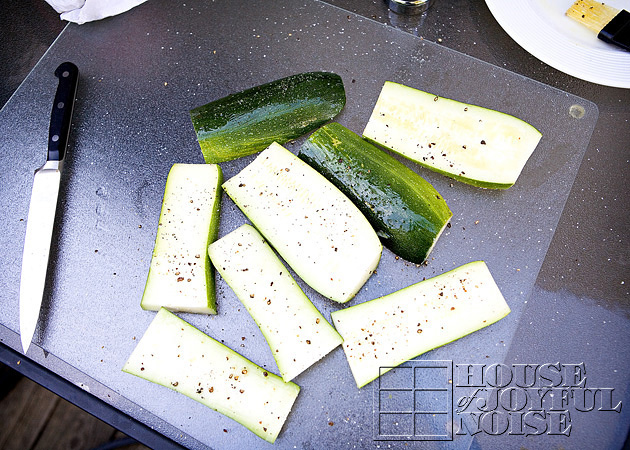
Cut off the ends of the zucchini, and then slice it up the long way, about 1/2 inches or there-abouts.  Then we cut those slices in half too.

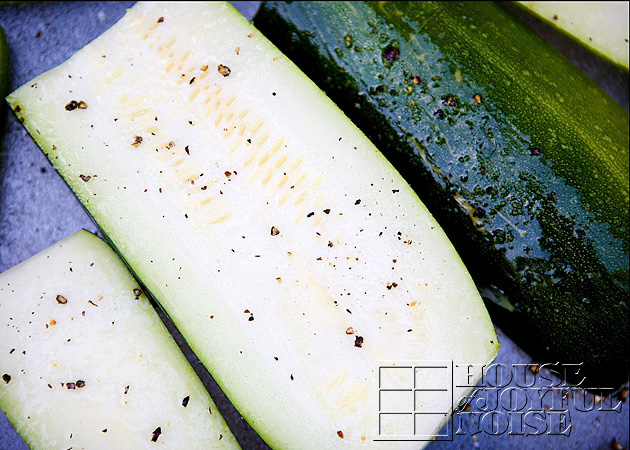
07_sliced-zucchini-squash Brush them with olive oil, and sprinkle on some kosher salt and ground pepper > both sides.

08_ready-to-grill-zucchinil They are ready to throw on the grill.  But the scallops take much longer, so we waited quite awhile before putting the zucchini on.


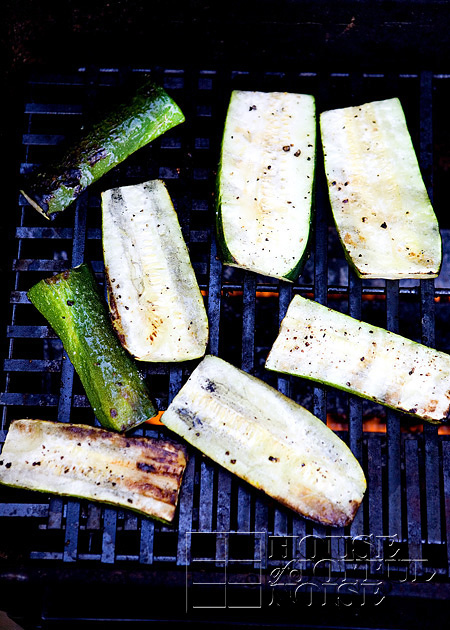
09_grilled-zucchini

When the scallops looked like they would be ready soon, we threw the zucchini on the grill.  The goal for these is to remove them off the grill when they are still dense and soft, but on the firmer side.  We don’t like mushy squash.

–

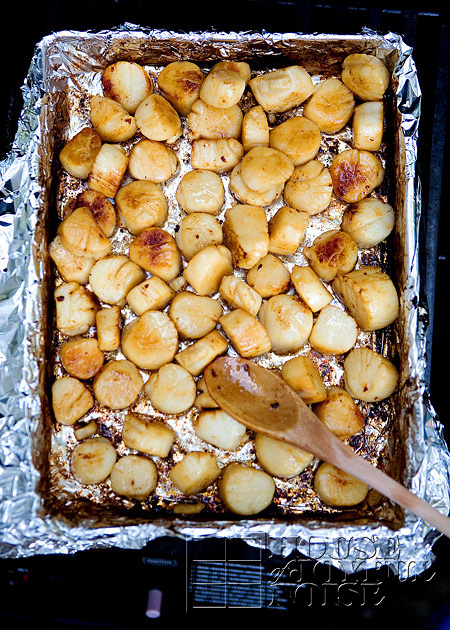
10_grilled-scallops

The scallops get beautifully brown, as all of the butter and sugar has caramelized.

–

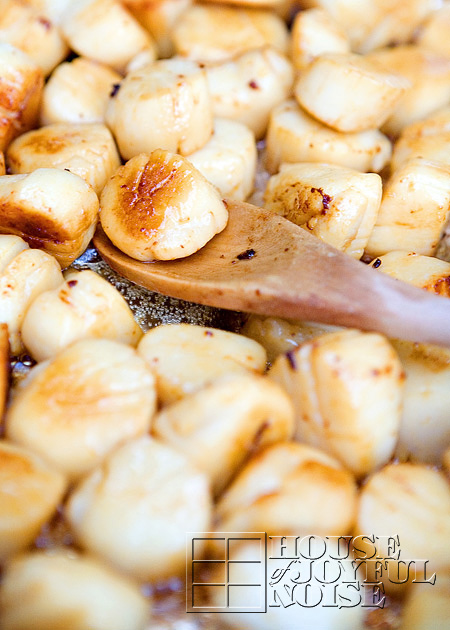
11_carmelized-scallops

Look how perfect.

–

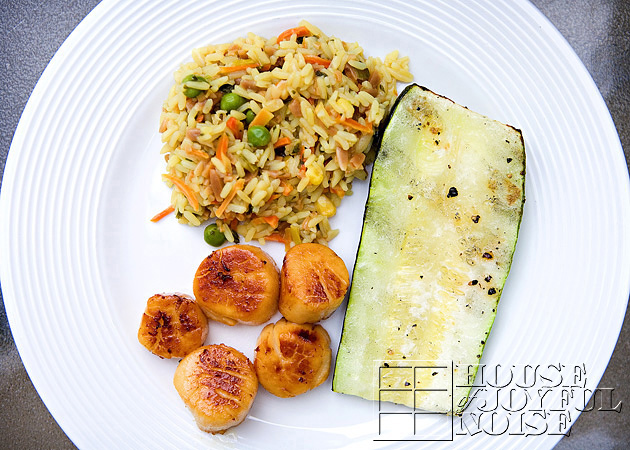
12_scallops-zucchini-rice-dinner We also made a rice side dish.  But don’t be too impressed with that.  It was literally one of those ‘Side Dish’ packets.  You know….add water and boil.

But how simple and summery is this meal?   It was SO good.  The kids enjoyed it too, as suspicious as they were.

We had scallops left over though, so Michael brought them to his friend.   He was a very grateful man, from what I heard.

This was the first time we have ever prepared scallops in any manner, and the first time we have put zucchini on the grill.  Have you grilled something new yet this summer?  Please share, or link us to it.

Save

Save

Filed Under: Main Dish, On The Grill, Recipes, Side Dishes Tagged With: grilled-scallops, grilled-zucchini, grilling, recipes, scallops, sea candy, summer-food, summer-grilling, summer-meals, summer-recipes, zucchini

  • « Previous Page
  • 1
  • …
  • 6
  • 7
  • 8
  • 9
  • 10
  • …
  • 17
  • Next Page »

We are wicked happy to have you here! We hope you find much inspiration, help, humor and enjoyment here.


Archives


POPULAR POSTS

* * * * * *

SUBSCRIBE to House of Joyful Noise blog! Every new post, delivered right to your email box!


Privacy Policy

Amazon Affiliates

Never at any additional cost to you, we may earn a small commission for our endorsement, recommendation, testimonial, and/or link to any products from our website. Your purchase through our links helps support our family, while sharing with you the products we authentically use and recommend, for various ideas, and letting you know where you can purchase them. Thank you for your support!

[footer_backtotop]

Copyright © 2026 HouseOfJoyfulNoise.com · Genesis Framework by StudioPress