• HOME
  • About Us
  • {A}’s Chipmunk Training Archives

 Homepage

  • The Homestead
    • Home Projects
    • Home Improvement
    • Home Decor
      • Seasonal Home decor
        • FALL Home Decor
        • WINTER Home Decor
        • SPRING Crafts and Creations
        • SUMMER Crafts and Creations
    • Our Chickens
    • Gardening
    • Organization
    • Re-Purposing
    • Furniture Refinishing
    • Budget
  • Crafts & Creations
    • Seasonal Home decor
      • FALL Crafts and Creations
      • WINTER Crafts and Creations
      • SPRING Crafts and Creations
      • SUMMER Crafts and Creations
    • DIY (Do-It-Yourself) Project
    • Kids Arts and Crafts
    • Homemade/Handmade Gift Ideas
    • Holiday Crafts
    • Fan Pulls
    • Free Printable/Downloadable
    • Sewing Projects
    • Giveaways
    • Business Features
  • Recipes/FoodFun
    • Breakfast
    • Lunch
    • Main Dish
    • Sandwiches
    • Appetizers
    • Slow Cooker
    • On The Grill
    • Side Dishes
      • Soups
      • Salads
    • Baking
      • Breads, Rolls and Muffins
    • Snacks
    • Treats
    • Desserts
    • Drinks
  • Homeschooling
    • Elementary Homeschooling
      • Elementary Homeschooling READING
      • Elementary Homeschooling MATH
      • Elementary Homeschooling LANGUAGE ARTS
      • Elementary Homeschooling SCIENCE
      • Elementary Homeschooling HOME ECONOMICS
      • Kids Arts and Crafts
    • Middle School Homeschooling
      • Middle School Homeschooling SCIENCE
      • Middle School Homeschooling HOME ECONOMICS
    • Language Arts
    • Math
    • History / Social Studies
    • Geography
    • Foreign Language
    • Field Trips
    • Games
    • Nature Study
  • The Big Picture
    • Life In General
    • Celebrations
    • Faith
      • Into the Light; The Series
    • Giveaways
    • Reviews & Sponsors
  • Photography & Lettering
    • Photography
    • truck lettering
    • vehicle graphics
    • Newborns
    • Kids
    • Engagement
    • High School Senior Pictures
    • High School Senior Pictures Sneak Peeks

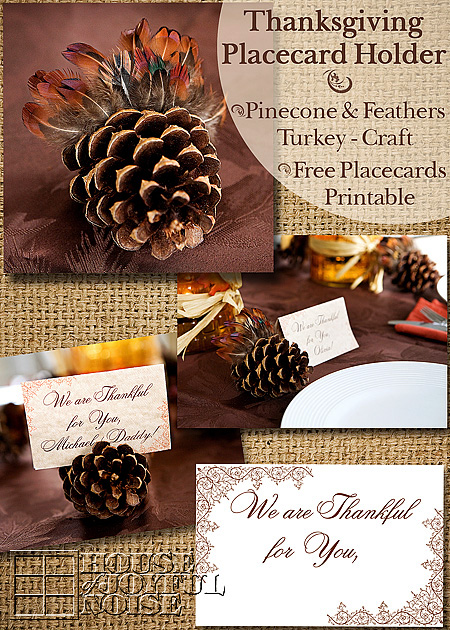
Thanksgiving Place Card Holder Turkey / Free Personalizable Place Cards Printable

November 17, 2012 By Laura 9 Comments

I’m so happy to offer you some free printable designs I created just for you:
Thanksgiving Place Cards

 as well as an adorable turkey craft to hold the cards, or as beautiful added detail to your table, if you’d like.
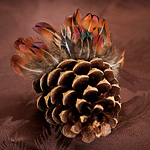
Thanksgiving is only days away.  If you are still scrambling to add a little ‘fancy’ detail to your Thanksgiving table setting, here’s an idea for you.  This idea is one I came up with for my own Thanksgiving table setting from last year that I never got a chance to share with you all.  Our guests loved them, and hopefully you will too.

Turkey Place Card Holders
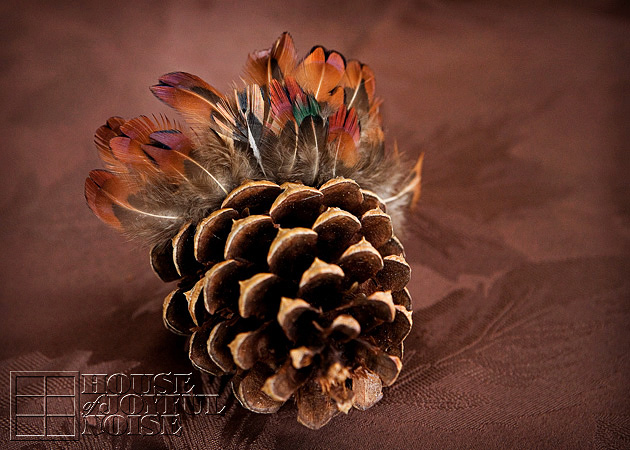
I think they are just simple, yet classy and beautiful looking.  They are easy to make, and require minimal supplies.  It’s so easy, there is no point in even showing you how to make them, when I can simply tell you in a few words:

I got a net bag of plain, natural pine cones at Michael’s Arts & Crafts.  They are for crafting and decor. I recommend not using the pinecones from any kind of potpourri, because they can be so strongly scented, and really clash with the otherwise enjoyable aromas of your Thanksgiving dinner.

The feathers were also bought at the same craft store, and come loose in a clear, flat cellophane bag.

The kids and I simply put some glue right between the last two rows of blades, on the backside of the second to last row. Then we simply stuck the feathers onto the backside there, starting in the middle and working our way outwards to the sides,being sure they were facing forward, and fanning nicely as we worked across. That was it!  These particular feathers are very fine, so it took just a little patience.  But I chose them because I loved the colors in them. We used toothpicks to be able to maneuver the feather into the position we wanted on the still wet glue, without using our fingers and getting glue all over them.

I made them to be place card holders, so I needed to make some of those too . . . . . .
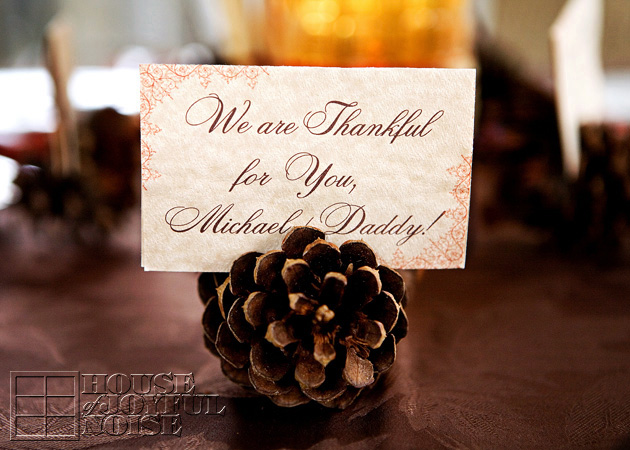
. . . . . . and I’m going to share that customize-able printable with you too, so you can have your own personalized settings like this.
I printed them out on sheets of card stock that a variegated warm beige color to it, rather than bright white.
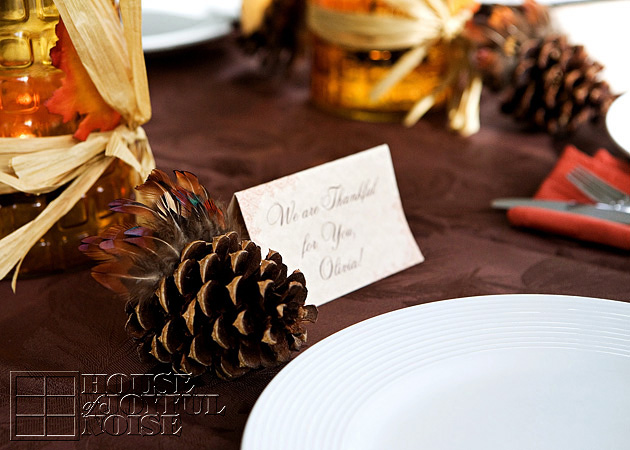
  Of course you also have the option of putting the place card on the table, beside the turkey, as seen in the photo above.

We also did something special on the inside of these place cards
; and so this is another idea or suggestion for you:
In light of Thanksgiving, and being most thankful for the blessing of those we love, the 6 of us in our family wrote a little something on the idea of each person’s card, expressing something about that person that we love or are thankful for.  It was an unexpected surprise for those joining us around the table this holiday; my father, brother, and a family friend. And I’ll tell you what; they all cried, finding more inside, and reading it!  The kids wrote the sweetest things.

If you would like to add a more whimsical flair to your turkeys like these, for just the kids or for everyone, you could add some googley eyes on white cardstock, and an orange waddle with felt, foam or construction paper.  I just happened to love the more subtle indication of a little turkey.
–

Free Thanksgiving Place Cards Printable

O.k., here is the customizable/personalizable place cards printable I promised you, but you must get it using one of the links to the downloadable file (you choose) below . . . . . .
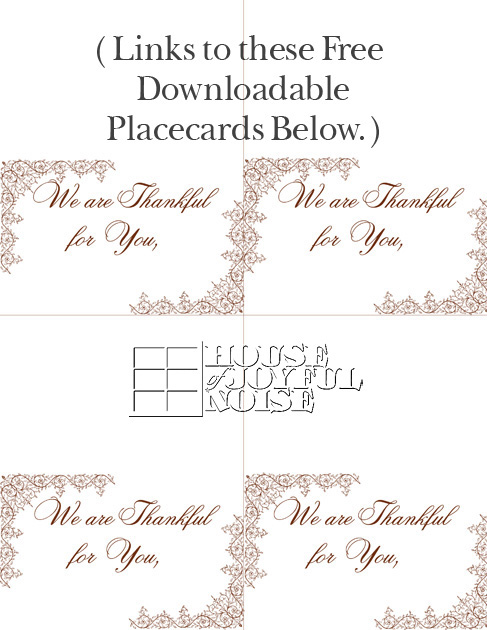
PSD FILE:  This version is still in layers.  If you use Adobe Photoshop or any other program that works with PSD files, you can add in each persons name, to personalize each card. The color for the font is hexcode #6f3014, and the font style I used is Cecily.  I forget the font size, but if all I just mentioned didn’t go over your head. I’m sure you’ll figure it out. Ha ha.
-or-
JPG FILE:  This version is flattened, and ready to print as is. You can simply write in each person’s name with a marker.
Specs:  8.5 x 11 printable – Use same size card stock; I’m suggesting a light and warm or compatible color, perhaps that goes with your table setting.
And now for a little Giddy-Diddy:

If you love this idea . . . . .
Just SHARE it however you do!
But most of all please know this year . . . .
We’ll be giving THANKS for YOU!

* * * * * *

Please come follow me here and there:


Filed Under: Crafts & Creations, FALL Crafts and Creations, FALL Home Decor, Free Printable/Downloadable, Holiday Crafts, Home Decor, Kids Arts and Crafts, Seasonal Crafts and Creations, Seasonal Home decor, The Homestead Tagged With: crafts, free-printables, holiday-crafts, November-crafts, pinecone-crafts, place-card-holder-idea, printable-Thanksgiving-place-card-holders, Thanksgiving, Thanksgiving-crafts, Thanksgiving-free-printable, Thanksgiving-place-card-holders, Thanksgiving-table-decor, Thanksgiving-table-setting-details, turkey-craft

Customized Sketchbooks | DIY idea

September 18, 2012 By Laura 15 Comments

customized-sketchbooks-idea

The kids and I are well into a new school year here, and things are going really well so far.  Our oldest is a high school sophmore now, and the 3 youngest (triplets) are fifth graders.  So naturally, each year has gotten more academically involved, deeper and serious for all of us;  myself as the teacher, and they as students.  But I can freely admit that I am learning almost as much as they are, and enjoying my re-education as we progress with each year.  I love finding new ways to keep their homeschooling experiences fun.

One new idea I came up with this year, actually came about as I was brainstorming a gift idea for a special-little someone-else in my life.  While that gift is more elaborate and expensive, and personalized from me, it occurred to me that it might be fun to incorporate the general idea into our schooling, on a more budget level, for my own kids. So I mentioned the idea to them, of keeping their own sketch books throughout the year, and was not prepared for their level of excitement about it! I also wanted them to customize their very own a little bit, so they treasured them more.

The intentions for these sketch books are for the kids to just use freely whenever they want to, to practice drawing, write a little poetry, journal some thoughts, or even just doodle as they feel like it. But I did let them know I may ask them to use their sketch pads to express their thoughts or feelings in any way they’d like, following field trips or other home schooling or life events worth noting, in an artistic way. These pads are for dry medium only, but naturally you can adapt the general idea to any kind of pad, as well as customize the cover using any material you’d like. But today, I’m just sharing with you what we did.

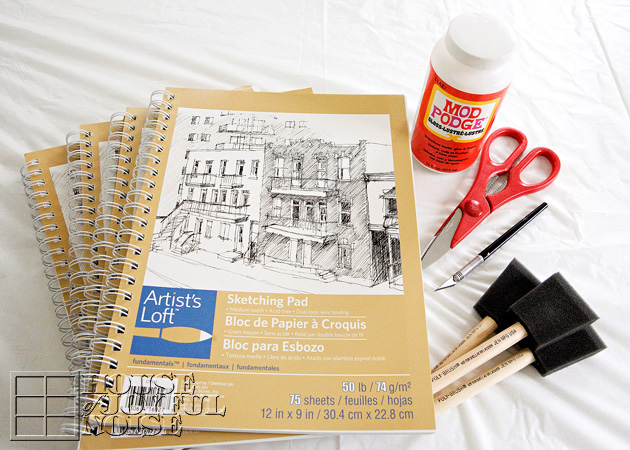
Here’s the basic supplies we worked with:

  • customized-sketchbooks-idea-1 Inexpensive spiral bound sketching pads
  • Modge Podge
  • Foam brushes
  • Scissors or an X-Acto type blade

customized-sketchbooks-idea-10
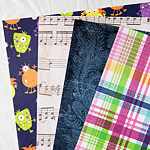
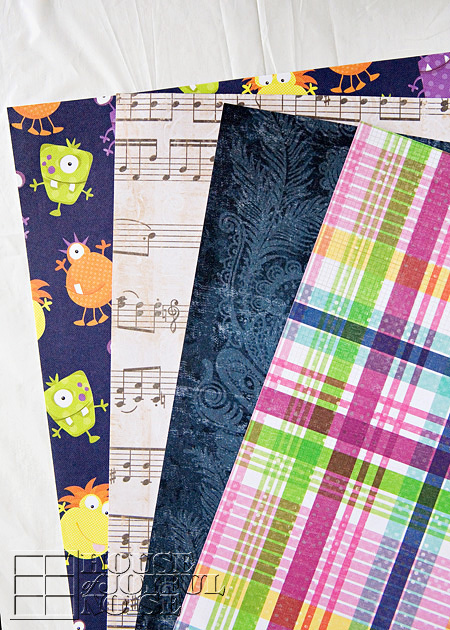
And, 12″ x 12″ patterned scrap booking paper.  These are the sheets my kiddos picked out for themselves.

Now things are about to get ever-so-slightly-messy. Especially with kids. So I thought I would tell you my cheap little trick I use for protecting the table for all of our craft happenings . . . . . .

0012-214x300

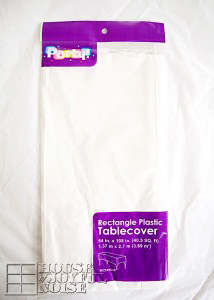
TIP: Plastic party table covers, from the Dollar Store!  One usually lasts us for many, many projects. When we are done working, we make sure any paint or glue on it is dry, and then we just roll it up in a ball and put it away for next time.  (You could fold it, if you really need to. I know some people are like that. Hey, I have my own weird issues, but they are different. I’m not judging! lol)

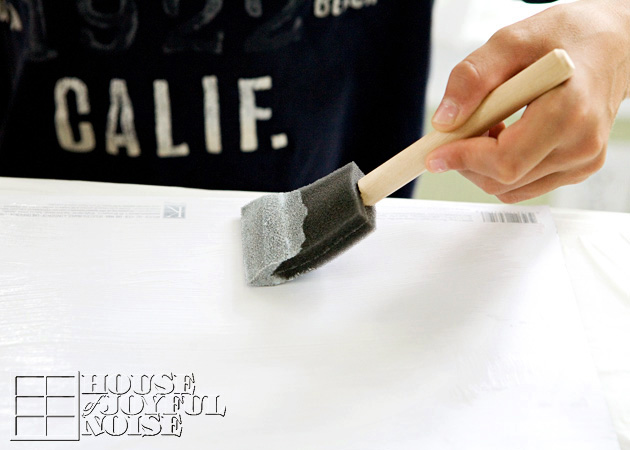
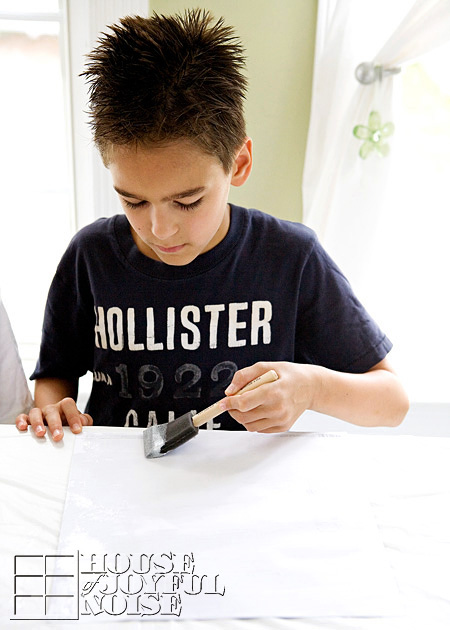
customized-sketchbooks-idea-2 So the first step is putting a quick layer of Modge Podge on the back of the patterned paper.

customized-sketchbooks-idea-3
You don’t want to put any excessive amount on, or go over and over it, or the paper will get kind of soggy, and buckle.
But you do want to go right to the edge of the paper.

customized-sketchbooks-idea-4
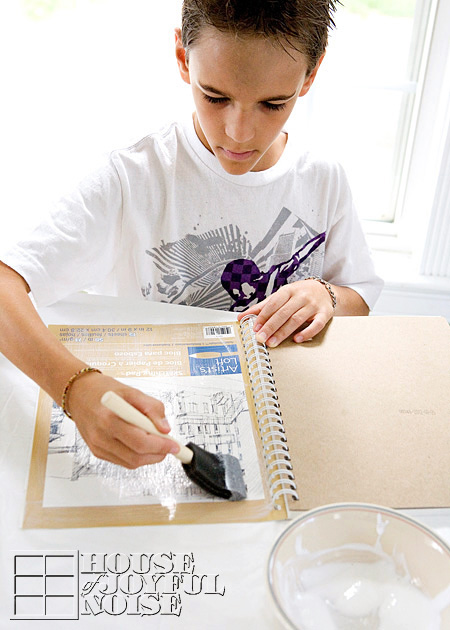
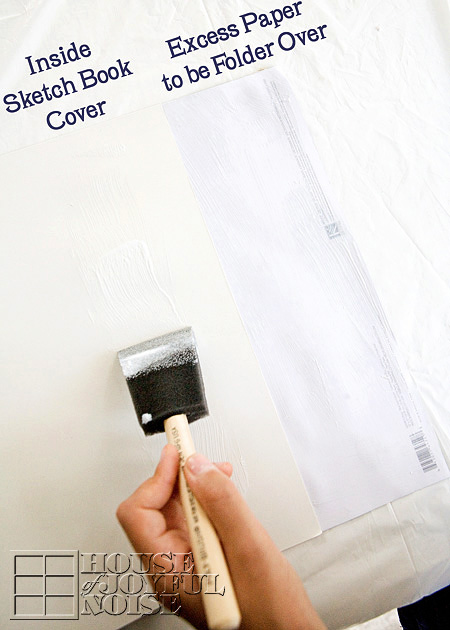
Then also put a layer all over the cover of the sketchbook.

customized-sketchbooks-idea-5
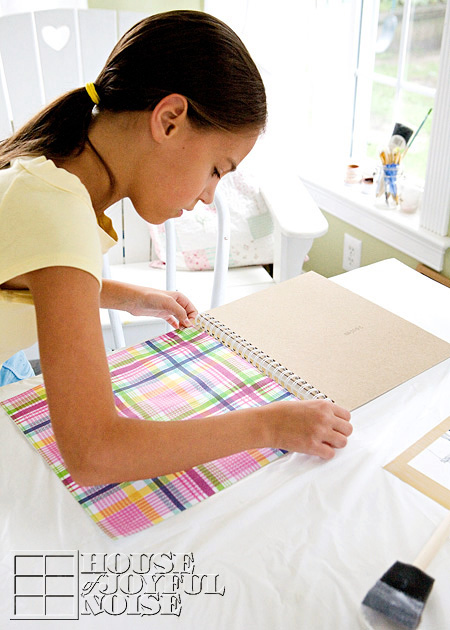
Then carefully place your Modge Podge’d paper, onto your Modge Podge’d sketch pad cover.

customized-sketchbooks-idea-6
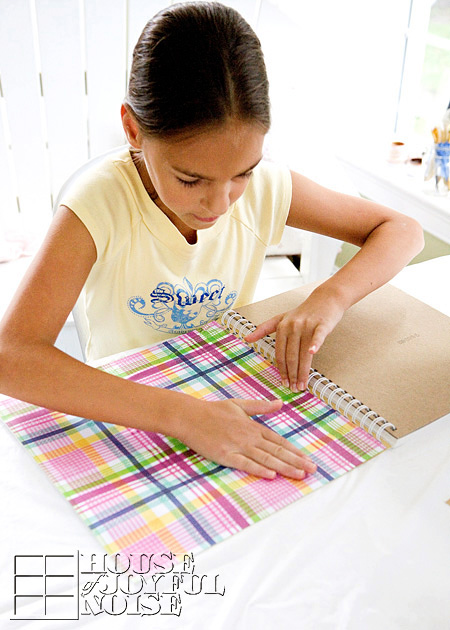
You can line up your paper evenly, by using the spiral bind as a guide.
Be sure to smooth out any air bubbles in the paper.

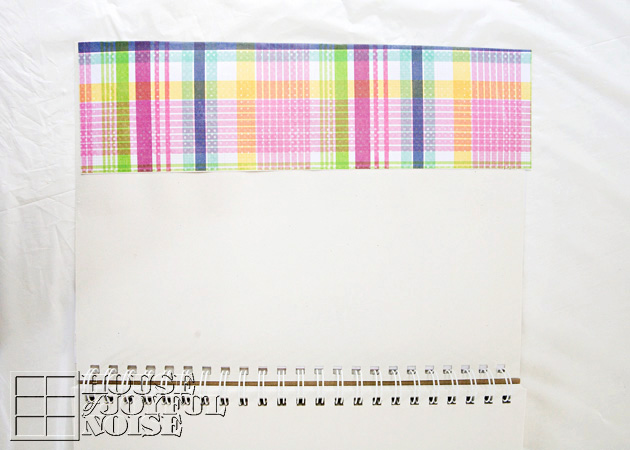
Now, the paper was not cut to size on purpose. You could figure out and prepare the exact size paper you needed ahead of time. But it just seemed easier to me to just put it on their, and then either trim off the excess, or just fold it over into the inside of the cover.

customized-sketchbooks-idea-7

These particular sketch pads were conveniently 12 ” tall, but only 9″ wide, so we had 3 extra inches to fold in.  The putting Modge Podge on both surfaces is just a preference, and may not be necessarry.  I just know with my kids, these sketch books were going places, and going to take a traveling beating. So, I figured the more secure the paper was adhered, the better.

customized-sketchbooks-idea-8 Granted, not all of them came out with the paper put on perfectly straight anyway, because they are kids, and doing the best they can. And perhaps not as particular and picky as I am! (Which really, has got to be a nice feeling, sometimes!) They just had fun making them, and were really excited about the whole project. Which is really the best part:  Kids being proud of what they made, and caring for those things that much more, because it is their own creation, from start to finish.

customized-sketchbooks-idea-9 I’ll tell you, it’s been weeks now, and these sketch books have proven to be a really great idea for my kids. They have really used them, on their very own whims. Regularly! Every day. It’s a beautiful thing to catch your kids sketching this or that.  Sometimes really working on a particular one over time, trying to make it come out just right. This is how all of my illustration skills were born!

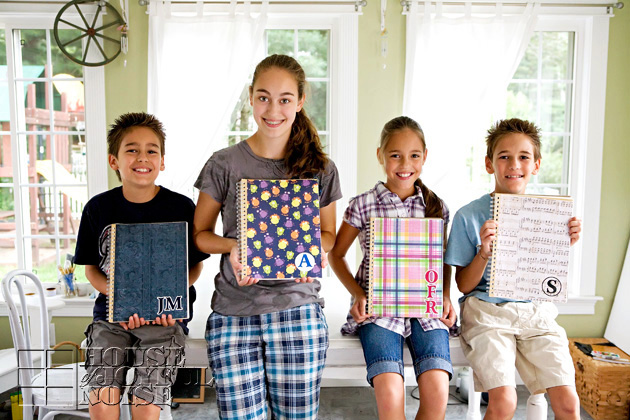
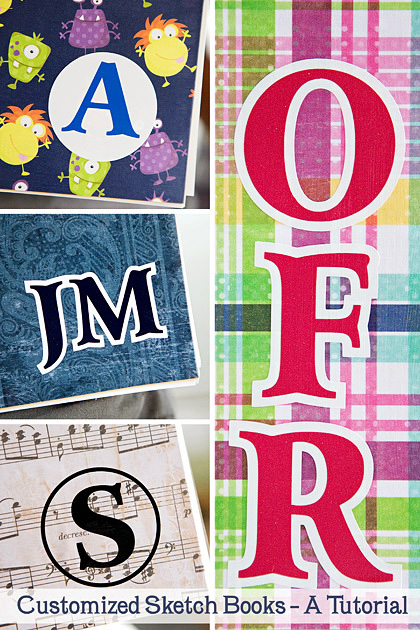
As you can see, we further personalized their sketch pads, with their initials. Those were all cut in vinyl for them, but they each specified the exact initials they wanted, colors, design and arrangement. I think they all came out so great!  And each cover really does well express their individual styles and personalities.

customized-sketchbooks-idea-11

 I hope this idea inspires you in some way. I know that for me personally, any notebook or sketch book full of blank or lined paper, gives me the butterflies.  IS there anyone else out there, who understands what I mean? The opportunity for expression just laying before those two covers, is exciting!  So consider making yourself a special one of your own, and just let whatever wants to come out of your head to your hand, come out. See what happens inside! You may be surprised, and you may just enjoy every minute of it. Everybody should just take time to chill and doodle, sometimes.

Thanks for coming over. Please share this idea if you are so inclined.

Save


Save

Filed Under: Budget, Crafts & Creations, DIY (Do-It-Yourself) Project, Homeschooling, Kids Arts and Crafts Tagged With: Catholic-families-Catholic-blogs, customized-sketchbooks, doodling, encouraging-imagination, homeschooling, illustrating, journaling, journals, sketchbook-ideas-for-kids, sketchbooks, triplets

Adorable Stretch Jewelry for Little Girls | Craft Tutorial

August 15, 2012 By Laura 12 Comments

little-girls-stretch-jewelry-craft-tutorial

My little girl, ‘O’, is always in a crafty mood. Her name is Olivia, but we call her ‘O’ almost as much.  She gets excited about any craft or project going on, and always (always) wants to help.  So she and I were chatting one day, and had come up with the plan to make her some cute stretch jewelry, possibly using buttons of some sort.  The next time we were in the craft store for other projects, we picked up the supplies for her jewelry too.  It’s a simple project, with adorable results, and practical for little active girls, too.

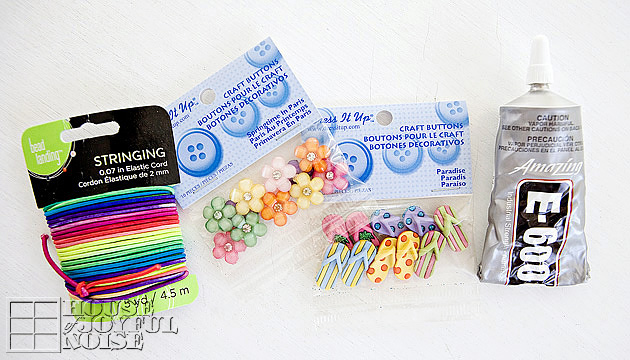
little-girls-stretch-jewelry-craft-tutorial-1 We found a whole section of all kinds of cute element buttons.  I would have had a hard time choosing, but ‘O’ is a pretty decisive girl, and decided the flowers with the rhinestone centers, and the flip flops, were what she wanted.  Interestingly, while they were all labeled buttons on their packaging, some did not have any hole or loop on the backs, to thread in any way! Such was the case with the flowers.  The flip-flops however, did have a loop on the backs.  No worries though. I was sure my Amazing E-6000 would do the trick. We also picked up stretchy elastic string.  I wanted to show you these supplies in their packaging (these bought at Michael’s Arts and Crafts), so that you would know what to look for, if you wanted to do this project yourself.

little-girls-stretch-jewelry-craft-tutorial-2
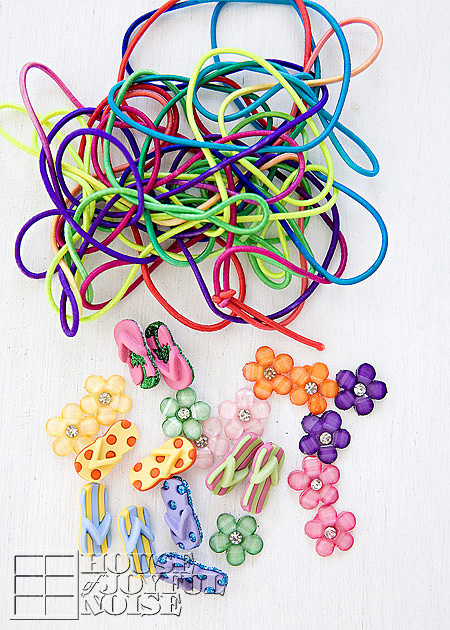
The string we got, as you can see, is all one long piece that changes colors.  So you can just choose an area of color you want, and cut it to the length you need.  Really fun matching up up with the buttons.  Aren’t they so cute?

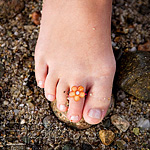
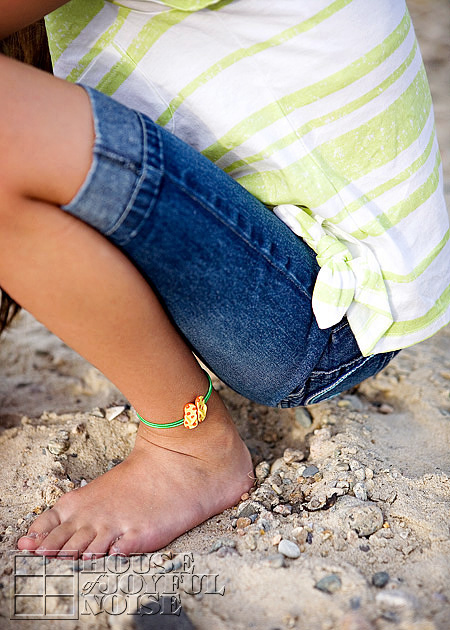
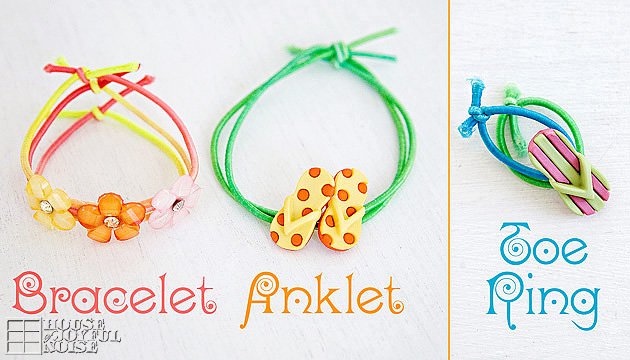
So we had a plan to make some bracelets, anklets, and toe rings.

0031

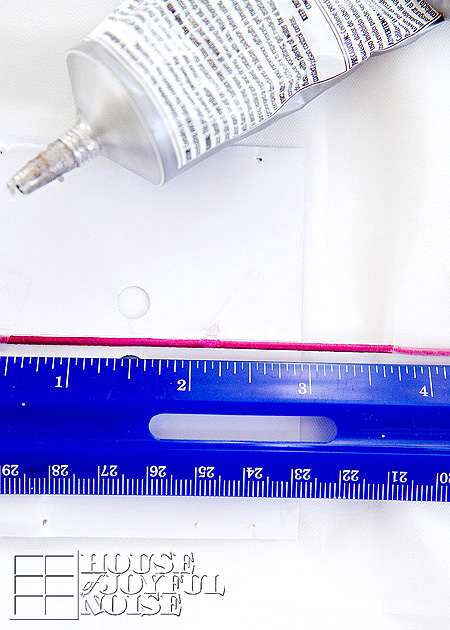
Depending on if your piece will be for the wrist, ankle, or toe, just take a quick measurement using the string around that body part, and than add an adequate amount more, for tying.  Now buttons with a hole or loop to thread of course will just slide right onto your string.  But the flowers we needed to glue.  So after cutting the string to length, we found the center of the string by using a ruler we had nearby. But you can estimate by folding the string in half or whatever.  In the center, we put a dab of glue, and then set the flower on and held it for a second.  We were working on a piece of paper, to protect our table from the glue. But being that the glue dribbles right over the string, we didn’t want the string adhering to the paper. So when it was set enough . . . . . .

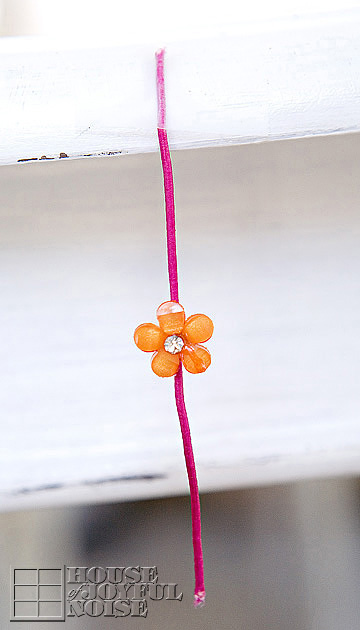
0041
. . . . . .we just taped them to the table’s edge, and let them hang, to completely dry.

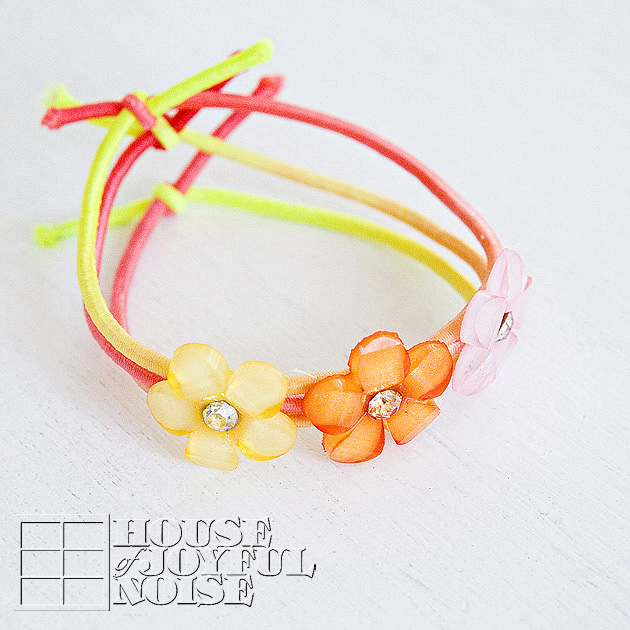
little-girls-stretch-jewelry-craft-tutorial-3 ‘O’ really had fun, choosing different elements, and then choosing what colors of string to go with it.  We especially liked how this one came out. We chose to use three pieces of string, and knot each of them on their own, instead of all together. It really alters the look!  The E-6000 really works amazing.  After knotting the jewelry on for the proper fit, you can then trim any excess string end with scissors. You just want to be sure they are tied to be snug, but not tight or uncomfortable, cutting off circulation or leaves band marks.

TIP: You may also want to dab the string ends with some kind of nail polish top coat, just so they don’t unravel or get fuzzier. I did, and I also put a dab on the knots, for extra security.

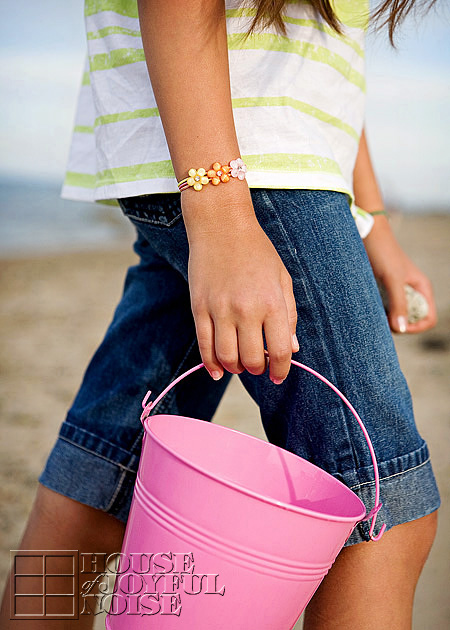
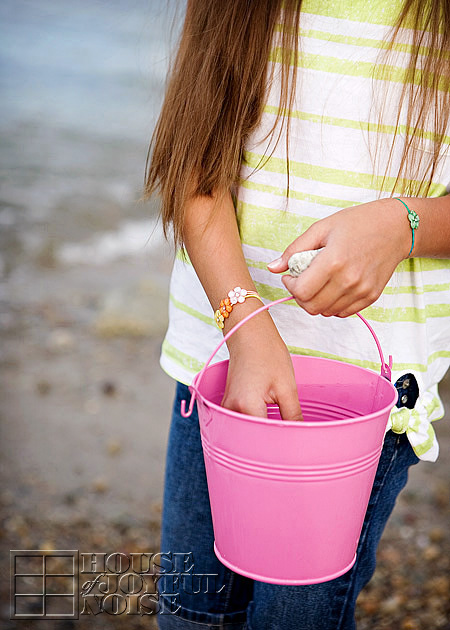
little-girls-stretch-jewelry-craft-tutorial-4 Aside from these accessories just looking adorable and so age appropriate, they really are great for every day play wear, being that they are fitting, and not the kind that will get caught on anything. They are not likely to break in any way, or get lost.  But even if they did, none of it is valuable in any way, and they can so easily be made again.

little-girls-stretch-jewelry-craft-tutorial-5
So little girls can just HAVE FUN, as they should, and not worry about their *bling*.

little-girls-stretch-jewelry-craft-tutorial-6
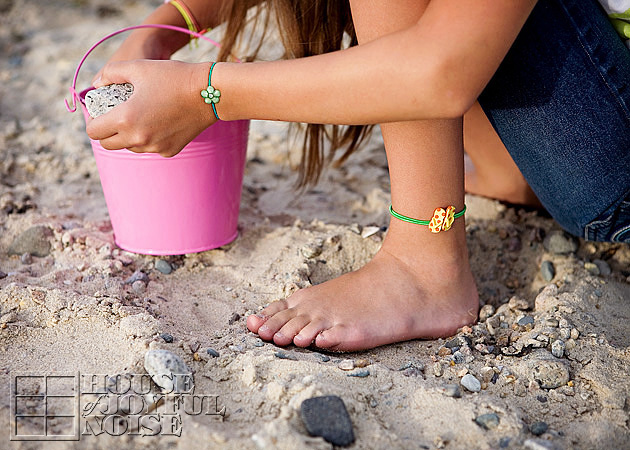
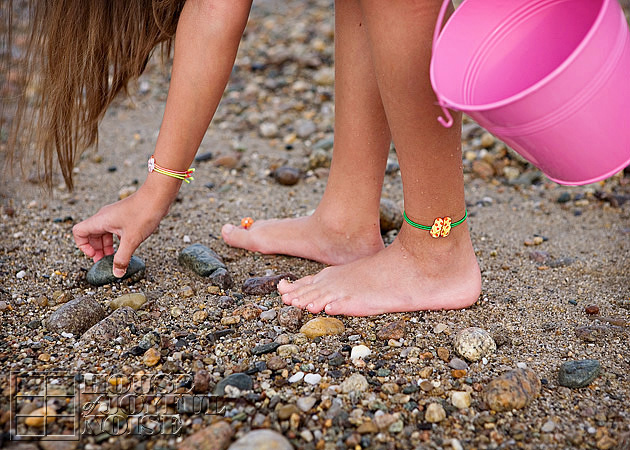
So perfect, for a little pretty style at the beach.

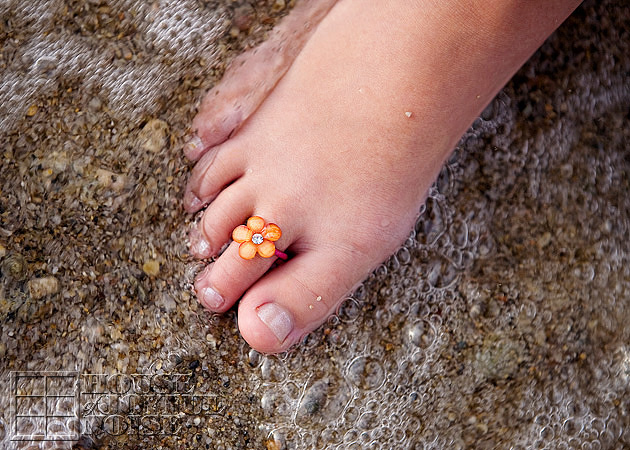
little-girls-stretch-jewelry-craft-tutorial-7 And they can even get wet, without a problem.

little-girls-stretch-jewelry-craft-tutorial-8
The options really are endless, and I can already see us ending up with a larger collection.  Because how cute would it be to make holiday accessories?  We can find button elements like this for Christmas . . . . . .Halloween . . . . . .Easter . . . . . . and it would also look lovely with any kind of clothing, including dressy-dresses.

If you are hoping to make homemade gifts this year, this is a great inexpensive and quick idea, for any little girls on your list.  If you aren’t sure of their sizes, just leave them untied, and when you give jewelry to them, you can just tie it off on them, and trim the excess.  Just as we did it making these for ‘O’.

little-girls-stretch-jewelry-craft-tutorial-9 We did not make any choker style necklaces, or pony-tail holders, but those are a couple more ideas.

012
‘O’ is the kind of girl who enjoys fashion.
She likes shopping for clothes, and enjoys putting her outfits together every day, including any accessories for her hair or as jewelry.

little-girls-stretch-jewelry-craft-tutorial-10 Love it? Say it. Pin it! Share it. Make it!


Save

Filed Under: Crafts & Creations, Kids Arts and Crafts Tagged With: crafts, kids-anklets, kids-bracelets, kids-stretch-jewelry, kids-toe-rings, little-girl-crafts, little-girl-handmade-accessories, little-girls-home-made-jewelry, safe-stretch-jewelry-for-girls

Terracotta Flower Pot Wind Chime | Tutorial

July 22, 2012 By Laura 98 Comments

terracotta-flower-pot-wind-chime-craft-3

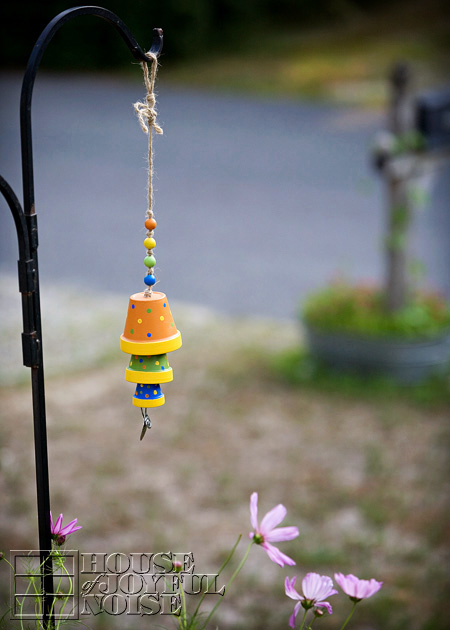
Making this flower pot wind chime was a fun and simple project to do with my kids. I was really looking forward to hanging out with them and painting, and I knew I would also love seeing the wind chime in my gardens, where I had every intention of hanging it, when it was done.
While I think we kind of ‘made it our own’, this flower pot wind chime was not at all my idea. I have seen them so many times at crafty website now, and so many style-versions of it, that I’m not sure which style I saw first, or where! Someone must have come up with this adorable idea first, but I’ll be darned if I know who! Whoever did, we thank them for the fun inspiration, to make something (else) to have around, that makes me smile inside, every day.

Here’s the basics on how we made our terracotta flower pot wind chime.

001_terracotta-pots
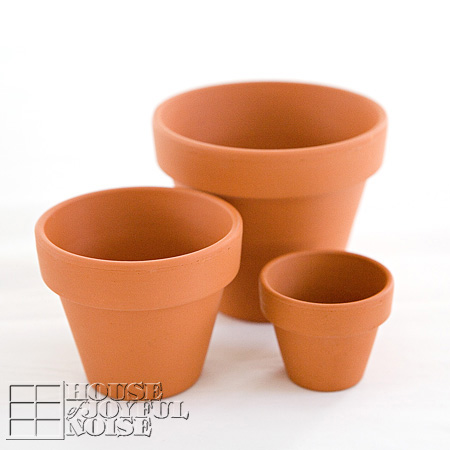
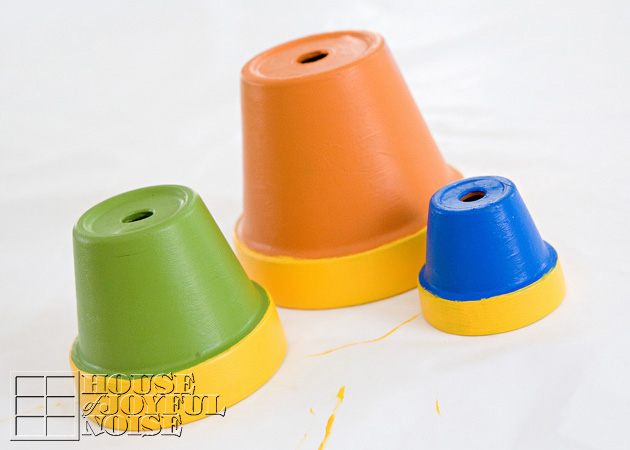
We started with 3 different sized terracotta plants, that have drainage holes in the bottom.
The smallest is tiny, at 1-1/2″ tall. Then the 2 next sizes up: 2-2/3″ and 3-1/2″.

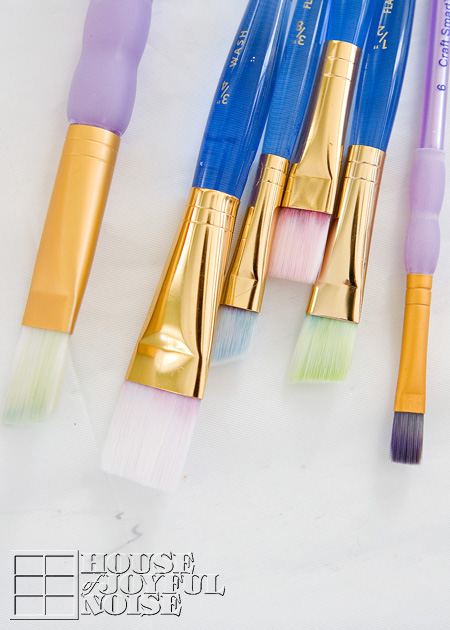
002_synthetic-flat-brushes
Using our little collection of synthetic brushes, we got to painting our pots.

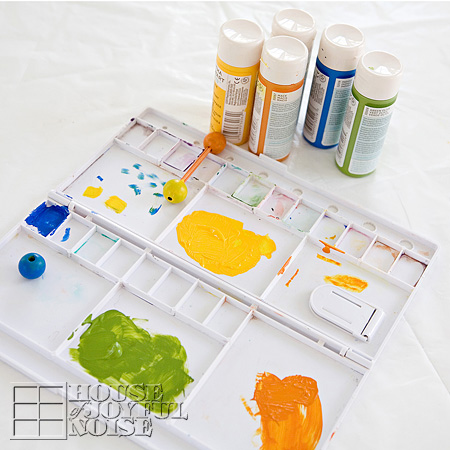
003_paint-palette
We used Martha Stewart Craft Paints, which are an acrylic paint. We also looked around and found what wooden beads we had in the house, which we wanted to use on our wind chime as well. After choosing our colors of paint and how we were going to paint the pots, we wanted the beads the same colors. One we had already was the correct color-green. The other 3 we had were not, so we painted them correct colors. If you can imagine, painting small wooden beads was not that easy. But we quickly figured out a helpful trick: We stuck 2 toothpicks in the bead holes, to hold them while we brush painted them the colors we wanted them to be. You can see them resting on the palette, drying.

004_painted-terracotta-pots I really wanted to take photos of the kids painting, for me! But they were done and back outside, on the other side of my window, swimming again, before I ever got photos of them painting. But, since they weren’t paying any attention to me anymore, I did clean up the edges of their pot-rim painting, just a little. ; )

005
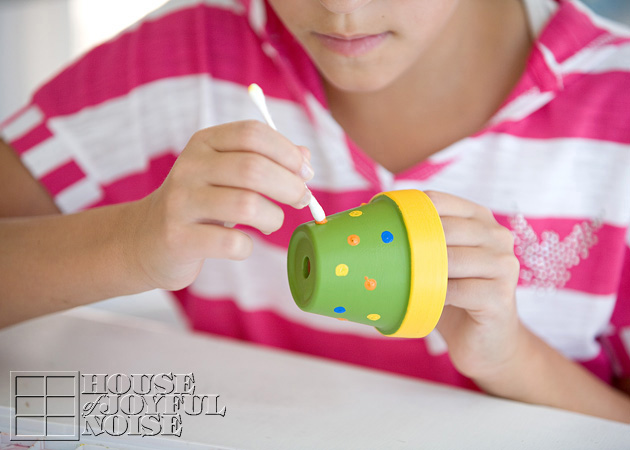
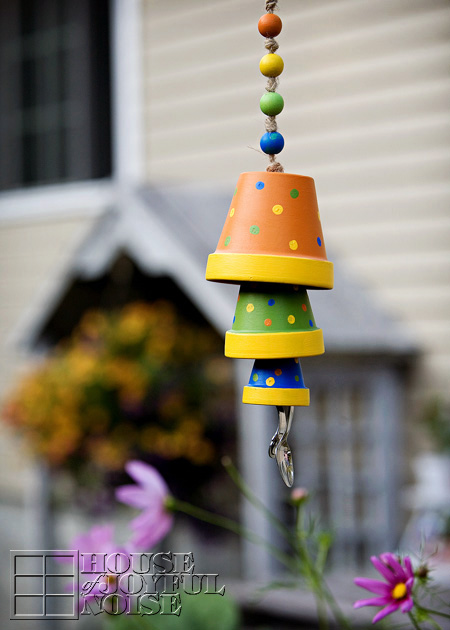
Our original idea, was to decorate our pots with little garden bugs.  Like butterflies, ladybugs, dragonflies, etc. It would have been so cute! Don’t you think? But none of us felt we could paint them that well, that small, and we couldn’t find any stickers or decals of any sort, to kind of Modge Podge them on. So, when it came time to decorate the pots, the boys were busy playing something else, and Alexis was at work. So O (Olivia) and I decided to just polka dot them.  I love polka dots, so I was sure I’d love it as much as the garden bugs idea.

006
Applying the polka dots could not have been easier. Since we wanted the dots very small, on our small pots, we just used q-tips! We dipped the tip in the paint, and then dotted it right onto the pot! The hardest part was spacing the colors. I always drive myself crazy with that…..not wanting the same colors right near each other, and trying to get even spacing too. But we did a well enough job!

0071 O and I worked together, polka-dotting, and our q-tip trick worked like a charm.

Now, I didn’t take photos of the assembly. But it’s easy enough to explain:  We used jute twine, and strung it through the holes of the pots. We tied big enough knots on the string, to hang the pots on the string as we wanted.  So each knot was inside the pot underneath the drainage hole.

terracotta-flower-pot-wind-chime-craft
Now, some crafters who have made flower pot chimes, opted to have the string come down out of the pot, with a wooden bead on the string (held in place with a knot before and after the bead) to act as the ‘ringer’, that would hit the pot when the wind blows. So they designed it that way, spacing their pots out more.  We chose to use the pots themselves, to be the ringers, so that when the wind blows hard enough, the pots hit each other. That required (visually) setting the pots overlapping each other a little.

As an afterthought too, I decided I wanted to give the chime a quick UV protectant spray coat of clear acrylic.  Since my chime was all already assembled, I just put some tin foil over the spoon, and sprayed it anyway, getting some up into the pots as well. I do recommend spraying the painted pots before assembly, if you wanted to. But no big deal.  It’s an aerosol, so it worked easy enough afterwards.

terracotta-flower-pot-wind-chime-craft-1
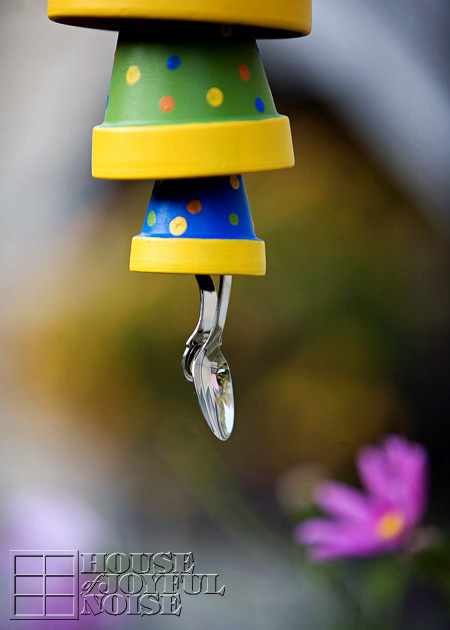
Aside from the paint design, the other touch that made it more ‘our own’, was that we added a stainless steel baby spoon as the bottom ringer. It really is a special touch, to me, with the memories of giving Alexis her first baby food, and then the triplets coming along, and the 3 little mouths we were trying to keep up with come the spoon- feeding age, with them. We didn’t bother having 3 bowls and 3 spoons, or we’d spend as much time picking up and putting down bowls and spoons, as we did putting spoons in sweet little open-waiting mouths.  Go ahead. Imagine that for a moment. No…..1 spoon, 1 bowl of food….down line of sweet, messy mouths we went. And then started at the beginning again.  Gosh I miss those days.

Wait. How did I end up talking about feeding my babies? Oh yes….the baby spoon, and the happy memories it brings me.

terracotta-flower-pot-wind-chime-craft-2

 So, it was simple as that. Anyone can make an easy and whimsical wind chime, even if you’re not that crafty. It’s a breeze.
Anyway, we’re happy you caught wind of this little fun project, and came to take a look.  Even if you’re just blowing through.

Ok, I’ll stop now.

P.S. Feel free to chime in, in the comments.
(Oh my gosh! Somebody stop me!)


Save

Filed Under: Crafts & Creations, Kids Arts and Crafts, Re-Purposing, Tutorial Tagged With: baby-spoon-chimes, crafts, diy, flower-pot-wind-chime, garden-decor, homemade-wind-chimes, kids crafts, Martha-Stewart-Craft-Paints, Plaid-products, polka-dot-crafts, terracotta-pot-crafts

Calvary Hill Planting | A Kids’ Lent Project

February 26, 2012 By Laura 29 Comments

020_easter-empty-tomb-calvary-hill-plant-kids-project-150x150

When Lent comes around, it’s difficult enough for us as adult Christians, to decide in which ways we’d like to embrace the 40 days leading to Easter. We are led by 3 things: Sacrifice, Prayer, and Alms-giving.  But as parents, we also want our children to take part in some way, and fully realize the significance of this period of time, too!  Attending Mass (especially through Holy Week), hearing the Scripture relating to Jesus’ death and resurrection, and witnessing (or participating in, depending on the ages of the children) their parent’s participation throughout Lent, certainly helps build their understanding of the importance of this season in our faith. 

However, I was thrilled last year, to come across this great project for the kids, that really invited them to be involved in some significant way even more, throughout the Lenten Season!:


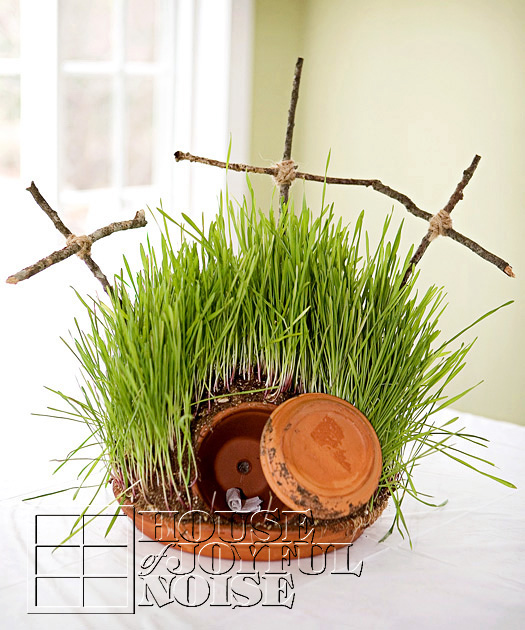
020_easter-empty-tomb-calvary-hill-plant-kids-project
Calvary Hill

As parents instruct the kids how to build this project, and plant and water the grass seeds, they have the opportunity to teach, or further discuss, the reality of the death and resurrection of Jesus, why and how He died, and what that means for all of us!

 This Calvary Hill plant needs to be nurtured and tended to by the kids, throughout Lent. By Easter, it is beautiful plant, symbolic why we celebrate. It makes for a wonderful Easter table centerpiece, and can also be put outdoors to keep for many months!  We put ours out near our gardens, on our potting bench.  It can also simply be placed right into a garden bed, or on a deck. We trimmed the grass down when necessary, and kept it watered, enjoying it for long past Easter.

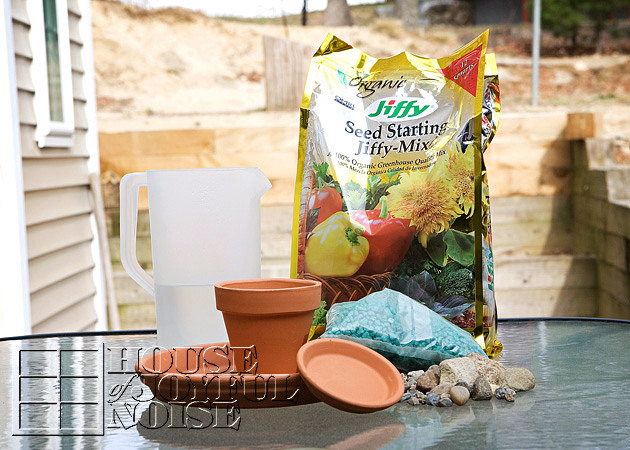
001_calvary-hill-plant-supplies Pictured here are some of the supplies you will need.

Here is a more complete list: 

  • Organic Seed Starting Mix (we used Jiffy brand)
  • Organic Hard Winter Wheat Berries, OR, Winter Rye (we used Winter Rye),
  • a large (12″) flower pot dish (w/ no drain hole),
  • a small (4″) flower pot and it’s dish,
  • small rocks (for drainage),
  • a pail
  • pail and shovel, with some water, for mixing soil.
  • some straightish-sticks of any kind, for the crucifixes
  • brown twine to tie together crucifixes
  • probably a glue gun

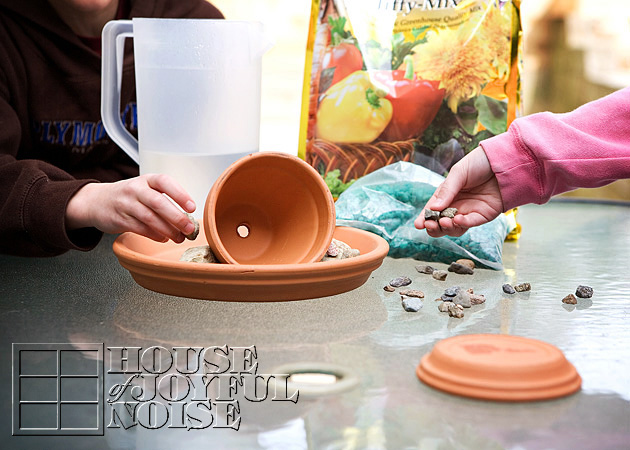
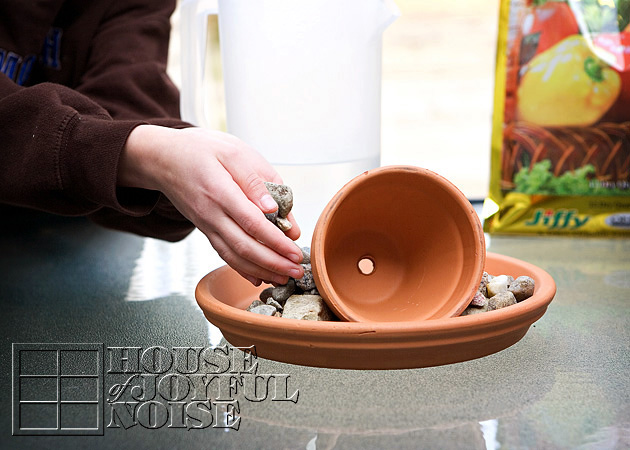
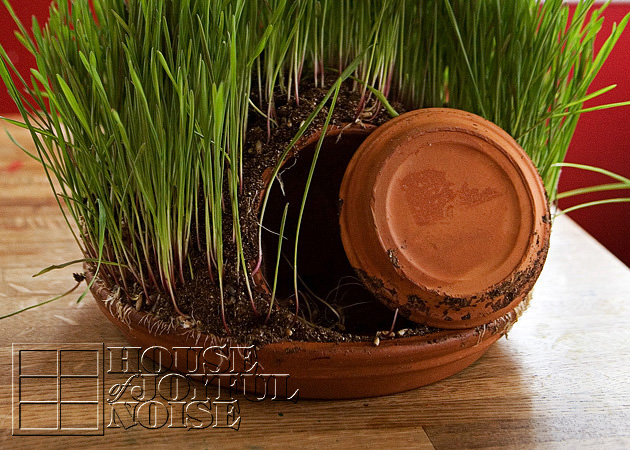
002_easter-kids-lent-project First will be creating Jesus’ tomb: Lie the small pot on it’s side, in the center of the large pot dish, with the opening of the pot a couple of inches or so from the inside edge of the big dish. The small pot is representative of Jesus’ tomb. You just want to be sure you leave room for the dish to that pot, to be in front of the pot opening, and room to roll to the side, which will serve as the stone in front of Jesus’ tomb.
–

003_kids-lent-project Fill the whole bottom of the large potting dish with small rocks on the 3 sides of the small pot (Jesus’ tomb), supporting it to keep it from rolling. Smaller rocks than we used are acceptable and may even be more suitable and manageable. We just grabbed some from our driveway! 
–

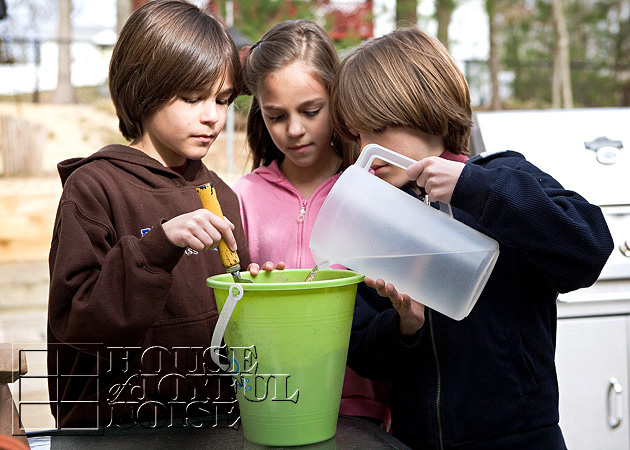
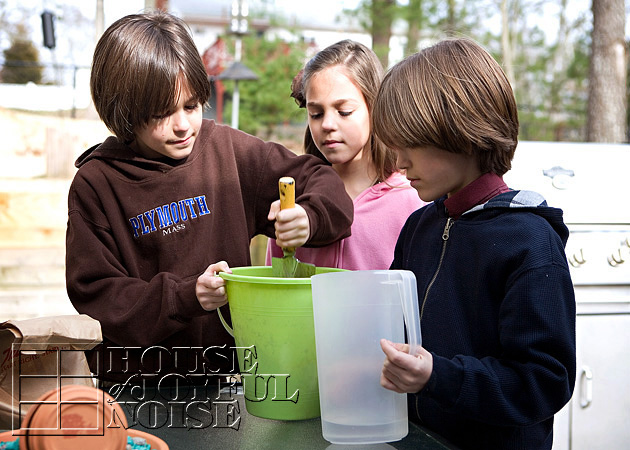
004_mixing-soil Next, in a pail, add water to some Organic Seed Starter Mix . . . . . .

005_ . . . . . .and mix to make some nice wet dirt!

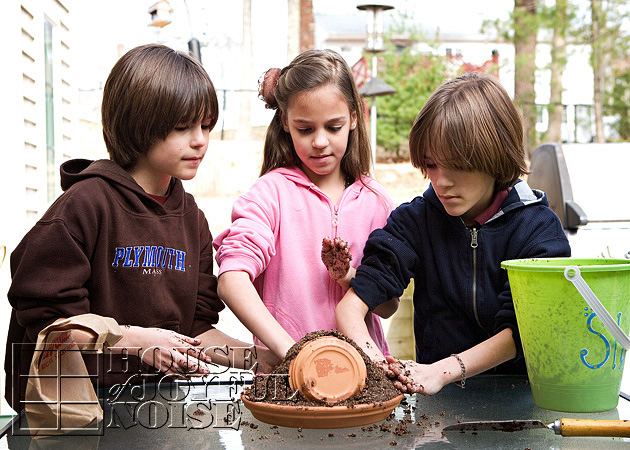
006_ Time to get dirty!

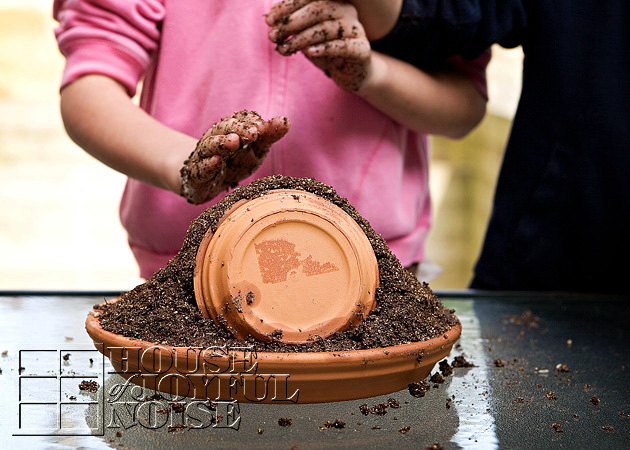
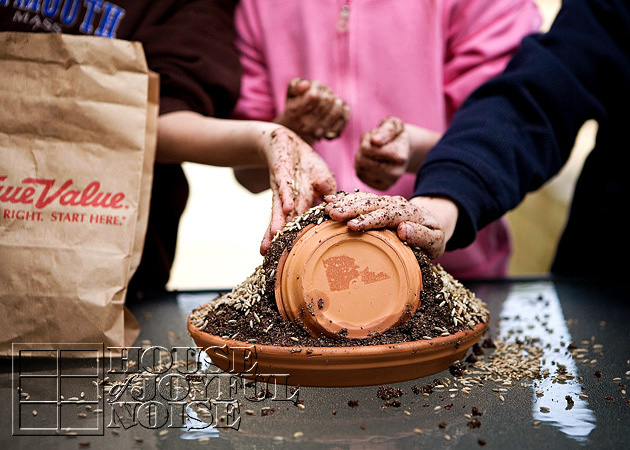
Scoop handfuls of dirt out of the pail, and place it all around the sides of and behind the tomb, as well as right over the top of it.  Create a nice round hill. 

*Note that in these photos, you see some dirt in front of the lid and somewhat in the way here. We learned that was not a good idea, as dirt was always falling out when we moved the lid. It is best to keep it clear of any soil.

007_soil  Again, keep the dirt away from the front of the tomb, so the ‘stone’ can roll away.  But be sure the tomb is covered in the soil mixture.

009_calvary-hill-seeding Next, is planting the seed. As mentioned earlier, we used Winter Rye, but Organic Hard Winter Wheat Berries can also be used.  Either grow quickly!  Simply cover the soil with the seed, pressing down into it if possible, and perhaps cover it with some more where you can, if there is room.

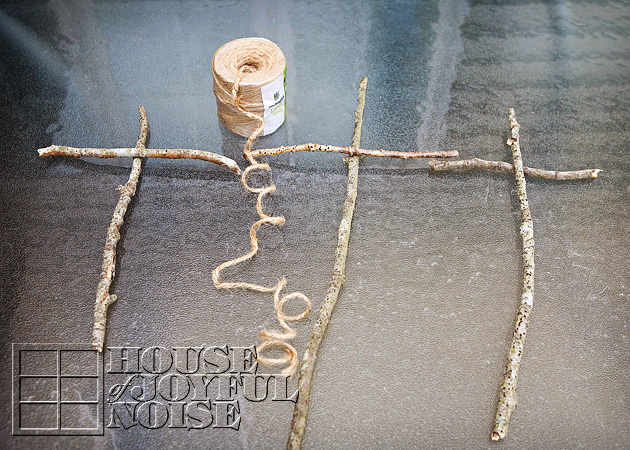
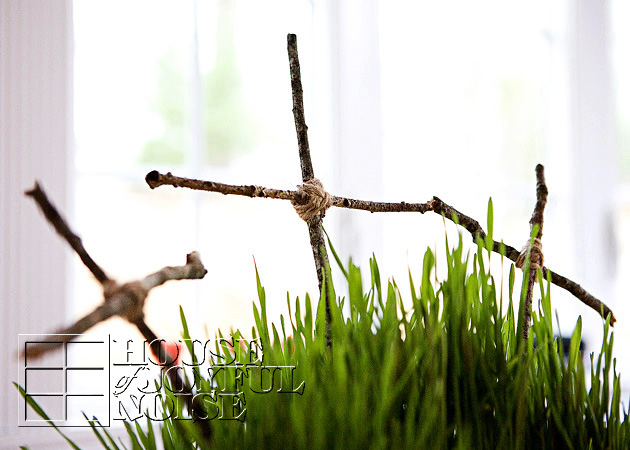
010_stick-crosses Now 3 crucifixes need to be made.  We wanted to keep it simple and rustic, so we simply found some straight sticks up in our wooded area, and created crossed wrapping the twine in a criss-cross effect around the intersection of the 2 sticks.  We tied off and then cut the twine ends, but then also used a dab of glue with a glue gun to secure it.

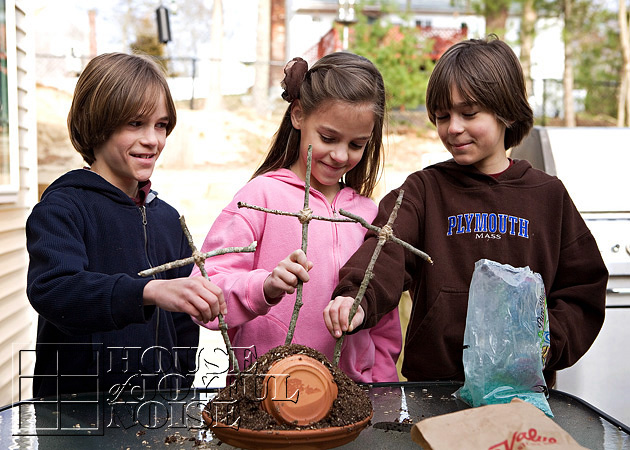
011_building-calvary-hill-plant-easter The crucifixes can be placed into the soil of your Calvary Hill now, as we did right away.  But as a tip, they would stay in place better, if you waited a bit for the seed to sprout and begin to grow, so there is a bit of a root system established to support the sticks.


012_kids-calvary-hill-plant-project
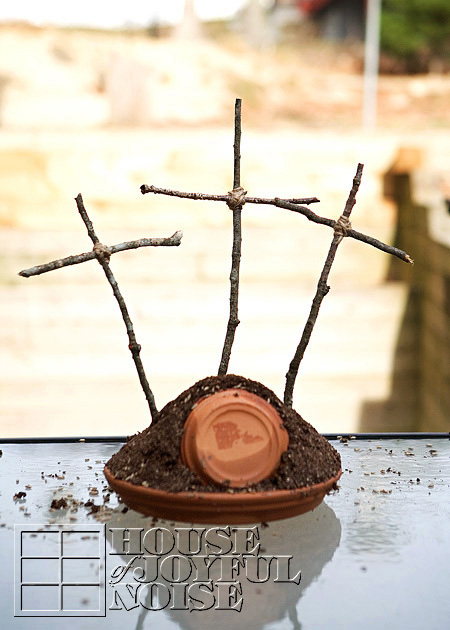
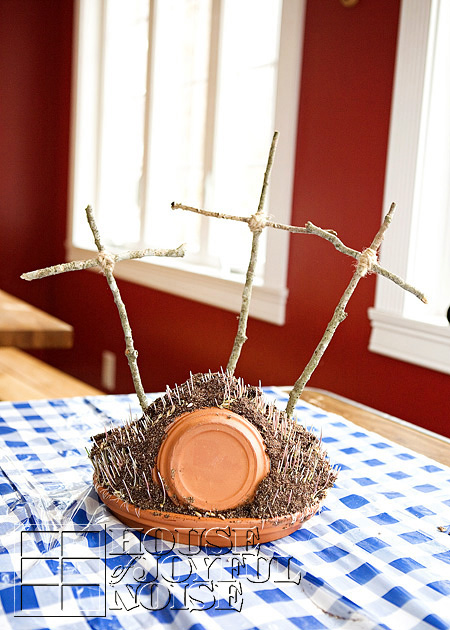
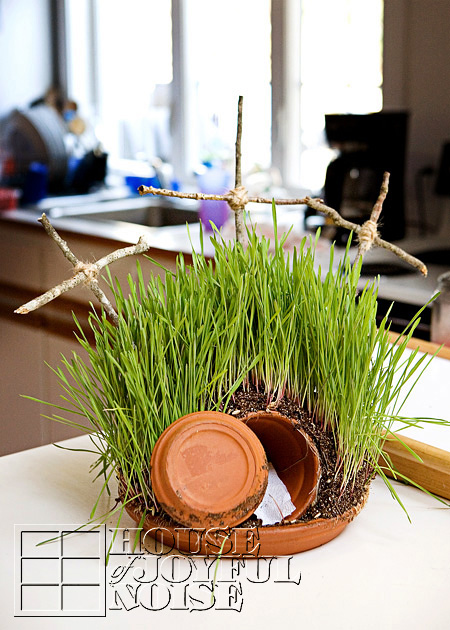
Here is what ours looked like, all done and ready to grow!

We brought it indoors, and placed it on a plastic covered table where sunlight would be on it a good part of the day. Throughout the first week or so, the kids need to simply mist spray the soil with water, in a spray bottle, 3 times a day, to keep the soil moist, and encourage the seed to sprout.  Perhaps you can come up with a simple 1 or 2 line poem to say, while they do this, as a form of meditation.
–

013_kids-lent-project
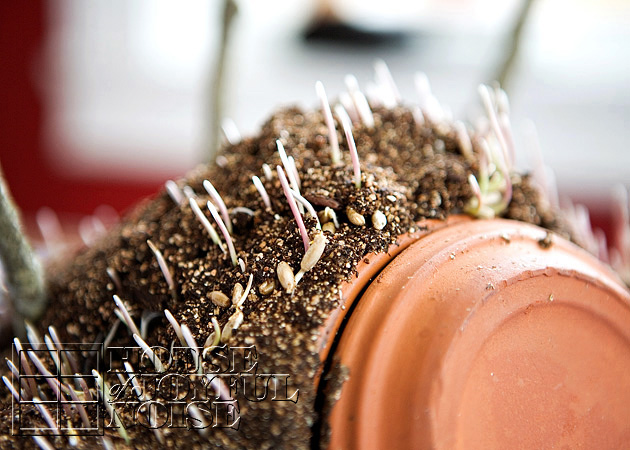
It’s growing!  The kids will be so excited to see this.

As sprouts push upward from beneath, some dirt will tumble down. This is why it is important to really try to keep the soil quite moist, until it is all held in place by the grass that grows. We thought the plastic table covering was wise, because all of the water spraying.
–

014-seeds-sprouting You will also notice some seeds and seed casings being pushed up to the surface. It’s fine.


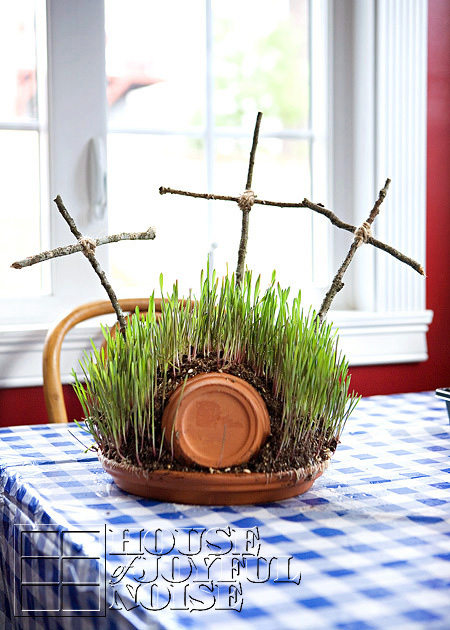
015_calvary-hill-plant-easter
Before you know it, you’ll have lush green grass, on your Calvary Hill!

More photos of Jesus’ empty tomb….

016_calvary-hill-plant

017_calvary-hill-plant-jesus-tomb

018_rustic-stick-crucifixes I just love this photo.


019_calvary-hill-kids-project
On Good Friday, you can wrap a clothespin with a white piece of cloth or paper towel, or simply cover it.  The clothespin and wrap is representative of Jesus’ body.
  Then roll the stone to close the opening of His tomb.  : (
–

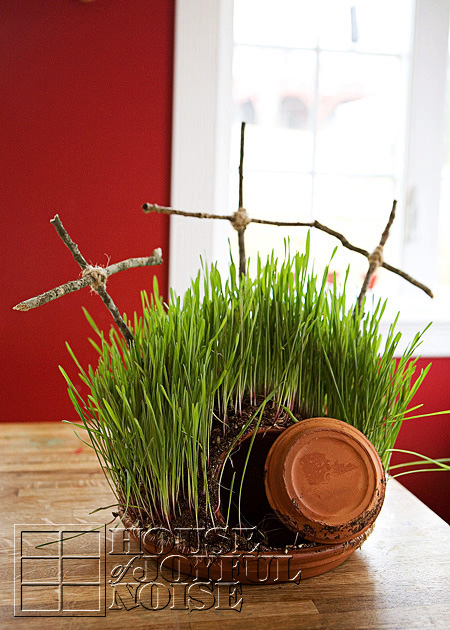
020_easter-empty-tomb-calvary-hill-plant-kids-project
On Easter morning
, JESUS IS RISEN!  When the kids get up in the morning, let them find the stone rolled away from Jesus’ tomb, and his garments folded or rolled neatly inside. 

It is our hope and prayer as adults, that our Lenten Season practices, help draw us closer to Jesus, deepening our relationship with Him.  May your kids not only enjoy this project, but like the seeds in the fertile soil, may it help sprout a faith in their hearts, that is bound to grow within them, and help guide them all throughout their lives.

ALLELUIA!!

(We’re happy to discuss this project, or answer any questions for you, in the comments below.)

* * * * * *

Follow us on FACEBOOK!


Filed Under: Crafts & Creations, Faith, Homeschooling, Kids Arts and Crafts, Kids Arts and Crafts, The Big Picture, Tutorial Tagged With: calvary-hill-plant, calvary-hill-plant-how-to, calvary-hill-plant-tutorial, Catholic-blogs, Catholic-families, Catholic-kids, christian-kids-project, Easter, easter-kids-projects, Easter-plant, Easter-table-centerpiece, kids-easter-crafts, kids-easter-lent-projects, kids-lent-projects, lenten-arts-and-crafts, lenten-projects, triplets

  • 1
  • 2
  • 3
  • …
  • 8
  • Next Page »

We are wicked happy to have you here! We invite you to connect with us anywhere you are, too!


SUBSCRIBE to House of Joyful Noise blog! Every new post, delivered right to your email box!

Archives

Find Us on Facebook

SuperWebTricks Loading...


POPULAR POSTS

* * * * * *

SUBSCRIBE to House of Joyful Noise blog! Every new post, delivered right to your email box!


Privacy Policy

Amazon Affiliates

Never at any additional cost to you, we may earn a small commission for our endorsement, recommendation, testimonial, and/or link to any products from our website. Your purchase through our links helps support our family, while sharing with you the products we authentically use and recommend, for various ideas, and letting you know where you can purchase them. Thank you for your support!

[footer_backtotop]

Copyright © 2023 HouseOfJoyfulNoise.com · Genesis Framework by StudioPress