• HOME
  • {A}’s Chipmunk Training Archives

 Homepage

  • The Homestead
    • Home Projects
    • Home Improvement
    • Home Decor
      • Seasonal Home decor
        • FALL Home Decor
        • WINTER Home Decor
        • SPRING Crafts and Creations
        • SUMMER Crafts and Creations
    • Our Chickens
    • Gardening
    • Organization
    • Re-Purposing
    • Furniture Refinishing
    • Budget
  • Crafts & Creations
    • Seasonal Home decor
      • FALL Crafts and Creations
      • WINTER Crafts and Creations
      • SPRING Crafts and Creations
      • SUMMER Crafts and Creations
    • DIY (Do-It-Yourself) Project
    • Kids Arts and Crafts
    • Homemade/Handmade Gift Ideas
    • Holiday Crafts
    • Fan Pulls
    • Free Printable/Downloadable
    • Sewing Projects
    • Giveaways
    • Business Features
  • Recipes/FoodFun
    • Breakfast
    • Lunch
    • Main Dish
    • Sandwiches
    • Appetizers
    • Slow Cooker
    • On The Grill
    • Side Dishes
      • Soups
      • Salads
    • Baking
      • Breads, Rolls and Muffins
    • Snacks
    • Treats
    • Desserts
    • Drinks
  • Homeschooling
    • Elementary Homeschooling
      • Elementary Homeschooling READING
      • Elementary Homeschooling MATH
      • Elementary Homeschooling LANGUAGE ARTS
      • Elementary Homeschooling SCIENCE
      • Elementary Homeschooling HOME ECONOMICS
      • Kids Arts and Crafts
    • Middle School Homeschooling
      • Middle School Homeschooling SCIENCE
      • Middle School Homeschooling HOME ECONOMICS
    • Language Arts
    • Math
    • History / Social Studies
    • Geography
    • Foreign Language
    • Field Trips
    • Games
    • Nature Study
  • The Big Picture
    • Life In General
    • Celebrations
    • Faith
      • Into the Light; The Series
    • Giveaways
    • Reviews & Sponsors
  • Photography & Lettering
    • Photography
    • truck lettering
    • vehicle graphics
    • Newborns
    • Kids
    • Engagement
    • High School Senior Pictures
    • High School Senior Pictures Sneak Peeks

Fall Themed Candles Embedding Real Leaves

October 10, 2013 By Laura 21 Comments

Today, I’m going to show you one way to preserve those beautiful Fall leaves you found, and make something beautiful to add to your warm Autumn home decor. Candles! Embedding real leaves.
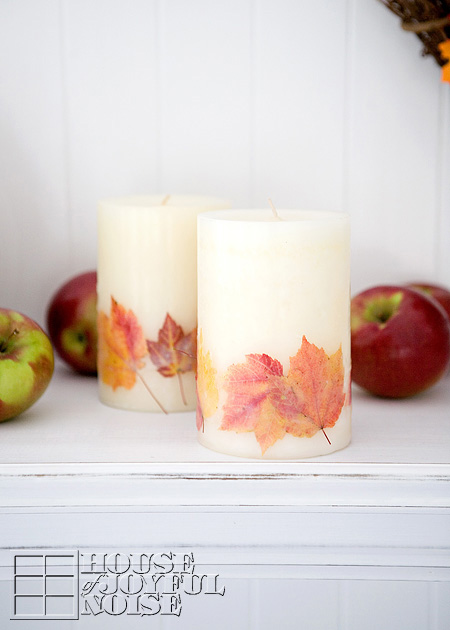

We’re simply taking store-bought medium-pillar candles, and embedding the real leaves as a beautiful decorative element.
To do this, I’ll be using a separate wax medium.  The reason I am choosing to not just glue the leaves on, or seal them in with Modge Podge or something, is because those mediums are flammable.  I likely will be burning these candles. While I won’t burn them very low, I didn’t want to take the chance of having anything chemically-flammable as part of the candle, when it is easy enough to avoid that. Also, embedding the leaves within the sides of the candles will give the look I am trying to achieve.

All you’ll need for this project is some pillar candles of some sort, some plain melting wax (for candle making), your pressed leaves that you collected, and some pans. (A few other optional supplies will be mentioned along the way.)
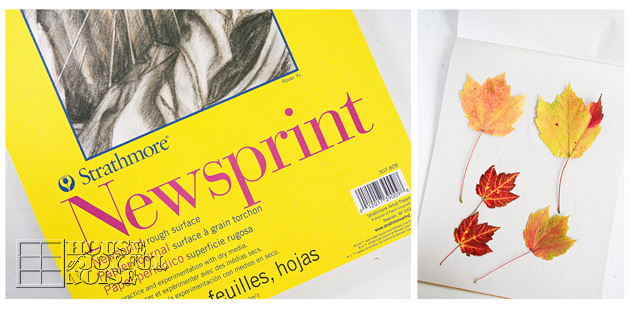
The first step in working with real leaves, is to ‘press’ them.  This not only flattens them, but somewhat preserves their moisture for a bit, yet keeps their pliability to be able to work with them well.   I press them by placing my leaves between the pages of a newsprint pad of paper, and putting a small pile of magazines, or whatever for weight, on top.  A few days will do.

–
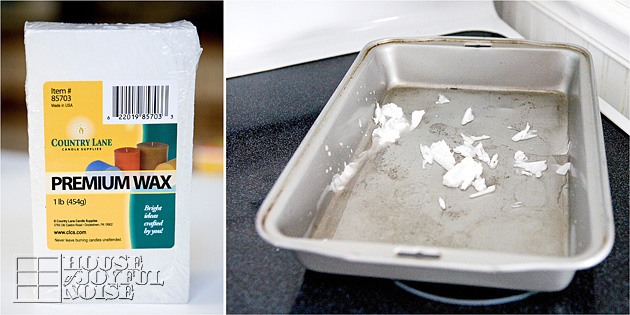
You’ll want to melt your wax over some kind of consistent heat. Making do with what I had, I cut some chunks off of my premium wax block, and put it in a roasting pan, over 2 burners on my electric stove on a very low heat. Possibly even the simmer setting. Start at the lowest and increase the heat as needed. Every stove is different, but generally speaking, you want the wax just liquid-y, but never to the point of bubbling. How much wax you melt depends on how many leaves you’ll be adhering, how many candles you are decorating, etc.  But regardless, you certainly want the wax deep enough to completely submerge a leaf.

  Once your wax is melted, you’ll want to have your pillar candles and leaves readily available to work with. Also, have a sheet of wax paper on a flat surface nearby, to be able to put your candle down as needed.

*This is a very important tip!
You need to keep your pillar candle itself somewhat warm to apply the dipped, hit-wax leaves successfully. The reason being is that lying your hot waxed leaf on the cold surface of the candle immediately sets the wax, and it does not apply well at all. 

But I have two great tips to choose from, for keeping your pillar candle warm:

1)  Have a heating pad on high on your nearby counter-top, with a sheet of waxed paper on it. You can roll the whole thing up with your pillar candle in it (in the waxed paper), or, you can simply lie the candle on it’s side, keeping warm on the side you’ll be applying to.

Or you can go with second option, which is what I ended up doing:
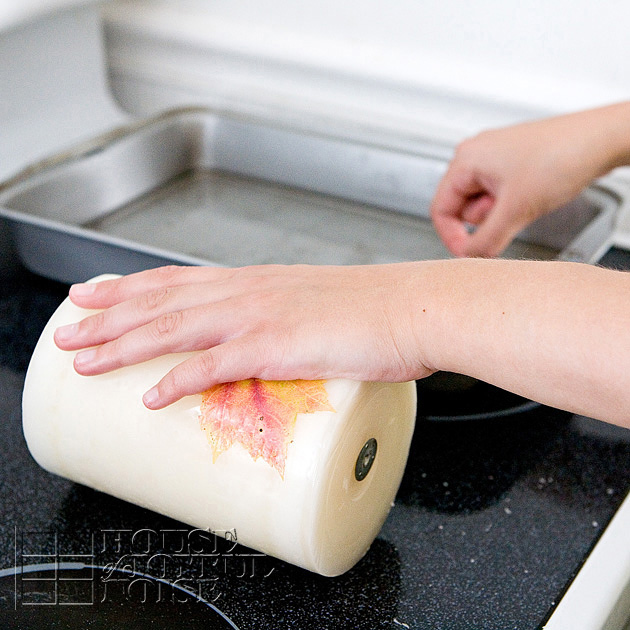
2) Simply lie the candle on the warm stove, beside the working burners to keep it warm. Obviously you don’t want your pillar candle to melt. But your burners should not be high enough to do that. This method worked well for me, as long as I did apply the just-dipped leaves to the warm area of the candle.
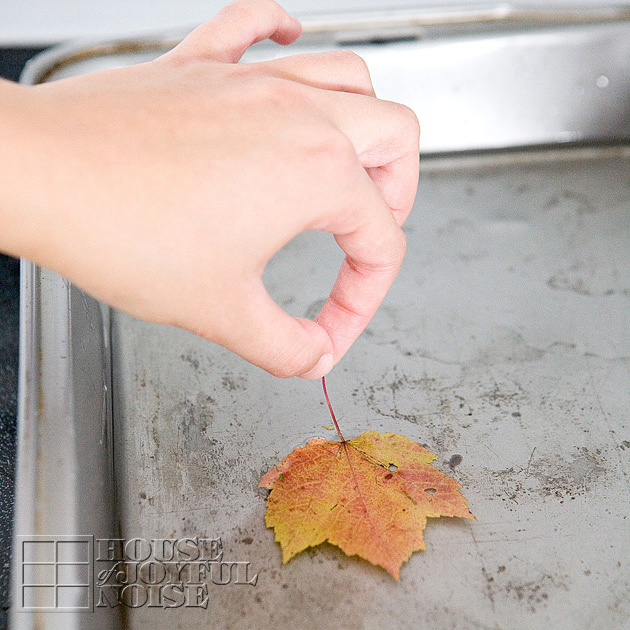
So here we go!

Dip your leaf in the hot melted wax, holding it completely submerging in the wax for a few moments. Keeping it submerged for a few moments (as opposed to dipping and retrieving) will really help the leaf get limp, which will be helpful in applying to the candle.
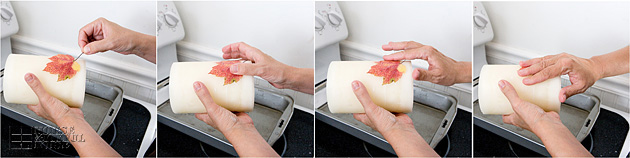
(View images left to right.)
Then quickly but carefully lie and really ‘cling’ your whole leaf to the candle, and begin to rub down all over as you can.  I say as you can, because it is hot!  And yet you want to press it down as much as you can, before it starts to set. So gently press it down all over, without rubbing hard in any way, and then really just lay your hand down over it as soon as you can while it sets.
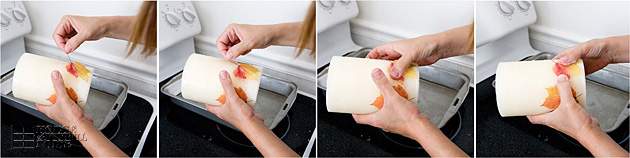
Continue adding leaves for your overall design. It is alright to overlap some pf the leaves as well.
Remember to warm the candle in between, as you’re dipping your next leaf.
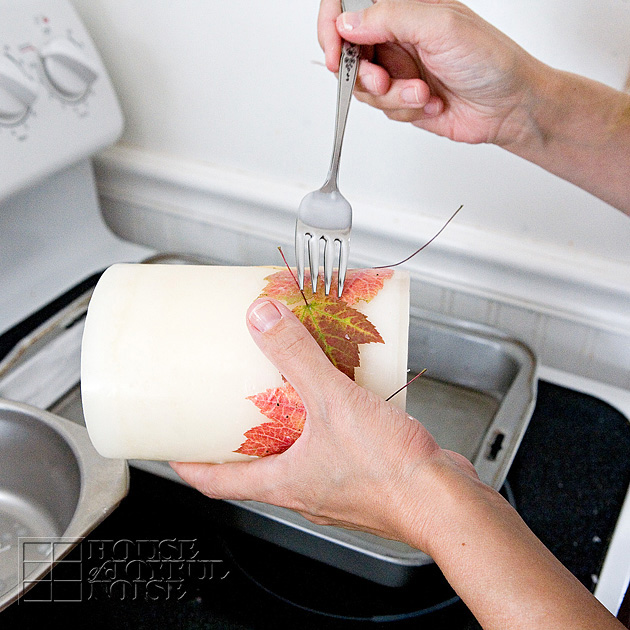
Now if you find the wax has set in an area that the leaf is not stuck down well, here is a little trick to re-work it:
Dip a fork into your hot melted wax, and drip it onto the area of your unsealed leaf that needs fixing.
Then press down again with your fingers.
The stems are optional to keep as is, cut shorter, or cut off at the base. I rather like them, and am leaving them for as long as they don’t break off on their own.
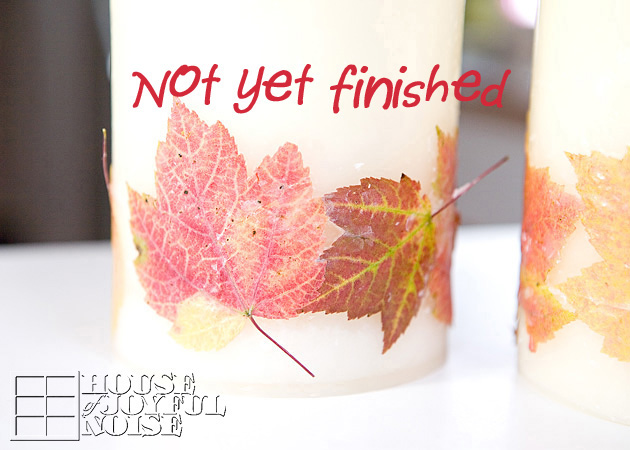
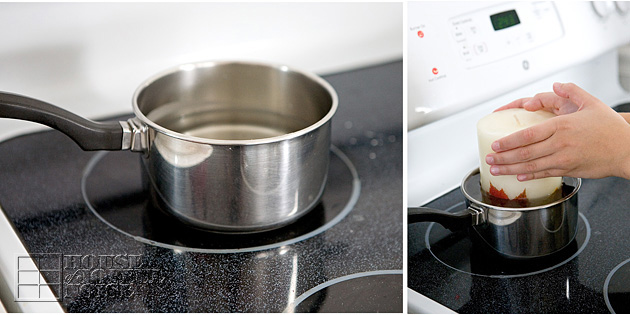
Once all of the leaves are applied, you might consider your candles done. But I really wanted to further seal the leaves onto the my pillar candles, so that they may better hold up for a longer period of time, without the leaves coming off.   The layer of wax over your leaves on your candle at this point is very thin, and that leaves (no pun intended) your decorative surface very fragile and at risk of being damaged.  It’s also somewhat bumpy from all of the pressing on. So another sealing coat is a good idea, and it’s easy to do!
Just heat up more wax in a sauce pan at a reasonable depth, and dunk the whole candle!  Use a size appropriate pan for the size of your handles, and no wider than you need, or you’ll need to use way too much wax to bring the level up.
Now….you also want to keep in mind that the submerging of your candle is going to drastically rise the level of your very hot melted wax. So, be mindful of the amount you melt.  My goal was to melt enough to dunk the candle to just over the leaf tips, without overflowing the wax all over my stove top range. I barely made it…missing just the tips of the leaves.

*Dunk it only once, (holding it submerged for a moment or two like the leaves), as double-dipping may create such a layer of wax, that it’ll become too difficult to see the beautiful shapes and colors of your leaves.
Once lifting them up out of the pan, just carefully set them down on that sheet of waxed paper, until the whole candle cools and sets.
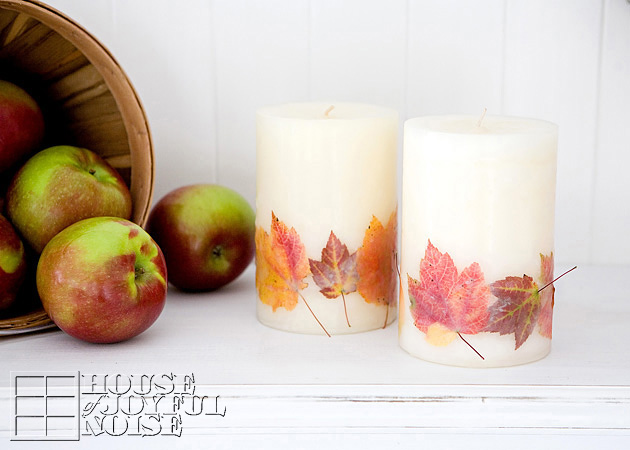
Now they are finished, and ready to add some Fall beauty to your home wherever you choose to display them.  You can enjoy them long after the leaves outdoors have dried up and crumbled away.
I hope you enjoyed this tutorial too, and will consider having fun making some Fall candles with real leaves yourself.
* * * * * *
Please come follow me here and there:

Save

Filed Under: Crafts & Creations, DIY (Do-It-Yourself) Project, FALL Crafts and Creations, FALL Home Decor, Home Decor, Seasonal Crafts and Creations, Seasonal Home decor, The Homestead, Tutorial Tagged With: add-fall-leaves-to-candles, autumn-crafts, candle-crafts, candle-detailing, candles, crafts, decor, dipping-leaves, diy, elementing-candles, fall-crafts, fall-decor, fall-leaves, home, home-decor-projects, how-to-wax-real-fall-leaves, leaf-crafts, leaves, pillar-candles, waxed-leaves

NEW Glass Tile Pendant Tutorial Using Trays | New Tips & Techniques

March 21, 2013 By Laura 28 Comments


It is not often that I ever do the same craft-like project, twice. But I’ve got a feeling that making glass tile pendant pieces are going to be something I’ll be doing again, and again. I am so fond of the high quality feel of the finished pieces, the variety of styles that can be made, the multitude of purposes they can be made to be used for, and the fact that I simply enjoy making them for myself and as gifts for others. By knowing how to do the general process of making glass tile pieces, you will then have the ability to make all kinds of wonderful and customized things, such as jewelry necklace (bracelet or ring) pendants, decorative magnets, key chains, drink coaster sets, vehicle rear-view mirror hangings, home decor embellishments, and so much more.

Recently, I did a whole lot of experimenting with making glass tile pieces, and in the process, learned quite a bit in my quest to perfect my techniques. Knowing what works well, or best, while crafting these, is information I wanted to have, considering I do plan on continuing to make them as I get the whim. In this post, I wanted to pass on all of those tips to you, if you are considering making some tiles yourself.  I will also compare the different style of these that I made, with the first time I made some glass tile pieces.
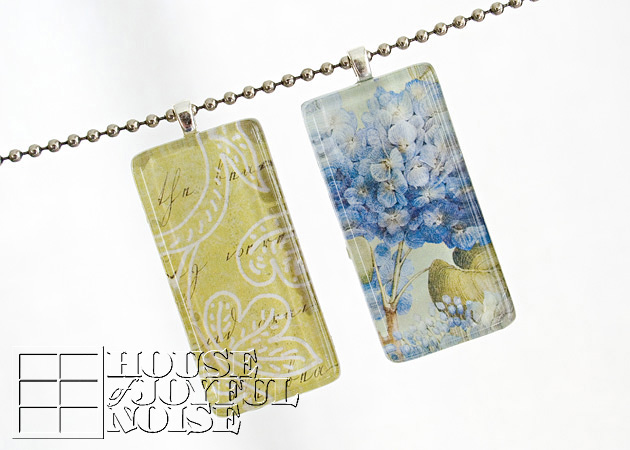
The first post I did on some glass tile pendants I made, was a detailed step-by-step tutorial, and it has been very popular in traffic.
Here below is a photo of just a couple of the finished pieces.


Those pendants were made differently, and are ultimately different in style, than the ones I am sharing today.
But they were also made with different materials.  Let me tell you about that first:  The first time, I used some beautiful, 2-sided scrapbooking paper (different on opposite sides), which is an adequately heavy stock to work with, and is also acid-free and manufactured printed, is completely permanent and so does not run or change in any way.  With the endless choices of beautiful scrapbooking papers available today, it’s definitely a wonderful option, when deciding on the designs of your pieces.

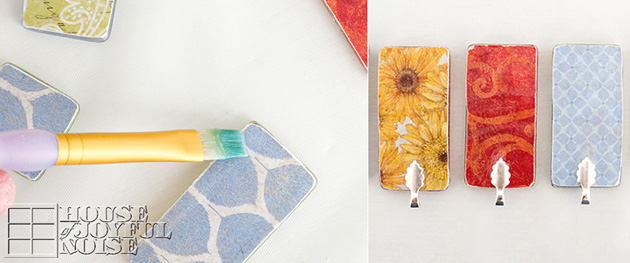
 Briefly put, the way in which they are made is that the 2-sided papers you chose applies directly onto the back of the tile, sealed with the glaze used, and the bail adhered directly to the back. (All seen in photo above.  You can see the complete tutorial here. I also made some lovely magnet sets at the same time. This method is just a bit more unfinished in the way that it is evident that they are hand-crafted. I would also say that they are a bit more work than the method I’m sharing in a moment, because the paper needs to be closely trimmed to size of the tile, and then the edges need some sanding down.  Still, they are beautiful finished pieces in their own way, and most everyone has a certain appreciation for hand-crafted jewelry. If you would like to follow the tutorial for that style of glass tile pendants, please see that post.
****

Now let’s move on to what I am sharing today. The glass tile pendant tutorial in this post is with using trays, which already have a bail. I am going to show you how these are made differently.


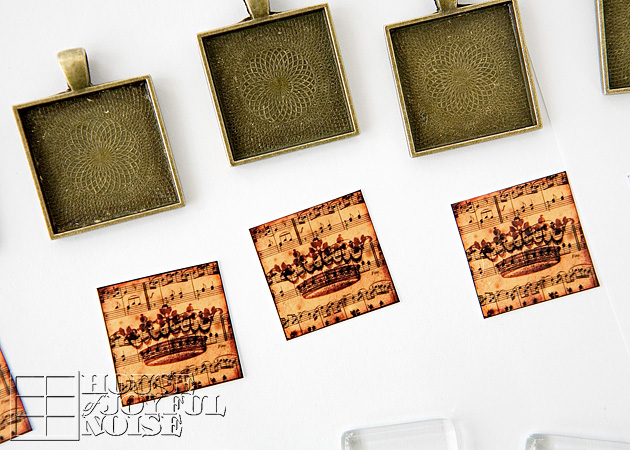
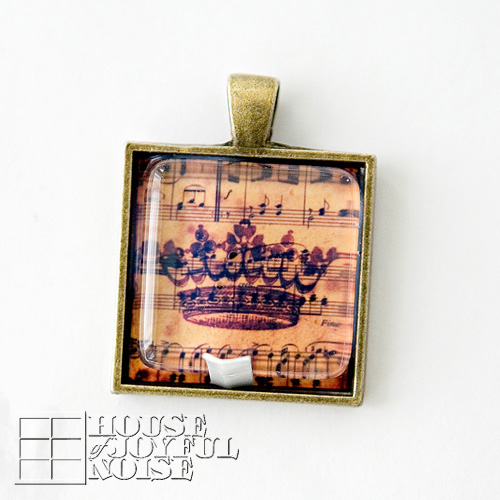
The bronze trays you see above (there are many sizes, shapes, finishes and styles available), designed to hold a graphic and glass tile, are shown in the above photos.
But first, I’d like to talk about the graphics. Meaning, the image/design that will show through the glass tile. If you would like to skip right to the successful method I used, you can jump to the SUCCESS paragraph.

If you’d like to learn through my  own personal errors and just have the power of knowledge about what does not work well in relation to printing the graphics yourself, you can also read the FAIL paragraphs.

FAIL: My trials and challenges came with hoping that I could print any graphics I wanted to use, myself. I had heard though that when using printed graphics in a craft in which the paper would come in contact with any kind of wet medium, a laser printer needed to be used, or else (if using an ink-jet printer) the ink would likely bleed/discolor, or change in some undesirable manner.  We do not have a laser printer; but in fact an ink-jet printer. Which from what I knew, as I just stated, was going to result in problems. However, I had found this stuff called Micro-Glaze, that in description of the consistency, is much like a shortening. It meant to be used to apply with a brush to the surface of the printed paper graphics, even if from an ink-jet printer, and supposedly protect the inks from the wet medium and any adverse effects. Well I can report that I tried again and again, following instructions and in various manners, without success. While the pieces always initially seemed fine, the following day the colors of the graphics became muddled beneath the glass (now permanently set), and soon it was a hot visual mess. Very frustrating in terms of a waste of time, as well as a waste of glass tile pendant supplies that are not meant to be so consumable and disposable.

FAIL: So, as seemed to be the recommendation for printing, I sent my graphics to be printed at the local copy center (Staples), that indeed only prints with laser printers. But again, I had the same sort of issues with the ink of the graphics getting blurry and muddled, and generally not looking like a clean graphic that kept it’s colors quality.  I was sure it was an ink/printing issue, and not any other supply I was using, because I was generally using the same materials I used last time, with the addition of trays. The only thing different, was that I was either printing my graphics, or having them printed, as opposed to purchased, acid-free, 2-sided scrap booking paper.  Finally, I found the solution to being able to use graphics I made myself or found somewhere, that needed to be printed somehow first.

SUCCESS:  Lastly, I decided to have the graphics I wanted to use, printed as photos. (So, on photo paper.) I was quite confident this was going to be the method that finally worked for me. While ordering those photos, in a spur of the moment decision, I chose for the photos to me printed on metallic paper.  I’m not sure if or where that may be an option for you. But as a professional photographer, I choose to have all of my photos printed by my lab for professional photographers only. (This is to ensure that my photos are printed to my specific editing settings.) I just thought maybe the metallic paper would throw a little more light back from the pendant graphic behind the glass, and I was right. But metallic paper is in no way necessary. Regular photo printing will be just as successful in the beauty of your piece.

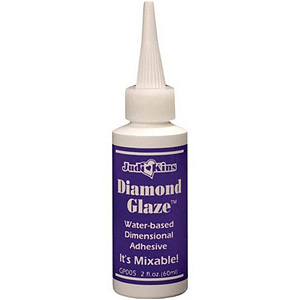
 Another product you’ll need for these kind of projects is Diamond Glaze.

This versatile product serves as an adhesive, as well as a crystal-clear sealer, and even a dimensional liquid you can apply that dries clear and as hard as glass!
I have tried a couple of other products that have claimed the same, but this one is the best quality stuff, in my opinion. The bottle sizes it comes in are small, but that is because it goes a long way.

For the highest quality of pieces, I also highly suggest using only the highest quality of glass tiles.
I will give you links to my supplier at the end of my post.

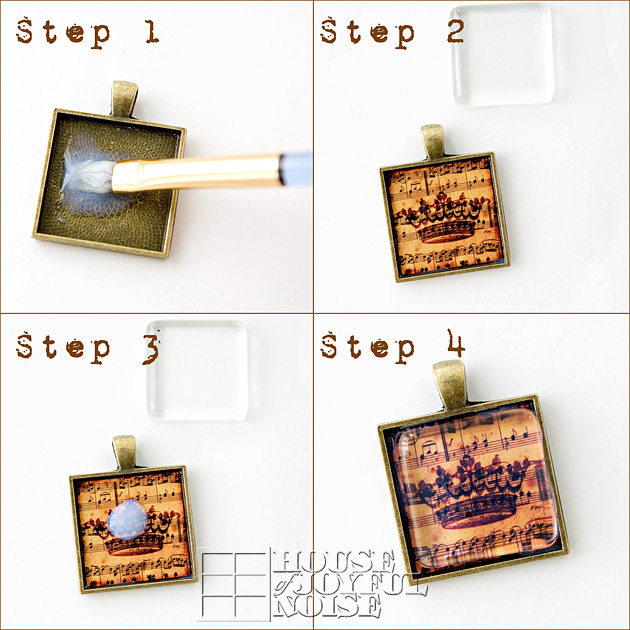
Here is how I make glass tile pendants in 4 easy steps:


1) With your graphics trimmed to size for your pendant (and checked for fitting), put just a drop or 2 of Diamond Glaze medium in the bottom of the pendant. Using a small flat brush, spread the glaze to cover the bottom of the pendant edge to edge.  This will serve as an adhesive.

2) Lay your graphic over the just applied glaze. Only gently tap down all over. You don’t want to squish the adhesive underneath out and over the sides of your graphic.

3) On top of the graphic, in the middle areas, squeeze another drop or 2 of glaze. There is no need to spread it with this small pendant.

4) Gently place your glass tile on top of the glaze puddle. The weight of the tile will automatically squish-spread the glaze beneath the glass.
Immediately look for any air bubbles and gently press the glass tile in the appropriate places to force the air bubble out from under the edge of the tile.


You can now leave your piece to dry and harden. If you notice that the tile is sliding more to one side or the other, because there is just enough excess space to do so, just take a little folded piece of paper to hold the gap, and your tile in place, as shown in the above photo. (But try not to let the paper tip come in contact with the glaze in the bottom of the pendant.)


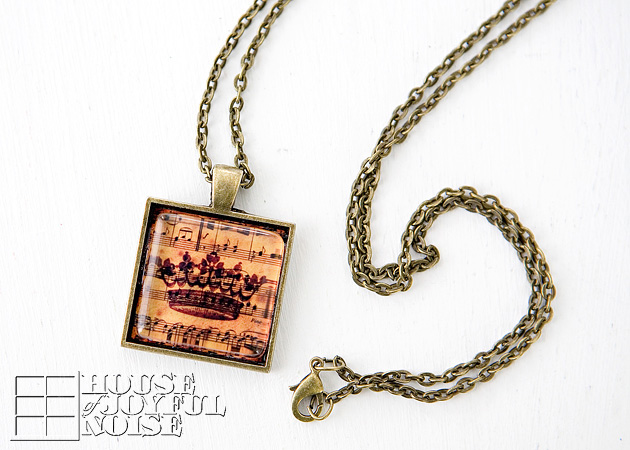
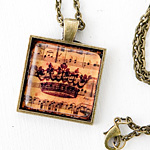
Here is a finished pendant on a matching bronze chain. I made this one for my sister, first.
She calls great Christian tunes “Jesus music”, and the crown made me think of Jesus (the Prince).
Then after I made it, I loved it so much, I made more: for me, my oldest daughter, and some friends. LOL


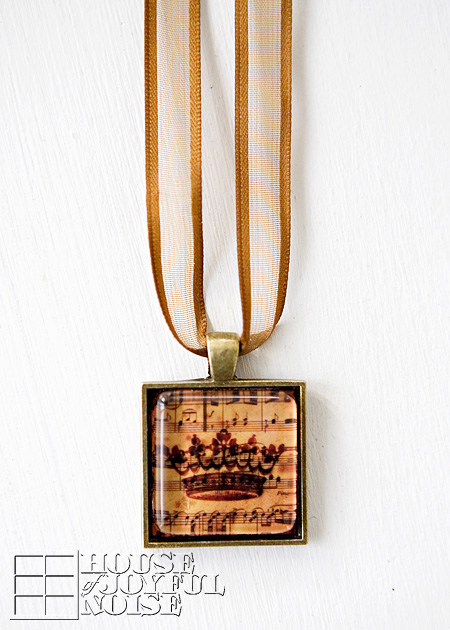
You can change it up, and wear your pendant on a little fancy, feminine ribbon.


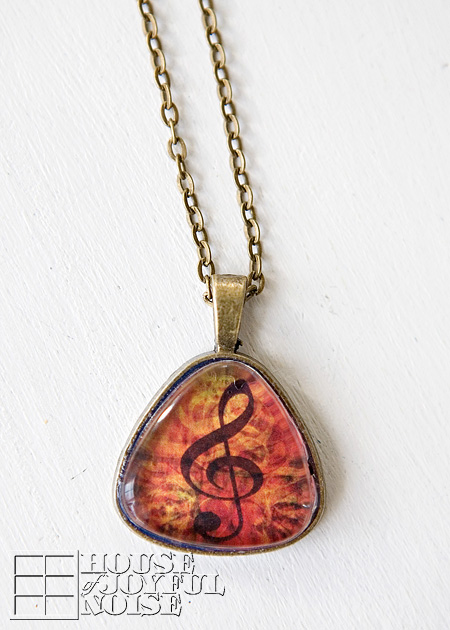
Here’s another I made; a guitar pick shape.
The crown on a music sheet pattern, as well as this music note, are graphics I found online.

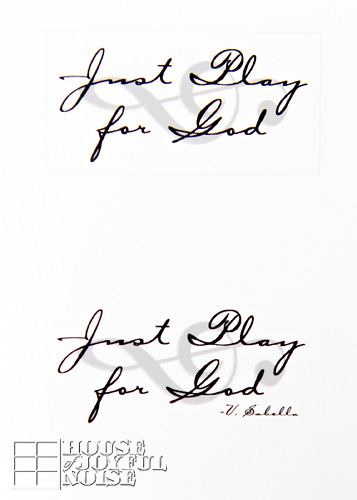
But this next one ( 2 shown on the sheet), I custom designed very specially, and there is a story that goes with it . . . .


Our 10 year old son Shane plays piano, and he has a wonderful piano teacher. When his first public performance was coming up, he found himself nervous about the upcoming occasion. So he told his teacher about his nerves, and asked her for any advice or tips she might have for him. She explained that being a little nervous was very normal, and how she herself has been very nervous with her own performances in the past. She recommended forgetting about all of the people there watching and listening, and then added:

“You know Shane, just play for God.”

Well, those were words that resonated with Shane. And in essence, changed him. From that moment on, because of this suggestion, and the new light he saw it in, his nerves disappeared. When performance day came, he walked up there as calm as could be, and gave a beautiful and flawless performance.

It’s amazing, how someone can say just the right thing, in just the right way, that really speaks to our heart.  It was words that really meant something to Shane, and I literally watched the effect wash over him, and stick. So I decided I really wanted to design a meaningful pendant for his teacher, that expressed her powerful words. As a reminder that they truly meant something to someone, and helped them not only in the present time, but likely words that will be there for him to fall back on, for the rest of his life.

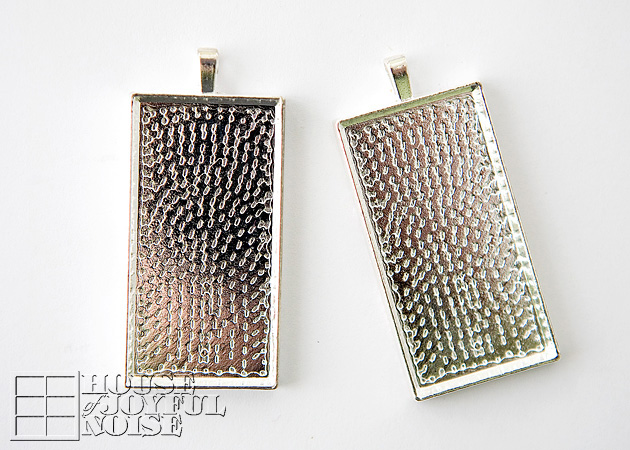
I purchased these silver-plated rectangle pendants on Etsy, with a shiny silver matching chain, and trimmed the quote-graphic to fit perfectly.

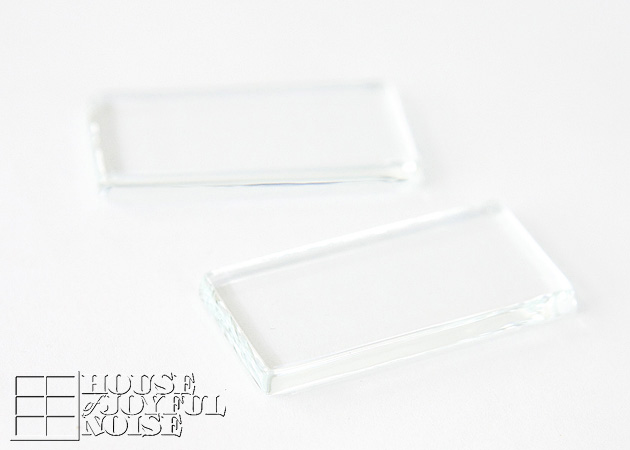
Here are the gorgeous rectangle glass tiles to fit.

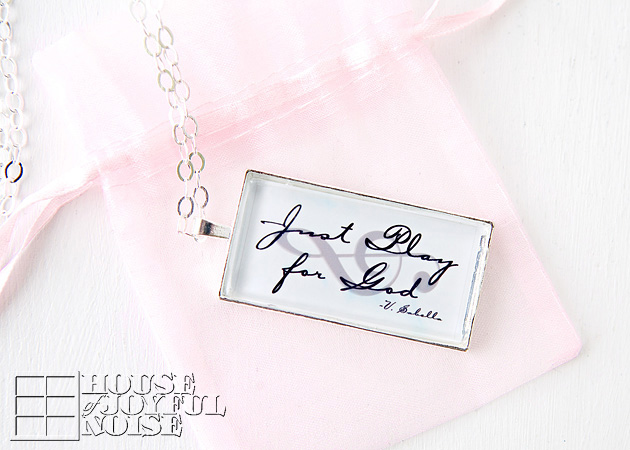
Here is the finished pendant, which was a gift he gave to his piano teacher, while (verbally)sharing with her how much her words meant to him, and why he wanted her to have this.
She cried, and it clearly meant a lot to her. We’ve seen her wear it often, too.
I had to make myself one as well.

And I made Shane a dog tag with the same graphic, which he wears with his medical i.d. dog tag (for his severe peanut allergy.)

My best recommendation for jewelry supplies is to look around Etsy. I did have a great supply vendor there, but she seems to be out of business now. Still, there are many similar vendors on Etsy. I suggest first searching for ‘pure white glass tiles’, and then hopefully they will also carry the rest of what you’ll need.  But the tiles, in my opinion, are the most important supply. I have found that the ‘pure white glass’ tiles are particularly superior in quality. So definitely make an effort to try to find those, whether you can find them on Etsy, or elsewhere.

I DO hope this tutorial has been helpful to you, and inspires you to make some beautiful glass tiles of your own!
Please leave any questions or comments you may have, in the comments section below, and I will respond best I can.
Thanks for hanging out with me.

* * * * * *

Please come follow us here and there:


Filed Under: Crafts & Creations, DIY (Do-It-Yourself) Project, Tutorial Tagged With: crafts, Diamond-Glaze, glass-tile-crafts, glass-tile-jewelry-making, glass-tile-magnets, glass-tile-pendant-tutorial, glass-tile-pendants, glass-tile-tips-and-techniques, handmade-gift-ideas-for-women, handmade-jewelry-gifts, handmade-necklaces, homemade-gifts, homemade-jewelry, tile-jewelry-using-trays

How to Blow Out Egg Yolks and String for Hanging | Decorative Eggs for Keeps.

March 6, 2013 By Laura 10 Comments


A couple of pre-Easter seasons back, we blew out and decorated eggs, and prepped some for hanging. I took lots of photos of the process of the way we did it, but never blogged it for you all.  It’s not all that hard. And the best part is, you don’t have to figure out what you’re having for dinner that night! You’ll have a bowl full of egg yolks, ready to scramble. : )  Breakfast for dinner! We do that sometimes around here.

Scroll down to read and see just how simple it is to blow out eggs, and string them for hanging after decorating them.

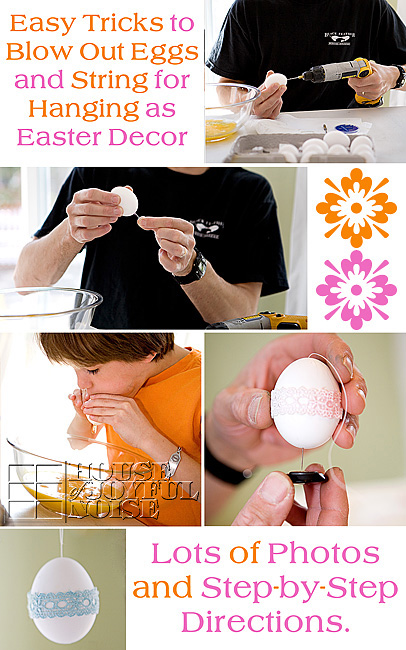
When you’re done reading through, the above collage is the perfect Pin It image for these tutorials.
(Hint, hint. ; )

So let’s pierce some eggs.


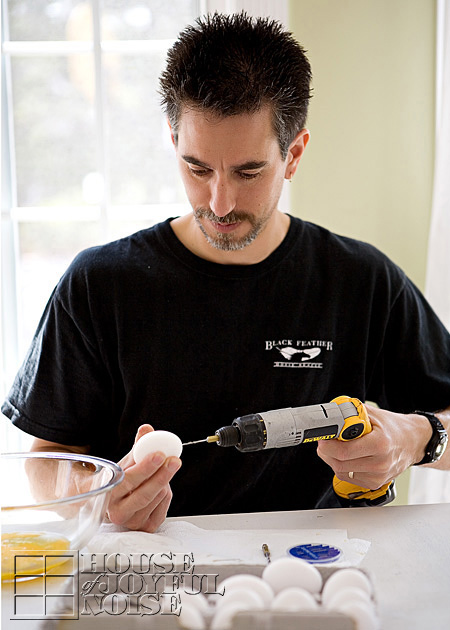
Using a drill makes putting the holes in the egg very easy.  Use a 1/16 drill bit for the top of the egg. This is the smaller hole.
On the bottom of the egg, make a slightly bigger hole, using the 1/8 drill bit.

Next, use a long pin in the bottom/big hole, and move it around and jab in and out, to break up the yolk sac some.
Now it’s time to blow that yolk out.
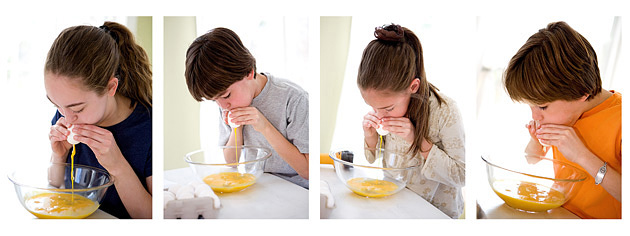
We let the kids take turns blowing them out. They thought it would be so fun.  But I was worried their head would explode, seeing how red their faces were getting! I was like, “Oh my gosh! Breathe!” Ha ha ha.
It took them a little bit to learn how to direct the air from their blow, into the hole. You need to do that best you can.  You can also try a syringe, to push air through. Once the yolk starts coming out, it comes out pretty fluidly.


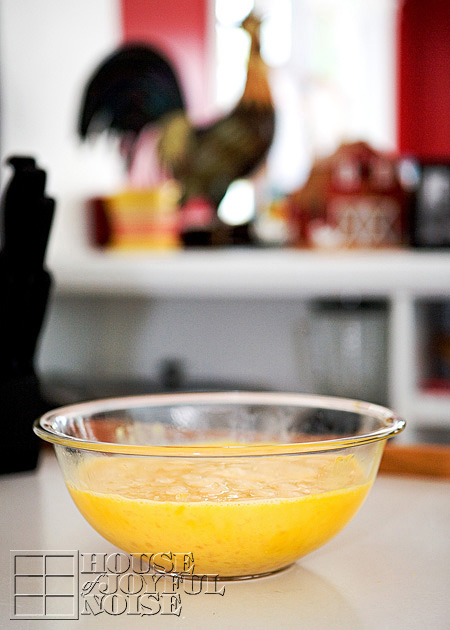
Plenty for our family of 6.

So after you have blown all of the eggs you want hallowed out, you’ll want to wash them off and out a bit. Run them under warm water, getting water inside the egg too, and shake them some, to wash the inside of the egg. Drain them as well as possible. You can then put them all on a plate in the microwave for microwave them for 10-15 seconds

Now you can decorate them.  It is a little tricky to dip-dye the hallowed eggs, because they tend to float now. So if you are dyeing them, you’ll need to keep it submerged with a spoon or whatever.  Of course, there is a host of other ways you can decorate eggs. And remember, since these are blown eggs, you’ll be able to keep them! So consider drawing on them, doing a little decoupage with dried flowers, using Washi tape, or embellishing them in a number of ways. Just use your imagining and have fun.

If you’d like to hang your hallowed eggs, here is how you can string them:
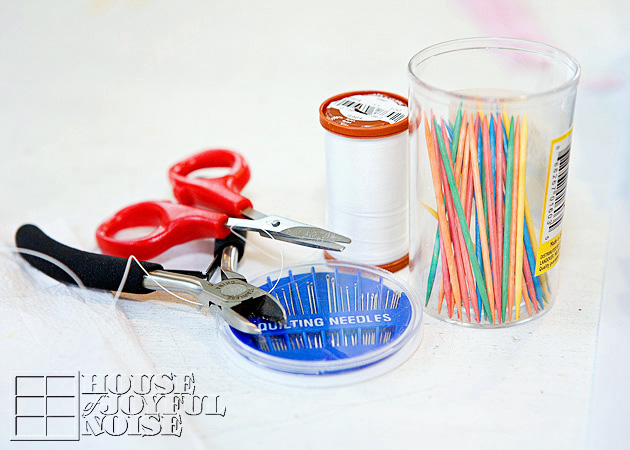
These are helpful supplies to string your eggs:

  • strong thread
  • eye needles
  • little scissors
  • toothpicks
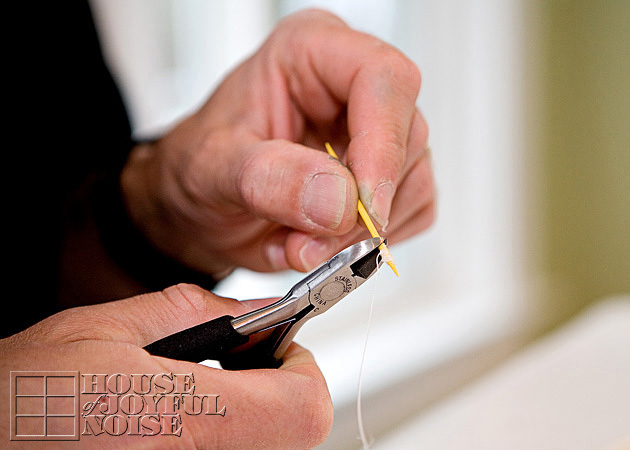
  • small (wire) cutters. As you have probably caught on by now, my husband was the executor of this project this day, while I was the photographer.
    (Please excuse my husband’s hard-working hands in these detail shots. Love this man so much, for all he does for our family. And then he does fun things like this with us, too.)
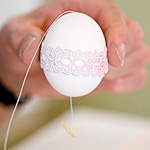
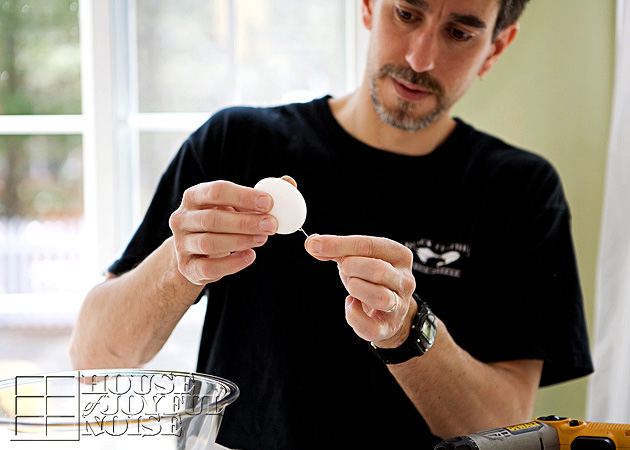
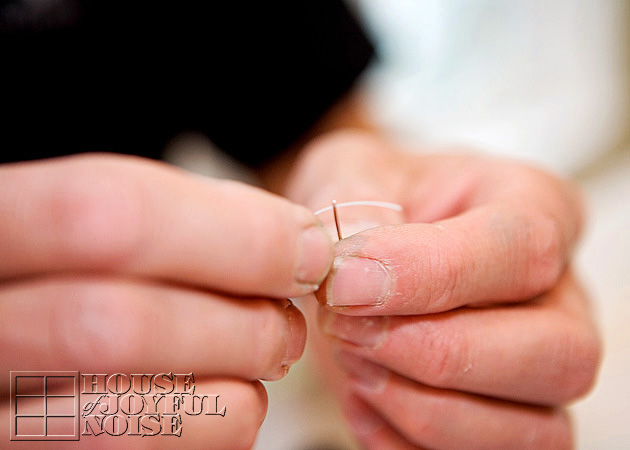
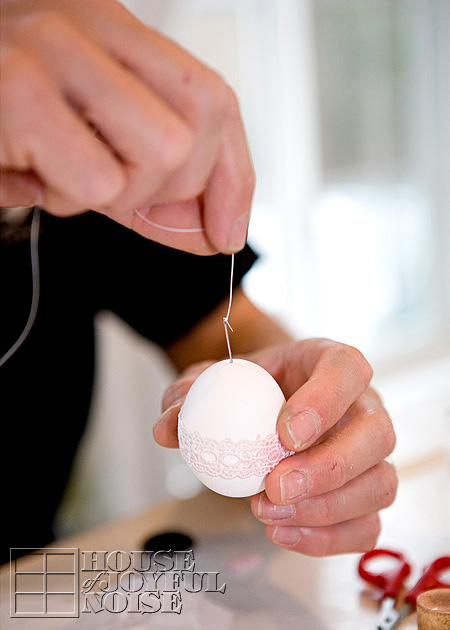
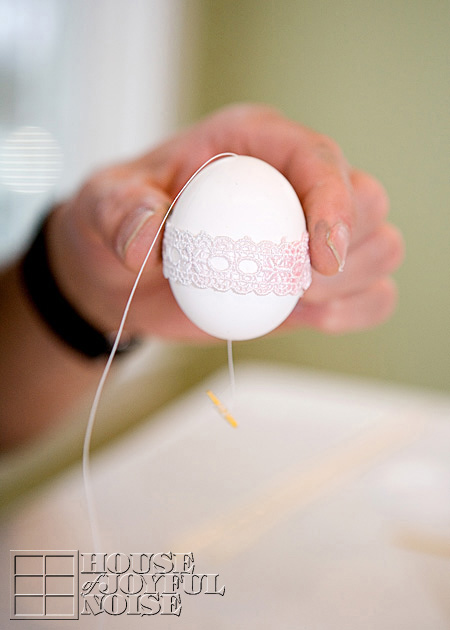
    Thread one of the larger sized needles, and tie it off as a single thread.
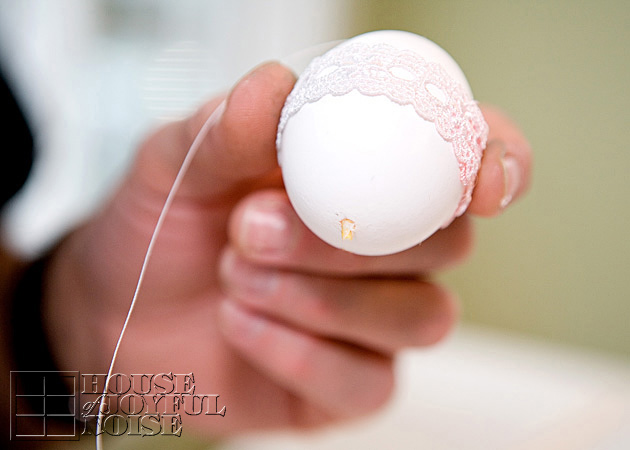
    Insert the threaded needle in through the top of the egg, all the way, but leave plenty excess out of the top for hanging later.
    Now it needs to come out the bottom, and as you can imagine, it would be challenging to make the needle do that.
    So here’s the trick . . . . .
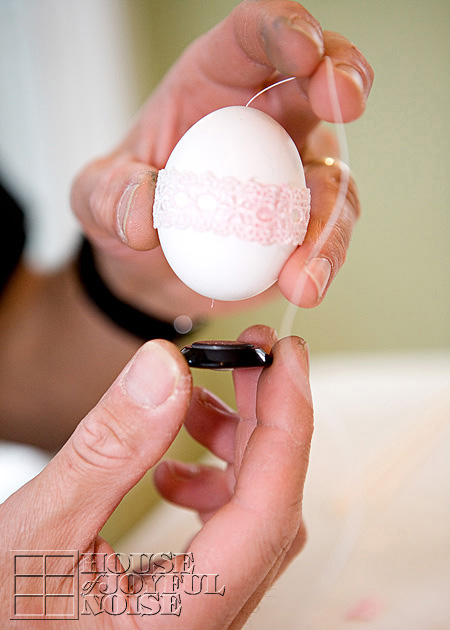
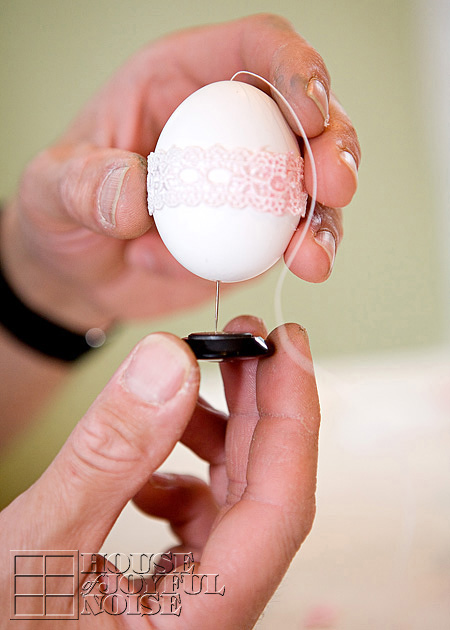
    Hover a magnet underneath the egg at the hole. 
    You can gently shake the egg as you do this, to try and get the tip of the pin to the hole as well.
    The magnet will draw the the threaded needle down out of the hole.
    Cut the pin off the thread now. You won’t need it anymore for this egg.
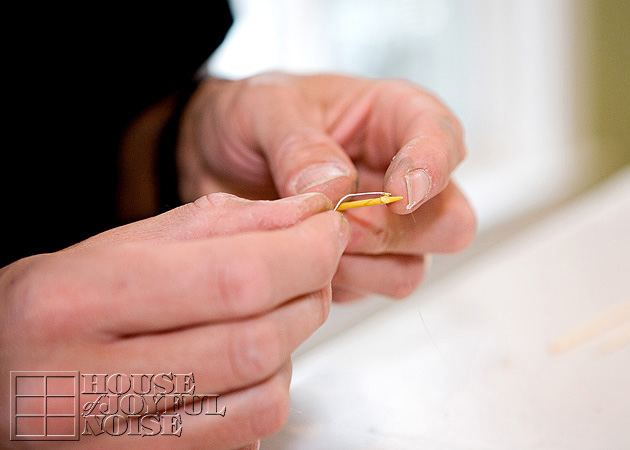
    On the same end of the thread that you cut the pin off, tie on a toothpick, and wrap the thread around it, as shown above.  You only need that little piece of toothpick where the thread is wrapped, (maybe 1/2″ or a little more) so you can cut the rest off using your cutters. So now you have this little piece of toothpick, tied onto the thread, that is coming out of the bottom of your egg.

    Now carefully push the whole thing back up into the hole of the bottom of the egg.  Let it fall in all of the way.
    This will act like an anchor inside the egg, for the string coming out of the top of the egg, to hang it.
    So with the single thread coming out of the top, tie it in a loop, to hang your egg.

    That is the process you do with all of your eggs.  If you don’t wish to hang some or any of your eggs, of course you won’t need to string them.
    All of it is fairly quick, and you’ll have your beautiful decorated eggs for years to come.
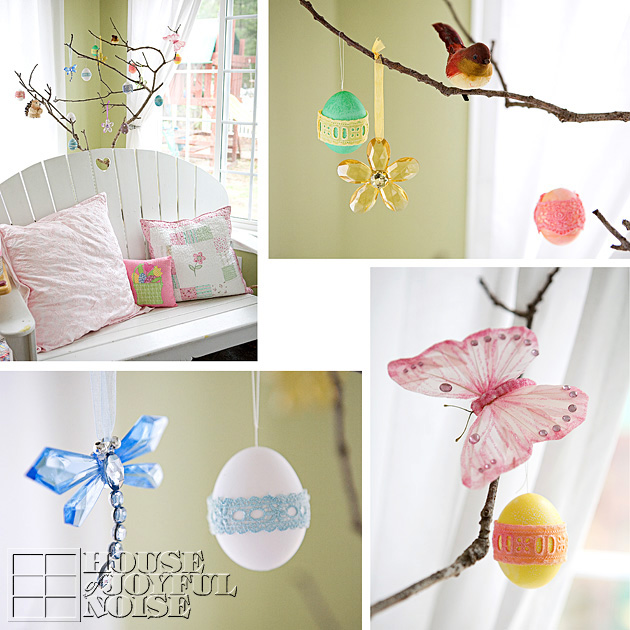
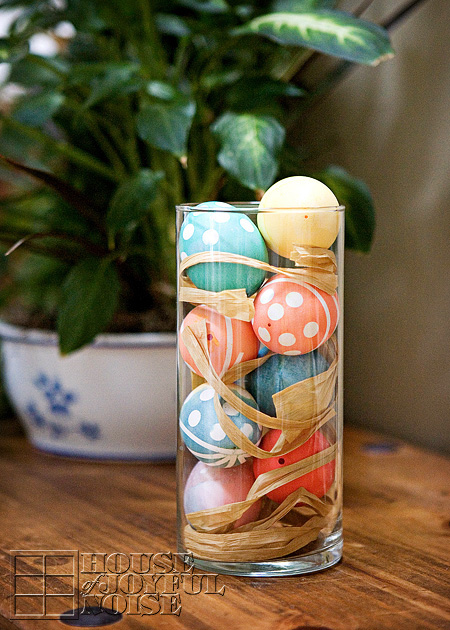
    Here’s how we have used some of ours:


Hung on an Easter Tree.


In a glass cylinder vase, with some pieces of Raffia paper.
What ways will you use yours?

I am considering making some more this year, decorating them in a new beautiful way, possibly personalizing some, and giving some of them as gifts!
We hope you found this tutorial helpful and learned some tricks that will help you blow some eggs of your own, and maybe string a few as well.
Thanks for coming by! May your Easter celebrations with those you love, be beautiful!

* * * * * *

Please come follow me here and there:

This tutorial was shared at Joyful Homemaking’s Think Tank Thursday Link Party #230!

Filed Under: Crafts & Creations, Holiday Crafts, Home Decor, Seasonal Crafts and Creations, Seasonal Home decor, SPRING Crafts and Creations, SPRING Home Decor, The Homestead, Tutorial Tagged With: crafts, decorating-with-blown-eggs, Easter decor, easter-crafts, Easter-home-decor, easter-tree, egg-blowing, hanging-blown-easter-eggs, how-to-blow-out-egg-yolks, how-to-string-blown-eggs

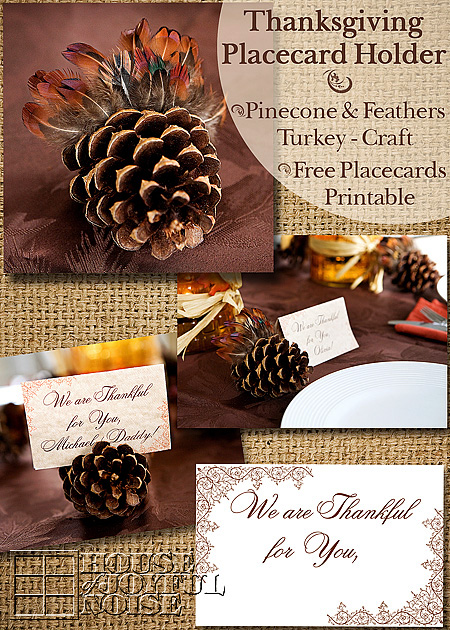
Thanksgiving Place Card Holder Turkey / Free Personalizable Place Cards Printable

November 17, 2012 By Laura 9 Comments

I’m so happy to offer you some free printable designs I created just for you:
Thanksgiving Place Cards

 as well as an adorable turkey craft to hold the cards, or as beautiful added detail to your table, if you’d like.

Thanksgiving is only days away.  If you are still scrambling to add a little ‘fancy’ detail to your Thanksgiving table setting, here’s an idea for you.  This idea is one I came up with for my own Thanksgiving table setting from last year that I never got a chance to share with you all.  Our guests loved them, and hopefully you will too.

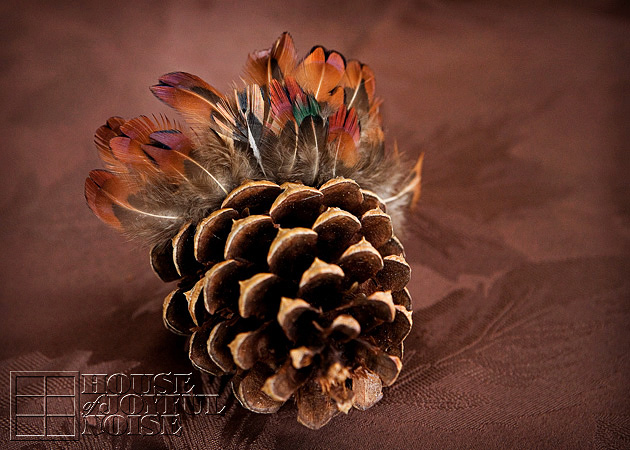
Turkey Place Card Holders

I think they are just simple, yet classy and beautiful looking.  They are easy to make, and require minimal supplies.  It’s so easy, there is no point in even showing you how to make them, when I can simply tell you in a few words:

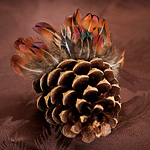
I got a net bag of plain, natural pine cones at Michael’s Arts & Crafts.  They are for crafting and decor. I recommend not using the pinecones from any kind of potpourri, because they can be so strongly scented, and really clash with the otherwise enjoyable aromas of your Thanksgiving dinner.

The feathers were also bought at the same craft store, and come loose in a clear, flat cellophane bag.

The kids and I simply put some glue right between the last two rows of blades, on the backside of the second to last row. Then we simply stuck the feathers onto the backside there, starting in the middle and working our way outwards to the sides,being sure they were facing forward, and fanning nicely as we worked across. That was it!  These particular feathers are very fine, so it took just a little patience.  But I chose them because I loved the colors in them. We used toothpicks to be able to maneuver the feather into the position we wanted on the still wet glue, without using our fingers and getting glue all over them.

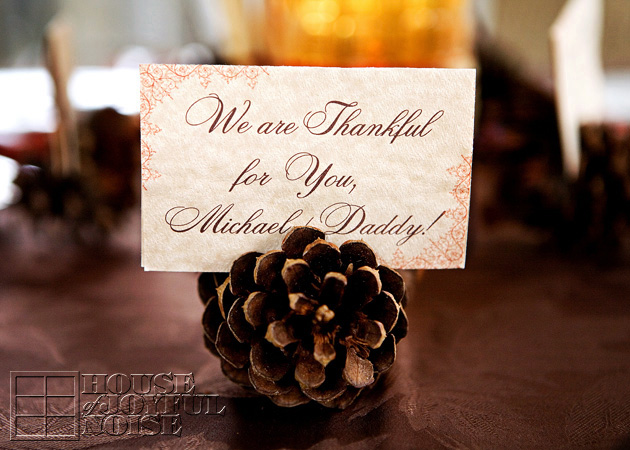
I made them to be place card holders, so I needed to make some of those too . . . . . .
. . . . . . and I’m going to share that customize-able printable with you too, so you can have your own personalized settings like this.
I printed them out on sheets of card stock that a variegated warm beige color to it, rather than bright white.

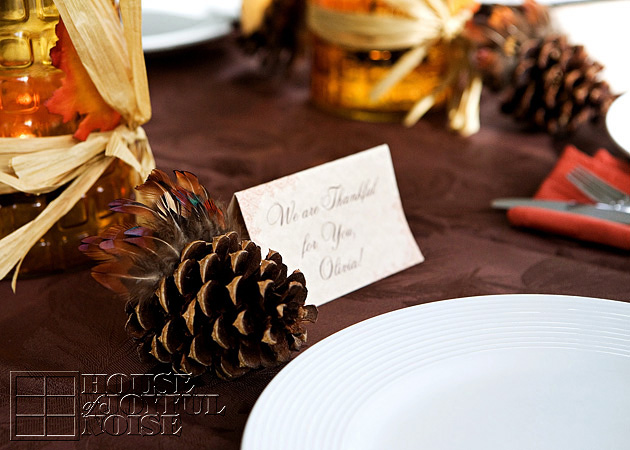
  Of course you also have the option of putting the place card on the table, beside the turkey, as seen in the photo above.

We also did something special on the inside of these place cards
; and so this is another idea or suggestion for you:
In light of Thanksgiving, and being most thankful for the blessing of those we love, the 6 of us in our family wrote a little something on the idea of each person’s card, expressing something about that person that we love or are thankful for.  It was an unexpected surprise for those joining us around the table this holiday; my father, brother, and a family friend. And I’ll tell you what; they all cried, finding more inside, and reading it!  The kids wrote the sweetest things.

If you would like to add a more whimsical flair to your turkeys like these, for just the kids or for everyone, you could add some googley eyes on white cardstock, and an orange waddle with felt, foam or construction paper.  I just happened to love the more subtle indication of a little turkey.
–

Free Thanksgiving Place Cards Printable

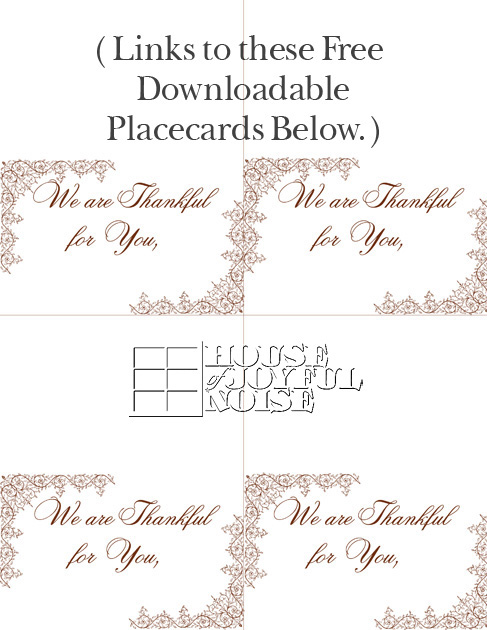
O.k., here is the customizable/personalizable place cards printable I promised you, but you must get it using one of the links to the downloadable file (you choose) below . . . . . .

PSD FILE:  This version is still in layers.  If you use Adobe Photoshop or any other program that works with PSD files, you can add in each persons name, to personalize each card. The color for the font is hexcode #6f3014, and the font style I used is Cecily.  I forget the font size, but if all I just mentioned didn’t go over your head. I’m sure you’ll figure it out. Ha ha.
-or-
JPG FILE:  This version is flattened, and ready to print as is. You can simply write in each person’s name with a marker.
Specs:  8.5 x 11 printable – Use same size card stock; I’m suggesting a light and warm or compatible color, perhaps that goes with your table setting.

And now for a little Giddy-Diddy:

If you love this idea . . . . .
Just SHARE it however you do!
But most of all please know this year . . . .
We’ll be giving THANKS for YOU!

* * * * * *

Please come follow me here and there:


Filed Under: Crafts & Creations, FALL Crafts and Creations, FALL Home Decor, Free Printable/Downloadable, Holiday Crafts, Home Decor, Kids Arts and Crafts, Seasonal Crafts and Creations, Seasonal Home decor, The Homestead Tagged With: crafts, free-printables, holiday-crafts, November-crafts, pinecone-crafts, place-card-holder-idea, printable-Thanksgiving-place-card-holders, Thanksgiving, Thanksgiving-crafts, Thanksgiving-free-printable, Thanksgiving-place-card-holders, Thanksgiving-table-decor, Thanksgiving-table-setting-details, turkey-craft

Adorable Stretch Jewelry for Little Girls | Craft Tutorial

August 15, 2012 By Laura 12 Comments

little-girls-stretch-jewelry-craft-tutorial

My little girl, ‘O’, is always in a crafty mood. Her name is Olivia, but we call her ‘O’ almost as much.  She gets excited about any craft or project going on, and always (always) wants to help.  So she and I were chatting one day, and had come up with the plan to make her some cute stretch jewelry, possibly using buttons of some sort.  The next time we were in the craft store for other projects, we picked up the supplies for her jewelry too.  It’s a simple project, with adorable results, and practical for little active girls, too.

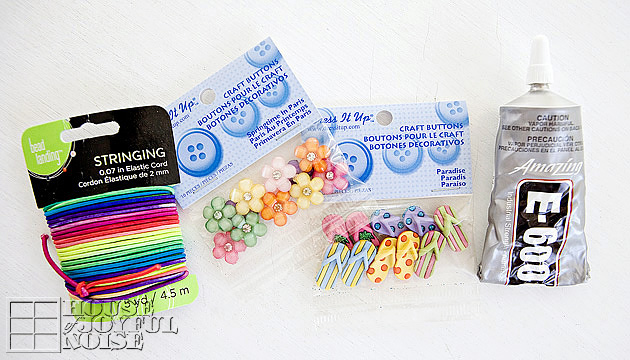
little-girls-stretch-jewelry-craft-tutorial-1 We found a whole section of all kinds of cute element buttons.  I would have had a hard time choosing, but ‘O’ is a pretty decisive girl, and decided the flowers with the rhinestone centers, and the flip flops, were what she wanted.  Interestingly, while they were all labeled buttons on their packaging, some did not have any hole or loop on the backs, to thread in any way! Such was the case with the flowers.  The flip-flops however, did have a loop on the backs.  No worries though. I was sure my Amazing E-6000 would do the trick. We also picked up stretchy elastic string.  I wanted to show you these supplies in their packaging (these bought at Michael’s Arts and Crafts), so that you would know what to look for, if you wanted to do this project yourself.
little-girls-stretch-jewelry-craft-tutorial-2
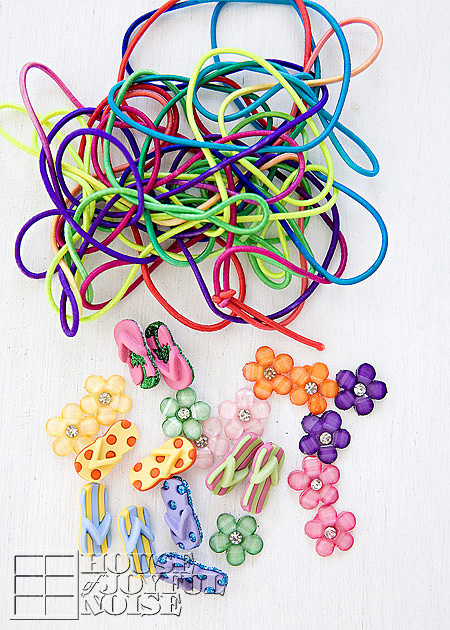
The string we got, as you can see, is all one long piece that changes colors.  So you can just choose an area of color you want, and cut it to the length you need.  Really fun matching up up with the buttons.  Aren’t they so cute?

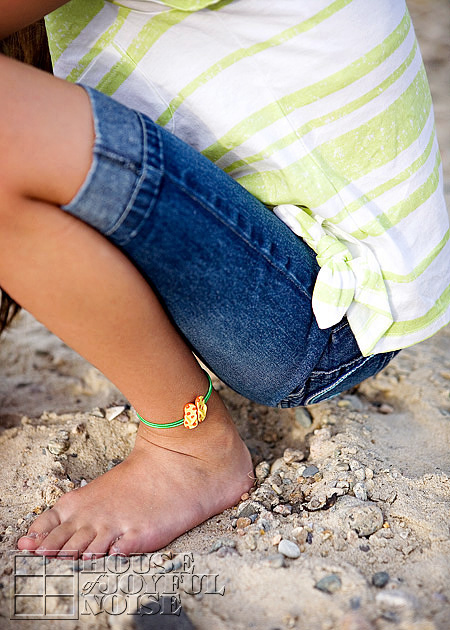
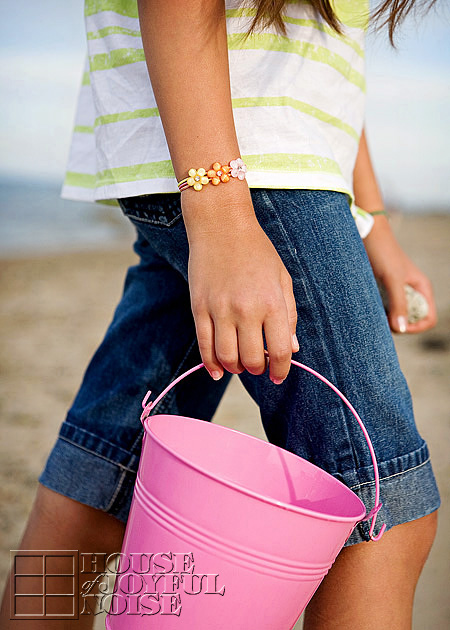
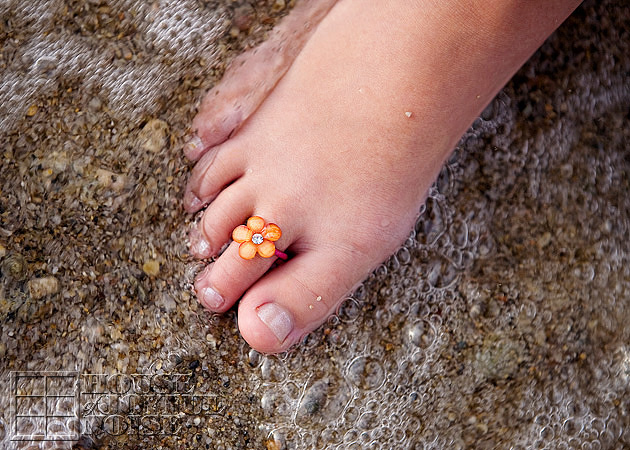
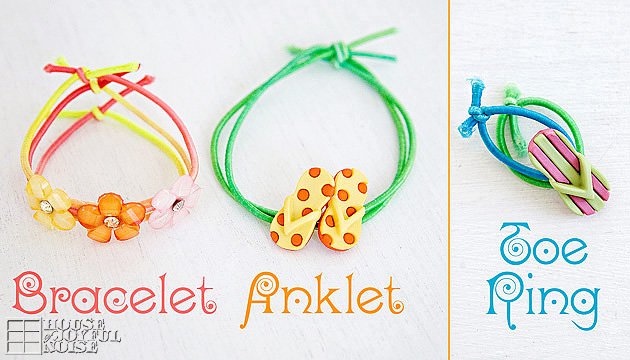
So we had a plan to make some bracelets, anklets, and toe rings.

0031

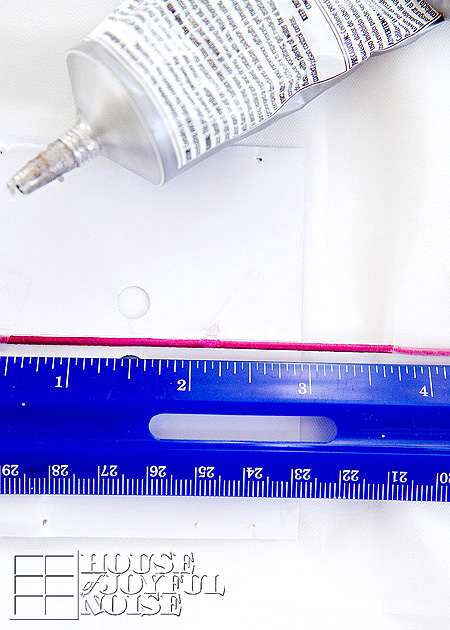
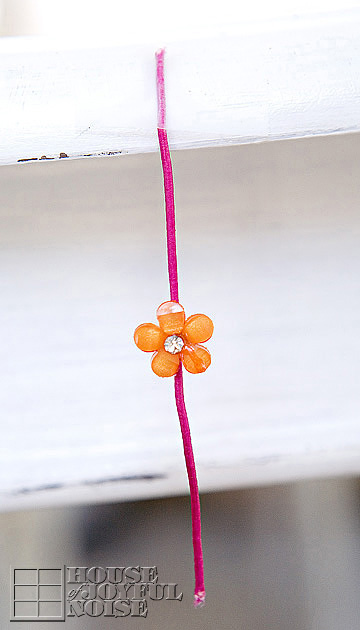
Depending on if your piece will be for the wrist, ankle, or toe, just take a quick measurement using the string around that body part, and than add an adequate amount more, for tying.  Now buttons with a hole or loop to thread of course will just slide right onto your string.  But the flowers we needed to glue.  So after cutting the string to length, we found the center of the string by using a ruler we had nearby. But you can estimate by folding the string in half or whatever.  In the center, we put a dab of glue, and then set the flower on and held it for a second.  We were working on a piece of paper, to protect our table from the glue. But being that the glue dribbles right over the string, we didn’t want the string adhering to the paper. So when it was set enough . . . . . .

0041
. . . . . .we just taped them to the table’s edge, and let them hang, to completely dry.

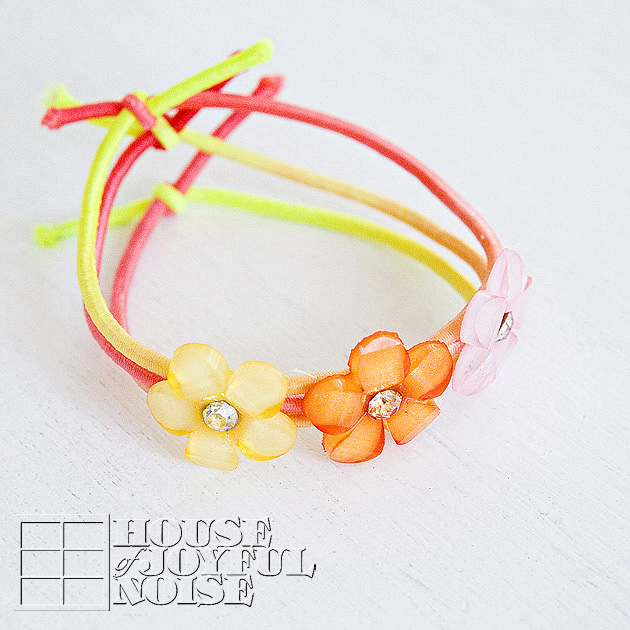
little-girls-stretch-jewelry-craft-tutorial-3 ‘O’ really had fun, choosing different elements, and then choosing what colors of string to go with it.  We especially liked how this one came out. We chose to use three pieces of string, and knot each of them on their own, instead of all together. It really alters the look!  The E-6000 really works amazing.  After knotting the jewelry on for the proper fit, you can then trim any excess string end with scissors. You just want to be sure they are tied to be snug, but not tight or uncomfortable, cutting off circulation or leaves band marks.

TIP: You may also want to dab the string ends with some kind of nail polish top coat, just so they don’t unravel or get fuzzier. I did, and I also put a dab on the knots, for extra security.

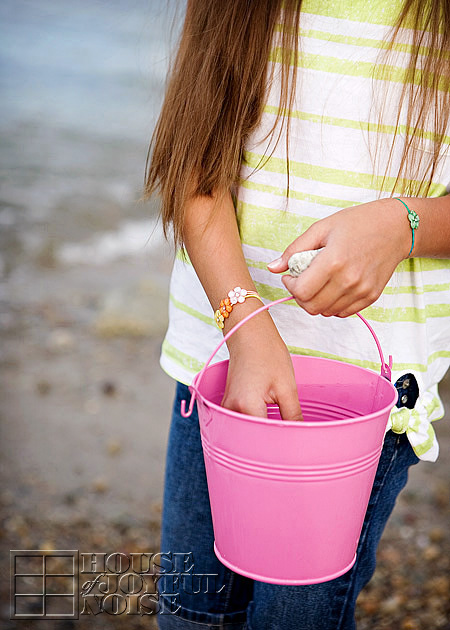
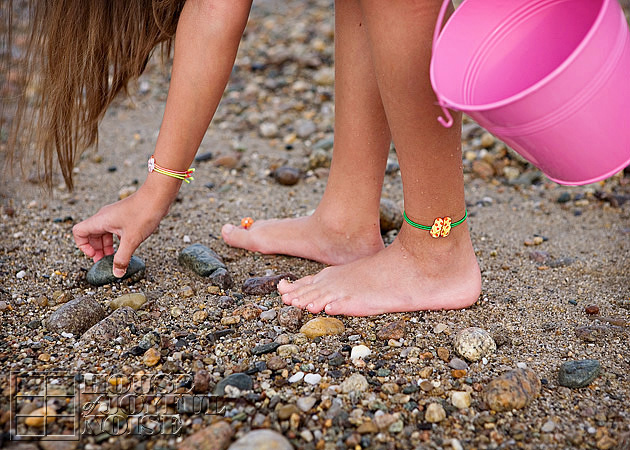
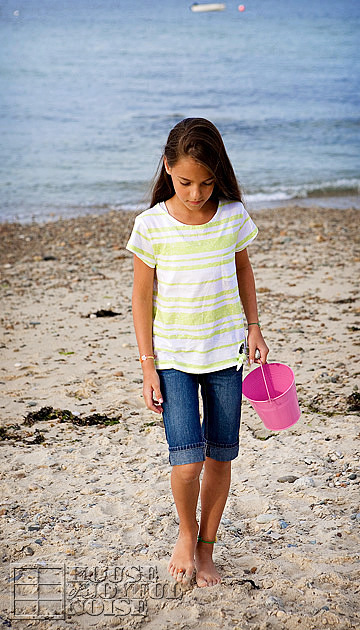
little-girls-stretch-jewelry-craft-tutorial-4 Aside from these accessories just looking adorable and so age appropriate, they really are great for every day play wear, being that they are fitting, and not the kind that will get caught on anything. They are not likely to break in any way, or get lost.  But even if they did, none of it is valuable in any way, and they can so easily be made again.

little-girls-stretch-jewelry-craft-tutorial-5
So little girls can just HAVE FUN, as they should, and not worry about their *bling*.

little-girls-stretch-jewelry-craft-tutorial-6
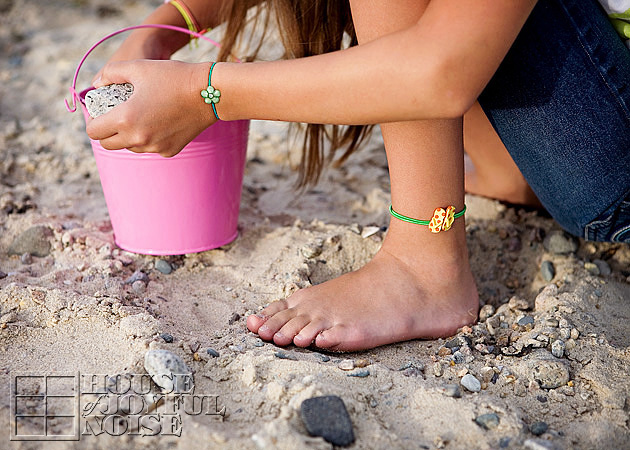
So perfect, for a little pretty style at the beach.

little-girls-stretch-jewelry-craft-tutorial-7 And they can even get wet, without a problem.

little-girls-stretch-jewelry-craft-tutorial-8
The options really are endless, and I can already see us ending up with a larger collection.  Because how cute would it be to make holiday accessories?  We can find button elements like this for Christmas . . . . . .Halloween . . . . . .Easter . . . . . . and it would also look lovely with any kind of clothing, including dressy-dresses.

If you are hoping to make homemade gifts this year, this is a great inexpensive and quick idea, for any little girls on your list.  If you aren’t sure of their sizes, just leave them untied, and when you give jewelry to them, you can just tie it off on them, and trim the excess.  Just as we did it making these for ‘O’.

little-girls-stretch-jewelry-craft-tutorial-9 We did not make any choker style necklaces, or pony-tail holders, but those are a couple more ideas.

012
‘O’ is the kind of girl who enjoys fashion.
She likes shopping for clothes, and enjoys putting her outfits together every day, including any accessories for her hair or as jewelry.

little-girls-stretch-jewelry-craft-tutorial-10 Love it? Say it. Pin it! Share it. Make it!


Save

Filed Under: Crafts & Creations, Kids Arts and Crafts Tagged With: crafts, kids-anklets, kids-bracelets, kids-stretch-jewelry, kids-toe-rings, little-girl-crafts, little-girl-handmade-accessories, little-girls-home-made-jewelry, safe-stretch-jewelry-for-girls

  • « Previous Page
  • 1
  • 2
  • 3
  • 4
  • …
  • 6
  • Next Page »

We are wicked happy to have you here! We hope you find much inspiration, help, humor and enjoyment here.


Archives


POPULAR POSTS

* * * * * *

SUBSCRIBE to House of Joyful Noise blog! Every new post, delivered right to your email box!


Privacy Policy

Amazon Affiliates

Never at any additional cost to you, we may earn a small commission for our endorsement, recommendation, testimonial, and/or link to any products from our website. Your purchase through our links helps support our family, while sharing with you the products we authentically use and recommend, for various ideas, and letting you know where you can purchase them. Thank you for your support!

[footer_backtotop]

Copyright © 2026 HouseOfJoyfulNoise.com · Genesis Framework by StudioPress