• HOME
  • {A}’s Chipmunk Training Archives

 Homepage

  • The Homestead
    • Home Projects
    • Home Improvement
    • Home Decor
      • Seasonal Home decor
        • FALL Home Decor
        • WINTER Home Decor
        • SPRING Crafts and Creations
        • SUMMER Crafts and Creations
    • Our Chickens
    • Gardening
    • Organization
    • Re-Purposing
    • Furniture Refinishing
    • Budget
  • Crafts & Creations
    • Seasonal Home decor
      • FALL Crafts and Creations
      • WINTER Crafts and Creations
      • SPRING Crafts and Creations
      • SUMMER Crafts and Creations
    • DIY (Do-It-Yourself) Project
    • Kids Arts and Crafts
    • Homemade/Handmade Gift Ideas
    • Holiday Crafts
    • Fan Pulls
    • Free Printable/Downloadable
    • Sewing Projects
    • Giveaways
    • Business Features
  • Recipes/FoodFun
    • Breakfast
    • Lunch
    • Main Dish
    • Sandwiches
    • Appetizers
    • Slow Cooker
    • On The Grill
    • Side Dishes
      • Soups
      • Salads
    • Baking
      • Breads, Rolls and Muffins
    • Snacks
    • Treats
    • Desserts
    • Drinks
  • Homeschooling
    • Elementary Homeschooling
      • Elementary Homeschooling READING
      • Elementary Homeschooling MATH
      • Elementary Homeschooling LANGUAGE ARTS
      • Elementary Homeschooling SCIENCE
      • Elementary Homeschooling HOME ECONOMICS
      • Kids Arts and Crafts
    • Middle School Homeschooling
      • Middle School Homeschooling SCIENCE
      • Middle School Homeschooling HOME ECONOMICS
    • Language Arts
    • Math
    • History / Social Studies
    • Geography
    • Foreign Language
    • Field Trips
    • Games
    • Nature Study
  • The Big Picture
    • Life In General
    • Celebrations
    • Faith
      • Into the Light; The Series
    • Giveaways
    • Reviews & Sponsors
  • Photography & Lettering
    • Photography
    • truck lettering
    • vehicle graphics
    • Newborns
    • Kids
    • Engagement
    • High School Senior Pictures
    • High School Senior Pictures Sneak Peeks

A T-Shirt Craft / Wicked Cool, Fun, Easy, & Not Messy!

August 17, 2011 By Laura 35 Comments

cool-fun-kids-t-shirt-craft-21

This just may be the coolest and most fun craft, I have ever done with our kiddos.  If that wasn’t awesome enough, it is super easy, and it doesn’t make a mess either!!  I know, right? It’s perfect for kid’s birthday parties, scouts, camps, etc.  Our kids didn’t want to stop.  They even made a couple of shirts for their friends.  But all of you mothers, as we show you how simple this project is,….think outside the box, for yourselves, or other projects, too. I am!
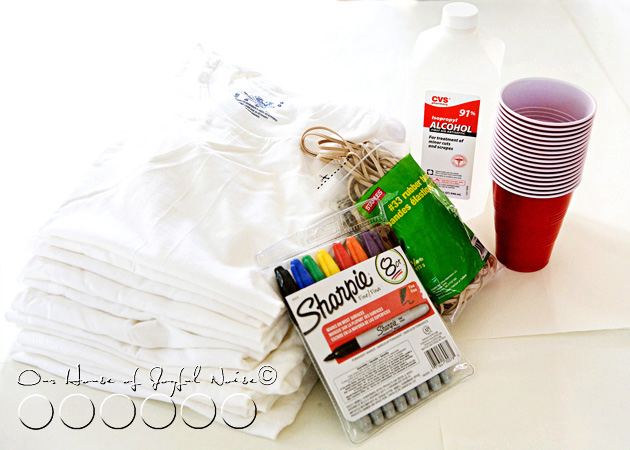
awesome fun t-shirt craft All you need is:

  • some white t-shirts (in your sizes)
  • sturdy plastic cups
  • rubber bands
  • bottled rubbing alcohol
  • a (liquid) dropper
  • and Sharpie Permanent Markers in colors!

Easy supplies to gather, right? Here’s how you get creative with them.
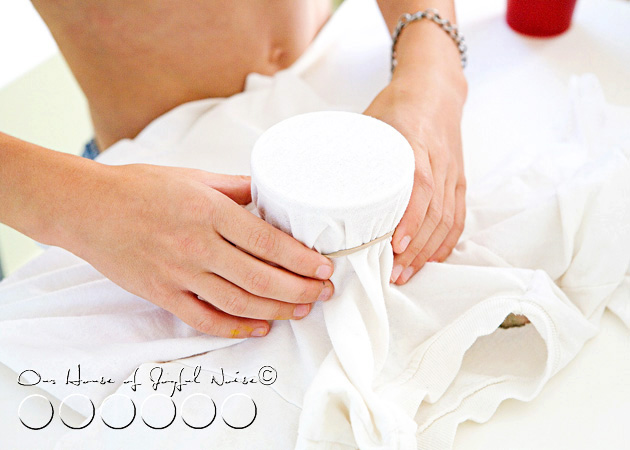
awesome fun t-shirt craft Lay your t-shirt on the flat surface you are working on, front side up. Take the cups, and arrange them upright in different places inside the t-shirt, one at a time.  As you do this, consider that where ever you have a cup, that’s where a design will be put on your shirt. Secure each cup as you go, with a rubber band. (You can do more later, on the sleeves or backside of the shirt.)
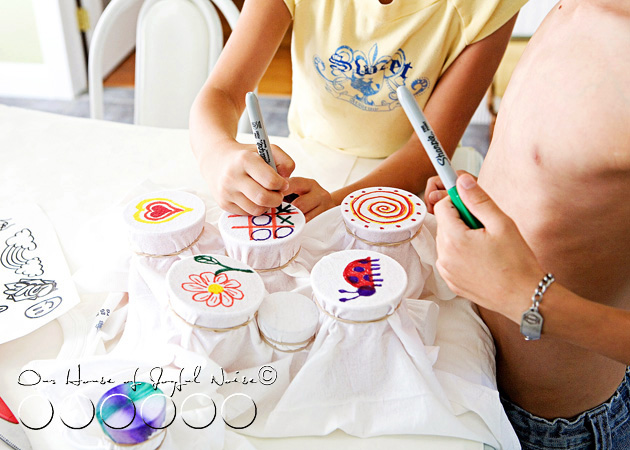
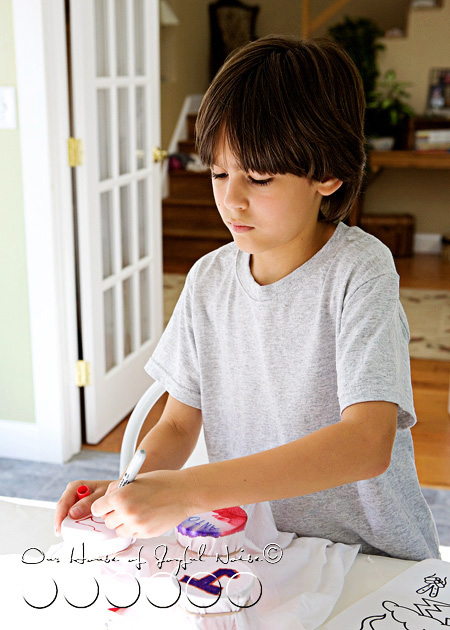
awesome fun t-shirt craft Using your colored Sharpie Permanent Markers, get creative and make some designs or simple line drawings on t-shirt fabric that is over the opening of the cups. My kids even played a game of Tic-Tac-Toe on one.  In a moment or 2, I’ll get to what colors or techniques you may want to avoid, and which ones worked best. We learned from little mistakes so you don’t have to, and figured out some tips and tricks that I’ll share with you too.

You’ll be able to see them for yourself, too. ; )
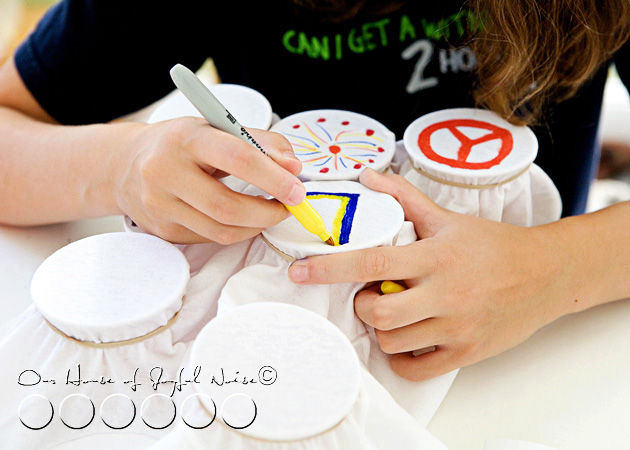
 

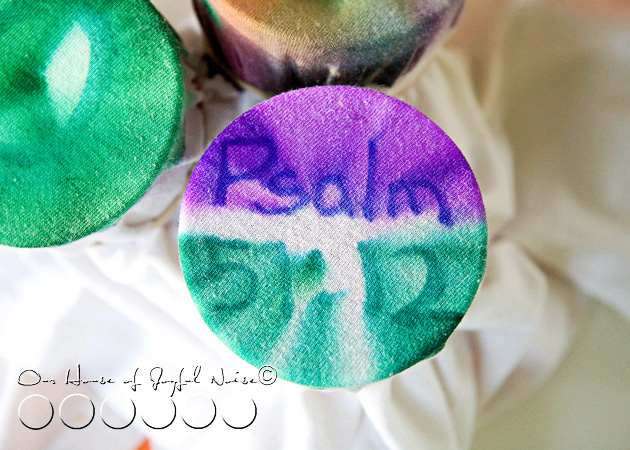
awesome fun t-shirt craft Each designer can personalize them in their own style, symbols, colors, or simple line drawings that they like, or mean something to them.  Or if it’s a gift, think of the recipient. Simple words may be able to be used as well.

Here’s where it gets even more fun.
awesome fun t-shirt craft

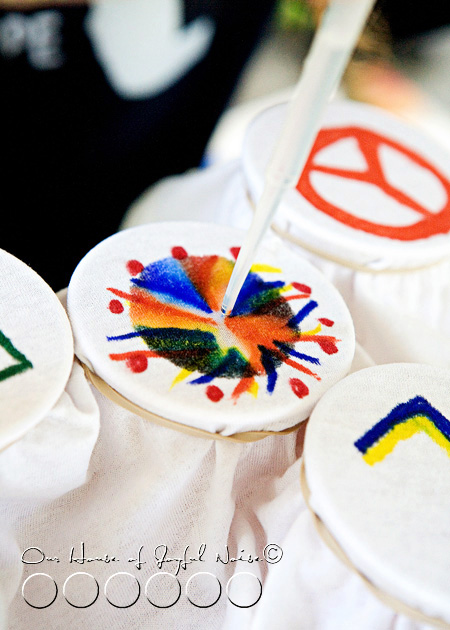
Working on one design at a time, slowly drop drops of alcohol in the *center of the circle/design.  As you do, you will see the marker ink start to spread.  You don’t want to drop too much alcohol though…..you need to do this slowly, and watch what is happening. The spreading will slow down, but if you watch carefully, it is often still spreading. If it does seem that it stopped, add more drops, one at a time, and keep watching.

*TIP:  It’s important, to only drop the alcohol drops in the center. Reason being, it pushes the ink from the center, outward, spreading it evenly and nicely, for the right effect. Also, if the fabric becomes too saturated with alcohol, the drops drip into the cup beneath, which pretty much evaporate. But that is why it’s important to keep the cups pretty upright, as to not spill any colored alcohol that may be sitting in the bottom of the cup.
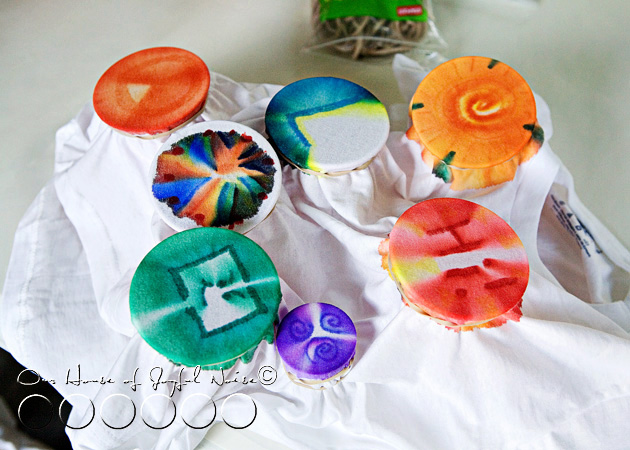
awesome fun t-shirt craft Once you get the feel for it, you can do more at once. As one design is spreading, you can start another (and another) beside it.

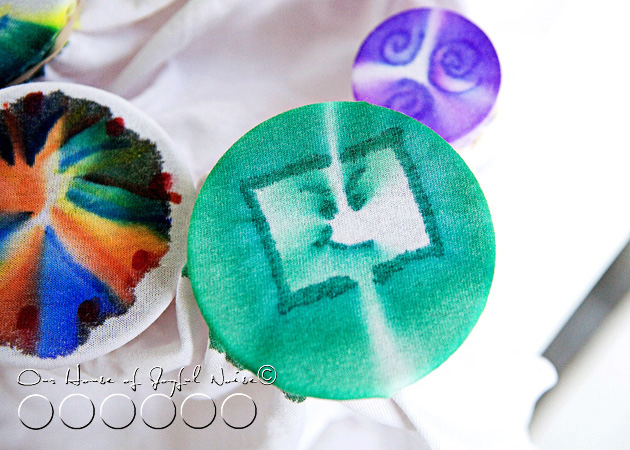
Do you see the multi-color burst? That one is still spreading very slowly.  Do you see the little purple swirly one? That’s a little shot glass, instead of a bigger plastic cup.  Perfect for the side of a sleeve too.
 

awesome fun t-shirt craft

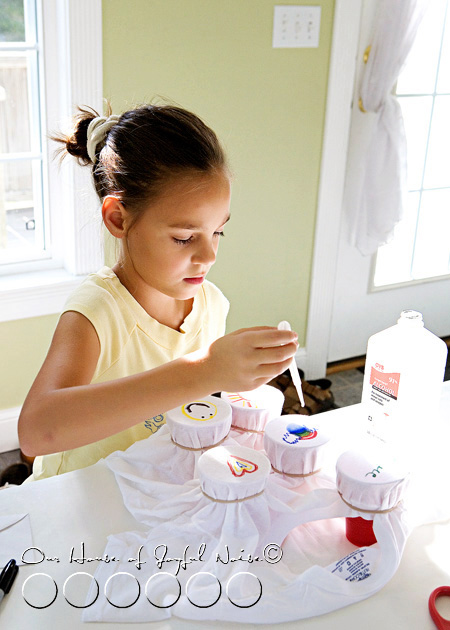
Here, {O} had finished drawing out her designs, and she’s now dropping alcohol on them.  It’s really so exciting, to watch them and see how they are going to turn out.
 

awesome fun t-shirt craft

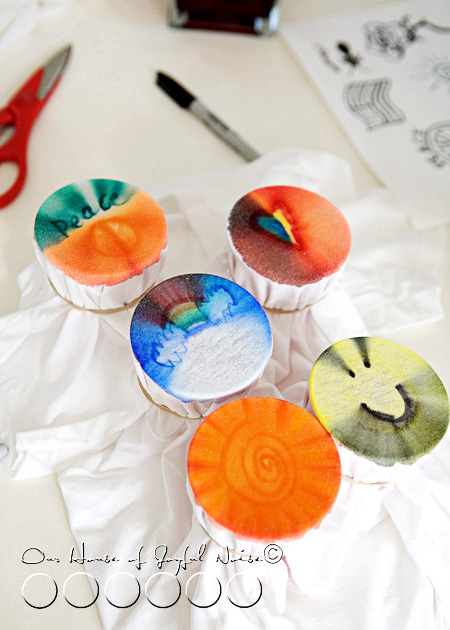
As you can see, black can get pretty messy.  In the case of the smiley face, I like how it turned out. It reminds me of a record. Remember those? ; )  But if the black were in the center of the design, it really would have blotted out the rest of the colors.

Now look at the rainbow and clouds. Because she was dropping alcohol under the last color of the rainbow, where the center is, all of the color above that pushed up. Because again, it spreads from the center. So that’s a good thing to keep in mind with your designs.   Blue reeeeaaallly spreads, so be mindful with that color, too.  It may seem like it’s a lot to remember, but really, once you are working with the colors you, you get it quickly.

*TIP:  We actually did a test t-shirt before we began our own t-shirts, and played a bit, just to see how it was going to work. But the colors’ chemistry is something we learned on the real ones.  So you may want to consider 1 practice t-shirt for everyone to do a practice design on collectively.  Or, you all can just live on the edge, and go for it!

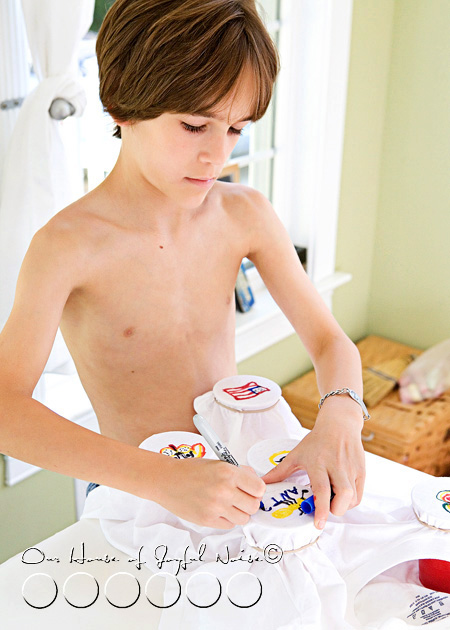
Here, the boys draw out their designs…..
 

awesome fun t-shirt craft

awesome fun t-shirt craft

awesome fun t-shirt craft

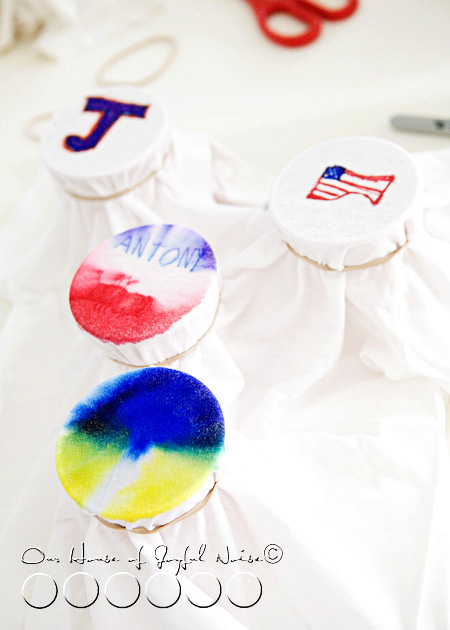
Sometimes, the ink will spread so much, that you can’t hardly tell what it was anymore, such as with the blue and yellow one above. It was a thunder cloud, with lightening coming out. But that’s ok! The designer knows what it was, which makes it fun!  Other times, you can vaguely still see the deign, like a subliminal message. ; )  In the photo above, the very top two designs in the photo are not alcoholed yet. So let’s take a look at how those came out….


awesome fun t-shirt craft See, I was concerned that that “J”, so colored in and outlined so darkly like that, might turn into a hot mess. Using dark colors and solidly coloring in something, is going to turn out much like that J. But the flag turned out pretty cool! Again….see how it spread from the center? It creates it’s own design.
 

awesome fun t-shirt craft

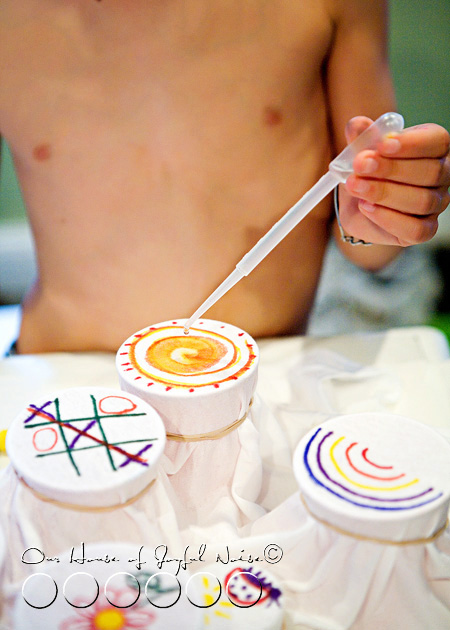
Drop…..drop…………….drop…..we don’t really want to stop!

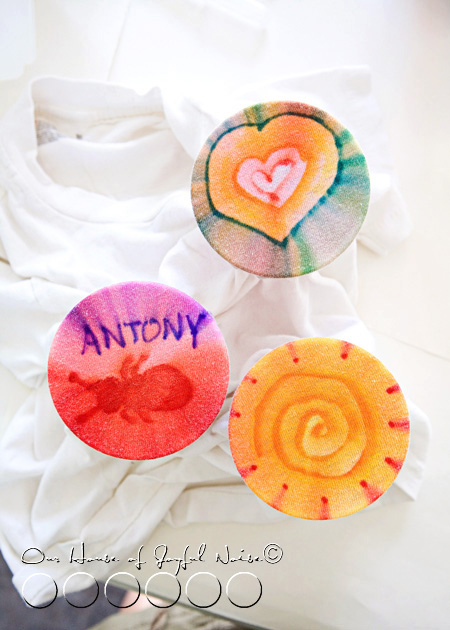
Here are some of my favorite designs…..
awesome fun t-shirt craft
Antony…..get it? ; )


awesome fun t-shirt craft

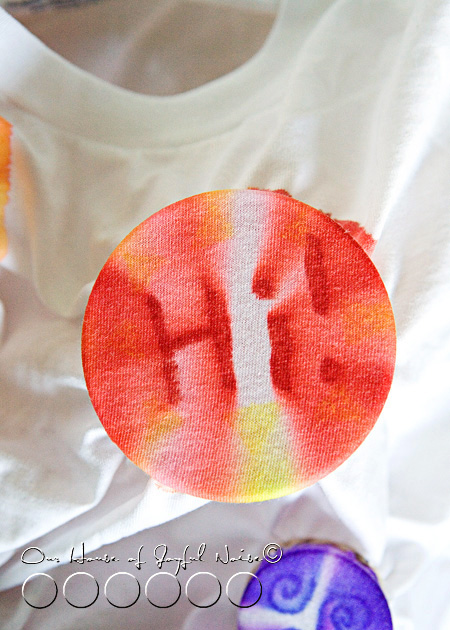
awesome fun t-shirt craft Have a nice day.


awesome fun t-shirt craft Love this one. It’s {S}’s design.


awesome fun t-shirt craft Dragonfly.

awesome fun t-shirt craft

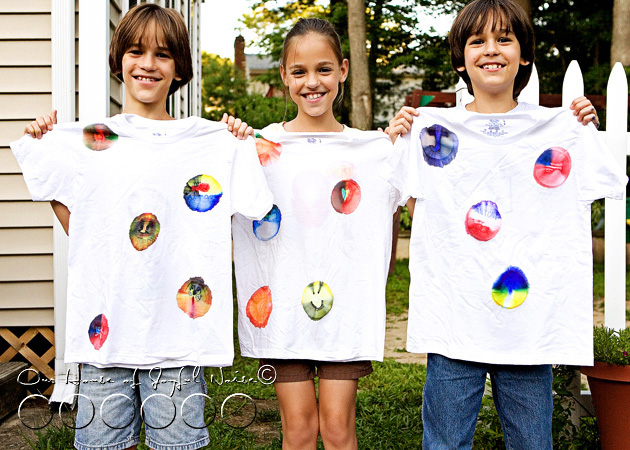
Here’s how the kid’s own t-shirts turned out.  WHICH, they are loving wearing. We have not washed them yet. I think I will just hit them with an iron before throwing them in the wash, to kind of ‘heat-set’ them first. Even though, it IS permanent marker, and shouldn’t come out.

Also…the shirts dry very fast, because it’s just alcohol, which evaporates.

Next time……because there will be a next time, very soon……we’re going to try not securing the rubber bands so tightly, and try to make a less defined circle.  Because it’s the fabric pulled tight over the edge of the cup, that really keeps the ink from spreading much more.  I bet it would look cool to let it go, too.
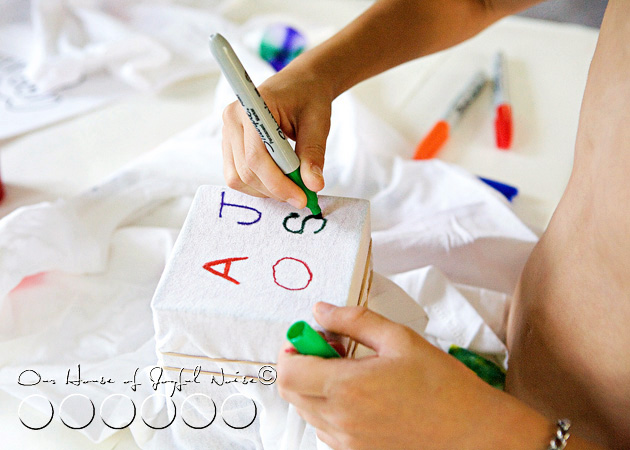
awesome fun t-shirt craft Our kids ‘signed’ the shirts to their friends, on the back side, bottom left, of the shirt.  Here, the shirt is secured over a square vase container.

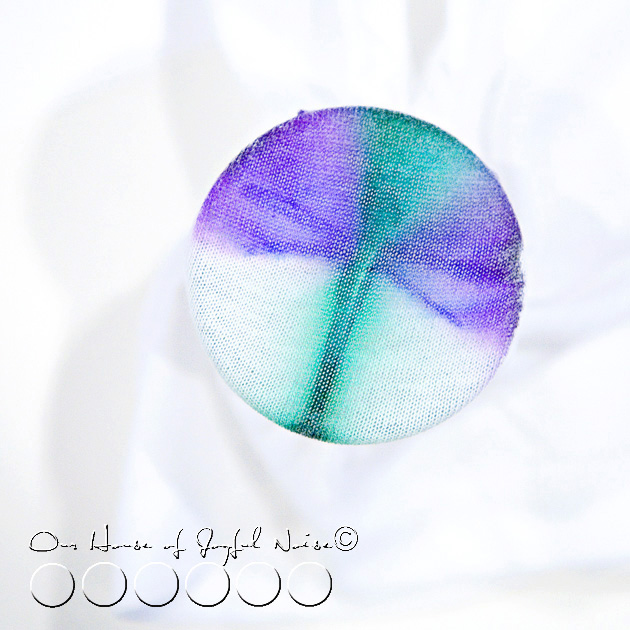
Check out how cool it spread…..
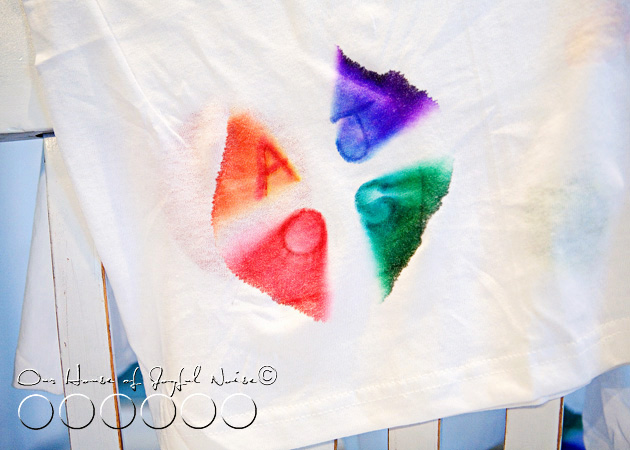
 

awesome fun t-shirt craft I have more designs in mind, that will be fun trying.

Other Ideas: This technique can be used in the more traditional way that tie-dyed shirts are done, by twisting and rubber banding the shirt, coloring it with markers, and applying the alcohol.

I’m going to try making my own shirt, with a design just in the center, on a women’s t-shirt. Maybe a little something cool on the sleeve cuff too.

Another idea: white bandanas!!

Hope you loved this easy, fun crafts, that’s (not just) for kids!!

You may also be interested in another t-shirt craft we did years ago: T-Shirts with Sole!

* SPREAD the craft idea with others!  Facebook it, Twitter it, or Pinterest it for yourself.*

Have fun with it!

If you and your kids do this craft, take photos, and blog it….come back and leave the link in the comments of this post, so we can see how yours came out!

******


Save

Filed Under: Crafts & Creations, DIY (Do-It-Yourself) Project, Kids Arts and Crafts, Kids Arts and Crafts Tagged With: best-t-shirt-crafts, Catholic-blogs, Catholic-families, crafts, fun-not-messy-kids-crafts, kids-arts-and-crafts, sharpie-markers-craft, t-shirt-art, t-shirt-craft, t-shirt-project

Decorative Wall Initials | Craft Tutorial

August 8, 2011 By Laura 10 Comments

decorative-wall-art-initial-modge-podge-10

Every time I’ve gone to Michael’s Arts and Crafts, I’ve looked at these large white initials / letters you can purchase individually.  I knew I wanted to create something using these letters as personalization, for {O}’s room. But I was undecided if I wanted to do her whole name, or just her initial.

decorative-wall-art-initial-modge-podge

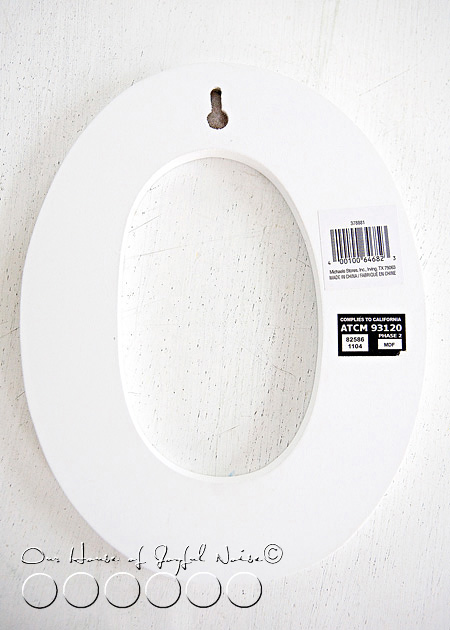
The letters have a nice flat white surface to work on.  But what to do on that surface, was another matter I was undecided on.  Those were the questions that kept me from purchasing any for while.  Finally, I decided just her initial would be cute, as we actually do call her “O” half the time.

To decorate the letter (or letters), I initially (no pun intended ; ), thought I’d probably paint a pattern. But then I took to the idea of picking out some cute scrap booking paper, and Modge Podging the surface.  Not a new concept by any means, but I wasn’t looking for a new invention.


decorative-wall-art-initial-modge-podge-1

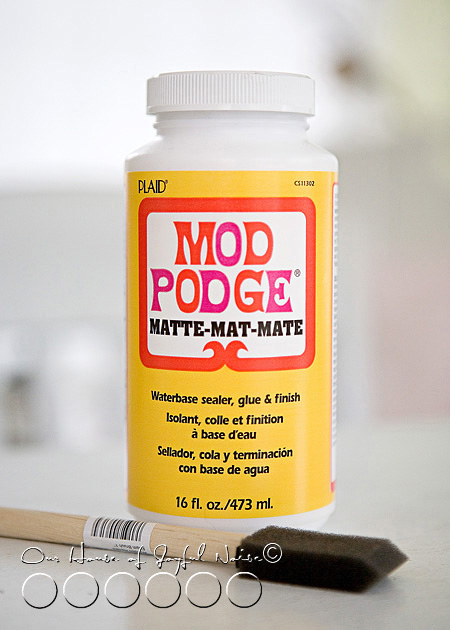
I love working with Modge Podge.  There are so many varieties, but I knew the Matte finish, which I had on hand, was all I needed, as a glue and also a top finish.


decorative-wall-art-initial-modge-podge-2

We had had a family trip to Michael’s one evening, so {A} could spend her Gift Card she got from her Grandmother for her birthday.  In case you are wondering, {A} knew exactly what she wanted, as she had been wanting it for a long time:  a wood burning kit.  She’s been having fun with that, practicing, and getting ready to do a project. So while we were there at our favorite local craft store, I thought it would be nice to let {O} pick out the scrap booking paper to use, to finish to the initial for her room.

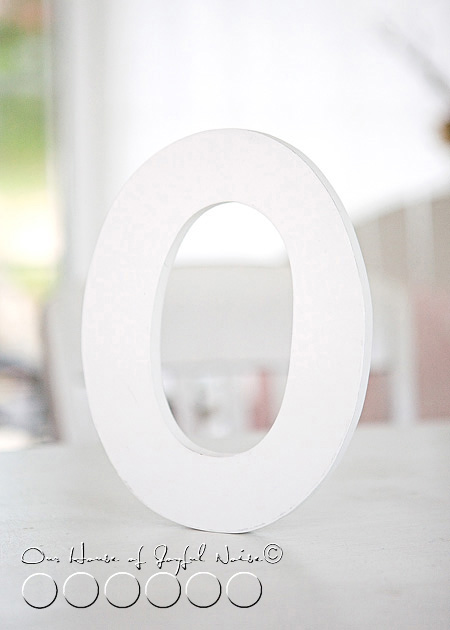
We chose 2, because I had the idea that we could finish both sides of the “O”, and make it reversible!  Naturally, you can’t do that with every letter of the alphabet, but it works for “O”.

decorative-wall-art-initial-modge-podge-3
The back side of the letter does have a hanger hole, and stickers, which were way too difficult to get off.  So I left them. The scrap paper is thick enough that I knew they wouldn’t show through. So my plan was to just paper and Modge Podge right over the hole and stickers.


decorative-wall-art-initial-modge-podge-4

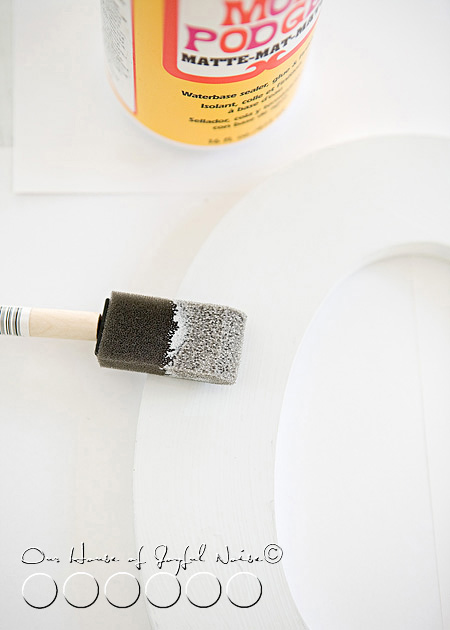
I started by putting a good layer of Modge Podge on the front surface of the letter.

decorative-wall-art-initial-modge-podge-5

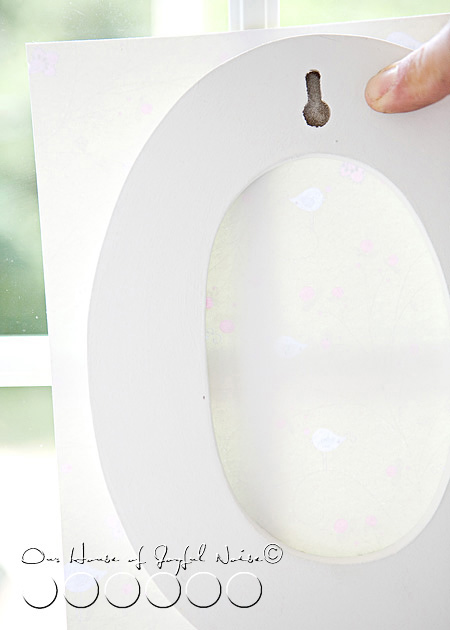
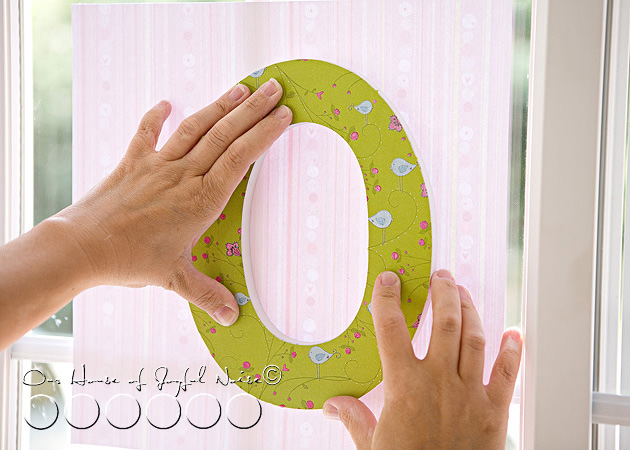
Then, I took my letter, and the apple green sheet of scrap booking paper, over to a window.  Placing the paper onto the window, with the backside facing me, I strategically placed the Modge Podged side of the letter, onto the paper.  The reason I did this at the window, was to be able to see the pattern on the other side of the paper, and get as many little blue birds onto the letter as I could, and not cut many or any in half, if possible.  The blue birds were the charm of the pattern to me, so I wanted them to be as much a part of the piece as possible.

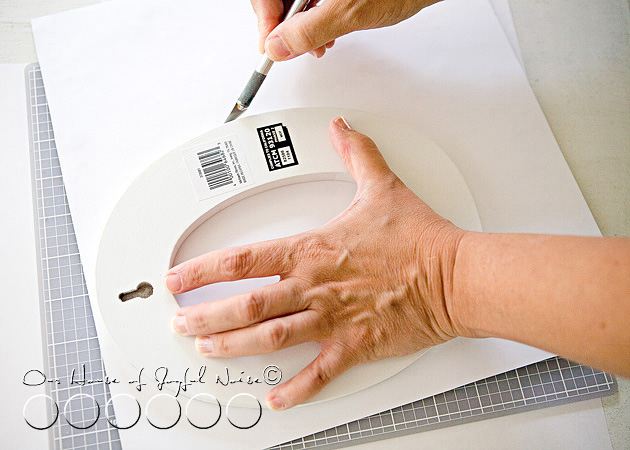
decorative-wall-art-initial-modge-podge-6 I took the letter now stuck to the paper, back to the table, and on a self-healing mat, trimmed off the excess paper with an x-acto knife.  Please excuse my mother’s hands. ; )


decorative-wall-art-initial-modge-podge-7 Once the apple green paper was all trimmed to size, and rubbed down good,  I repeated the whole process for the opposite side:

1) Modge Podge the white surface of the letter 2) Bring the scrapping paper and the Modge Podged letter over to the window, and place the paper onto the window with the back side facing you 3) *Strategically place the letter onto the paper, considering the placement of the paper.  4) Trim off excess paper with an x-acto.

*Using striped paper, is even trickier! It’s a tad more difficult, with a rounded letter such as this, to place the letter in such a way to be sure that the stripes will be straight.  Of course the striped pattern could go horizontally, or even diagonally. With a letter with a straight edge, it is easier to line up with the stripes and get it straight.  If this is more than you’d want to bother with, be sure you choose paper that is a more random sort of pattern. Or, to be super safe, you could use solid paper, if that’s not too boring for you.


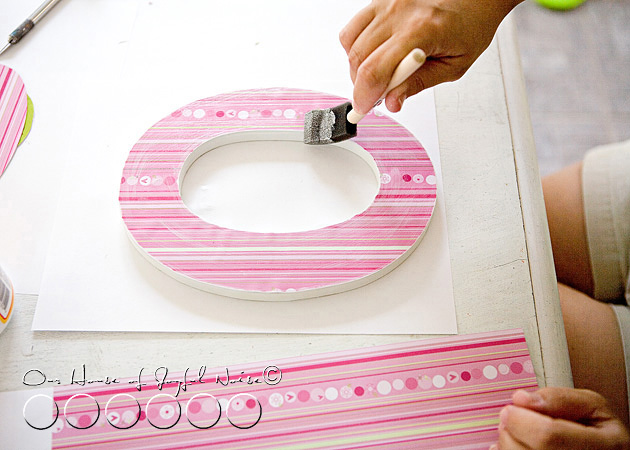
decorative-wall-art-initial-modge-podge-8 Once all of the paper is trimmed, Modge Podge the surfaces as a protective coating and finish. Allow one side to dry completely, before doing the other.   Then I sanded the edges, just to rough it up just a little.

I was undecided, it it really looked finished. I’m still not sure! I’d love your opinion, once you see it hanging.

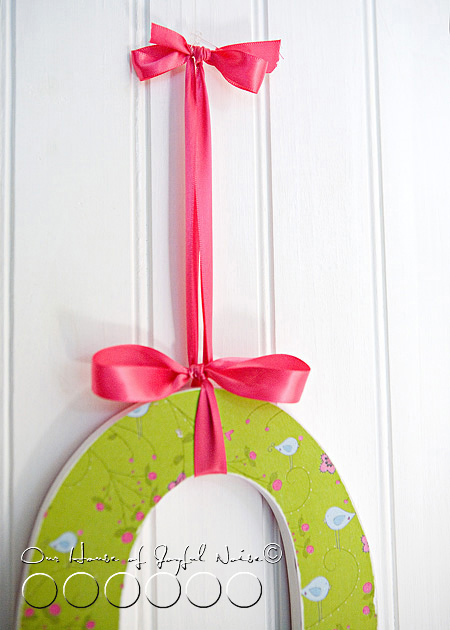
Now, since I made this a reversible/2 sided letter, covering the hanger hole on the back side, I hung the letter with a coordinating satin ribbon. It took a little patience, to double tie the bows, and have them come out nice, so that the weight of the letter did not untie the bows!  With a few deep breathes, I managed.

decorative-wall-art-initial-modge-podge-9

decorative-wall-art-initial-modge-podge-11
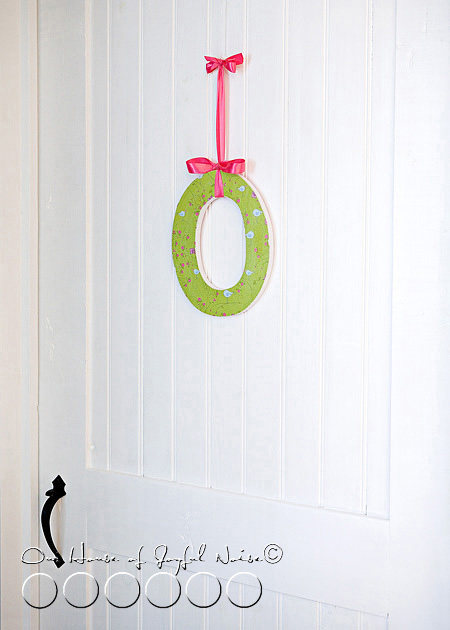
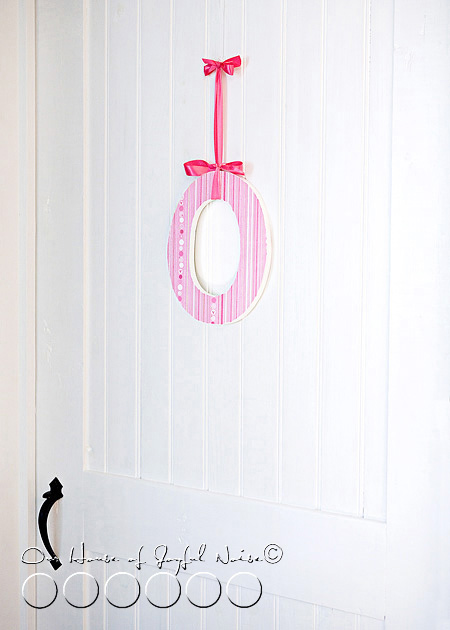
Here it is, hung on {O}’s bedroom door.  The plan was actually to hang it inside her bedroom, but there was not adequate light in there (later in the afternoon) when I wanted to photograph it. So I hung it on her door. It may or may not stay there.

As a side note, Michael made this latch door, as he is (still in the process of) making all of the doors in the whole house. I-love-these-doors!  They will actually be a little distressed and made to look older, later on when they are all done, for a more old farmhouse look.

decorative-wall-art-initial-modge-podge-12
{O} loves that she can flip her letter over any time she wants, and change the look of it, “depending on what mood I’m in that day”, as she put it.


decorative-wall-art-initial-modge-podge-13

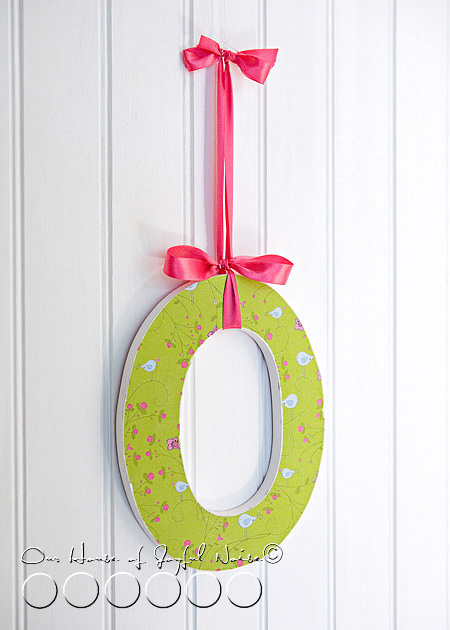
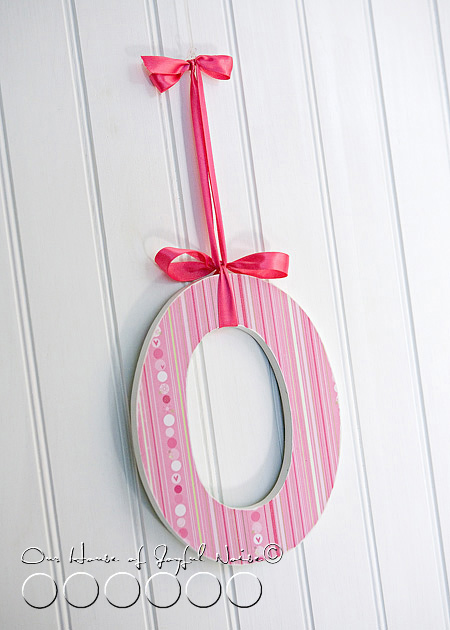
Here’s a closer look.  I like it, but I am still wondering:  Does it need some sort of trim? Or should I paint the inside edge of the letter, a color that coordinated both sides? Or is it cute as is?


decorative-wall-art-initial-modge-podge-14
Give me your opinion. This craft may or may not be officially complete.  Either way, I think it’s a quick & easy craft, and adds a little cute personalization to a room. Imagine the creative ways you could make a decorative letter.  Maybe using 3d elements, painting, or hanging with different materials like thin rope, twine, lace…the possibilities are endless.  I’m already thinking of the boys room.

See, we’ve been working on finishing and decorating our home for years. I have SO much to show you, in the near and distant future, as various parts of the kid’s rooms are finished and decorated.  The girl’s each have their own room, and the boys have a BIG room to share.  Very cool features. The kids have very different personalities, and we are creating their rooms in ways to reflect that, and their style. Such a fun process! We are so blessed with Michael’s carpentry skills too, and we ladies know how much fun interior decorating is!  (As money allows, which is why it’s taken us this long as it is.) So I hope you’ll follow us along through our home finishing journey.

But back to the “O”.  Done or not? And have you resubscribed, as you need to, and put yourself in the running for our current GiveAway?


Save

Filed Under: Crafts & Creations, DIY (Do-It-Yourself) Project Tagged With: craft-tutorial, crafting, crafts, decorative-letters, kids-bedroom-decor-ideas, Modge-Podge-crafts, modge-podge-projects, room-personalization, uses-for-scrapbook-paper

Shabby-Chic Fan Pull & Pillow | Craft and Home Decor

July 19, 2011 By Laura 4 Comments

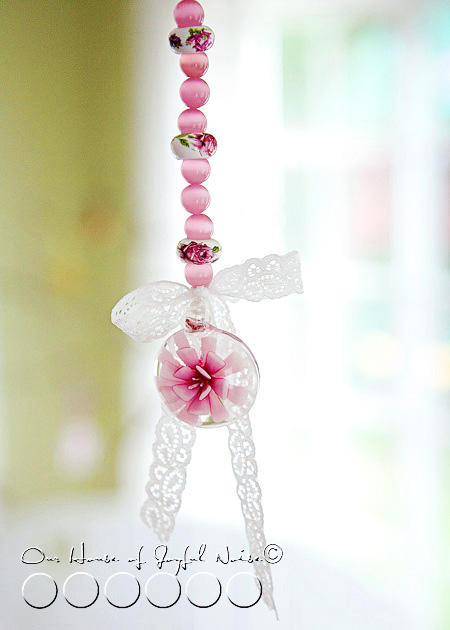
shabby-chic-fan-pull-craft-3

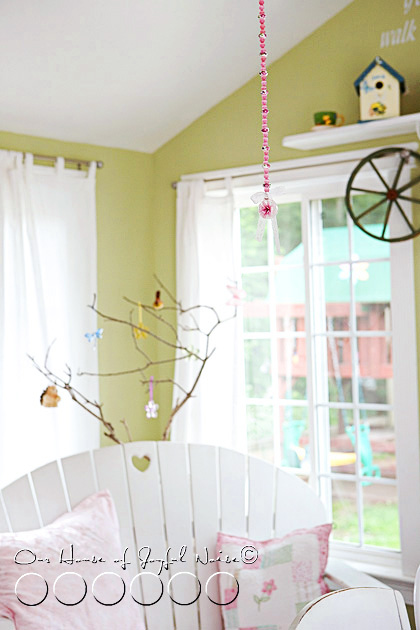
I know!  It’s been awhile since I’ve made a ceiling fan pull, huh?  Hey, a girl only has so much time to craft! But once I got this new one in my head, I couldn’t go out & get the supplies to make it, fast enough.  I made it, and then I was so excited to see it up, that I took down my summer fan pull, to put it up.

shabby-chic-fan-pull-craft

I’m all about farmhouse style, to the core. But I definitely dig a little Shabby Chic. It’s just a wonder to me, because when I was a little girl, I hardly had a feminine bone, and I was sure I never would.  I even recall a mylar motorcycle poster on my bedroom wall at one point. But here I am!

I really dig pink, lace, and Shabby-Chic-ness.

This fan pull has that kind of feel to me.  You?  That’s what I was going for, anyway.

shabby-chic-fan-pull-craft-1

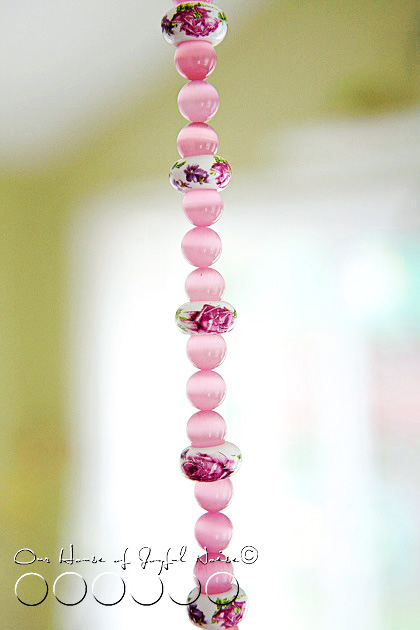
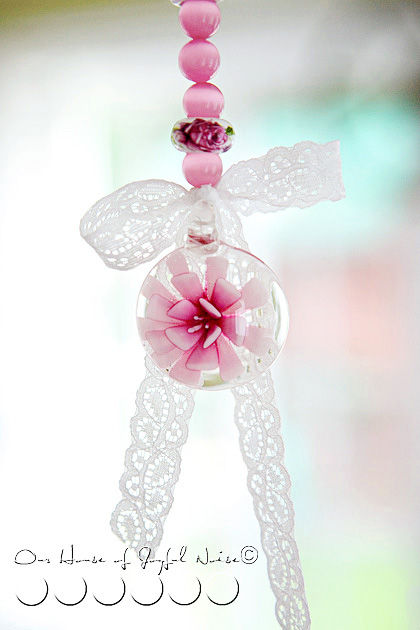
I found THE perfect beads at Michael’s Arts & Crafts.  I used the style of the round soft pink ones (in various colors) so many times.  But how about those rose ones, huh? I swear my heart skipped a beat, when I saw those.

shabby-chic-fan-pull-craft-2

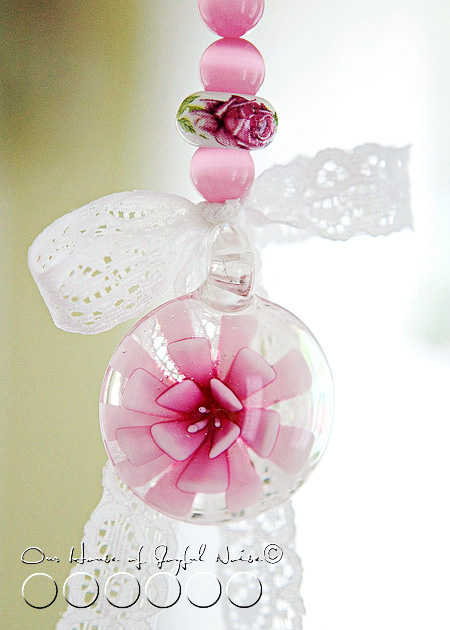
And despite the fact that I used a large glass pendant just like this one in green, for a spring fan pull, this pink one went way too perfectly, for this pull too.

Besides, I couldn’t find a big pretty rose to use. Not at that store anyway. And this worked nicely.

shabby-chic-fan-pull-craft-4
I was so excited to add my last little touch: a lace ribbon bow.


shabby-chic-fan-pull-craft-5

It looks so pretty, hanging in the middle of the room, that the summer fan pull may not make it back up, this year.

(If you’d like to check out all of my other fan pulls I’ve made so far, you can search ‘fan pulls’ in the category box later, in the sidebar.)


shabby-chic-fan-pull-craft-6
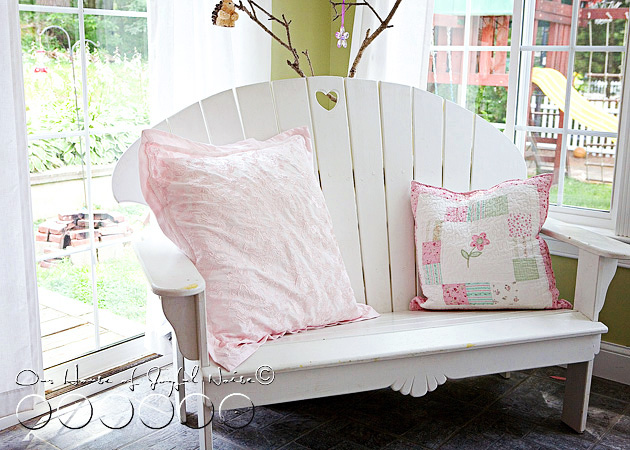
I’ve been meaning to share something else with you all, since um….February?!  The big Shabby Chic Pillow, that Michael got me for Valentine’s Day.
<3


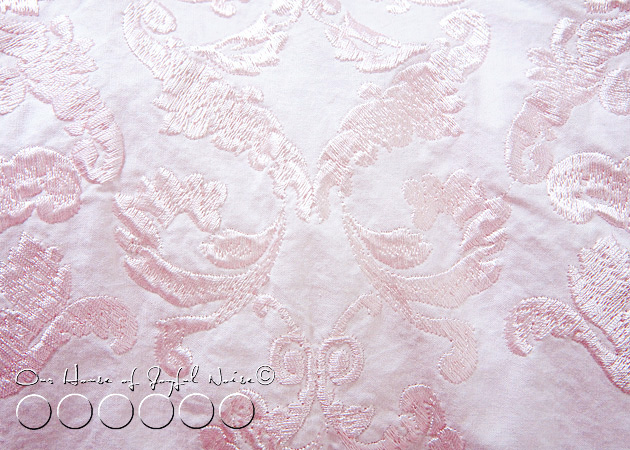
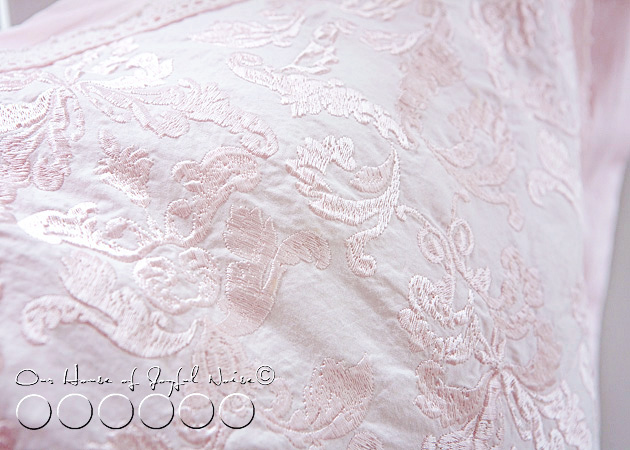
shabby-chic-pillow-home-decor How pretty is this embroidered pattern?

It’s a satin like thread, on a light polyester, I guess.

shabby-chic-pillow-home-decor-1 The texture of the thread-work plays so awesome in the light.

shabby-chic-pillow-home-decor-4

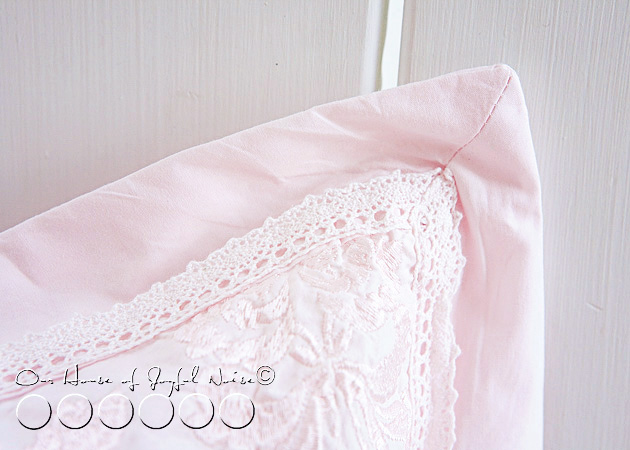
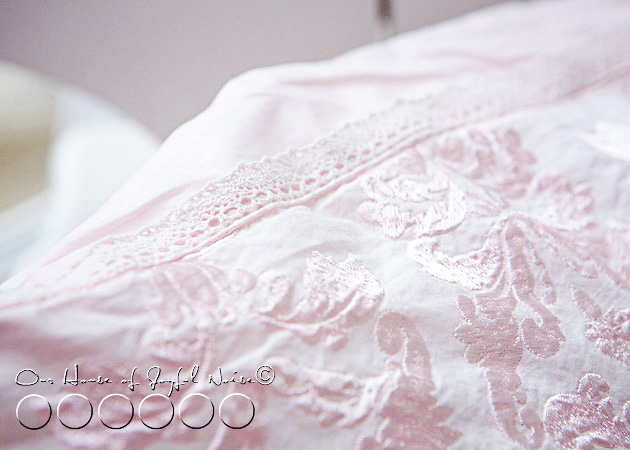
So does the crocheted lace trim.


shabby-chic-pillow-home-decor-3 Lovely, isn’t it?


shabby-chic-fan-pull-craft-6 Yes, when the kids come in from playing, all covered in dirt, I preach! “Oh boy!  You better be SURE not to touch-my-PILLOW!”.  (And between you and me, I may have a few heart palpitations with that preachin’.)

Yes, I COULD just wash it.  But then I’d have to iron it again too! And I really despise ironing.

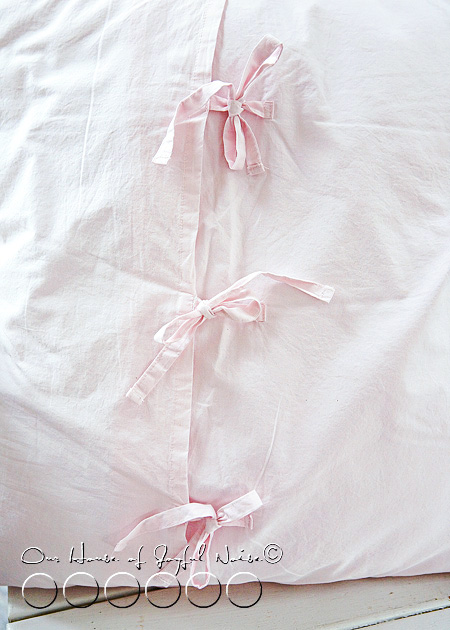
Oh, which reminds me, that yes, this pillow cover IS removable.  Check out the back….


shabby-chic-pillow-home-decor-5
It’s the details.  You know?

I don’t know why I get so crazy over this stuff.  But I do.  Like….butterflies. Over so many little things in life.  Not kidding.

Well, I hope you enjoyed seeing my Shabby Chic fan pull & pillow.
Thanks for stopping by.

*


Save

Filed Under: Crafts & Creations, DIY (Do-It-Yourself) Project, Fan Pulls Tagged With: ceiling-fan-pull, crafts, fan-pulls, shabby-chic, shabby-chic-crafts

Eyeletted Paper Pennants | Room Decor | Craft Tutorial

June 13, 2011 By Laura 9 Comments

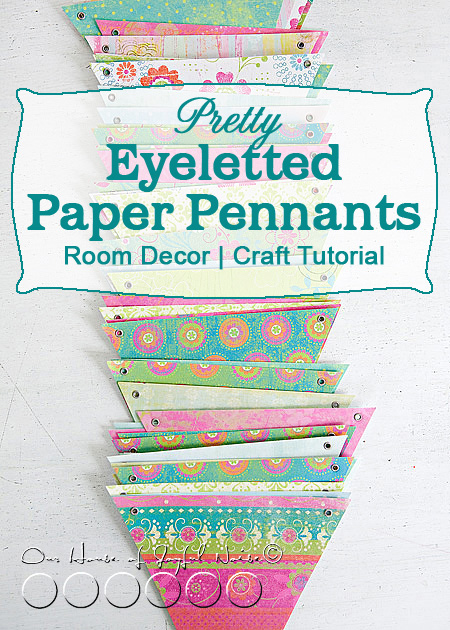
eyeletted-paper-pennants-room-decor-tutorial_0001

Sometimes, my crafts come about in all-backwards-sorts-of-ways. This craft, these pretty eyeletted paper pennants, is one of those.
I love how they came out. And lucky for you, I took photos of the whole process.

eyeletted-paper-pennants-room-decor-tutorial-12

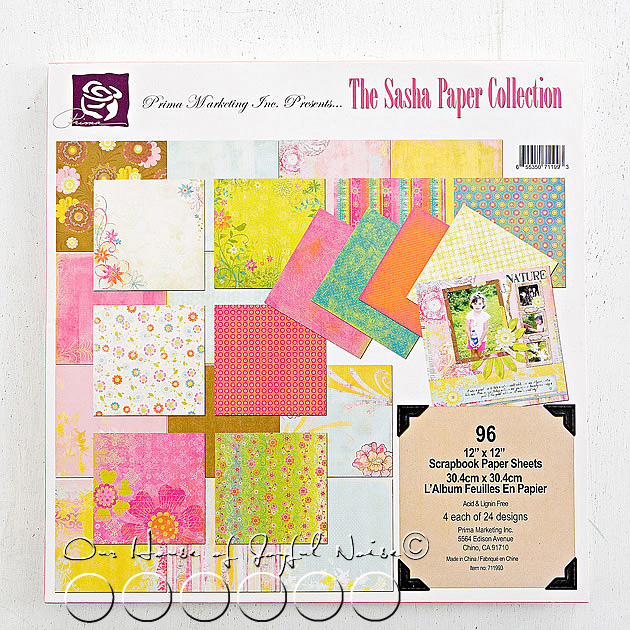
See, I happened to be in one of my favorite crafts stores, Michael’s Arts & Crafts, and saw this pad of 12×12 scrapbooking paper, that was nothing short of stunning to me.

I had to have it.

The hesitation was, that I don’t much scrapbook these days.  I will again, one day, begin scrapping like mad very regularly, and catch up on the many years I am behind on.  But in the moment, it seemed foolish to buy the pad of paper to save, for years.   So I bought it with the promise to me, that I would find something to do with the beautiful papers, right away.

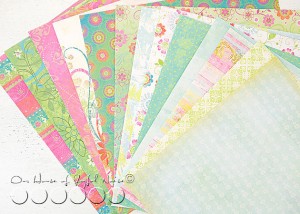
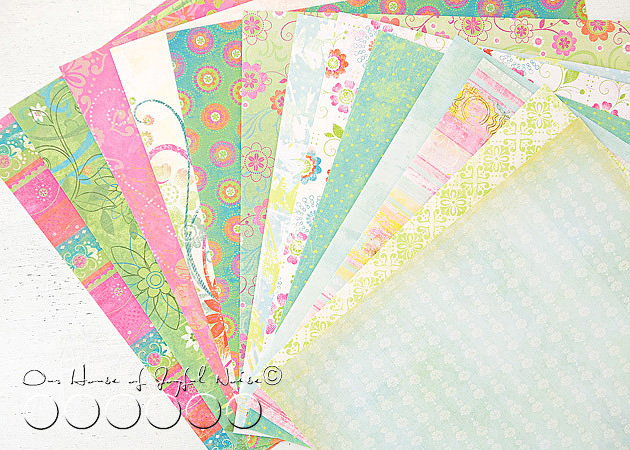
eyeletted-paper-pennants-room-decor-tutorial Are they not ever so lovely?  Please take a real moment, to look at that photo. Because on this particular day, it took a little more patience than I had, to arrange them in that perfect fan, you see.


eyeletted-paper-pennants-room-decor-tutorial-1 It’s The Sasha Paper Collection.

What I decided to do with some of the paper, was make paper pennants, with metal eyelets.  My original and only intention, was just to string them in my daughter(‘)s (plural & possessive, lol) rooms, like bunting. No big project, by any means, in the end. But the project will be expanded, as you’ll soon learn.

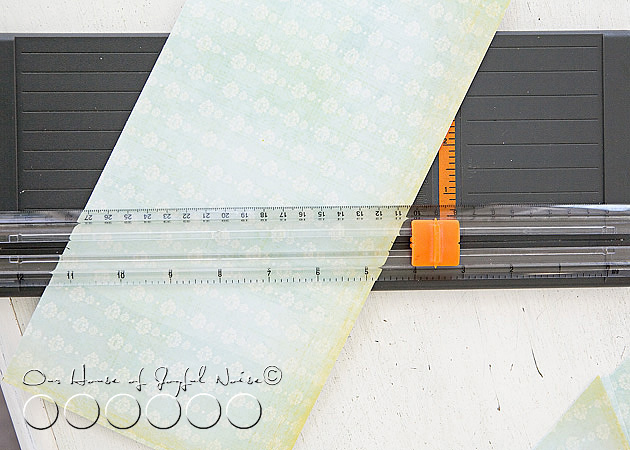
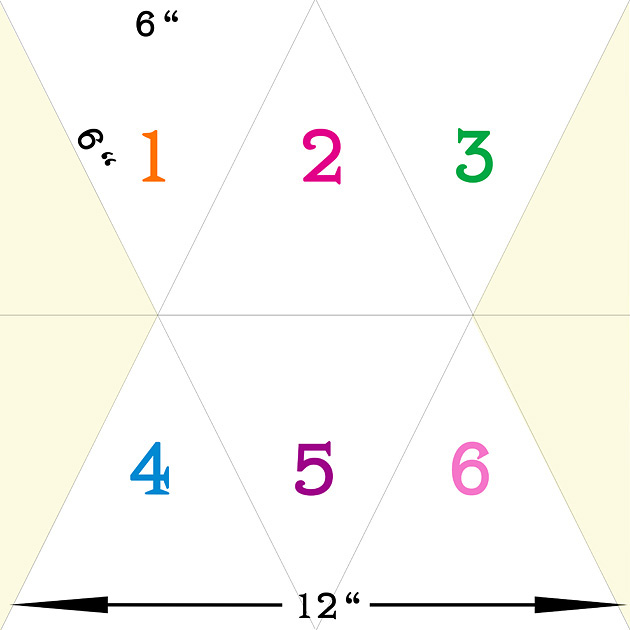
Now, I did get the pad of designer paper on sale. But still, I as always, I wanted to get the most ‘bang for my buck’.  So this is how I utilized the space of my paper:

eyeletted-paper-pennants-room-decor-tutorial-13

Remember asking yourself back in school, when in your life, you would ever need to use that math?  There it is, People. I figured it out rather quickly, and rather felt genius-like.  Of course, I’m practicing a lot with my 8 years olds triplets, these days.  ; )

I have good craft plans for the pale yellow scrap pieces, by the way.  So all you tree-huggers can be at ease.
(Nothing wrong with a tree-hugger. I’m just sayin’.)


eyeletted-paper-pennants-room-decor-tutorial-2 Oh how I *love* my Fiskar Trimmer, in times like these!!  Zip, zip!!

eyeletted-paper-pennants-room-decor-tutorial-3

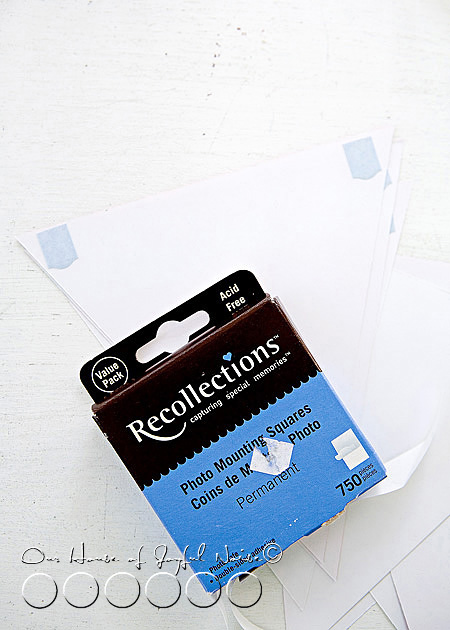
Now because I was going to be putting eyelets through these paper pennants, I thought it wise to perhaps, re-enforce them, to prevent them ripping when pulled for any reason. So I just used some photo mounting stickers, and didn’t remove the the backing.

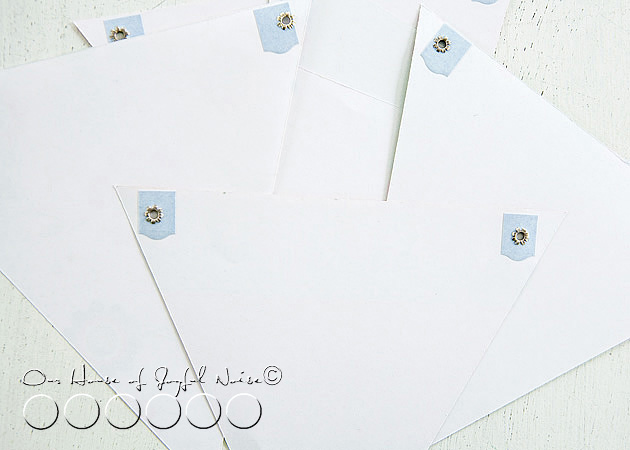
THEN, I added all of the metal eyelets. Which, you may or may not know, can be all kinds of fun!

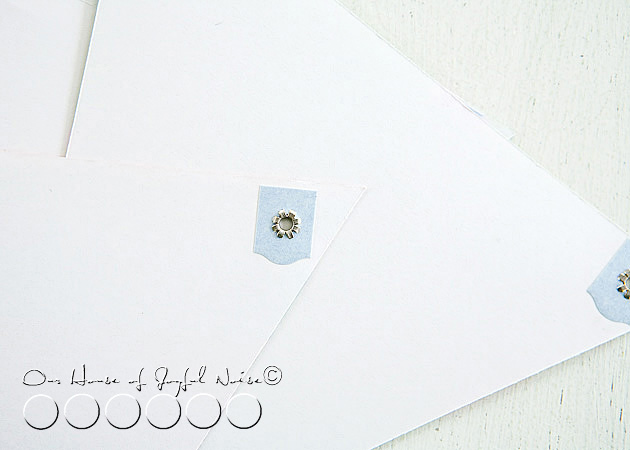
Do you all know what metal eyelets are?  This is what they look like….see the corners of the pennants:

eyeletted-paper-pennants-room-decor-tutorial-4

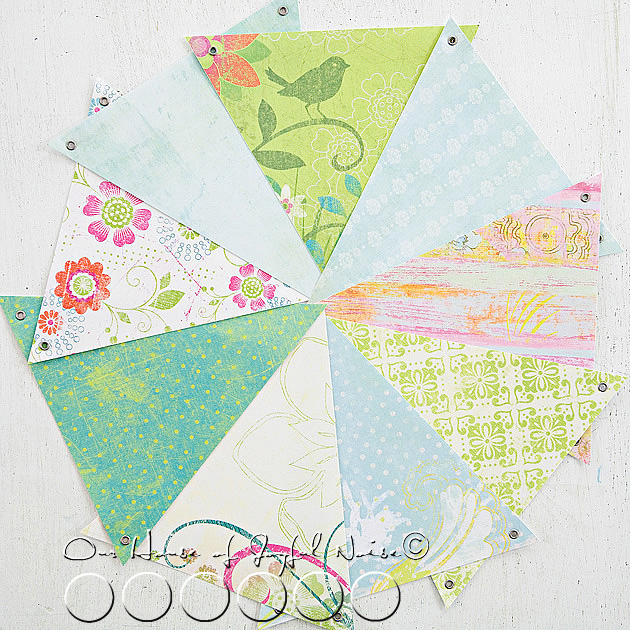
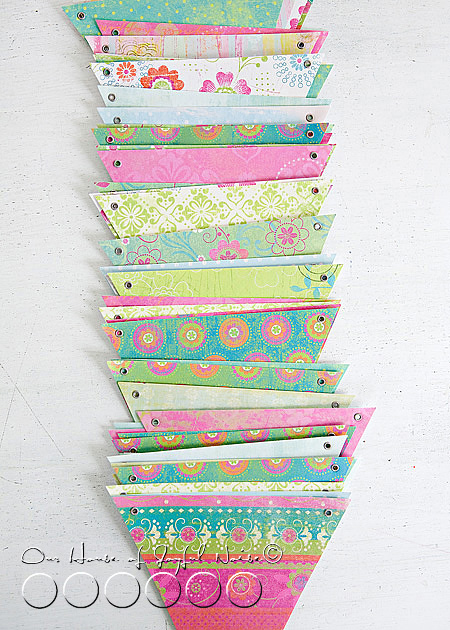
Perfect to attach or strong ribbon.  This ferris wheel of patterns, are the ones my oldest daughter chose, for her room, which is a color I like to call ‘Spring Rain’.  (Because I forget the real name of the paint. lol).

eyeletted-paper-pennants-room-decor-tutorial-5

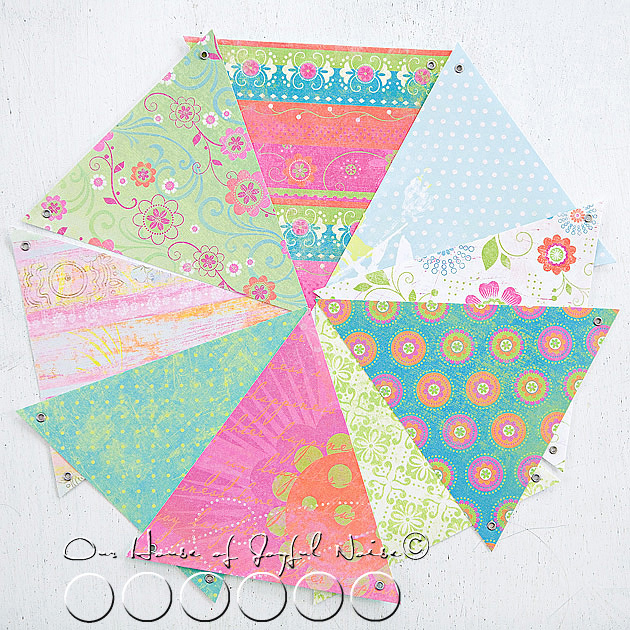
This wheel of designs my youngest daughter (the middle & only girl triplet) chose for her room, which is a soft pretty pink.


eyeletted-paper-pennants-room-decor-tutorial-6
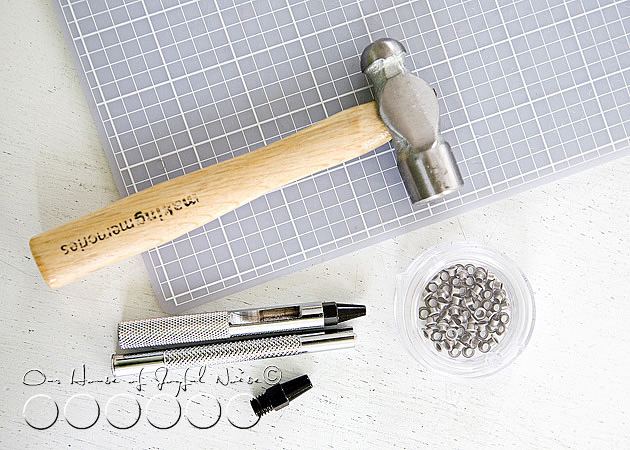
Here are the tools needed for doing metal eyelets, in case you do not know anything about this technique. (I don’t know why I feel like there will be people who have never heard of this?  So perhaps I am over-explaining to a very crafty-wise crowd….)

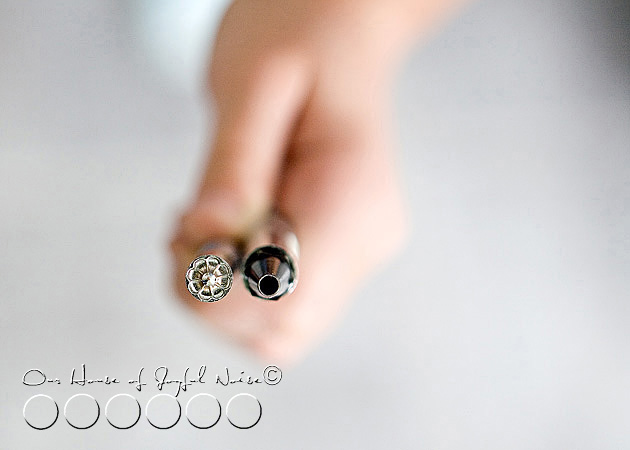
eyeletted-paper-pennants-room-decor-tutorial-7 But just in case, I’m going to give you a little more info here.  Above, are the 2 main tools needed: the hole tapper, and the eyelet smasher.  A hammer is involved. <Eyebrows bouncing up and down.> Sounds like fun, huh?

I think it is.  : )


eyeletted-paper-pennants-room-decor-tutorial-8 This is what the eyelets look like, post-smashing.


eyeletted-paper-pennants-room-decor-tutorial-9 I was thinking I might do a little eyelet technique tutorial, step by step with photos, if there is anyone who would like to learn?  Eyelets can be used for a wide variety of crafts, including fabric!  It offers an awesome element to scrap booking and card making as well. Your imagination is the only limit. Let me know in the comments, if a tutorial would tickle your fancy.

I’ll do it for even 1 person.  I’m full of love like that.

I’ll even dedicate the tutorial to you, like a song.  ; )

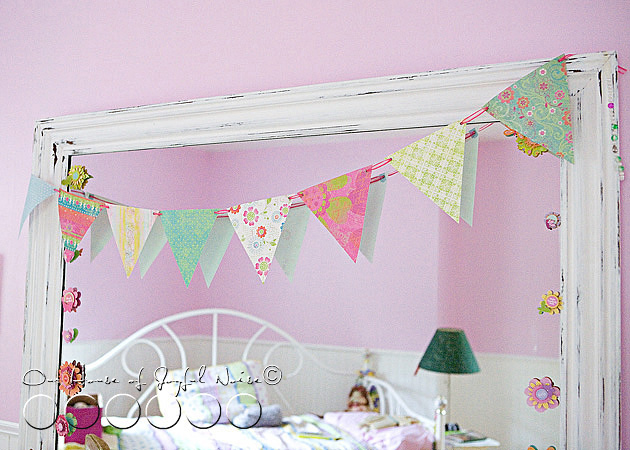
eyeletted-paper-pennants-room-decor-tutorial-10 I used the same sheer ribbon I always have on hand, to string this paper bunting, and I just hung it across {O}’s Mirror for now.


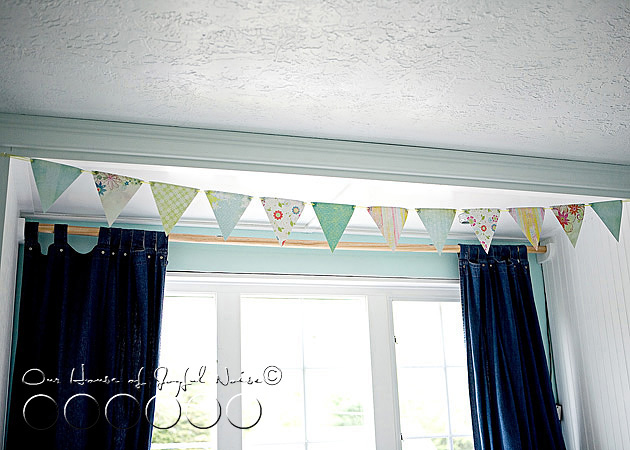
eyeletted-paper-pennants-room-decor-tutorial-11 {A} chose the pale yellow ribbon.  Pay NO mind to the horrid curtain and window with no trim (in these photos).  She has an amazing room, hand-crafted by hubby, and I can’t wait to show you all sometime soon.

  eyeleted-paper-pennants-room-decor-tutorial_012

So, in closing, I have to tell you….with getting 6 pennants, out of multiple designs chosen out of this pad of paper, and the way I got carried away with my happy-hammer, I ended up with WAY more eye-letted pennants than I ever needed, for my original plan!  I have a horrible guesstimation gauge!  Ask my hubby – I can never figure out the appropriate sized container to store dinner left-overs in!  Either way too big, or way too small….never just right.Ever.

Anyway….the question is:

“WHAT TO DO WITH ALL OF THESE EXTRA EYE-LETTED PENNANTS?”

I have a few brainstorms brewing, but I would LOVE *YOUR* ideas!  It’s quite possible there are many of you who will have amazing ideas, I would never have thought of.  So give them to me!  What would YOU do with them?

*(Love this post? How about subscribing to our blog in the sidebar, ‘Liking’ our Page on Facebook, or following me (Laura) on Twitter? Or all 3? 😀 )


Save

Save

Save

Filed Under: Crafts & Creations, DIY (Do-It-Yourself) Project, Tutorial Tagged With: crafts, eyeletted-paper-pennants, eyeletting-tutorial, paper-pennants-tutorial, pennants, pennants-craft, pretty-pennants, room-decor-pennants

Tissued Decorative Storage Tins | Craft

June 7, 2011 By Laura 7 Comments

tissued-storage-tins-craft-21

Sometimes, us creative people, have ideas that come out better in our head, than they do in real life!  Agree? But this project of tissued decorative storage tins was the opposite.  On the one hand, it may have been just a tad more difficult than I had imagined.  Only because I should have remembered how tissue paper and I, can go round and round and round.  We just don’t seem to get along. I normally do not have the patience for the stuff, and end up making the tissue a wrinkled mess. So much so, that I refer to my husband, to put the tissue in gift bags if I can, and he also is so kind, as to do all of my packaging for my portrait photography orders for my clients.   But on the other hand, these tissued tins actually came out way nicer than I expected!  I’d have to say the credit for that probably goes to Modge Podge. Love that stuff!

This idea is one I came up with as homemade gifts for our nieces & nephews, for Christmas 2010, as well as for my God-Daughter {Ju}. (You all know her by now, right?)   I thought they would be cool for them to keep little treasures & trinkets in, in their rooms, or even for my oldest nephew/God-Son to keep change or what-not in in his Jeep.

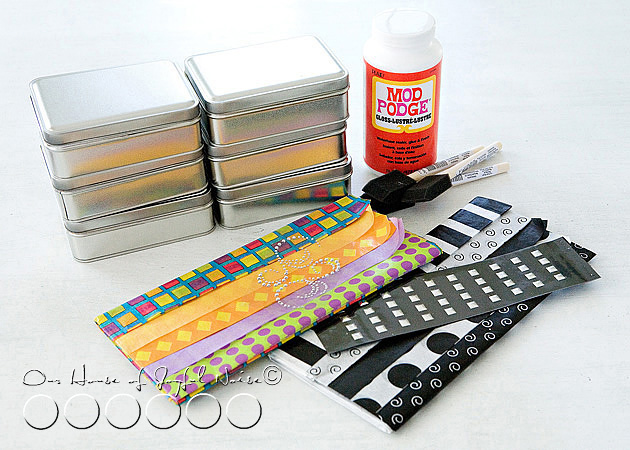
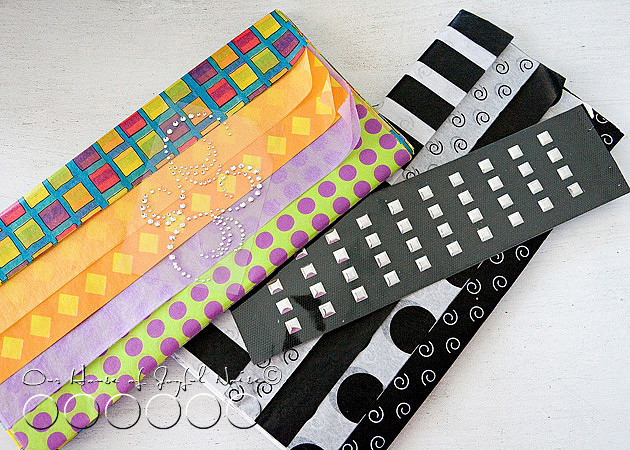
tissued-storage-tins-craft Here’s all you need!

As well as an x-acto knife or razor blade of some sort (not shown), and possibly a little patience, if you are like I am with tissue paper.  If you don’t need the patience…..well I’m happy for you!  : )

tissued-storage-tins-craft-1 I was so thrilled to find such bold & funky designer tissue paper, at The Dollar Store!…. that I thought was just perfect for the age range of the kids, from elementary school to teens, and for both the boys and the girls as well.  The silver sticky elements I got in the scrapbooking section of Michael’s Arts & Crafts.


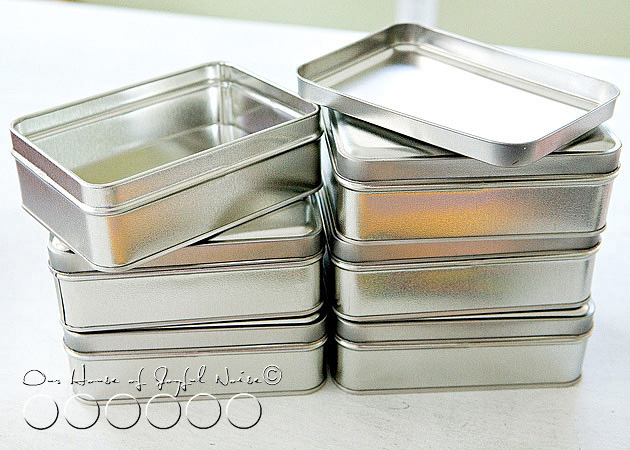
tissued-storage-tins-craft-2 I found the tins shown, at Michael’s Arts & Crafts.

They had a variety of shapes and sizes to choose from.

tissued-storage-tins-craft-3

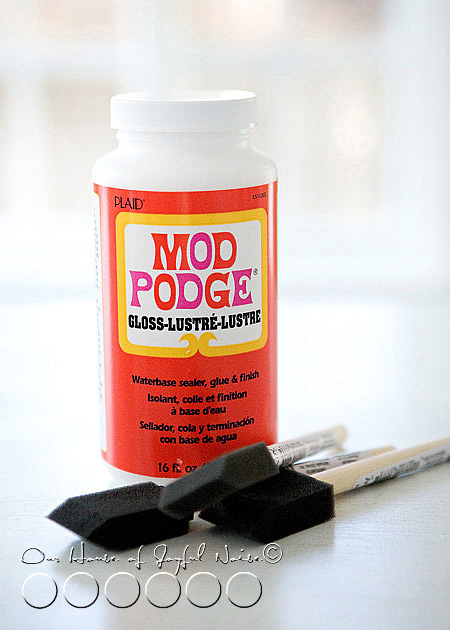
Modge Podge and foam brushes came from the same place.

So this is how this is done:

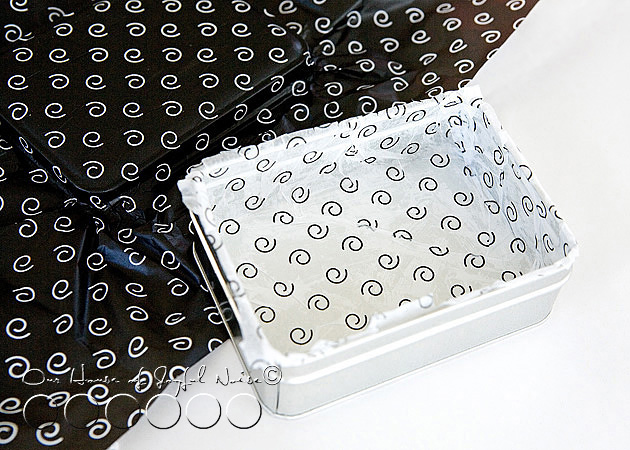
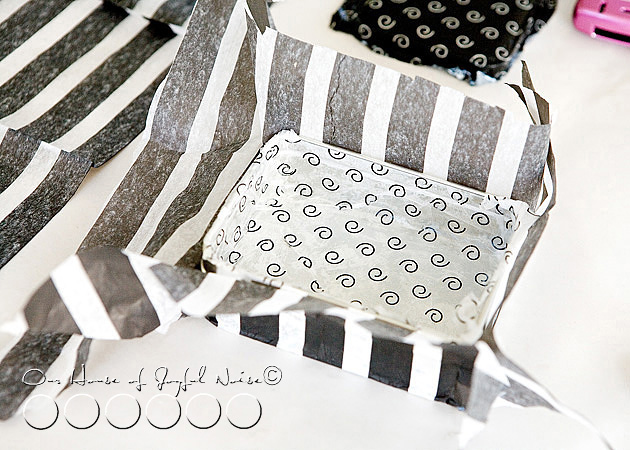
With your foam brush, you begin by Modge Podging the inside of one tin, and then layer it with the tissue design you would like on the inside.


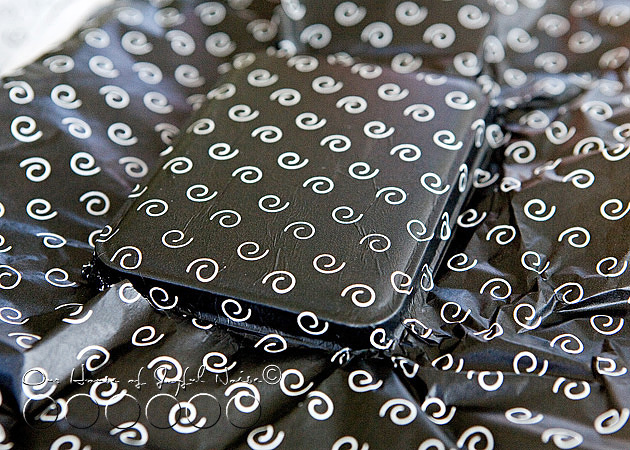
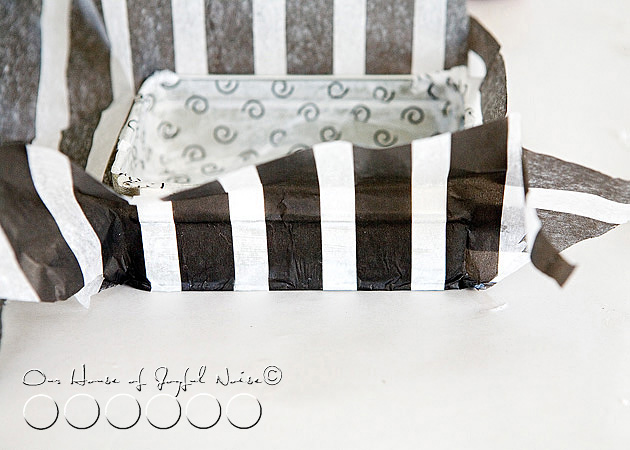
tissued-storage-tins-craft-4 You really only want to Modge Podge up to the lip of the inside of the tin before laying on the tissue, but let the tissue overlap from there, for now.  Just carefully rip off or cut the excess with scissors.  Then leave to dry.  We’ll get to how to finish it off in a minute or 2.

Now I am telling you right now, there is no way for the tissue to come out perfectly smooth. Most especially on the inside, where you virtually have to stuff the tissue in there.  But do be careful not to tear the tissue or poke a hole in it. However, IF you do by accident, (as I did more than once (yes, the patience with tissue issue…..) it’s not that hard to cover it up, or manipulate the tissue to make the hole not show.  Honestly, it’s just the insides of the tins that are the hardest part of the whole project.

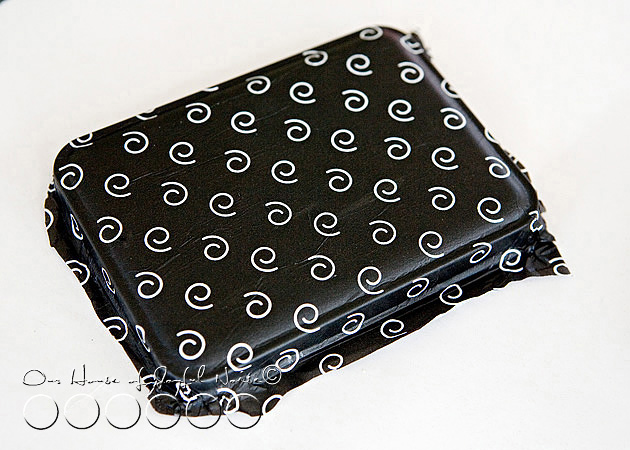
tissued-storage-tins-craft-5 Do the outside of the tin cover, in much the same way.  Again, only Modge Podge to the lip of the lid, then apply the tissue.  Now getting a little (Modge Podge) glue where it shouldn’t be, and the tissue sticking to it, is no big deal. It can be scraped off easily enough once dry.


tissued-storage-tins-craft-6 Just rough trim it with your x-acto blade, and then leave to dry.  If you are trimming first before it really sits to dry, just make sure you don’t drag-rip the tissue.  Your blade will get Modge Podge on it, so you’ll want to try to keep it clean too.

tissued-storage-tins-craft-7 Now you can do the outside of the tin container the same way:  Apply the Modge Podge, and then apply the tissue, smoothing it all as best you can.  Agai…wrinkled are going to happen here and there.


tissued-storage-tins-craft-8 It was really fun to have these co-ordinating designs to work with.  (Pay no mind to my BlackBerry over there.  Always nearby, and forever bLiNkInG!)

Now, in terms of cleaning them up, I found an x-acto knife to be a handy little tool!  I trimmed off the excess tissue, by running the sharp point of the blade, right in the groove of the lips.  If you aren’t sure exactly where or how I mean, just inspect the earlier photo above of the bare tins, and the ones coming up, and think about how the tin is put together.  You can’t have tissue anywhere, where the tin cover and container need to fit together.  Just a little common sense I dug up there. ; )

OK, so after each tissued piece is dry, and you have trimmed the excess tissue off everywhere, you then need to put a coat of Modge Podge over all of the tissue layers, inside and out!  I did second coats of Modge Podge too, letting them dry before coats, and I recommend doing that.  That is what gives the tins a finished look, once they are dried, and keeps the tissue surfaces protected.  Granted, now that the tissue is trimmed and there is tin lips exposed, you want to try and apply the Modge Podge a little more carefully, as to not get glue all over the naked tin parts .  But again, if any gets on the bare tin edges, once it is dry, it scrapes right off like any glue would. Modge Podging the inside of the tissued tins are probably the hardest to do with your foam brushes, only because you’ll see it puddles a little where folds and creases of the tissue are.  It looks a mess at first. But that is ok…..just spread it out best you can, because the Modge Podge really dries hard and clear.  You are using the foam brush to sort of stick down and smooth out any wrinkled tissue as well, as you work.  You’ll be amazed how good it starts to look as the Modge Podge dries clear.

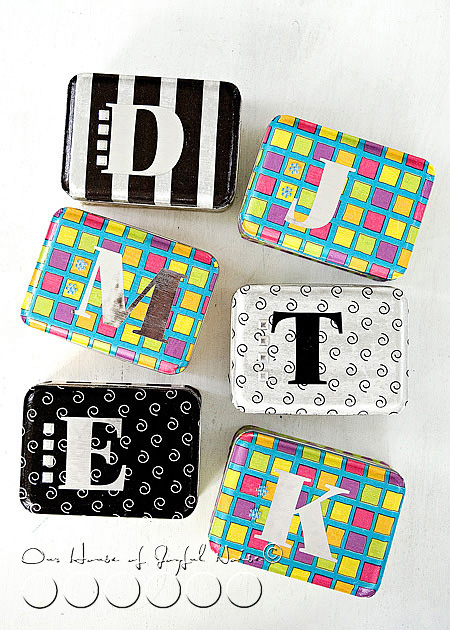
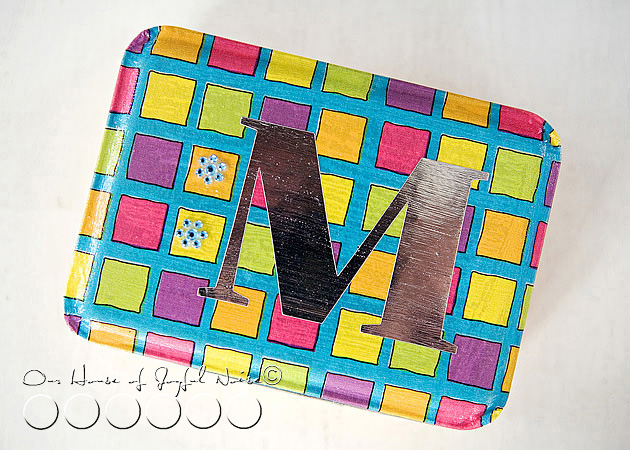
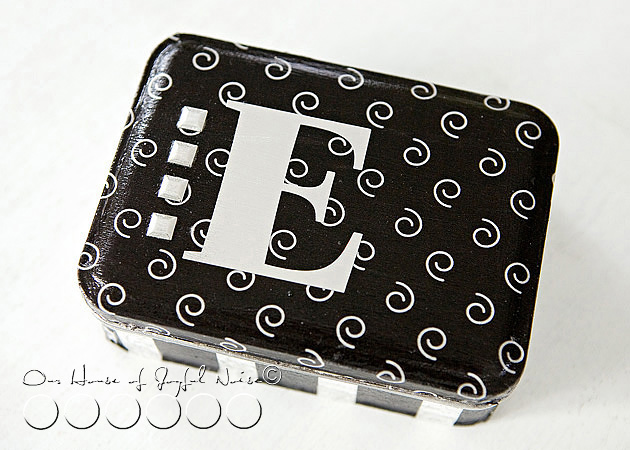
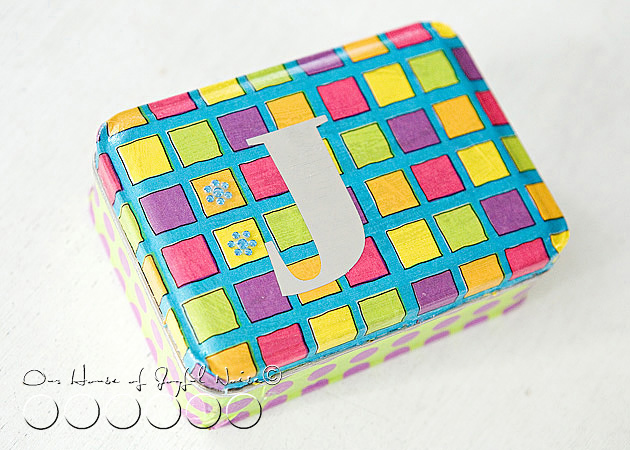
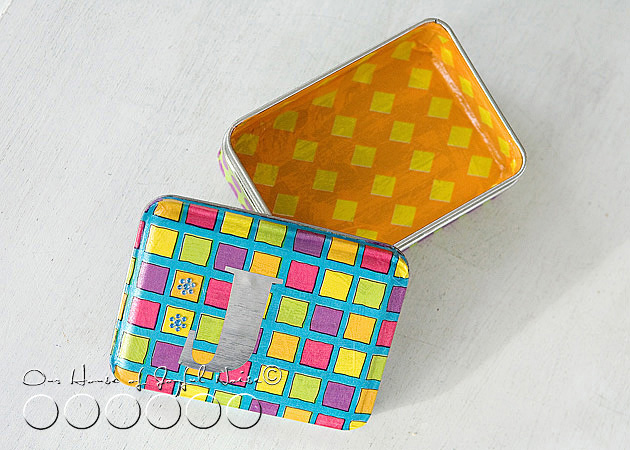
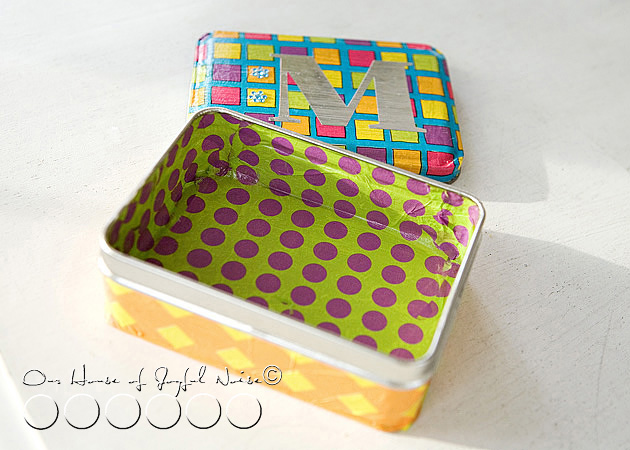
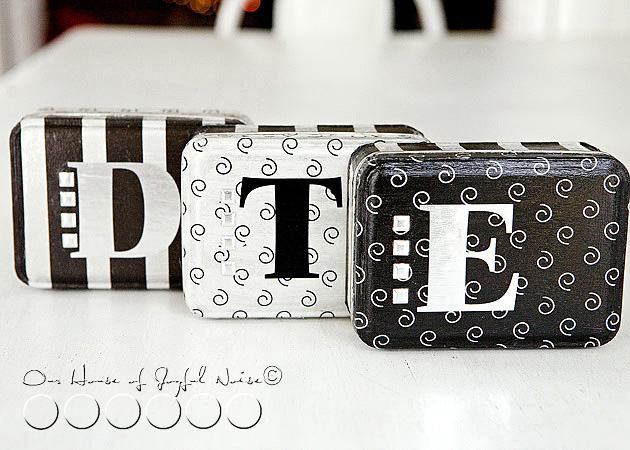
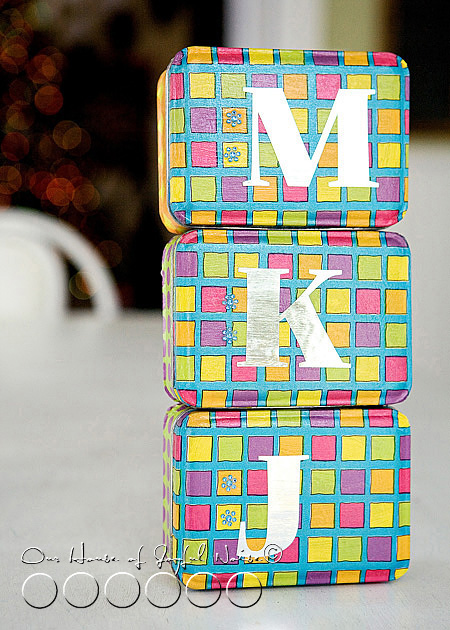
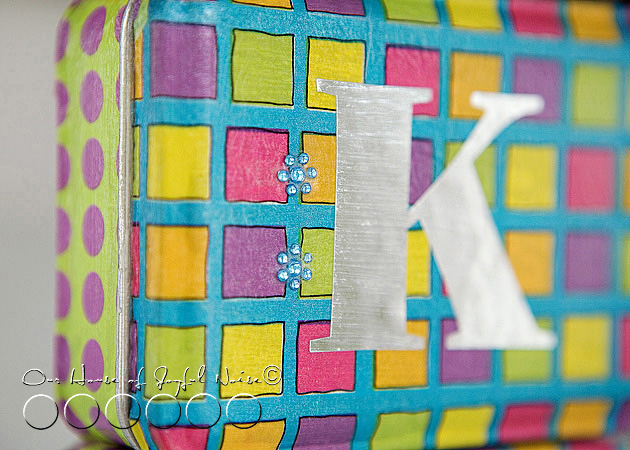
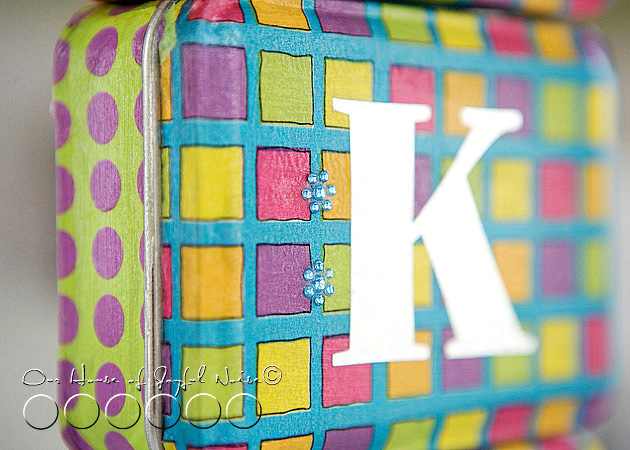
I wanted to personalize them, so I had hubby cut their initials out of sliver mylar vinyl.  Then used the decorative sticky elements, to add a little extra bling.  Finally, I went right over the mylar and the elements on the covers, with another coat of Modge Podge.  Honestly, these came out slick & with a bit of sheen, seeing as though I used the glossy Modge Podge.

I LOVE how they came out, and I am about to show you a whole bunch more of photos, so you really can get the idea. (And, o.k., so I can show them off a little more.)

tissued-storage-tins-craft-9

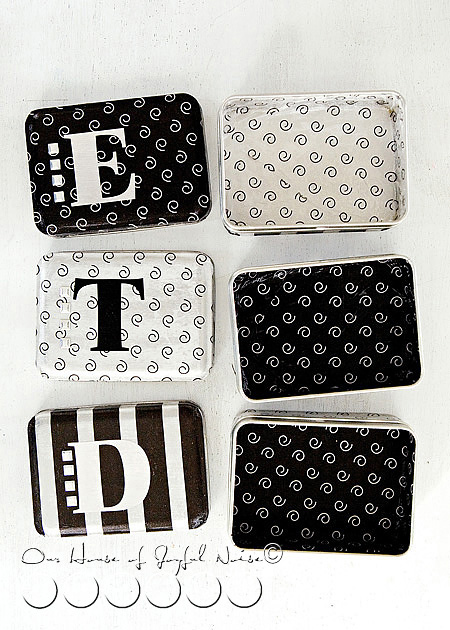
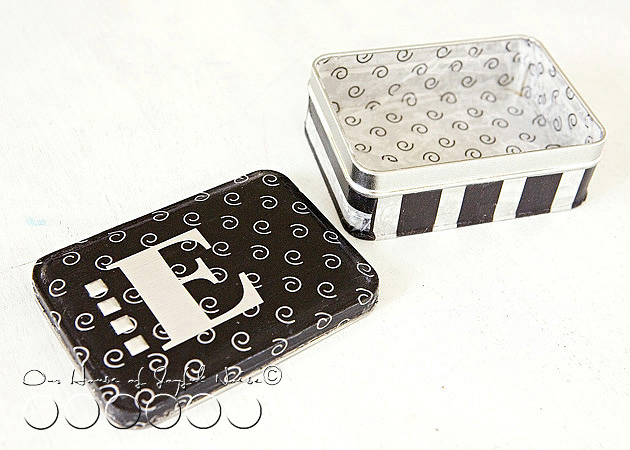
Bold Black & white for the boys……bright happy colors for the girls.


tissued-storage-tins-craft-10

tissued-storage-tins-craft-11

tissued-storage-tins-craft-12

tissued-storage-tins-craft-13

tissued-storage-tins-craft-14

tissued-storage-tins-craft-15

tissued-storage-tins-craft-16

tissued-storage-tins-craft-17

tissued-storage-tins-craft-18

tissued-storage-tins-craft-19

tissued-storage-tins-craft-20

Like? Love? Let me know what you think!

******

Save

Filed Under: Crafts & Creations, DIY (Do-It-Yourself) Project, Homemade/Handmade Gift Ideas, Tutorial Tagged With: crafts, gift tins, handmade gifts, homemade-gifts, Modge-Podge-crafts, modge-podge-projects, storage-tins, tissue paper crafts

  • « Previous Page
  • 1
  • 2
  • 3
  • 4
  • 5
  • 6
  • Next Page »

We are wicked happy to have you here! We hope you find much inspiration, help, humor and enjoyment here.


Archives


POPULAR POSTS

* * * * * *
SUBSCRIBE to House of Joyful Noise blog! Every new post, delivered right to your email box!


Privacy Policy

Amazon Affiliates

Never at any additional cost to you, we may earn a small commission for our endorsement, recommendation, testimonial, and/or link to any products from our website. Your purchase through our links helps support our family, while sharing with you the products we authentically use and recommend, for various ideas, and letting you know where you can purchase them. Thank you for your support!

[footer_backtotop]

Copyright © 2026 HouseOfJoyfulNoise.com · Genesis Framework by StudioPress