• HOME
  • {A}’s Chipmunk Training Archives

 Homepage

  • The Homestead
    • Home Projects
    • Home Improvement
    • Home Decor
      • Seasonal Home decor
        • FALL Home Decor
        • WINTER Home Decor
        • SPRING Crafts and Creations
        • SUMMER Crafts and Creations
    • Our Chickens
    • Gardening
    • Organization
    • Re-Purposing
    • Furniture Refinishing
    • Budget
  • Crafts & Creations
    • Seasonal Home decor
      • FALL Crafts and Creations
      • WINTER Crafts and Creations
      • SPRING Crafts and Creations
      • SUMMER Crafts and Creations
    • DIY (Do-It-Yourself) Project
    • Kids Arts and Crafts
    • Homemade/Handmade Gift Ideas
    • Holiday Crafts
    • Fan Pulls
    • Free Printable/Downloadable
    • Sewing Projects
    • Giveaways
    • Business Features
  • Recipes/FoodFun
    • Breakfast
    • Lunch
    • Main Dish
    • Sandwiches
    • Appetizers
    • Slow Cooker
    • On The Grill
    • Side Dishes
      • Soups
      • Salads
    • Baking
      • Breads, Rolls and Muffins
    • Snacks
    • Treats
    • Desserts
    • Drinks
  • Homeschooling
    • Elementary Homeschooling
      • Elementary Homeschooling READING
      • Elementary Homeschooling MATH
      • Elementary Homeschooling LANGUAGE ARTS
      • Elementary Homeschooling SCIENCE
      • Elementary Homeschooling HOME ECONOMICS
      • Kids Arts and Crafts
    • Middle School Homeschooling
      • Middle School Homeschooling SCIENCE
      • Middle School Homeschooling HOME ECONOMICS
    • Language Arts
    • Math
    • History / Social Studies
    • Geography
    • Foreign Language
    • Field Trips
    • Games
    • Nature Study
  • The Big Picture
    • Life In General
    • Celebrations
    • Faith
      • Into the Light; The Series
    • Giveaways
    • Reviews & Sponsors
  • Photography & Lettering
    • Photography
    • truck lettering
    • vehicle graphics
    • Newborns
    • Kids
    • Engagement
    • High School Senior Pictures
    • High School Senior Pictures Sneak Peeks

How to Make Homemade Embossed Glycerin Soap Bars

January 30, 2009 By Laura 8 Comments

homemade-glycerine-soap-gifts_1
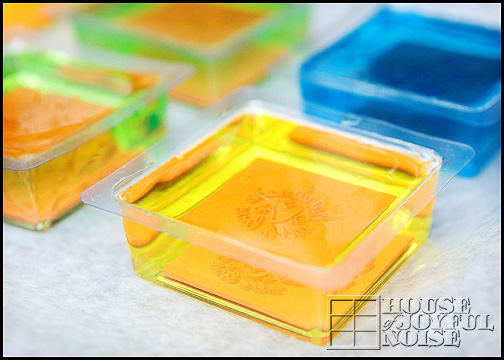
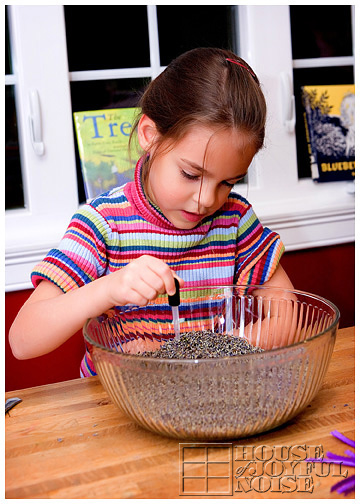
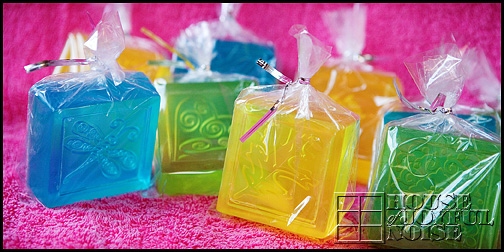
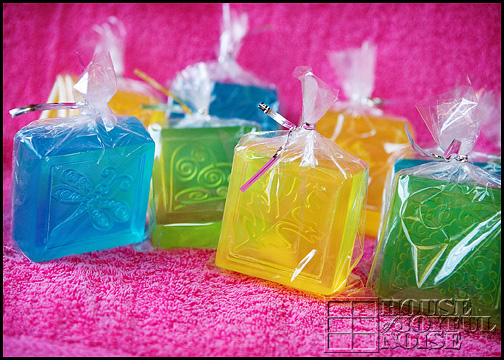
This was one of my personal favorite crafts we made;  Embossed Homemade Glycerin Soap Bars! It was so much fun choosing designs, colors and scents.  Yes, we know most people use soap pump bottles now.  Bars are sometimes considered too messy….but my kids make a pretty good mess with the bottles too, anyway! The thing drips all over the place.  Anyhoo…..if one MUST use the pump bottles, these are pretty enough to just sit in a bathroom and look nice!

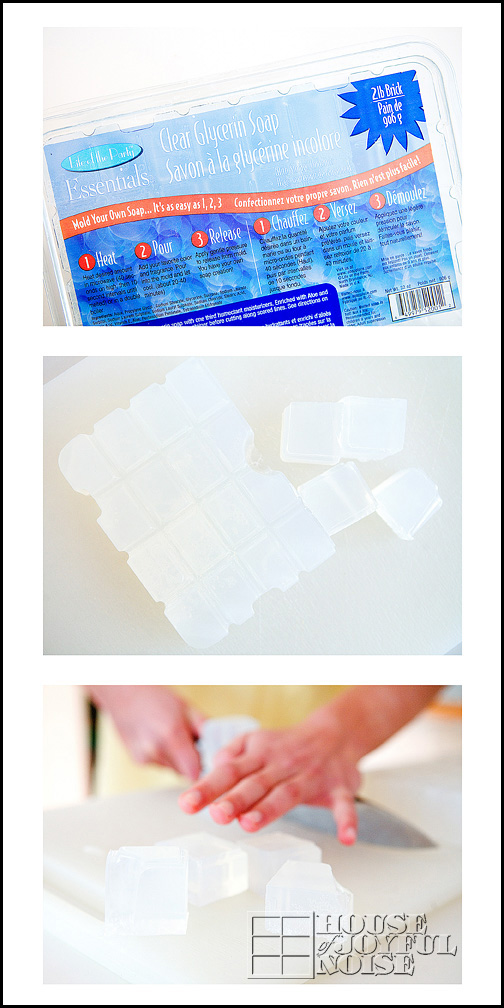
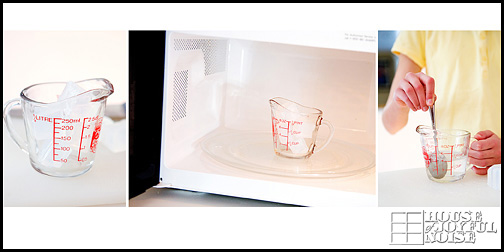
So here are the EASY steps to making them.  I tried to combine the photos of steps, in a storyboard format.  So the steps are left to right, or top to bottom. I’ll do my best to explain the steps as well.

You will need:

  • 2lb glycerin soap block
  • soap molds
  • rubber soap embossers
  • soap scent oil
  • soap coloring
  • clear bags
  • bag ties

From Home:

  • a microwave
  • a glass measure cup

Many of these soap supplies can be found all together in the soap supply aisle at your craft store.  We always go to Michael’s Arts and Crafts.

Steps described below photos.
how-to-make-homemade-glycerine-soap_02

1) This is what a the package of the soap glycerin soap block might look like.

2)  It is scored so you can cut chucks easily, with a large knife.

3) You want to cut the chunky cubes into groups of 4.

Next….
how-to-make-homemade-glycerine-soap_03

4) Put 4 cubes of soap into a glass microwavable measuring cup.

5) Microwave for 40 seconds, take out carefully, stir, and see if it is all melted. If it needs to go in again, do so in 10 second intervals, until it’s all completely melted.

6) Stir again.

We used scents and coloring put out by Party Lite.  The oils are called Essential Oils.   They all come in little bottles, in hanging packaging. These are found with the soap supplies at the craft store as well.

So then……
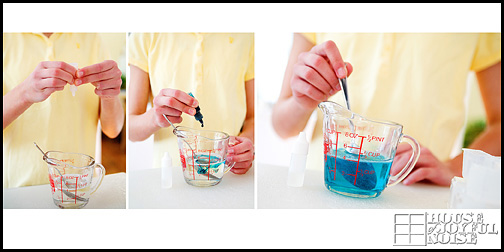
how-to-make-homemade-glycerine-soap_04

7) Add 6 drops of your preferred scent. We used Green Apple.

8)  Add 3-5 drops of a chosen color. How much you add depends on how deep you want the coloring to be.

9) Stir again.

~~~

Embossing Your Soap Bars

They sell these rubber embossed designs, to lay into the bottom of your soap molds! Some soap molds come with a design embossed into the plastic mold as well.

Soap molds come in all kinds of shapes as well;  oval, octagon, rectangle, square, etc.  We went with the squares, as they fit these rubber embossers perfectly.
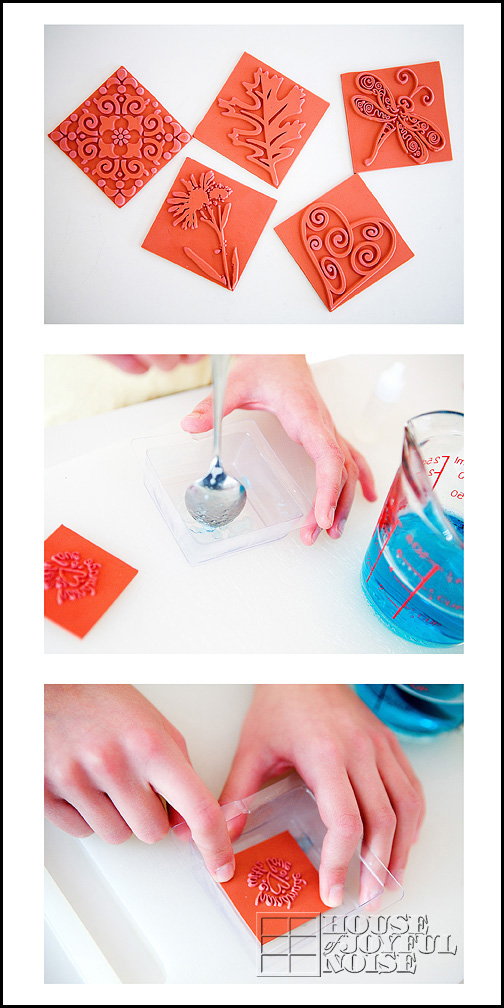
how-to-make-homemade-glycerine-soap_06

10) Rubber Embossers

11) With a spoon, put some dabs of the hot melted soap in the bottom of the mold.  This helps keep the rubber embosser in place.

12)  Place the embosser on the soap dabs, and gently press down well all over.

Next….
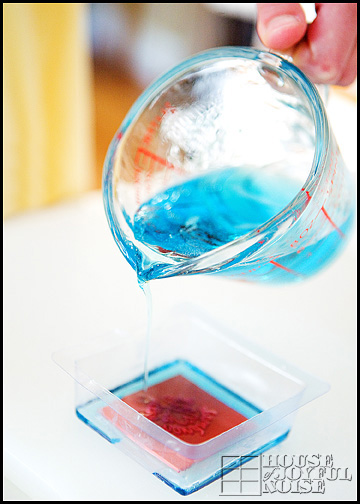
how-to-make-homemade-glycerine-soap_07

13) Start pouring the scented/colored/melted soap into the mold fairly slowly, but consistently.
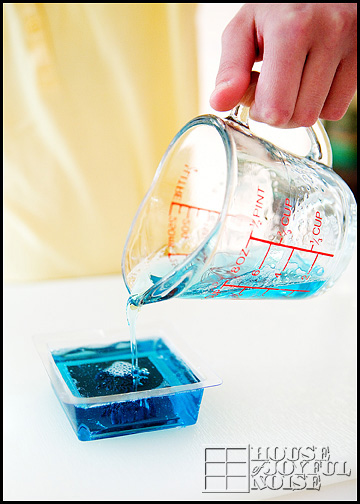
how-to-make-homemade-glycerine-soap_08

14) Fill nearly to the top.  We just leave any bubbles. They mostly dissipate on their own.
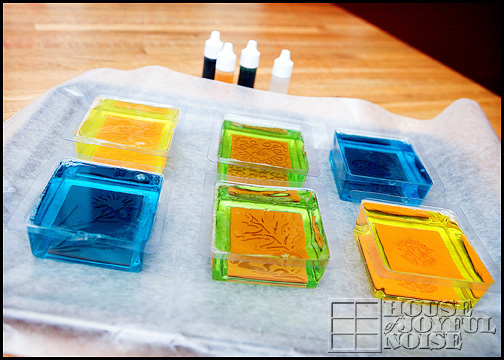
how-to-make-homemade-glycerine-soap_09

As we filled each mold, we placed them on a cookie sheet lined with wax paper.

They need to set for….awhile?  lol.  We always just let them set for a day or so, or overnight, to be sure they were turned solid.  But we’re not sure how long it really takes.
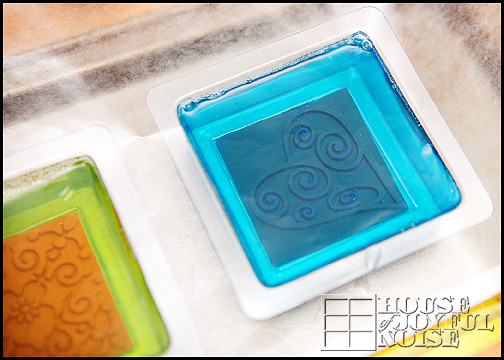
how-to-make-homemade-glycerine-soap_10

how-to-make-homemade-glycerine-soap_11

As they do start to set, you will see the soap start to get less crystal clear.

~~~

The next day they’ll be set for sure.

All you need to do is work them out of the mold.  They don’t pop or slip right out, but it’s not that difficult with a little effort.  The goal is just to try and not mark up your beautiful soaps.

Once they are popped out, you just peel off the rubber embosser, and admire your COOL design on the soap! Try not to get finger prints all over them too. Especially the tops.
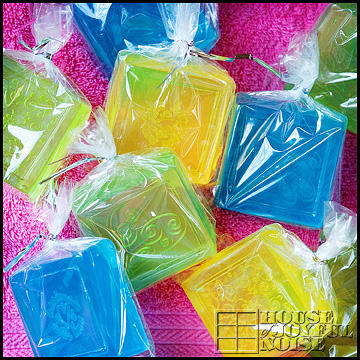
how-to-make-homemade-glycerine-soap_12

We just packaged the soaps with the proper size of clear bags, found in the candy aisle of the crafts store, and the fancy silver twist ties came with the bags.
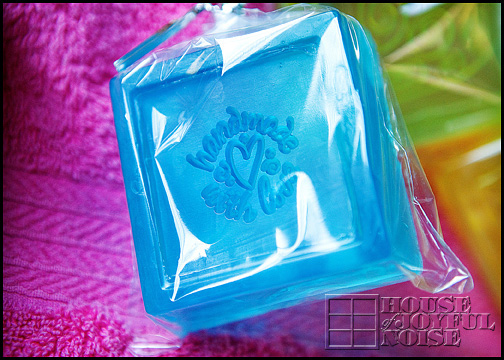
how-to-make-homemade-glycerine-soap_13

“Made With Love”.  My favorite design.  Although the dragon fly and the ornate tile ones were close seconds.
how-to-make-homemade-glycerine-soap_

That’s it for this craft!!  Easy, huh?? And so PRETTY!  We think they made lovely gifts.

Trust me, they come out so nice, and smell so good!!  I love the clarity of glycerin soap, but there are other kinds of soaps you can make too. I am sure the directions are a little different though.  Naturally, with this soap making process we showed you here, there are certain steps you will not want your children to do alone;  such as any of the steps that involve the hot melted soap, or chopping with the big knife! But they can count out 4 soap cubes and load the measuring cup up, choose and add drops of scent and coloring, pop out the soaps and bag and tie them, etc.

We do hope you try making some yourselves sometime!!

STAY CLEAN NOW!  : )

Save

Save

Save

Save

Filed Under: Crafts & Creations, Homemade/Handmade Gift Ideas, Tutorial Tagged With: arts and crafts, crafts, easy-homemade-gift-ideas, embossing-glycerine-soap-bars, homeade-gift-ideas, homemade-glycerine-soap-bars, how-to-make-glycerine-soap-bars, soap-crafts

Homemade Bookmarks – Craft Tutorial

January 26, 2009 By Laura 5 Comments

crafts-copy

Hi People!

This is the first of a handful of installments, that finally show you what we were making as we crafted during the pre-Christmas season.  Now that all of the gifts have been given, we can share, and not be concerned with ruining any surprises.  But we hope that some of you may gather an idea or 2, by us posting these projects, to put on your idea list for crafting and/or gift giving of your own, next Christmas or anytime.

We tried to think of gifts we could craft, that most anyone could use. Universal, sort of gifts.  We think we did pretty well in the end.  These gifts are simple;   Simple to make (as the kids did a lot of it, with instruction and/or assistance), and simple in concept.  We did not invent any of these things, but simply put ‘our touch’ to them.  Should any of these projects appeal to you, we’re sure they’ll come out as your own as well.  So many of you are SO creative, that you will likely make them even better, or put a new twist of your own on them, that makes them unique for you.   Whatever you do, have fun!!  Remember, even if everything doesn’t come out perfect, the fact is that they were made with love!  If your recipients can’t appreciate that, then….well,… I won’t say.  But they should.  lol.  Otherwise, you might consider  ‘indian-giving’.  Ha haha!

So let’s get to it! :

You may or may not recall, that one of the headers to a crafting post was this:

homeamde- bookmarks_00

Showing any more than that would have given the project away.  But we were making…………

BOOKMARKS!


homemade-bookmarks_2

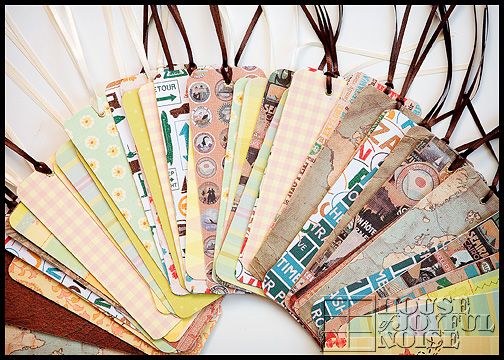
We know we love books, and we love to read.  Many people are the same.  Even if they are not big cover-to-cover kind of readers,  one may find a bookmark handy to keep their place in a recipe book, a how-to book, a magazine, a journal, their Bible…and who knows what.  So we hoped these would come in handy, in some way, for our recipients.  We did know that many do love to read, in our case.

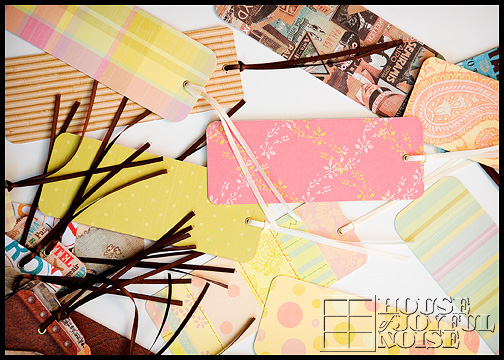
I did not think to take step-by-step photos, since photos would have given it away.  But we think you’ll get the gist by looking at the photos of the finished bookmarks, and reading the following information.

Here’s how we made them:

Directions

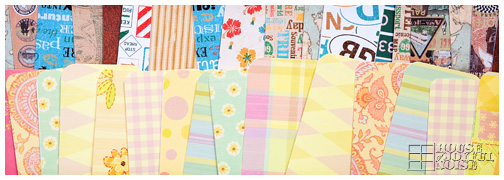
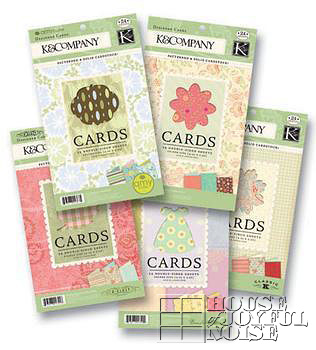
First, we needed some card stock.  We found these handy pads of beautiful designed card stock in, in the scrapbooking aisle of Michael’s Arts & Crafts.  They are actually meant for making greeting cards, but they worked out to be just what we were looking for, and a good size too.  They looked like this:

homemade bookmarks

One thing we REALLY loved about these card stock pads, was that each ‘card’ was 2-sided!!  It had a different, but coordinating, design on the backside! So that means we had 2-sided bookmarks!!  Very cool. We were excited about that.

So we cut these cards into bookmark size, and marked the centers of exactly where we wanted a hole for the ribbon.

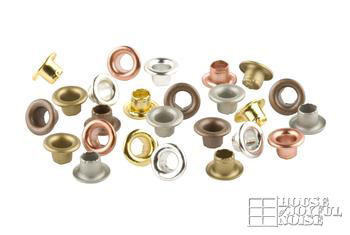
Some supplies we already had on hand that we used are:  thin satin ribbon, a Fiskar cutter (used by many scrapbookers, that make cutting straight as easy as gliding the blade).   Also, eyelets that look like this:

eyelets-brads

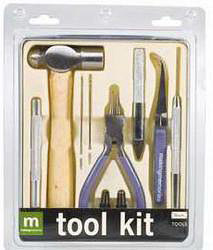
And an eyelet tool setter kit, which I already had on hand too, from scrapbooking with eyelets.  That looks like this:

eyelet-setter-tool-kit

It might look scary, but every piece is pretty self-explanatory as to what it does.  Included are 3 size whole punchers tips (which 2 you can see right over the l and k of tool kit, and the other is already screwed onto the handle piece, 3rd in from the right).  All you do is choose the correct size tip for the size eyelets you are using, stand it up on the card stock right where you want a hole, and tap with the hammer.  Next, put eyelet through the hole, hold it in while turning over the card, and get the ‘splaying’ tool. (I may have made that word up.  Not sure.  But it spreads the backside of the eyelet out to hold into the card.  So roll with it.)  So you put the ‘splayer’ into the eyelet back, and hammer!  This takes some real hammering, so be sure you are careful and use cardboard or something.  I used a self-healing cutting board.

Now take a piece of cut ribbon, doubled over, and  put the 2 ends together through the eyelet, and then through the loop of your ribbon.  To finish the bookmarks off, we used a corner rounder, which is also found in the scrapbooking section.

That’s it! 

No doubt, you’ll want to keep a few for yourselves too.  We did!  So Happy Reading!

All of the supplies used can be found at any Michael’s Arts and Crafts, or most any other good craft store.

If you have any questions, just let us know!!  I am always happy to clarify!

I am also used to needing to.   lol  : )

homemade bookmarks

Save

Save

Save

Save

Filed Under: Crafts & Creations, Homemade/Handmade Gift Ideas Tagged With: bookmarks, bookmarks-craft-tutorial, crafting, crafts, eyelet-setter-tool-kit, gift-ideas-for-readers, homemade-bookmarks, homemade-gift-ideas, how-to-make-bookmarks, paper-crafts

Cocoa and Crafting

December 6, 2008 By Laura 1 Comment

We’ve been doing more crafting than usual around here lately, as Christmas gifts.  I’m way behind in blogging about them, but in thinking about that I realized in a different light….they are Christmas gifts!!  Surprise gifts, of course. Granted, the recipients,,,our extended family….rarely visit our blog. If ever.  But, you know, they MIGHT.  And we really don’t want to ruin their Christmas surprises.  So…..I guess I just won’t post the finished products, until maybe after Christmas, and if anyone concerned visits and guesses what we made, oh well!!

So for one of our first projects a few crafting Sunday’s ago, we were discussing what and how we were going to do what we were going to do.  The plan was to hand sew them, until my husband said,

“Well, why don’t we just bring up the sewing machine and figure out how to use it?”

(me)  “WHAT?  What sewing machine?  We don’t have a sewing machine! ”

(him) “Yes we do.  It’s downstairs in the basement.”

(me)  “We DO?!  Where did we get it?”

(him) “It was your mother’s”

After a moment of stunned silence and a confused stare, I think I ended up on the floor, laughing hysterically.  Outright bafflement hysterics.  WHY you ask??  Because TRUST ME, my mother never sewed a day in her life! In fact, she had one of those trigger gun things that shot plastic things to put a button back on.  And anyone reading this, who knew my mother, is probably laughing at just imagining my mother sitting at a sewing machine.  I loved my mother, God rest her soul.  But she was NEVER the sewing type! She was just not the real domestic kind.  In fact, neither am I, by genetic-nature, that is – believe it or not. My early years as a wife, was on the comical side. I loved this man, but really….did I really have to do all those things they do? I wanted to want to. But…where WAS the WANT to??  Only for him. You know? Love is a crazy thing. I had to grow THAT bone, and I DID! In time.  Granted, it’s still growing.  But I have found deep and abiding joy in things I never knew I could embrace.  In fact, I feel myself really…going back in time, if you will.  My husband has really noticed how I have evolved over the years.  In fact,  he actually called me “my little pioneer woman’” the other day.  And I think I gushed, “Real-lly?” Truth be told, I was beaming with pride. Because I am admiring their ways more and more every year.  Thus…hand making some gifts, I suppose.

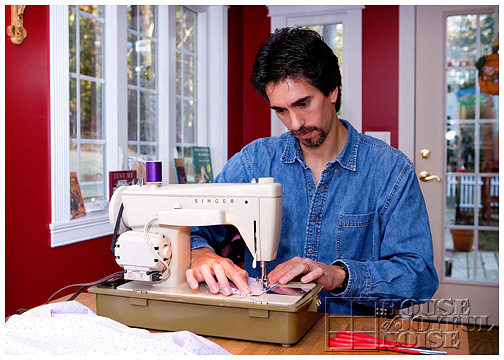
So he goes downstairs, and low and behold, he comes up with a SINGER, and dusts it off.  Well I’ll be darned.  There it is.  I tried to remember seeing it before. In a closet maybe?  In my childhood basement? Hmmm.  Just not sure.   Anyway….he got to figuring the thing out, because he’s mechanical like that. And he was suddenly seeming to be MORE than enjoying it.  Can I just say?…..

Men and their toys!!

m

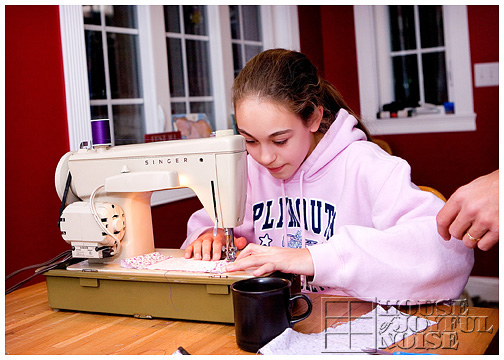
He showed {A} and I how it worked, …..and showed us.  And showed us some more.  He just didn’t want to give it up.  Finally, he let {A} in there to give it a whirl, and I did a few as well.  a

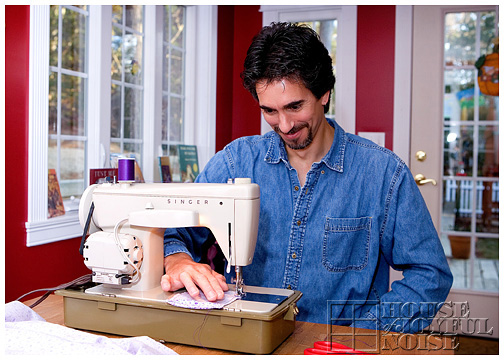
Then {A} happly sat down to do more too.  But Daddy was itching to get in there!  Seeing his hand??  Next thing we know, he tells her “OK, time’s up!!  It’s my turn.  Let me in there.”.  Maybe a little uncomfortable to announce this, but not as eager as he was to have another turn, apparently!! m1hand Oh ,,,,just look at the show-off sewing with one hand. Cute though, isn’t he??

all4

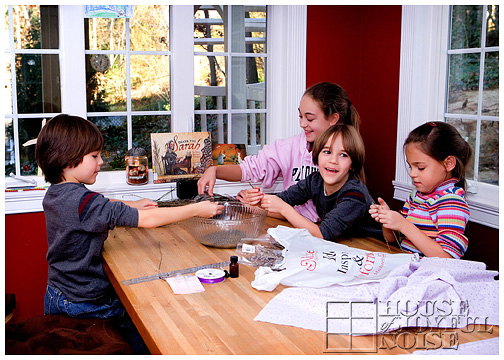
The little ones were helping too, on another part of the project.   They LOVE projects of any kind.  Family crafting is the most fun.  Usually. : )

o

Our little dolly, always willing to roll up her sleeves and get to work.

Maybe you can guess what we made on this day?  Probably.  The great thing is, besides getting one project done, is that we know how to sew with a machine now!  Granted, we’re not pros, but {A} may be before long.  She’s pretty ambitious at that machine on just about a daily basis.  You should see the the little things she’s made already!

Gosh….my girls, AND BOYS, just may get that genetic-domestic bone thing.

Filed Under: Crafts & Creations, Seasonal Crafts and Creations, WINTER Crafts and Creations Tagged With: crafting, crafts, sewing, sewing-machine

  • « Previous Page
  • 1
  • …
  • 4
  • 5
  • 6

We are wicked happy to have you here! We hope you find much inspiration, help, humor and enjoyment here.


Archives


POPULAR POSTS

* * * * * *

SUBSCRIBE to House of Joyful Noise blog! Every new post, delivered right to your email box!


Privacy Policy

Amazon Affiliates

Never at any additional cost to you, we may earn a small commission for our endorsement, recommendation, testimonial, and/or link to any products from our website. Your purchase through our links helps support our family, while sharing with you the products we authentically use and recommend, for various ideas, and letting you know where you can purchase them. Thank you for your support!

[footer_backtotop]

Copyright © 2026 HouseOfJoyfulNoise.com · Genesis Framework by StudioPress