• HOME
  • {A}’s Chipmunk Training Archives

 Homepage

  • The Homestead
    • Home Projects
    • Home Improvement
    • Home Decor
      • Seasonal Home decor
        • FALL Home Decor
        • WINTER Home Decor
        • SPRING Crafts and Creations
        • SUMMER Crafts and Creations
    • Our Chickens
    • Gardening
    • Organization
    • Re-Purposing
    • Furniture Refinishing
    • Budget
  • Crafts & Creations
    • Seasonal Home decor
      • FALL Crafts and Creations
      • WINTER Crafts and Creations
      • SPRING Crafts and Creations
      • SUMMER Crafts and Creations
    • DIY (Do-It-Yourself) Project
    • Kids Arts and Crafts
    • Homemade/Handmade Gift Ideas
    • Holiday Crafts
    • Fan Pulls
    • Free Printable/Downloadable
    • Sewing Projects
    • Giveaways
    • Business Features
  • Recipes/FoodFun
    • Breakfast
    • Lunch
    • Main Dish
    • Sandwiches
    • Appetizers
    • Slow Cooker
    • On The Grill
    • Side Dishes
      • Soups
      • Salads
    • Baking
      • Breads, Rolls and Muffins
    • Snacks
    • Treats
    • Desserts
    • Drinks
  • Homeschooling
    • Elementary Homeschooling
      • Elementary Homeschooling READING
      • Elementary Homeschooling MATH
      • Elementary Homeschooling LANGUAGE ARTS
      • Elementary Homeschooling SCIENCE
      • Elementary Homeschooling HOME ECONOMICS
      • Kids Arts and Crafts
    • Middle School Homeschooling
      • Middle School Homeschooling SCIENCE
      • Middle School Homeschooling HOME ECONOMICS
    • Language Arts
    • Math
    • History / Social Studies
    • Geography
    • Foreign Language
    • Field Trips
    • Games
    • Nature Study
  • The Big Picture
    • Life In General
    • Celebrations
    • Faith
      • Into the Light; The Series
    • Giveaways
    • Reviews & Sponsors
  • Photography & Lettering
    • Photography
    • truck lettering
    • vehicle graphics
    • Newborns
    • Kids
    • Engagement
    • High School Senior Pictures
    • High School Senior Pictures Sneak Peeks

Terracotta Flower Pot Wind Chime | Tutorial

July 22, 2012 By Laura 106 Comments

terracotta-flower-pot-wind-chime-craft-3

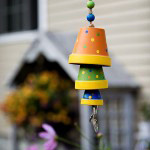
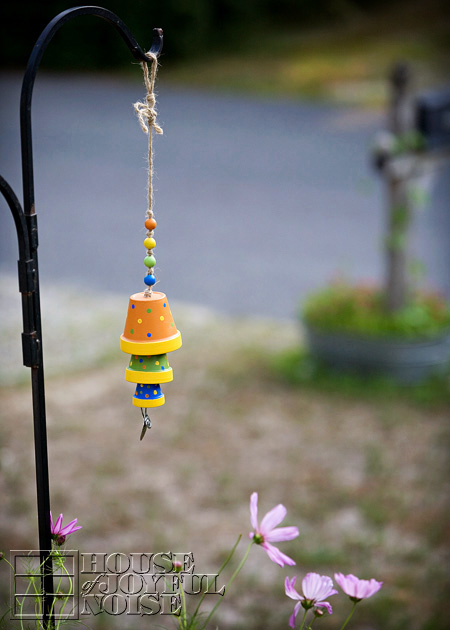
Making this flower pot wind chime was a fun and simple project to do with my kids. I was really looking forward to hanging out with them and painting, and I knew I would also love seeing the wind chime in my gardens, where I had every intention of hanging it, when it was done.
While I think we kind of ‘made it our own’, this flower pot wind chime was not at all my idea. I have seen them so many times at crafty website now, and so many style-versions of it, that I’m not sure which style I saw first, or where! Someone must have come up with this adorable idea first, but I’ll be darned if I know who! Whoever did, we thank them for the fun inspiration, to make something (else) to have around, that makes me smile inside, every day.

Here’s the basics on how we made our terracotta flower pot wind chime.
001_terracotta-pots
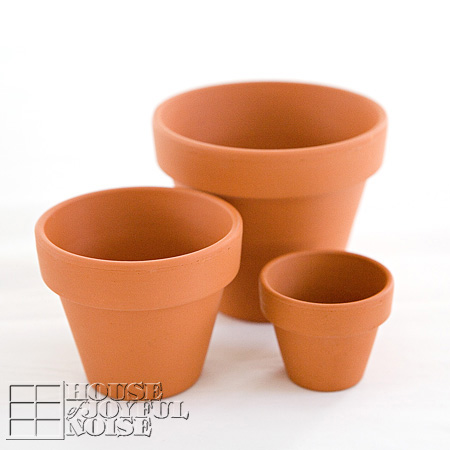
We started with 3 different sized terracotta plants, that have drainage holes in the bottom.
The smallest is tiny, at 1-1/2″ tall. Then the 2 next sizes up: 2-2/3″ and 3-1/2″.
002_synthetic-flat-brushes
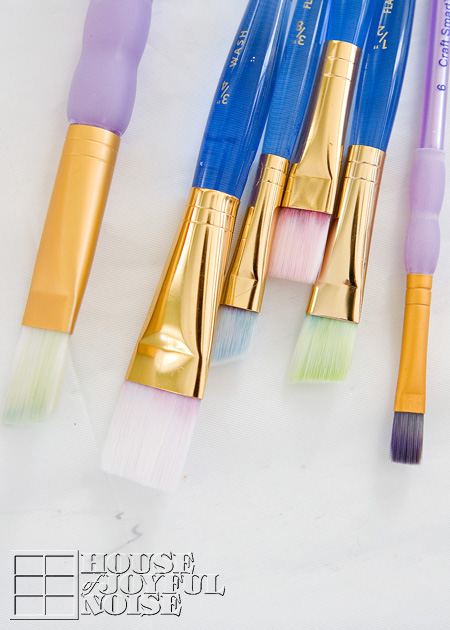
Using our little collection of synthetic brushes, we got to painting our pots.
003_paint-palette
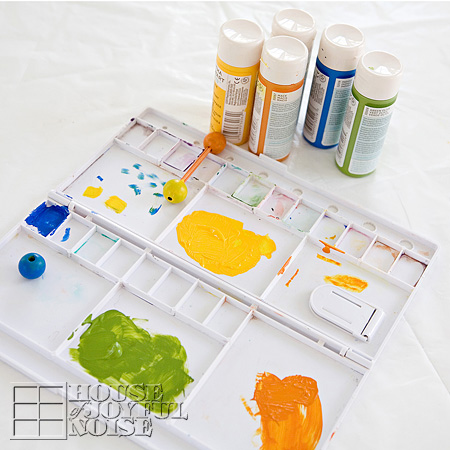
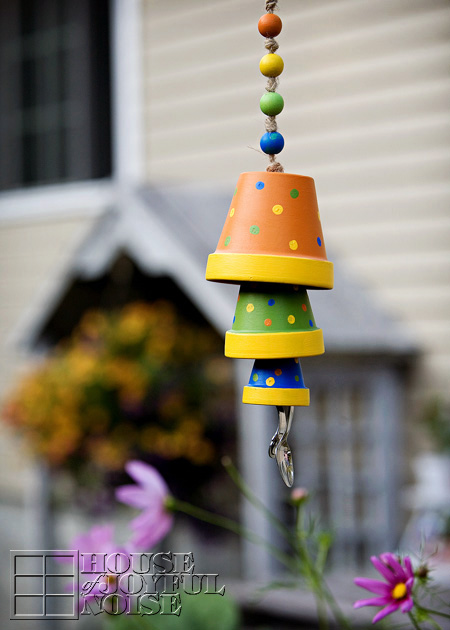
We used Martha Stewart Craft Paints, which are an acrylic paint. We also looked around and found what wooden beads we had in the house, which we wanted to use on our wind chime as well. After choosing our colors of paint and how we were going to paint the pots, we wanted the beads the same colors. One we had already was the correct color-green. The other 3 we had were not, so we painted them correct colors. If you can imagine, painting small wooden beads was not that easy. But we quickly figured out a helpful trick: We stuck 2 toothpicks in the bead holes, to hold them while we brush painted them the colors we wanted them to be. You can see them resting on the palette, drying.
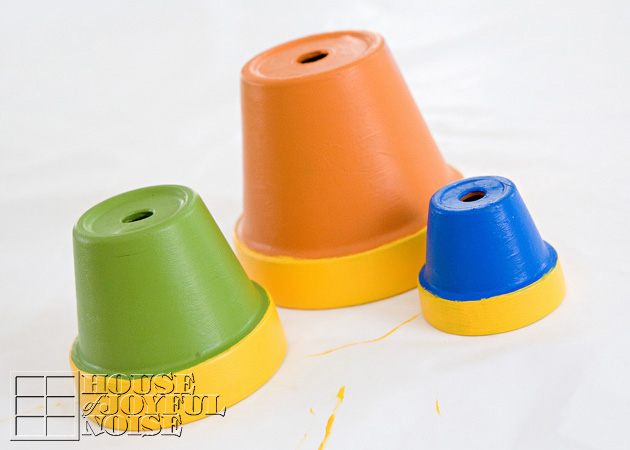
004_painted-terracotta-pots I really wanted to take photos of the kids painting, for me! But they were done and back outside, on the other side of my window, swimming again, before I ever got photos of them painting. But, since they weren’t paying any attention to me anymore, I did clean up the edges of their pot-rim painting, just a little. ; )
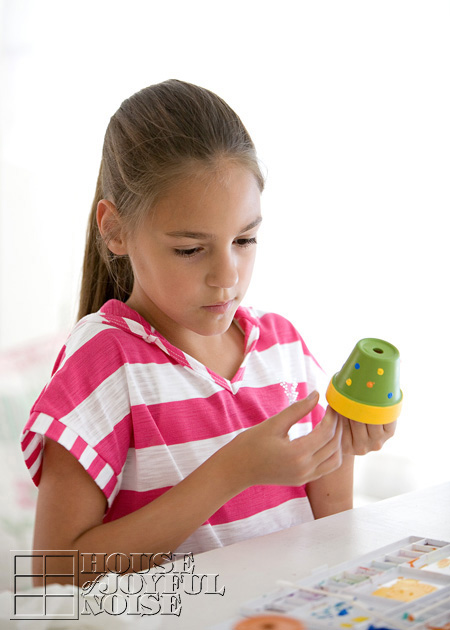
005
Our original idea, was to decorate our pots with little garden bugs.  Like butterflies, ladybugs, dragonflies, etc. It would have been so cute! Don’t you think? But none of us felt we could paint them that well, that small, and we couldn’t find any stickers or decals of any sort, to kind of Modge Podge them on. So, when it came time to decorate the pots, the boys were busy playing something else, and Alexis was at work. So O (Olivia) and I decided to just polka dot them.  I love polka dots, so I was sure I’d love it as much as the garden bugs idea.
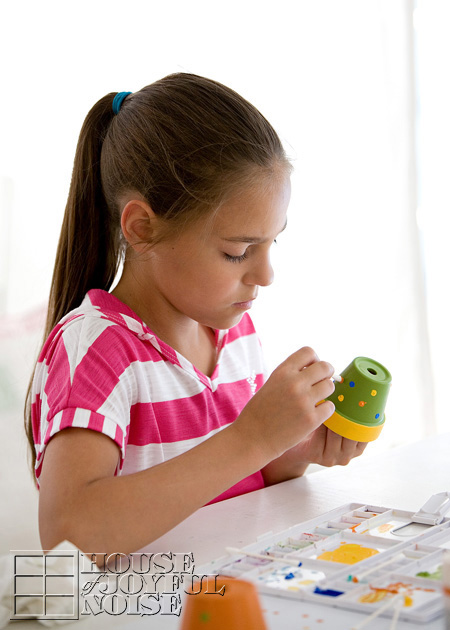
006
Applying the polka dots could not have been easier. Since we wanted the dots very small, on our small pots, we just used q-tips! We dipped the tip in the paint, and then dotted it right onto the pot! The hardest part was spacing the colors. I always drive myself crazy with that…..not wanting the same colors right near each other, and trying to get even spacing too. But we did a well enough job!
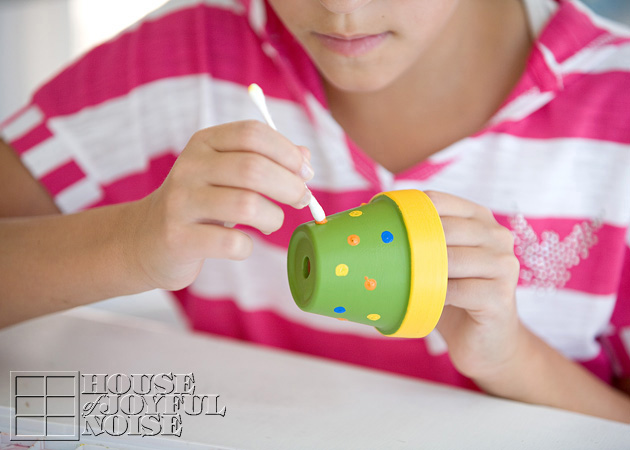
0071 O and I worked together, polka-dotting, and our q-tip trick worked like a charm.

Now, I didn’t take photos of the assembly. But it’s easy enough to explain:  We used jute twine, and strung it through the holes of the pots. We tied big enough knots on the string, to hang the pots on the string as we wanted.  So each knot was inside the pot underneath the drainage hole.
terracotta-flower-pot-wind-chime-craft
Now, some crafters who have made flower pot chimes, opted to have the string come down out of the pot, with a wooden bead on the string (held in place with a knot before and after the bead) to act as the ‘ringer’, that would hit the pot when the wind blows. So they designed it that way, spacing their pots out more.  We chose to use the pots themselves, to be the ringers, so that when the wind blows hard enough, the pots hit each other. That required (visually) setting the pots overlapping each other a little.

As an afterthought too, I decided I wanted to give the chime a quick UV protectant spray coat of clear acrylic.  Since my chime was all already assembled, I just put some tin foil over the spoon, and sprayed it anyway, getting some up into the pots as well. I do recommend spraying the painted pots before assembly, if you wanted to. But no big deal.  It’s an aerosol, so it worked easy enough afterwards.
terracotta-flower-pot-wind-chime-craft-1
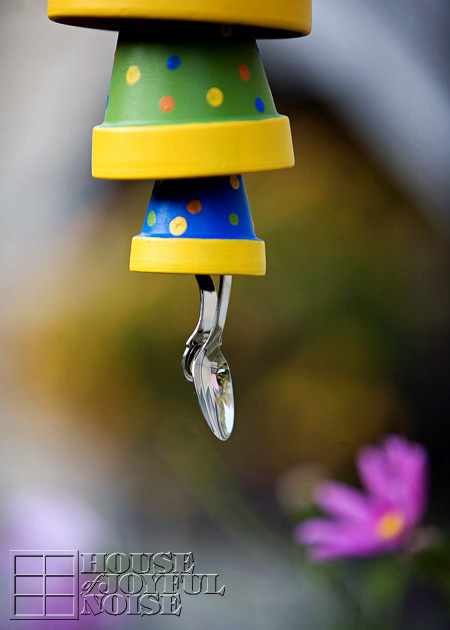
Aside from the paint design, the other touch that made it more ‘our own’, was that we added a stainless steel baby spoon as the bottom ringer. It really is a special touch, to me, with the memories of giving Alexis her first baby food, and then the triplets coming along, and the 3 little mouths we were trying to keep up with come the spoon- feeding age, with them. We didn’t bother having 3 bowls and 3 spoons, or we’d spend as much time picking up and putting down bowls and spoons, as we did putting spoons in sweet little open-waiting mouths.  Go ahead. Imagine that for a moment. No…..1 spoon, 1 bowl of food….down line of sweet, messy mouths we went. And then started at the beginning again.  Gosh I miss those days.

Wait. How did I end up talking about feeding my babies? Oh yes….the baby spoon, and the happy memories it brings me.
terracotta-flower-pot-wind-chime-craft-2

 So, it was simple as that. Anyone can make an easy and whimsical wind chime, even if you’re not that crafty. It’s a breeze.
Anyway, we’re happy you caught wind of this little fun project, and came to take a look.  Even if you’re just blowing through.

Ok, I’ll stop now.

P.S. Feel free to chime in, in the comments.
(Oh my gosh! Somebody stop me!)


Save

Filed Under: Crafts & Creations, Kids Arts and Crafts, Re-Purposing, Tutorial Tagged With: baby-spoon-chimes, crafts, diy, flower-pot-wind-chime, garden-decor, homemade-wind-chimes, kids crafts, Martha-Stewart-Craft-Paints, Plaid-products, polka-dot-crafts, terracotta-pot-crafts

Painted AMERICAN BIRDHOUSE – Tutorial

June 11, 2012 By Laura 27 Comments

Summer holds a whole lot of good things, and for us, it really kicks into high gear in the beginning of July, with back to back celebrating of the 4th of July, and our oldest daughter’s birthday!  Then the summer rides out with a little more down time, just chilling on the beach, making day trips, and hanging out chatting and laughing around the camp fire at night. So about this time in June, we’re getting excited for all of the fun to come, just around the corner! The gardens are planted, we’re reaching the end of our school books, and we can just feel the summer vibe coming on the sea breeze!

What really gives me so much joy, is helping make my home and gardens, reflect the seasons and holidays!  Around here, about mid-June through July, it is all about red, white and blue!  Our family’s homestead is that much more enjoyable, with the little bits of decor I add, and it just puts the happy in my heart, to see it.  But the greatest joy in it all for me, is planning and creating all of those little things around our home. Like this American Birdhouse I am sharing with you all today. Honestly, day or night, you can turn the music up loud, put some art tools in my hands, and COLOR ME HaPpY!!

So I’ll just tell you how I did this. While I didn’t photograph every step of the action, I can tell you what I did, and give you some photos I took of what the birdhouse looked like after those steps.


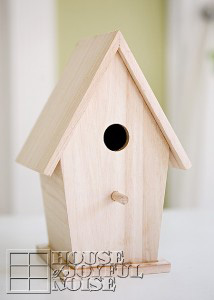
To start, I picked out an unpainted wooden birdhouse at Michael’s Arts and Crafts. There were a few styles to choose from, but this one would best work with the paint-job layout I had in my head.

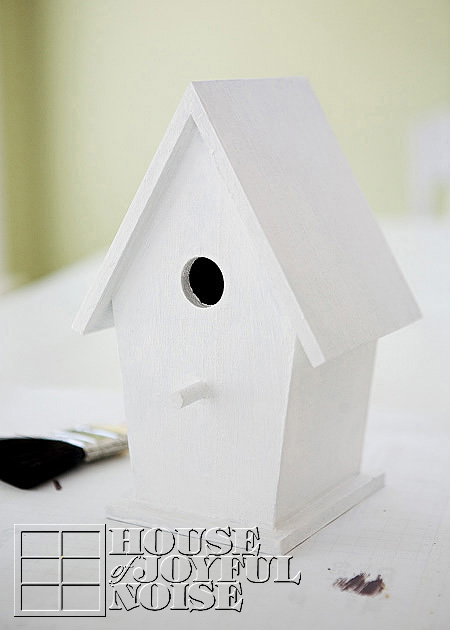
I primed it with some grey primer I had on hand, and then I painted it white with acrylic paint. Because of the grey primer, it did take 2 quick coats of white to cover. This paint dries fast, which I love, so I can keep the fun rolling.

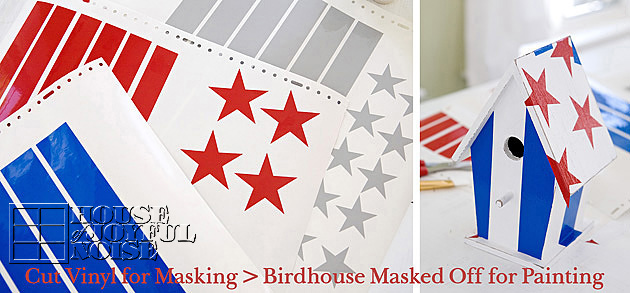
Next, I asked my husband, Michel, to cut some stars and stripes out of vinyl for me, the next job he ran, to use as masks. I wasn’t sure of the size I wanted to work with for either the stars or stripes, so he cut out 2 sizes of each.  Sticking some cut pieces on the house helped me decide which size I’d like better, and I went with the fatter stars and stripes.  NOTE: Just to confuse things, Michael used some scrap vinyl he had, that happened to be red and blue…to put on my white house. I know….it looks done already, huh? I would have preferred white masking, but c’est la vie….it was just a mask. Don’t let it confuse you-as it was trying to confuse me. It was going to be way better looking when I was done with it, but the colored vinyl did give me a good preview of the final layout!

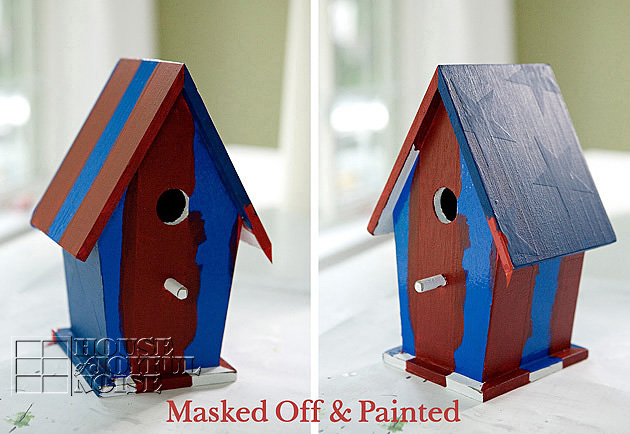
So here it is, with the masking still on, and all painted in.  Looks like a hot mess to me! It did take more brain power than I had planned on burning, trying to think in opposite terms here:  “Ok….where the red and blue mask is, it will be white….and I am painting the white I see, red and blue. Right?….Wait……”. Ugh. See? White vinyl would have taken less thought for me.

 But I managed, believe it or not, to not screw it up much.  Although everyone was instructed not to talk to me or ask me questions whilst paintbrush in hand. I’m good, but I’m not that good. ; )

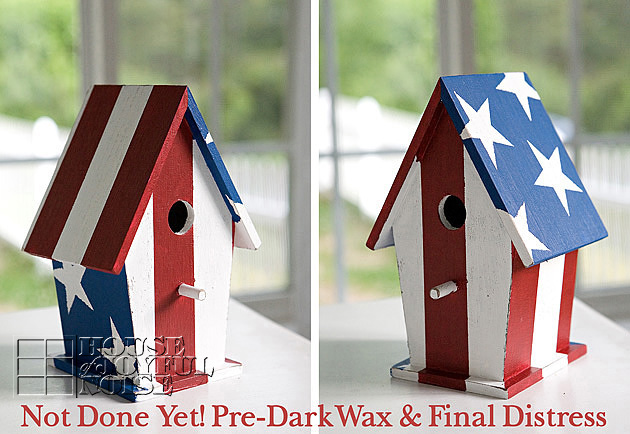
So here is what it looked like after all of the masking was peeled off.  Revealing that I really did it right!

It’s looking pretty good already, huh? But it was still not done yet!

 My vision was an older looking American Birdhouse. So I finally really attacked it, with my sand paper! I go to town, distressing.  I don’t know what it means, but I suspect distressing my creations gives me an unnatural level of joy.  Sometimes, I need someone around, to stop me. For me, this is when many things I make, really come to life, and become what I created them to be.

So, after Michael took away the sand paper, I did just a few more little things:  1) I dusted it all off with a soft rag.  2) I rubbed on a good coat of clear wax, and let that dry.  3)  Then, ever so tentatively, I added some dark wax too. I am so careful with that stuff, because it is powerfully staining!  I carefully and minimally applied it, to age it exactly to a specific, pinpointed year. (Ha ha…I have no idea what year, really….I’m just kidding. lol)  I’m not sure if you can even tell how much it was aged in these photos, with the effect of the dark wax, but it really was the final touch of perfection, for me to call it d-o-n-e.

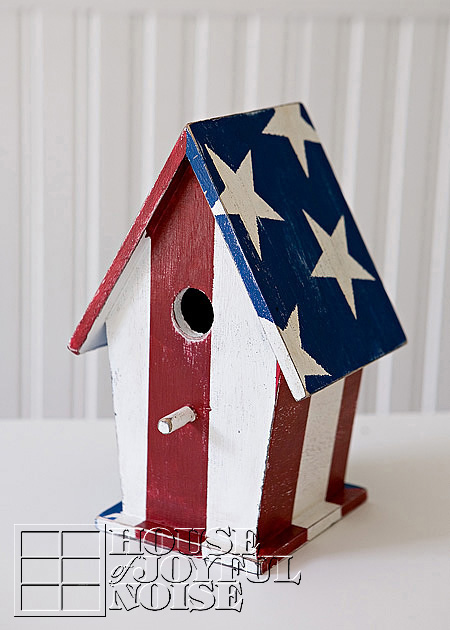
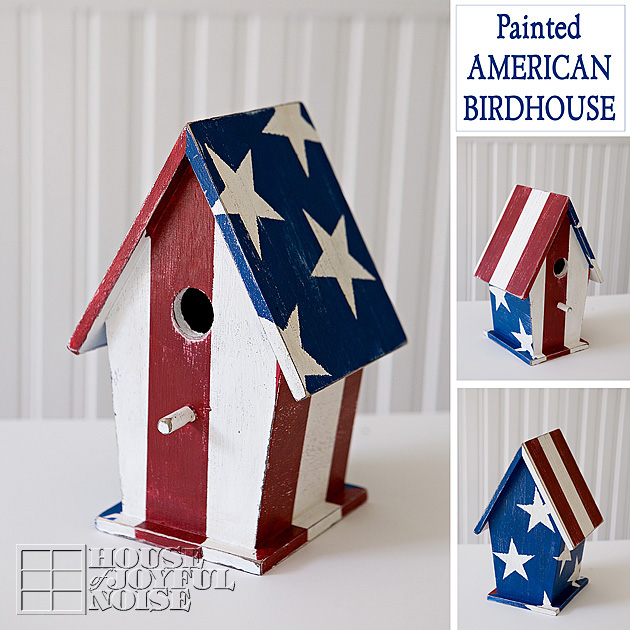
And here it is! . . . . . .


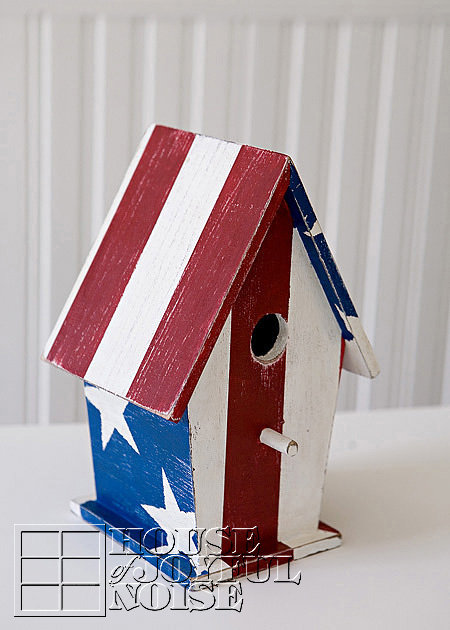
This is the front and it’s left side, obviously. But I tell you this for you to notice, how the stars wrap around from one side, diagonally, all the way to the other.  And the stripes do the same thing.

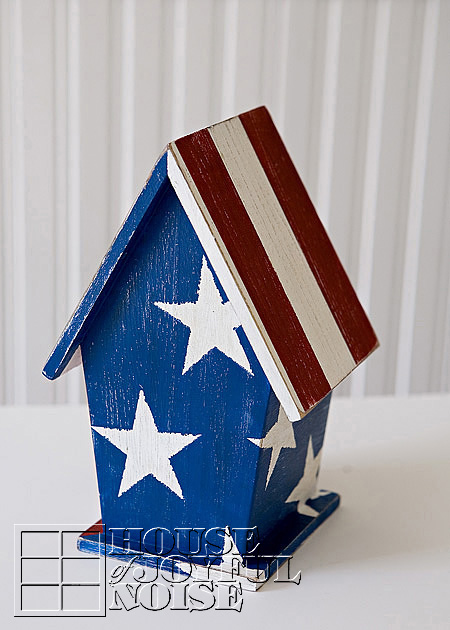
So I am about to show you all sides . . . . . .


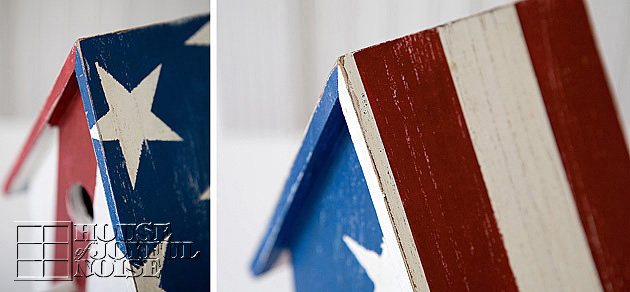
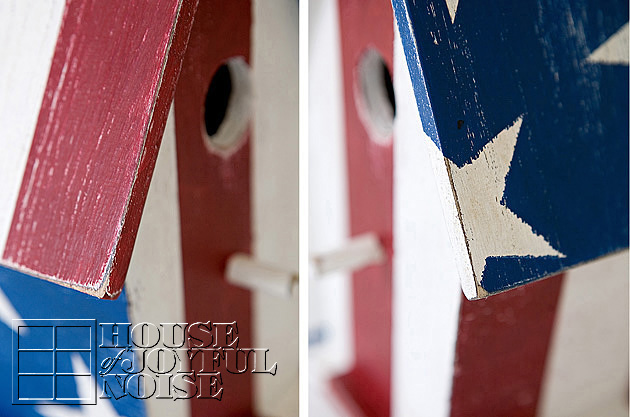
 Of course, I would love to show you close-ups of the detail in my distressing . . . . . .


It truly is what makes this an American Beauty, to me!

 I just love how it came out. Do you? You can bet your American bottom, I’ll be Pinning this baby!

Coming up soon here on the blog, I’ll be showing you where I put this, to be displayed for awhile this summer.

Tell us, do you had any special summer decor to your home this time of year?  We hope you have a moment to tell us about it, or say hello, before you ski-dattle! If not today, thanks so much for coming by! We’re always glad you did.


Save

Filed Under: Crafts & Creations, DIY (Do-It-Yourself) Project, Home Decor, Tutorial Tagged With: american-crafts, american-home-decor, american-projects, birdhouses, crafts, decorative-birdhouses, july-decor, july-home-decor, painting-birdhouses, painting-projects, patriotic crafts, red-white-and-blue-crafts, red-white-blue-decor, stars and stripes

Boys’ Hardware Accessories

May 14, 2012 By Laura 24 Comments

004_boys-hardware-bracelets-accessories-300x214

It seems to be somewhat easier, to come up with crafty ideas for my girls. But the other equal half of my kiddos, are boys!  I know they get just as excited when I am making something for them, too. So I try to see what cool ideas I can come up with, that they’ll dig.

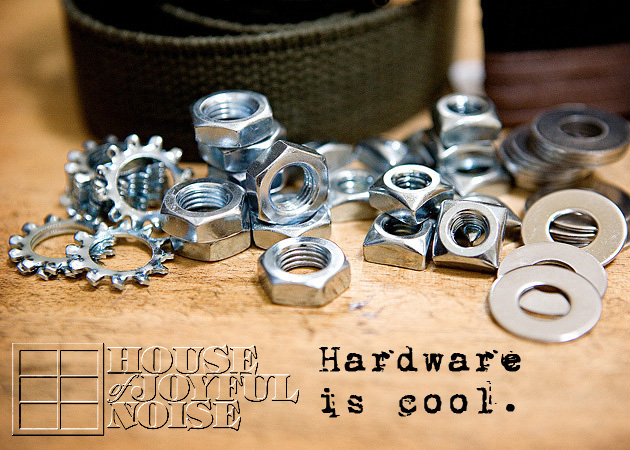
     Something recently got me thinking about hardware.  Hardware is just cool, and definitely boyish! With all the various sizes and shapes that it comes in, for all kinds of building and fix-it projects, I got brainstorming what cool projects I could come up with for my boys.  In this post, I’m sharing some hardware jewelry and belts I made for them.

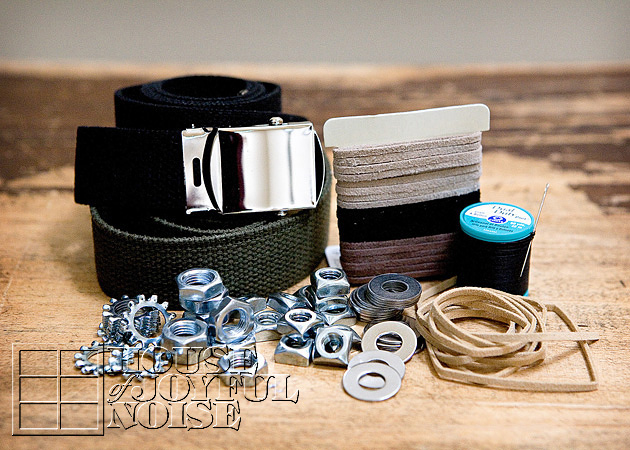
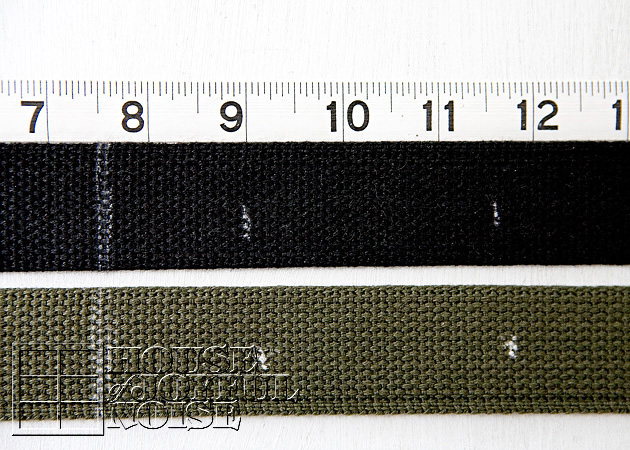
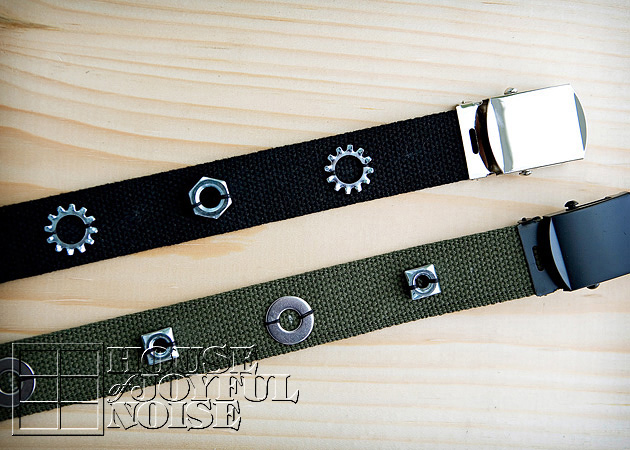
001_boys-hardware-accessory-supplies         I picked up a couple of adjustable belts at an army surplus store, and some suede string in a few different boyish colors, at the craft store.  I also gathered some heavy duty sewing thread, a sturdy quilting needle, and of course, a variety of hardware!


002_boys-hardware-accessories       I have to say, picking out the hardware was pretty darn fun! I went to the hardware store with all of my kids in tow, and we were there for a good while! I think we were making the store clerk a little nervous that we’d mix up the hardware in the 2 aisles of tiny organized drawers of hardware!  But we didn’t. ; ) 

     I knew I’d be getting some good ole hexagon bolt nuts and flat washers. But I was eager to see what other cool little shapes I could find as well.  I thought the square nuts and star lock washers were very cool, so I got a bunch of them as well. Now, if your husband is handy as mine is, you may already have some of this kind of hardware at home. My husband did have a big tin of hardware, but they were really old and dirty. While it would have been great to recycle that, I wanted new and shiny pieces for these projects.


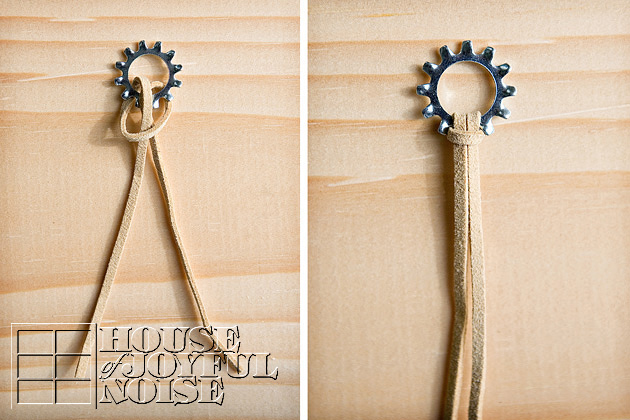
003_suede-string-loop    To make bracelets, choose a hardware element, and then figure out how much suede string length you’ll need to tie round one side of a boys wrist, and double that length, with a little extra for tying. Do the same with a piece for the other side of your hardware element. For a necklace, cut a single piece long enough for the desired length and tying.  The above photo demonstrates how you can attach the suede string to the hardware:  with your piece of string folded in half, feed your two loose end through the backside hole of your hardware, out of the front, and then bring those ends  in between and through the loop on the opposite end. Pull and the loop will close onto the hardware, as seen.

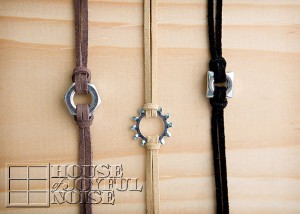
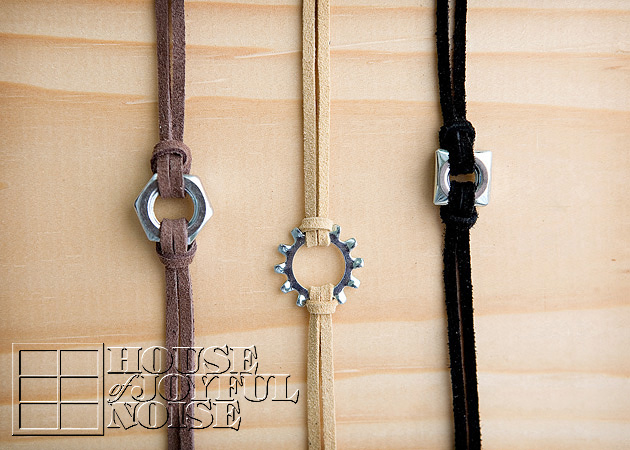
004_boys-hardware-bracelets-accessories   Here are three finished bracelets, using a single piece of hardware.  If you prefer, the end of the strands for any of the jewelry shown, could be finished with clasps, but we didn’t bother.  We just tie them on.  It adds to the casual feel!  (Warning: You do need to tie them tightly though, or they tend to just come untied.)


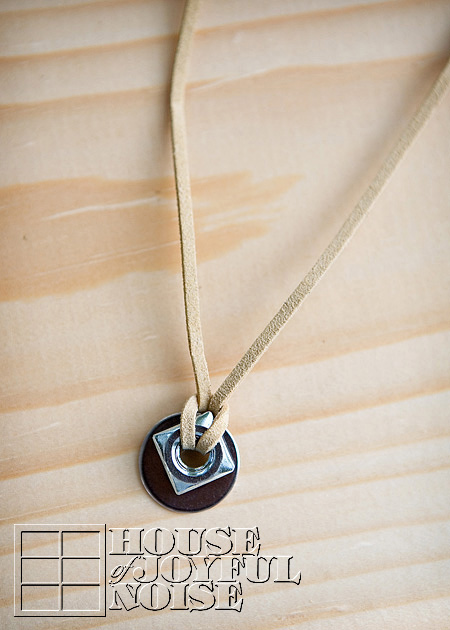
005_boys-hardware-necklace-accessories
Here is a necklace, using a flat washer and a square nut.
It’s fun to play around with the hardware, and seeing what combos you can come up with, for a different design or look.


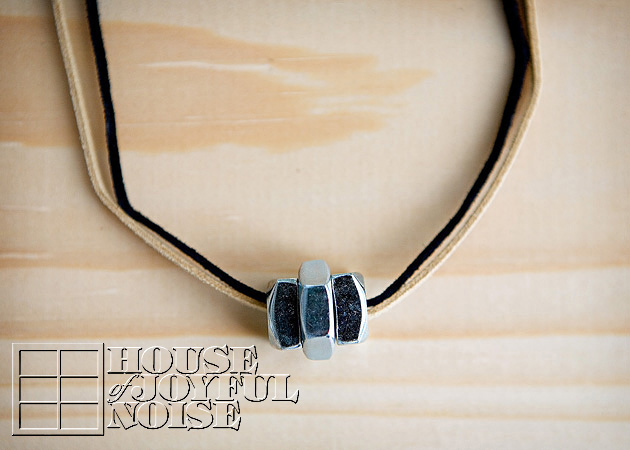
006_boys-hardware-necklace-accessories This is the front view of another necklace, using a double strand of suede in 2 different colors, holding a hex-nut in the middle and square nut on each side.


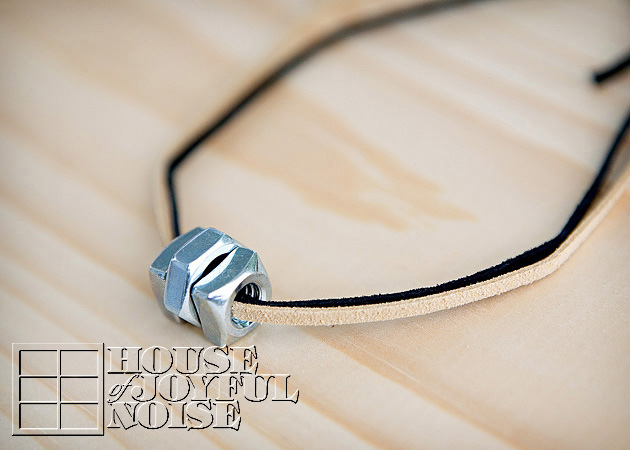
007_boys-hardware-necklace-accessories This is a side view of the same necklace.

    Now, for the tricked out adjustable belts!  These take just a little more time and simple effort! But if you get the smiles from your boys that I did, it’s well worth it! Well, actually it’s only fair to admit that their big sister asked me if I’d like some help sewing the hardware these, and I happily said “yes!”  So maybe you’ll have a helper too, but might I at least suggest that you at least use the help of a thimble! Pushing a needle through the material of these belts can result in some sore fingertips.

     These first couple of steps that I explain next, are actually easy to do, and probably steps you’d figure on your own would be helpful to do first. But, I thought I’d just suggest them just in case. More than anything, they are most complicated for me to explain! So bare with me. (Or skip the directions if you don’t plan on needing them.) :


008_boys-hardware-accessories-how-to   The first tip I have for you, is to get a waist measurement of the belt wearer, if you can.  Or, you can just use the belt on the boy(s) to figure things out, which is what I did! These adjustable belts can be cut to length, so that is a wonderful thing. But because of the hardware elements you’ll be hand sewing on, you need to know where that buckle is going to be on the belt!

Here’s how I did it: 
I simply slid the belts right through the loops of my boys pants that they had on, just sort of overlaying the excess of the belt over the buckle, to figure out how much of the belt you’ll be needing. Slide the buckle along the belt, and determine how much of the belt end would be fed through the buckle, when putting it on. By doing that, you’ll get an idea of where to lock the buckle into place, with the toothed lever underneath. Mark each side of the buckle with chalk. Then you can really feed the belt through the buckle, and mark off where the ‘tail’ of the belt is, that is coming out of the buckle, and which is actually the opposite end of the belt. You are marking it off with chalk, because you don’t want to sew any hardware on that area, or it will not fit through the buckle. (Think about it. 😉   So you’ll only want to be sewing elements on the area of that will actually be around their waste – not the piece that will be going through the buckle.  (Am I over-explaining here? This is the longest paragraph in the whole post – I swear. 😉 Once you have the buckle in place on the belt, with the right amount of tail, you will see the excess of belt material that you can cut off.  Be sure to cut the right end, that is already a rough end!  It’s the end closest to where the buckle is. You do not want to cut off the sealed end with the metal piece! 

     Once the buckle area is chalked off, and the tail is marked off, you can make a couple of tick marks between belt loops if you’d like, so you generally where the are of belt will be showing. This is not necessary, but an added step if you want the hardware to show in just the right places, and not hiding under any loops. Then you can remove the belt off the pants, and cut off that excess material you won’t need. They come pretty long from the army surplus store, even at the shortest length.  Them I took off the buckle for the time being, to be able to work with the belt easier.  Next, I laid the belts flat on the table, and I figured out how spaced I wanted the hardware pieces, by just generally laying them out, and then measuring the estimated space.  After marking where I wanted my first piece, I measured and made a tick mark about every 2 1/2 inches from there.

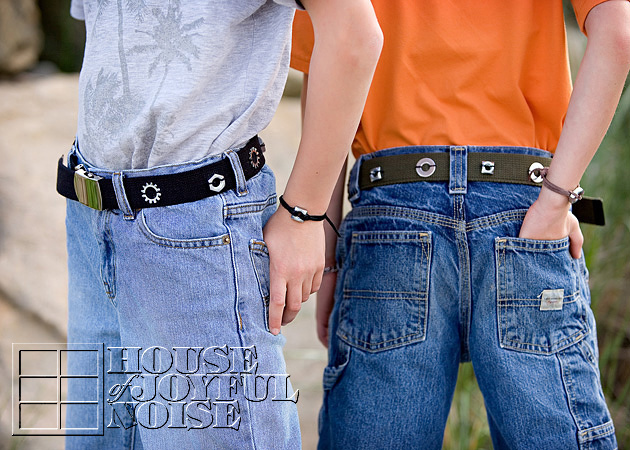
009_boys-hardware-belts-accessories Here are a couple of finished belts.  The hardware pieces are just quickly hand sewn on. I secured each each side of the hardware with 2 stitches, using the heavy duty thread. I also did one stitch in the center of the hole (of the hardware) just through the belt material, to take up some thread slack on the back side, while crossing over from one side of the piece of round hardware to the other. This allowed me to sew on a whole piece of hardware at a time, before finishing off the stitch and cutting the thread. (I started with long doubled thread, so that I could sew on and finish off a few pieces of hardware at a time, before really needing to re-thread a new strand of thread.)

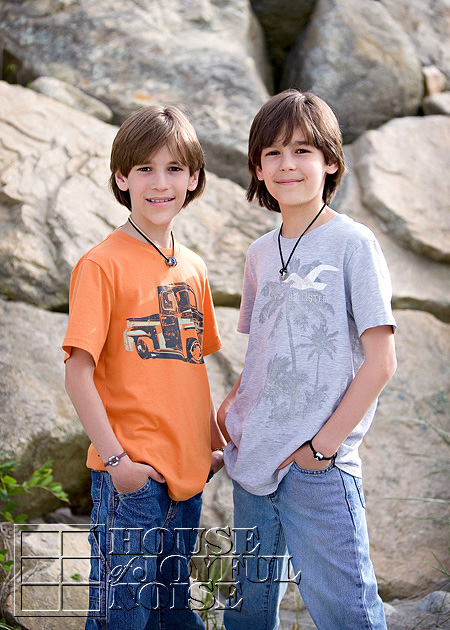
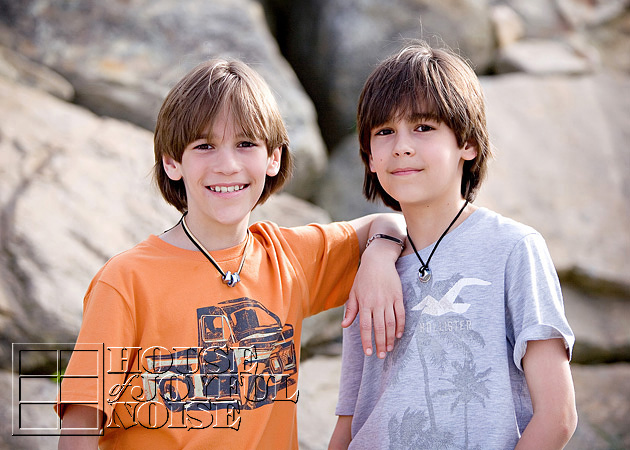
     I’m happy to say, my boys were thrilled with their new accessories!  So much so, that they were happy to model for me, so they could show you how cool it looks sporting these hardware accessories.  Take a look for yourself…..

  010_boys-hardware-accessories
Yup, this is Mama’s boys. And I love it! (Although their triplet sister, and big sister, are just as much my blessings!)
 

011_boys-hardware-accessories I think they’re looking cool (with or without accessories), and I think they know it.  Rico Suave 1 and 2……no?  ; )  lol.


012_boys-hardware-accessories      They don’t normally tuck shirts in, but they’ve been wanting to, to show off their belts. Their Daddy tucks his shirts in, all lot of the time. I don’t get it, but I love him anyway. lol

013_boys-hardware-accessories      So there you go: My boys sporting their cool new accessories, Designed by Mama! And yes, I did edit out all of their bumps, scrapes and bruises, acquired by all of the ways boys full of antics get them! But tell me what you think;  Is wearing hardware possibly the new cool?  Or do my boys just make it look good?


Save

Filed Under: Crafts & Creations, DIY (Do-It-Yourself) Project, Tutorial Tagged With: boys-accessories, boys-belts, boys-fashion, boys-hardware-accessories, boys-jewelry, boys-styles, crafts, crafts-with-hardware, diy, do it yourself, handmade-gifts-for-boys, repurposed-hardware

Glass Tile Pendants and Magnet Sets | Tutorial | Handmade Gifts

March 25, 2012 By Laura 27 Comments

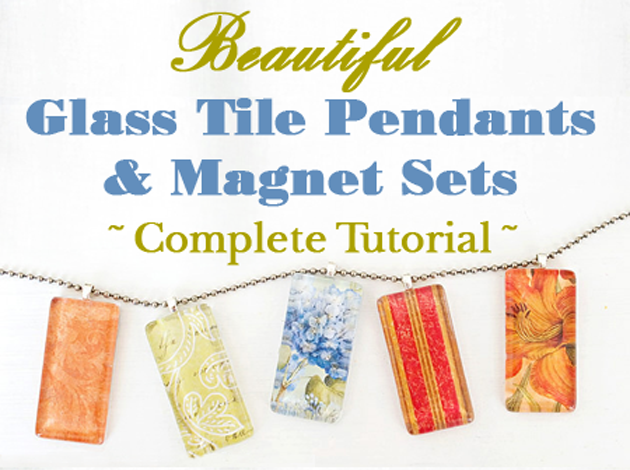
Glass Pendants and Magnet Sets Craft Tutorial

   
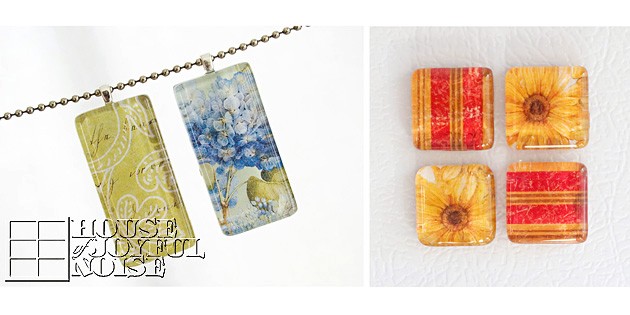
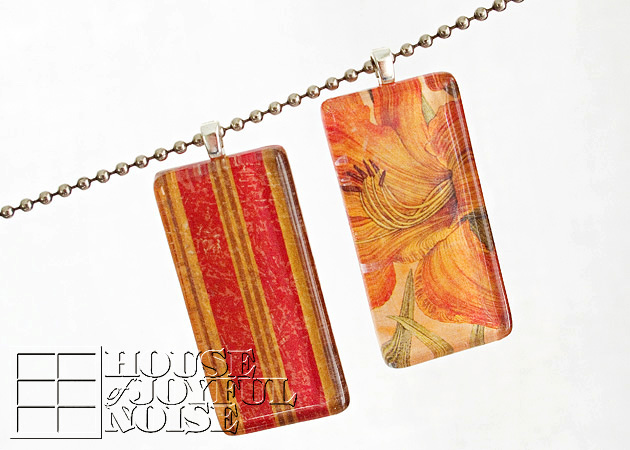
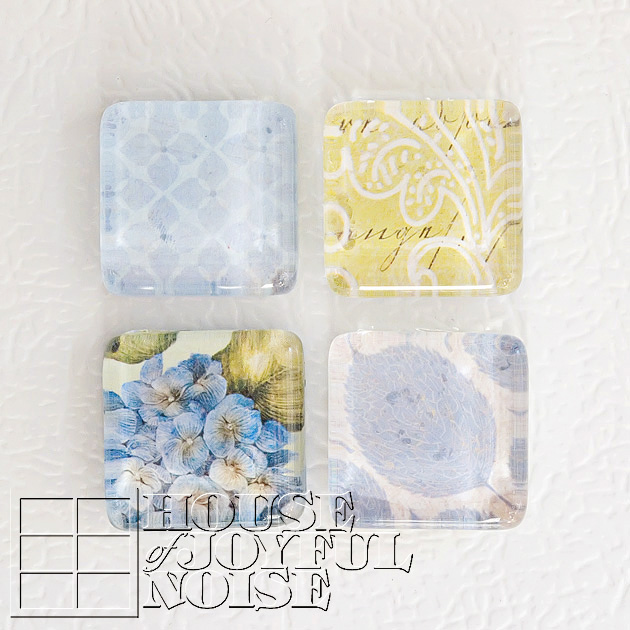
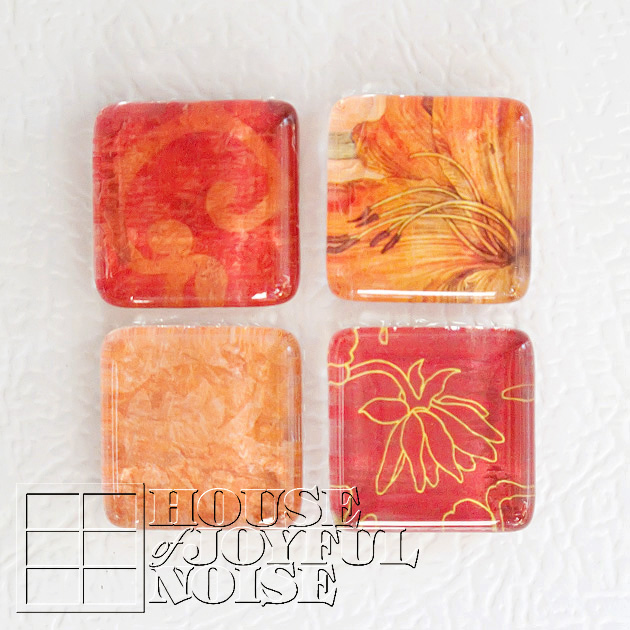
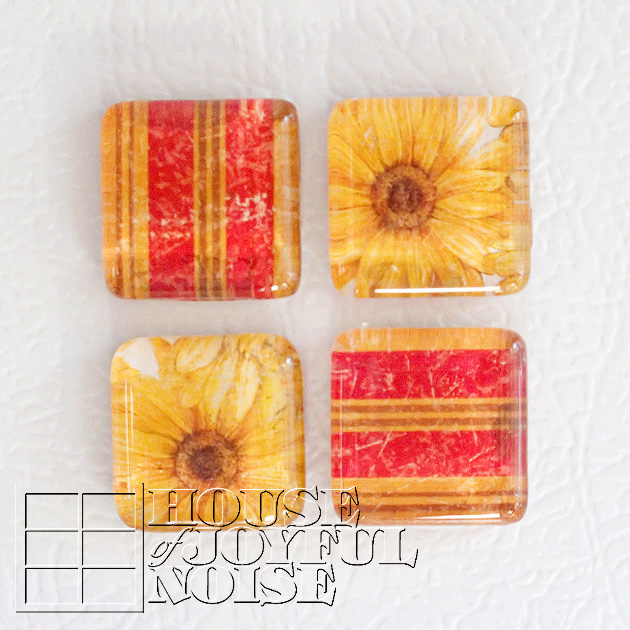
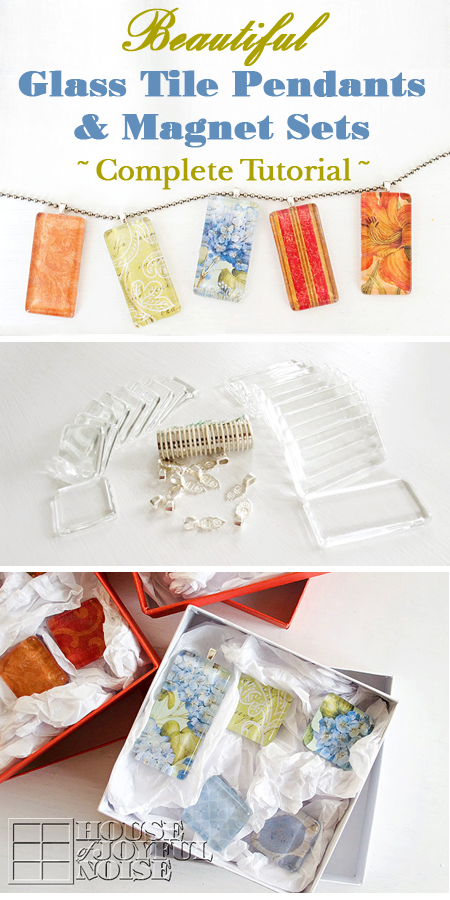
Today we’re going to show you how we made these beautiful glass pendants and magnets. They make such beautiful gifts, for women, as necklaces or magnet sets. I’m sure you could use the same technique to make other jewelry as well, such as cuff bracelets or rings.
You can choose any cardstock print you love, and the necklace pendants can be worn on any necklace chain, ribbon or cord.  So they can be very versatile in style, for you or your gift recipient’s liking.

duo-magnets-pendants    
This was the my first time doing this particular project. But in doing, so I learned lots of tips and tricks along the way, that I’ll be sharing with you throughout this tutorial.  Also, at the end I will share with you the specifications of the supplies, and the resource where you can get them, as I did.  So let’s get started:

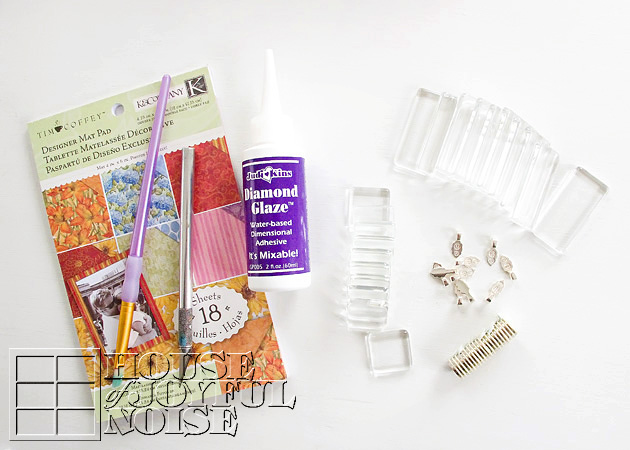
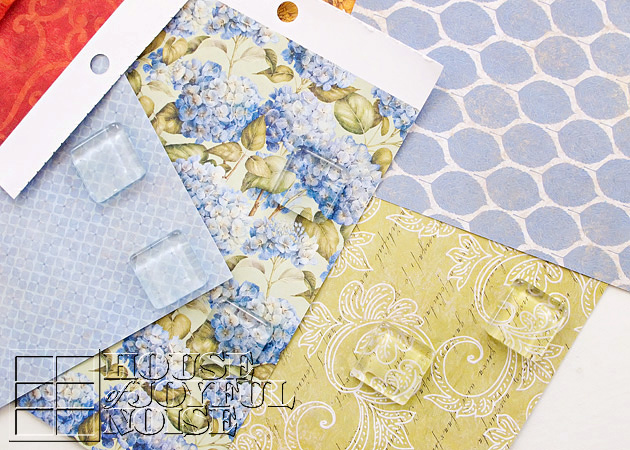
001_glass-tile-craft  Here are all of the supplies I used, but I’ll give more details and sources at the end, so you know exactly what to get, and where:

  • 2-sided designer card stock
  • glass tile rectangles
  • glass tile squares
  •  magnets, with adhesive
  • sterling silver plated bails
  • Diamond Glaze Dimensional Adhesive
  • an x-acto blade
  • a synthetic hair paint brush

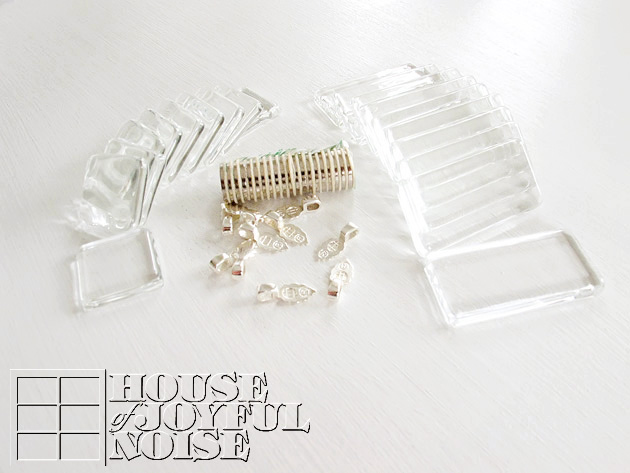
002_glass-tiles-bails-magnets Here is a closer look, at the beautiful tiles, bails and magnets I started with. 

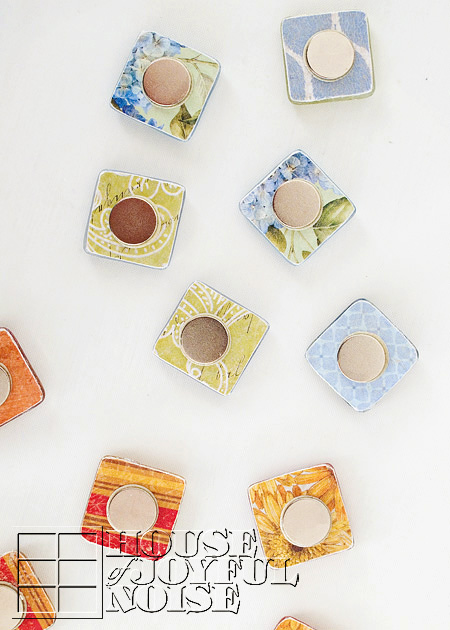
005_making-glass-magnets All of the tiles, both pendants and magnets, are made by adhering beautiful card stock paper behind the tile, which is then magnified through the glass in such a pretty way. 

So here’s a TIP to start:  Before applying any adhesive, I put each tile on the paper I’d be using, and moved it around and looked at the design coming through, so I could decide ahead of time, exactly where I wanted to place each tile. 

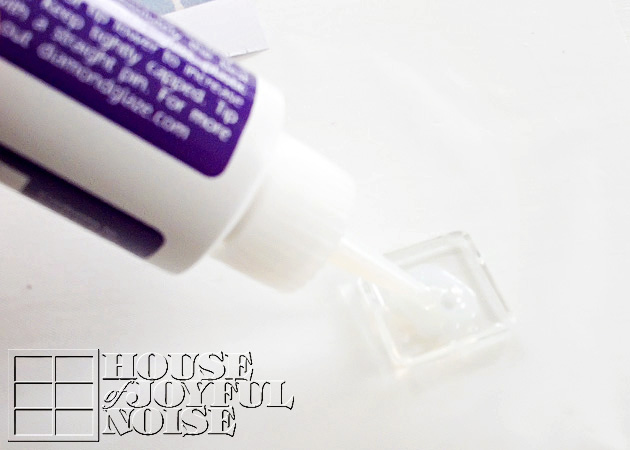
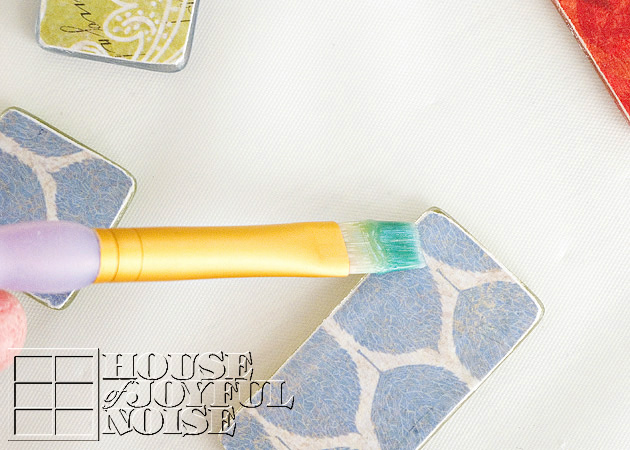
003 Once I decide that, I put a little Diamond Glaze on the center back (flat side) of a tile, and then spread it out with a little brush to the edges, pressing out any bubbles with my brush.  I’d give it a moment to get a little tacky and less wet, and then I’d place and press down onto the paper where I wanted it.

TIP:  Eventually I got tired of squeezing it out of the bottle, so I’d put a small puddle on a coated paper-plate, to work from with the brush. You can do that too, if you want to.

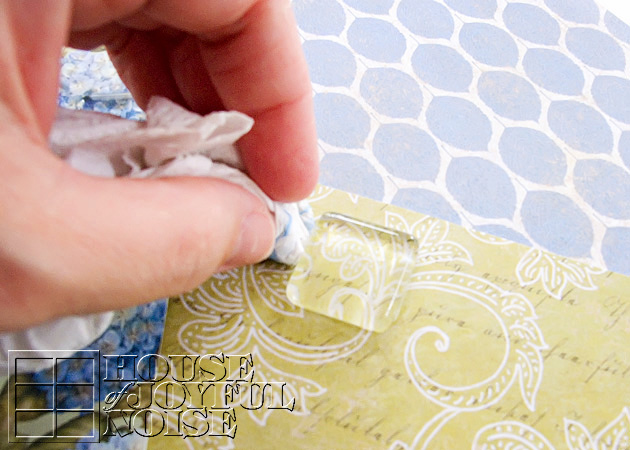
004_making-magnets TIP:  In pressing it down hard enough, to be sure there is no air bubbles, the adhesive smooshes out from underneath the sides of the tile little. You don’t want to leave it, because it hardens like glass!  And you’ll be trimming the excess paper off. So, I used little pieces of twisted paper towels, to clean/wipe the sides, every time.  If you leave it, you will not be able to trim the paper neatly.

Also, I often carefully picked up the paper with the tile on it, and rubbed the back down too, just to be sure it was smoothed out.  Any of the tiles may need to be pressed down repeatedly, as air bubbles tend to sneak in. So just keep checking them until they are drier.

One by one, get all of your tiles adhered to the paper.


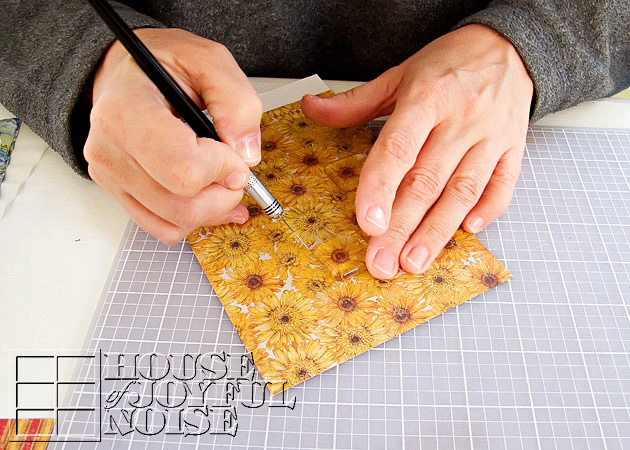
006_glass-tile-crafting Once they are all adhered and dried, it’s time to trim.

TIP:  To know if they are dry enough, simply touch the back-side of the tiles where the paper is, and if it is at all cool to the touch or damp feeling, leave them longer to dry.  I honestly do not have any time frames for you on drying time, because I made a LOT of tiles in a craft period spread over 2 days.

But once you know they are dry, trim the tiles out of the paper, very closely to the edge of the tiles. I always cut on my self-healing cutting mat. But you can use dense cardboard (not corrugated), if you need to.

Once all of the tiles are trimmed out, they look pretty done from the front!  You’ll see how beautiful they are already, and you’ll be inspired to make them wearable, or be able to place on a refrigerator.  So they need bails or magnets!

007_making-glass-pendant-necklaces Now I wanted to give the whole back-side of the tiles a coat of Diamond Glaze, as well, brushing just over the edges of the paper as well. The purpose of this is to protect the paper, seal the edges, and make the backs glass-like as well. 

TIP:  Whenever and where-ever you brush on this glaze, you want to use an adequate amount to let it settle to a glass-like surface. If you brush too thinly, just know it will leave a brush marks in those areas. Allow them to dry completely.

If you want to be sure they are thoroughly dry, leave them overnight before the next step.

 From there, I lightly sanded any rough edges of paper I felt, with fine sand paper,  just to make it feel smooth. I wiped off any fine dust from that.

008_making_designer-pendants Once all of the backs were dry, it was time to add the bails to the backs of the pendants.  Basically, I just added a dab of glaze straight from the bottle, onto the center back top of the pendants.

TIP: Be sure to look at the front design, to check that you won’t be adding your bail to the wrong end, leaving you with an upside down pendant! ; )   (I was proud of me for remembering to check that, before I made that mistake.)

009making-glass-tile-pendants Once it has tacked up just a bit, I pressed my bails on just like shown, and then cleaned up what smooshed out, with my brush.

TIP:  As you work throughout this whole process, you may want to clean your brush. The Diamond Glaze is washable, and so so is your brush!  Just wash with warm water (maybe a bit of dish soap if need be), rinse well, and dry.

010_making-magnets
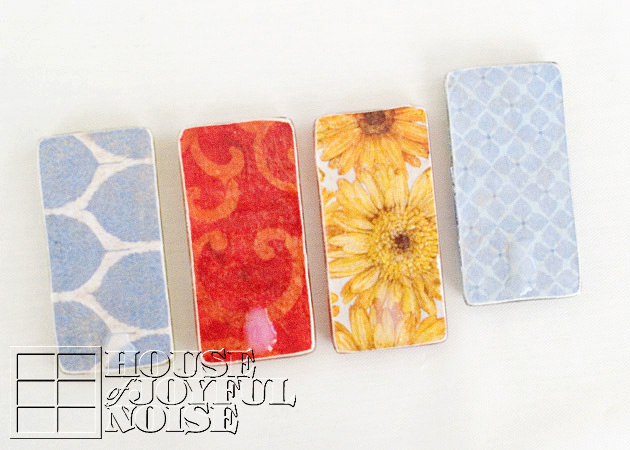
For the magnets, add a small dollop of glaze to the center of the back of the magnets.   It will tack up a bit while you try to pry the magnets apart, and peel the adhesive backing off of one.  Then just press the sticky part down onto the center of the magnet.  Again, clean up any glaze that squished out, for a cleaner looking finished piece.

TIP: If you use too much glaze, the magnet will just slide off center. Just move it back in place. As the glaze tacks up, it’ll stay.  I can see a couple of mine above slid a little, and I missed it.

Another Tip: After all of the pieces were dried, I went back one more time, and added a bit of glaze around the magnets, and around the bails (and underneath the loop), then smoothing with the brush, just for a little more re-enforcement. Whether they really needed that or not, I don’t know.  But I just wanted to be sure the bail would not lift the paper if pressed on, or the magnets would not stay on the fridge and the tile be left in anyone’s hand without the magnet, when moving them!  So I took the time for that extra step.

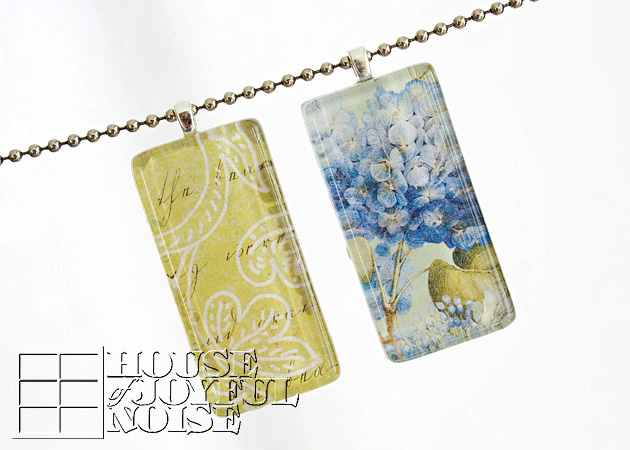
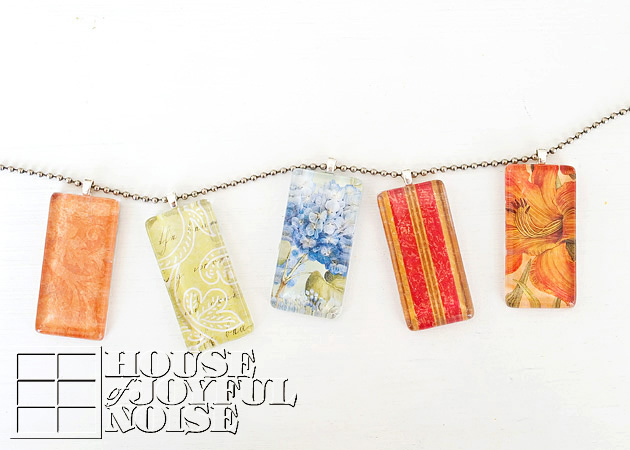
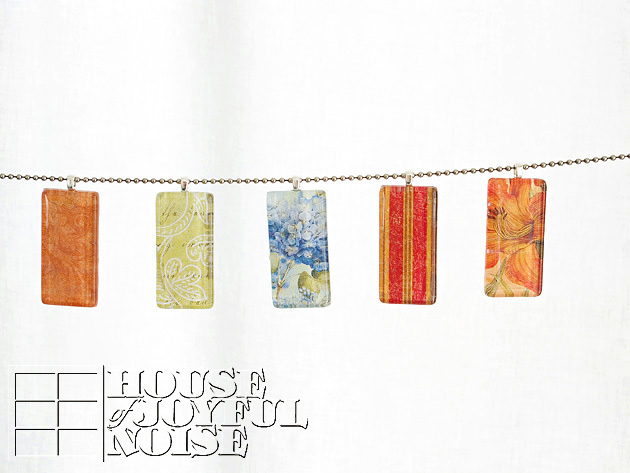
011_making-pendant-necklaces As I said before, they can be worn on a ball chain as a necklace. But they are so versatile for various outfit styles! Consider wearing them on box chains, suede string, leather cords, or a matching sheer or satin ribbon!

Closer peeks of pendants….

012_glass-tile-pendants

013_glass-tile-pendants

….and the magnets sets….

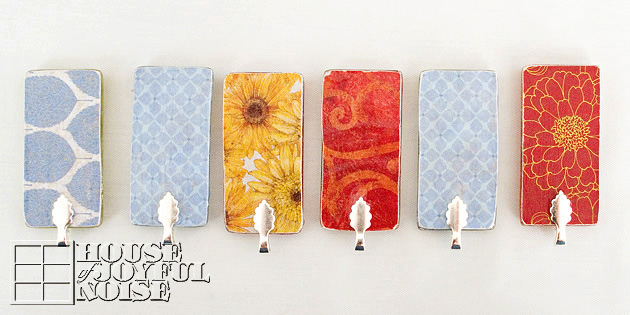
  014_glass-tile-magnets

015_glass-tile-magnets

016_glass-tile-magnets

017_glass-tile-pendant-necklaces-craft The chained pendants, lying on the table.

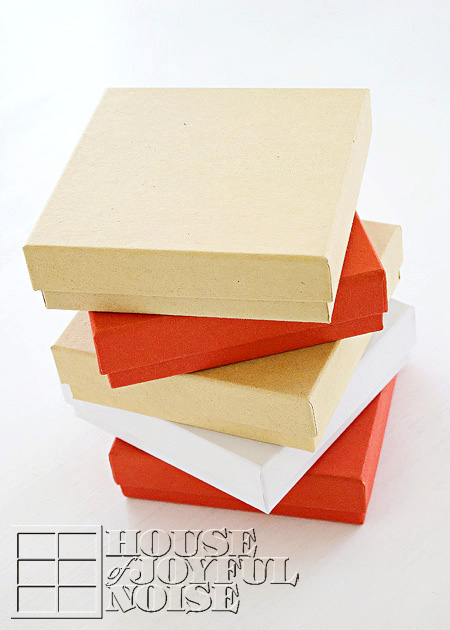
018_jewelry-boxes

I found the perfect boxes, to package these gifts in.


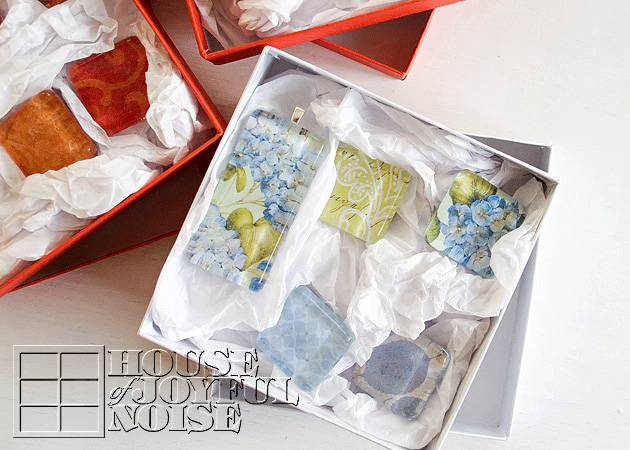
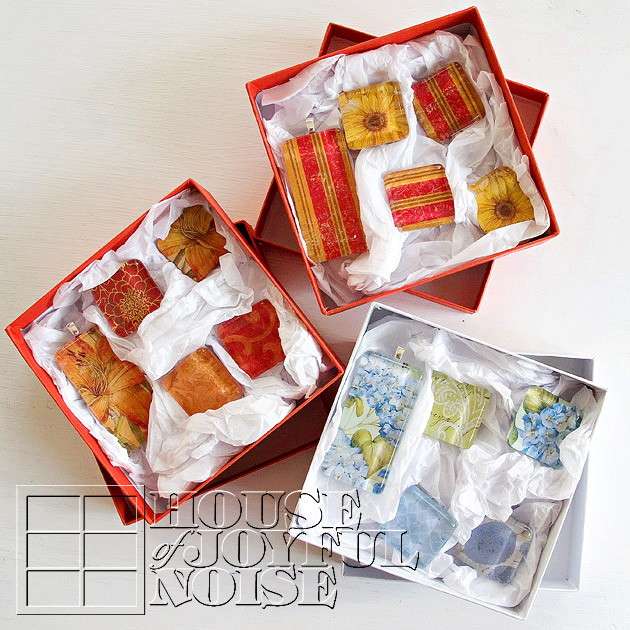
019_glass-tile-pendants-magnets I started, trying to fold the tissue paper.  But ummm….honestly, there needs to be a youtube filmage someday, on me and tissue paper, trying to work together.  I have NO = NONE = ZERO patience for it! It took me….seconds, to just crumble it up, and start stuffing it in the boxes!  But you know, in the end, the look kind of worked, with the slick glass pieces!

I was SO excited to finish packaging them up, and get them to the post office! 

020_glass-tile-magnets-pendants I was just thrilled, with how nice they all came out!  Granted, every piece was not absolutely perfect, but they were made with absolute love! That’s what anything homemade, is all about!

In closing, I’d like to give the the specifications and resources, if you’d like to try making these yourself. Because really, it’s quite easy, quite fun, and you’ll be amazed at what beautiful pieces you made all-by-yourself!  What a perfect gift for a special friend’s birthday, or as Mother’s Day or Christmas gifts! Someone, could be impressed with you. ; )

EXTRA TIPS:

CARD STOCK CHAT:  You do really need to use heavy designer card stock for these, as opposed to regular scrap booking paper. The layer of glaze would make regular weight paper very soggy and ripply, very fast. You’d have a hot mess on your hands, quickly.  The heavier stock holds up to the glaze much better. Also, I really loved using the 2 sided designer card stock, because the coordinating papers made really nice coordinating mixed sets of magnets! I had fun putting them together. The brand I used of the card stock were pads by K&Company.

MAGNETS: I got the 1/2″, ‘3 pounds of force’ Neodymium magnets for strength. Of course, I had no idea what that meant. I can tell you, they have some crazy force!!  I had a few comical happenings!  At times, they just kept pushing away from each other. Or, they would just pulling each other and piling up, with no sense of control! Chaos, I tell you! So maybe I got too strong? But it’s better than the frustration of weak magnets!

GLASS TILES:  I got/used 7/8″ Square Pure White Glass Hand-Cut Tiles, and 1-7/8″ x  7/8″ Rectangle Pure White Glass Handcut Tiles

BAILS: Sterling Silver, Standard Small. (There are various styles.)

DIAMOND GLAZE: 2 Oz. Bottle.  – This stuff can be used as a glaze, and also as an adhesive. As you know, I used it for both in this project!  It dries beautifully clear, and glass-hard! So it can also be used dimensionally!  For example, as raised glass dots on a piece, or to add pop to any design!  I can’t wait to work with it some more.

SUPPLY SOURCE:  Well, the card stock pad I got at Michael’s Arts & Crafts.  But everything else….the tiles, bails, magnets and Diamond Glaze, I got on Etsy!  I would start by searching look for a vendor who sells glass tiles, and in particular, search for ‘pure white glass’ tiles. They seem to be superior in quality, in my experience. I did have a specific vendor I could recommend, from whom I bought my supplies from, but she seems to be out of business now.

* That’s a wrap to this project!  I hope you loved what you saw, and find yourself inspired! You can do this!  Please feel free to ask any questions you may have in the comments and I’ll do my best to answer them for you, or just leave some love, if you’d like.  Thanks for coming by!

 Love it?  PIN IT!!

Save

Save

Save

Save

Save

Save

Save

Save

Save

Save

Filed Under: Crafts & Creations, DIY (Do-It-Yourself) Project, Holiday Crafts, Homemade/Handmade Gift Ideas, Tutorial Tagged With: craft-tutorials, crafts, Diamond-Glaze, glass-pendant-tutorial, glass-tile-crafts, glass-tile-magnets, glass-tile-pendants, handmade-necklaces, homemade-gifts, homemade-jewelry, jewelry-how-to, jewelry-tutorials

Call Us Copy Cats! | Crayon Wall Art

September 13, 2011 By Laura 16 Comments

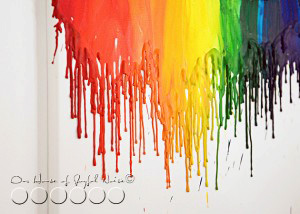
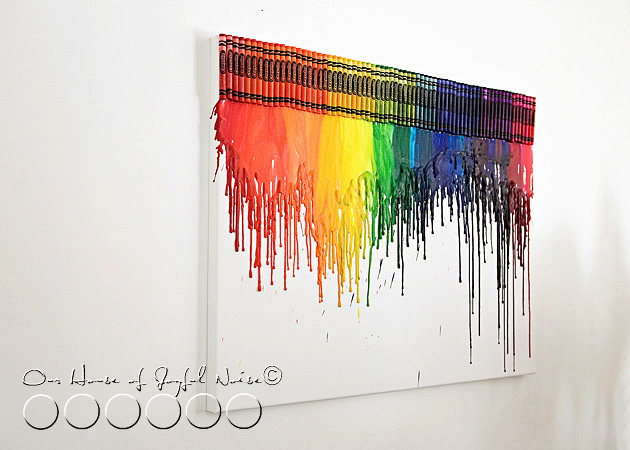
crayon-wall-art-tutorial-20


This crayon art thing that is happening….You know, the one that’s sweeping the nation?  It’s been pinned to death, and it’s invaded Blogland, like there is tomorrow.  And although I am hardly ever one to copy someone else’s ideas, or follow trends for the sake of everybody else doing it, I KNEW I was going to do this art-craft with my kids, the very-first-time I saw it.

Even at the risk, of being called ‘Copy Cats’.


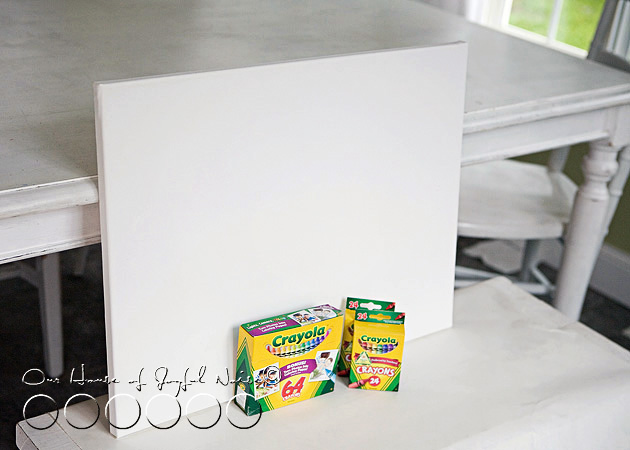
crayon-wall-art-tutorial  So I picked up a 16″ x 20″ white canvas. I knew I was going to love this piece when it was done so I wanted it as big as I thought we could manage, without buying every store in town out of Crayolas.  Oh yes! It has to be Crayola Crayons for me. IS there another brand? Huh. Not in my world. I’ve been a Crayon-Brat since I could….well, color! It’s Crayola, or bust.

So we started with a box of 64, and two boxes of 24. And then…..we got a 3rd box of 24 after that.  Naturally, we couldn’t use ALL of the crayons in every box.  Every color we did use, we needed 4 or more of, to make it across the canvas.  Some colors were just not going to work.  And some, I just didn’t like.


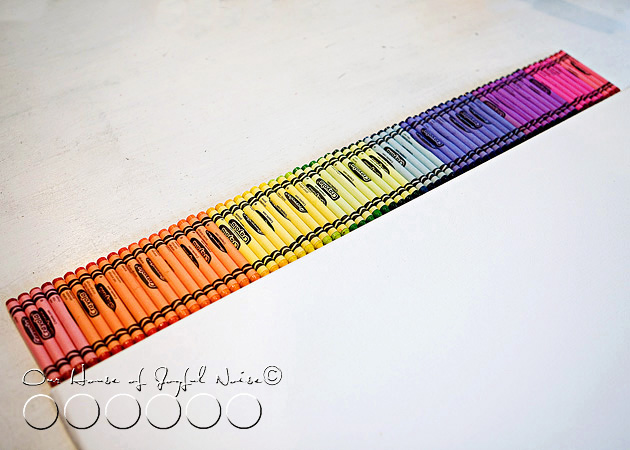
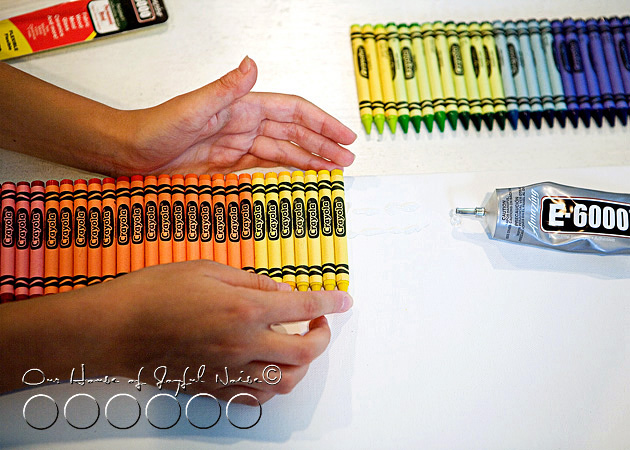
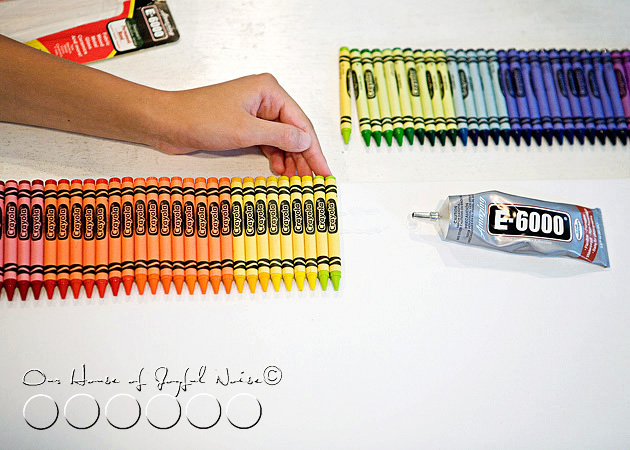
crayon-wall-art-tutorial-1  We laid our colors in the exact order we wanted, along the top of the canvas on the table.  Then we got ready to glue them.


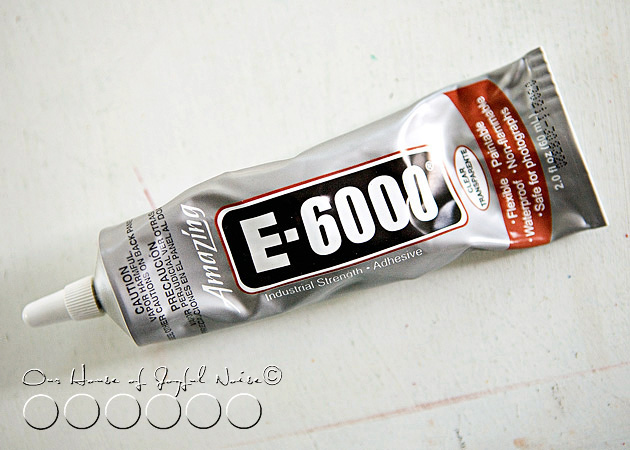
crayon-wall-art-tutorial-2 Our initial plan, was to hot glue the crayons down.  But we quickly decided that wasn’t working for us.  The hot glue cooled and hardened too quickly.   So we broke out the ‘Amazing E-6000’.


crayon-wall-art-tutorial-3 Amazing, is right.  I love the stuff!  It’s the Mac-Daddy of all super glues, in my crafting world.
It really stinks though. I recommend ventilation, because the fumes can’t be good for anyone.


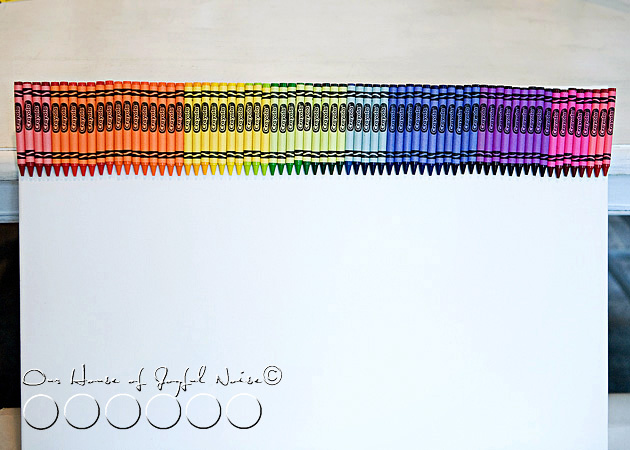
crayon-wall-art-tutorial-4 We just put a couple of lines of glue for a few inches at a time, and the kids helped lay down the crayons in order, as we went.   Alexis helped make sure the tops of the crayons, were as even as possible, aligned with the top of the canvas.

I wanted to just get to melting them right away.  But Alexis, often my handy voice of reason, convinced me that it really would be best, to let the glue crayons set overnight, if we were going to apply high heat to them.

I knew she was right. So I stomped away, and pretty much pouted the rest of the day.


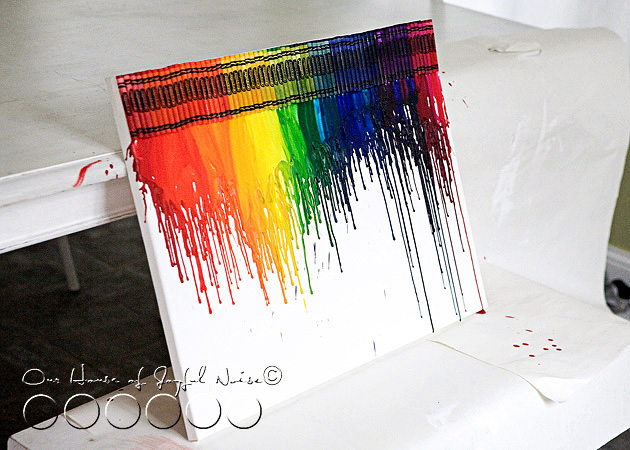
crayon-wall-art-tutorial-5 The next day, it was all set for sure! Those crayons weren’t budging.   So we stood the canvas up on the bench, and leaned it against the table.   We put large sheets of paper underneath the canvas, because we knew we were about to make a hot mess. (Like usual, but literally this time.)  I highly advise a drop cloth or paper of some sort! The wax is bound to get dripping.


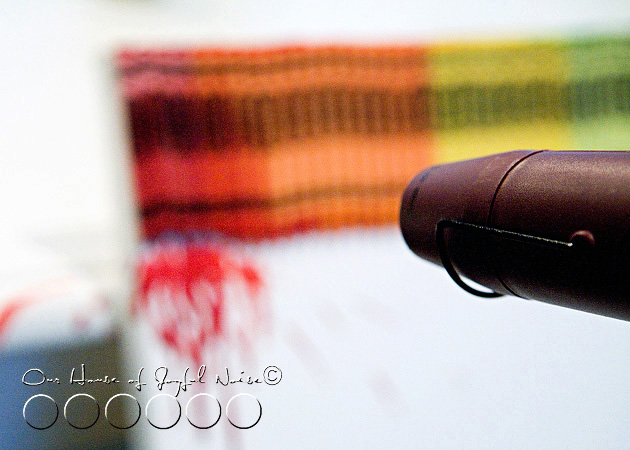
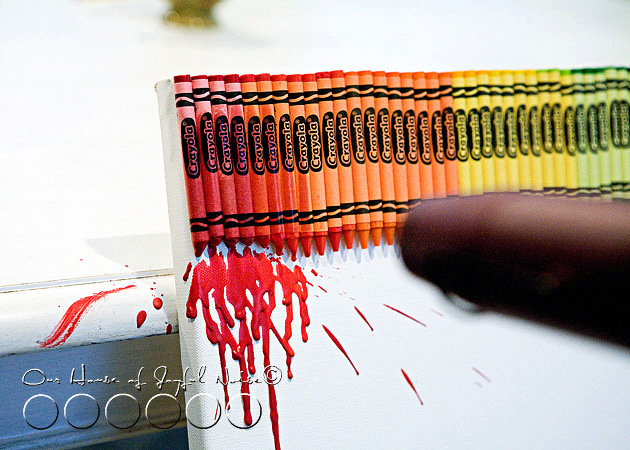
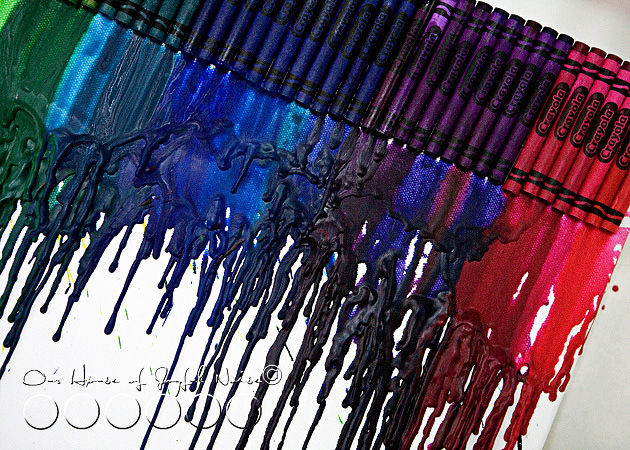
crayon-wall-art-tutorial-6 Finally, we could start melting the crayons!  (Yyyipeeee!!)   I can tell you, we tried a hair dryer, for about….ohhh, a milli-second. I knew there was no way I’d have that kind of patience. If it ever got the crayons melting at all, the hair dryer would probably be over-heating by then. So we plugged in my heat gun, I have used for embossing powder, over the years. I KNEW that would work.

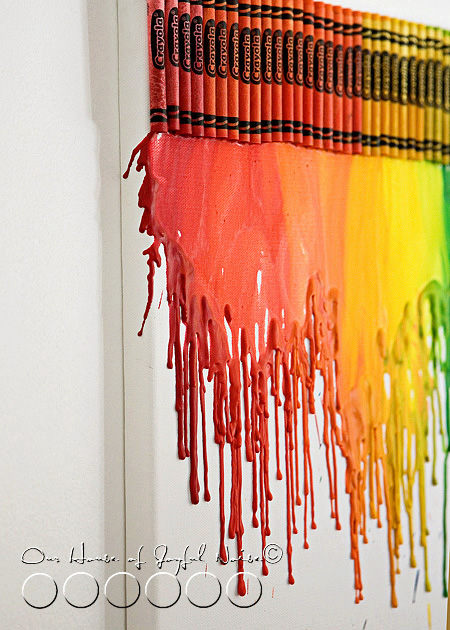
crayon-wall-art-tutorial-7 And boy did it ever.  We learned immediately that it could really blow some hot wax around!  Oops!


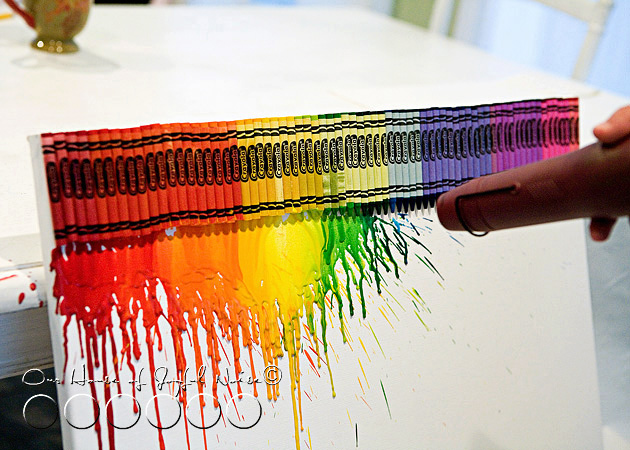
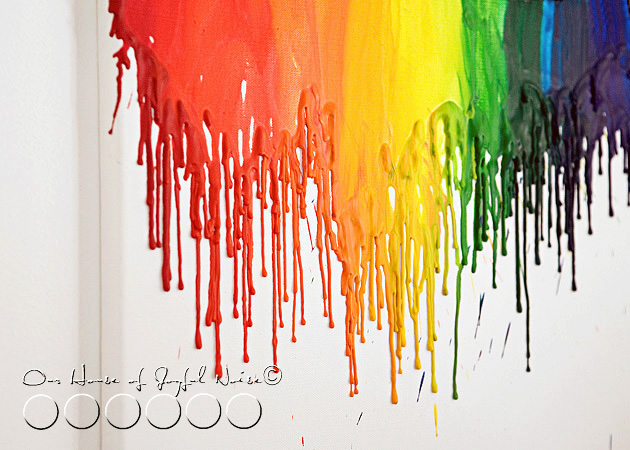
crayon-wall-art-tutorial-8 Very slowly, we worked our way across, watching what was happening as it was, and adjusting our distance and angle of the blowing hot air, as we did. I really didn’t want the colors blowing sideways!  But….more ‘control’ therapy for me.  Sometimes, one cannot control the way the wind blows, completely. (I’ve tried, on many-a-photo-shoot.) Furthermore, I wanted this to be more the kid’s masterpiece, than mine.


crayon-wall-art-tutorial-9 We were directing the heat onto the lower end of the crayons, and waving it around as needed.  The trick, is really to avoid getting too close to the top of the crayons, which we did not want to melt, and to not heat the middle either, as to have a crayon tip blob just fall out.  Sometimes, we started to see smoke, from the paper heating so much, so you want to be careful of that too.

We all took turns, while we all tried to verbally direct each other too. lol

crayon-wall-art-tutorial-10 WARNING though:   This is really NOT  a craft for a young child to do alone.  The heat gun is hot, and the melting wax is really hot too.  But, it’s a fun craft to do with your littles.


crayon-wall-art-tutorial-11 I really kept trying to go back, to try and perfect this, or fill in that, and the kids were like, “Mama, just leave it!!  It looks good. Don’t ruin it!”.   Excellent therapy for me, to just embrace the art that happened.   Because I have ALWAYS been the kind of technically sound type artist.  The kind that brings to life something I see, exactly as I see it in my head, down to the last detail.   My ‘let-loose’ therapy started in art school, the day I had to draw a nude model on paper, with a stick that had been dipped in ink, with my mouth. Talk about lack of control!  I think that exercise actually set me back a few years. lol


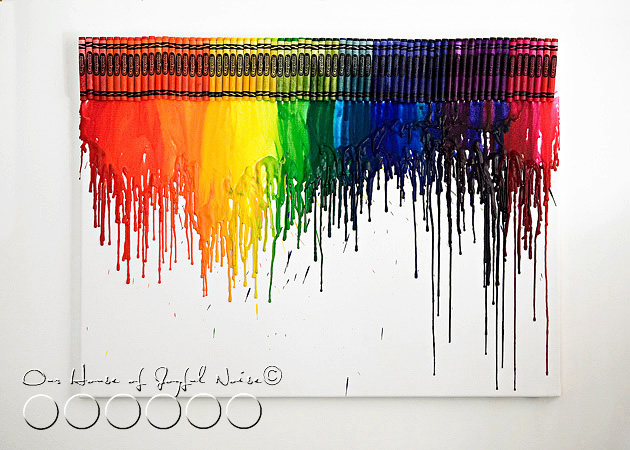
crayon-wall-art-tutorial-12 We all took a step back to take a good look at out artwork, and agreed to call it DONE.

Then we waited for Daddy to come home to see it. And of course, hang it up for us.  Somewhere.

But where?  That was the question.  I wanted it in every room I thought of!  It’s colorful, and happy!  And the kids and I made it together.   It had to be in a good place.


crayon-wall-art-tutorial-13
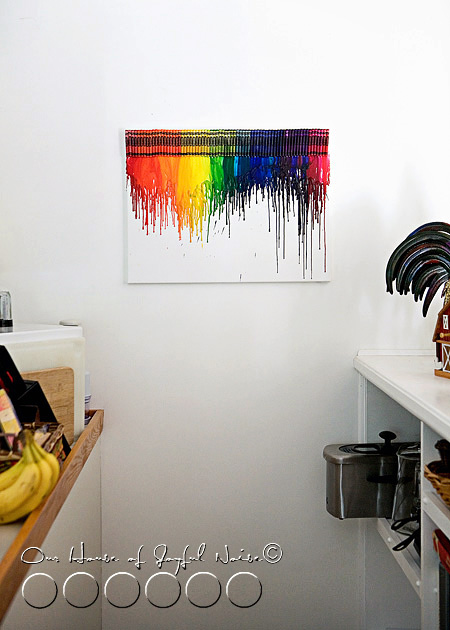
We decided on the wall over the stairwell in the kitchen, down to the lower levels, was a good place for awhile.


crayon-wall-art-tutorial-14  It was on the way down to what will at some point be the kids’ Rec Room.

It’s also on the way down to the Laundry Room.  And you all know, we ALL could use a smile, on the way to the Laundry Room!

crayon-wall-art-tutorial-13
Being over the stairwell there, it can be seen from about half the house on that level.  The kitchen, the school room, and the living room.


crayon-wall-art-tutorial-17 I have always said, “Colors make me happy.”  They really do.


crayon-wall-art-tutorial-18
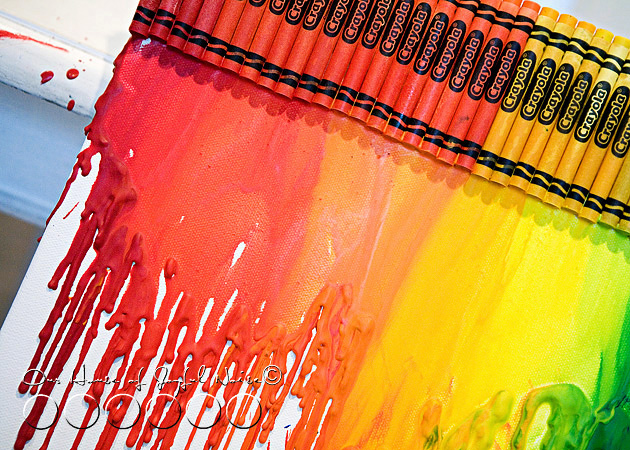
Oh, the texture!
I wonder what the Crayola Corporation thinks about this craze.  Surely they’ve caught wind of it by now.  Probably not being able to keep their crayons in stock at stores, and all. I’d have to guess they should be pleased, with what must be a sudden and dramatic increase in sales. We helped with that!!


crayon-wall-art-tutorial-19 But again, it was not my idea.  I wish it was.  And although copying the latest craft happening will never be my style, I do not regret this once, for a minute.
I do want that thank, though, whoever did come up with this idea. Because we had so much fun doing it!

Have you, given this idea a try yet?  And if not, don’t you want to now?

******


Save

Filed Under: Crafts & Creations, DIY (Do-It-Yourself) Project, Kids Arts and Crafts, Tutorial Tagged With: arts and crafts, crafts, Crayola-crayons, crayon-art, crayon-wall-art, DIY-art, E-6000, melting crayons

  • « Previous Page
  • 1
  • 2
  • 3
  • 4
  • 5
  • 6
  • Next Page »

We are wicked happy to have you here! We hope you find much inspiration, help, humor and enjoyment here.


Archives


POPULAR POSTS

* * * * * *

SUBSCRIBE to House of Joyful Noise blog! Every new post, delivered right to your email box!


Privacy Policy

Amazon Affiliates

Never at any additional cost to you, we may earn a small commission for our endorsement, recommendation, testimonial, and/or link to any products from our website. Your purchase through our links helps support our family, while sharing with you the products we authentically use and recommend, for various ideas, and letting you know where you can purchase them. Thank you for your support!

[footer_backtotop]

Copyright © 2026 HouseOfJoyfulNoise.com · Genesis Framework by StudioPress