• HOME
  • {A}’s Chipmunk Training Archives

 Homepage

  • The Homestead
    • Home Projects
    • Home Improvement
    • Home Decor
      • Seasonal Home decor
        • FALL Home Decor
        • WINTER Home Decor
        • SPRING Crafts and Creations
        • SUMMER Crafts and Creations
    • Our Chickens
    • Gardening
    • Organization
    • Re-Purposing
    • Furniture Refinishing
    • Budget
  • Crafts & Creations
    • Seasonal Home decor
      • FALL Crafts and Creations
      • WINTER Crafts and Creations
      • SPRING Crafts and Creations
      • SUMMER Crafts and Creations
    • DIY (Do-It-Yourself) Project
    • Kids Arts and Crafts
    • Homemade/Handmade Gift Ideas
    • Holiday Crafts
    • Fan Pulls
    • Free Printable/Downloadable
    • Sewing Projects
    • Giveaways
    • Business Features
  • Recipes/FoodFun
    • Breakfast
    • Lunch
    • Main Dish
    • Sandwiches
    • Appetizers
    • Slow Cooker
    • On The Grill
    • Side Dishes
      • Soups
      • Salads
    • Baking
      • Breads, Rolls and Muffins
    • Snacks
    • Treats
    • Desserts
    • Drinks
  • Homeschooling
    • Elementary Homeschooling
      • Elementary Homeschooling READING
      • Elementary Homeschooling MATH
      • Elementary Homeschooling LANGUAGE ARTS
      • Elementary Homeschooling SCIENCE
      • Elementary Homeschooling HOME ECONOMICS
      • Kids Arts and Crafts
    • Middle School Homeschooling
      • Middle School Homeschooling SCIENCE
      • Middle School Homeschooling HOME ECONOMICS
    • Language Arts
    • Math
    • History / Social Studies
    • Geography
    • Foreign Language
    • Field Trips
    • Games
    • Nature Study
  • The Big Picture
    • Life In General
    • Celebrations
    • Faith
      • Into the Light; The Series
    • Giveaways
    • Reviews & Sponsors
  • Photography & Lettering
    • Photography
    • truck lettering
    • vehicle graphics
    • Newborns
    • Kids
    • Engagement
    • High School Senior Pictures
    • High School Senior Pictures Sneak Peeks

Fall Themed Candles Embedding Real Leaves

October 10, 2013 By Laura 21 Comments

Today, I’m going to show you one way to preserve those beautiful Fall leaves you found, and make something beautiful to add to your warm Autumn home decor. Candles! Embedding real leaves.
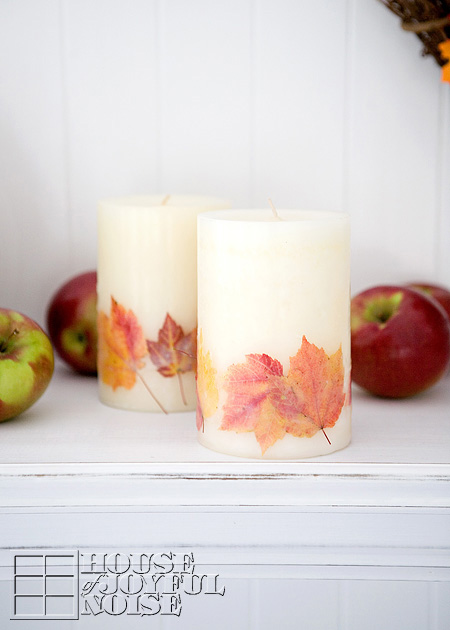

We’re simply taking store-bought medium-pillar candles, and embedding the real leaves as a beautiful decorative element.
To do this, I’ll be using a separate wax medium.  The reason I am choosing to not just glue the leaves on, or seal them in with Modge Podge or something, is because those mediums are flammable.  I likely will be burning these candles. While I won’t burn them very low, I didn’t want to take the chance of having anything chemically-flammable as part of the candle, when it is easy enough to avoid that. Also, embedding the leaves within the sides of the candles will give the look I am trying to achieve.

All you’ll need for this project is some pillar candles of some sort, some plain melting wax (for candle making), your pressed leaves that you collected, and some pans. (A few other optional supplies will be mentioned along the way.)
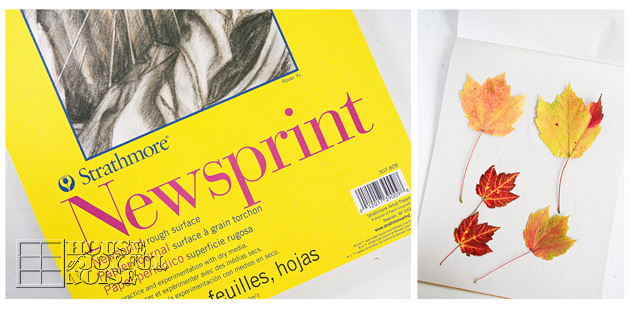
The first step in working with real leaves, is to ‘press’ them.  This not only flattens them, but somewhat preserves their moisture for a bit, yet keeps their pliability to be able to work with them well.   I press them by placing my leaves between the pages of a newsprint pad of paper, and putting a small pile of magazines, or whatever for weight, on top.  A few days will do.

–
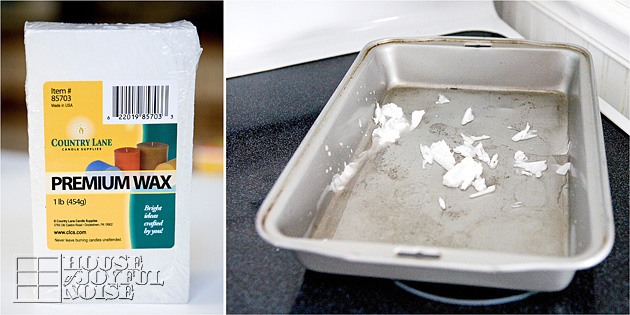
You’ll want to melt your wax over some kind of consistent heat. Making do with what I had, I cut some chunks off of my premium wax block, and put it in a roasting pan, over 2 burners on my electric stove on a very low heat. Possibly even the simmer setting. Start at the lowest and increase the heat as needed. Every stove is different, but generally speaking, you want the wax just liquid-y, but never to the point of bubbling. How much wax you melt depends on how many leaves you’ll be adhering, how many candles you are decorating, etc.  But regardless, you certainly want the wax deep enough to completely submerge a leaf.

  Once your wax is melted, you’ll want to have your pillar candles and leaves readily available to work with. Also, have a sheet of wax paper on a flat surface nearby, to be able to put your candle down as needed.

*This is a very important tip!
You need to keep your pillar candle itself somewhat warm to apply the dipped, hit-wax leaves successfully. The reason being is that lying your hot waxed leaf on the cold surface of the candle immediately sets the wax, and it does not apply well at all. 

But I have two great tips to choose from, for keeping your pillar candle warm:

1)  Have a heating pad on high on your nearby counter-top, with a sheet of waxed paper on it. You can roll the whole thing up with your pillar candle in it (in the waxed paper), or, you can simply lie the candle on it’s side, keeping warm on the side you’ll be applying to.

Or you can go with second option, which is what I ended up doing:
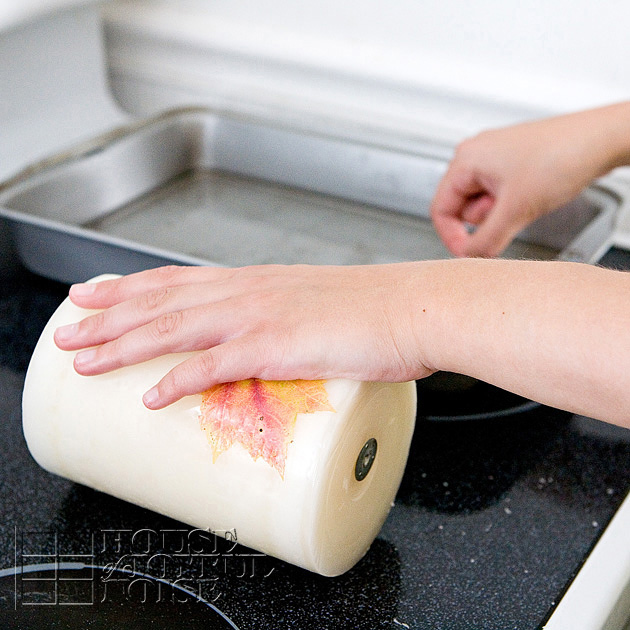
2) Simply lie the candle on the warm stove, beside the working burners to keep it warm. Obviously you don’t want your pillar candle to melt. But your burners should not be high enough to do that. This method worked well for me, as long as I did apply the just-dipped leaves to the warm area of the candle.
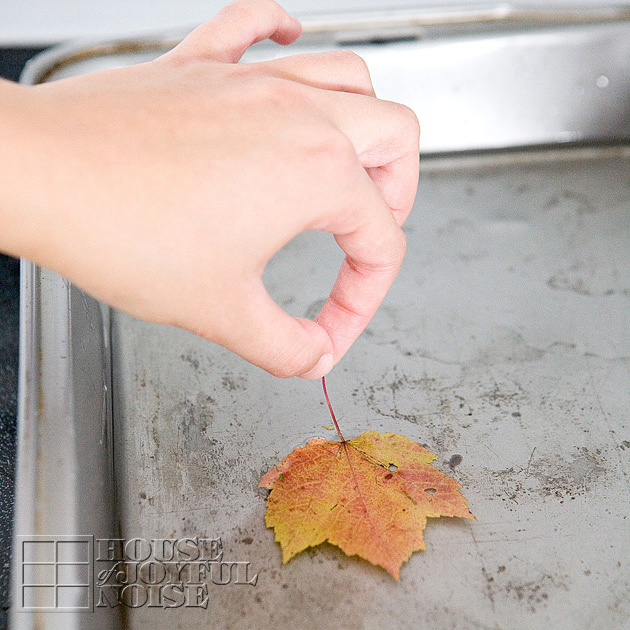
So here we go!

Dip your leaf in the hot melted wax, holding it completely submerging in the wax for a few moments. Keeping it submerged for a few moments (as opposed to dipping and retrieving) will really help the leaf get limp, which will be helpful in applying to the candle.

(View images left to right.)
Then quickly but carefully lie and really ‘cling’ your whole leaf to the candle, and begin to rub down all over as you can.  I say as you can, because it is hot!  And yet you want to press it down as much as you can, before it starts to set. So gently press it down all over, without rubbing hard in any way, and then really just lay your hand down over it as soon as you can while it sets.

Continue adding leaves for your overall design. It is alright to overlap some pf the leaves as well.
Remember to warm the candle in between, as you’re dipping your next leaf.
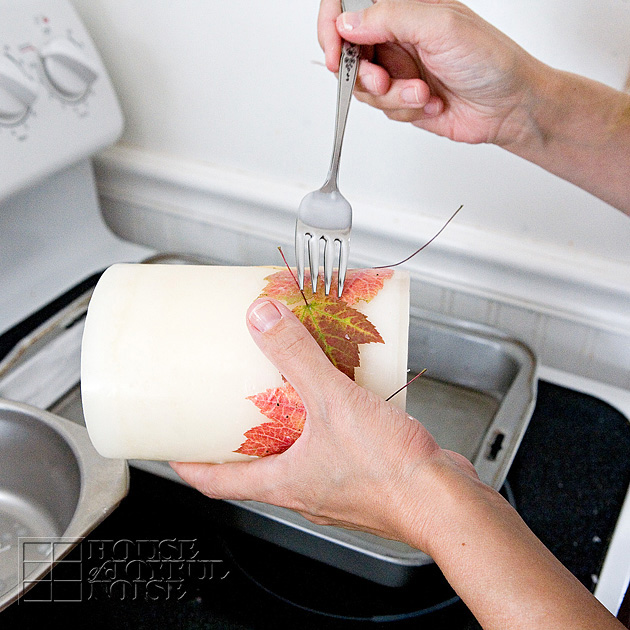
Now if you find the wax has set in an area that the leaf is not stuck down well, here is a little trick to re-work it:
Dip a fork into your hot melted wax, and drip it onto the area of your unsealed leaf that needs fixing.
Then press down again with your fingers.
The stems are optional to keep as is, cut shorter, or cut off at the base. I rather like them, and am leaving them for as long as they don’t break off on their own.
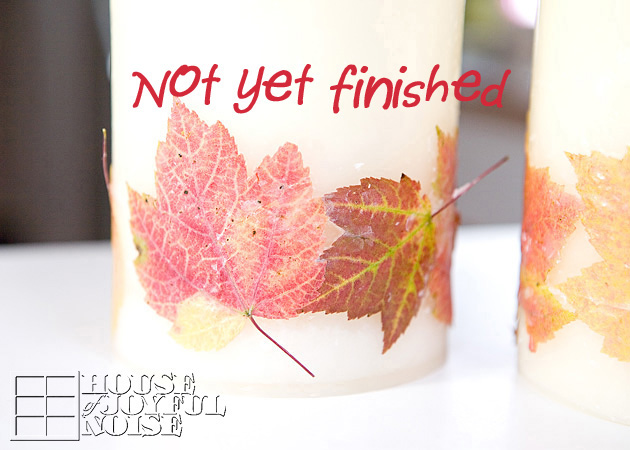
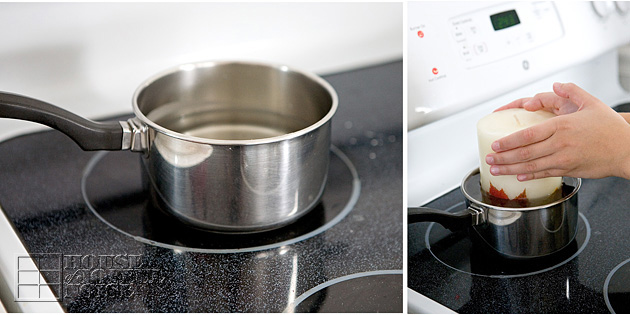
Once all of the leaves are applied, you might consider your candles done. But I really wanted to further seal the leaves onto the my pillar candles, so that they may better hold up for a longer period of time, without the leaves coming off.   The layer of wax over your leaves on your candle at this point is very thin, and that leaves (no pun intended) your decorative surface very fragile and at risk of being damaged.  It’s also somewhat bumpy from all of the pressing on. So another sealing coat is a good idea, and it’s easy to do!
Just heat up more wax in a sauce pan at a reasonable depth, and dunk the whole candle!  Use a size appropriate pan for the size of your handles, and no wider than you need, or you’ll need to use way too much wax to bring the level up.
Now….you also want to keep in mind that the submerging of your candle is going to drastically rise the level of your very hot melted wax. So, be mindful of the amount you melt.  My goal was to melt enough to dunk the candle to just over the leaf tips, without overflowing the wax all over my stove top range. I barely made it…missing just the tips of the leaves.

*Dunk it only once, (holding it submerged for a moment or two like the leaves), as double-dipping may create such a layer of wax, that it’ll become too difficult to see the beautiful shapes and colors of your leaves.
Once lifting them up out of the pan, just carefully set them down on that sheet of waxed paper, until the whole candle cools and sets.
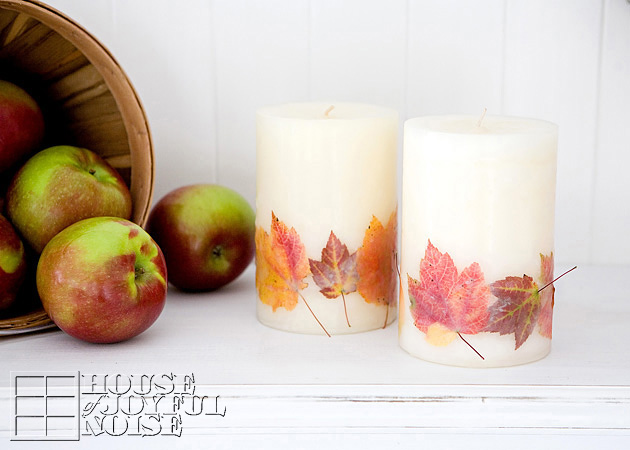
Now they are finished, and ready to add some Fall beauty to your home wherever you choose to display them.  You can enjoy them long after the leaves outdoors have dried up and crumbled away.
I hope you enjoyed this tutorial too, and will consider having fun making some Fall candles with real leaves yourself.

* * * * * *
Please come follow me here and there:

Save

Filed Under: Crafts & Creations, DIY (Do-It-Yourself) Project, FALL Crafts and Creations, FALL Home Decor, Home Decor, Seasonal Crafts and Creations, Seasonal Home decor, The Homestead, Tutorial Tagged With: add-fall-leaves-to-candles, autumn-crafts, candle-crafts, candle-detailing, candles, crafts, decor, dipping-leaves, diy, elementing-candles, fall-crafts, fall-decor, fall-leaves, home, home-decor-projects, how-to-wax-real-fall-leaves, leaf-crafts, leaves, pillar-candles, waxed-leaves

Dream Craft Art Studio: Reveal – Move In Ready! – Part 3

September 16, 2013 By Laura 6 Comments

Good gosh!  Is it me, or has this been a long. time. coming?
I am THRILLED to say, the art studio is DONE!!
Construction and carpentry-wise, anyway.  I’m sure we’ll have a few more organization units to install, but I’ll figure out just what I need  in the process of moving in with all of my stuff!

Before you scroll down and see, you may want to see the previous states of progress, to really appreciate all it is now.  It’s still just a little bit hard to show you because….I’m afraid you all just might be bored by it!  It’s the reason I haven’t shared more of the progress along the way.  I’m the type who has the whole finished version in my head along the way, and so knowing where it’s going….anything prior to that is somehow……less than.  But, I did give you a few couple of progress updates as you know! It’s just that, it’s a whole lot of whiteness right now; as I said was my plan all along. My dream was a bright white canvas to work in and on, and to photograph in, with a whole lot of color accents.  And I must say, I do love it already, even just as all white at this point!  The light being thrown around, is divine!

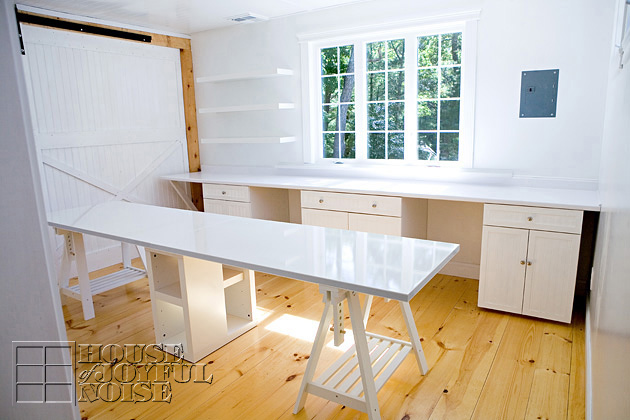
Here’s a look inside now!

A view from the entry door! 
It’s instant cheer for me, just walking in.
The bright natural light in the mid-day all through the afternoon, is phenomenal!  And if you all know me, I need light.

The creative space/room is 13′ 8″x 12′.
One of the biggest features you may notice here, is that the single window was finally replaced with the larger (relocated) picture window, as planned.  It made the world of difference in the light that it lets in, as I knew it would.  

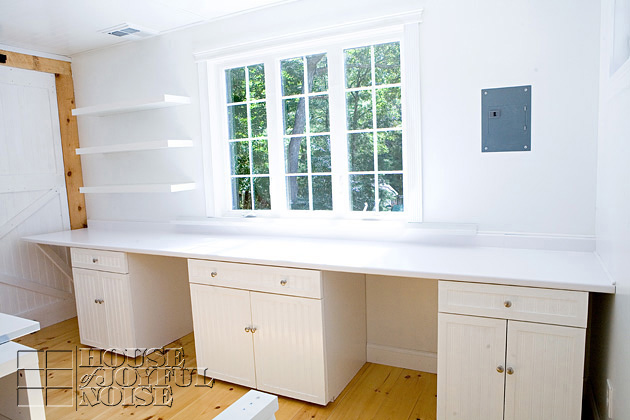
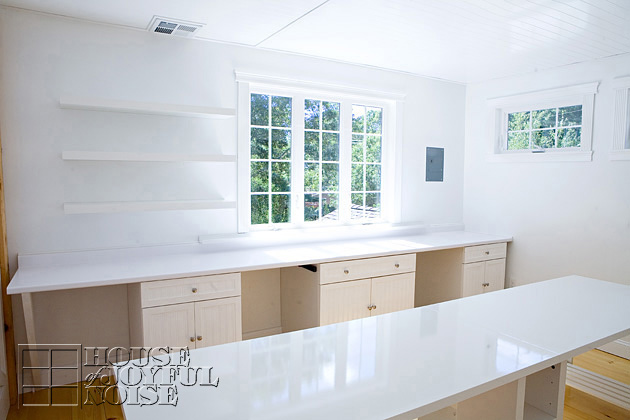
Those very simple shelves to the left are from Ikea; love them! While the plan was to build cabinetry, I realized we had white cabinets in 2 different rooms of the house that were emptied (of my craft stuff that was packed up), and they needed to get out of the rooms they were in.  After talking with Michael, we realized we could definitely re-purpose them into this art studio, and keep true to our original plans of white storage cabinets, drawers, cubbies, and one single counter space all along that wall. It worked!  The counter-top was custom-ordered through Lowe’s, and delivered. It is 13’4″.
We have a couple of white stools that fit well right under those cubbies, and are the perfect height for sitting and working. But I believe I’ll also be ordering some roll out paper storage, for the loads of paper I have in stock.
Also on the right wall will definitely be some art or a sign, over that control panel, and possibly another shelf or 2.

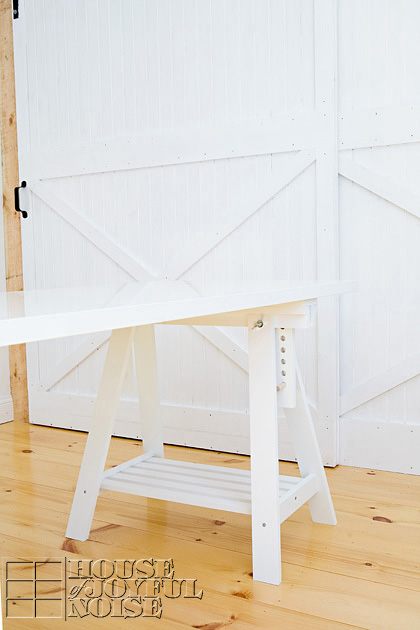
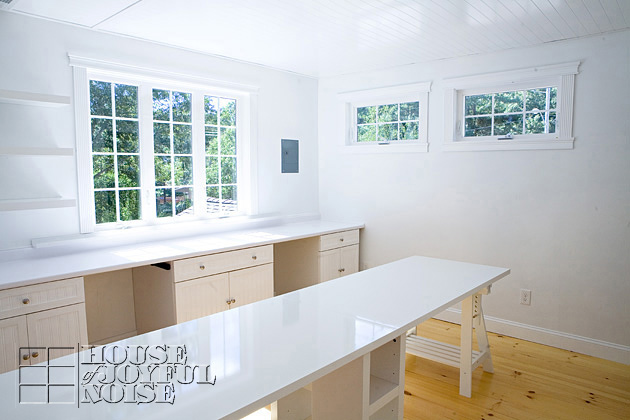
The crafting table is long!  From Ikea: it’s actually two (60″) tabletops combined for a total of 10′ of workspace. 
There is space for 6 people to sit and work comfortably, with foot room and all.
I’ve picked out the chairs, but still need to order them.


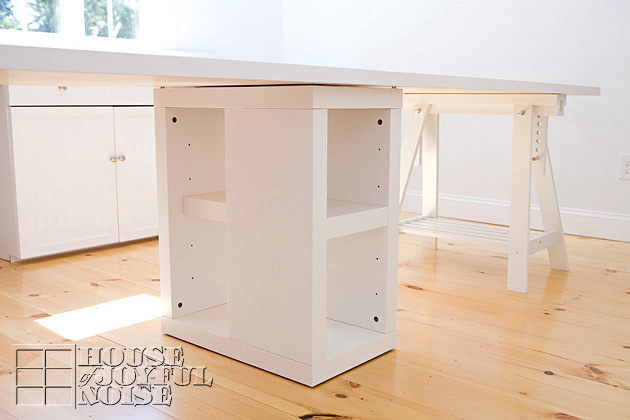
Also from Ikea, to support our tabletops:  2 work-horses, with cute storage shelving.
–

As well as this unit, that offer even more storage shelving.

So yes, the length of the work table is almost as long as the room; just like I wanted. The surface is perfect!  Quite stain and generally scratch resistant. 
But we’ll likely always protect the surface with newsprint or something just in case anyway.
In this photo you’ll also notice the 2 additional windows we have, to welcome more light in the late afternoon light.
Under the windows will likely be more shallow storage units of some kind, or something like that. I’m still unpacking, setting up, and figuring out what else I need.

I’ll be storing the big, ugly and/or cumbersome items for our crafting projects. The drawers are deep and hold lots of little and long stuff.  As I said, there will be more storage worked into underneath the cubbies, but will also offer additional seating, if necessary.  My husband will be doing a lot of his designing and cutting at the end on the far left, and be able to weed material easily on the table. (If I don’t have a project mid-mess, of course.)

Speaking of Michael, I am SO THANKFUL to him for all of the many hours of hard work he put in, making this dream of mine come true for me, and for our family. I am so very blessed for the many ways in which he is a wonderful husband to have.

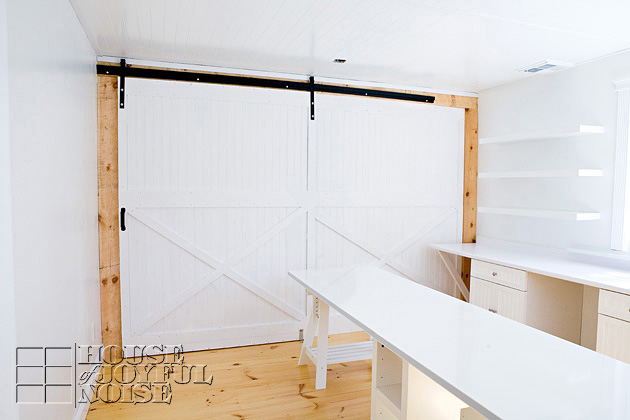
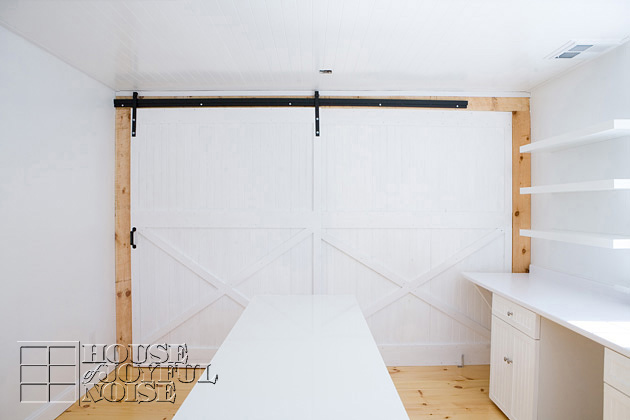
Did you notice the amazing barn doors?….
Michael completely designed, custom-built and installed those, too!
No small project!  I love them.  Perhaps I will do another post just on those, and give you a closer look with more verbal details.
And then there is yet another reveal behind those barn doors: one of our boy’s awesome bedroom!  He’s all moved in, and loving it.

My art studio reveal is not done though! 

There will be one more, showing you what it looks like all moved in!  Expect lots of COLOR added!  And instant happiness and inspiration. We actually started moving stuff in right after taking these photos for this post.
We are so thrilled with how it’s all coming together. What do you think?  Do you have a dedicated space to get creative? Tell us about it or share your links, please.
And be sure you are following us for our next art studio reveal!
Thanks for coming over, Friends.

* * * * * *

Please come follow me here and there:

Save

Save

Save

Filed Under: Crafts & Creations, Home Improvement, Home Projects, Organization, Photography, The Homestead Tagged With: art-studio-ideas, art-studios, craft-art-organization, craft-room-ideas, craft-rooms, craft-spaces, craft-studios, craft-tables, crafting-furniture, dream-art-studio, dream-craft-room, home-renovating, Ikea, Improvement, organization

Our Summer Mantels | Home Decorating Ideas

July 10, 2013 By Laura 9 Comments

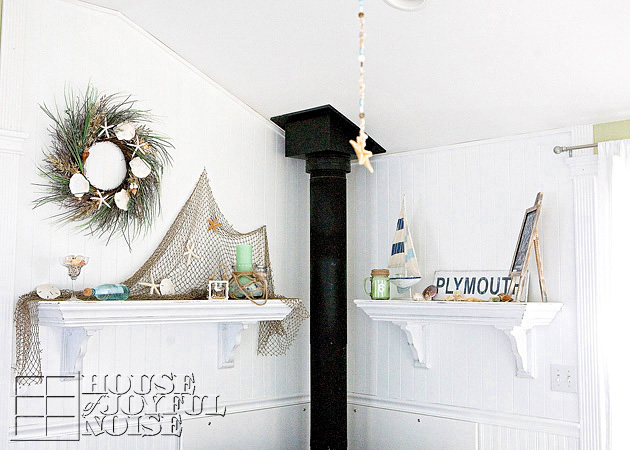
We’re three weeks deep into the summer season, so I thought it was high time I got our summer mantels decor on the blog.  It’s not only fun to show, but hopefully it gives someone some home decorating ideas. And if you aren’t aware of it, mantel decorating is twice the fun around here, because we have double mantels! Courtesy of the hard-working hands of my carpentry-able husband. So the mantels inspiration, ideas, photos, decor, fun….is always x2 here at the House Of Joyful Noise! 

I knew the season of summer was going to be fun to work with. Once I got thinking about it, I started getting all kinds of ‘theme’ ideas that fit the summertime season! But, where we live right by the ocean, it only seemed to right to go with the beach/nautical/seaside authentic decor, this first summer with our new mantels. I am sure as the years go by, I’ll continue to get this thrill from the creative process of putting together pieces to decorate the mantels, and so it will always be somewhat difference from year to year and season to season. And by seasons, I am referring to both the four seasons of New England climate, as well as holidays. In other words, no 2 summer double-mantels will be just the same.

That said, I AM so in love with my finished summer mantels right now, that I can’t imagine ever taking it down, or putting it back together just like this, next year.

Do you love them too?  
I just love seeing them. Whether on accident as I breeze through, or just sitting there, looking them over, and enjoying them.
I realize Autumn will descend on us at some point, and I’ll have new excitement and inspiration for that season (which I love), but for now, I am digging summer. A LOT. In all kinds of ways.

Oh you know I took details photos, so I can tell you [Read more…]

Filed Under: Home Decor, Mantel Decorating (Ideas), Photography, Seasonal Home decor, SUMMER Home Decor, The Homestead Tagged With: decorating-mantels, decorating-with-theme, home-decorating-mantels, mantel-decorating-ideas, mantel-decorating-tips, mantels, nautical-decorating, ocean-decor, seaside-decorating, summer-decorated-mantels, summer-mantel-decorating-ideas

A Simple Pallet Compost Bin and Learning Organic Composting

June 21, 2013 By Laura 3 Comments


I’ve finally jumped. We have built a simple compost bin, for the purpose of learning some organic composting, and it’s (hopefully) already cooking.

com·post
/ˈkämpōst/

Noun – Decayed organic material used as a plant fertilizer.

Verb – Make (vegetable matter or manure) into compost: “don’t compost heavily infested plants”.

Synonym – fertilize – manure

For as long as I have been gardening, I have wanted to be making my own organic compost for our gardens.  Because we all know that what one is trying to grow organically, is going to grow best in healthy, rich, organic soil, that derives from organic compost.  While on the one topic I have learned a lot and made physical progress with gardening over the past several years, on the other, we have been buying compost in bags for the gardens. Reason being; every time I research and start reading about making organic compost, I get confused and overwhelmed with all of the info I am finding online. It just seems….complicated, and too specifically scientific, and . . . . I’ve just been afraid that while I have managed to make 4 beautiful and healthy children, I am somehow going to fail at making some good healthy dirt!

But then, I found myself inspired and encouraged, thanks to an online friend, when [Read more…]

Filed Under: Gardening, The Homestead Tagged With: compost, compost-bin-ideas, composting, composting-tips, Gardening, how-to-make-compost, how-to-make-organic-compost, learning-composting, making-compost-for-gardens, organic-composting, palette-compost-bin

A Horseshoes Post

June 10, 2013 By Laura 16 Comments

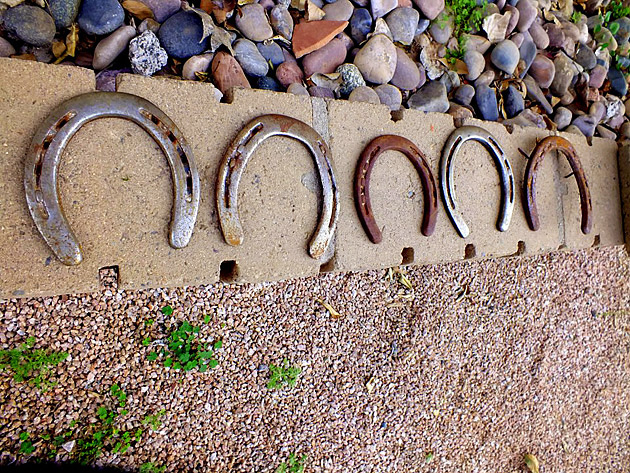
Awhile back, my sister-in-law messaged me asking if we might have any use for some horseshoes.   She lives out in Arizona, and found a bunch on her property from some horses they had boarded. She thought maybe we could use them for some creative project or other.
She even sent a quick photo of them . . . . . .

I thought it was really nice of her to think of us, and offer them. I said “Sure!”, of course.  Although I really had no idea what I’d do with them.  I loved the idea of creatively using horseshoes for something, but nothing was coming to mind.   The HEAVY package arrived, and I took a look at them. And then I put them back in the package, and it sat under my desk in view, reminding me every day to brainstorm about it.  Still . . . . . . nothing popped in my head.  So then I Googled, and looked on Pinterest, hoping to find some inspiration, or even an idea I really liked.  I did find lots of ideas, but none of them struck me.

And then one day, I had an idea, and [Read more…]

Filed Under: Home Decor, The Homestead Tagged With: antique-horseshoes-commercial-display-stand, antiques, horseshoes, horseshoes-decor, ideas-for-horseshoes, mailbox-post-decor, mailbox-post-ideas, the-american-wringer-co

  • « Previous Page
  • 1
  • …
  • 8
  • 9
  • 10
  • 11
  • 12
  • …
  • 30
  • Next Page »

We are wicked happy to have you here! We hope you find much inspiration, help, humor and enjoyment here.


Archives


POPULAR POSTS

* * * * * *

SUBSCRIBE to House of Joyful Noise blog! Every new post, delivered right to your email box!


Privacy Policy

Amazon Affiliates

Never at any additional cost to you, we may earn a small commission for our endorsement, recommendation, testimonial, and/or link to any products from our website. Your purchase through our links helps support our family, while sharing with you the products we authentically use and recommend, for various ideas, and letting you know where you can purchase them. Thank you for your support!

[footer_backtotop]

Copyright © 2025 HouseOfJoyfulNoise.com · Genesis Framework by StudioPress