• HOME
  • {A}’s Chipmunk Training Archives

 Homepage

  • The Homestead
    • Home Projects
    • Home Improvement
    • Home Decor
      • Seasonal Home decor
        • FALL Home Decor
        • WINTER Home Decor
        • SPRING Crafts and Creations
        • SUMMER Crafts and Creations
    • Our Chickens
    • Gardening
    • Organization
    • Re-Purposing
    • Furniture Refinishing
    • Budget
  • Crafts & Creations
    • Seasonal Home decor
      • FALL Crafts and Creations
      • WINTER Crafts and Creations
      • SPRING Crafts and Creations
      • SUMMER Crafts and Creations
    • DIY (Do-It-Yourself) Project
    • Kids Arts and Crafts
    • Homemade/Handmade Gift Ideas
    • Holiday Crafts
    • Fan Pulls
    • Free Printable/Downloadable
    • Sewing Projects
    • Giveaways
    • Business Features
  • Recipes/FoodFun
    • Breakfast
    • Lunch
    • Main Dish
    • Sandwiches
    • Appetizers
    • Slow Cooker
    • On The Grill
    • Side Dishes
      • Soups
      • Salads
    • Baking
      • Breads, Rolls and Muffins
    • Snacks
    • Treats
    • Desserts
    • Drinks
  • Homeschooling
    • Elementary Homeschooling
      • Elementary Homeschooling READING
      • Elementary Homeschooling MATH
      • Elementary Homeschooling LANGUAGE ARTS
      • Elementary Homeschooling SCIENCE
      • Elementary Homeschooling HOME ECONOMICS
      • Kids Arts and Crafts
    • Middle School Homeschooling
      • Middle School Homeschooling SCIENCE
      • Middle School Homeschooling HOME ECONOMICS
    • Language Arts
    • Math
    • History / Social Studies
    • Geography
    • Foreign Language
    • Field Trips
    • Games
    • Nature Study
  • The Big Picture
    • Life In General
    • Celebrations
    • Faith
      • Into the Light; The Series
    • Giveaways
    • Reviews & Sponsors
  • Photography & Lettering
    • Photography
    • truck lettering
    • vehicle graphics
    • Newborns
    • Kids
    • Engagement
    • High School Senior Pictures
    • High School Senior Pictures Sneak Peeks

A Great Pie Taste-Testing! | $50 to Williams-Sonoma

December 21, 2012 By Laura 35 Comments

All about PIE!   This is a Sponsored post written by me on behalf of Mrs. Smith’s. All opinions are 100% mine.

 

Say “I” if you love pie!  And if you love free money, you can put some whip cream on top of that! This should be a fun post for you. It sure was for us!
Recently, Mrs. Smith’s asked us to try their new Mrs. Smith’s Signature Deep Dish pies, and also sent us a sweet prize to give away too.

$50 to spend at Williams-Sonoma!

I’m actually one to bake my pies from scratch. But in a crunch, Mrs. Smith’s is my store-bought pie to fall back on!

My husband and kiddos love pie from anywhere, so they were all over this one! So I thought it would be fun for them to have a great pie taste-testing!
And guess what? No one disagreed!
Imagine that.
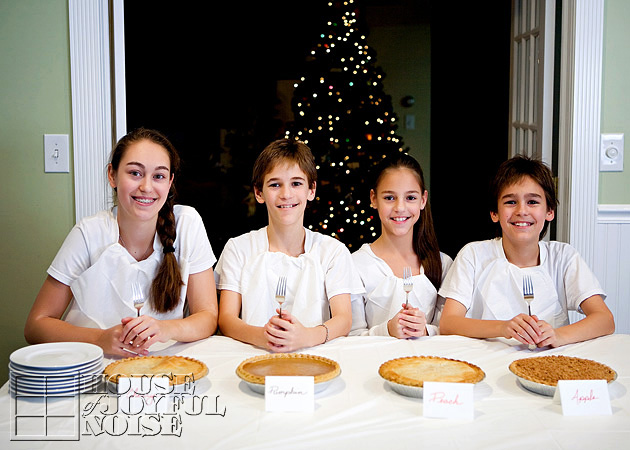

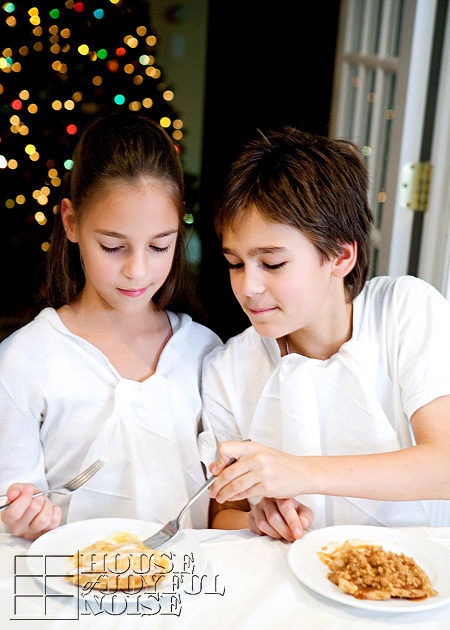
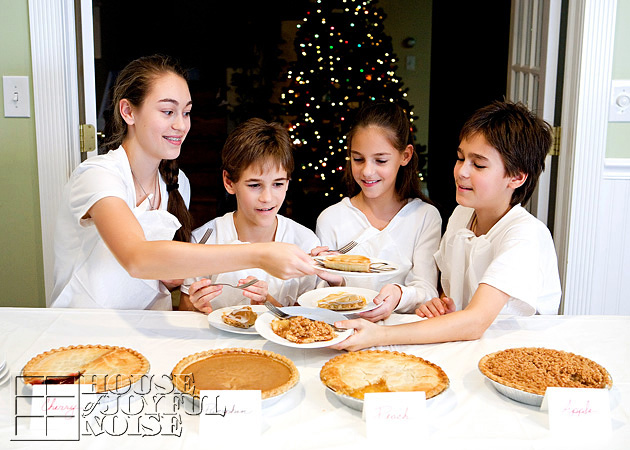
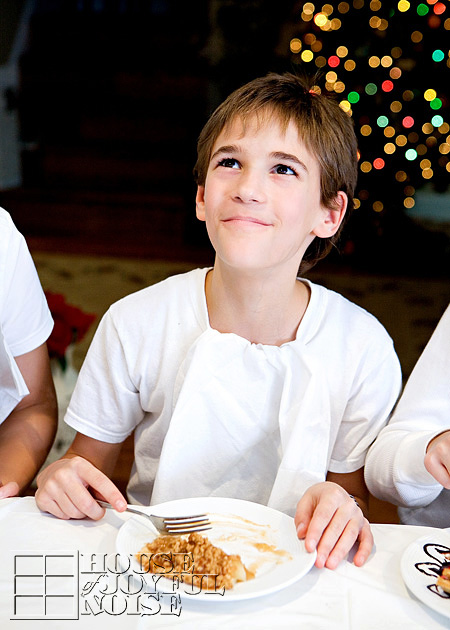
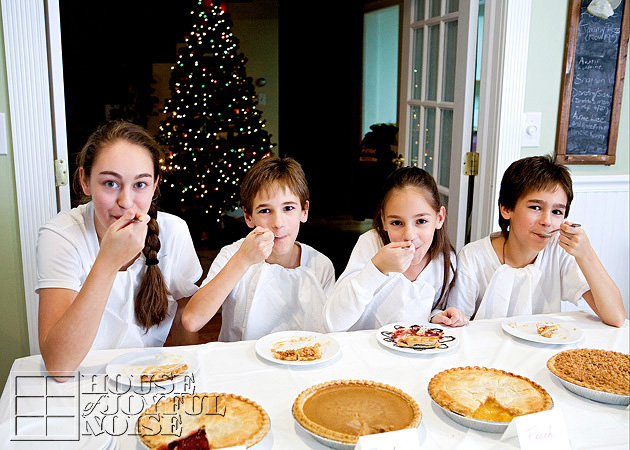
Our eager pie-tasting contestants. The kids were napkin-bibbed, with forks and fists.
They were ready to stuff their pie-holes.
(Pun intended.  ; )
Here’s what Mrs. Smith’s was dishing up for us:
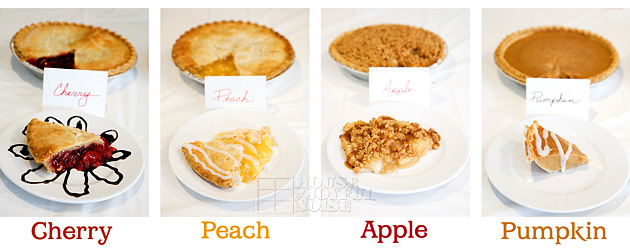
Signature Deep Dish Cherry Pie with Butter Fudge Sauce
Signature Deep Dish Peach Pie with Cream Cheese Icing
Signature Deep Dish Dutch Apple Pie with Caramel Sauce
Signature Deep Dish Pumpkin Pie with Cream Cheese Icing
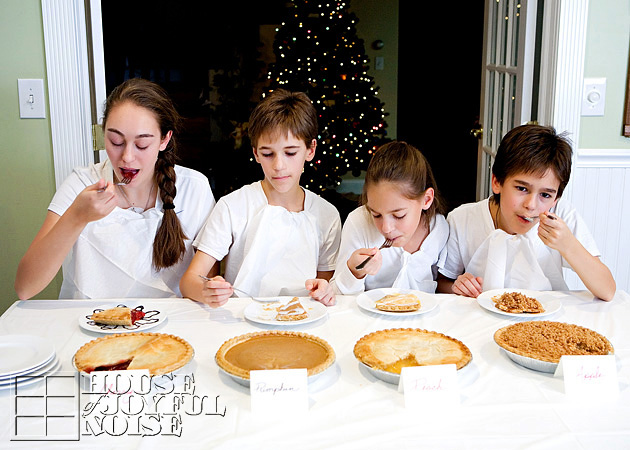
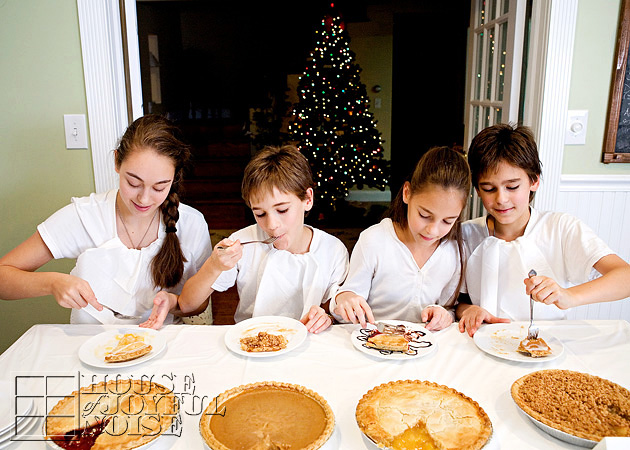
And the kids got tasting, all of them!
And I just took photos . . . . . .
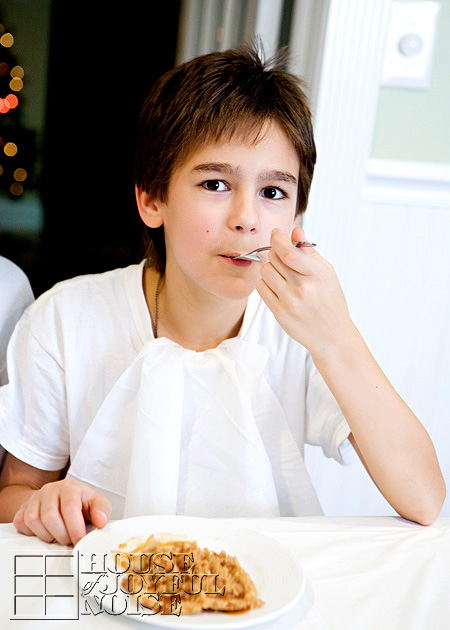


Time to switch plates.


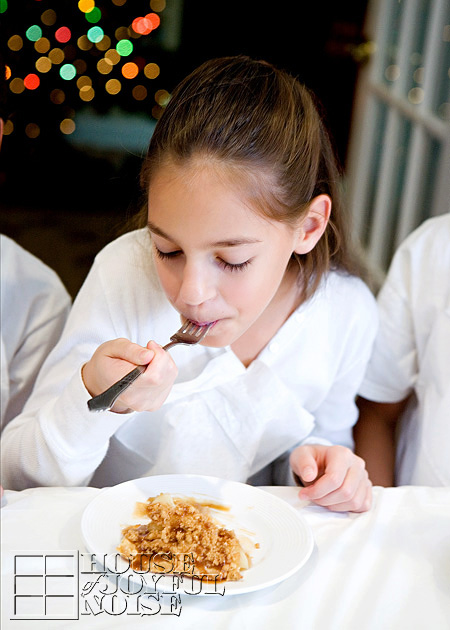
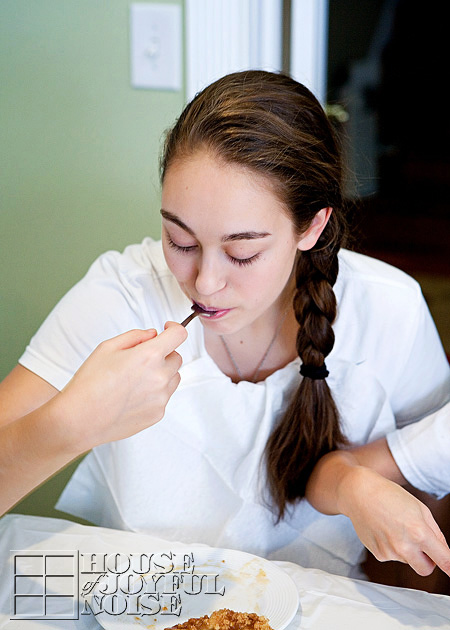
Discerning the flavor.


They were loving every minute!

And you can bet Michael/Daddy was off-camera to the side, tasting them all too.
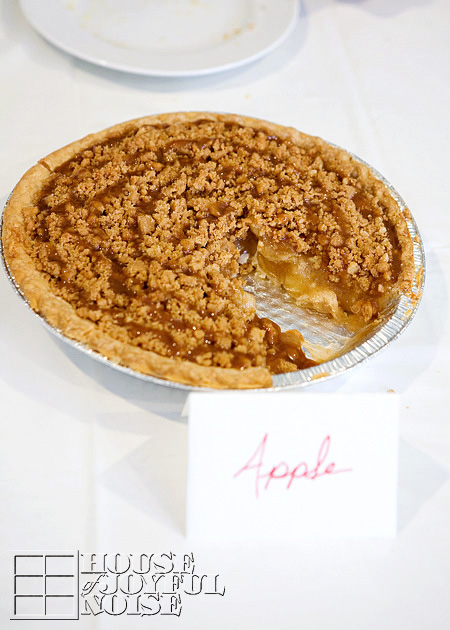

And also having fun designing some more with the sauces and icing.

Afterwards, each one of the kids wrote down their reviews on all 4 of the pies they tried, in one of my many notebooks.
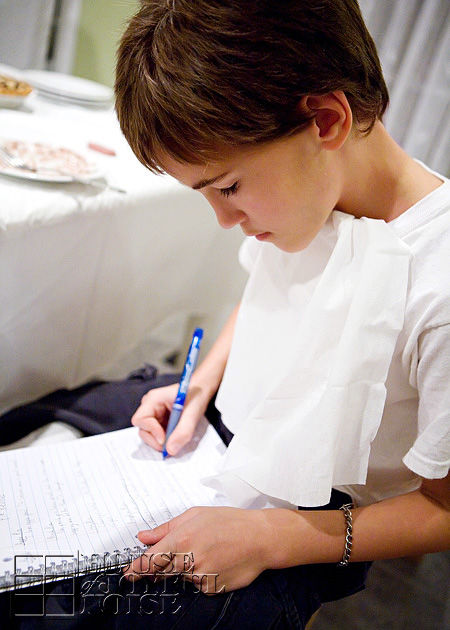

They were so cute and serious about it. Like real little food critics.

 Here are some of their comments:
“The peach pie tastes great, and the cream cheese topping was better than I thought!”
“One reason I liked the apple pie is because the apple and caramel blend perfectly together.”
“The peach filling was sticky and gooey, which made it even better!”
“The cream cheese icing was a good choice for the sticky peach!”
“I liked the pumpkin pie. The spices taste good with the pumpkin.”

You can learn more about Mrs. Smith’s Pies on their Facebook or follow them on Pinterest
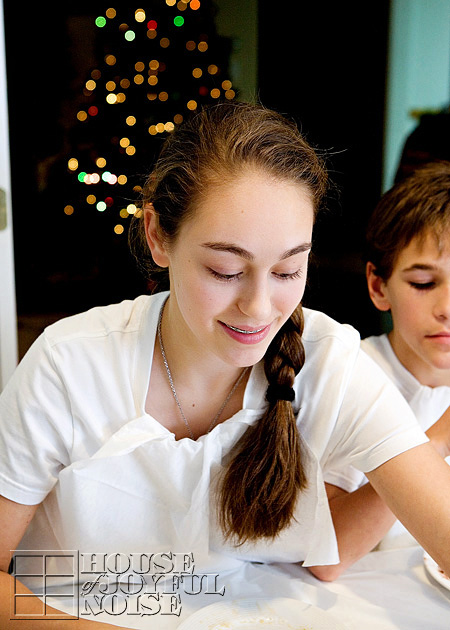

So the pie-tasting began so late in the afternoon, that the kids pretty much had pie for supper.  I did have them eat at least a small and healthy meal afterwards, just so I would feel better about it.
And then their Daddy took me out to dinner. And we had a wonderful time.

 NOW……. who wouldn’t be interested in winning this?!
Yes. A $50 Gift Card to Williams-Sonoma.  And with it, I will also send you a coupon for a free Mrs. Smith’s Signature Deep Dish Pie of your own.
Someone is going to win. And it might as well be you! Right?

You can shop, and then have some pie! That’s what I’d call a good day. ; )
Visit Sponsor's Site

Save

Save

Save

Save

Save

Save

Save

Save

Filed Under: Baking, Desserts, Giveaways, Recipes, The Big Picture Tagged With: Mrs-Smith's-pies, pie, pie-tasting, Williams-Sonoma

Pumpkin Shaped Cookies | Recipe

November 1, 2012 By Laura 14 Comments

00

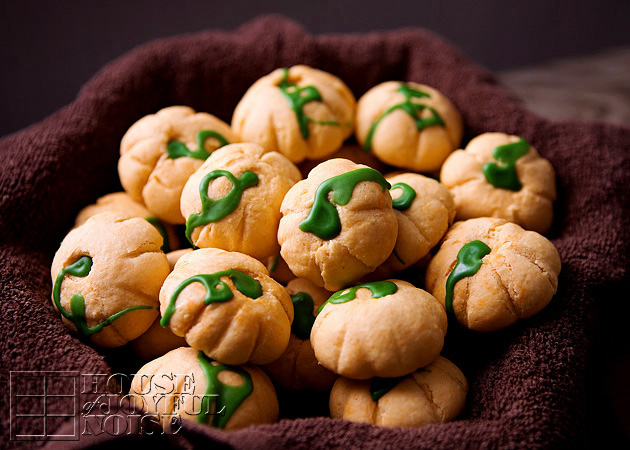
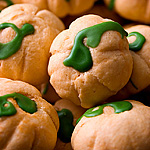
It’s the first day of November, and we’re still riding high on the beauty of Autumn all around us! I think we’ve done more baking than ever this year as well.  I had an idea about trying to make some pumpkin shaped cookies, using a dough recipe I already had, and they came out so great!  These are beautiful cookies to have around on Thanksgiving, or anytime during the pumpkin/Autumn season, and they were fun to make, too.  It may seem like a lot of steps, but it is easy, and the dough recipe itself is very useful!

The dough is the same recipe from my God-Mother’s Italian cookies, found here in a post called Cookie Love.  It’s a very I am going to give you the recipe right here as well, but you really can see how it is made at the other post.  *Please note; you can mix the ingredients to make dough with a Kitchen Aid Mixer, but we did not have one at the time of the other post, so we did it by hand. For these pumpkin shaped cookies, we did use the mixer since we have one now. It’s just easier and faster with a mixer, but still doable by hand.

Ingredients

  • 4  C Bleached All Purpose Flour
  • 1  C Sugar
  • 2 Tbs. Baking Powder
  • 4 Eggs
  • 1/2C Land-O-Lakes Margarine
  • 4 Tsp. Vanilla Extract
  • 1/4 C Milk
  • Confectioners Sugar
  • A Little Extra Milk for Glaze
    . . . . . . and some kind of Coloring.

Which brings me to this stuff . . . . . .

01_icing_coloring

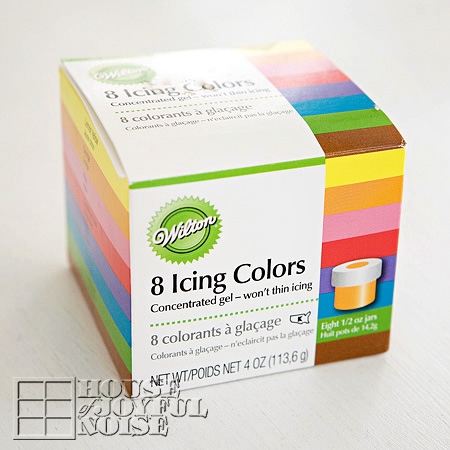
Wilton’s Icing Colors.
Even though it says for icing, it works for any food coloring. I love it, because it IS concentrated.  It gives a nicer color, and is more potent, so it gets the job done easily.  Food coloring drops to me are a pain. It takes too much to get the depth of color you want, and adds a water content at the same time that you may not want. So this stuff is the bomb for me. It’s what I used to color my cookie dough orange. It is also great for icing, and we use it for that in this recipe too. ; )
1. In a large bowl (or your Kitchen Mixer bowl),  put in flour, sugar, baking powder, eggs, margarine, vanilla, and milk.

2.    Mix it all together with fork at first. Once it starts to form, you can use your mixer or clean hands.

3. Flour a counter or big board.

4. Remove dough from bowl, and knead for several minutes, sprinkling the surface more if the dough starts sticking.

5. Grease baking sheets with vegetable oil. (You probably can use Pam Spray…if you’re a fan of that.)

02

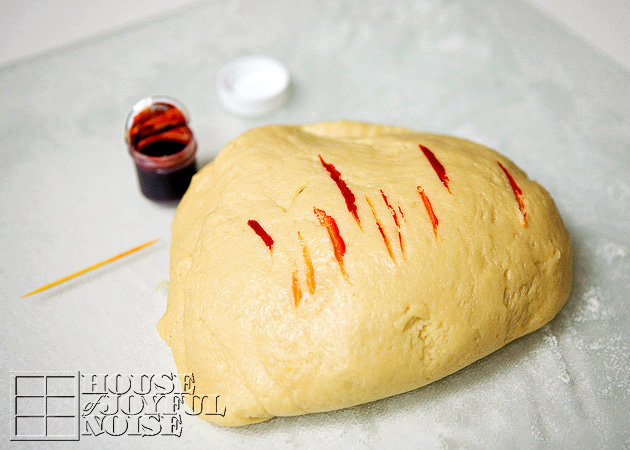
6. Once your dough is formed, it’s ready to color. Using a toothpick, mix up the orange container of coloring gel, and just wipe the toothpick onto your dough.  Then fold it in and knead the dough some more until the color works through and is uniformly mixed into the dough. Add more color as needed to get the desired  density of color.

** Two Things to Note Here:  A) This gel will likely stain yours hands and/or clothing a little, so use kitchen gloves and an apron is your concerned with that.  B) The color will lighten/fade a lot after baking.  So keep that in mind. Although the dough may appear too dark orange, they won’t be when done. (See photos of baked cookies for reference.)

7.   Grab a piece of dough, and begin to roll into a ball between the palms of your hands.  You want it to be about the size of say….a large cherry tomato.  You can place them directly on the cookie sheet, or keep working on a floured surface, such as a cutting board.

8. Pre-heat your oven to 375 degrees.

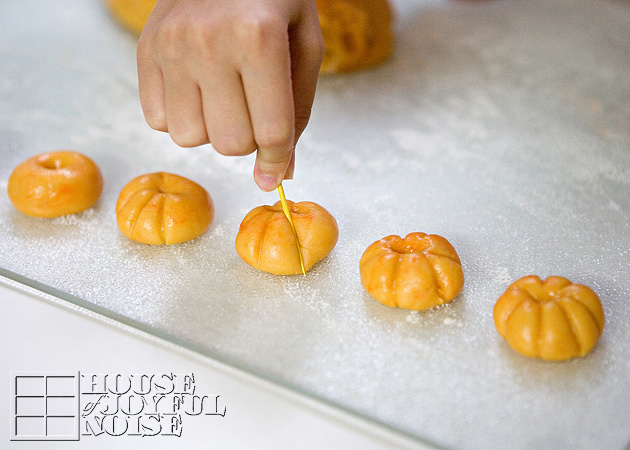
03_how-to-make-pumpkin-shaped-cookies 9) First poke your finger down into the center of each orange dough ball.

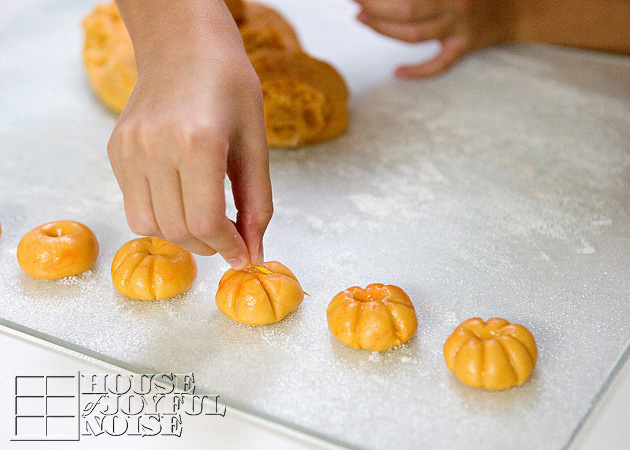
10) Then, taking a toothpick, stand it up beside the dough ball, and press in your indentations for the pumpkin grooves, as seen above.

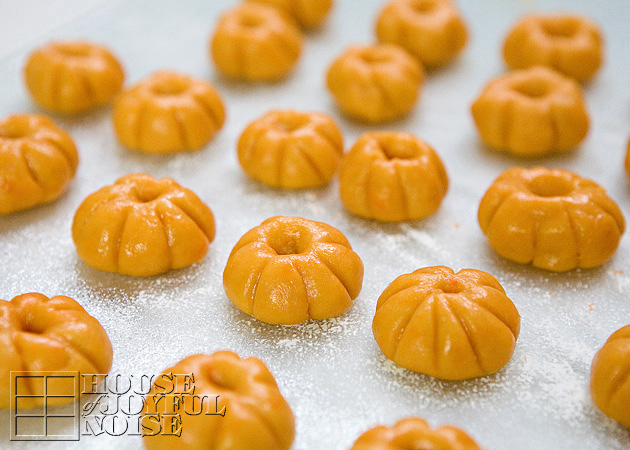
04_how-to-make-pumpkin-shaped-cookies Make the indentations deep!  Really lay that toothpick in there, and rock it to the top, so the grooves are made all the way to the top.  The cookies will puff while baking, and you will completely loose your groove indentations if you don’t make them deep pre-baked.

05_pumpkin-shaped-cookies They should look similar to this when the are done.   My little girl Olivia was a great help forming the pumpkins!

11) Now transfer to cookie sheets with  thin metal small spatula if need be.  (Try not to squich your pumpkins, as the dough is soft!) Place the dough pumpkins on the cookie sheets,  about an inch 1/2 apart, staggered.

**You will have more pumpkins waiting for their turn in the oven.  This dough makes at least a few dozen, depending on the size of your cookies.

12) Bake full sheets for 8-10 minutes.  You want them to be pale – not browned, but if you are wondering if they are cooked enough, open one with knife and see if it is baked through well. If not, put back in for 1-2 minutes more, depending on how doughy they still were.

13.  Remove from oven………and then place them each on a cooling rack.

  For cookie glaze:
14) In a small bowl, pour some confectioner’s sugar, and add a little milk.  I don’t really measure the sugar or milk here.  I recommend adding one tablespoon of milk at a time, and stir well. You want the glaze thick, as it will be much easier it will be to work with if it is not thin and runny.. You will be surprised at how much powdered sugar you need!

15) Add in green gel coloring and mix well.

16)  When cookies are completely cooled, transfer your green icing to a piping bag with a very fine point tip, or if need be, a zip-lock bag with the very tip of the corner snipped off.

17) Just pipe on a stem in the center top of the pumpkin, a leaf if you are really good, and maybe make some curly vines coming off.

06_pumpkin-shaped-cookies As you can see, my piping skills could use some practice.  But I thought they came out so adorable, and they are as delicious as the Italian Cookies recipe! It’s all the exact same ingredients, except for the tasteless coloring.  What I love about this dough recipe, is it is flexible to make many different looking cookies.

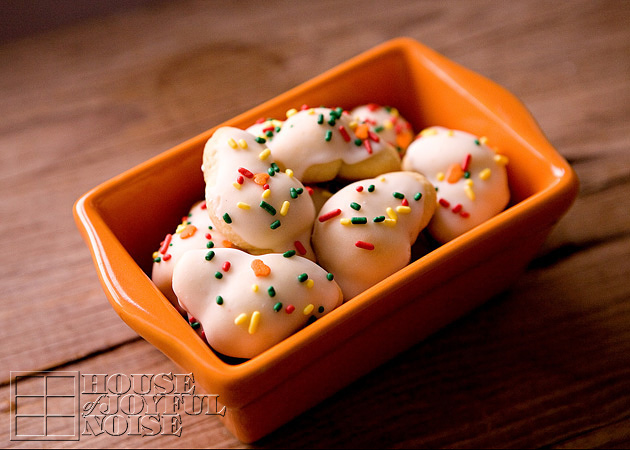
Alexis kept some of the dough before it was colored orange, and made these traditional cookies. . . . . .

07_italian-cookies Also quite Autumn looking!
The cookies can be sealed in an air tight container, or even put in the freezer the same way, for a coming holiday, or unexpected company.

We hope you try this recipe out, and have some fun making them yourself. Your mouth will surely thank you!

. . . . . .

 Come follow me here and there:


Save

Save

Filed Under: Baking, Desserts, Fun Food, Recipes, Treats Tagged With: Autumn-cookies, Baking, cookie-recipes, cookies, cute-cookies, Fall-cookies, italian cookies, pumpkin-shaped-cookie-recipe, pumpkin-shaped-cookie-tutorial, Thanksgiving-cookies

Recipe for Apple Pie Pops

October 2, 2012 By Laura 20 Comments

000_apple-pie-pop-recipe

 If you only knew the recipes I see in a day, a week, a month – that I have every intention of making!  I get to really making some, but most not, simply because there is really only so much time in a day, and so much food we can eat in it!  Granted some (little) people (my kids and husband), eat way more than others (myself.)  I actually am one of those with big eyes. I can be starving, and then eat 2 crackers, and I’m good. My kids cannot believe how little I eat. I just get full easy. Still, I consider myself a food lover, if only in my head. I love to find recipes, plan great food for my family, and photograph it too. And I really do enjoy eating. I’m just done sooner than everyone else.

Anyway, I first saw these pie pops almost 2 years ago at Bakerella’s site.  As soon as I saw them that first time, I immediately fell smitten.  She had seen them at yet another’s site. Since then I have seen them 100 times, all over the place.  Of course, you can make these pie pops with any kind of pie filling you’d like. But I have a particular fondness for apple pies, so that’s what I was planning to make.  We do a lot of baking in the Fall, so last year got away before we made them. But not this year! This past weekend we finally made them, as well as some cute cookies I’ll be sharing soon too!

So although these are not my idea, I thought I’d share how we made our Apple Pie Pops.

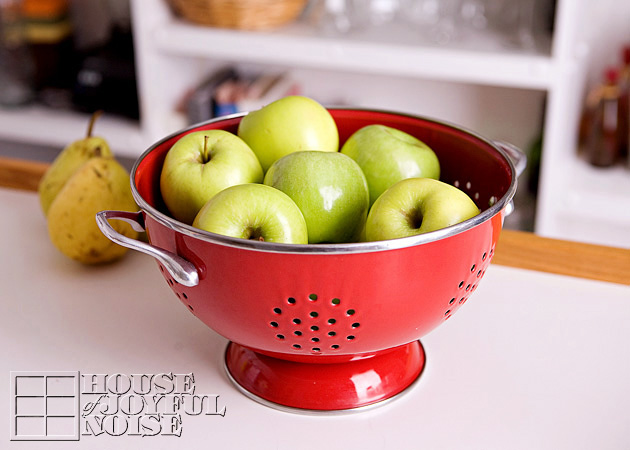
001_green-apples-red-colander

For any apple filling for baked goods, you want to start with good, firm apples, and a mix of the tart and sweet variety. Whether they are evenly mixed, or a little more of the sweet or tart, is all up to your preference.  I chose to keep it even, and used Granny Smiths (tart) and Golden Delicious (sweet).

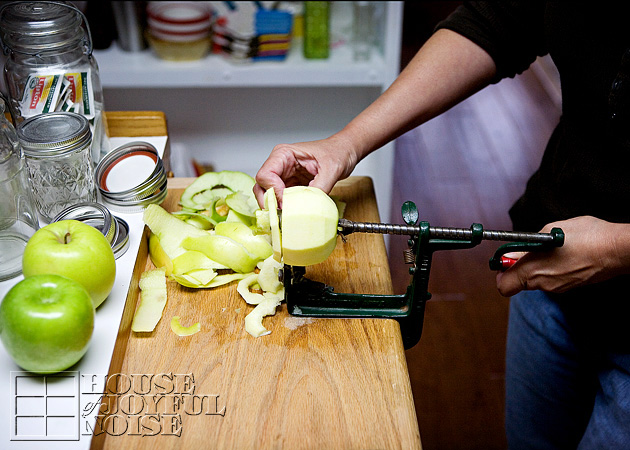
002_antique-apple_peeler-corer-slicer One of the greatest parts of making any baked goods that call for apples, is using my Aunt Dot’s apple peeler-corer-slicer.  The peeler part actually needs to be replaced, but we have not been able to find it yet.  But that’s alright – so we peel the apples by hand for now, or forever. We still feel so blessed to have this antique of my beloved aunt’s, that is such a part of my most fondest childhood memories.

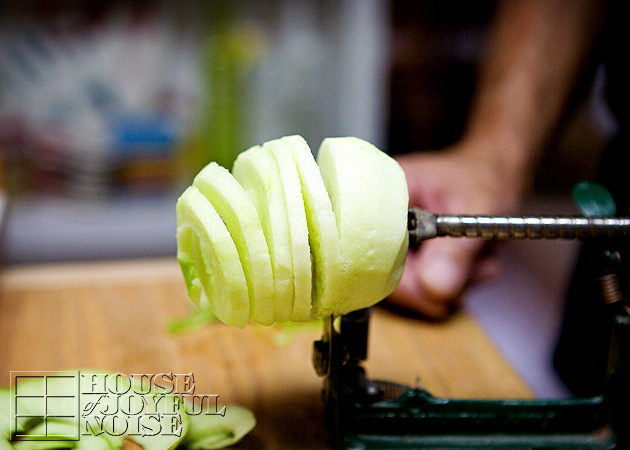
003_antique-apple-peeler-corer-slicer But I’ll admit, it’s damn handy!

Apple Pie Filling Recipe

6 C. peeled *apples, chopped small, and evenly sized as possible
3/4 C. sugar
2 T. all purpose flour
3/4 t. ground cinnamon
1/4 t. salt
1/8 t. nutmeg (Optional. I don’t like it.)
1 T. lemon juice

*Reminder: Use a mix of sweet and tart firm apples.

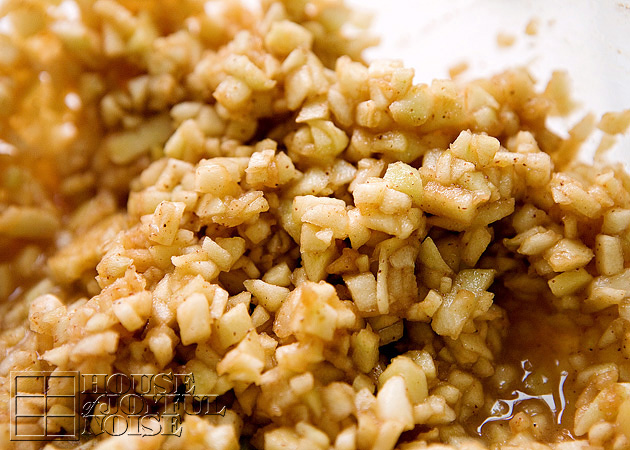
004_apple-filling Mix it all up well in a bowl.

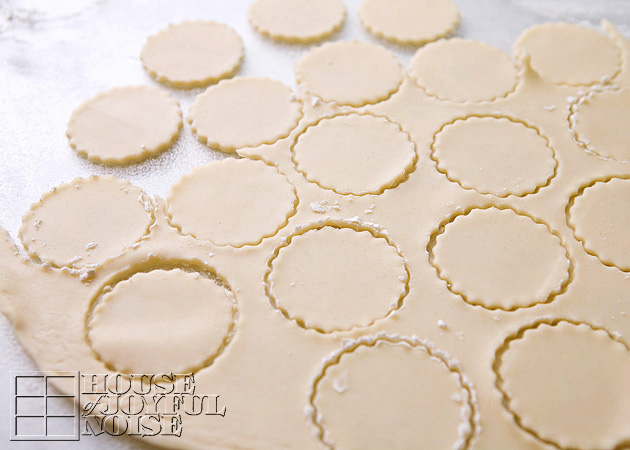
005_dough-circles Pie Crust Dough: You can make your own, or use store-bought ready pie crust, such as Pillsbury.
On a flour dusted surface, roll out your dough.  If you are using ready pie crust that is already round, remember that the size of the circle of dough does not matter for our purpose with pie pops, as it would for a pie dish. So you can roll it out larger and thinner than as it comes, and get more out of it. (We wish we did roll ours out thinner, and will next time. I’ll tell you about that at the end.)

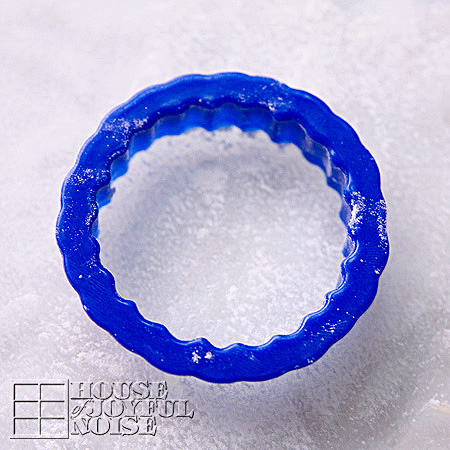
006_scalloped-cookie-cutter
Use a scalloped or plain circle cutter, or any other manageable shape that you would like, that is about 2 inches in diameter.  I like the idea of our pops looking like real little pies, but using shapes like an apple, or a maple leaf, or a pumpkin, etc., would also be cute.  Cut your shapes out of your crust dough as closely as possible, to get as many out of your dough as you can. Weed out the scraps of dough, re-roll, and use again. (As seen 2 photos up.)


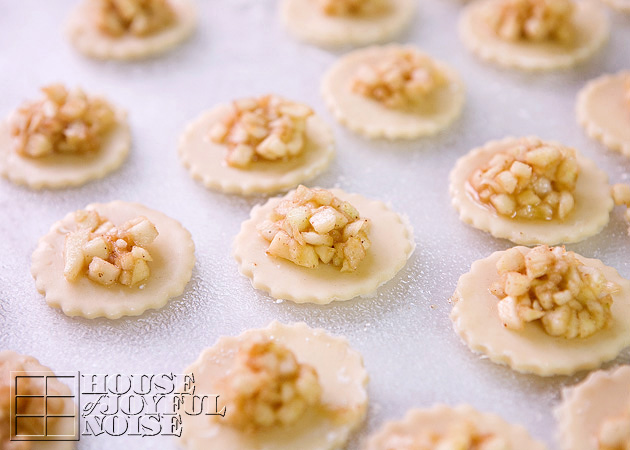
007_apple-pie-pops-recipe

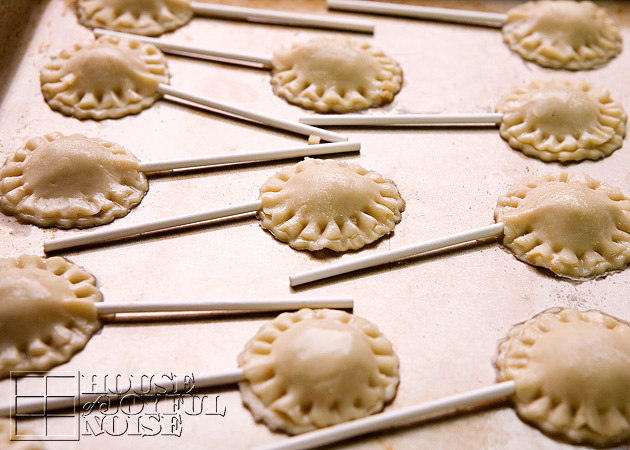
Put a good dollop (what a great word…dollop..) of apple filling in the center of half of all of your cut dough shapes, because you’ll need the other half as tops, of course. You want to put as much as possible on there, but remembering you’ll need to cover it with the other dough circles, and be able to seal it. Too much apple filling will be a problem, and too little will just be….sad.

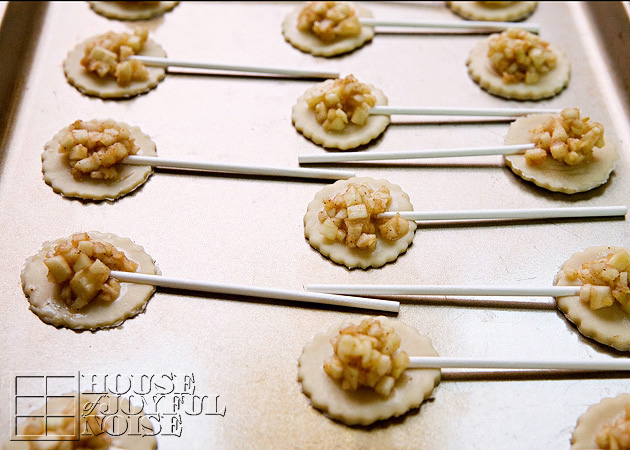
008_making-apple-pie-pops Transfer your pie bottoms with the filling onto a greased or sprayed cookie sheet.
If it easier for you, you can transfer the dough shapes first, and then put the filling on.

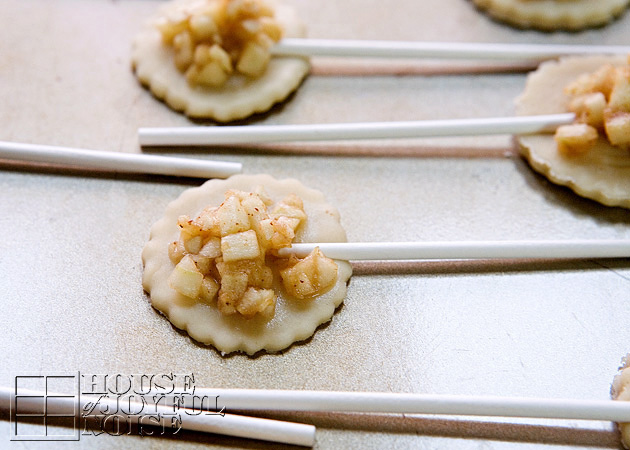
009_how-to-make-apple-pie-pops Also add your pop sticks. These are found in the candy making aisle of the craft stores. Now, I have seen that some cover their sticks with aluminum foil, to prevent them from burning. That is too tedious for me, and I was sure they wouldn’t burn anyway, and they didn’t, except where they got a little juice on them. No biggie, and still not worth covering them in foil. But you do what you want!

010_how-to-make-apple-pie-pops You may want to pre-heat you oven at this point, to 375°

 Now put on your tops. We had a little dish of water, just to dip one finger in, and wet the under-edge of the top all the way around, just to help it stick the bottom better. It also helps to stretch the top piece out bigger, to better fit over your dollop : ) of apple filling.
To make the wavy edge like a real pie, just cut off the end of a pop stick, and use it to press grooves all the way around each pie. This is a a bit tedious too, but one that is worth it to me!

Lastly, just brush each pie pop top with a little egg white, and if you wish, sprinkle with a bit of sugar for sparkle. The egg whites really help the pie crust kind of blister and look nice.

When the oven is up to temperature, you can put your pie pops in for 12-15 minutes.

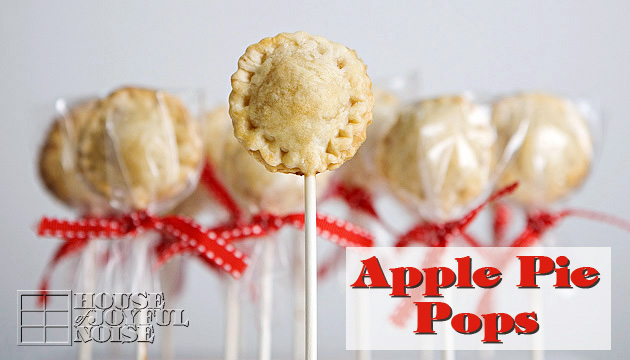
011_apple-pie-pops How’s that for a high cute factor?
We bagged each one, and tied them closed with a little red stitched ribbon. Presentation is everything, Folks!

As mentioned earlier, we did not roll out our dough as thin as we will next time. Our pops seemed to be a little more crust, and a little less apple filling than we would have liked. We must remember the filling soaks in just a bit, and the dough really puffs as it bakes into pie crust. Nonetheless, they were oh so good, and next time they’ll be perfect. : )

There are SO many Fall-time apple treats to enjoy – Apple Pie Pops, big Apple Pies, Apple Crisp, Caramel Apples, Apple Sauce, Apple Cake, Apple Cider…..it’s endless, and there are no complaints here! My favorites are Apple Crisp and Apple Pie, both with Vanilla Ice Cream, please.
Do you eat more apples this time of year? What are your favorite apple or Fall treats?

******

Come follow me here or there:

Save


Save

Save

Filed Under: Baking, Recipes, Treats Tagged With: apple-pie-filling, apple-pie-pops, apple-recipes, Baking, baking-recipes, fall-treats, how-to-make-pie-pops, recipes

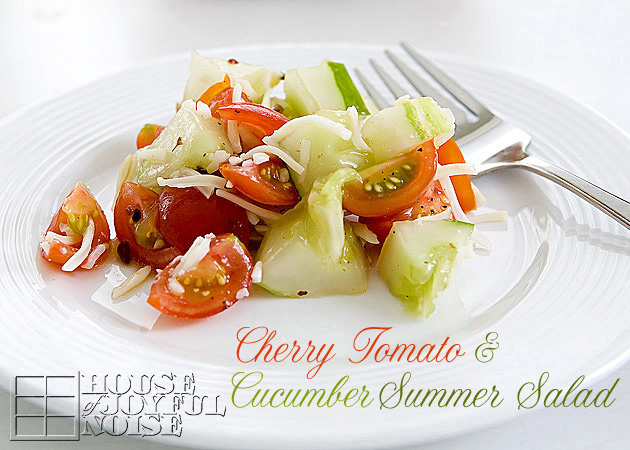
Cherry Tomato and Cucumber Summer Salad | Recipe

August 12, 2012 By Laura 2 Comments

000_salad-fork

 When it is summertime, I want meals that are as simple and quick to make as possible. If we don’t have a tight schedule that day, then we’ve spent the day involved in some project or other. Especially on weekends, when Michael is home too. Usually it’s been it’s blazing hot out all day too, being summertime and all. And let’s face it, the heat and humidity really has a way of draining anyone’s energy and ambition that much more.

That’s exactly how I happened to come up with this simplest of salads. Dinner was not even planned, never mind started!  Michael threw some steaks on the grill, and I just grabbed the vegetables we brought in from the garden that day, off of the counter, and threw together a cold side dish. I was not going for anything grand.  And anyway, my kids pop cherry tomatoes in their mouth off of the vine, and they love cucumber spears, with or without a dash of pepper.

The big surprise was that it was far more delicious than I had even begun to anticipate, and it was the talk of dinnertime too.

Long term, it’s a fabulous dish for the whole family to love this much for another reason:
We need to have a variety of options, to use the abundance of certain vegetables we get out of our garden almost daily, in the summertime.

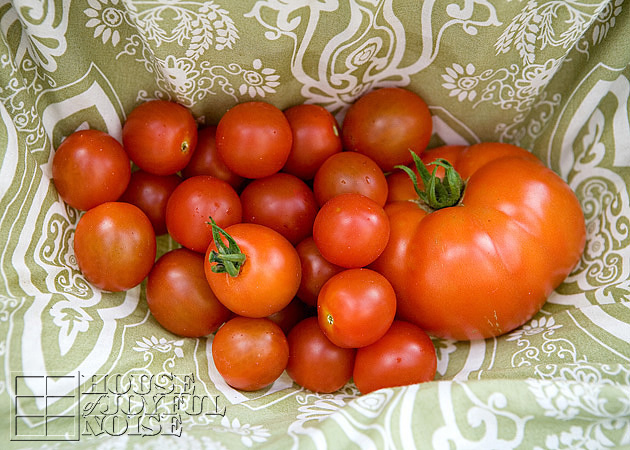
001_garden-tomatoes-in-skirt  Here’s one day’s picking, carried in my skirt.

It’s likely that the next day will harvest about same amount, ready for picking, again.
Especially given that Olivia has her own garden this year, too, and is also growing cherry tomatoes.

002_chopped-cucumber  She’s growing the cucumbers alone, but she shares with her siblings at lunch sometimes, or for a snack, and she’s happy to offer one for our dinner anytime, as well.

Those 2 vegetables, were the simple main staples for this recipe:

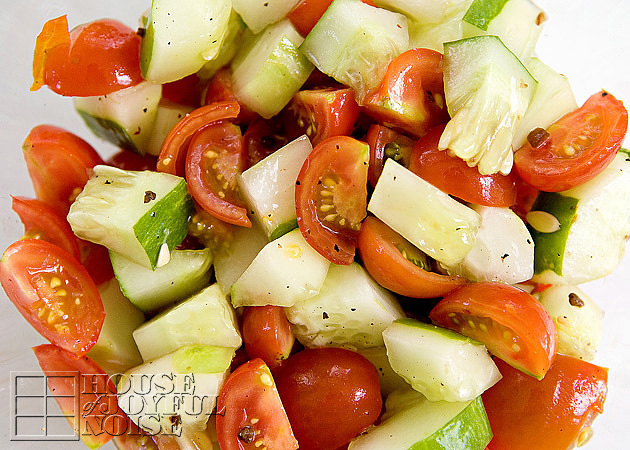
Quartered Cherry Tomatoes.
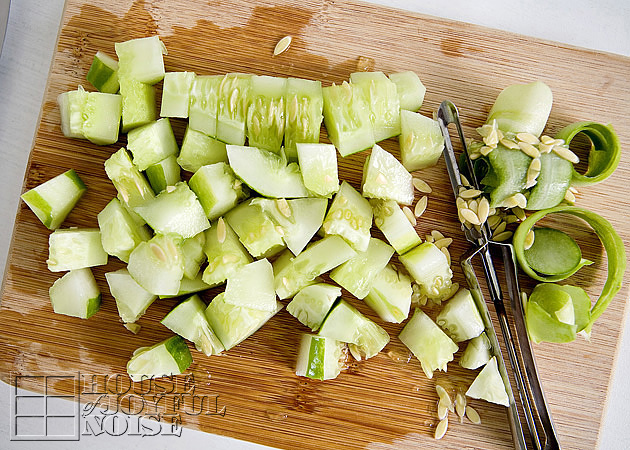
Cucumber, quartered the long way, and then chopped.

TIP: I always stripe my cucumbers with the peeler. It makes them a littler fancier looking, and even more enjoyable.

simple-summer-salad-recipe Throw in a dash of kosher salt, and drizzle all over with Balsamic Vinegar Salad Dressing.  We also add black pepper, because we love it, and put it on just about everything. The dressing, as opposed to straight up balsamic vinegar, has all kinds of little bits of seasoning goodness already in it.  Give it a quick toss.  I like to let it marinate just like that for a few minutes.

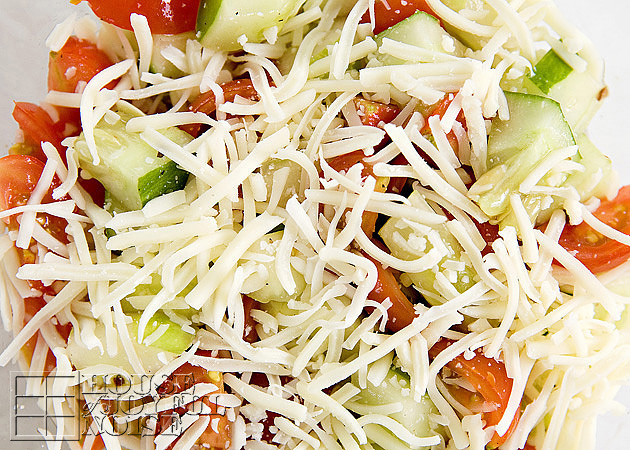
simple-summer-salad-recipe-1 When it’s time for dinner, I throw some shredded mozzarella cheese on top.

It’s done.  Does it sound plain, to you? Well I’ll tell you what . . . . . .

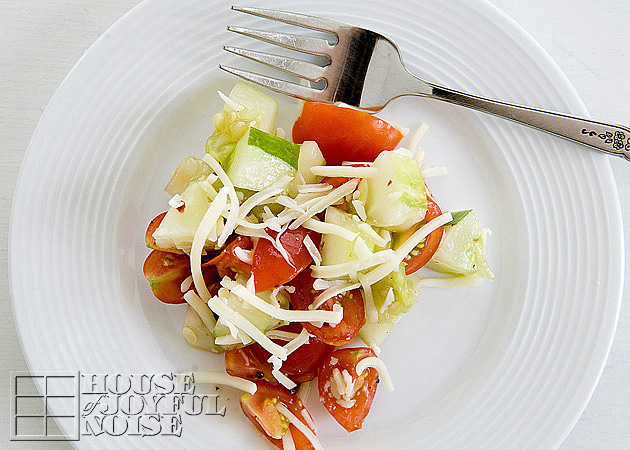
simple-summer-salad-recipe-3 It’s simple all right, but it’s sure not plain tasting!  The tang of the Balsamic Vinegar Dressing, really brings out the sweetness of the cherry tomatoes.  The combination of the two compliments each other so well. The fresh cucumber, and the soft and subtle flavor of the cheese adds a new texture, and another surprise taste.

We have also used this salad, rolled up in a tortilla, with grilled chopped chicken. Also simple, quick, and delicious.

simple-summer-salad-recipe-2 This is what summer tastes like.

It’s that simple.

What is your simplest summer dish?


Save

Filed Under: Recipes, Salads, Side Dishes Tagged With: cherry-tomato-cucumber-salad, cold-salads, light-salad-recipes, quick-salads, recipes, salad-recipes, salads, simple-summer-salad, summer-salads

Oven Cooked Corn on the Cob – Perfect!

August 5, 2012 By Laura 45 Comments

cooking-corn-on-the-cob-perfect

 For the 20+ years Michael and I have been together, we have been trying to figure out how to cook corn on the cob, so it comes out just right.  Sometimes it has come out really good, but most times it hasn’t.  It’s just a gamble. We have tried cooking it a few different ways; over the fire with wet husks, steamed, and boiled.  The fire method corn came out amazing the first time, and not as much the second.  The steamed method we only did once, because we didn’t like how it came out. More times than not, we have boiled it.  For us, perfectly cooked corn is- when the kernels are popping right off the cob as you eat it. But we usually don’t seem to cook it for just the right amount of minutes.  Then we can’t figure out:  Is it over-cooked? Or did we not cook it long enough?

So most every time we have gotten corn, and the kids got it all husked, the conversation usually goes something like this:

Me: “Honey, how long do we boil the corn for again?”
Michael: “Oh my gosh…there’s that question again! We never remember. How long did we boil it for last time? Did it come out good?”
Me: “I don’t remember now. Do you?”
Michael: “Not really.”
Me:  “Is it 7 minutes? Remember the guy at the Butcher Block told us most people over cook it?”
Michael: “Kind of. But I don’t remember how long he said. I don’t think 7 minutes is long enough, though.”
Me: “Wait, I think it’s 10 minutes.”
Me again:  “Or, is that boiling eggs.  Hmmm. No, I think it’s 10 minutes .”
Michael: “Did we bring the water to a boil first, and then put the ears of corn in?”
Me:  “No, that’s lobster. And Ramen Noodles.”
Michael: “Why don’t you Google it and see how long it’s supposed to be.”

And that, is about how it has gone, for years.  We get so excited to have corn on the cob, but that is because we only tend to remember the times it came out perfect and delicious.

Finally, we have found the absolute easiest method to cook corn on the cob, perfectly. 
And that is, perfectly, every time.  It’s crazy how easy and hassle free this is.  So at this time of year, when corn on the cob is such a popular summer side dish, we thought we should share with you the method that will be our one and only from now on.

Pre-heat your oven to 350°

cooking-corn-on-the-cob-perfect-1 You have 2 options here:

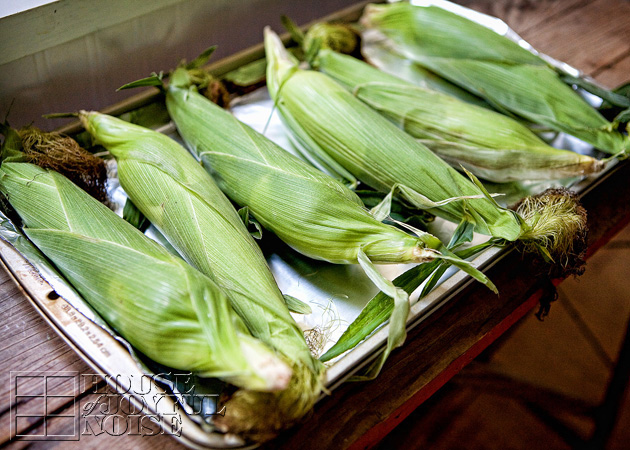
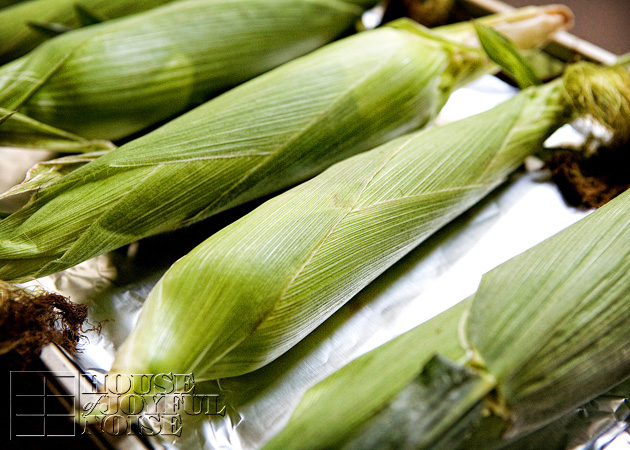
1) You can lay your corn, unhusked, on a cookie sheet. (Tin foil or not is also optional.)

-OR-

2) You can put the corn right in your oven on the racks. If you choose that way, it is a good idea to cut off all of the silk hanging out, so it doesn’t catch on fire. << Important Tip there, I think. ; )
Both ways, the corn cooks wonderfully.  I use method 1, because it is easier for me. I can put the whole pan with all of the corn in, and take it out, quickly and easily. Plus I can’t reach in the oven very far, and my hands burn easily.  Michael prefers method 2, because he doesn’t want to get the pan out, or wash it, and he has longer arms.  He throws the corn cobs, in and take them out one at a time when the timer goes off, just grabbing them without even using an oven mitt. Because he doesn’t want to get the mitt out either. Even though the corn is piping hot.  He just doesn’t take precautionary safety measures, as a general rule of the fool.  You know . . . . . . protective eye wear when cutting wood, a face mask when spraying toxic paint fumes, or using oven mitts to take hot things out of the oven, for gosh sakes! It been an argument between us for years. I remember his father was the exact same way, about all of the same safety measures, including taking hot things out of the oven mitt-less. His mother would squabble at the father about it too, after he’d say “Ow!!” Throw the thing down quick. (Chuckle.) “That thing is hot!!”  Well HELLO!! What I don’t get, is why I thought my in-laws were so cute when they were bickering, and I get so aggravated at Michael about it, and I’m not feeling as cute. Honestly, I love my husband dearly, and I am thankful he is still alive, and well, in one piece. By the grace of God; this I know!  Anyway, you choose the method that works best for you, and I’ll leave you alone about it.

cooking-corn-on-the-cob-perfect-2  So put the corn in the oven however you choose to, and set the timer for 30 minutes. Oh how I love the smell of the corn cooking this way. A real roasted smell.
After 30 minutes, remove the corn from the oven.
You can leave it in the husks if the rest of your dinner is not ready. But if you are just about ready to all sit down and eat, here is what you do next:

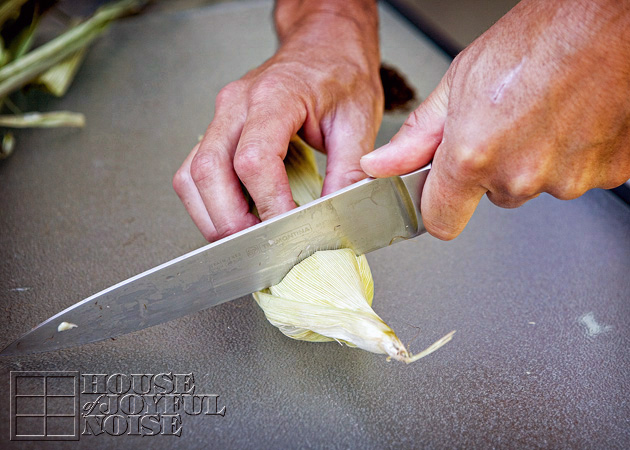
cooking-corn-on-the-cob-perfect-3 You simply take a big knife, and cut off the tip of the corn, unhusked,  about an inch or so into the cob.

This is where it just gets amazing to me . . . . . .

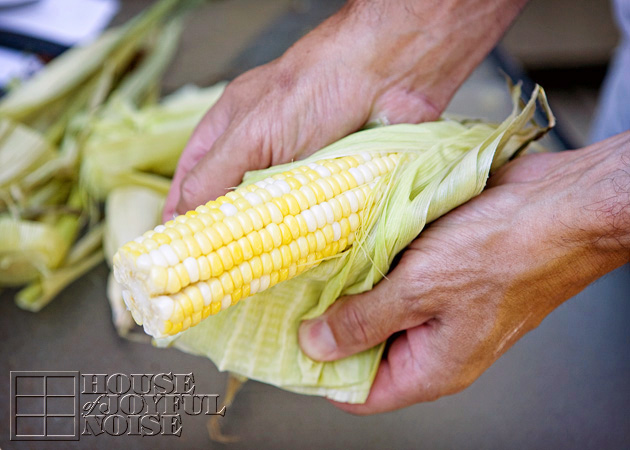
cooking-corn-on-the-cob-perfect-4 Then you just peel back and off the husks, which come off so easily. And, pretty much all of the silks come right off with it! 
Break off the other end, and season as you wish!

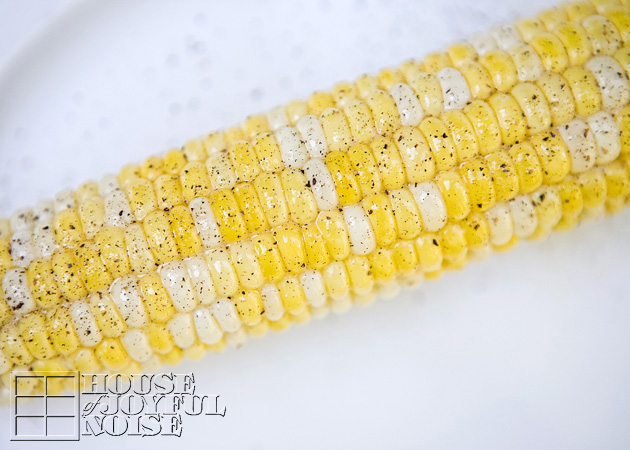
cooking-corn-on-the-cob-perfect-5 We love it with butter and pepper.  Sometimes a little salt. OH SO GOOD! So very easy, and perfect.

Every time.

If you haven’t tried cooking corn in your oven, you must try it this way!

What is your usual way of cooking corn on the cob, so it comes out just right for you? And for how long do you cook it? 

We know there are many methods, and we’d love for you to tell us what has worked for you.

P.S.  As an update, if you want to make the husking even EASIER STILL, you can cut off both ends of the cooked corn (in other words, stem end included), and cob will just roll out of the husks and the silks practically fall off.  But whether you chop both ends or just the tip, stripping the cobs after cooking them (in the oven) is much easier than shucking ahead of time!
We are loving those of you coming back to give us your report! ~ The Richard Family


Save

Save

Filed Under: Recipes, Side Dishes Tagged With: best-way-to-cook-corn-on-the-cob, corn, corn on the cob, how-to-cook-corn-on-the-cob-perfectly, oven-cooked-corn-on-the-cob, perfect-corn-on-the-cob

  • « Previous Page
  • 1
  • 2
  • 3
  • 4
  • 5
  • …
  • 17
  • Next Page »

We are wicked happy to have you here! We hope you find much inspiration, help, humor and enjoyment here.


Archives


POPULAR POSTS

* * * * * *

SUBSCRIBE to House of Joyful Noise blog! Every new post, delivered right to your email box!


Privacy Policy

Amazon Affiliates

Never at any additional cost to you, we may earn a small commission for our endorsement, recommendation, testimonial, and/or link to any products from our website. Your purchase through our links helps support our family, while sharing with you the products we authentically use and recommend, for various ideas, and letting you know where you can purchase them. Thank you for your support!

[footer_backtotop]

Copyright © 2026 HouseOfJoyfulNoise.com · Genesis Framework by StudioPress