• HOME
  • {A}’s Chipmunk Training Archives

 Homepage

  • The Homestead
    • Home Projects
    • Home Improvement
    • Home Decor
      • Seasonal Home decor
        • FALL Home Decor
        • WINTER Home Decor
        • SPRING Crafts and Creations
        • SUMMER Crafts and Creations
    • Our Chickens
    • Gardening
    • Organization
    • Re-Purposing
    • Furniture Refinishing
    • Budget
  • Crafts & Creations
    • Seasonal Home decor
      • FALL Crafts and Creations
      • WINTER Crafts and Creations
      • SPRING Crafts and Creations
      • SUMMER Crafts and Creations
    • DIY (Do-It-Yourself) Project
    • Kids Arts and Crafts
    • Homemade/Handmade Gift Ideas
    • Holiday Crafts
    • Fan Pulls
    • Free Printable/Downloadable
    • Sewing Projects
    • Giveaways
    • Business Features
  • Recipes/FoodFun
    • Breakfast
    • Lunch
    • Main Dish
    • Sandwiches
    • Appetizers
    • Slow Cooker
    • On The Grill
    • Side Dishes
      • Soups
      • Salads
    • Baking
      • Breads, Rolls and Muffins
    • Snacks
    • Treats
    • Desserts
    • Drinks
  • Homeschooling
    • Elementary Homeschooling
      • Elementary Homeschooling READING
      • Elementary Homeschooling MATH
      • Elementary Homeschooling LANGUAGE ARTS
      • Elementary Homeschooling SCIENCE
      • Elementary Homeschooling HOME ECONOMICS
      • Kids Arts and Crafts
    • Middle School Homeschooling
      • Middle School Homeschooling SCIENCE
      • Middle School Homeschooling HOME ECONOMICS
    • Language Arts
    • Math
    • History / Social Studies
    • Geography
    • Foreign Language
    • Field Trips
    • Games
    • Nature Study
  • The Big Picture
    • Life In General
    • Celebrations
    • Faith
      • Into the Light; The Series
    • Giveaways
    • Reviews & Sponsors
  • Photography & Lettering
    • Photography
    • truck lettering
    • vehicle graphics
    • Newborns
    • Kids
    • Engagement
    • High School Senior Pictures
    • High School Senior Pictures Sneak Peeks

Granola Goodness | Recipe

February 1, 2012 By Laura Leave a Comment

granola-recipe-1

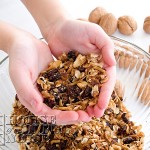
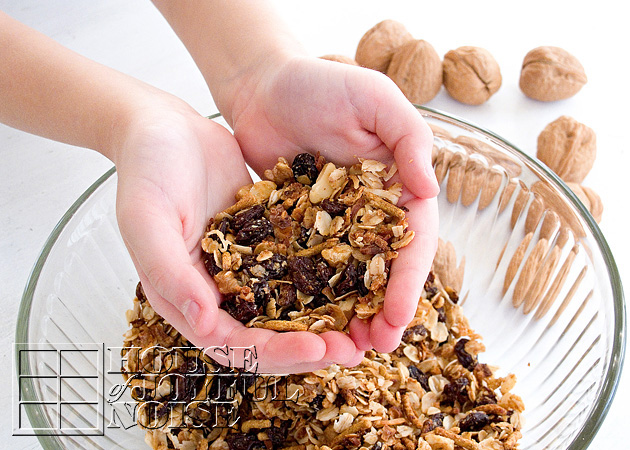
We love granola around here!  It’s such a good and wholesome snack, handful after handful, with CrUnCh!  (Oh, how I love crunch.)  It’s really a great way to start your day off right too, in the morning!  Throw some in a bowl with a few splashes of cold milk, or load it on top of a serving of yogurt!

Unfortunately, it’s next to impossible to find ‘peanut-safe’ granola at the markets.  Added to the allergies now, is cashews and pistachios. Even small amounts of granola are kind of pricey to buy, ready-made, anyway.  So, if we want granola (and we do!), it’s up to us to make it homemade.  But we don’t mind, because it’s easy and fun to make, and we can make BIG batches.

granola-recipe We have posted another granola recipe here on the blog before, and that one can be found here.  There is so many ways to make granola! Experimenting with different ingredients, is half the fun and surprise!  Here is the granola recipe we’ve been crunching on this week!

Granola Goodness

(Note: All C.(cup) measurements are heaping – not level.)

  • 4C rolled oats
  • 1 1/2 C shredded unsweetened coconut
  • 1 C wheat germ
  • 1/2 C natural bran (We used Fiber One cereal.)
  • 2 C raisins
  • 1/2 C cooking oil
  • 1/2 C honey
  • 1/2 tsp. vanilla

(*Chopped nuts optional. We have a kiddo allergic.)

Preheat oven to 350 degrees. Combine dry ingredients in a large bowl.  In a small saucepan, combine oil and honey.  Stir over low heat until the honey is melted and it’s warm and blended with the oil enough. (About 5 minutes.)  Stir in vanilla.  Pour oil mixture over dry ingredients, little by little, mixing to blend well.  Spread mixture on two cookie sheets, and bake for for 15-20 minutes until lightly browned, stirring and flipping mixture over about half way through time. Let cool completely.  Store in an airtight container.  Makes about 12+ cups!

Granola Goodness
 
Print
Prep time
15 mins
Cook time
15 mins
Total time
30 mins
 
There is nothing like a good granola! Here we are sharing our recipe with you, in hopes you'll enjoy it as much as we do!
: House of Joyful Noise blog
: Snack
Serves: 12 Cups
Ingredients
  • 4C rolled oats
  • 1½ C shredded unsweetened coconut
  • 1 C wheat germ
  • ½ C natural bran (We used Fiber One cereal.)
  • 2 C raisins
  • ½ C cooking oil
  • ½ C honey
  • ½ tsp. vanilla
  • (*Chopped nuts optional. We have a kiddo allergic.)
Instructions
  1. Preheat oven to 350 degrees.
  2. Combine dry ingredients in a large bowl.
  3. In a small saucepan, combine oil and honey.
  4. Stir over low heat until the honey is melted and it's warm and blended with the oil enough. (About 5 minutes.)
  5. Stir in vanilla.
  6. Pour oil mixture over dry ingredients, little by little, mixing to blend well.
  7. Spread mixture on two cookie sheets, and bake for for 15-20 minutes until lightly browned, stirring and flipping mixture over about half way through time.
  8. Let cool completely.
  9. Store in an airtight container. Makes about 12+ cups!
3.4.3177

Filed Under: Baking, Breakfast, Recipes, Snacks, Treats Tagged With: cereal, crunchy-snacks, granola, granola recipe, healthy snacks, home made granola, homemade granola, printable-recipes, recipe

Valentine Ladybug Mint Cookies

January 24, 2012 By Laura 4 Comments

valentine-ladybug-cookies-12

These adorable Ladybug Cookies I came up with, come right in time for Valentine’s Day, and I promise you, they couldn’t be easier to make! (There’s not even baking involved!) I think you are going to love what they are made with, too!  (You know…besides LOVE.)  I’m talking ingredients.  These cookies are also a sweet idea for a little girl’s birthday party, or to send in with your kids to school, to share with their class.  You’ll look so clever. (You don’t have to tell a soul it was my idea. ; )

Does the word fondant scare you?  Ever heard of the stuff? I know it makes more than a few nervous. But it can actually be a LOT of fun to play with! (Think Play Dough. ; )  Truth be told, in this recipe, we did make and dye our own marshmallow fondant, simply because we knew how, and we think it tastes a little better than store bought. But you don’t have to!  Rolled and ready fondant is available in craft and baking supply stores, and even comes in colors! I know Wilton sells ready-made fondant, but I heard a brand called Satin Ice, tastes better. I see that the Satin Ice brand is available to order online. I’ve seen it in a container so you probably roll that out yourself. I have not tried it yet, but I will.  But if you’d like to learn how to make your own marshmallow fondant like we did, we have a tutorial coming up on that.  For today, we’re just going to show you how simple it is to put together these cookies, with some light pink fondant all ready to go!

valentine-ladybug-cookies Participating Ingredients: 

      • Keebler Grasshopper Fudge Mint Cookies *(peanut safe)
      • Junior Mints Candy (*peanut safe)
      •  Fondant – in light pink (rolled and ready)
      • Any kind of icing (for piping glue)
      • Sprinkles in Valentine shapes/colors (*peanut safety varies with brands)
      • Confectionery Sugar
      • (Mini marshmallows and color dye seen are for making your own fondant, if you are.)

* One of our boys has a serious peanut allergy, so we are always checking ingredients carefully, for his safety.


valentine-ladybug-cookies-1 We rolled out our fondant on wax paper and a little dusting of confectionery sugar, making sure to roll it thin and even. 


valentine-ladybug-cookies-2 Next, we cut circles out of the fondant.  These will be the wings.  We started with this small cookie cutter, but it turned out to be a little bigger than we wanted the circles to be, as the cookies were smaller than this.  It was the smallest actual circle cookie cutter we had, so we needed to improvise. And so the search began throughout the house, to find something that will cut the circles smaller.


valentine-ladybug-cookies-3 Phew!  Good think we have a drink now and then! ; )  This shaker/mixer top turned out to be just right!


valentine-ladybug-cookies-4 Cut the circles in half, and the wings are done! 


valentine-ladybug-cookies-5 I told you! Easy, right? 


It’s mere assembly, from here on out, Friends.


valentine-ladybug-cookies-6 Put some of that icing in a piping bag, with the smallest tip, and just put a little on each side of the cookies.

(These cookies do tend to come a little stuck together in the packaging, so we made efforts to pipe on the messy sides, leaving the smoothest and nicest part of the cookie at the bottom, where it will show between the wings.)


valentine-ladybug-cookies-7 Put the wings on, as shown above. Like a ladybug’s wings, slightly spread.


valentine-ladybug-cookies-8 Pipe a little dab of icing on the back/flatter side of a Junior Mint candy…..


valentine-ladybug-cookies-9 ….and stick on the head.


valentine-ladybug-cookies-10 All that is left to do, is decorate the wings a little!  We tried to arrange them, like the dots usually on the wings of a ladybug, as we recalled.  You do want to be sure, that you press the decorative sprinkles down into the fondant.  You may even want to add a dab of water? (Didn’t try that).  If the sprinkles aren’t pressed down enough, they’ll fall off when the fondant sets up more.


valentine-ladybug-cookies-11 THAT’S IT!!  How CUTE are these?  How EASY are these? 


valentine-ladybug-cookies-13 You can make a whole bunch, in no time at all.  And it’s fun!


valentine-ladybug-cookies-14 Our kids all got in on the action!  They were on their own (the three younger ones are 9 years old here.).  But even younger ones can put these cookies together with a little help! 


valentine-ladybug-cookies-15

valentine-ladybug-cookies-16 We used the red cots from Confetti Sprinkles too.


valentine-ladybug-cookies-17 If you think about it, you could use some alternative ingredients, to make these cookies similarly as well. Oreo cookies could be cute. Dark brown M&M’s can be used as heads. (They are not peanut safe, for us.) Use your imagination!


valentine-ladybug-cookies-18 Just for fun, can you spot the ladybug, who’s wings were cut too big?


valentine-ladybug-cookies-19 We hope you liked this cute little idea. Share it.  🙂  And thanks for stopping by the House!

Stay tuned, for more thoughts and shares on the way!  Valentine’s Day related, and otherwise.

Save

Save

Filed Under: Baking, Fun Food, Holiday Crafts, Recipes, Treats, Tutorial Tagged With: Baking, ladybug-cookies, ladybug-theme-ideas, ladybugs, marshmallow fondant, Valentine-cookies

Delightful Cranberry Muffins

January 17, 2012 By Laura 2 Comments

cranberry_muffins1


The rest of my family loves anything made with cranberries. But loving these muffins came as a big surprise to me, the first time my daughter made them.  Reason being, I personally have never cared much for cranberry bread of any kind.  I figured, it was cranberries, period, that I didn’t like. And between you and me, that felt a little wrong, and perhaps a bit of info I should keep to myself, living in an area simply surrounded by cranberry bogs, and in the town that until fairly recently) was the home of Ocean Spray Cranberry World.  You’ll also never hear me say “Pass the cranberry sauce” at the Thanksgiving table, either. Although, I don’t mind a little spread on 2 slices of toasted bread with plenty of mayonnaise, when making my turkey sandwiches in the following days.  I do enjoy cranberry juice now too, and with Ocean Spray still nearby in Massachusetts, there is plenty of that around. At many warm- seasoned waterfront events, representatives of Ocean Spray are often set up giving out free samples of their large variety of juices.  So….they were bound to grow on me, so to speak.  Cranberries are wonderful to decorate with, too!  I especially love using them with my winter ice sculpture yard decor! They add such a beautiful splash of color, against winter.

In the next year or so, we plan to take a cranberry-related field trip or two, with the kids.  So you’ll likely be seeing some interesting educational information and photos about cranberries and cranberry bogs around here, in the future.  And perhaps more recipes as well. We hope you enjoy this one as much as we have.

. . . . . .  

  Delightful Cranberry Muffins

cranberry_muffins1

Ingredients:

  • 1/2 cup butter, softened
  • 1 cup sugar
  • 2 eggs
  • 1 tsp. vanilla extract
  • 1 cup sour cream
  • 2 cups all purpose flour
  • 1 tsp. baking powder
  • 1/2 tsp. baking soda
  • 1/2 tsp. ground cinnamon
  • 1/4 tsp. salt
  • 1 cup chopped frozen or fresh cranberries

TOPPING:

  • 2 tbsp. sugar
  • 1/8 tsp. ground cinnamon


Directions:

     In a mixing bowl, cream together butter and sugar. Add eggs and vanilla; mix well. Fold in sour cream. Combine flour, baking powder, baking soda, cinnamon, and salt; stir into creamed mixture just until moistened. Fold in cranberries. Fill greased or paper lined muffin tins 2/3 full. Combine topping ingredients; sprinkle over muffins. Bake at 400 degrees F for 20-25 minutes, or until a toothpick, or until the muffins test done. Cool in pan 10 minutes; remove to wire rack.  When completely cooled, store in a container. 

  Makes about 18 muffins.

    These muffins freeze very well, also.  We like to make a couple of batches at a time, and freeze some, to take out and pop in the microwave, on any morning we fancy. : )

cranberry-muffins-recipe Enjoy!…Warm or cold, with or without butter.


Save

Save

Save

Save

Save

Filed Under: Baking, Breads, Rolls and Muffins, Breakfast, Recipes Tagged With: cranberry-muffins-recipe, cranberry-recipes, muffin-recipes, recipes, recipes-using-cranberries

New Light, New HOUSE. (We’ve Moved!)

January 16, 2012 By Laura 19 Comments

WELCOME, to the ALL NEW, OUR HOUSE OF JOYFUL NOISE! OH, have I been dying to spill, about all of this!  You may have noticed, we’ve barely been posting on the blog, and THIS is why! We have MOVED the blog, switched up our name a little, and started an all new Facebook Page! Generally speaking, we have really just opened up the windows all over the place, and there is a whole lot of freshness coming in!

JANUARY. The name of this month, comes from the Roman god named Janus – /Jay-ness/, the god of doors and gates. The patron of beginnings and endings, and especially of the important events of a person’s life. This roman god has been represented with 2 faces; one which looks back to the past, and one that looks ahead to the future.

I never knew of this roman god, and when I learned of where the name of January derives from recently, here at the beginning of this new year, and particularly at this point in my life, really resonated with me. Because it spoke to me, personally. The imaginary vision of this door of light, for me, beautifully depicts not only the leaving behind of the year behind me and the one ahead, but all of the changes I am making in my life, and with our blog here, at the start of this year.

WHAT CHANGES, YOU ASK?

Well that’s what I’m about to tell you about. But where to start?


BIG CHANGE IN BUSINESS, FOR ME.

    • This was a huge decision for me. But after 13 years, I have decided to put my business, Laura Lee Richard Photography, on serious and indefinite hiatus. I have felt this desire to do this, coming, for awhile. Last year, I limited the clients I took. In doing that, it made me realize what I really needed and wanted to do. And that is, to just let it go for now. I have many reasons, but here are some, in order of importance:
  • I want to put even more, into raising and homeschooling my awesome kids, and be completely available for all of their various schedules, commitments, lessons, games, activities and fun. I love, love, love homeschooling them! Still! Plus, I am prepping our oldest for college now, and that’s serious business! I love this life style of ours. I love these years with my kids growing up, so very much, and I don’t want to miss any of it!
  • I know I am known as a professional photographer, and I’ll always still be one. (Just not in business right now.) But, did you know, I was once known as an illustrator? I really, really have a deep longing, to get back to my creative roots. I want to draw more, paint more, for me and with my kids! Just get back to more of my hand-skill art, and enjoying that process again. I truly have many, many creative outlets that I want to indulge in, actually, as time allows. Including some graphic designing, which you could very well benefit from, on occasion. ; ) I have an art education in these things, as well as photography. There is no pressure on me, to create art for anyone but me now. So it will come as it does. But I do look forward to sharing it all, with you, right here on the blog, along the way.
  • Throughout my years in photography, I have seen the photography industry gradually change. More than ever, it is really going down paths I am not interested in battling. As much as I have loved doing all of the portrait photography I have done for my clients over the past 13 years, I have a real drive to really nurture other business endeavors, that I can sanely and happily do on my time. While focusing on the things that bring me such joy. Such as my family, and of course…..

THIS BLOG!!!

IT LOOKS DIFFERENT. BUT WHAT ELSE WILL BE NEW HERE?

Yes, it does look very different! So how do you like the new place? I really went through the gamut, deciding on a design for the new header. I wanted a logo icon out of it, but I wanted it to express so much more. I was all over the place with this one, literally lying awake most nights, brainstorming, and sketching out thoughts during the day. Then I had too many ideas. I prayed on it, and finally I came up with and designed this, myself. It conveys everything, I wanted it too. I love the clean and simplicity of it.  Window = House. Window = New Experiences. Window=LIGHT=Truth=God. Windows especially represent light, for me. I do, and have always loved natural light! Light is a necessity, for me. Because 1) I am an artist. 2) I am a photographer, always working it. 3) I used to struggle with Seasonal Affective Disorder (before I filled my house with windows!), and 4) Because God is the light of our life, and our rock! I love colors too, as they represent all of life and creativity, that we can only truly see, with light. ; ) The header/logo flat out makes me happy when I see it. We hope you love the new digs too!


NEW NAME.

Just a slight change there. It was just easier. We’ll leave it at that.


ONE FEED!

This one is one of the big deciding factors, for an all new blog. For those of you who have been following us, with the crazy aggregate feeds and changes, you know what I am talking about, People! No more!! One feed for all, and all for one! BUT THIS MEANS YOU PROBABLY NEED TO RE-SUBSCRIBE TO THIS BLOG! But no crazy explanations or directions. Just subscribe as you normally do, and perhaps remove our former blog feed (the one with the word OUR in it) from your subscriptions. (No more posts will be coming to you through that.) You’ll really want to re-subscribe, subscribe for the first time, or follow us on our all new Facebook Page! (See the pretty social buttons at the top of the page! 🙂 While subscribing will notify you of our new posts, liking our new Facebook Page will add a whole new element of fun for you! We’ll be sharing what we are working on, all kinds of little things, be able to better interact with you, share great links to other blogger’s projects and ideas we think you’d love, as well as some things we’ve shared before that you may have missed. And….my random thoughts, which can be rather interesting all by themselves sometimes! That, and so much more. The activity on our all new Facebook Page is going to be really kicked up a notch! So if you are on Facebook, LIKE us today, and join the fun with us! We’d hate for you to miss out on all of that, and it’s such a great place to connect, with YOU!


WHY? WHAT IS COMING UP AT THE NEW HOUSE?

Well, a lot of the same kind content we’ve been sharing, with lots of photos as always. But more of it! Perhaps some different presentation, and style to my blogging. We will be all over the social networks now, and we’re sure you’re going to love all that is coming:

  • Tasty recipes for you and your family to try.
  • Farmhouse / Home decor that may inspire you.
  • Our unique home improvements and furniture projects that make farmhouse-style house a home!
  • What’s being created in our art studio!
  • New fun crafts with step by step directions, for you or your kids.
  • Homeschooling chit-chat.
  • Chickens!
  • Our occasional personal celebrations and fun.
  • Thoughts on parenting, self, life & faith.
    . . . . . . and more.

All in all, we are planning on a whole lot of content that we invite you to just enjoy reading about, sharing, or using as an inspirational spring-board, for yourself!

And don’t forget! We have nearly 4 years of archives on all of these topics, to look back through as well!

BUT WAIT!! THERE’S MORE!!
(I always wanted to say that. lol)

I have really been on a journey of personal growth. It has been a challenging experience at times, but also such beautiful thing.  For all of the joy we have felt in our life, I feel it all blossoming even more. God is never done with us, is He? I am growing, and seeking growth, in many ways. And while this is in many areas of my life, I am positive it will all carry over and be reflected in our blog. I am also positive, you will all help me along, with your words of wisdom, and encouragement, that I am certain you will share. In fact, I am counting on it! Because, although I am still contemplating how I want to go about this, I believe I’ll be venturing into new territories, in some topic content.  A series, so t0 speak, with deeper personal topics, that I am sure many out there will be able to relate to, in some way. Not too heavy.  It’ll be a good thing. I don’t want to say too much, because I am still a little scared! It’s QUITE out of my personal comfort zone. But, I am thinking it through, praying on it, and I hope you’ll stick around to encourage me, if I dip my toe in the water! ; )


ONE THING IS FOR SURE, FRIENDS! . . . . . .

It’s going to be a ride at the HOUSE!! You are going to see things changing and growing, all of the time! And we sincerely invite you all, to come along with us! Share in it with us, and bring your own special touches with you! Invite your friends, to the HOUSE too! YOU are why we have grown so much! YOU are why we have felt so encouraged to keep making (Our) House Of Joyful Noise be all that it can be! So be sure to stay with us, or join us starting today!! Please go hit those pretty buttons at the top in the header of the blog, and subscribe to this all new blog, and/or follow us on our all new Facebook Page! It’s a new blog here, so most of those subscribed before must subscribe again, to stay with us! It depends on how you subscribe, but why take the chance to miss us? ; ) We’ll see you around!  But before you go, please say hello and let us know how you like the new House Of Joyful Noise!  (We’d love your honest feedback!)

-Laura & our the Richard Family!)

Save

Save

Filed Under: Crafts & Creations, Faith, Faith/ Catholic, Homeschooling, Life In General, Photography & Lettering, Recipes, The Big Picture, The Homestead Tagged With: Catholic-blogs, Catholic-families, creative-blogs, farmhouse-style-blogs, homeschooling-blogs, recipe-blogs

Gift Idea for the Coaches!

November 14, 2011 By Laura 10 Comments

03_coach-gift-handmade-300x214

We’ve got a great gift idea for coaches, today!  We need to show our kids’ coaches, and especially volunteer coaches, our appreciation for their sacrificed time and generous efforts in coaching and teaching our kids.  This post does contain an affiliate link, in case you don’t have the equipment to do projects like these.

Even though I haven’t even blogged about our kid’s sports fall season(s) yet, I thought I would share with you all a nice personalized gift idea that is great as a ‘thank you’ to your kids’ sport coaches.  Although keep in mind, the specifics/design of this idea can be changed for many other gift needs, and fitting for teacher’s (on a pedestal mug), Dads, teens, etc., Christmas or thank you gifts as well, as long as you have some kind of cutter machine, such as a Silhouette.  (The number of projects and crafts you can do with this machine, are only limited by your imagination!)  You may consider some simple graphics, or the special occasion of the recipient.  The gift idea is completely customizable and suitable for so many, which is why we thought it would be great to share with you.

We’ve done this gift before for other coaches too, but this time it was for our boy’s awesome flag football coaches. We put this gift together very quickly, literally right before their Superbowl Game!(<< Whoo Hooo!)

01_
We picked up these ‘guy mugs’ (beer mugs….or Root Beer Float Mugs! ; ), at the Dollar Store!  As well as the brown paper gift bags, and the silver bag filler.  2 gifts, for less than $6.00!


02_lettering-mugs
After taking measurements of our mugs, we put together a quick layout on the computer, and cut out 2 sets. (One for each coach, and personalized with their own name.)  Our boy’s team was the Raiders, whose colors are silver and black (on white). We chose to just use ‘frost’ vinyl material, for something quick.  But silver letters outlined in black, would have been nice for this gift too, as their team colors.


03_coach-gift-handmade I didn’t take step-by-step photos.  But the general procedure is:  layout what you are wanting cut in the computer, cut it out on your cutter, weed the vinyl material, cover the weeded vinyl with transfer tape, peel off the back, apply your lettering/design, and then peel off the transfer tape.


04_viny-lettering-mugs
I did wrap and stuff the mugs in white tissue, and put them in the bags with the silver filler.

We think it’s a great gift!  It’s sharp looking, personalized, so affordable, and most of all…..thoughtful!  (And I keep hearing, that’s what counts. ; )

The boys had a blast this season, and we were so happy as it was, that their team made it to play in the Superbowl game, just as their big sister did last year playing flag football.  Did they win? Well, we’ll let you know how that game went, in an upcoming post.

Meanwhile, CHEERS! <clink!>. We hope you enjoyed this quick gift idea.

* * * * * *


Filed Under: Crafts & Creations, DIY (Do-It-Yourself) Project, Homemade/Handmade Gift Ideas Tagged With: gift-ideas-for-coaches, gifts-for-coaches, homemade-gifts, Silhouette, Silhouette-cutters, thank-you-gift-ideas

  • « Previous Page
  • 1
  • …
  • 29
  • 30
  • 31
  • 32
  • 33
  • …
  • 101
  • Next Page »

We are wicked happy to have you here! We hope you find much inspiration, help, humor and enjoyment here.


Archives


POPULAR POSTS

* * * * * *

SUBSCRIBE to House of Joyful Noise blog! Every new post, delivered right to your email box!


Privacy Policy

Amazon Affiliates

Never at any additional cost to you, we may earn a small commission for our endorsement, recommendation, testimonial, and/or link to any products from our website. Your purchase through our links helps support our family, while sharing with you the products we authentically use and recommend, for various ideas, and letting you know where you can purchase them. Thank you for your support!

[footer_backtotop]

Copyright © 2025 HouseOfJoyfulNoise.com · Genesis Framework by StudioPress