• HOME
  • {A}’s Chipmunk Training Archives

 Homepage

  • The Homestead
    • Home Projects
    • Home Improvement
    • Home Decor
      • Seasonal Home decor
        • FALL Home Decor
        • WINTER Home Decor
        • SPRING Crafts and Creations
        • SUMMER Crafts and Creations
    • Our Chickens
    • Gardening
    • Organization
    • Re-Purposing
    • Furniture Refinishing
    • Budget
  • Crafts & Creations
    • Seasonal Home decor
      • FALL Crafts and Creations
      • WINTER Crafts and Creations
      • SPRING Crafts and Creations
      • SUMMER Crafts and Creations
    • DIY (Do-It-Yourself) Project
    • Kids Arts and Crafts
    • Homemade/Handmade Gift Ideas
    • Holiday Crafts
    • Fan Pulls
    • Free Printable/Downloadable
    • Sewing Projects
    • Giveaways
    • Business Features
  • Recipes/FoodFun
    • Breakfast
    • Lunch
    • Main Dish
    • Sandwiches
    • Appetizers
    • Slow Cooker
    • On The Grill
    • Side Dishes
      • Soups
      • Salads
    • Baking
      • Breads, Rolls and Muffins
    • Snacks
    • Treats
    • Desserts
    • Drinks
  • Homeschooling
    • Elementary Homeschooling
      • Elementary Homeschooling READING
      • Elementary Homeschooling MATH
      • Elementary Homeschooling LANGUAGE ARTS
      • Elementary Homeschooling SCIENCE
      • Elementary Homeschooling HOME ECONOMICS
      • Kids Arts and Crafts
    • Middle School Homeschooling
      • Middle School Homeschooling SCIENCE
      • Middle School Homeschooling HOME ECONOMICS
    • Language Arts
    • Math
    • History / Social Studies
    • Geography
    • Foreign Language
    • Field Trips
    • Games
    • Nature Study
  • The Big Picture
    • Life In General
    • Celebrations
    • Faith
      • Into the Light; The Series
    • Giveaways
    • Reviews & Sponsors
  • Photography & Lettering
    • Photography
    • truck lettering
    • vehicle graphics
    • Newborns
    • Kids
    • Engagement
    • High School Senior Pictures
    • High School Senior Pictures Sneak Peeks

Maple Sugar House Field Trip | Homeschooling

April 1, 2012 By Laura Leave a Comment

maple-sugar-field-trip-homeschooling-16

            As a kid growing up in western Massachusetts, tapped maple trees and maple farms seemed to be everywhere.  Visiting maple sugar houses, and learning about the process of making maple syrup and sugar, were some of my favorite school field trips. 

     Living a significant shift away from that area now, maple farms are not as common around here. But this was yet another field trip I really wanted to take our kiddos on.   We almost arranged one out where I grew up, but the timing of getting out there would have risked missing the end of the season this year.  So I found Matfield Maple Farm, less than an hour from us, and we went on a beautiful day! It almost felt wrong from the get-go, with no snow on the ground though!  And that was not the only change in the picturesque scenes I have carried in my fond memories of maple sugaring. But I was still excited for the kids to learn all about today’s process of maple sugaring farms.

My visual memories of the maple tapping season are very much like this:

maple-sugar-field-trip-homeschooling-20      Metal pails on trees, catching the pure sap from the taps that were put into them. And always, as I recall, snow on the ground.   After all, one of the best parts of our class trips, was eating syrup on snow, inside the sugar house!  Maple tapping season is the few weeks of the tail of winter, and first weeks of spring, when the nights are still cold, but the days are warmer.  That’s when the sap starts flowing. But in western MA, near the Berkshires, we always got so much snow in the winter in those years, it simply had not all melted yet, come maple sugaring season.

MY have things changed.  Not only are winters not as true as they used to be throughout the season , but maple trees being tapped for  sap at many farms, now look like this:

maple-sugar-field-trip-homeschooling
They are drilled and tapped much the same way, but tubes run connecting one tree to another, with all of the sap from all of the trees, running to one place.  I realize it’s more time efficient, and time is money after all. But I must say, I really miss the charm of good old fashioned pails on maple trees. 

     Watching and learning the whole process of how maple sap is collected, and boiled down into pure maple syrup, was still something I wanted my kids to see for themselves.  But I really hoped it would be just like how I learned about it, and I was looking forward to taking photos of the pails on the trees!  I did have an idea this farm used the more modern method, so it wasn’t a complete surprise. But I was hoping. They did say they also tap with pails, but we didn’t happen to see any. 

     Still, we were very much enjoying our trip, and it sure was a beautiful day for one.  Saturday was when the touring was, so Daddy/Michael was able to come too. It was a family field trip!

maple-sugar-field-trip-homeschooling-1       We had a chuckle at their cute sugar shack sign.  We’d recognize that shape anywhere!  Clever, recycling a basketball backboard into a sign! We  just love little family run businesses, and we always do all we can to support them, because we know all about having a little dream, and trying to make it work.

maple-sugar-field-trip-homeschooling-2      The kids fed the llamas, while a small crowd of us waited for the tour guide. {JM} was gathering clovers on the ground to feed them too.

    Soon, the owner/tour guide, and his daughter led us out into the woods, as he started telling us about the maple farm.

maple-sugar-field-trip-homeschooling-3

     The first stop was this natural spring. Do you see how vibrantly green that grass is?  The guide told us that is there even through the winter snow, because of the spring there. Imagine how pretty that must be. BUT….no snow for us! ; )

maple-sugar-field-trip-homeschooling-4       We were all offered to get a drink, and taste the fresh spring water. So I told one of my boys, who was going up first, that I wanted to get a photo of him getting some water. But all I got a bum shot!


maple-sugar-field-trip-homeschooling-5     Thankfully I have other kids, and got another chance.


maple-sugar-field-trip-homeschooling-6 We moved on, following each other on these wood-board paths. 

     A couple of times, we all had to duck under sap lines.  I personally thought of doing the limbo, but didn’t want to show off. ; )


maple-sugar-field-trip-homeschooling-7
Next we stopped at the 450 gallon gathering tank, where all the lines run to.  Here, the guide told us about the easiest way to know what trees to tap.  They go out scouting trees in the warmer weather, and mark the maples, when the trees have leaves.  That is when they can quite obviously tell which trees are of the maple variety.  As opposed to the winter / early spring, when it’s harder to tell which are which.   See the jug down by his feet? In it was a little treat for us all.

maple-sugar-field-trip-homeschooling-8     He passed out little sampling cups, and poured us all some pure maple sap, straight out of the trees. If you have never seen or tried it, maple sap looks just like water, and tastes almost as refreshing, with just a hint of sweet.  Sap straight from the sugar maple tree is about 98 percent water and 2 percent sugar, as well other nutrients, and minerals.  Maple syrup is derived by boiling it all down to the point where the process of evaporation leaves only about 33 percent of water and 67 percent sugar.


maple-sugar-field-trip-homeschooling-9      Do you know what this is? It’s called Skunk Cabbage. He broke off a piece for us to smell, but recommended we don’t let it touch our nose, whilst sniffing!  It’s named well. It stinks terribly! 


maple-sugar-field-trip-homeschooling-10
A poison Oak tree, evidences by the poisonous vine plant climbing it.


maple-sugar-field-trip-homeschooling-11  Back at the sugar shack, we all learned more about the process of boiling down the sap to the right consistency.  This is a wood burning boiler, bringing the sap to the boiling point of 212 degrees.  When it does boil, the steam rises up out of the sugar shack, and the syrup gets thicker and sweeter.


maple-sugar-field-trip-homeschooling-12
To the right of this shot is the pre-heating waiting area.  As it is moved into the boiling area, and getting to increasing thickened consistencies, it is moved over to the next holding well.


maple-sugar-field-trip-homeschooling-13
We found it interesting that it takes 40 gallons of maple tree sap, to make one single gallon of maple syrup!


016       Samples of the finished product were shared with us as well. The kids were sure to get their own little cup, and immediately began asking about plans to have pancakes for dinner.  Honestly, there is no comparison between pure maple syrup, and the ‘syrup’ for pancakes that they sell at the grocery store, which is actually made of corn syrup!

maple-sugar-field-trip-homeschooling-14      Another favorite part of field trips is always the gift shop! Here, what they sold was right behind us right there in the sugar shack, on some shelves.  Of course they sold pure maple syrup in fancy bottles, and there was some maple sugar candy as well, which is made by bringing the boiling process even further, removing an even higher percentage of water, until the sugar starts to crystallize. (I think.)

    A quick funny story about maple sugar candy:  As a kid on maple sugar house field trips, I always spent my spending money on buying maple sugar candy for my father.Every time. And I’d be so excited to give it to him, because I was under the impression he really loved it.  Then about a year or so ago he and I were discussing maple sugar houses, and I found out he hates maple sugar candy!  He says it’s far too sweet for him. But it just goes to show you how happy he pretended to be, so as not to hurt my feelings as a kid. (Thanks, Dad. : ) 

     I didn’t buy him any candy this time.

maple-sugar-field-trip-homeschooling-15 We thought these bird houses were cute too.


maple-sugar-field-trip-homeschooling-17
The kids had a great time, as you can tell by the smiles on their faces.


maple-sugar-field-trip-homeschooling-18      On the way home, we stopped lakeside, and ate our nice picnic lunch with the swans.

maple-sugar-field-trip-homeschooling-19      It was a wonderful day, and along with the memories, we brought home a bottle of pure maple syrup. Chosen not only for it’s contents, but of course for the fabulous bottle, with an embossed maple leaf in the glass!  I already have ideas of what I can do with it, for detail home decor come Autumn.  But before then, we have many pancakes and waffles to eat, drizzled with our pure maple syrup! 

      A planned meal for that night was quickly kicked to the curb, and we satisfyingly filled ourselves with blueberry pancakes. It was the kid’s first maple sugar house trip, but it won’t be their last! We will be getting to a maple sugar farm in the next couple of years, that still does things the good old fashioned way! But this place was still worth the trip, and no doubt the memories and lessons will be as sticky as the syrup on their plates.

     I know not everyone lives in the right climate, but have you all been to a maple sugar shack lately? Did they use the old or new method, and what your thoughts on the two? We’d enjoy it if you shared.


Filed Under: Field Trips, Homeschooling, Nature Study, Science Tagged With: homeschooling, homeschooling-field-trips, homeschooling-nature, homeschooling-science, maple-farm, maple-sugar-house, maple-sugar-shack, maple-sugaring, nature-study, pure-maple-syrup

Glass Tile Pendants and Magnet Sets | Tutorial | Handmade Gifts

March 25, 2012 By Laura 27 Comments

Glass Pendants and Magnet Sets Craft Tutorial

   
Today we’re going to show you how we made these beautiful glass pendants and magnets. They make such beautiful gifts, for women, as necklaces or magnet sets. I’m sure you could use the same technique to make other jewelry as well, such as cuff bracelets or rings.
You can choose any cardstock print you love, and the necklace pendants can be worn on any necklace chain, ribbon or cord.  So they can be very versatile in style, for you or your gift recipient’s liking.

duo-magnets-pendants    
This was the my first time doing this particular project. But in doing, so I learned lots of tips and tricks along the way, that I’ll be sharing with you throughout this tutorial.  Also, at the end I will share with you the specifications of the supplies, and the resource where you can get them, as I did.  So let’s get started:

001_glass-tile-craft  Here are all of the supplies I used, but I’ll give more details and sources at the end, so you know exactly what to get, and where:

  • 2-sided designer card stock
  • glass tile rectangles
  • glass tile squares
  •  magnets, with adhesive
  • sterling silver plated bails
  • Diamond Glaze Dimensional Adhesive
  • an x-acto blade
  • a synthetic hair paint brush

002_glass-tiles-bails-magnets Here is a closer look, at the beautiful tiles, bails and magnets I started with. 

005_making-glass-magnets All of the tiles, both pendants and magnets, are made by adhering beautiful card stock paper behind the tile, which is then magnified through the glass in such a pretty way. 

So here’s a TIP to start:  Before applying any adhesive, I put each tile on the paper I’d be using, and moved it around and looked at the design coming through, so I could decide ahead of time, exactly where I wanted to place each tile. 

003 Once I decide that, I put a little Diamond Glaze on the center back (flat side) of a tile, and then spread it out with a little brush to the edges, pressing out any bubbles with my brush.  I’d give it a moment to get a little tacky and less wet, and then I’d place and press down onto the paper where I wanted it.

TIP:  Eventually I got tired of squeezing it out of the bottle, so I’d put a small puddle on a coated paper-plate, to work from with the brush. You can do that too, if you want to.

004_making-magnets TIP:  In pressing it down hard enough, to be sure there is no air bubbles, the adhesive smooshes out from underneath the sides of the tile little. You don’t want to leave it, because it hardens like glass!  And you’ll be trimming the excess paper off. So, I used little pieces of twisted paper towels, to clean/wipe the sides, every time.  If you leave it, you will not be able to trim the paper neatly.

Also, I often carefully picked up the paper with the tile on it, and rubbed the back down too, just to be sure it was smoothed out.  Any of the tiles may need to be pressed down repeatedly, as air bubbles tend to sneak in. So just keep checking them until they are drier.

One by one, get all of your tiles adhered to the paper.


006_glass-tile-crafting Once they are all adhered and dried, it’s time to trim.

TIP:  To know if they are dry enough, simply touch the back-side of the tiles where the paper is, and if it is at all cool to the touch or damp feeling, leave them longer to dry.  I honestly do not have any time frames for you on drying time, because I made a LOT of tiles in a craft period spread over 2 days.

But once you know they are dry, trim the tiles out of the paper, very closely to the edge of the tiles. I always cut on my self-healing cutting mat. But you can use dense cardboard (not corrugated), if you need to.

Once all of the tiles are trimmed out, they look pretty done from the front!  You’ll see how beautiful they are already, and you’ll be inspired to make them wearable, or be able to place on a refrigerator.  So they need bails or magnets!

007_making-glass-pendant-necklaces Now I wanted to give the whole back-side of the tiles a coat of Diamond Glaze, as well, brushing just over the edges of the paper as well. The purpose of this is to protect the paper, seal the edges, and make the backs glass-like as well. 

TIP:  Whenever and where-ever you brush on this glaze, you want to use an adequate amount to let it settle to a glass-like surface. If you brush too thinly, just know it will leave a brush marks in those areas. Allow them to dry completely.

If you want to be sure they are thoroughly dry, leave them overnight before the next step.

 From there, I lightly sanded any rough edges of paper I felt, with fine sand paper,  just to make it feel smooth. I wiped off any fine dust from that.

008_making_designer-pendants Once all of the backs were dry, it was time to add the bails to the backs of the pendants.  Basically, I just added a dab of glaze straight from the bottle, onto the center back top of the pendants.

TIP: Be sure to look at the front design, to check that you won’t be adding your bail to the wrong end, leaving you with an upside down pendant! ; )   (I was proud of me for remembering to check that, before I made that mistake.)

009making-glass-tile-pendants Once it has tacked up just a bit, I pressed my bails on just like shown, and then cleaned up what smooshed out, with my brush.

TIP:  As you work throughout this whole process, you may want to clean your brush. The Diamond Glaze is washable, and so so is your brush!  Just wash with warm water (maybe a bit of dish soap if need be), rinse well, and dry.

010_making-magnets
For the magnets, add a small dollop of glaze to the center of the back of the magnets.   It will tack up a bit while you try to pry the magnets apart, and peel the adhesive backing off of one.  Then just press the sticky part down onto the center of the magnet.  Again, clean up any glaze that squished out, for a cleaner looking finished piece.

TIP: If you use too much glaze, the magnet will just slide off center. Just move it back in place. As the glaze tacks up, it’ll stay.  I can see a couple of mine above slid a little, and I missed it.

Another Tip: After all of the pieces were dried, I went back one more time, and added a bit of glaze around the magnets, and around the bails (and underneath the loop), then smoothing with the brush, just for a little more re-enforcement. Whether they really needed that or not, I don’t know.  But I just wanted to be sure the bail would not lift the paper if pressed on, or the magnets would not stay on the fridge and the tile be left in anyone’s hand without the magnet, when moving them!  So I took the time for that extra step.

011_making-pendant-necklaces As I said before, they can be worn on a ball chain as a necklace. But they are so versatile for various outfit styles! Consider wearing them on box chains, suede string, leather cords, or a matching sheer or satin ribbon!

Closer peeks of pendants….

012_glass-tile-pendants

013_glass-tile-pendants

….and the magnets sets….

  014_glass-tile-magnets

015_glass-tile-magnets

016_glass-tile-magnets

017_glass-tile-pendant-necklaces-craft The chained pendants, lying on the table.

018_jewelry-boxes

I found the perfect boxes, to package these gifts in.


019_glass-tile-pendants-magnets I started, trying to fold the tissue paper.  But ummm….honestly, there needs to be a youtube filmage someday, on me and tissue paper, trying to work together.  I have NO = NONE = ZERO patience for it! It took me….seconds, to just crumble it up, and start stuffing it in the boxes!  But you know, in the end, the look kind of worked, with the slick glass pieces!

I was SO excited to finish packaging them up, and get them to the post office! 

020_glass-tile-magnets-pendants I was just thrilled, with how nice they all came out!  Granted, every piece was not absolutely perfect, but they were made with absolute love! That’s what anything homemade, is all about!

In closing, I’d like to give the the specifications and resources, if you’d like to try making these yourself. Because really, it’s quite easy, quite fun, and you’ll be amazed at what beautiful pieces you made all-by-yourself!  What a perfect gift for a special friend’s birthday, or as Mother’s Day or Christmas gifts! Someone, could be impressed with you. ; )

EXTRA TIPS:

CARD STOCK CHAT:  You do really need to use heavy designer card stock for these, as opposed to regular scrap booking paper. The layer of glaze would make regular weight paper very soggy and ripply, very fast. You’d have a hot mess on your hands, quickly.  The heavier stock holds up to the glaze much better. Also, I really loved using the 2 sided designer card stock, because the coordinating papers made really nice coordinating mixed sets of magnets! I had fun putting them together. The brand I used of the card stock were pads by K&Company.

MAGNETS: I got the 1/2″, ‘3 pounds of force’ Neodymium magnets for strength. Of course, I had no idea what that meant. I can tell you, they have some crazy force!!  I had a few comical happenings!  At times, they just kept pushing away from each other. Or, they would just pulling each other and piling up, with no sense of control! Chaos, I tell you! So maybe I got too strong? But it’s better than the frustration of weak magnets!

GLASS TILES:  I got/used 7/8″ Square Pure White Glass Hand-Cut Tiles, and 1-7/8″ x  7/8″ Rectangle Pure White Glass Handcut Tiles

BAILS: Sterling Silver, Standard Small. (There are various styles.)

DIAMOND GLAZE: 2 Oz. Bottle.  – This stuff can be used as a glaze, and also as an adhesive. As you know, I used it for both in this project!  It dries beautifully clear, and glass-hard! So it can also be used dimensionally!  For example, as raised glass dots on a piece, or to add pop to any design!  I can’t wait to work with it some more.

SUPPLY SOURCE:  Well, the card stock pad I got at Michael’s Arts & Crafts.  But everything else….the tiles, bails, magnets and Diamond Glaze, I got on Etsy!  I would start by searching look for a vendor who sells glass tiles, and in particular, search for ‘pure white glass’ tiles. They seem to be superior in quality, in my experience. I did have a specific vendor I could recommend, from whom I bought my supplies from, but she seems to be out of business now.

* That’s a wrap to this project!  I hope you loved what you saw, and find yourself inspired! You can do this!  Please feel free to ask any questions you may have in the comments and I’ll do my best to answer them for you, or just leave some love, if you’d like.  Thanks for coming by!

 Love it?  PIN IT!!

Save

Save

Save

Save

Save

Save

Save

Save

Save

Save

Filed Under: Crafts & Creations, DIY (Do-It-Yourself) Project, Holiday Crafts, Homemade/Handmade Gift Ideas, Tutorial Tagged With: craft-tutorials, crafts, Diamond-Glaze, glass-pendant-tutorial, glass-tile-crafts, glass-tile-magnets, glass-tile-pendants, handmade-necklaces, homemade-gifts, homemade-jewelry, jewelry-how-to, jewelry-tutorials

Flat Stanley Comes For a Stay With Us, In Plymouth, MA, from Oregon! | Homeschooling

March 19, 2012 By Laura 1 Comment

us-300x214

Have you ever heard of Flat Stanley?  Or the Flat Stanley kid’s books his character is from?  Well I hadn’t.  Or I don’t recall, anyway.  Our oldest daughter does remember the books, but I have not been at all familiar with Flat Stanley, and neither had our fourth grade trio!  But we were about to get very familiar with him!  He was coming from Oregon, to stay at our house with our family, in Plymouth, MA, as an exchange student, of sorts.

001 
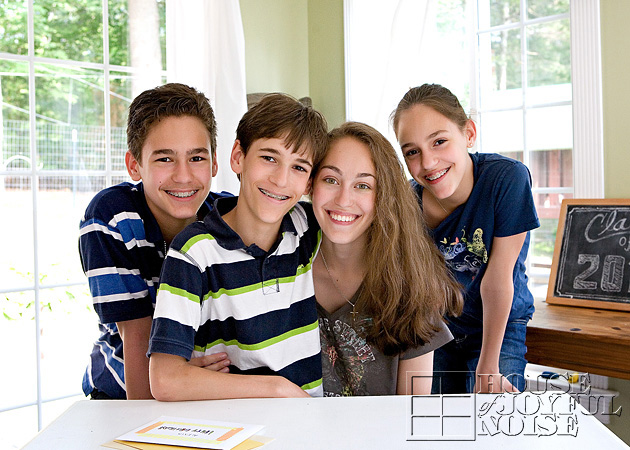
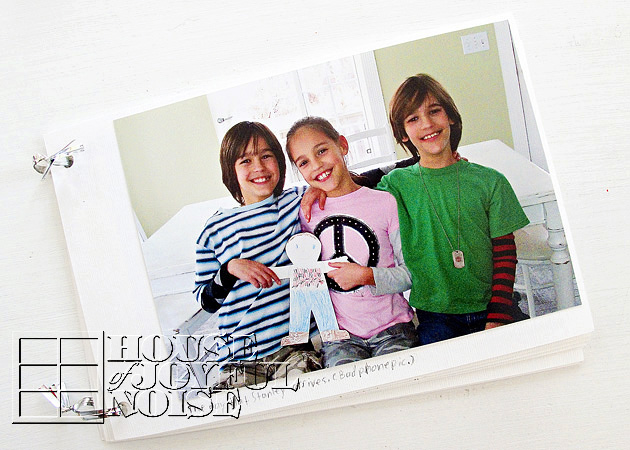
This is the day Flat Stanley arrived, and I told the triplets all about their new and exciting project!  (Please excuse the bad cell phone pic in this one shot!) Flat Stanley was not only going to be fun, but he was going to be a wonderful homeschooling project, loaded with excellent lessons.


lp_
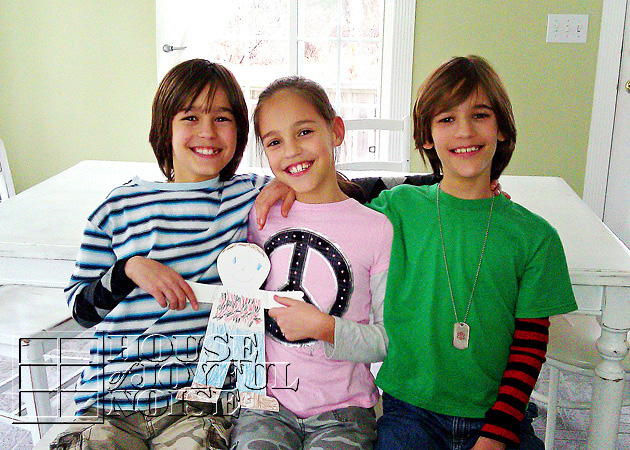
This is our little friend Logan. Handsome guy, huh? He’s also so sweet, so smart, and the best big brother ever. He’s just all about love. His mother and I are  friends.  When she was looking for some hosts to send Logan’s Flat Stanley from his elementary school to where Flat Stanley could go and learn about a new area, and to take that info back to Logan’s first grade class, we were all over it!  What a great class project this would be for our younger ones! And what a great area for Flat Stanley to learn about! Plymouth, MA is a town filled with much American History!   We couldn’t wait to show Flat Stanley so many things, and see to it he enjoyed his trip. ; )

(Half the fun, was pretending Stanley was real.  And yet we learned even more about our area, right along with him.)

The following photos are just a few highlights of Flat Stanley’s trip here in Plymouth, Massachusetts:

002_flat-stanley-mayflower
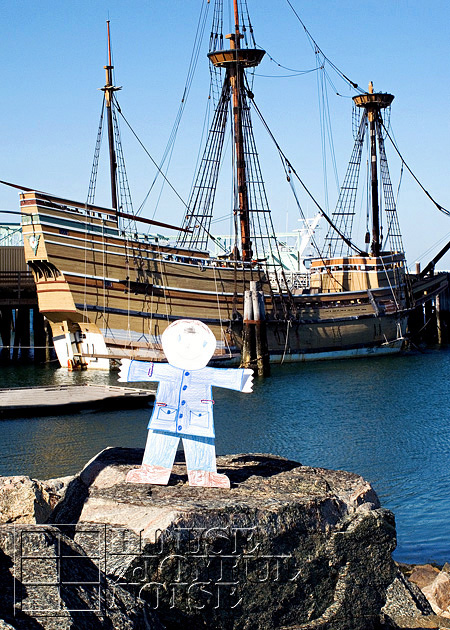
Flat Stanley in front of the replica of the Mayflower. (Also knows as the Mayflower II.)


003_flat-stanley-plymouth-rock 
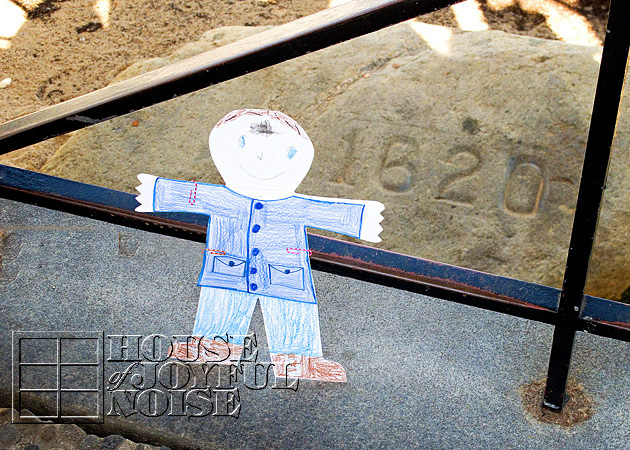
At Plymouth Rock!  He was very excited to see this rock he had heard and read so much about, in person.

004_flat-stanley
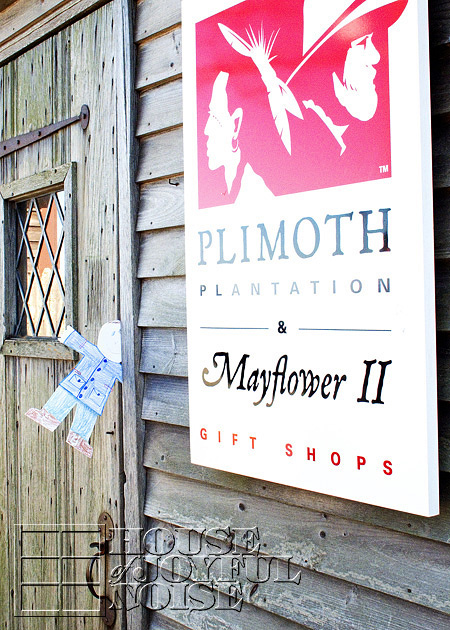
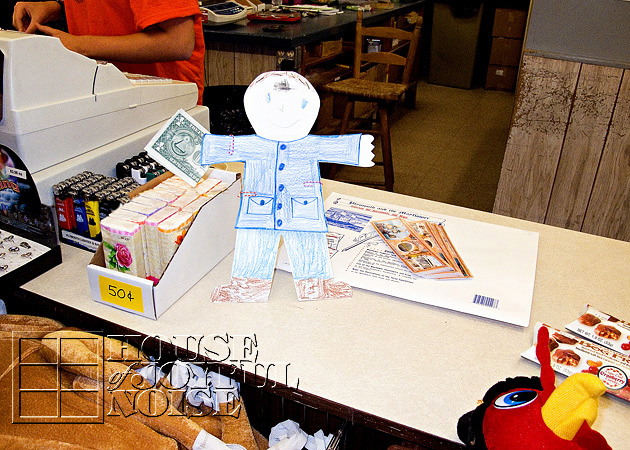
Unfortunately, Flat Stanley came at a time that is a little off-season, in this tourist town. He really wanted to take a look around this gift shop we came upon, but this particular one was closed for the season. But that’s not a problem when you are Flat Stanley!  He slipped through the door crack. He was looking for souvenirs to take home to Logan, and his class!  But of course, there was no one to ring anything up for him.


005 
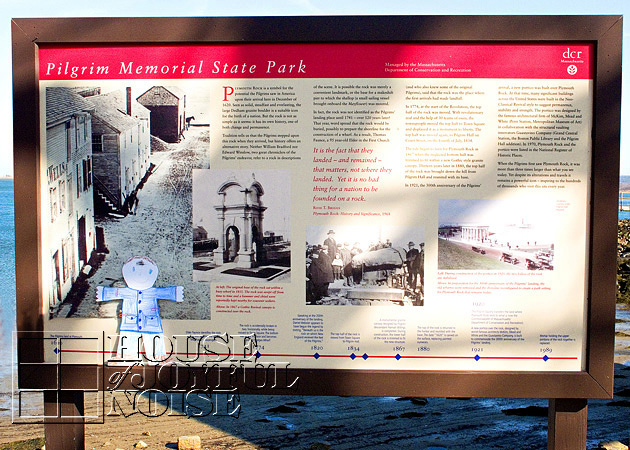
Stanley read this whole sign, to learn more about our area, and the historical events that happened right here!  It was a lot of reading for a first grader, filled with important facts and dates.  But Stanley found it so interesting.

006_flat-stanley-sagamore-bridge
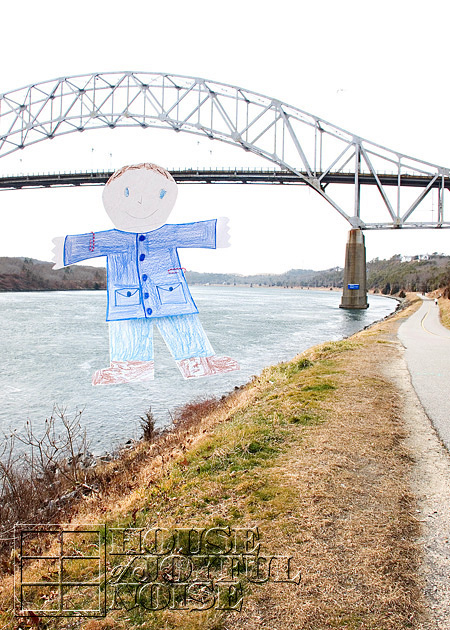
One sunny day, we took Stanley down to the Cape Cod Canal.  It was windy and cold, but he really wanted to see the two bridges, the Sagamore and the Bourne.  The Canal walk/bike trail, runs about 7-8 miles, between the two bridges.  It was too cold to walk the length, but he did get to see both bridges!


007_flat-stanley-ash-wednesday 
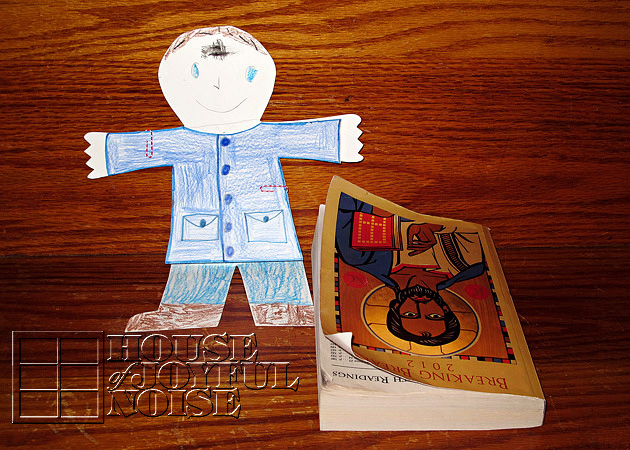
Of course Flat Stanley attended Mass with us on Sundays.  He also received his ashes on Ash Wednesday. (Were you wondering what was on his forehead, until now? ; )

008_flat-stanley-superbowl-party He had a great time with us on Super Bowl Sunday!

He cheered on the Patriots with us, like a true New England fan!


009 Here, Stanley finds some great souvenirs to get for his friend Logan, his classmates, and also the teacher of his class.

He bought everything with his own spending money!

Stanley is so thoughtful.

010_flat-stanley
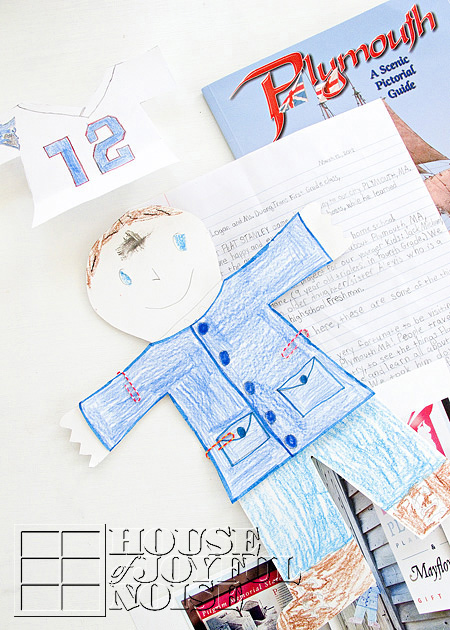
Since Stanley arrived with just a t-shirt on, the kids made him some paper-doll clothes: a warm jacket, and a New England Patriot’s jersey. (As seen wearing on Superbowl Sunday.)

The kids also wrote a really great report, all about Stanley’s stay with us, in Plymouth, MA. 

As their teacher, I was SO pleased with their report!

011 
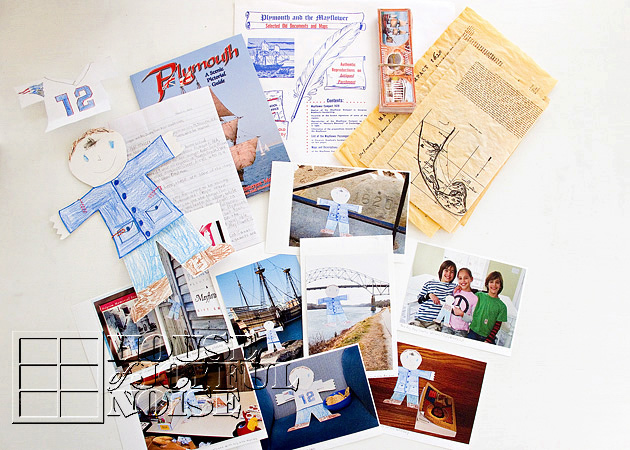
We had gathered together many great mementos to send back with him, to share with Logan and his classmates.  There was a nice educational Plymouth, MA guide book as a gift for Logan, and bookmarks for all of his classmates too!

012
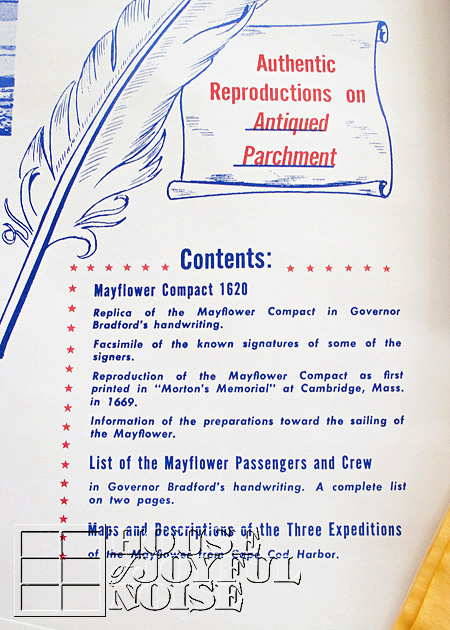
This was for the teacher and her classroom.   Do you see the contents list?  Check out what they look like….

013 
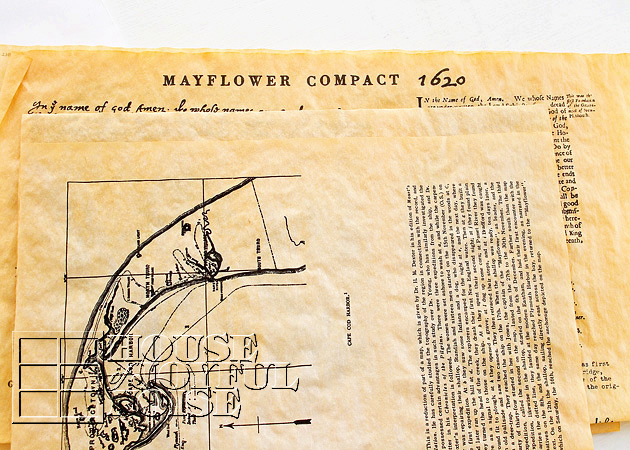
How cool is that, for a classroom to have?

014-flat-stanley-visits-plymouth-ma 
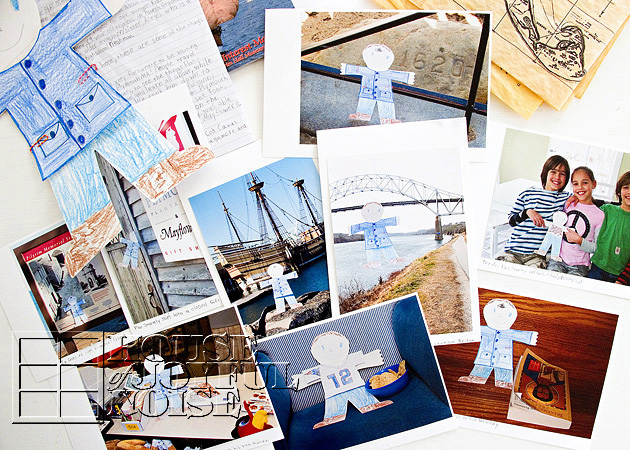
These are all of the printed photos of Stanley’s trip, in this post.

015 The kid’s made a photo album to send as well, using the photos, card stock, sticky photo tabs, a whole puncher, and silver twist ties. They wrote notes under each photo in the album.

That way Logan’s class could see all Stanley got to see while he was here, and Stanley could have the album as memories from his trip, and his stay with us.

In the end, we realized there were many lessons for the kids, in hosting Flat Stanley.  Here are some of the academic and social skill areas that were involved:

  • American History / Social Studies
  • Geography
  • Map Skills
  • Gathering Resources & Information
  • Organizing Information
  • Writing a Report
  • Handwriting
  • Spelling & Vocabulary
  • Addressing Packages / Post Office
  • and of course…..Being a Proper Host!

016
After a long good-bye with our new friend Stanley, we packed him and all of his belongings up in a box, and headed to the post office, to see him off!

It was a project we all enjoyed very much!  We hope Logan and his class, enjoy learning all about Plymouth, MA, from Stanley’s education here.

Have you ever heard of these Flat Stanley projects? Have you ever sent one to another state, or hosted one where you live? Share a link to your blog post if you have one, or just tell us a little about it!

Save


Save

Filed Under: Geography, History / Social Studies, Homeschooling Tagged With: Catholic-blogs, Catholic-families, elementary-geography, elementary-history, Flat-Stanley, Flat-Stanley-Massachusetts, Flat-Stanley-OR, Flat-Stanley-Oregon, Flat-Stanley-Plymouth-MA, homeschooling, report, triplets

Calvary Hill Planting | A Kids’ Lent Project

February 26, 2012 By Laura 29 Comments

020_easter-empty-tomb-calvary-hill-plant-kids-project-150x150

When Lent comes around, it’s difficult enough for us as adult Christians, to decide in which ways we’d like to embrace the 40 days leading to Easter. We are led by 3 things: Sacrifice, Prayer, and Alms-giving.  But as parents, we also want our children to take part in some way, and fully realize the significance of this period of time, too!  Attending Mass (especially through Holy Week), hearing the Scripture relating to Jesus’ death and resurrection, and witnessing (or participating in, depending on the ages of the children) their parent’s participation throughout Lent, certainly helps build their understanding of the importance of this season in our faith. 

However, I was thrilled last year, to come across this great project for the kids, that really invited them to be involved in some significant way even more, throughout the Lenten Season!:


020_easter-empty-tomb-calvary-hill-plant-kids-project
Calvary Hill

As parents instruct the kids how to build this project, and plant and water the grass seeds, they have the opportunity to teach, or further discuss, the reality of the death and resurrection of Jesus, why and how He died, and what that means for all of us!

 This Calvary Hill plant needs to be nurtured and tended to by the kids, throughout Lent. By Easter, it is beautiful plant, symbolic why we celebrate. It makes for a wonderful Easter table centerpiece, and can also be put outdoors to keep for many months!  We put ours out near our gardens, on our potting bench.  It can also simply be placed right into a garden bed, or on a deck. We trimmed the grass down when necessary, and kept it watered, enjoying it for long past Easter.

001_calvary-hill-plant-supplies Pictured here are some of the supplies you will need.

Here is a more complete list: 

  • Organic Seed Starting Mix (we used Jiffy brand)
  • Organic Hard Winter Wheat Berries, OR, Winter Rye (we used Winter Rye),
  • a large (12″) flower pot dish (w/ no drain hole),
  • a small (4″) flower pot and it’s dish,
  • small rocks (for drainage),
  • a pail
  • pail and shovel, with some water, for mixing soil.
  • some straightish-sticks of any kind, for the crucifixes
  • brown twine to tie together crucifixes
  • probably a glue gun

002_easter-kids-lent-project First will be creating Jesus’ tomb: Lie the small pot on it’s side, in the center of the large pot dish, with the opening of the pot a couple of inches or so from the inside edge of the big dish. The small pot is representative of Jesus’ tomb. You just want to be sure you leave room for the dish to that pot, to be in front of the pot opening, and room to roll to the side, which will serve as the stone in front of Jesus’ tomb.
–

003_kids-lent-project Fill the whole bottom of the large potting dish with small rocks on the 3 sides of the small pot (Jesus’ tomb), supporting it to keep it from rolling. Smaller rocks than we used are acceptable and may even be more suitable and manageable. We just grabbed some from our driveway! 
–

004_mixing-soil Next, in a pail, add water to some Organic Seed Starter Mix . . . . . .

005_ . . . . . .and mix to make some nice wet dirt!

006_ Time to get dirty!

Scoop handfuls of dirt out of the pail, and place it all around the sides of and behind the tomb, as well as right over the top of it.  Create a nice round hill. 

*Note that in these photos, you see some dirt in front of the lid and somewhat in the way here. We learned that was not a good idea, as dirt was always falling out when we moved the lid. It is best to keep it clear of any soil.

007_soil  Again, keep the dirt away from the front of the tomb, so the ‘stone’ can roll away.  But be sure the tomb is covered in the soil mixture.

009_calvary-hill-seeding Next, is planting the seed. As mentioned earlier, we used Winter Rye, but Organic Hard Winter Wheat Berries can also be used.  Either grow quickly!  Simply cover the soil with the seed, pressing down into it if possible, and perhaps cover it with some more where you can, if there is room.

010_stick-crosses Now 3 crucifixes need to be made.  We wanted to keep it simple and rustic, so we simply found some straight sticks up in our wooded area, and created crossed wrapping the twine in a criss-cross effect around the intersection of the 2 sticks.  We tied off and then cut the twine ends, but then also used a dab of glue with a glue gun to secure it.

011_building-calvary-hill-plant-easter The crucifixes can be placed into the soil of your Calvary Hill now, as we did right away.  But as a tip, they would stay in place better, if you waited a bit for the seed to sprout and begin to grow, so there is a bit of a root system established to support the sticks.


012_kids-calvary-hill-plant-project
Here is what ours looked like, all done and ready to grow!

We brought it indoors, and placed it on a plastic covered table where sunlight would be on it a good part of the day. Throughout the first week or so, the kids need to simply mist spray the soil with water, in a spray bottle, 3 times a day, to keep the soil moist, and encourage the seed to sprout.  Perhaps you can come up with a simple 1 or 2 line poem to say, while they do this, as a form of meditation.
–

013_kids-lent-project
It’s growing!  The kids will be so excited to see this.

As sprouts push upward from beneath, some dirt will tumble down. This is why it is important to really try to keep the soil quite moist, until it is all held in place by the grass that grows. We thought the plastic table covering was wise, because all of the water spraying.
–

014-seeds-sprouting You will also notice some seeds and seed casings being pushed up to the surface. It’s fine.


015_calvary-hill-plant-easter
Before you know it, you’ll have lush green grass, on your Calvary Hill!

More photos of Jesus’ empty tomb….

016_calvary-hill-plant

017_calvary-hill-plant-jesus-tomb

018_rustic-stick-crucifixes I just love this photo.


019_calvary-hill-kids-project
On Good Friday, you can wrap a clothespin with a white piece of cloth or paper towel, or simply cover it.  The clothespin and wrap is representative of Jesus’ body.
  Then roll the stone to close the opening of His tomb.  : (
–

020_easter-empty-tomb-calvary-hill-plant-kids-project
On Easter morning
, JESUS IS RISEN!  When the kids get up in the morning, let them find the stone rolled away from Jesus’ tomb, and his garments folded or rolled neatly inside. 

It is our hope and prayer as adults, that our Lenten Season practices, help draw us closer to Jesus, deepening our relationship with Him.  May your kids not only enjoy this project, but like the seeds in the fertile soil, may it help sprout a faith in their hearts, that is bound to grow within them, and help guide them all throughout their lives.

ALLELUIA!!

(We’re happy to discuss this project, or answer any questions for you, in the comments below.)

* * * * * *

Follow us on FACEBOOK!


Filed Under: Crafts & Creations, Faith, Homeschooling, Kids Arts and Crafts, Kids Arts and Crafts, The Big Picture, Tutorial Tagged With: calvary-hill-plant, calvary-hill-plant-how-to, calvary-hill-plant-tutorial, Catholic-blogs, Catholic-families, Catholic-kids, christian-kids-project, Easter, easter-kids-projects, Easter-plant, Easter-table-centerpiece, kids-easter-crafts, kids-easter-lent-projects, kids-lent-projects, lenten-arts-and-crafts, lenten-projects, triplets

Our Road to Homeschooling – Our Story

February 22, 2012 By Laura 18 Comments

00_

We all have our story, I suppose.  Our own road, that led us to where we are, homeschooling.  I know we have ours.  And I would think nobody would really care to hear it, except for the fact that, people ask! -ALL OF THE TIME!  But I warn you….it’s really a story. Like, of the novel kind. In the way of lengthy. So, if you are interested to read about it, you may want to go all out, and make a hot beverage to go with it, or something. I’m not sure it’s all that entertaining, but it’s our story, nonetheless.


My First Thoughts of Homeschooling Our Children

I think the seed was planted in my heart real early on, to be a homeschooling Mama. As a child, myself.  I never really liked my own reality of being in school, at all. But I did love playing school, with my siblings and friends. I have many memories of pretending. One of us would be the teacher, and the rest of us would be the students.  I vividly remember some summer days, of sitting on a couple of front porch steps made of boards, with our bare legs and feet dangling underneath the porch, and using the one step higher as our desk. (Something I would never do today, knowing the spiders and other creepy crawlies that would be under there. Lol.). So yeah, playing school was a favorite activity of mine to play, even though I wasn’t a fan of real school.


Miss Beadle Made Me Do It

I’m pretty sure I also got some inspiration from Miss Beadle, from Little House on the Prairie! I most loved any scenes in the school house. To this day, I have such a love for old schoolhouses. Granted, Miss Beadle’s class was not truly homeschooling. But still, I fell in love with the simplicity of the one-room schoolhouse, with the bell, the old desks and chalkboard slates, the burning stove for heat, and the notion that kids of different ages, even siblings, could not only learn together in the same place, but could actually benefit in many ways, from that. It differed a lot, from my own experience of going to school. I also really felt some kind of connection with the style of raising children in those days on the Prairie, and how it seemed to build strong character in them, as was seen in the roles as they grew up over the years. Of course, it was just a show. But as I got older, I learned that it was a true representation of that era, and to this day, I am drawn to that way of life.

So those impressions probably took real root in my heart, even as young as I was.  But, I think the first real, formed thought I had on the matter, was in the moments that I held my first newborn baby, Alexis Grace, in my arms.  I had had an all natural, drug-free birth with a midwife, and I was so exhausted after laboring all through the night. But I vividly recall being in my hospital bed sometime later that day, holding my new baby girl in my arms, all wrapped in a blanket, and looking into her sweet little face with her little pink cotton hat, thinking: “I cannot even imagine ever sending you off to school every day.” I knew, she would grow up in the blink of an eye, and I already did not want to miss any of it. I think that was the day I figured I would never send her to school.


But Then I Did, for a Blink. 

When she became kindergarten age, there was no doubt by then that I simply wanted to homeschool her. No part of me wanted to send her to school for a 1/2 day, 5 days a week.  But in the same time frame, I found myself pregnant. (Hooray!!)  And I found myself thinking about the 1-on-1 time I had had with Alexis, in her first year, and I didn’t want to not be able to give that same valuable bonding time, to our new baby. Honestly, I find it kind of silly looking back now, but it’s what I was concerned with at the time, as much as I was conflicted because I didn’t want to miss having Alexis home, at the same time. In addition to that, I wasn’t sure I could school Alexis effectively, and care for a newborn with the same attention. (? – I know now, I could have, with one baby.) So, being on the fence with my decision, I did take her to be tested and registered her for kindergarten. Just in case, we decided to send her.


Well, the baby on the way, turned out to be three babies on the way!
 

That ‘kindergarten year’, turned out to be non-stop caring for, feeding, bathing, changing, rocking, soothing our 3 newborns!  That is, once we got them all home! They were born several weeks early, after my own 6 months of strict and complete bedrest, while I was pregnant with them. (Early complications that threatened them.)  But what I found in those bedridden months, while spending such time with Alexis on my bed, was that home schooling was for us, as much as I ever thought it was! Among our pillows and blankets on my bed, Alexis really learned to read, and write, and teaching her such things as critical thinking, was something I found I really loved to do. Watching her get it, and be excited, and grow in her knowledge, was just downright fun to me. And she seemed to be loving it, too.

It was also the time that I spent very pregnant on bed rest that I spent a lot of time praying, and bargaining with God, or so I thought.  It was a personal promise to Him, in that time, that later cemented my commitment to home school our kids as soon as possible. Of course, I would soon have my hands more than full, and be way short on sleep. So off to kindergarten Alexis went, exactly five days after her triplet siblings were born. I was seriously hurting, physically, but I was determined to be the one, that brought her to school, for her first day. Of course, another mother (just trying to be friendly and chatty), had to mention how I looked like I was ‘ready any day’, and asked me when I was due. Thanks, Lady! She was every shade of apologetic and astonished, when I had to tell her I already gave birth 5 days prior, to triplets. Honestly though, I couldn’t really blame her. That belly took it’s sweet time going down.


That First Year

I wasn’t too bothered by Alexis going to school that year, for half days. For one, her school was literally within walking distance. But also because my own kindergarten year, were rather magical memories.  At that time in our lives, it gave Alexis a change of pace that was good for her, and Lord knows I would not have had much time to really teach her well. But over the following weeks, the babies grew and progressed and came home one by one, all in God’s time, and we were all finally home as a family, a week before Christmas. THAT, was the best Christmas, ever!!  Honestly, after all we had been through, I think that was when we learned to truly trust in God, and had learned to appreciate the little things. Journeys like that forever change people.  It sure did us.

homeschooling-3 (2002-Home All Together for Our First Christmas – Our Christmas Card)

So, in reading this, you’d probably think the next year, I began home schooling Alexis. Right? But no…..it took me a couple of years, to get my groove, caring for 3 babies. With the reality of official homeschooling being new territory for me, I wanted to do it right. Whatever right is, right? So, Alexis continued to go to school, through 1st and 2nd Grade! All the while we knew she would be home schooled as soon as I could.  I have to say though, that there were regular instances in her formal school years, where I knew formal schooling would not be for us. So at the end of 2nd Grade, I pulled her out of school for good.


And Our Homeschooling Journey as a Family Began

homeschooling-7 (2005 – Alexis in 3rd Grade / Triplets 3 years old) – Catching and studying Periwinkles!

Of course, I would have the other 3 to school as well, soon enough. The triplets have never been to school, and that was the plan from the beginning of their lives.  Honestly, I believe children begin being schooled by their parents, at birth! So it’s really a natural progression, to just keep going. But the ‘first day of school’ that Alexis technically began schooling at home for 3rd Grade, in 2005, the triplets were only 3 years old. It was an easy and relaxed first year.  Alexis did her written work and math easily, and we did a lot of out door excursions all together, learning about nature, and finding our homeschooling groove. Which came quite naturally.

homeschooling

homeschooling-4
2005- Alexis with her bull frog, “Goliath”.

I began kind of formally schooling the trio the following year in 2006, although they had only just turned 4 and were too young for kindergarten, only because they kept asking to “have school work like Alexis does“.  So, I began table work with them that year. Meanwhile, they were picking a lot up and learning  right along with Alexis….

homeschooling-1

2006-Science / Nature Trail Walk / Learning about mushrooms we found.

The following year in 2007, I was officially homeschooling all 4 of the kids:

homeschooling-5

2007 – School Photo.  Alexis: 5th Grade /  JackMichael, Olivia & Shane: Kindergarten

Because they learned so much the year before, Kindergarten was kind of a joke to them.  I heard a lot of, “I already know how to do this, but it’s still fun!”. It was just a warm up year anyway, to start working at the table in a disciplined way, for an extended period of time.  But making learning pretty fun and exciting, in those early years, I came to believe was crucial. I found it really sets the pace for their attitude, about learning.  That theory of mine, could also be a whole other post, sometime.  But let’s keep this post on track.

Suffice it to say, after so many years of homeschooling now, all 4 of our kids still have a great attitude about school time, and love learning so much, that it is often self-propelled.   Now that they are older, it is not always FUN, per say. But they all still seem to have a great appreciation for the process of learning. Mind you, while we do throw some fun in our school year here and there in various ways, most often they do put several hours into several subjects a day. I’m not an easy teacher. It’s all getting done, and done well. Because I feel they need to know how to work hard as well, and to understand, that often times in life, there are tasks to be done, responsibilities to tend to, or lessons to be learned, that fun or less than enjoyable or not, still need to be accomplished. That’s life.  But to start out with a good experience with learning while they are young, and create that curiosity and thirst for knowledge in them, followed by more disciplined work ethic and a good outlook, really seems to have set a nice pace for our kids.  We think, hope, and pray, that it has become a part of them, for all they set out to do, or find themselves faced with, all throughout their lives.

homeschooling-6 So, that is our story, of how we came to be a homeschooling family. All of the reasons WHY we homeschool, could be another post all it’s own.  All I can tell you now, is that there isn’t a day we have regretted it. If ever we found ourselves back in time, with the choice once again of which road of education-style to choose, we would take this one less traveled by once again. We really do feel, for our family, it is making all of the difference.


homeschooling-2 (2015)

*2017 UPDATE:
Our oldest daughter is away in her second year of college. She is double-majoring in Communication and Theology.

NOTE: If you homeschool your children as well, share with us a bit about how you came to making the choice. If you have told your story and have a link, leave it for us below! If you are not homeschooling yet, but are considering it, why do you feel you are drawn to it?
Got a homeschooling topic or question you’d like to hear from us about? Let us know that too!
We’d love to hear from you, and connect with you all!


Filed Under: Faith, Faith/ Catholic, Homeschooling, Life In General, Parenting, The Big Picture Tagged With: Catholic-blogs, Catholic-families, decision-to-homeschool, home-schooling-families, homeschooling, homeschooling-families, triplets, why-we-homeschool

  • « Previous Page
  • 1
  • …
  • 27
  • 28
  • 29
  • 30
  • 31
  • …
  • 100
  • Next Page »

We are wicked happy to have you here! We hope you find much inspiration, help, humor and enjoyment here.


Archives


POPULAR POSTS

* * * * * *

SUBSCRIBE to House of Joyful Noise blog! Every new post, delivered right to your email box!


Privacy Policy

Amazon Affiliates

Never at any additional cost to you, we may earn a small commission for our endorsement, recommendation, testimonial, and/or link to any products from our website. Your purchase through our links helps support our family, while sharing with you the products we authentically use and recommend, for various ideas, and letting you know where you can purchase them. Thank you for your support!

[footer_backtotop]

Copyright © 2026 HouseOfJoyfulNoise.com · Genesis Framework by StudioPress