• HOME
  • {A}’s Chipmunk Training Archives

 Homepage

  • The Homestead
    • Home Projects
    • Home Improvement
    • Home Decor
      • Seasonal Home decor
        • FALL Home Decor
        • WINTER Home Decor
        • SPRING Crafts and Creations
        • SUMMER Crafts and Creations
    • Our Chickens
    • Gardening
    • Organization
    • Re-Purposing
    • Furniture Refinishing
    • Budget
  • Crafts & Creations
    • Seasonal Home decor
      • FALL Crafts and Creations
      • WINTER Crafts and Creations
      • SPRING Crafts and Creations
      • SUMMER Crafts and Creations
    • DIY (Do-It-Yourself) Project
    • Kids Arts and Crafts
    • Homemade/Handmade Gift Ideas
    • Holiday Crafts
    • Fan Pulls
    • Free Printable/Downloadable
    • Sewing Projects
    • Giveaways
    • Business Features
  • Recipes/FoodFun
    • Breakfast
    • Lunch
    • Main Dish
    • Sandwiches
    • Appetizers
    • Slow Cooker
    • On The Grill
    • Side Dishes
      • Soups
      • Salads
    • Baking
      • Breads, Rolls and Muffins
    • Snacks
    • Treats
    • Desserts
    • Drinks
  • Homeschooling
    • Elementary Homeschooling
      • Elementary Homeschooling READING
      • Elementary Homeschooling MATH
      • Elementary Homeschooling LANGUAGE ARTS
      • Elementary Homeschooling SCIENCE
      • Elementary Homeschooling HOME ECONOMICS
      • Kids Arts and Crafts
    • Middle School Homeschooling
      • Middle School Homeschooling SCIENCE
      • Middle School Homeschooling HOME ECONOMICS
    • Language Arts
    • Math
    • History / Social Studies
    • Geography
    • Foreign Language
    • Field Trips
    • Games
    • Nature Study
  • The Big Picture
    • Life In General
    • Celebrations
    • Faith
      • Into the Light; The Series
    • Giveaways
    • Reviews & Sponsors
  • Photography & Lettering
    • Photography
    • truck lettering
    • vehicle graphics
    • Newborns
    • Kids
    • Engagement
    • High School Senior Pictures
    • High School Senior Pictures Sneak Peeks

Canning for the First Time | Homemade Strawberry Jam

July 10, 2012 By Laura 4 Comments

first-time-canning-strawberry-jam-1
Just a bit ago, I had shared with you all what a great strawberry season we had this year, and all we have learned in the process of growing them.  Every season from the beginning, it had been my hope and plan, to learn make our own homemade strawberry jam.  The problem was, it never seemed we had quite enough berries ready, at the same time. But then between a bag we froze last year, and some more we froze this year, I was sure it was time to really try making some jam! For the first-time-ever.

Our usual household jam, has always been Polaner’s All Fruit.  Just reading and comparing ingredients with the other jams and jellies on the grocery store shelves, made the choice clear to me. I mean…I wanted all fruit.  So I was thinking I’d try a sugarless recipe to make out own jam.

001_pectin 
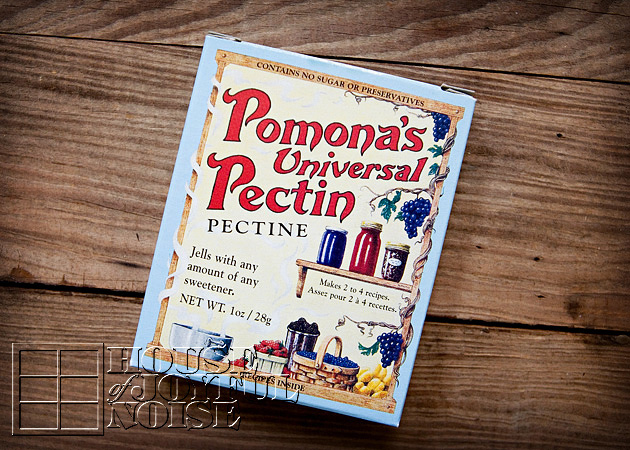
Inside the box of Pomona’s Universal Pectin (and calcium powder, necessary ingredients for making jam, I found a paper with several recipes, that I had actually read over a few times, since I bought the pectin months ago.  I kept procrastinating, because in my head, making jam,and canning it and all, seems like a huge and scary task!  And I still had questions.

So I was pretty happy when I noticed a JAMLINE on the recipe/directions paper!

I was like….”Really? There is a number I can call, with any questions I have about making this jam today?”  It was a weekend, so I didn’t think anyone would really answer.  I was imagining some company and all. But to my surprise, a woman and answered. And I could tell right away, she was not an employee in some company, but just a woman in her kitchen, who knows all there was to know, about making jam.  It was the most relaxed and friendliest conversation.  Like calling your Great-Aunt-Someone-Or-Other. We talked for awhile! I wish I actually got her real name. Maybe it was really the Pomona Family! Turns out she was located very near where I grew up in western MA.  Anyway, she answered all of my questions, and I really enjoyed talking to her, as much as I did making the jam! I learned a lot in our chat, and was so glad I called!

I thought I’d highlight some the most interesting things (to me) that I learned:

  •  When I told the woman I was planning to make the “All Fruit” (no sugar)  recipe, because we normally eat Polaner’s All Fruit, she let me know right off the bat, that if that was our usual brand, we were probably going to be UNpleasantly surprised with our own jam.  Why?  Because as it turns out that the reason Polaner’s is so sweet, is because they use a lot of fruit juice concentrate in it. So there actually IS a lot sugar in it, in the end.
  • To give us as something as close to Polaner’s in taste, but still keep the sugar content acceptably low, she suggested I use the  Low Sugar recipe.  So that’s what I did. Well….we did.  Michael was in the kitchen with me.
  • Just to compare the sugar content of the recipe I was going to follow, to the typical jams in the store, my recipe called for 2 Cups of sugar, while the store bought has 6+ Cups in a jar! We were going to use all of the strawberries we had, and make as much as we could.  So we ended up double-1/2’ing the recipe….which added up to 5 Cups of sugar.  Still….5 Cups for 12+ jars of jam was pretty good. I guess.

002_frozen-strawberries 
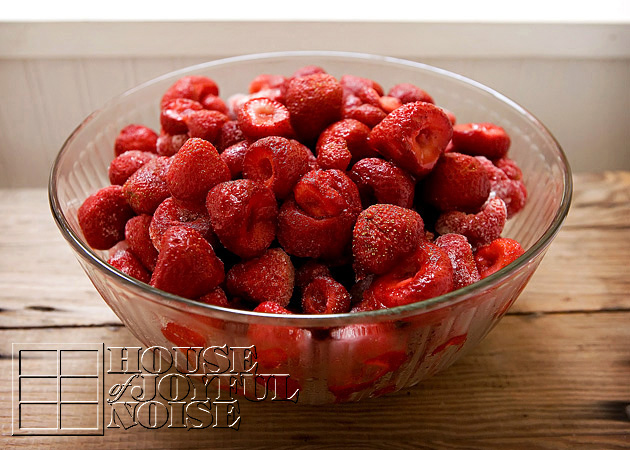
I used the 2 big ‘picks’ of berries that I had put in the freezer, after washing and hulling.

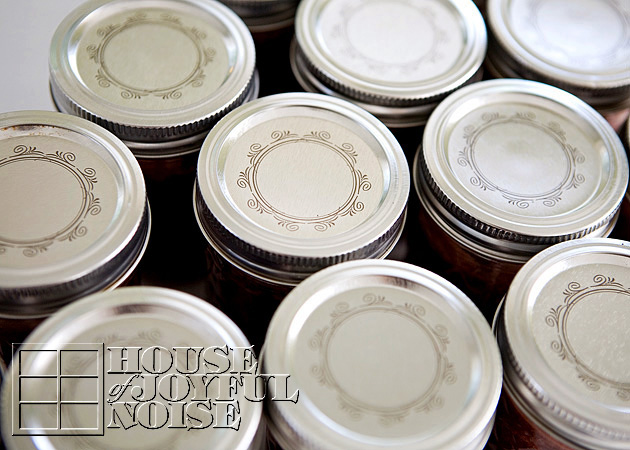
We mashed, stirred, cooked, stirred some more, filled (the jars) and then boiled them, and then let sit to cool.  After some time we started hearing Pop! Pop!  I was counting the pops, hoping they would all seal properly, so they didn’t spoil during storage.

You can get Pomona’s Recipes Low Sugar Recipe, and all of their jam and jelly recipes, HERE.

first-time-canning-strawberry-jam 
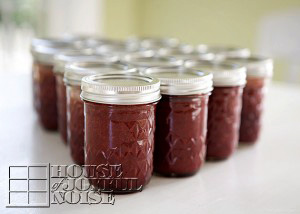
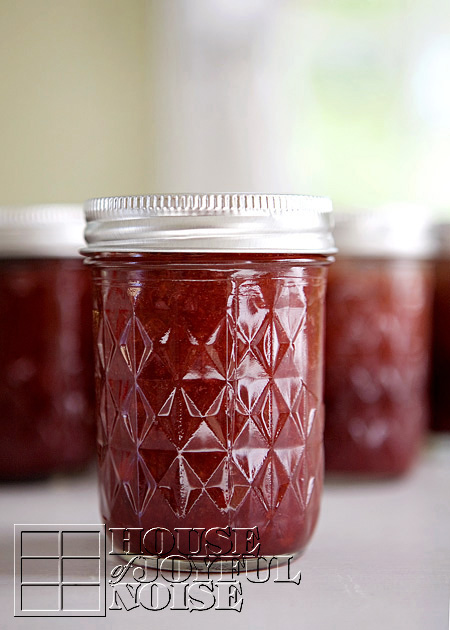
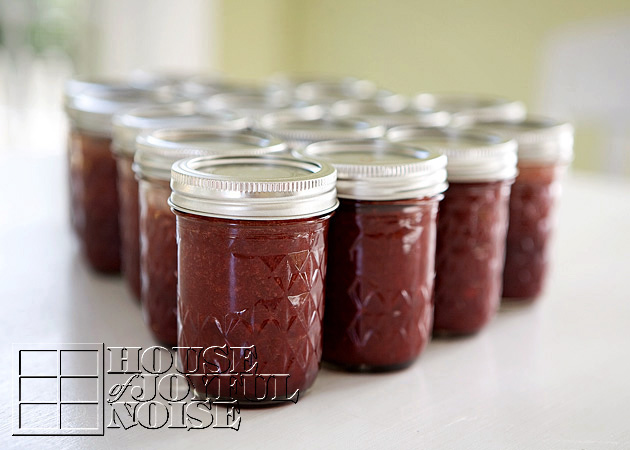
In the end we had about 16 jars of our very own Strawberry Jam!  Made in the Richard Kitchen!
I was so ready to design some of my own canning labels.

first-time-canning-strawberry-jam-2 Naturally, we had to try some as soon as we could. So the next morning we opened a jar.  Very good!  Definitely a bit different taste than the Polaner’s we were used to, but we all loved it! The consistency was not as gelled as we had hoped.  Just a little runny—so I’m not sure about giving any of these jars for Christmas Gifts just yet.  I actually may call that Jamline again, and ask they nice woman what we might do better next time.  But we’ll have no problems eating up these jars, and maybe giving some away, anyway.  I already gave my brother one yesterday, and he was so excited to get it.

005_jar-of-jam
So I’d done it.  That little dream of making my own jam someday, with the strawberries I grew myself, had happened. And in retrospect, it was not nearly the big task I thought it would be.  So I am quite sure that I’ll just make our own from now on.  Providing of course, that we always grow enough berries.  Although I’d never have a problem just getting them at one of our Farmer’s Markets if need be, either.  I’m really so thrilled about this little accomplishment, and the idea that it’s one more homemade good, grown and made right here on our own little homestead.  It’s not even jam that I love so much!  It’s the idea, of it all…..just gardening and growing, cooking and canning…wearing an apron, even. You know…I like to be a little ‘Olivia Walton-ish’ when I can.  Taking care of and feeding my family, with all of the home grown love I can put in it.
That’s always the sweetest and best ingredient of all.  And it’s something you just can’t get in a jar bought at the store.

No matter how much sugar they put in it.


Filed Under: Breakfast, Recipes Tagged With: canning, canning-for-the-first-time, homemade-strawberry-jam, low-sugar-jam-recipe, pectin, Pomonas-Universal-Pectin, recipes

Valentine Chocolate Covered Spoons

February 8, 2012 By Laura 5 Comments

003_valentine-chocolate-covered-spoon-150x150
Chocolate covered spoons are something we have been intending to try making, for awhile now. There really needs to be no upcoming holiday to make them. But when there is a holiday coming up, it’s another good reason to go ahead and make them!
If you have never heard of chocolate covered spoons, they are just what they sound like they are:  spoons covered in chocolate!  And then prettied up.  They can be used to to stir your coffee, hot chocolate, warm milk, etc – to add some chocolatey flavor to your drink, or make licking your spoon that much more enjoyable!  Meanwhile, if you’ve made a whole batch, they just look pretty sitting in any container in your kitchen.
Chocolate covered spoons can be made as simply or fancifully as you’d like. You’re the designer, with each and every spoon, and that’s the fun of it!  I already had an idea of how we wanted to make some chocolate covered spoons for Valentine’s Day, so that’s what we’re sharing with you in this post.

005_valentine-chocolate-covered-spoons1 Here are a bunch of our spoons, already finished. I thought they looked nice in this simple white gravy boat. We made even more than this though.  We’ll be using some ourselves, but we really made them for the kids to give to their friends. And our oldest made some for her whole basketball team. lol.  I made a simple Valentine card printable, to go with each spoon, and you can get that for yourself HERE, if making these spoons is an idea you’d like to use for your kid’s friends or classmates, too.  It’ll make a unique Valentine, don’t you think?

I did not photograph the step-by-step process, but I think it is simple enough directions to explain.   All you need is some hard plastic spoons, *chocolate to melt, a tad bit of shortening (optional, I guess), and whatever you’d like to decorate the chocolate covered spoons with!   We used Valentine sprinkles and marshmallows for this batch.  But you can drizzle with white melted chocolate after, use sprinkles on other (holiday) colors, cover in nuts…whatever you’d like!

*Because we have a boy with a severe peanut allergy, we cannot use the chocolate melts (like Wilton’s) that are sold in stores in the baking / candy supplies aisles, because they are not guaranteed peanut-safe.  They are convenient though, and melt very nicely, if you can use them!  Since we cannot, we use Hershey’s Milk Chocolate Chips, and so the best we can with those. I believe we can find peanut-safe melts online though, if we planned ahead.

001_chocolate-covered-spoons We got everything out that we needed:  spoons, chocolate (chips), sprinkles and marshmallows, and shortening.  You can melt the chocolate in a mug or a glass measuring cup – just choose something deep. We got a few cookie sheets out, and covered them with some wax paper.  

We began melting about 1/2 cup of chocolate chips at a time, in a mug, in the microwave, with just a 1/2 teaspoon of shortening. (I normally avoid shortening for anything, but a tad bit does help the chocolate melt and stir up smoothly.)   We started at a minute, and then did 10-1secomd intervals, stirring completely in between, until all of the chocolate is melted and smooth. 

Two important tips:   1) You do not want to overheat the chocolate, or it will be ruined. Little by little is the way to go, and add a dab more shortening if you feel it needs it.  2)  I use the handle end of a wooden spoon, for stirring chocolate.  I saw that tip somewhere a long time ago, as it doesn’t heat and cool like metal does.  Stir rapidly, for smooth and shiny chocolate.

002_chocolate-covered-spoons When your chocolate is melted, dip a spoon!  It does take a little patience to wait for each spoon to stop dripping off excess, unless you want to make a big mess.  Then, over an extra the cookie sheet or wherever, sprinkle on your decorations!  For the ones we were adding marshmallows to, we pressed those in first, and then added the sprinkles.  We had fun with our little Valentine variety. Simply rest the handle of the spoon on the edge of a cookie sheet, and the wet chocolate end of the spoon on the wax paper to harden.  As soon as the sheet was full of spoons, we put the sheet in the refrigerator, to further harden.


003_valentine-chocolate-covered-spoon
A couple of other things we have learned:   The spoons really need to be kept in a cool place. Cold, is best. SOME of our spoons, developed white specs on the chocolate the next day.  We know that tends to happen sometimes when the chocolate is overheated any amount.   It could very well have something to do with our needing to use chocolate chips too.  (You know how milk chocolate chips have that white-ish coating sometimes?)  But we did notice, that they spoons we left int he coldest place, are still looking perfect!! Those are the ones we’re giving away! lol.  Regardless……the little change from the smooth chocolate you see will not hurt you or any different.  It’s just prettier to prevent it, if you can.


004_chocolate-covered-spoons To package nicely, we got some skinny clear bags sold in the baking/candy making aisles. They have some for chocolate covered pretzels, and that what we used!  We just cut them down to about 8 inches, and they were perfect!  Then we tied on curling ribbon, and curled!  As I said, I designed a Valentine for each spoon, for these.  But this is a fun project for you (maybe with our kids too!),  and it’s certainly a pleasant treat that will bring a smile to anyone’s face, when given away, or served with a hot drink!

ENJOY!

Save


Filed Under: Crafts & Creations, Drinks, Fun Food, Holiday Crafts, Homemade/Handmade Gift Ideas, Recipes, Seasonal Crafts and Creations, Treats, Tutorial, WINTER Crafts and Creations Tagged With: chocolate-covered-spoons, chocolate-covered-spoons-how-to, chocolate-spoons, edible-crafts, February-crafts, February-treats, kids-recipes, recipes, serve-with-coffee, treats-to-serve-with-hot-drinks, unique-valentines, valentine-ideas, valentines

Delightful Cranberry Muffins

January 17, 2012 By Laura 2 Comments

cranberry_muffins1


The rest of my family loves anything made with cranberries. But loving these muffins came as a big surprise to me, the first time my daughter made them.  Reason being, I personally have never cared much for cranberry bread of any kind.  I figured, it was cranberries, period, that I didn’t like. And between you and me, that felt a little wrong, and perhaps a bit of info I should keep to myself, living in an area simply surrounded by cranberry bogs, and in the town that until fairly recently) was the home of Ocean Spray Cranberry World.  You’ll also never hear me say “Pass the cranberry sauce” at the Thanksgiving table, either. Although, I don’t mind a little spread on 2 slices of toasted bread with plenty of mayonnaise, when making my turkey sandwiches in the following days.  I do enjoy cranberry juice now too, and with Ocean Spray still nearby in Massachusetts, there is plenty of that around. At many warm- seasoned waterfront events, representatives of Ocean Spray are often set up giving out free samples of their large variety of juices.  So….they were bound to grow on me, so to speak.  Cranberries are wonderful to decorate with, too!  I especially love using them with my winter ice sculpture yard decor! They add such a beautiful splash of color, against winter.

In the next year or so, we plan to take a cranberry-related field trip or two, with the kids.  So you’ll likely be seeing some interesting educational information and photos about cranberries and cranberry bogs around here, in the future.  And perhaps more recipes as well. We hope you enjoy this one as much as we have.

. . . . . .  

  Delightful Cranberry Muffins

cranberry_muffins1

Ingredients:

  • 1/2 cup butter, softened
  • 1 cup sugar
  • 2 eggs
  • 1 tsp. vanilla extract
  • 1 cup sour cream
  • 2 cups all purpose flour
  • 1 tsp. baking powder
  • 1/2 tsp. baking soda
  • 1/2 tsp. ground cinnamon
  • 1/4 tsp. salt
  • 1 cup chopped frozen or fresh cranberries

TOPPING:

  • 2 tbsp. sugar
  • 1/8 tsp. ground cinnamon


Directions:

     In a mixing bowl, cream together butter and sugar. Add eggs and vanilla; mix well. Fold in sour cream. Combine flour, baking powder, baking soda, cinnamon, and salt; stir into creamed mixture just until moistened. Fold in cranberries. Fill greased or paper lined muffin tins 2/3 full. Combine topping ingredients; sprinkle over muffins. Bake at 400 degrees F for 20-25 minutes, or until a toothpick, or until the muffins test done. Cool in pan 10 minutes; remove to wire rack.  When completely cooled, store in a container. 

  Makes about 18 muffins.

    These muffins freeze very well, also.  We like to make a couple of batches at a time, and freeze some, to take out and pop in the microwave, on any morning we fancy. : )

cranberry-muffins-recipe Enjoy!…Warm or cold, with or without butter.


Save

Save

Save

Save

Save

Filed Under: Baking, Breads, Rolls and Muffins, Breakfast, Recipes Tagged With: cranberry-muffins-recipe, cranberry-recipes, muffin-recipes, recipes, recipes-using-cranberries

French Toast, My Way. (The Best Thing Since Sliced Bread.) | Recipe

September 15, 2011 By Laura 8 Comments

fried-french-toast-recipe-4

Recently, a very special breakfast was in order.  It was our triplets’ 9th Birthday, and we always have a special breakfast on birthdays in our house.  Usually, it is my husband’s specialty of ‘Birthday Number Pancakes’, which we have blogged about many times.  But this time, I had plans.  I really wanted to make French Toast, and just like the kind I had had so many times growing up, at a particular restaurant. The crazy thing is, I cannot for the life of me (yet) remember, what restaurant that was! It’s one of those questions I’d love to ask my Mom, but can’t, because she is gone now.  : (  I know she would know. I have searched recipes all over the net, trying to find a recipe even close to the kind I had had, to no avail.  Alas….I decided, “What do I need a recipe to follow for? I can figure this out as I go!”  I decided I believed in me.

And what became of that fearless leap, is the best French Toast, we have ever had. (Quite equal to the mystery restaurant’s French Toast, if I do say so myself. Except their’s was like, a 1.5 inch thick slice of bread, cut corner to corner into a triangle.  The crust sides were the best.)

It’s important to note, I am pretty health conscience, for my family. But this French Toast was to be deep fried, which of course is why it is SO good. And it’s a treat! On special occasions, one needs to indulge. Still, I wanted to make this recipe as healthy as I possibly could, while still making it taste exactly like I wanted.   So, while we never really have white bread, we did for this.  The oil I was deep frying in, was the healthiest possible (I think): Canola Oil.  It’s what we always use to make donuts and such as well in the Fall. And as you read the few steps here you’ll find I had a few other tricks that made me feel better about the whole health thing in my mind.  You are going to need a deep fryer, for this particular how-to recipe. Ready?

Participating Ingredients, to have on hand:

(*Amounts depending…)

  • Bread Slices (I used thickest white slices I could find.)
  • Corn Flakes Cereal
  • Eggs
  • Milk
  • Vanilla
  • Cinnamon
  • Canola Oil

For Table:

  • Butter
  • Confectionery Sugar
  • Syrup

***

*I say amounts depending, because it really depends on how many French Toast you need to make.  If you need more of a batch of anything, you just get a little more as you go.  No big deal.   Also, to keep things moving and producing quickly, it’s helpful to have a helper. {A} and I were a great team in the kitchen this particular morning. (And will be a gain soon. ; ).  So, the following is stations you want to have prepared before you actually begin cooking.

Dipping Mixture:  In a shallow dish, crack 3 eggs.  Add 3/4 cup of milk,  a few drops of Vanilla Extract, and a dash or 2 of cinnamon. Whip it up with a fork.

Bread/Toast: A key ‘trick’ here, to making your French Toast as good as it can be, is to pre-toast your bread. Trust me, it makes all the difference, as to not soak-up the mixture into the bread, but rather coat it as intended.  So for us 6, I covered 2 cookie sheets with tin foil, and put the bread slices in the oven at the lowest setting. Just watch them, until they are toasted a bit. Flip them if you’d like. Both sides don’t need to ‘look’ toasted, but just feel toasted on the surface.  Once they are all toasted, pile them all onto one sheet and cover the emptied sheet with a layer of paper towel.

Deep Fryer:  Fill fryer with Canola Oil to recommended level. Heat to 350 degrees.

Crunch Coating:  In a shallow dish also, have Corn Flakes cereal crushed up.  Little flakes are fine.  Don’t crush it to dust.

Now…..here goes the assembly line routine, which you can sort of see in the 2 photos coming up:

001 1) Put a piece of toast into the egg mixture, flip it over quickly with a fork to coat the other side, and take it out right away using a forl. Let it drip off as it hangs from the fork, and then lay it in crushed Corn Flakes dish.

2) Press the toast slice down a little into the flakes, flip over, and press again.  Neither side has to be completely covered with the flakes.  You just want some on there.

3)  Move the coated slice from the flakes, and lay it in one end of the deep fryer basket.  Then do a 2nd piece the same way:  Quickly coat both sides in egg, let drip, coat both sides in flakes, and lay in  free area of basket.

4) Now lower basket into oil, and immediately start counting to 1o.  The toast will float.  So when you get to 10, flip them both over, and count to 10 again.  Bring the basket up, and hook on the side.

fried-french-toast-recipe Enter Trick # 1: I had to stand both pieces up after each set, as shown above.  In my mind, it best helps any excess oil drip off, instead of soaking into the toast.  And ultimately, makes it crispier. Then….I would put onto the paper-towel covered cookie sheet in the still warm oven.

Repeat sets of toast until you are done. We only had to make a little more egg mixture once, and crush up some more Cornflakes a few times.

fried-french-toast-recipe-1 Now, this was our Trio’s Birthday Breakfast, and so we had traditions to stick to. I managed to cut 9’s out of the top French Toast on each of their plates, and put it on the side. Of course, this was before we added the wonderful toppings! (Coming up.)

fried-french-toast-recipe-2 The Happy & Hungry, 9 Year Old Triplets!!

For topping, I just lightly butter, sift a little confectionery sugar on,  and then drizzle on the syrup.

fried-french-toast-recipe-3 I can’t even explain how delicious this French Toast is. My family was loving every bite. It’s filling, for sure. But it’s not heavy in your mouth or stomach, in the oily ‘ugh’ kind of way. It tastes light, and sweet, and it’s nicely crispy on the outside. Add some sausage or bacon on the side, with juice or coffee, and it’s a special breakfast, that’s worth the little production effort for sure. Consider trying it this weekend, and letting us know how you liked it!

I think we might be having it again ourselves.  😛


Save

Filed Under: Breakfast, Recipes Tagged With: birthday-number-breakfast, breakfast-recipes, Catholic-blogs, Catholic-families, deep-fried-french toast, deep-fryer-french-toast, french-toast, french-toast-recipes, fried-french-toast, recipes, triplets

Striped Cucumber Salad | Recipe

August 26, 2011 By Laura 4 Comments

cucumber-salad-recipe-4

It’s a wonder, that our children have not turned into cucumbers, this summer. They love them, and our gardens have been so generous with them, that the kids have happily eaten them many days for lunch, dinner, and sometimes even as a snack.  They’ve had them as spears, sliced the long way and added to their tomato sandwiches, chopped up in a garden salad, and as this Cucumber Salad, which we are sharing with you today.

We know. It’s not the most inventive recipe, if we can even call it that. The ‘recipe’ is actually more about the dressing it’s in.  It’s one that I imagine has been around a long time, as my mother used to make it while I was growing up.  Recently we were at our friend’s house, getting our families together, and they made us the most de-li-cious dinner.  Part of that meal was a simple romaine salad with sliced fresh strawberries, and a dressing very similar to this one. So as you take note of this dressing, keep in mind the various or creative ways you can use it for, too.  This dressing, and this salad, is a perfect summer-side, to a light meal.

Striped Cucumber Salad


cucumber-salad-recipe Our Cucumber Salad begins with a fresh organic cucumber, from our own gardens.


cucumber-salad-recipe-1 I have always, peeled cucumbers in stripes.  But there have been 2 separate reasons I have done so.

In the off-season, I have peeled the grocery-store bought cucumbers this way because, as we all know, the majority of the vitamins & minerals are in the skin, and I want to get all I can into my kids/family. But also, before we ate organic, the cucumbers from the store were usually waxed.  Man I hated that! I couldn’t stand the feel of it trying to wash them, (the wax never came off), and the funny feeling it left on my hands too. Also, we just weren’t partial to eating wax. You?  😕 So, peeling the skin in stripes, was a compromise, of sorts.

But even when the cucumbers are organically right from our gardens, I think the stripes just make them fancy & pretty.  So I chop off the ends, and stripe peel them.

cucumber-salad-recipe-2 And then I slice it.


cucumber-salad-recipe-3  

And maybe I’ll have fun taking photos of it. It’s a cucumber caterpillar!!

So much for not playing with my food.

Now I know this is silly, but, I didn’t take photos of making the dressing.  It would have been boring, and unnecessary.  It’s so simple though, and there isn’t actually ‘correct’ amounts of any one ingredient. It just matters more of how thick you want the dressing, and how much you like this or that ingredient.  All to your preferred taste.  But this is generally my winged recipe, I mix in a bowl well, with a fork.


Cucumber/(Salad) Dressing

  • 1/2 c. mayonnaise (Hellman’s Real, for us)
  • 1/4 c. white sugar
  • 4 tsp. distilled vinegar

dashes of:

  • dill weed
  • seasoned salt
  • black pepper

Of course….all of these amounts will vary with how many cucumbers you cut up.  I like it to just coat the cucumbers. My mother made enough, that it was more of a soup, that the cucumbers sat in.  She made a lot! LOL


cucumber-salad-recipe-5 In my antique blue Pyrex dish (missing the handle), that was once my grandmothers, I arrange all of the cucumber slices, and drizzle the dressing right over it.  Then I throw another dash of dillweed on top. This dish is light, tangy, sweet, with a tad of salty.  All at once.  More importantly, it’s FRESH, light, delicious, easy, and well……COOL!  It’s a perfect side for summer grilled dinners, etc.

I’ll warn you, with the same wise words my mother-in-law once warned me with, and of which I shared with my kids recently, and they have found absolutely hysterical, and love to say it now every time they have cucumbers:

“Be careful now. Cucumbers tend to repeat on you, later.”

From what I can tell, no one minds repeating around here, except me.  ; )

Save

Save

Filed Under: Recipes, Salads, Side Dishes Tagged With: cucumber-recipes, cucumber-salad, dressing-recipes, light-dressing, light-salad-dressing, light-salads, light-side-dishes, recipes, summer-salads

  • « Previous Page
  • 1
  • 2
  • 3
  • 4
  • 5
  • 6
  • Next Page »

We are wicked happy to have you here! We hope you find much inspiration, help, humor and enjoyment here.


Archives


POPULAR POSTS

* * * * * *

SUBSCRIBE to House of Joyful Noise blog! Every new post, delivered right to your email box!


Privacy Policy

Amazon Affiliates

Never at any additional cost to you, we may earn a small commission for our endorsement, recommendation, testimonial, and/or link to any products from our website. Your purchase through our links helps support our family, while sharing with you the products we authentically use and recommend, for various ideas, and letting you know where you can purchase them. Thank you for your support!

[footer_backtotop]

Copyright © 2025 HouseOfJoyfulNoise.com · Genesis Framework by StudioPress