
• HOME
  • {A}’s Chipmunk Training Archives

 Homepage

  • The Homestead
    • Home Projects
    • Home Improvement
    • Home Decor
      • Seasonal Home decor
        • FALL Home Decor
        • WINTER Home Decor
        • SPRING Crafts and Creations
        • SUMMER Crafts and Creations
    • Our Chickens
    • Gardening
    • Organization
    • Re-Purposing
    • Furniture Refinishing
    • Budget
  • Crafts & Creations
    • Seasonal Home decor
      • FALL Crafts and Creations
      • WINTER Crafts and Creations
      • SPRING Crafts and Creations
      • SUMMER Crafts and Creations
    • DIY (Do-It-Yourself) Project
    • Kids Arts and Crafts
    • Homemade/Handmade Gift Ideas
    • Holiday Crafts
    • Fan Pulls
    • Free Printable/Downloadable
    • Sewing Projects
    • Giveaways
    • Business Features
  • Recipes/FoodFun
    • Breakfast
    • Lunch
    • Main Dish
    • Sandwiches
    • Appetizers
    • Slow Cooker
    • On The Grill
    • Side Dishes
      • Soups
      • Salads
    • Baking
      • Breads, Rolls and Muffins
    • Snacks
    • Treats
    • Desserts
    • Drinks
  • Homeschooling
    • Elementary Homeschooling
      • Elementary Homeschooling READING
      • Elementary Homeschooling MATH
      • Elementary Homeschooling LANGUAGE ARTS
      • Elementary Homeschooling SCIENCE
      • Elementary Homeschooling HOME ECONOMICS
      • Kids Arts and Crafts
    • Middle School Homeschooling
      • Middle School Homeschooling SCIENCE
      • Middle School Homeschooling HOME ECONOMICS
    • Language Arts
    • Math
    • History / Social Studies
    • Geography
    • Foreign Language
    • Field Trips
    • Games
    • Nature Study
  • The Big Picture
    • Life In General
    • Celebrations
    • Faith
      • Into the Light; The Series
    • Giveaways
    • Reviews & Sponsors
  • Photography & Lettering
    • Photography
    • truck lettering
    • vehicle graphics
    • Newborns
    • Kids
    • Engagement
    • High School Senior Pictures
    • High School Senior Pictures Sneak Peeks

Have a Coke, & Some Petunias, & a Smile!

May 24, 2011 By Laura 23 Comments

coke-bottles-crate-repurposing-creative-gardening-7


Gardening season is upon us, and we’ve been doing a few creative home-front (literally, in front of our home) projects I am excited to share with you, one after the other, here on the blog
Our garden beds are all ready for planting next weekend as well, with the soil all screened and fertilized.  (So exciting!) Aside from that, I’ve been getting creative & efficient around the garden beds, and this post is one of the little cute projects I’ve been wanting to share.

The week prior to Mother’s day, {A} and I found ourselves scouting a few antique stores, and I spotted this Coke crate among the goods, in the items on the sidewalk outside of the door of one of the stores.
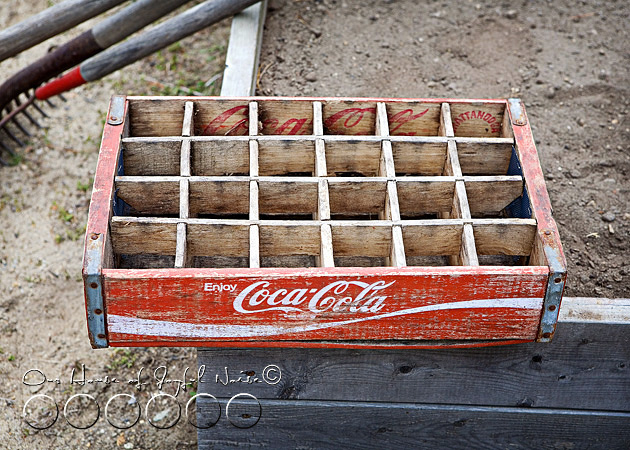
coke-bottles-crate-repurposing-creative-gardening I was so drawn to it, and I had an immediate re-purposing vision for it, too.  As I walked around the store, I got to ‘thinking too much’.  As cheap as I am sure it was, there was a reason I didn’t want to get it, too.  As I hemmed & hawed about whether to get it or not, {A} wanted to know what was holding me back.  When I told her, she thought it was a ridiculous reason. But you know…I think differently than a lot of people, I think. Everything seems to have some psychological puzzle to it, to complicate things for me. It keeps my brain busy, I guess.  But the bottom line is, ultimately, we got in the car and drove home.  Yes, leaving the awesome, vintage, well-worn, old & rustic, Coke bottle crate behind.

It soooo bugged me all week.  I had wished I got it, and I said so out loud a 1/2 dozen times.  Michael asked me why I didn’t get it then, if I wanted it so bad, and {A} was happy to fill him in, with an amused chuckle at the end. (Imagine my appreciation of that. <eye roll>,)

I might tell you at some point in this post, my reasoning for not getting the crate in the first place.  If I am feeling up to being laughed at some more.  But for now, I’ll tell you now that on Mother’s Day, we went back and got that crate!  I was prayin’ it would still be there, and thankfully, it was.  $10.   That’s the price the guy gave me, and it was the most I was willing to pay.
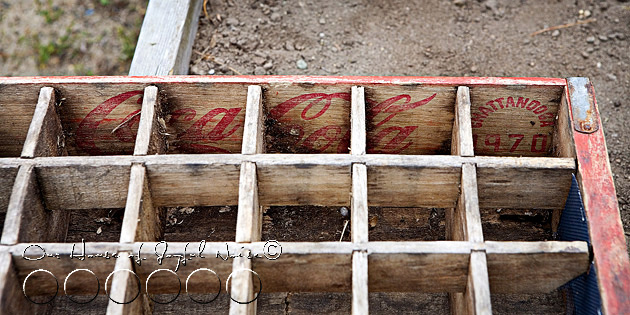
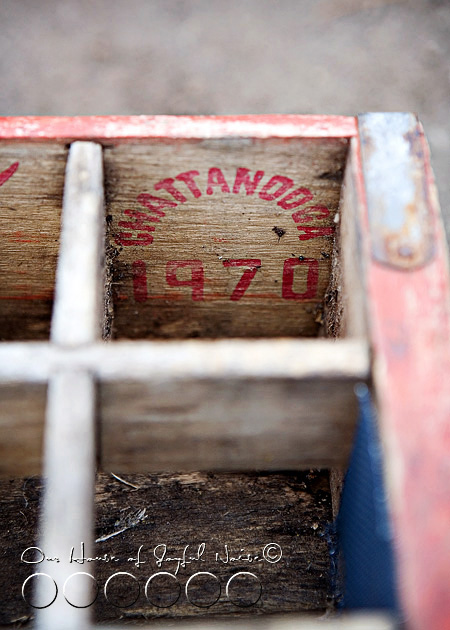
coke-bottles-crate-repurposing-creative-gardening-1 I loved it more than I even remembered.  It had a little stink to it, and some cobwebs, that I wasn’t aware of before, because I hadn’t handled it or got that close.  But still…..it was sweet.  I especially love the printing on the wood on the inside-back.  I don’t know why. I just think the whole dang thing is cool, and I was wicked excited about my plans for it.
coke-bottles-crate-repurposing-creative-gardening-2

1970.  Get-Out!

O.K….it’s not really that old. ; )  But it’s still cool, and it’s got a really old feel.

So I gathered the other things I needed for my project, and put my little vision together…..

.

.

.

.
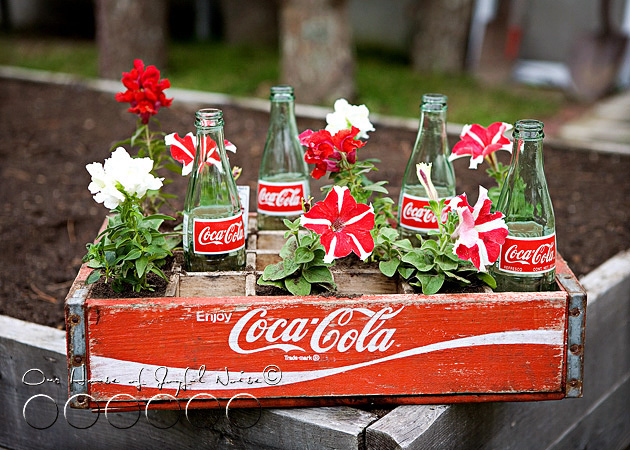
coke-bottles-crate-repurposing-creative-gardening-3 ….And it looked even better in real life!

Initially, I was just planning on using a mix of white & red Petunias.  But my little girl really loved these candy cane striped ones, and I love to make my kiddos happy. I threw in a few Snap Dragons for good measure.
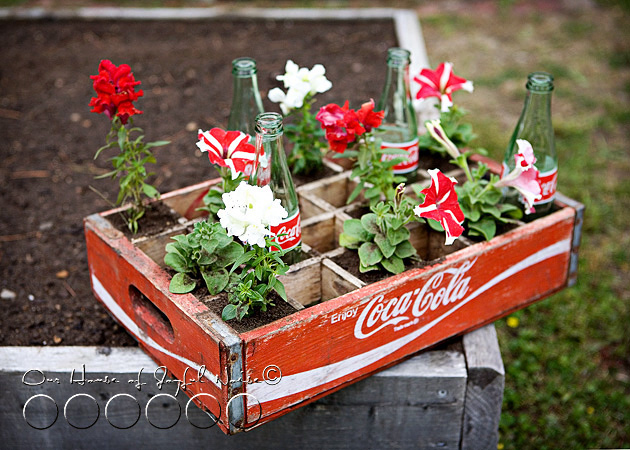
coke-bottles-crate-repurposing-creative-gardening-5 I just love how it looks, sitting on the edge of any of the garden beds.  Or anywhere we put it out there.   And my hesitancy for getting it, has bothered me less and less, now that it makes me so happy, every time I catch sight of it.   So I guess I’ll tell you what my issue was.

See, the thing is, I just don’t condone drinking soda. (I’ll give you a moment, to say….”Oh brother!”, too.)


I mean….I am not wicked ANTI-soda, but my kids don’t drink it, and I never have it in the house.  They have all tried it, and hate it.  They don’t like the carbonation.  Which is great, because I wouldn’t let the little ones have it on any regular basis, anyway. My husband used to drink it sometimes, but I think he has come around to my way of thinking about it.  It’s just so BAD for you.  Your body, your teeth, yourSELF.

Ok, maybe I am wicked anti-soda.

Listen, I know you must think it’s ridiculous, too. But like lots of things one has strong feelings about, this goes back to my childhood.  Without naming names, when I was a kid, I knew some other kids who were having some serious stomach problems.  As it turns out, all of the soda they drank was eating their stomach. (And their teeth too, as far as I could see.)  So you see….that really disturbed me as a little kid.  I know. You need to drink a lot of it, and regularly, to have such issues.  But the point is……I’d rather encourage drinking lots of water.  And milk for the kids. And green tea, I heard, has all kinds of benefits. Liquids that are good for you! And I really did not want to send the false message to the world, in my own front yard, that I condone Coke-drinking as a life-style.  Because clearly, I do not.

But, you know….now that I see how cute my soda bottles crate is, with that really great Coke logo…..(I have to admit, and so do you, that it’s a great logo!)…..I am letting the possibility of this misconception, go.

I’m almost over it, already.

No really!
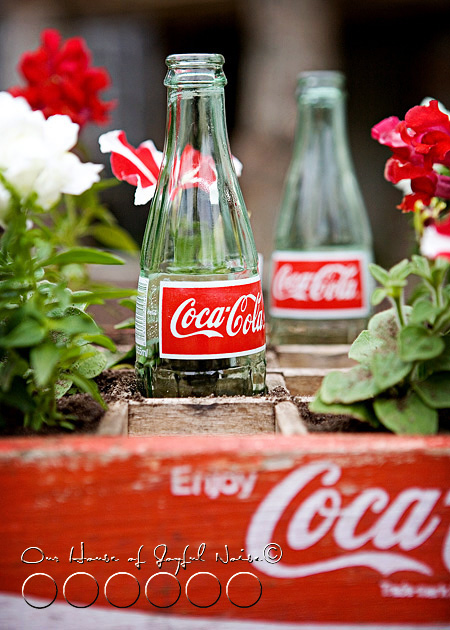
coke-bottles-crate-repurposing-creative-gardening-6

There’s a little story behind the bottles that ended up in this cute-gardening-repurposing-project, too.   While out at other antique stores on Mother’s Day, I found the perfect Coke bottles, to use for this. They were old and circa-I-forget.  But suffice it to say, they were original Coke bottles, with the embossed Coke logo in the glass.  All transparent, greenish glass.  Original Coke bottles, like I said.  $5 each, and I only wanted 3.  But Michael convinced me that he could get the exact same thing at Stop & Shop.  “Really Michael?” I asked. “Are you sure they are exactly like this.”.  “Yes”, he said. “I can’t see buying antique ones just to sit in our front yard, at $5 each, when I can get them for a buck-something.  Who is going to know the difference?”  “ME!” I said.  “I don’t do any of these things for anyone else!  I do them because they make ME happy. It’s part of the way I make my home for my family!”

(Men so don’t get these things.  Right?  Is it just my man?)
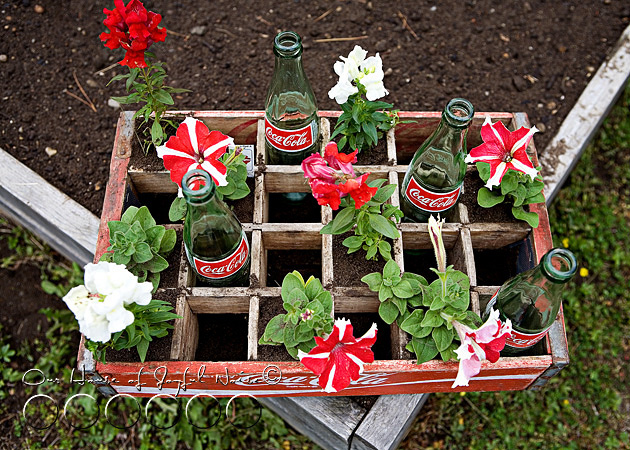
coke-bottles-crate-repurposing-creative-gardening-8 So I left those antique Coke bottles there in the store, over my husband’s antics about it. Because he was going to get me some just like them.  And only I would know, they were not really antiques.  Uh-huh.

(Now I had 2 things I would have to keep pushing out of my mind. Right?  That’s what I was thinking.)

These bottles you see in the photos, are what he brought home to me, from Stop & Shop.  I was like, “Michael!  These are not the same!!”  “Sure they are, why not?” he asked.  “BeCAUSE….”, I had to explain, “These have this red & white screen printed logo thing on them.  The others did not have that! The logo was embossed on the glass. These aren’t the same.  It’s not the real thing, Michael!!“

And then I busted out laughing hysterically, realizing the pun I just made by accident.  Which of course, lightened my heart, and I forgave him.

But I’m back to mad again, I think. I mean, I kind of would have liked the real vintage Coke bottles.  You know? On the other hand, the red & white logos do look nice among the flowers, with the red & white crate and all.
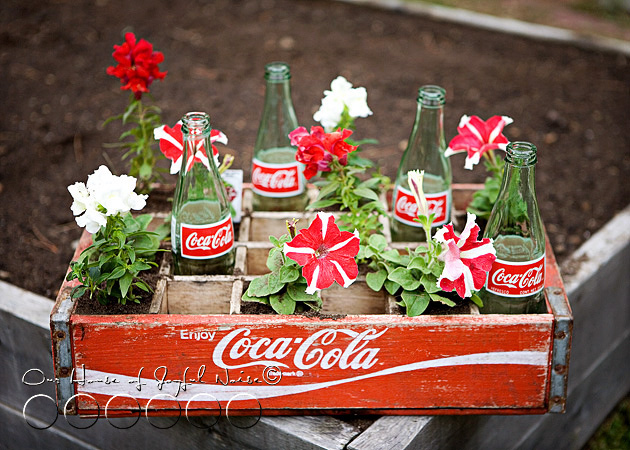
coke-bottles-crate-repurposing-creative-gardening-4 So that’s my great long story, of this little garden project.  I hope you love it, and it inspires you to get creative with your own flowers and plantings in your garden areas.  But please do not let it encourage you to drink Coke! Just pour out the contents down the drain, like I did.  Promise?  Soda in general, is just not good for you.  It’s high in sugar. It’s bad for your teeth.  I heard it eats stomachs! So disturbing.

This has been a public service announcement, and a creative gardening inspiration project, all in one!  What a bargain, huh?  Aren’t you glad you stopped by?

Here, have a water, and a smile.

: )


*(Love this post? How about subscribing to our blog in the sidebar, ‘Liking’ our Page on Facebook, or following me (Laura) on Twitter? Or all 3? 😀 )
Save

Save

Save

Filed Under: Gardening, Re-Purposing, The Homestead Tagged With: Coke-bottle-crate-ideas, creative-garden-planters, creative-gardening-ideas, Gardening, repurposing-soda-bottle-crates, using-vintage-pieces-in-your-gardens

A Peek at Our Easter Home Decor, and Finished Eggs

April 20, 2011 By Laura 3 Comments

easter-home-decor-5

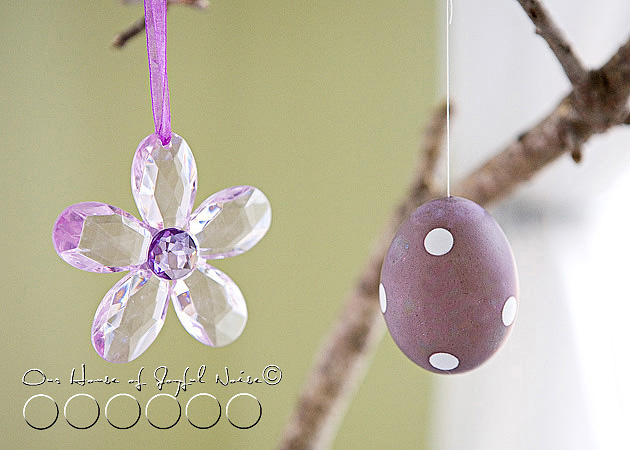
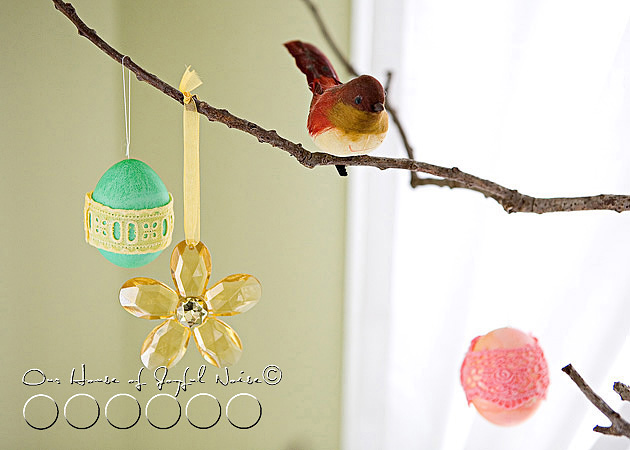
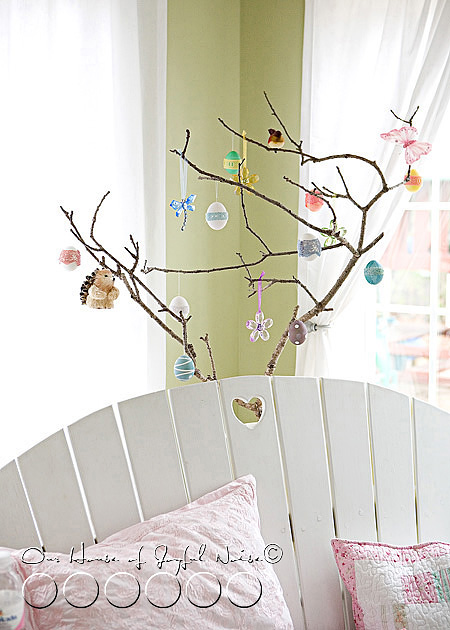
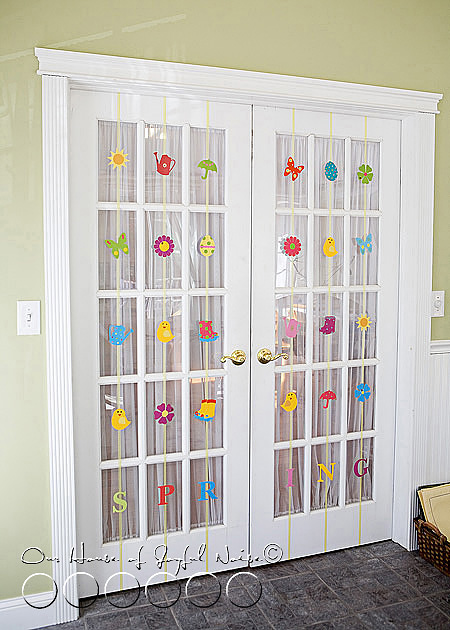
After sharing with you all the egg dying fun we had with the kids, I wanted to show you what we did with the eggs they dyed, and a little bit of the rest of the Easter/Spring decor around our home.  As always, our little holiday tree ( or, branch in a bucket of bricks…lol.) is decorated.  Mostly photos here – less chit-chat.
–

easter-home-decor
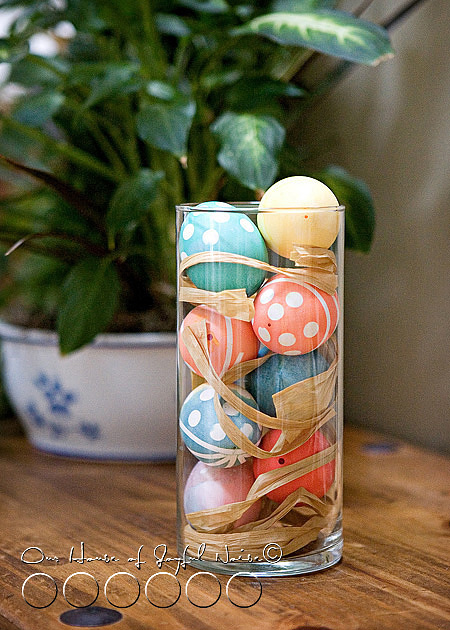
{O} did this arrangement of some of our dyed eggs and raffia in a tall glass jar, all by herself. (She’s 8.) I was so impressed.

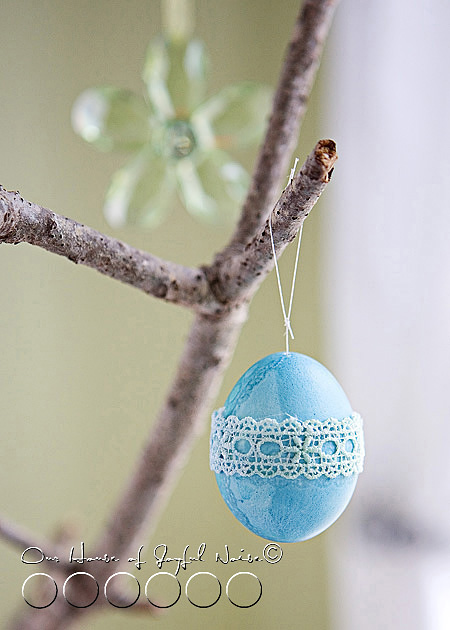
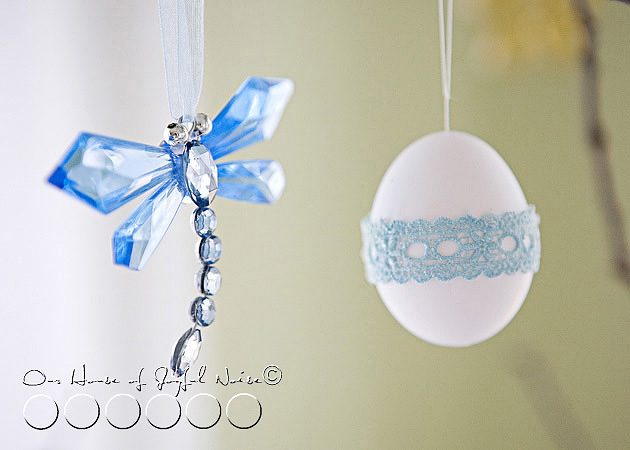
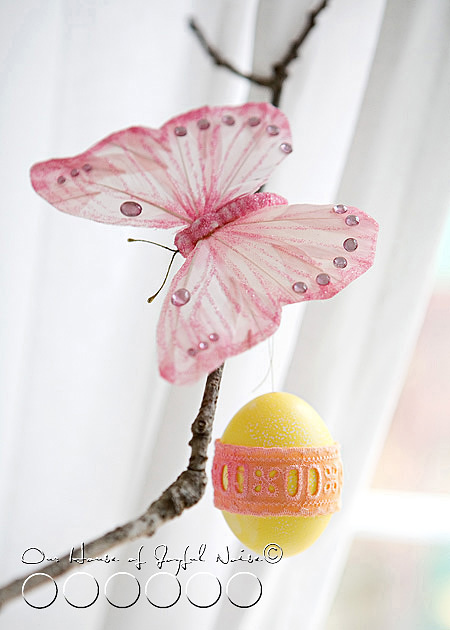
Next, you can see what I decided to do with some of those dyed pieces of lace you saw in the photos of the egg dying post….

easter-home-decor-1

easter-home-decor-2

easter-home-decor-3

easter-home-decor-4

easter-home-decor-6

easter-home-decor-8

easter-home-decor-9

easter-home-decor-10
easter-home-decor-12

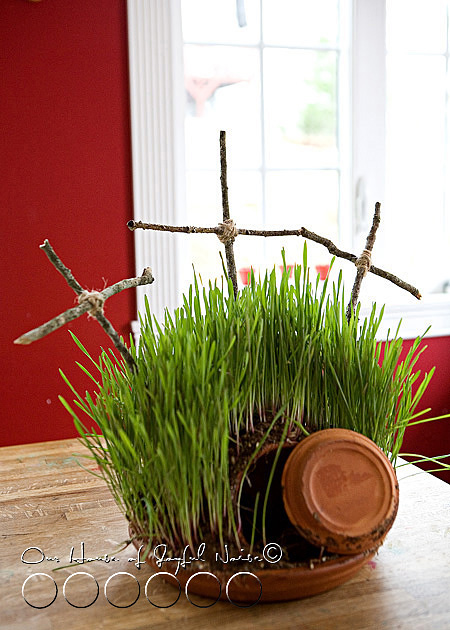
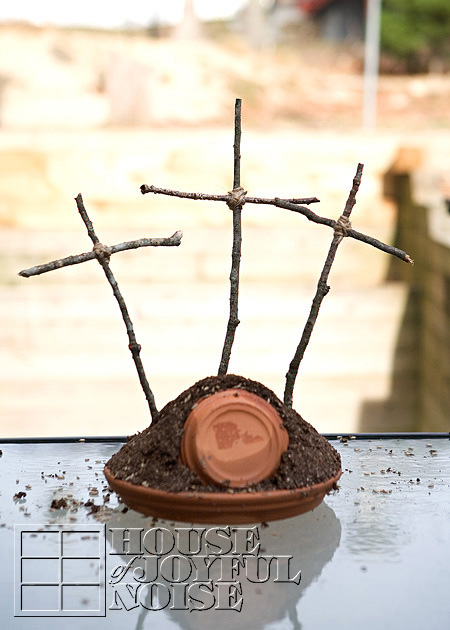
CALVARY.

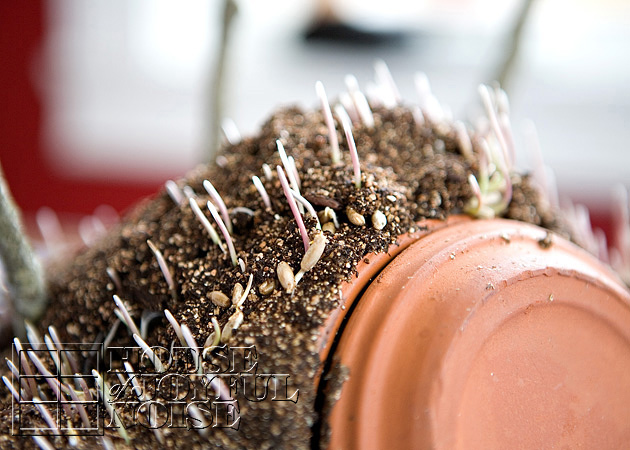
This was a Lenten project & (Scriptural) lesson we did with the kids. Well, Michael really gave the lesson, and he did a really good job with the message, as they all worked, getting their hands really dirty.  It always warms my heart, to listen to the kids talk about their faith, so directly from their heart, and in such sweet ways. I took lots of photos of them making this.  I’ll share in time next year, and show you how it is done.  (If I’m still blogging.)  The whole thing will be going out in my garden.   I love it, for all it represents.  The kids put it together, seeded it, watered it every day, and grew it to this,  and all of that makes me love it even more.

JESUS’ TOMB.

I hope you enjoyed the peek.  : )  We won’t be blogging again until next week. Our family has a busy and focused rest of the week, that I’m really looking forward to, as we prepare ourselves for Easter.  So we just wanted to say to you now…

From our home to yours, wishing all of you, and your families, a blessed Holy Week, and a joyful Easter Sunday celebration.

See you again soon.

Save

Save

Filed Under: Gardening, Home Decor, Photography, Seasonal Home decor, SPRING Home Decor, The Homestead Tagged With: Catholic-blogs, Catholic-families, decorating-with-dyed-Easter-eggs, Easter-home-decor, easter-tree

Ladder to Bookshelf | Re-Purposing

March 15, 2011 By Laura 25 Comments

ladder-book-shelf-4

In addition to our continual progress of finishing the inside of our home since our major house reconstruction, we’ve had a continually growing list of ideas for smaller projects around our home.

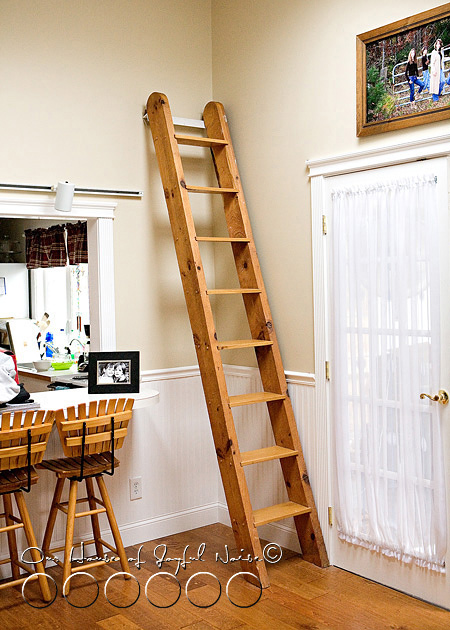
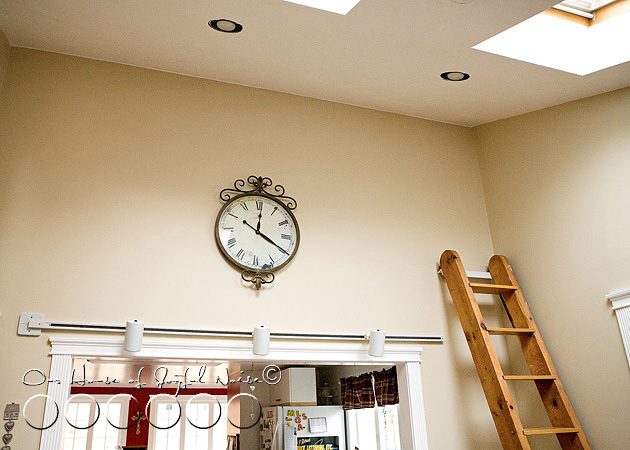
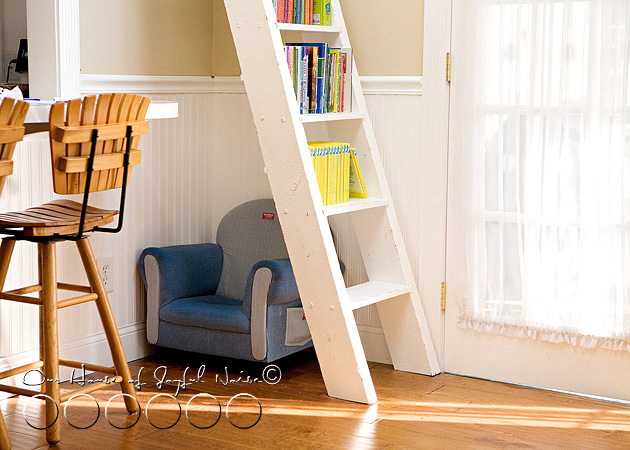
One of them has involved this ladder inside our home.

ladder-book-shelf

ladder-book-shelf-2
It has been right here where you see it, every since we bought our home in 1995.   What has changed a lot, is almost everything around the ladder.  For one thing, at the foot of this ladder, where you now see French doors to our sun room, was a brick hearth, to a black iron coal stove, that was built into a brick wall as a fireplace of sorts.

You may wonder just what the purpose of the ladder was.

ladder-book-shelf-1

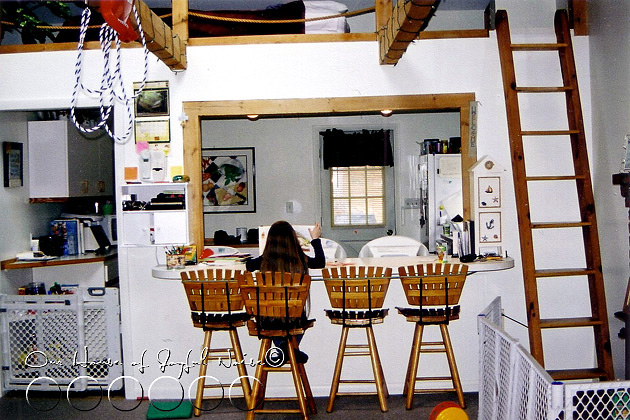
Well, at the top of the ladder, was a carpeted crawl loft, that was open to and overlooked the living space.  We had a few large floor plants up there, that looked lovely in the sunlight, that streamed in from the skylights.

But when we added a second story to our home, the crawl loft, and all of the new construction to the backside of the house, became the boy’s room.  So, a wall replaced our beloved crawl loft.

As you’ve probably figured out along the way here, the ladder was the way to get up into the loft.

ladder-book-shelf-2
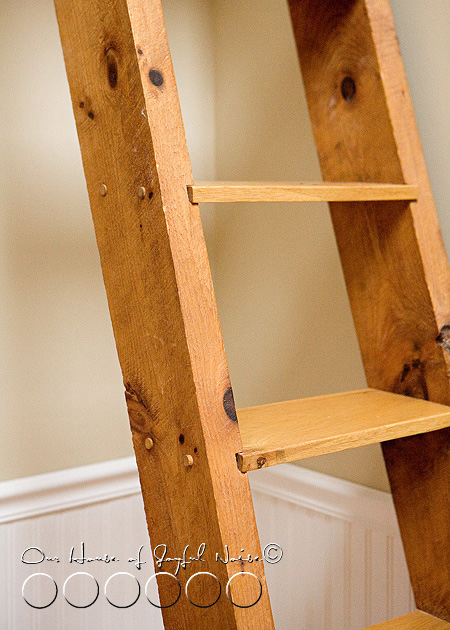
It’s a beautiful, solid, solid (read: HEAVY!!) wood.  It’s the same natural wood the beams were made of, that also used to be a part of the house.

ladder-book-shelf-1

As a humorous tidbit of knowledge for you, (if you’ve never been through our home reconstruction posts), the crawl loft became our (mine and Michael’s) bedroom, when we gave our own to our triplets following their birth.   The house only had 2 bedrooms at the time, and ours was by far the biggest.   So…we took our bed down, put the mattresses up in the crawl loft, and we climbed the ladder to bed every night.

We really didn’t mind it, much. You couldn’t really see our bedding that much, and it was….cozy. : )    I’d say it was even kind of fun.  Except for when one of the kids woke up, and needed us.  Or, when we had to go potty.   I feared in the dead of night many times, that I would fall trying to descend the ladder in my sleepy state, and splat on the brick hearth below.    But it never happened.  Maybe because Michael said “Be care-ful” every.single. time. I had to go down.  Even when he was sleeping.

Oh…..{A} just found a photo that will give you an idea of how much the house has changed:

loft See the loft at the top?  With big boxy openings, roped off with 2 ropes.  You can also see the natural beams I spoke of.  They were great for wrapping Christmas lights on, and using for outdoor toddler swings, in the house!  The beams were so strong, and with the cathedral ceiling, there was plenty of room! Of course they had outdoor swings too.  Boy did they love swinging.  You can also see what was the back door.  That wall came down, and there is a school room there now, on the other side of the stairwell that descends into the floor.   Yes…things have changed.  Drastically. Inside and out.   Do you love seeing houses transformations?  I’ll post the links on our HOJN Facebook Page sometime soon, if you’d like.  But be sure to ‘Like’ the HOJN Facebook Page, so you don’t miss them in your feed!  I put lots of fun extras there, for you all.

ladder-book-shelf

Anyway….ever since the loft was ripped out and the wall went up, the ladder-to-nowhere,  has remained there.  We couldn’t get rid of it! It was a sentimental piece.  We always loved that ladder, and it’s one of those things people always mention when they first visit our home.   It’s unique, and unusual, in a home. But really…. it’s needed purpose!  And it’s looked dark and ….. well, heavy, in our light and airy living space.

So I had an idea to make the ladder more useful, and we started by doing something possibly, crazy.

ladder-book-shelf-8

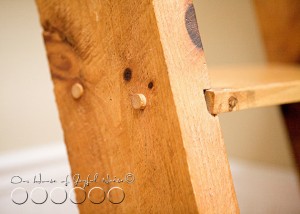
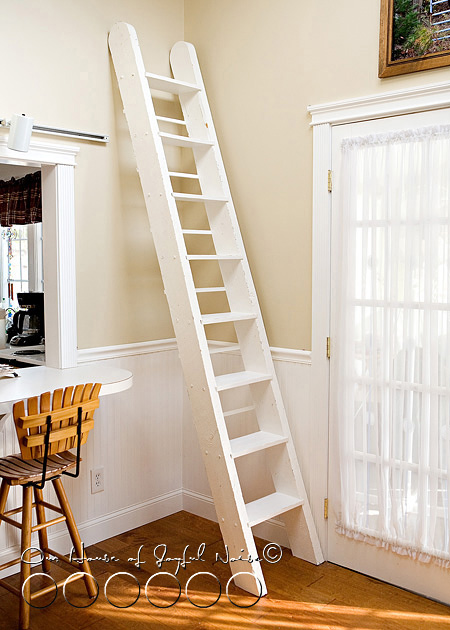
We painted it white.  After adding a few little pieces you may notice, which you’ll understand why in a moment.

Now, if you know me, I’m really not down with perfectly painted stuff.  I like things old. Beat up. Worn.

ladder-book-shelf-6
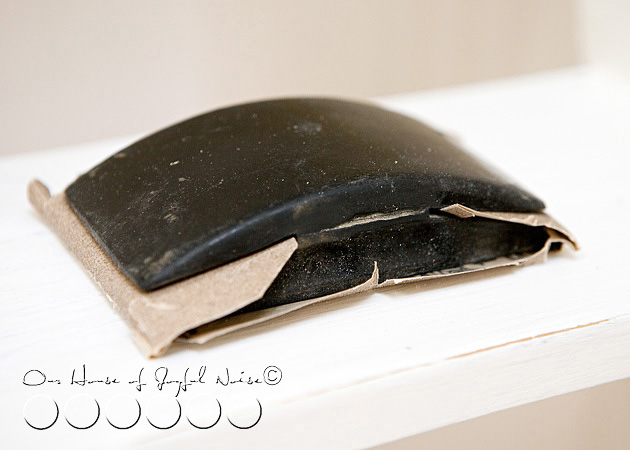
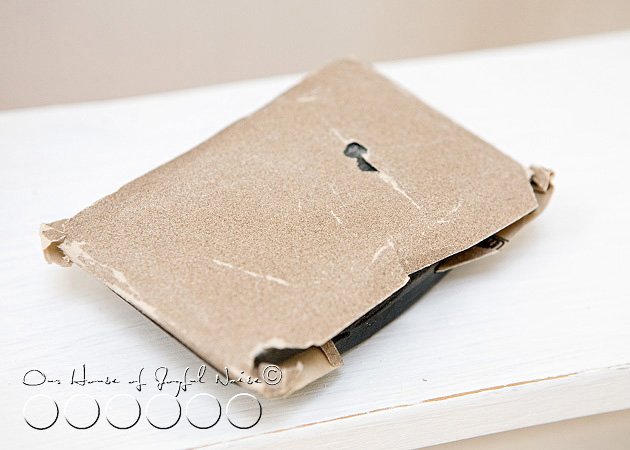
So I took a sandpaper covered block, and ‘had-at’ the newly painted ladder.

ladder-book-shelf-7 And wore a hole in it. : )  (The sandpaper of course. Not the ladder.)

ladder-book-shelf-9
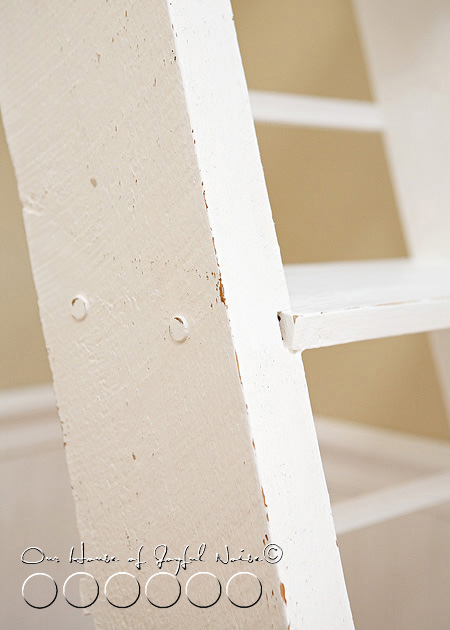
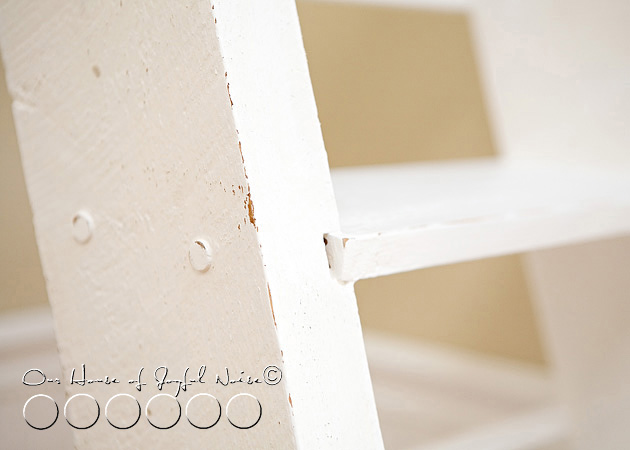
I did my best to make it look……well, not ‘just painted’.

ladder-book-shelf-10
But I’m not any kind of expert at distressing pieces yet.  I’m sure it needs something more.  A glaze of some kind, to crack the paint some, or something.  I don’t want to yellow it, as a lot of the ‘new paint’ around is white as snow.  But, I plan to ask a friend what more I can do, to push it a little more.

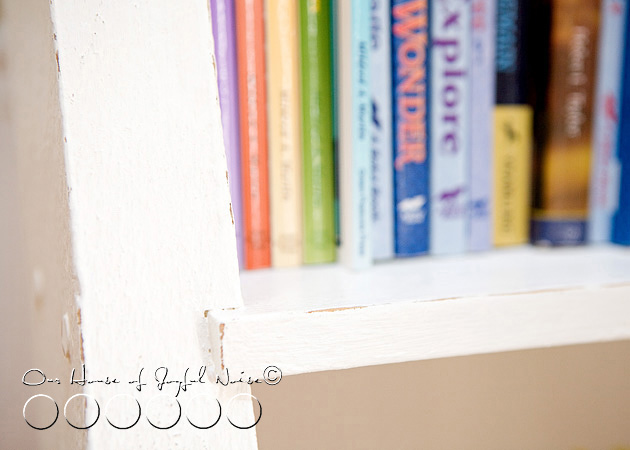
But the purpose of painting the ladder, and adding the little crossbars to the back, was to use it for….

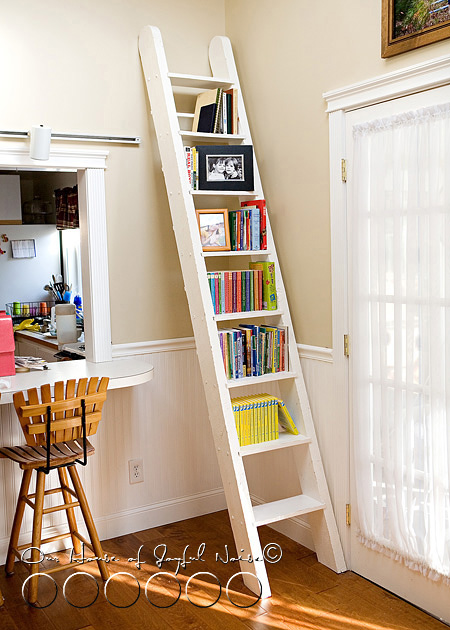
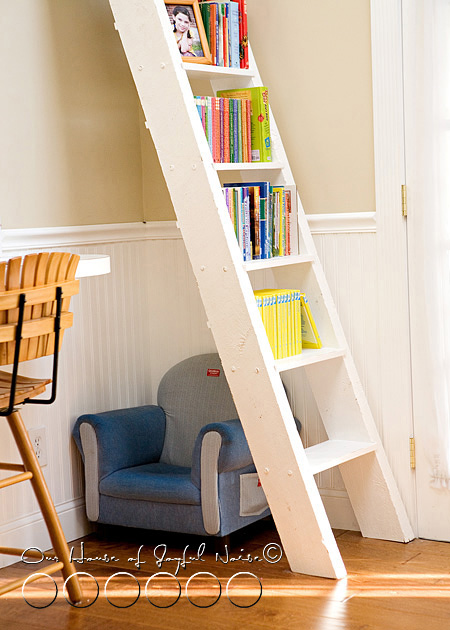
ladder book shelf
Books!!

With the exception of when we were actually using the ladder every day to access the loft, we’ve always had photo frames and little things displayed on the ladder. I just took them off before photographing it before.  But, we are swimming in books around here.  So I thought it would be a creative and useful transformation.

ladder book shelf
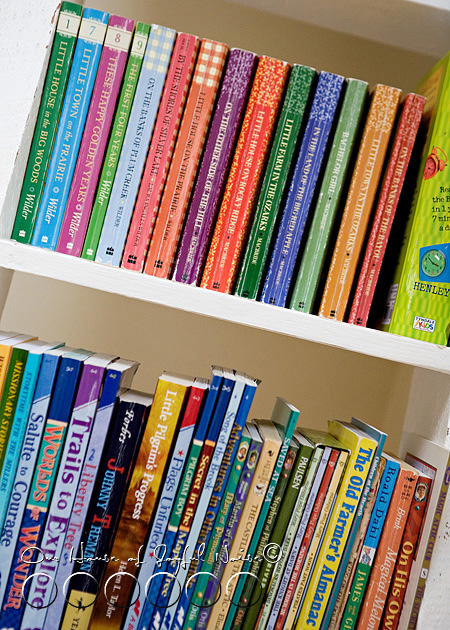
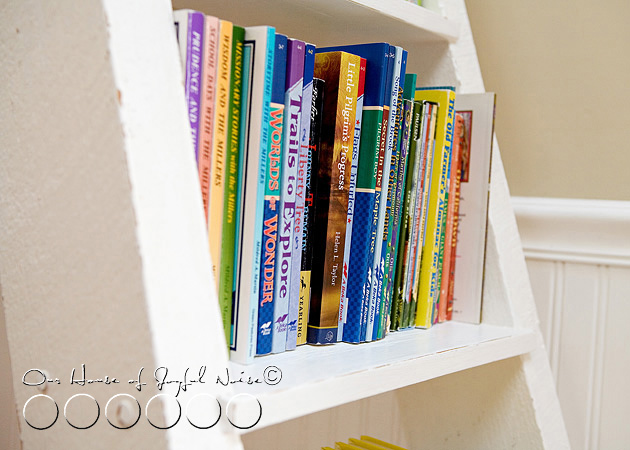
Mostly it’s the kid’s books on the ladder for now, with the bottom step left open for stepping up and reaching higher.   There are lots more books, that will be relocated to the ladder, soon.  And we have more book shelving that Michael just installed as well, that will be for another post.

ladder book shelf

Because not only do the kids have more reading books, but then there are my own, and some of my mother’s too.   Books of all kinds.  For leisure, for education, for how-to, for you-name-it.  As I said, we’re swimming in them.

ladder book shelf
I actually filled a couple of boxes recently, with books to get rid of.    We have cabinets filled, and boxes downstairs, of more books – still needing sorting.

ladder book shelf

So this ladder transformation I think was a wise one.   The ladder now has purpose.  I’m sure it feels more worth, in it’s day to day life.  We all need purpose.  Don’t you think?


ladder-book-shelf-3
I have to admit:   I’m feeling a little pang inside, about painting over this beautiful wood.

Do you think that was a mistake?

ladder book shelf
But I do think the corner as a whole, looks a little cheerier, and more in keeping with what the rest of the house has going on.  Because we’ll probably be doing something with those wooden breakfast bar chairs too.  Not painting them white.  But they need stripping of the shellac , or something.

Anyway….

ladder book shelf

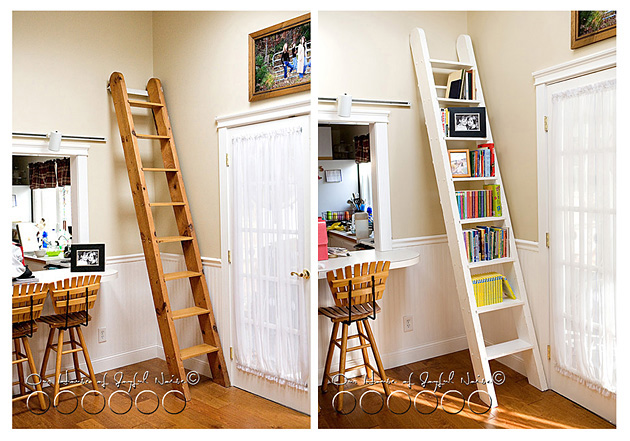
BEFORE                                                                                       AFTER

What do you think?  A good idea?   And are you cringing, because I painted that wood?  Go ahead and tell me the truth.  I think I can take it.


Save

Save

Save

Save

Filed Under: Home Decor, Home Improvement, Home Projects, Organization, Re-Purposing, The Homestead Tagged With: book-storage-solution, creative-bookshelf, ladder bookshelf, ladder-makeover, ladder-repurposing, repurposing

How to Make Beautiful Winter Ice Decor for Your Yard

January 20, 2011 By Laura 10 Comments

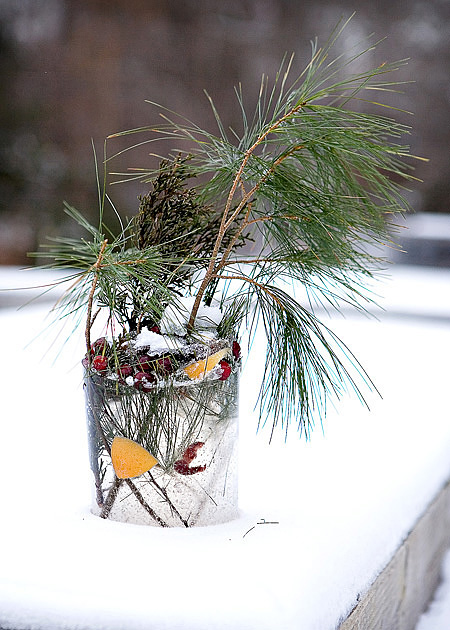
ice decor
In mid-December, I had decided that my yard was looking all too-blase’, for me.  There was snow, so that was a plus.  It just looks so bleak and dead, without snow at least. But it really needed more than just……white, everywhere. It bothered me more this year, because I had seen, what I was missing, before.  You see, at the end of 2 Autumn seasons ago, Michael and I had cleaned out the garden beds, and thrown down winter rye seed.  By the time the first snow had fallen that year, beautiful bright green rye was coming up out of the snow in all of the garden beds in the front yard.  I can’t tell you how much I enjoyed it all winter.  Three perfectly snow covered, raised rectangles,  elevated out of the blanket of snow on the ground, with beautiful, spring-green grass poking up out of it, everywhere. It always looked, just beautiful.

But this past Autumn, we threw it down the winter rye seed a little too late.  It was already too cold to germinate and grow.  I was so mad at myself, for waiting too long.  And I’ve suffered for it.  I haven’t looked at our front yard, without grumbling under my breathe about it, once this winter.  I miss the bright green rye.  It’s looked so….lifeless out there, without it.  Fresh fallen snow is always pretty.  But the rye just added so more.

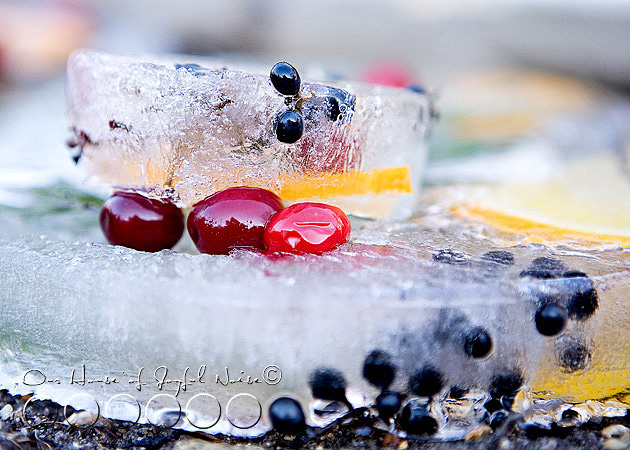
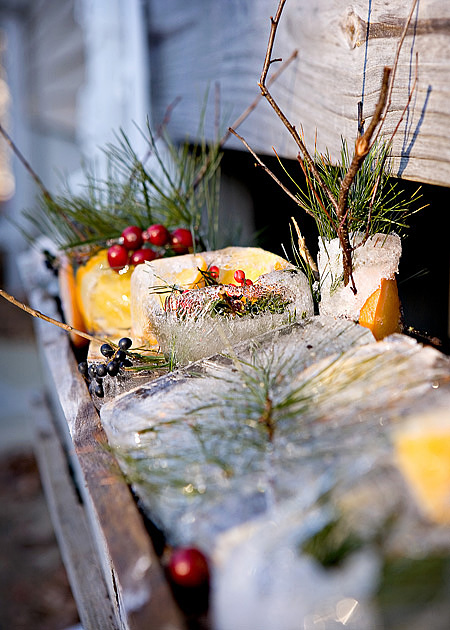
The week before Christmas, I was thinking about how I could add some pretty out there.  So I decided to try and make some ice molded sculptures, adding pretty things to it.  Then I could place them about the yard, on railings, in my empty garden beds, and on the walls out back outside our school windows, where the birds spend the day coming and going.

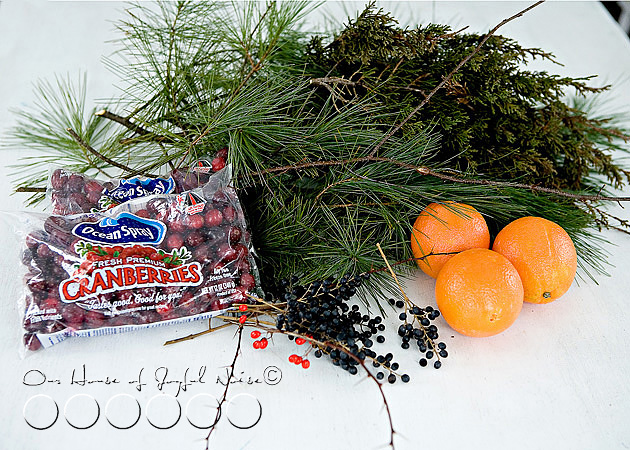
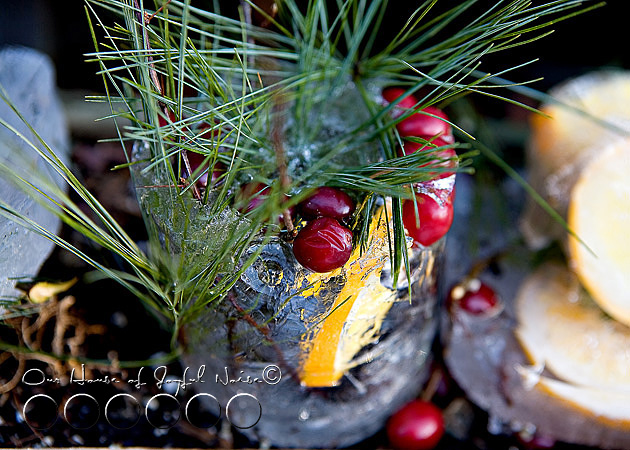
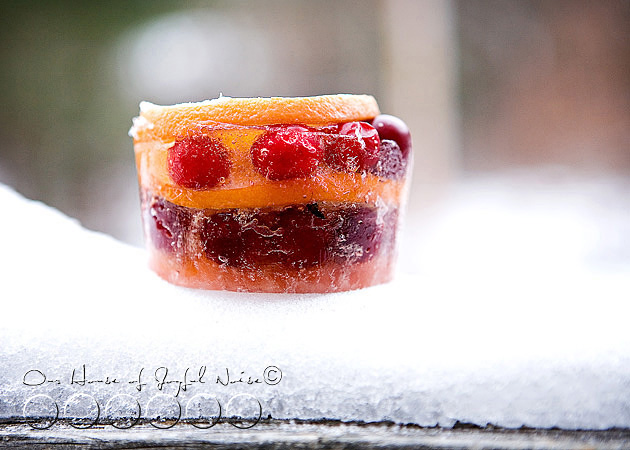
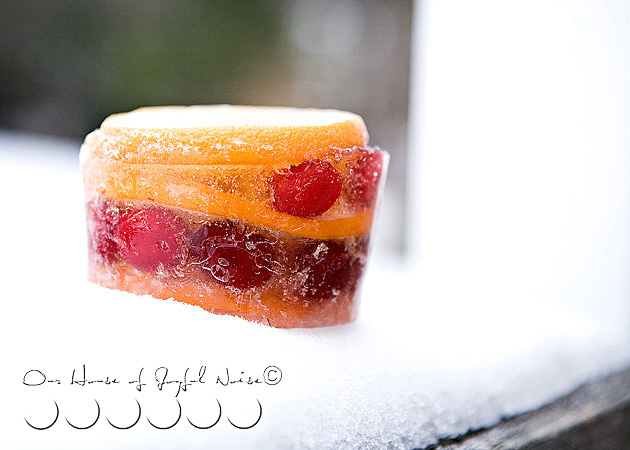
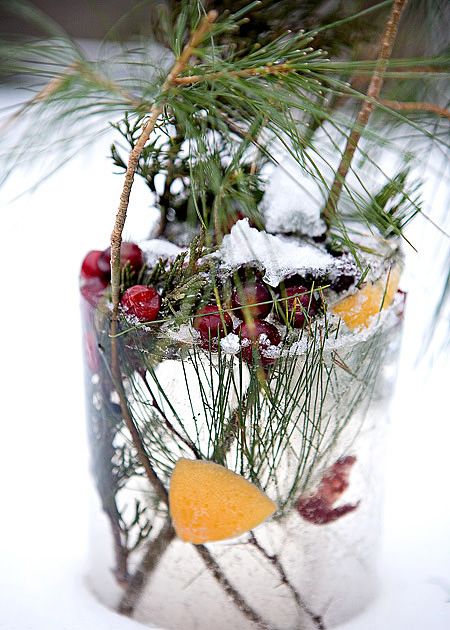
ice decor I started with some store bought bags of cranberries, and some oranges as well.  The rest, I got from our yard.  (Alright….some from the neighbor’s yard too. But, we manage the property, and I was pretty sure she wouldn’t care. Or ever know. lol).  I found 2 kinds of berries on sticks.  Holly berries, and……what are those dark ones??  I’m not really sure.  If you know, maybe you can tell me.
–

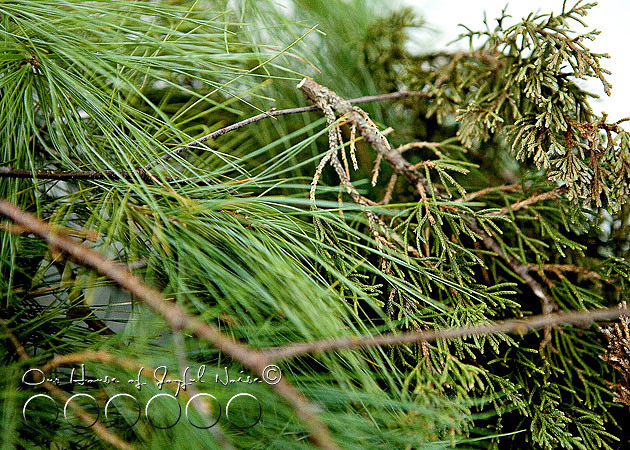
ice decor I also tried to gather a few different kind of pine branches and sticks, for variety.
–

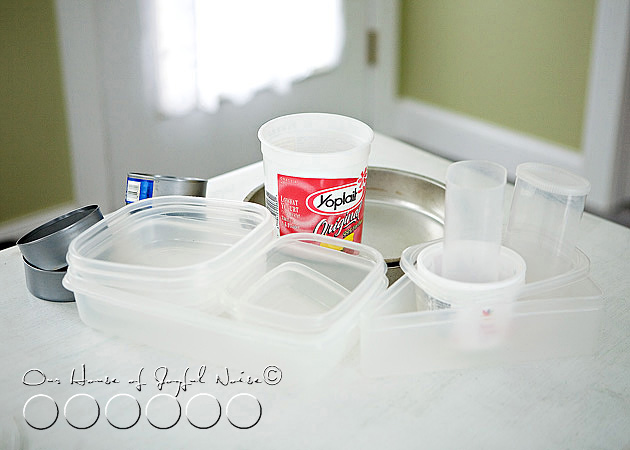
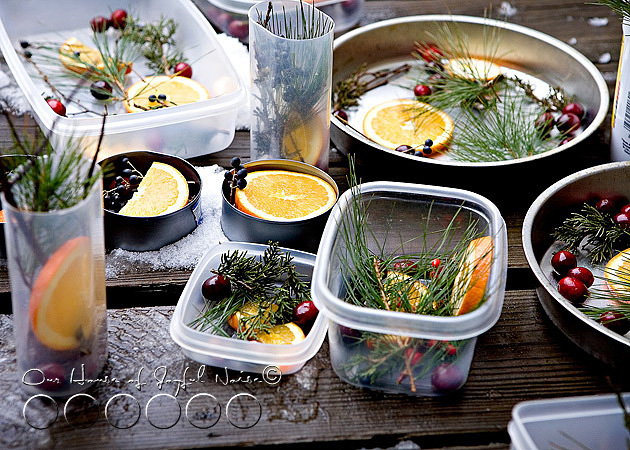
ice decor From the kitchen, I gathered containers in as many different shapes and sizes as I could find.  I was especially excited about the triangle pizza slice ones!  I also got some tuna cans that had been washed out, and put downstairs for the next garbage day.
–

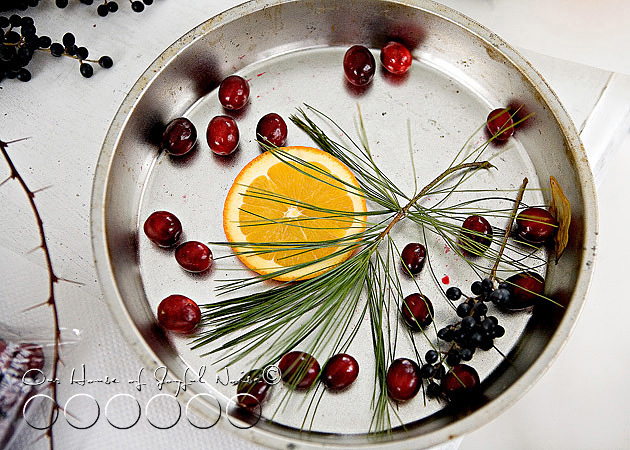
ice decor Then the fun started.  We sliced up some oranges, started pulling pieces of pine off the big branches, and started arranging things just-so in the containers.

Who is WE, all of a sudden?

ice decor

Me, and {O}.  She is always right there, no matter what I am doing, asking to help. “Would I be able to help?”  It’s her most used sentence, and it always has been.   She’s so nice to have around.  She makes my second cup of coffee every morning too.  She peeks in my first cup about 50 times, just hoping it is time to get me more.  Now the boys are trying to cut in on her morning gig, and she’s not having it.

Oh…I’m getting off topic I guess.   So….

ice decor
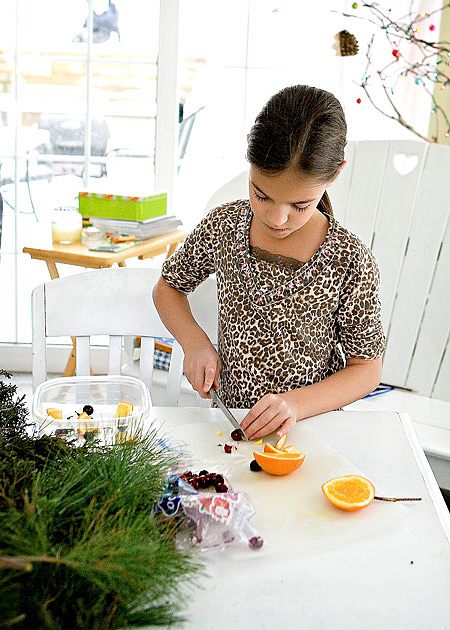
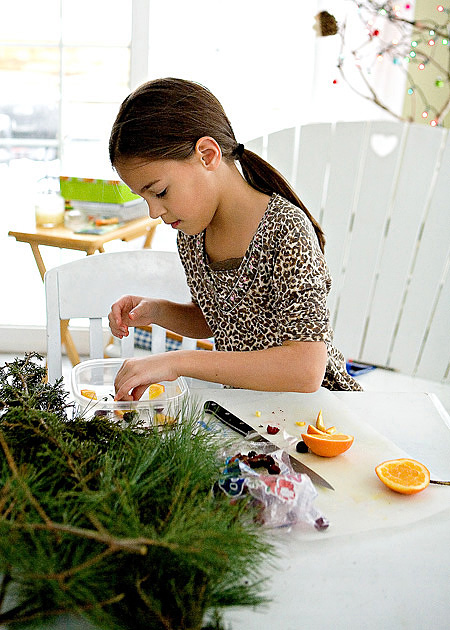
….she was really enjoying doing this project with me.  She was cutting stuff with the big knife, arranging every piece with love, and feeling like such a big girl.  Designing and crafts is her thing, anyway.

We had a lot of fun, trying to make each arrangement a little different than the others.
–

ice decor
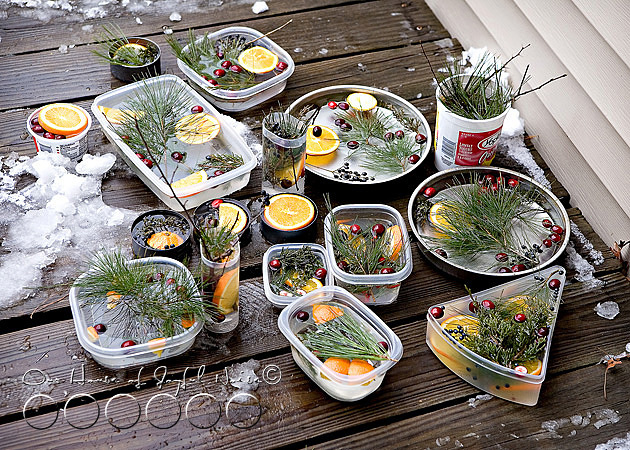
As we finished each one, we put it out on the deck.

ice decor
They looked so pretty, all together, against the wet deck that brought out the grain in the wood.    I was more excited than ever, just imaging how beautiful they were going to be.  But they weren’t done yet.
–

ice decor
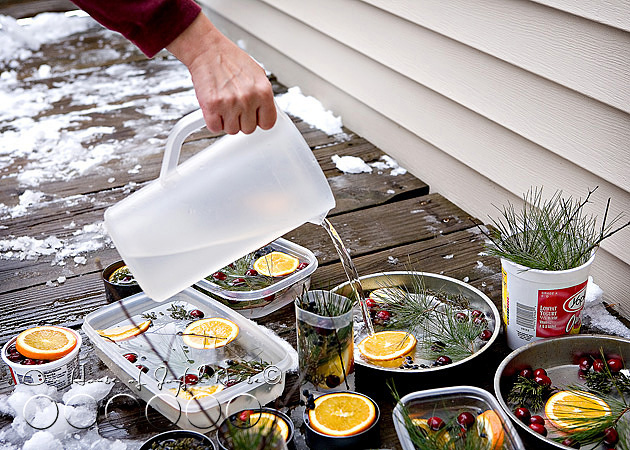
We had to fill each container with water, being careful not to disturb our arrangement too much.

Is it me, or are my old and vein-y hands making it into a lot of blog posts lately?

ice decor

Lovely!!  All that was left for them now, was to freeze!  So we left them right there, for them to do just that.

And we waited …. day, after day, after day.

Christmas came, and went, and they still sat there, unfrozen.

Yes,  a little technical difficulty in my plan.  One should check the weather report, before one decides to make a 100 frozen ice sculptured outside, huh?  A little warm front moved in, out of the blue, after weeks of being frigid cold out there.  Sometimes, they would start to freeze, and I would get all excited.  This would be about 2:30 a.m., when I got up to put more wood on the fire, and I just had to run out there, and check if they were freezing yet, in my nighty.

But the next day, the temps would climb back up to 36 degrees or so again, and it was back to square one.

(Sigh.)   The round tin pans were starting to rust!!

But then finally, they froze enough….

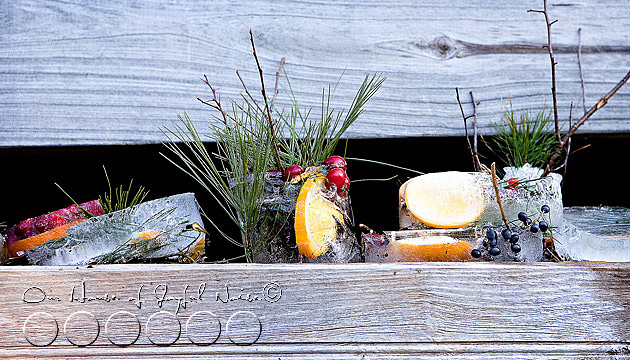
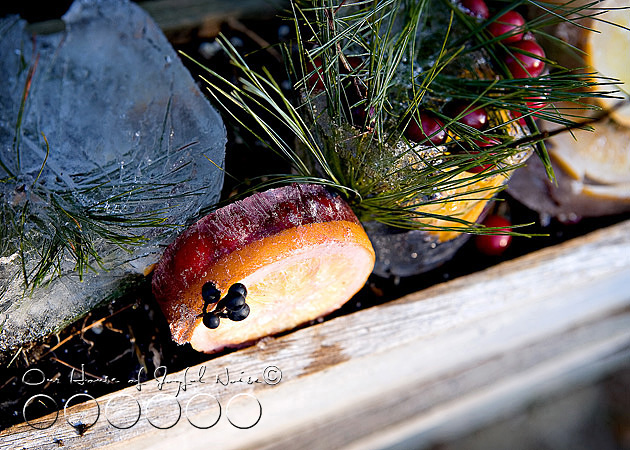
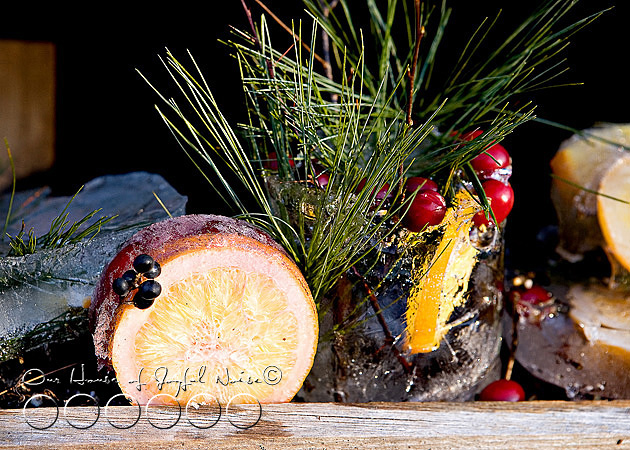
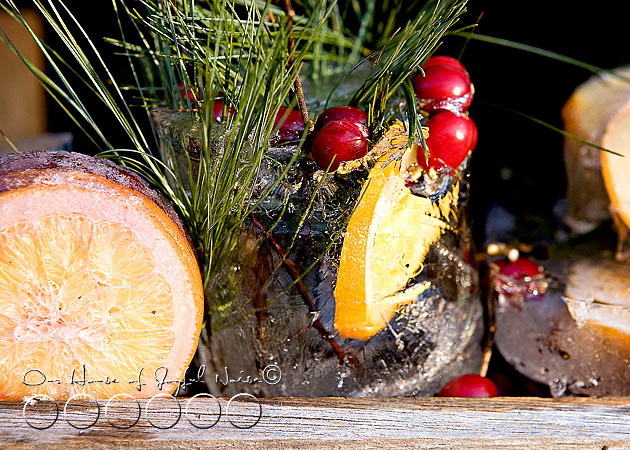
ice decor Taking them out of their containers, one by one, was like opening a gift, every time.

Each one a unique surprise.

ice decor
I thought they were so beautiful.

Don’t you think so too?………

ice decor

ice decor

ice decor

ice decor
This one was still partially unfrozen, but I didn’t mind much.  It was still pretty, so I laid them in the garden beds.
–

ice decor
Many of them filled my flower box.
–

ice decor

ice decor
Others I just plunked in the snow, on the railings.
–

ice decor

I loved the pitcher ones.  I put those in my garden beds too.  The spring greens sticking up looked like it belonged there.

They brought comfort and a smile to my face, and relieved my longing for the sight of my winter rye.

When it’s warm enough again, and our ice creations melt away, the little critters around that we enjoy so much, will be delighted with the berries and oranges our ice left behind.

ice decor

I hope you’ll try making some yourself, if your climate allows. (I do recommend checking the weather forecast – unless you just happen to live where it is always bitter cold this time of year.)   It really is another great, easy, and fun activity to do with your kids.  Or alone! Please send us a photo if you make some!!

I think we’ll make some more soon, too.  It really is enjoyable to do.  I’d like to experiment with some other natural ingredients.   Maybe strawberries, raspberries, blueberries…..oh, pinecones!! Those would look nice.  Do you have any other ideas?  Let me know.  I bet we could get quite creative with this.

Ice is so pretty as it is.  I could get obsessed with this.


Save

Save

Filed Under: Gardening, Home Decor, Seasonal Home decor, The Homestead, WINTER Home Decor Tagged With: how-to-beautify-winter-yard, how-to-make-ice-decor, ice art, winter yard decor, winter-home-decor

Heart Strings / A Valentine’s Craft

January 17, 2011 By Laura 49 Comments

If brilliant colors make you happy, and you love fun projects, then this Valentine’s craft is just for you!  We’re showing you just how to do it, step by step today!

heart-strings-valentines-craft-30

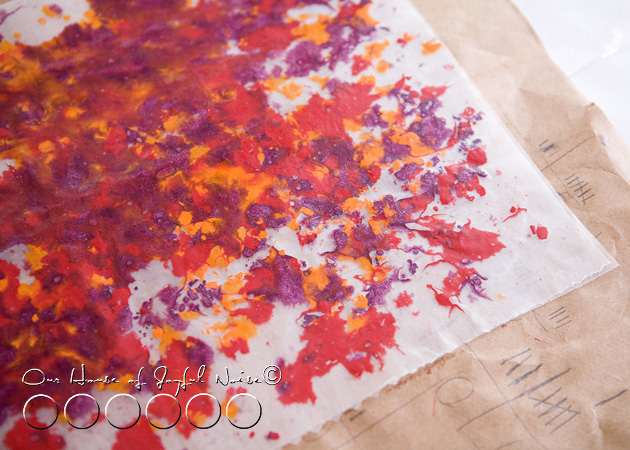
While my home is not completely decorated for the upcoming ‘month of love’ just yet, I knew it was time to get to some Valentine crafting! I happened to see this craft from Martha Stewart Living, and was inspired to try it ourselves, with a spin or 2 of our own on it.  By melting crayons in between wax paper, and cutting out hearts, some very cute Valentine’s decor can be made!  That Martha is a clever one, huh? ( Or, her creative team – whatever. lol.)  You can make this craft as quick and simply. or as involved, as you choose, and I am going to tell you the ways how.

Supplies needed:

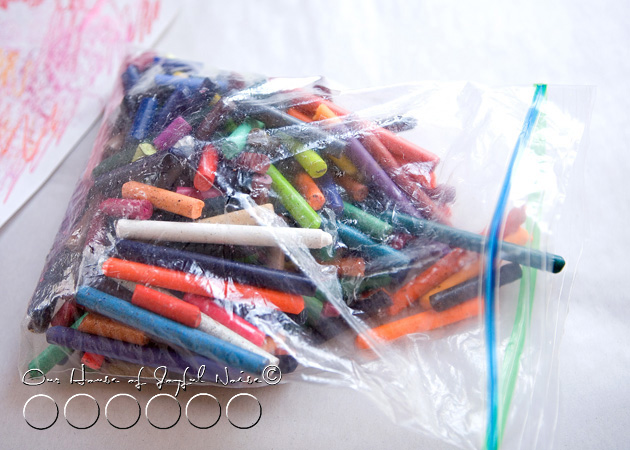
  • Crayons, with paper removed (This craft is a great way to use up those old broken crayon pieces!)
  • A sharpener with a fat hole.
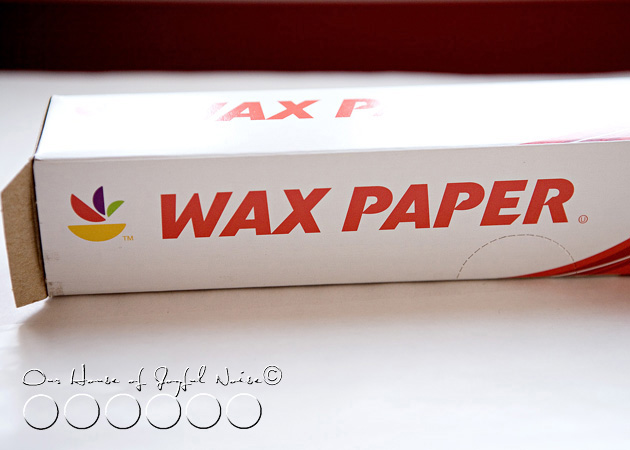
  • *Wax paper
  • Clothing iron
  • Brown craft paper, or brown paper bags (Just a protection layer for ironing.)
  • Hearts stencils or cookie cutters (2-3 sizes is nice.)
  • Pen or pencil
  • Scissors
  • Scotch-like tape

*  DO NOT substitute parchment paper for the wax paper. It is not the same thing, as parchment paper has teflon in it.

Other optional supplies, depending on what you want to do with your crafts decoration:

  • White cotton twine and food coloring. (Simplified option:  thin ribbon in white or any Valentine color.)
  • A clothing hanger, or a long tree branch

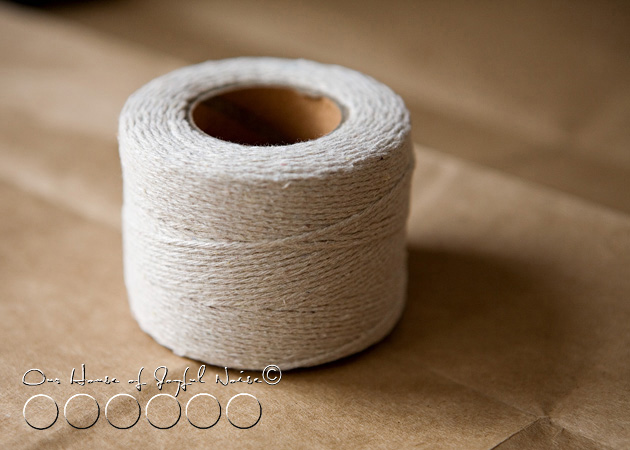
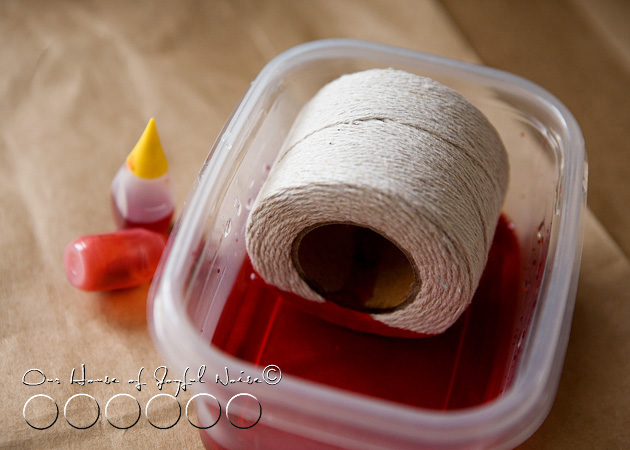
I intended to hang our hearts once they were done.  So instead of using some satin ribbon (which is simple and faster, if you want to go that route), I had this vision of hanging our hearts on dyed string, that varied in color.  So, with a roll of white cotton twine, and some food coloring, this is how I did it:

heart-strings-valentines-craft

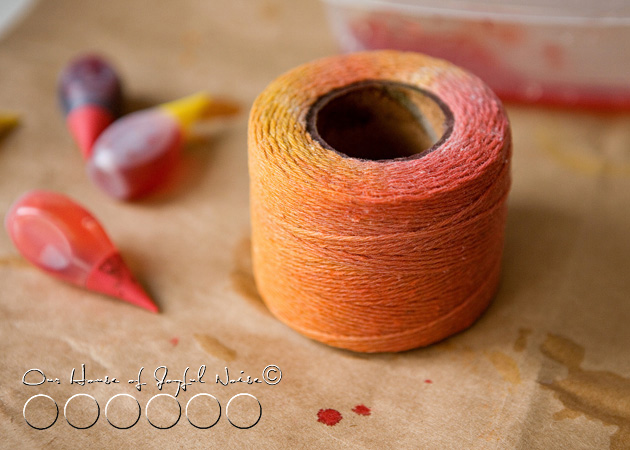
heart-strings-valentines-craft-1 In a plastic container, I added some red food coloring to some water, deep enough to soak the roll on it’s side to the cardboard roll core. I just let it sit for awhile, while I did other things,  until I thought it soaked through all of the layers of twine.  Then, I made orange and yellow soaks as well, letting a different side of the roll sit in each.

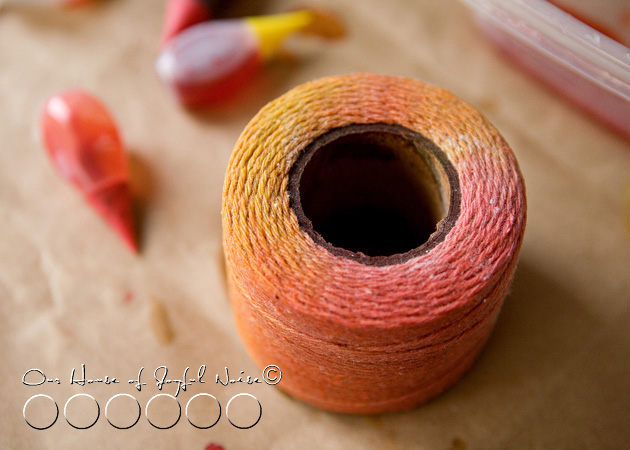
heart-strings-valentines-craft-2 I loved the results!   How pretty is that?

heart-strings-valentines-craft-3

I knew as the twine was pulled off the roll, the layers would get lighter, but that too would only help the variations in the string colors.  Now, all of this string is not going to dry on the roll all the way through, any time this year, but that’s o.k.  You’ll be able to use the string damp just fine, and it’ll dry hanging.


heart-strings-valentines-craft-4 But while the string roll was soaking in various colors, the kids and I got to making our hearts.

heart-strings-valentines-craft-6

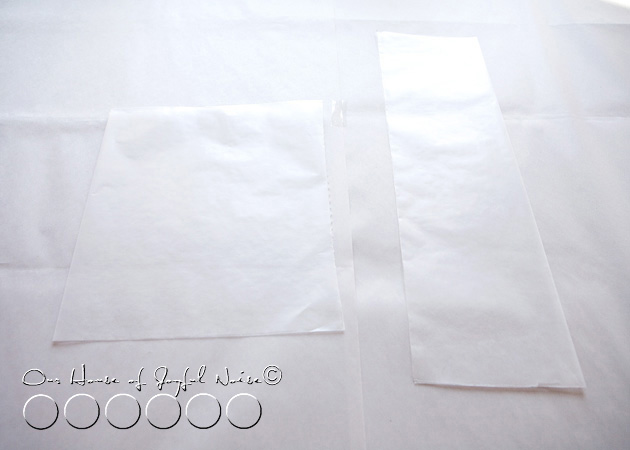
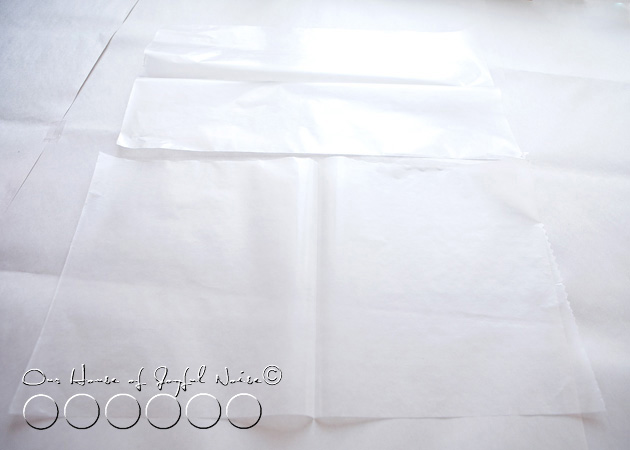
Pull off a piece or 2 of wax paper, fold in half to make a good crease, and then open back up. . . .


heart-strings-valentines-craft-5 What size piece you use depends on how many hearts you’ll want to make.  Remember, you’ll only be able to get hearts out of one half, as it will be ironed together soon, with crayon shavings in between.


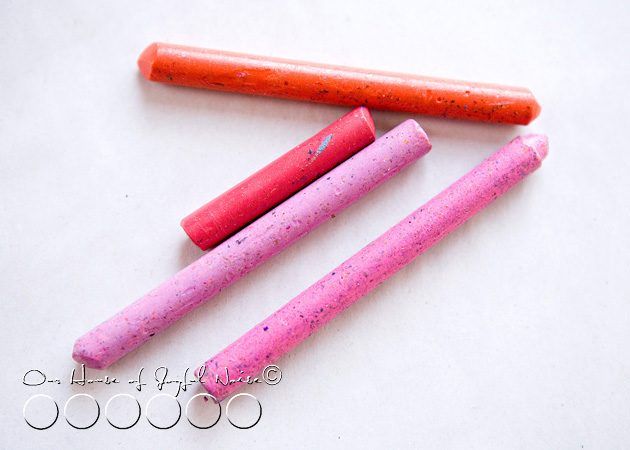
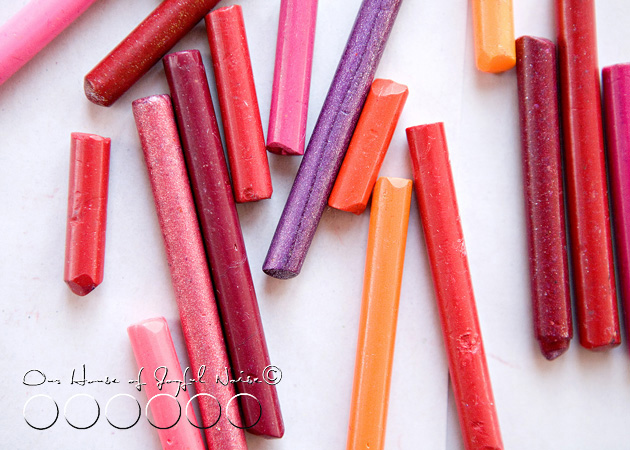
heart-strings-valentines-craft-7 Grab your old peeled crayons, and start choosing some great colors for Valentine hearts.  No need to stay with strictly traditional colors, such as red and pink.  Try some purples, raspberries, and even oranges and yellows!


heart-strings-valentines-craft-8 Now, if your old crayons have been kicking around together for some time, as ours have, they are going to have yuckity-doo-dahs all over them.  Even as a kid, with me and my sibling’s bottomless bucket of crayons, I hated this.

So because I have had particular issues, long before I was a blogger, I have had a trick for this crayon problem.  And since you came to this blogger with issues blog, I’m going to share it with you.  : )


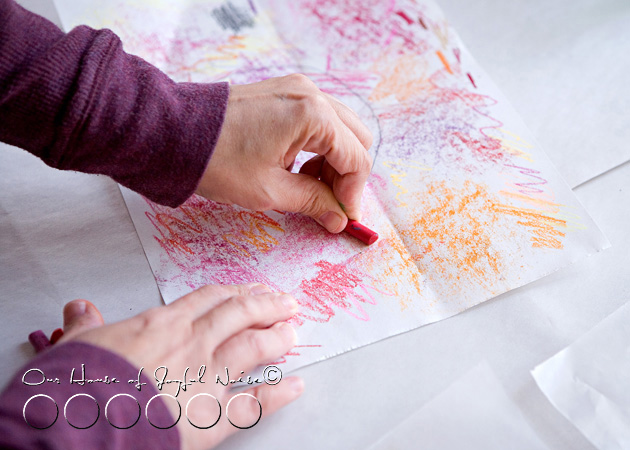
heart-strings-valentines-craft-9 Just lay the crayons down, one by one, on some scrap paper, and rub the yuckity-doo-dahs away!  I found this is also a good way to test what the color really looks like!!  Some crayons when used, do not look anything like the shade of the actual crayon!  So deceiving.


heart-strings-valentines-craft-10 Old crayons, like new:  Yuckity-doo-dah free!


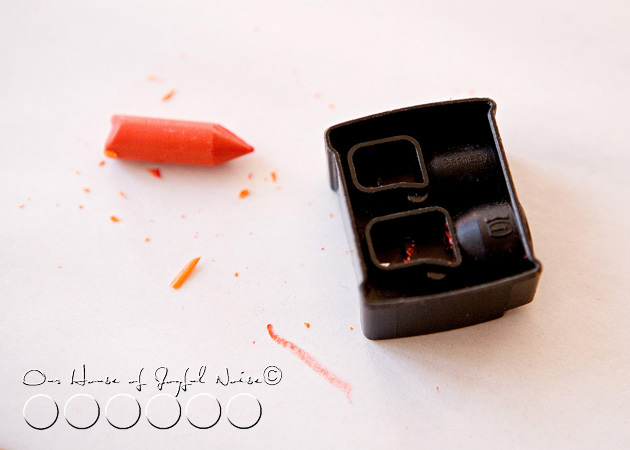
heart-strings-valentines-craft-11 To make crayon shavings, you need a sharpener of some kind.  Our little hand pencil sharpener did not have a hole big enough for a crayon, so we used my make-up one!  Thanks Lancome!

Now….you’ll need to iron on your table or other flat surface, so I highly recommend putting down some crafts paper to protect your surface, from both melting crayon, and the heat from the iron.

On top of the protected surface, lay your open wax paper pieces.


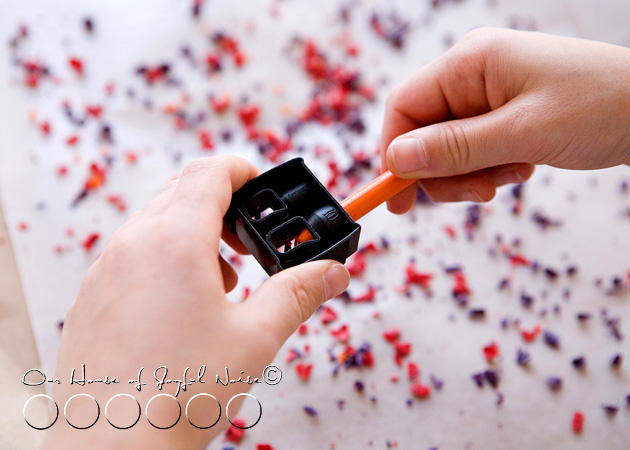
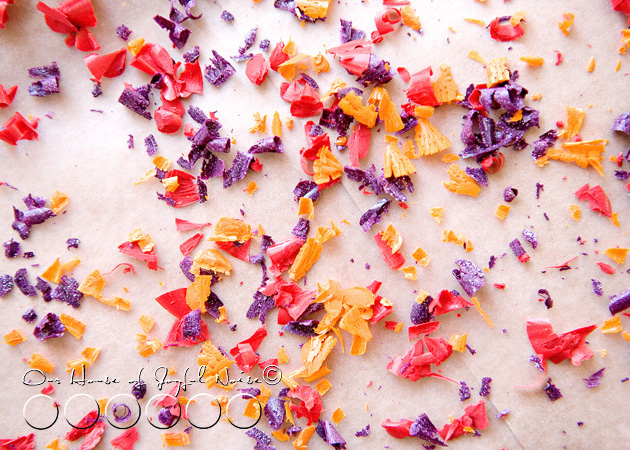
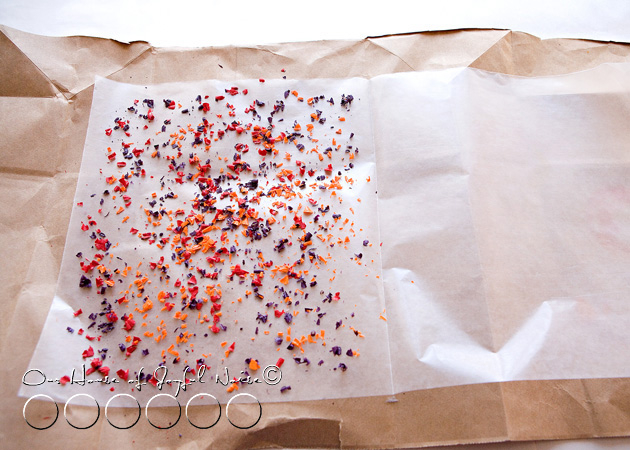
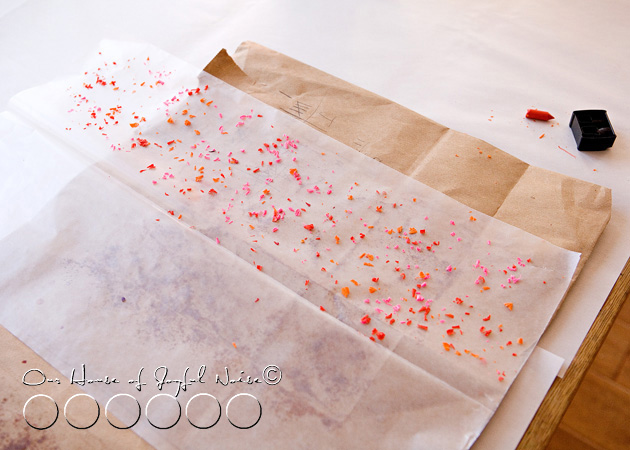
heart-strings-valentines-craft-12 Over only one side of your wax paper piece, sharpen your crayons and let the shavings fall onto the paper.  Each of my our kids did their own, and had their own unique colors combinations, which was going to make for a nice variety of colored hearts.

heart-strings-valentines-craft-13 Some of our crayons were metallic ones!!  So that was adding a whole new element of pretty!


heart-strings-valentines-craft-14 Make sure you cover the whole side with shavings pretty well.  Brush any pieces in from the very edge though.

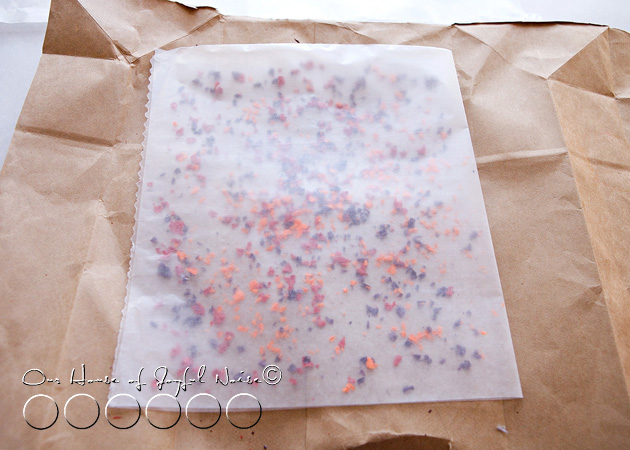
heart-strings-valentines-craft-15 Fold over the empty side of wax paper, onto the side with the shavings.

Now, Martha’s directions say to fold up each open side some, to keep the melting crayon in.  But, I didn’t want to waste any space, as we wanted to make lots of hearts, and some on the bigger side too.  So….I just made sure I was working on my brown paper bag.  (We also had other craft paper taped to cover our surface under that.)

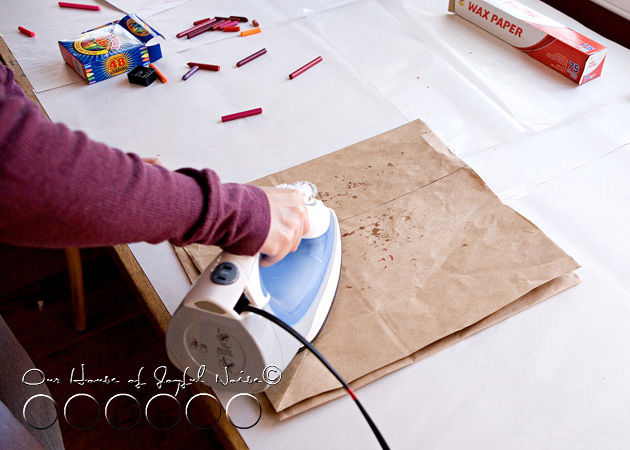
heart-strings-valentines-craft-16 Now, after putting brown paper on top of your waxed paper and shavings, you can start ironing.  What setting?  Good question!!  See, Martha said on a ‘medium setting’.  But guess what?  Our iron doesn’t have a medium setting!  So I set it between silk and wool, ; )  …. and adjusted the heat up or down from there.

As you can see, some oils from the crayons may seep through the wax paper and the brown paper.  It doesn’t cause any problems. Just make sure you clean the surface of your iron off when you are done with this craft, so it doesn’t transfer to your clothes!  What a hot mess that would be!   (Note to self:   Clean surface of iron from crayon craft!!)  (By the time I decide to iron an article of clothing, I’ll have forgotten I ever did this craft with it.)

As you iron, you’ll want to keep peeking,  to see if there are more shavings that still need melting in areas.


heart-strings-valentines-craft-17 Heavy in crayon wax…..but nice!!


heart-strings-valentines-craft-18 The next kiddo went with a lighter layer of shavings, for a new effect.  Or, his hands just got tired from sharpening the crayons.


heart-strings-valentines-craft-17 They were looking good!!  Just holding each of them up to the light, I could tell this was going to look super cool when we were done.

heart-strings-valentines-craft-18

I couldn’t wait to see what this one was going to look like, all melted.

heart-strings-valentines-craft-21 LOVE!!!


heart-strings-valentines-craft-22 Now, you may notice some bubbling or wrinkling in areas.  I’m not sure why this happened sometimes.  I was guessing maybe it was too much heat at times.  But since this was a fun crafts class, and not our Science class, we weren’t going to waste time running tests, to figure it out.  We decided it was a cool effect, and embraced it.

Next, came tracing hearts onto our waxed pieces, and cutting them out with scissors.

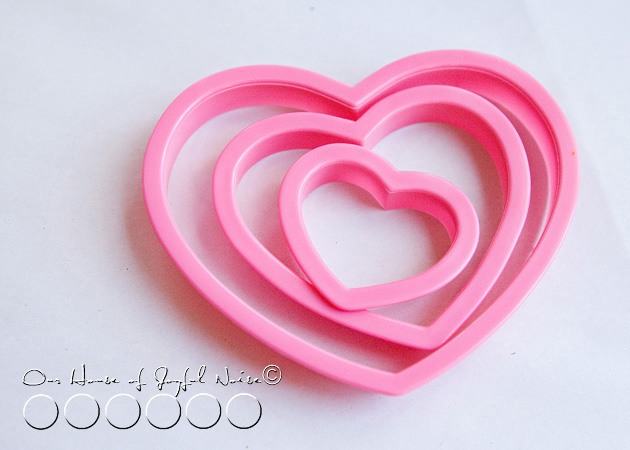
heart-strings-valentines-craft-19 We used simple heart shaped cookie cutters that we had, in 3 different sizes.  Just trace them using a pen or pencil, and then cut out on the heart shaped line.  I used a pen, and because I was using it on wax paper, it wouldn’t really write, which I preferred anyway.  I was able to see the tracing indention well enough to cut, just by tracing it a couple of times.    * I did not take photos of tracing and cutting.  I have faith you get the picture.

Nor did I take photos of exactly how we did the rest of our crafts.   BUT……Once your hearts are all cut out, there several things you can do with them:

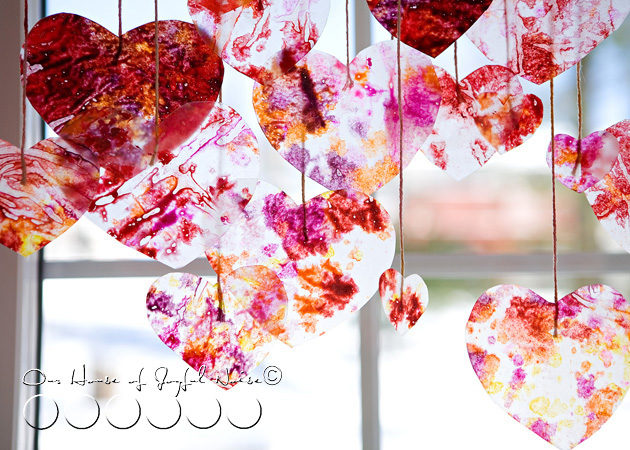
1)  The easiest thing you can do, is just put them on your windows much like window clings, using a little transparent tape!  The hearts have a stained-glass look, and they would be beautiful  with the light coming through, and the colors so radiant.

2)  Another option, is using pieces of thin cut ribbon, tape one end to the back of each heart, and tie them to a clothing hanger at different lengths.  Instant Valentine’s themed mobile!!

3)  You can take it to the extreme, like we did…..


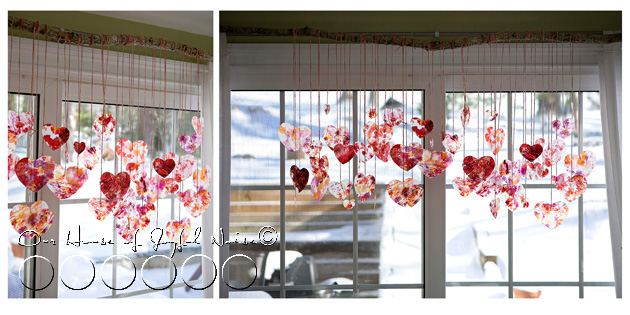
heart-strings-valentines-craft-23
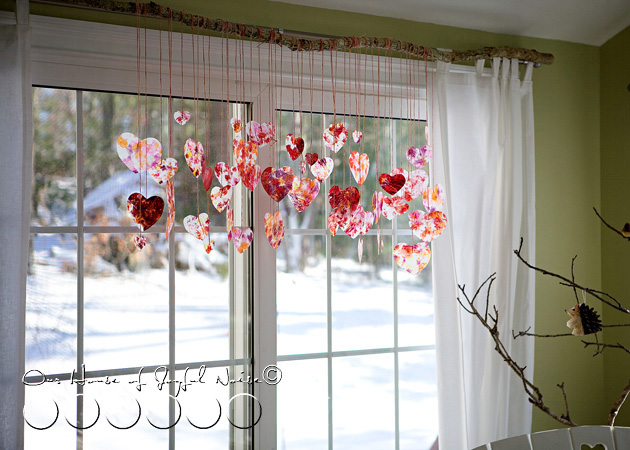
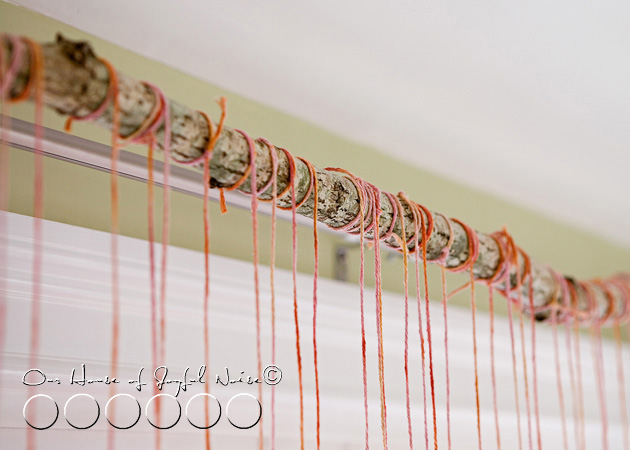
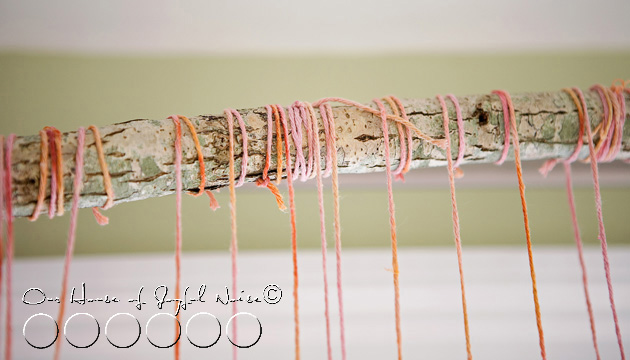
Michael went out and found us a really long and fairly straight tree branch, that would meet the length of our sliding glass doors.   Then, to work in a comfortable manner tying our hearts on it, we set 2 chairs very far apart, and rested each end of the stick on the top back of each chair.  Using long pieces of our dyed string, we wound one end around the stick a few times, and taped the dangling end to the back of each heart, at different lengths.


heart-strings-valentines-craft-24 Yes, you could just tie it on quickly, but I knew I would love the look of our pretty, hand-dyed string, wound around this rustic tree branch.  And I was right.


heart-strings-valentines-craft-25 It was worth ll of my efforts.  It may not be worth it to you.  Also….my girls helped with this some.


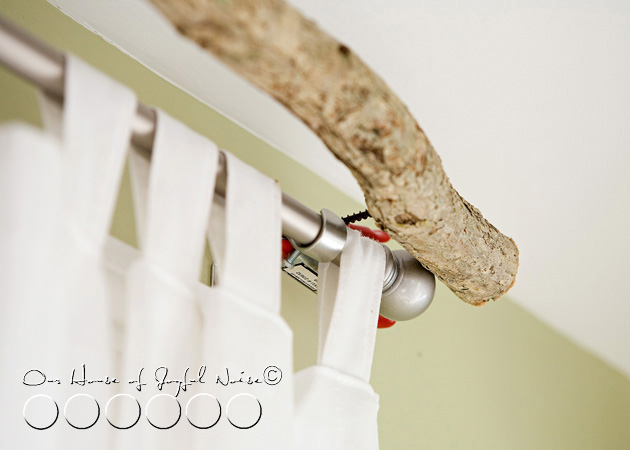
heart-strings-valentines-craft-26 If you’re wondering how we hung this long tree branch adorned with colorful Valentine hearts up high and across our slider glass doors, I’ll tell you:   Michael screwed a long screw into the backside of the stick on each end.  Then we simply used those little tight-clamp thingies, and clamped them to the curtain rod bracket.  See?  No permanent damage anywhere.


heart-strings-valentines-craft-27

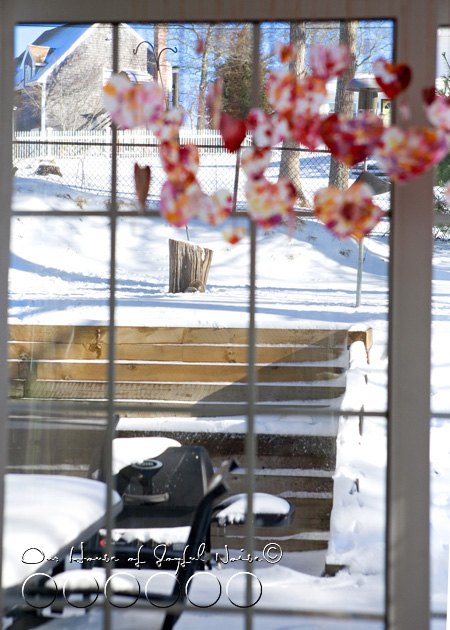
They colors really look beautiful, hanging there, even as I look past them, through our window into the snowy scene behind them.   There are often squirrels out there frolicking in the snow (o.k. …finding the fallen bird seed), and birds at the feeders, eating.

We think the critters rather appreciate our Valentine decorations on display.

heart-strings-valentines-craft-28
I love coming in our front door, and seeing them swaying in the breeze across the room in front of us.  I can feel the love in the air.  It makes us smile.


heart-strings-valentines-craft-29 The colors of love are a beautiful thing.

Let them shine, shine, shine.

(Love this craft idea?  Share the link on your Facebook!  Your mom-friends will love it too! Or….*pin it* to one of your boards! ; )


Save

Filed Under: Crafts & Creations, Holiday Crafts, Home Decor, Kids Arts and Crafts, Tutorial, WINTER Crafts and Creations, WINTER Home Decor Tagged With: crayon crafts, February-crafts, February-projects, heart shaped crafts, heart-crafts, heart-strings, heart-strings-tutorial, kids crafts, Valentine-crafts, valentine-decorations

  • « Previous Page
  • 1
  • …
  • 9
  • 10
  • 11
  • 12
  • 13
  • …
  • 15
  • Next Page »

We are wicked happy to have you here! We hope you find much inspiration, help, humor and enjoyment here.


Archives


POPULAR POSTS

* * * * * *

SUBSCRIBE to House of Joyful Noise blog! Every new post, delivered right to your email box!


Privacy Policy

Amazon Affiliates

Never at any additional cost to you, we may earn a small commission for our endorsement, recommendation, testimonial, and/or link to any products from our website. Your purchase through our links helps support our family, while sharing with you the products we authentically use and recommend, for various ideas, and letting you know where you can purchase them. Thank you for your support!

[footer_backtotop]

Copyright © 2026 HouseOfJoyfulNoise.com · Genesis Framework by StudioPress