• HOME
  • {A}’s Chipmunk Training Archives

 Homepage

  • The Homestead
    • Home Projects
    • Home Improvement
    • Home Decor
      • Seasonal Home decor
        • FALL Home Decor
        • WINTER Home Decor
        • SPRING Crafts and Creations
        • SUMMER Crafts and Creations
    • Our Chickens
    • Gardening
    • Organization
    • Re-Purposing
    • Furniture Refinishing
    • Budget
  • Crafts & Creations
    • Seasonal Home decor
      • FALL Crafts and Creations
      • WINTER Crafts and Creations
      • SPRING Crafts and Creations
      • SUMMER Crafts and Creations
    • DIY (Do-It-Yourself) Project
    • Kids Arts and Crafts
    • Homemade/Handmade Gift Ideas
    • Holiday Crafts
    • Fan Pulls
    • Free Printable/Downloadable
    • Sewing Projects
    • Giveaways
    • Business Features
  • Recipes/FoodFun
    • Breakfast
    • Lunch
    • Main Dish
    • Sandwiches
    • Appetizers
    • Slow Cooker
    • On The Grill
    • Side Dishes
      • Soups
      • Salads
    • Baking
      • Breads, Rolls and Muffins
    • Snacks
    • Treats
    • Desserts
    • Drinks
  • Homeschooling
    • Elementary Homeschooling
      • Elementary Homeschooling READING
      • Elementary Homeschooling MATH
      • Elementary Homeschooling LANGUAGE ARTS
      • Elementary Homeschooling SCIENCE
      • Elementary Homeschooling HOME ECONOMICS
      • Kids Arts and Crafts
    • Middle School Homeschooling
      • Middle School Homeschooling SCIENCE
      • Middle School Homeschooling HOME ECONOMICS
    • Language Arts
    • Math
    • History / Social Studies
    • Geography
    • Foreign Language
    • Field Trips
    • Games
    • Nature Study
  • The Big Picture
    • Life In General
    • Celebrations
    • Faith
      • Into the Light; The Series
    • Giveaways
    • Reviews & Sponsors
  • Photography & Lettering
    • Photography
    • truck lettering
    • vehicle graphics
    • Newborns
    • Kids
    • Engagement
    • High School Senior Pictures
    • High School Senior Pictures Sneak Peeks

Polka Dot and Plaid 4th of July Printables, for Celebrations/Cookouts

June 18, 2012 By Laura 6 Comments

Free printables for you!

2_pennants-4th-ofjuly-free-printable1

2021 NOTE – WE’RE SORRY, BUT THE FILES TO THESE PRINTABLES ARE NO LONGER AVAILABLE.  🙁

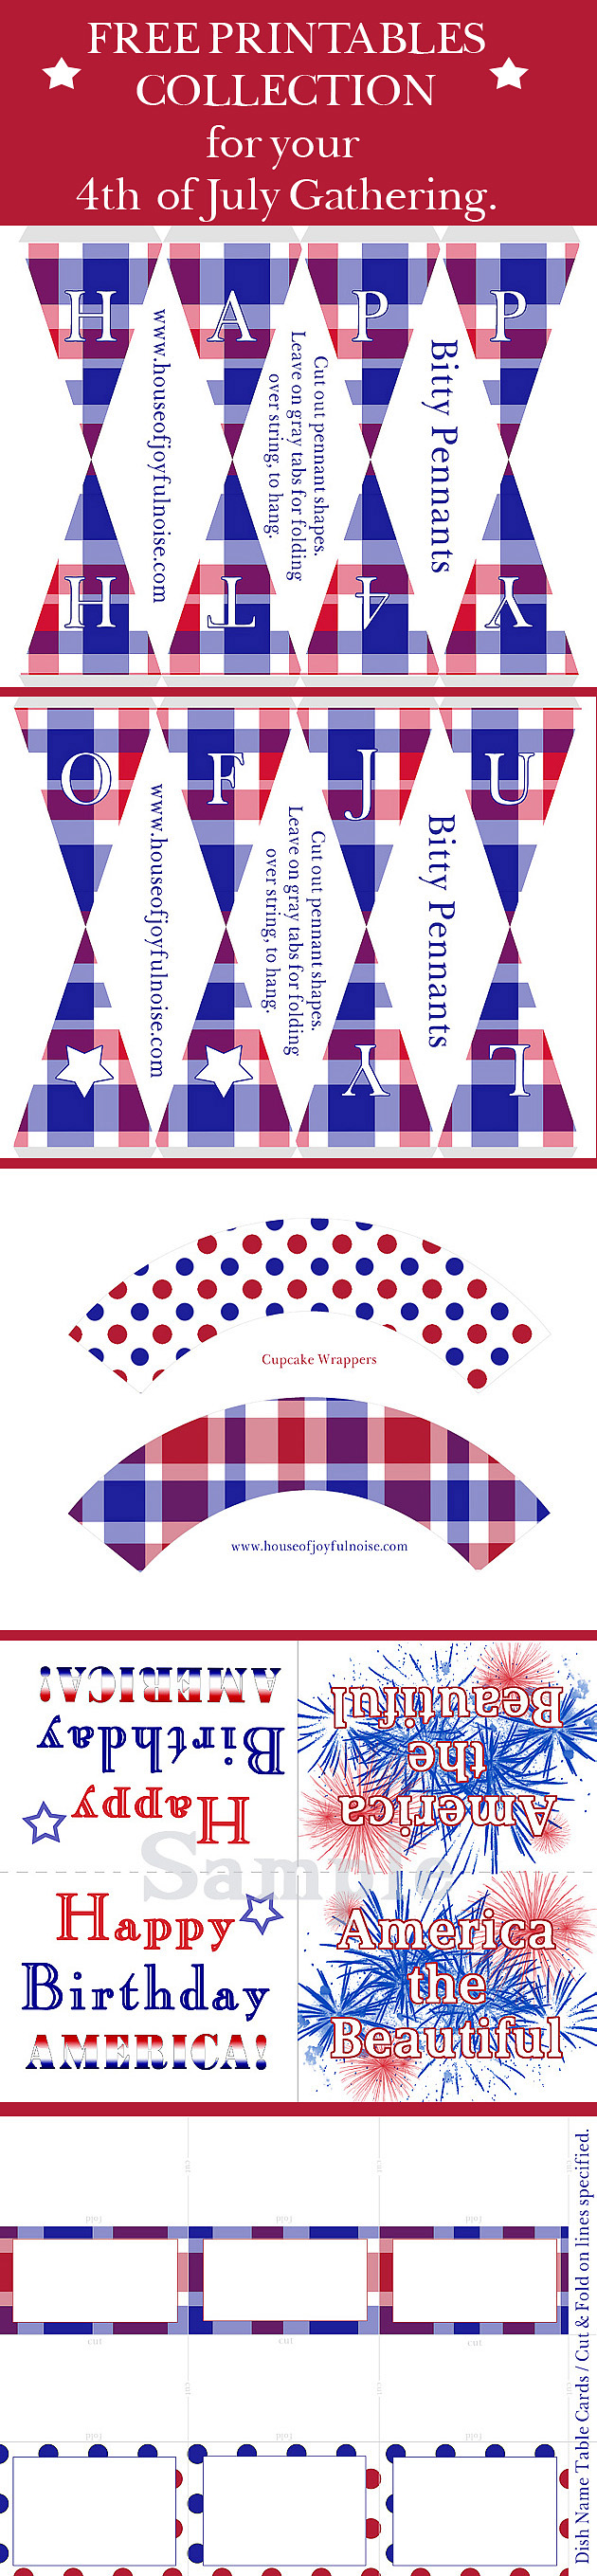
I have been having fun designing some 4th of July printables to share with you, to add a fun red, white and blue themed touch to any cookout or celebration you may have planned, with family and/or friends. (Or, you can even print the cute Bitty Pennants out and string up in your home!) These are the little details that make hosting a gathering so fun to plan, and also the details that impress your guests, and make them smile. So I hope you like them! I tried to design them with simple direction right on them, to show you how easy they can be to prepare.  But I will give you some printing tips, at the end here as well, after you look at the previews of the printables in this post.  But first . . . . . .

*IMPORTANT NOTE:  *Do NOT save the images of the printables you see below,but rather use the download links after the images at the end, for the full size printables.  What you see here are just low resolution previews, and not suitable for printing.
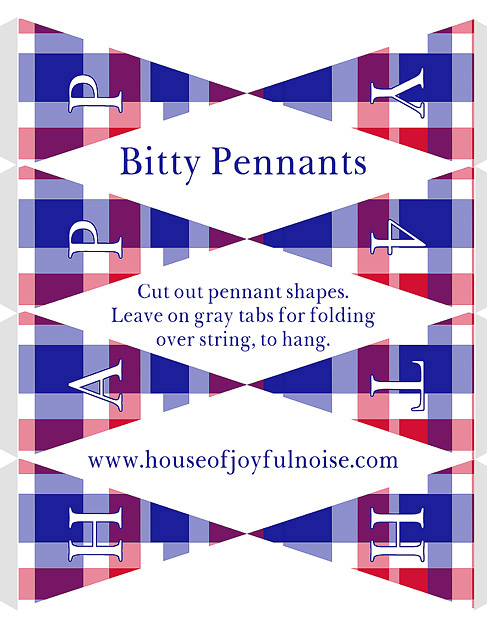
1_pennants-4th-of-july-free-printable

2_pennants-4th-of-july-free-printable

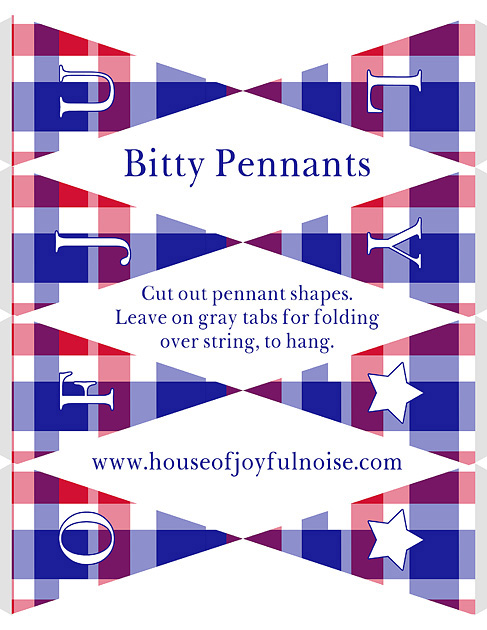
I must say, I think these Bitty Pennants are adorable!  I gave them some tabs, so they can be folded right over some thin ribbon or string, and then just secured with a little piece of tape.  If you choose to download the pennants, please note that you will need both Part 1 and 2.
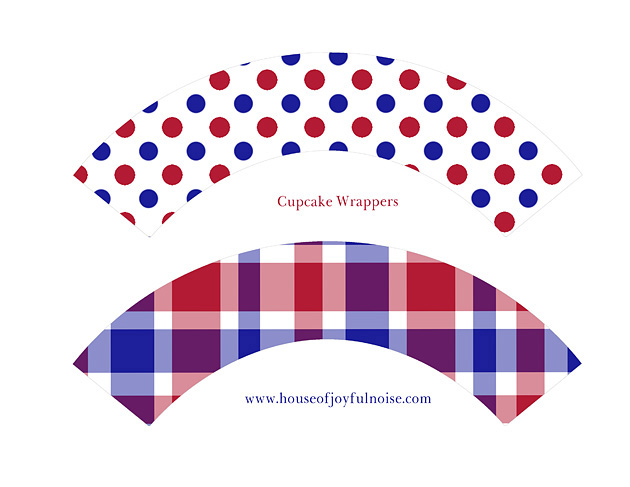
cupcake-wrappers-free-printable These wrappers, designed for cupcakes, could possibly also be used around the bottom of those short clear acrylic cups, filled with fruit treat ideas like these.
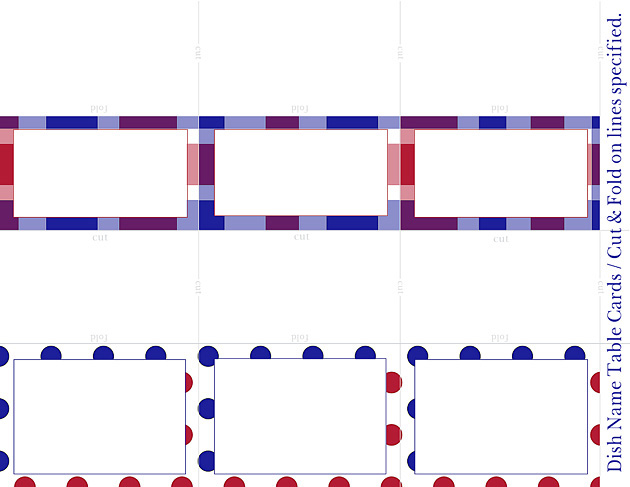
red-white-blue-dish-name-cards-free-printable How cute would these little cards be, sitting tent-like on your food table in front of each dish, letting guests know what’s on the menu?
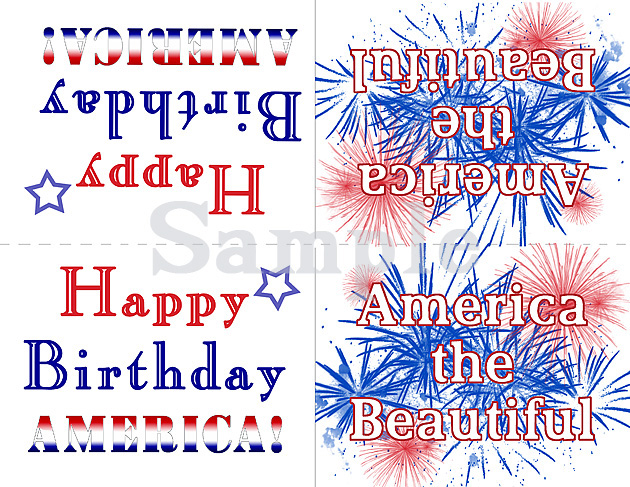
4th-july-free-printable Lastly, these cards I actually designed last year, but decided to offer them all to you again. They are a bit bigger cards, and print as a full 8.5 x 11 sheet. All you need to do is cut on the solid line, and fold on the dotted. You can hang them to spin on strings, put them tent like on the tables, or slide them under a glass table top. They are like birthday cards for America, and really remind everyone the reason for celebrating, and the gift that our freedom is.

Printing suggestions:  I recommend printing any or all printables at least on some good cardstock, as opposed to regular printer paper.  Be sure for each download you choose of the links below, that you choose the correct orientation for printing, as well as your highest quality printing setting!  Also, if you’d really like to get vibrant colors closer to what you see on your computers, try printing on matte photo paper.

With that, here are the download links, for the actual full-size printables. Just click on the link, and when the image comes up, right click, and ‘Save Image As’, to where you will be able to a location where you will find them on your computer. (Again, do not save and print the images above, or they will look terrible, and waste your ink and paper.)

Bitty Pennants-Part 1

Bitty Pennants-Part 2

 Cupcake Wrappers

Dish-Name Table Card Tents

America’s Birthday Cards

I hope you enjoy these, as well as your celebrations of fun, food, family and friends!

HAPPY BIRTHDAY, AMERICA!
4th-fourth-of-july-free-printables *******End of Post*****
This long single image below for Pinterest pinning!  : )

Save

Save

Filed Under: Celebrations, Crafts & Creations, Free Printable/Downloadable, Free Printables, Home Decor, Seasonal Home decor, SUMMER Crafts and Creations, The Big Picture Tagged With: 4th of July, 4th of july free printables, 4th of july party decor, 4th-of-July-celebrations-decorations, 4th-of-july-cookout-decorations, american party decor, free-printables, red-white-blue-decor

Painted AMERICAN BIRDHOUSE – Tutorial

June 11, 2012 By Laura 27 Comments

Summer holds a whole lot of good things, and for us, it really kicks into high gear in the beginning of July, with back to back celebrating of the 4th of July, and our oldest daughter’s birthday!  Then the summer rides out with a little more down time, just chilling on the beach, making day trips, and hanging out chatting and laughing around the camp fire at night. So about this time in June, we’re getting excited for all of the fun to come, just around the corner! The gardens are planted, we’re reaching the end of our school books, and we can just feel the summer vibe coming on the sea breeze!

What really gives me so much joy, is helping make my home and gardens, reflect the seasons and holidays!  Around here, about mid-June through July, it is all about red, white and blue!  Our family’s homestead is that much more enjoyable, with the little bits of decor I add, and it just puts the happy in my heart, to see it.  But the greatest joy in it all for me, is planning and creating all of those little things around our home. Like this American Birdhouse I am sharing with you all today. Honestly, day or night, you can turn the music up loud, put some art tools in my hands, and COLOR ME HaPpY!!

So I’ll just tell you how I did this. While I didn’t photograph every step of the action, I can tell you what I did, and give you some photos I took of what the birdhouse looked like after those steps.


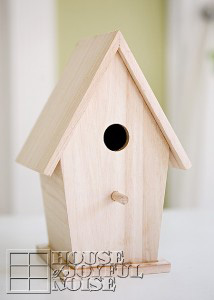
To start, I picked out an unpainted wooden birdhouse at Michael’s Arts and Crafts. There were a few styles to choose from, but this one would best work with the paint-job layout I had in my head.

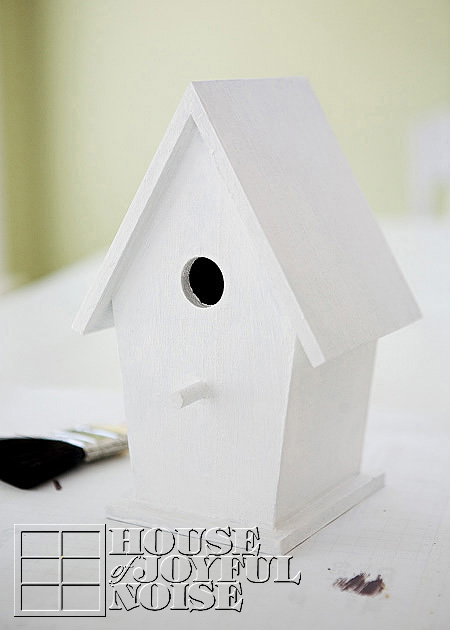
I primed it with some grey primer I had on hand, and then I painted it white with acrylic paint. Because of the grey primer, it did take 2 quick coats of white to cover. This paint dries fast, which I love, so I can keep the fun rolling.

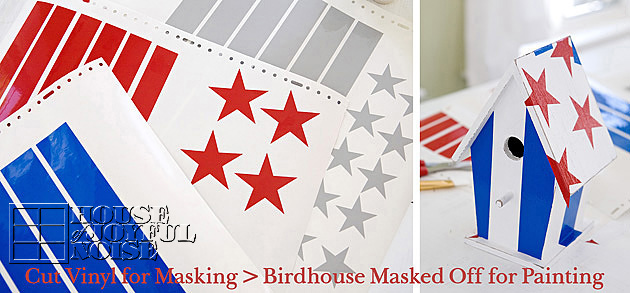
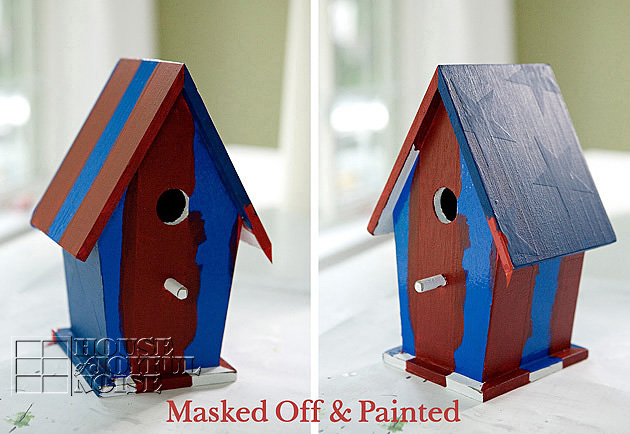
Next, I asked my husband, Michel, to cut some stars and stripes out of vinyl for me, the next job he ran, to use as masks. I wasn’t sure of the size I wanted to work with for either the stars or stripes, so he cut out 2 sizes of each.  Sticking some cut pieces on the house helped me decide which size I’d like better, and I went with the fatter stars and stripes.  NOTE: Just to confuse things, Michael used some scrap vinyl he had, that happened to be red and blue…to put on my white house. I know….it looks done already, huh? I would have preferred white masking, but c’est la vie….it was just a mask. Don’t let it confuse you-as it was trying to confuse me. It was going to be way better looking when I was done with it, but the colored vinyl did give me a good preview of the final layout!

So here it is, with the masking still on, and all painted in.  Looks like a hot mess to me! It did take more brain power than I had planned on burning, trying to think in opposite terms here:  “Ok….where the red and blue mask is, it will be white….and I am painting the white I see, red and blue. Right?….Wait……”. Ugh. See? White vinyl would have taken less thought for me.

 But I managed, believe it or not, to not screw it up much.  Although everyone was instructed not to talk to me or ask me questions whilst paintbrush in hand. I’m good, but I’m not that good. ; )

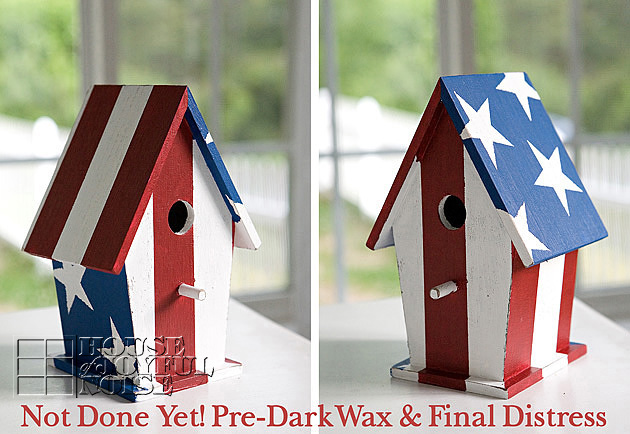
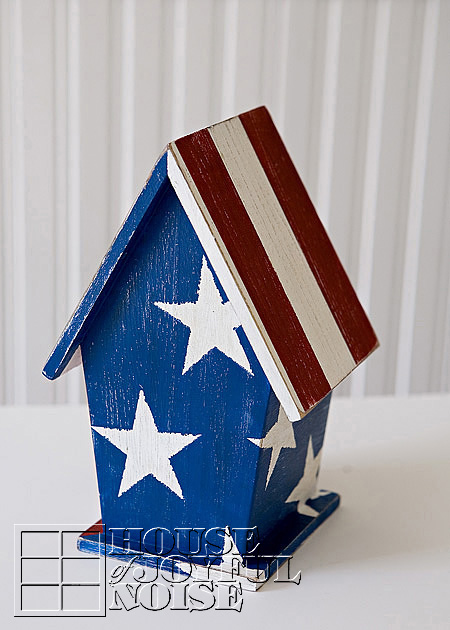
So here is what it looked like after all of the masking was peeled off.  Revealing that I really did it right!

It’s looking pretty good already, huh? But it was still not done yet!

 My vision was an older looking American Birdhouse. So I finally really attacked it, with my sand paper! I go to town, distressing.  I don’t know what it means, but I suspect distressing my creations gives me an unnatural level of joy.  Sometimes, I need someone around, to stop me. For me, this is when many things I make, really come to life, and become what I created them to be.

So, after Michael took away the sand paper, I did just a few more little things:  1) I dusted it all off with a soft rag.  2) I rubbed on a good coat of clear wax, and let that dry.  3)  Then, ever so tentatively, I added some dark wax too. I am so careful with that stuff, because it is powerfully staining!  I carefully and minimally applied it, to age it exactly to a specific, pinpointed year. (Ha ha…I have no idea what year, really….I’m just kidding. lol)  I’m not sure if you can even tell how much it was aged in these photos, with the effect of the dark wax, but it really was the final touch of perfection, for me to call it d-o-n-e.

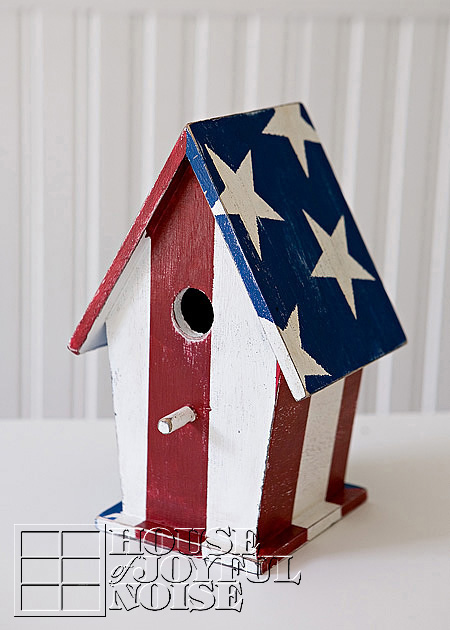
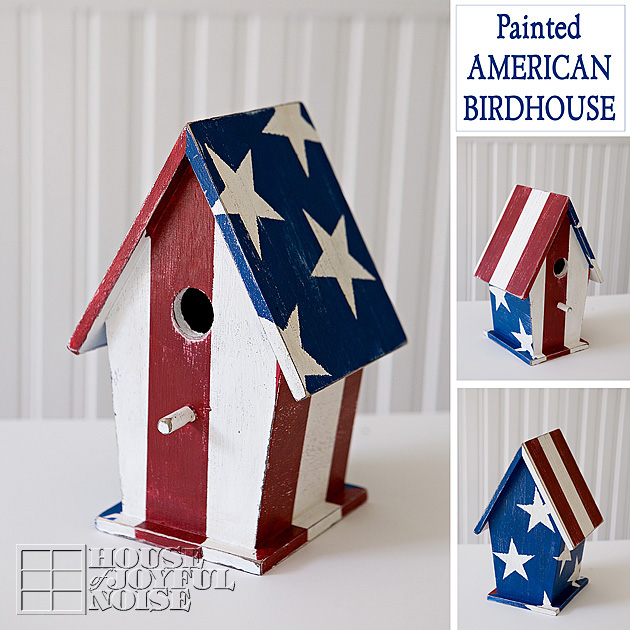
And here it is! . . . . . .


This is the front and it’s left side, obviously. But I tell you this for you to notice, how the stars wrap around from one side, diagonally, all the way to the other.  And the stripes do the same thing.

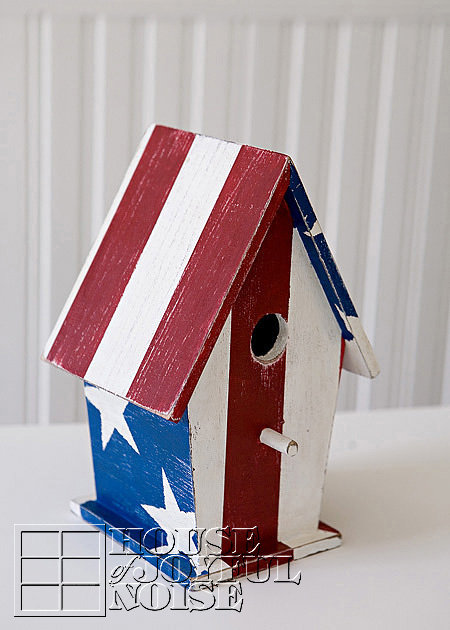
So I am about to show you all sides . . . . . .


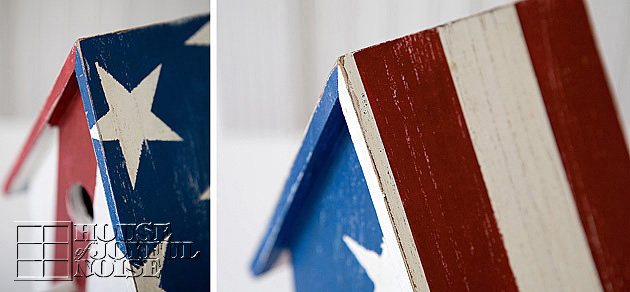
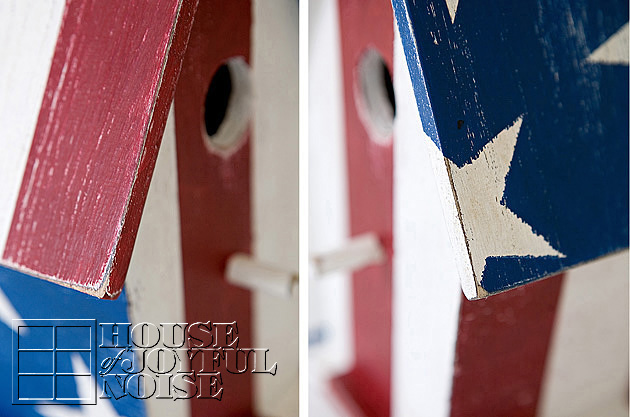
 Of course, I would love to show you close-ups of the detail in my distressing . . . . . .


It truly is what makes this an American Beauty, to me!

 I just love how it came out. Do you? You can bet your American bottom, I’ll be Pinning this baby!

Coming up soon here on the blog, I’ll be showing you where I put this, to be displayed for awhile this summer.

Tell us, do you had any special summer decor to your home this time of year?  We hope you have a moment to tell us about it, or say hello, before you ski-dattle! If not today, thanks so much for coming by! We’re always glad you did.


Save

Filed Under: Crafts & Creations, DIY (Do-It-Yourself) Project, Home Decor, Tutorial Tagged With: american-crafts, american-home-decor, american-projects, birdhouses, crafts, decorative-birdhouses, july-decor, july-home-decor, painting-birdhouses, painting-projects, patriotic crafts, red-white-and-blue-crafts, red-white-blue-decor, stars and stripes

Pinwheel Wreath | Tutorial and Decor

May 29, 2012 By Laura 19 Comments

017_pinwheel-wreath-300x214


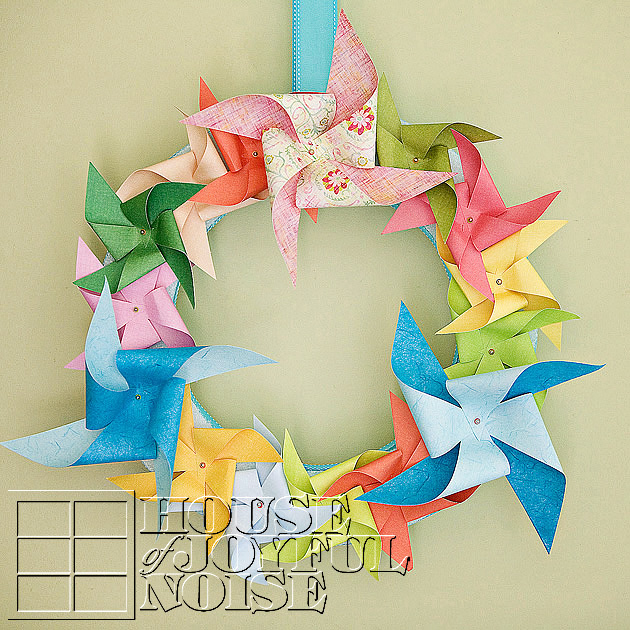
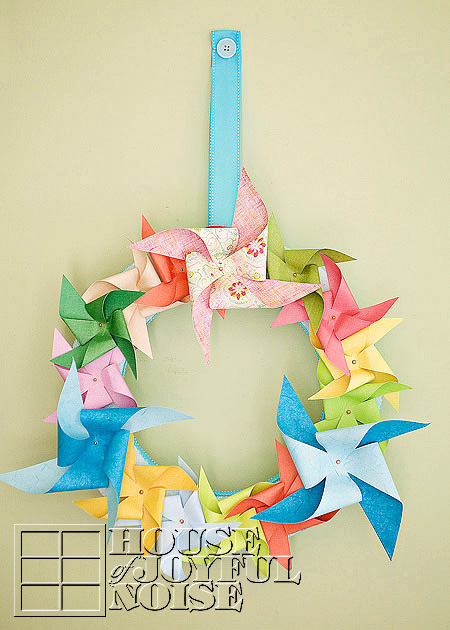
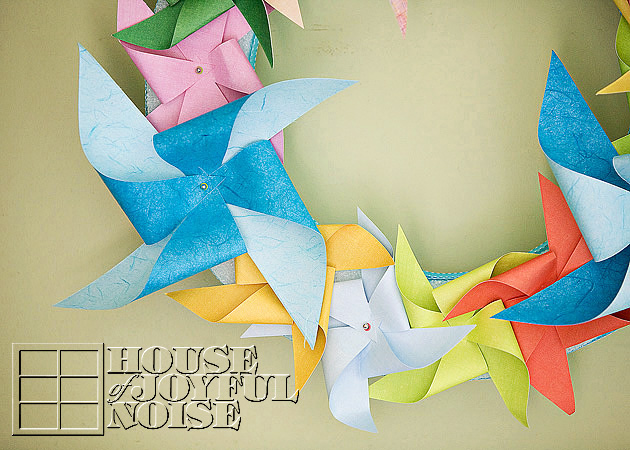
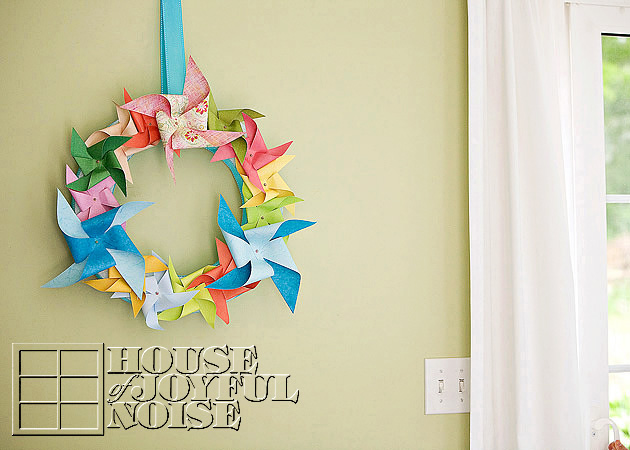
Is there anyone, who doesn’t love pinwheels? They are just so fun, so whimsical, and can give anyone that feeling of childhood joy as it spins, no matter how old we are.  I am so smitten with pinwheels lately, that projects involving them just keep popping into my head! This idea of a pinwheel wreath, however, has been on my brain since last year!  I wasn’t sure exactly how I would design it, but I figured it out as I went along, and the results just make me smile!  Just like I knew it would.

001_pinwheel-wreath-home-decor
What do you think?

I found it fun and easy to make.  They don’t spin, as this project was strictly decorative. But I’m already thinking about designing another one that works! For this pinwheel wreath however, I just wanted it to have a summer feel, with lots of pops of color, so I chose summer hues accordingly. But imagine all the different and fun color combinations that you could come up with! 

 Let me show you how easily I made this wreath.

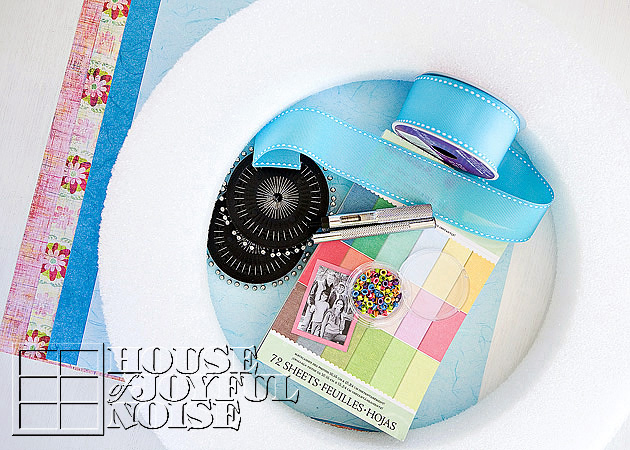
002_pinwheel-wreath-supplies
Supplies
Needed: 

**I got everything on this list at Michael’s Arts & Crafts**

  • a styrofoam wreath base
  • a pad of double-sided cardstock (called a Solid Mat Pad) -papers size 4.75 in x 6.75 in.
  • 4 or less double-sided designer 12×12 in scrap papers you love (heavier stock)
  • eyelet brads
  • eyelet setting tool set (had in my toolbox)
  • a small hammer (had)
  • long pins (- with the ball on the end. I got metallic ones.)

Optionals:

  • wide ribbon of choice
  • scissors, or a Fiskar Trimmer! (Which I highly recommend as a constant craft tool I have!)

___

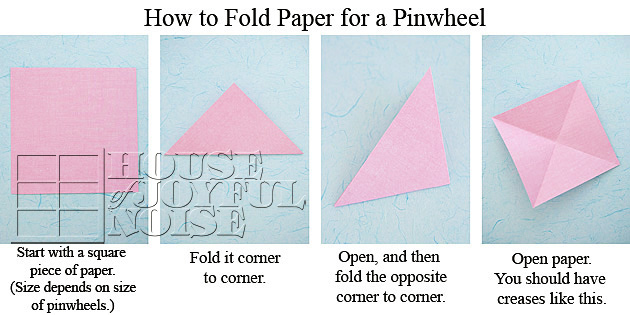
Next I am going to show you how to fold paper for pinwheels. But to start, you need your pinwheel paper in squares – size depending on how big or small you want your pinwheels. (You may want to experiment to decide that.)

The multi-colored pad of 2-sided paper I bought was 4.75 in x 6.75 in. So the easiest and fastest thing for me to do was to take 2 inches off, and make them square, at 4.75 in x 4.75 in.  So I had a little pile of those cut to size in no time (with my Fiskar Trimmer), and ready to fold.

04_how-to-fold-pinwheel-paper

As you may be able to tell in the above 3rd frame photo, I did not open the paper to make the second fold, the first time when I photographed this. But you should…..it’s easier and makes a nicer second fold.  I also zoomed in, so don’t let sizes fool you.  But looking at the 4th frame, I am sure you get the idea of how the folding needs to get done. It kind of looks like a little square kite!

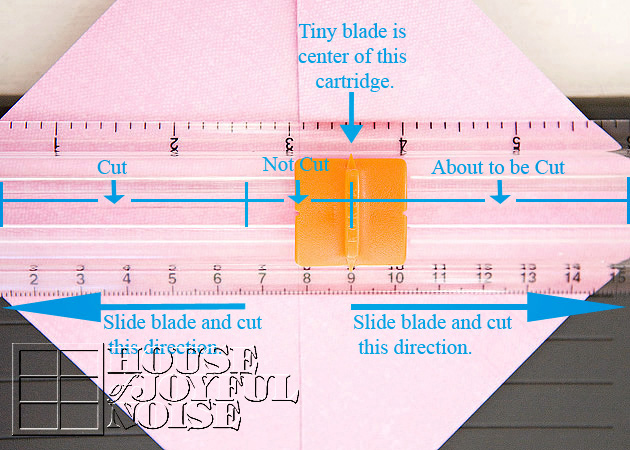
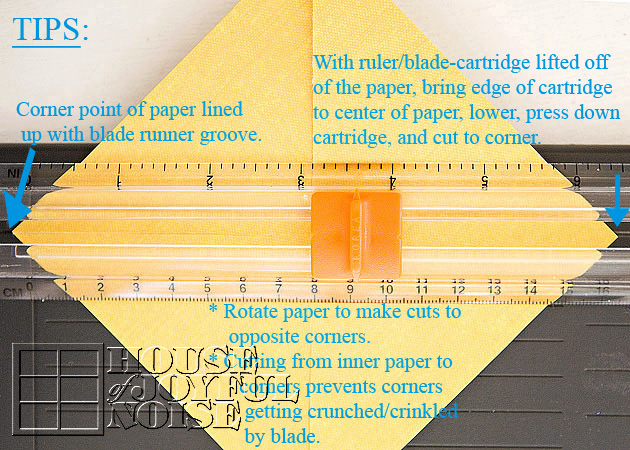
Next, is the cutting that needs to be done on the creases.  Now, you CAN just use scissors for this! Just be sure to note where you need to stop cutting.  There are 4 cuts on each square, and none of them go all the way to the center. But for mostly all of my craft paper cutting, I use my awesome (older model) Fiskar Trimmer.  In case you have one, or are going to get one for this craft, I have made some labeled photos with directions and tips here below, of exactly how you can cut them all quickly and easily. I hope they explain well for you.


005_how-to-cut-pinwheel-paper

006_how-to-cut-pinwheel-paper So if you just study these photos above and read the notes, you’ll find that cutting the square papers can be done in a zip! That’s what I love about the Fiskar Trimmer…….it’s fast, and the cuts are straight and perfect. I use it a lot!


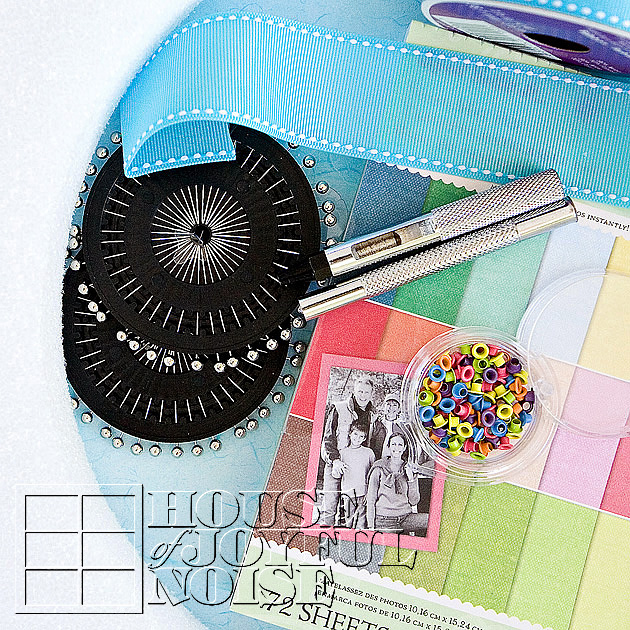
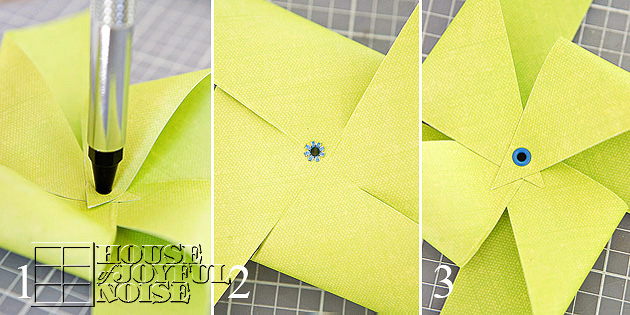
007_pinwheel-wreath-supplies In this photo above, I’d like you to take note of the eyelet setter tool set, and the pins.  I hope you are familiar with eyelet (brads) and the tools needed to set them?  They are used a lot in scrap booking as well. In a nutshell….a tip makes a hole in the paper for the brad to be put in.  The setter is used on the backside of the eyelet or brad, to ‘splay’ the metal open and hold it in the paper. You do this with a little hammer, and it’s fun!  You’ll see how it looks finished in a moment.


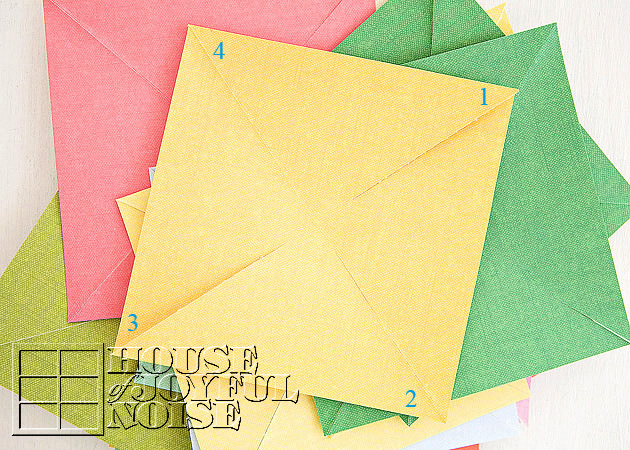
008_how-to-fold-pinwheel Here I have my little squares of paper all cut.  When folding a pinwheel, you need to bring every other corner to the center of the square. So I have numbered them to give you the visual of that.  Also, you can now get a good look at how the cuts do not go all the way to the middle, and about where they should stop.

I could not take photos of every step of this process, because it takes a lot of tight holding with very busy hands, and I couldn’t hold a camera too! But if you need to see how eyelet brads are set step by step with the hammer method, you can check this video here.  There are newer tool sets out on the market, that set eyelets or brads with a spring-action tool, and another method as well. You will see the options at the video link above, but the hammer method I use is demonstrated.


09_eyelet_brad_process-how-to-make-pinwheel

FRAME 1

Every other corner is brought to the middle, with the point quite passing the middle. Each corner overlaps the previous, and you really need to hold them all exactly in place.  Then, taking your eyelet hole puncher, you tap out the hole with the hammer on the top of the setter. With 4 layers of paper here, you really need to hit it hard a few a couple of time! ALSO NOTE:  Just like when using an ordinary paper punch, you don’t want to punch a hole off the edge of an of the papers. This can be tricky with 4 corners on top of each other! So be sure they are all in place before making the hole.

FRAME 2

The eyelet brad has been put into the hole, held in there carefully while flipping the pinwheel over, and the back of the eyelet has been hammered and ‘splayed’ (I like that word…lol) out, to hold the eyelet in place. Careful not to crush your pinwheel too much!

FRAME 3

What the finished eyelet looks like on the front.

Seriously easy as 1-2-3!  (On repeat mode. ; )

–

OHHHHhhhh….It’s about to get even more fun, now!

010_pinwheel

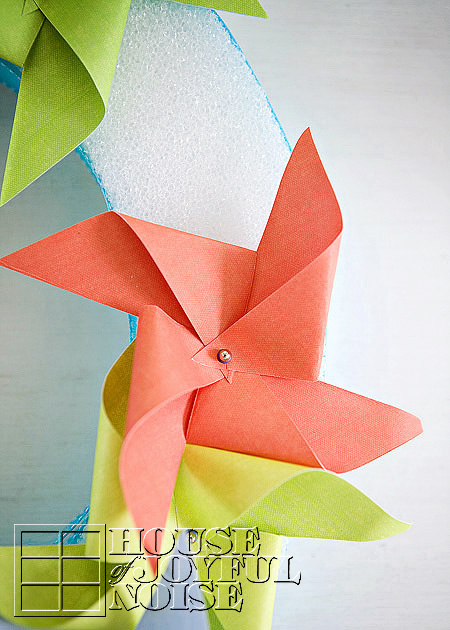
Taking your pins, and putting each one through the eyelet of each pinwheel, you can start pushing them into your styrofoam wreath!  The pins can be easily put in and taken out, so you can really play and see what you think looks good to you.  You’ll also get an idea of how many pinwheels you’ll need, and how many bigger pinwheels you’d like to use, if any. I added 3 larger pinwheels to my smaller ones.  The larger ones were made with 12″x12″ 2-sided designer scrap papers.


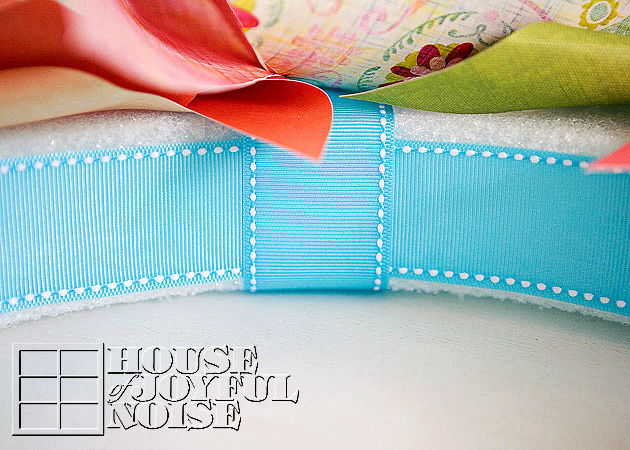
0111 Before you get all of your pinwheels put in and in place just how you’d like it, you may want to add ribbon to the inside and outside of your foam wreath.  I think the ribbon just makes the whole wreath look more finished.  There are different ways you can do that, such as wrapping and winding around the wreath. But I had beautiful turquoise wide ribbed ribbon that laid flat nicely all around the inside and outside, so I chose to do that.

To attach it, I used E6000 glue. Maybe not the best technique. But I squiggled it on, and spread it with some little ripped paper and let it get a tad tacky, before laying the ribbon down.  I was concerned it would soil through, but spreading it out and letting it set really helped, and it worked.  You may want to use hot glue, or just pin it all the way around. I was thinking….my metallic pins would have looked pretty cool.  Like shiny studs.

With the ribbon glued all around the outside and inside perimeter of the circle, I looped another cut piece to hang the wreath from later, before pinning all of the pinwheels in place.

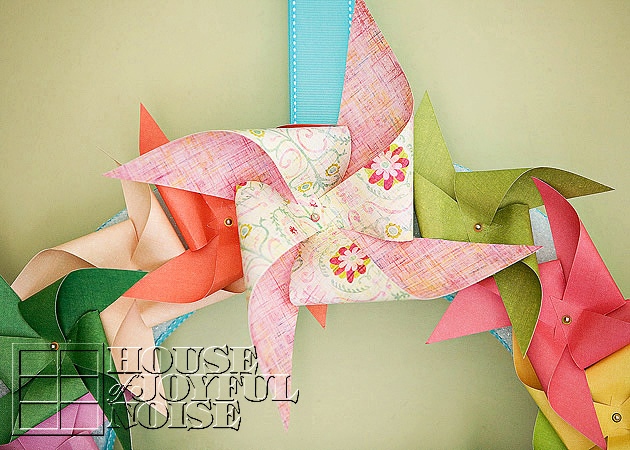
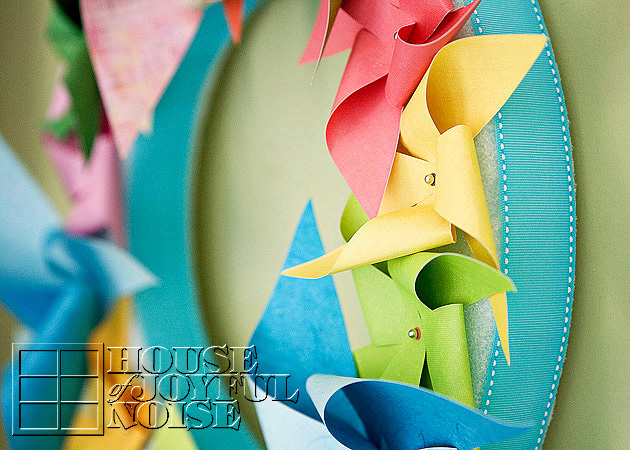
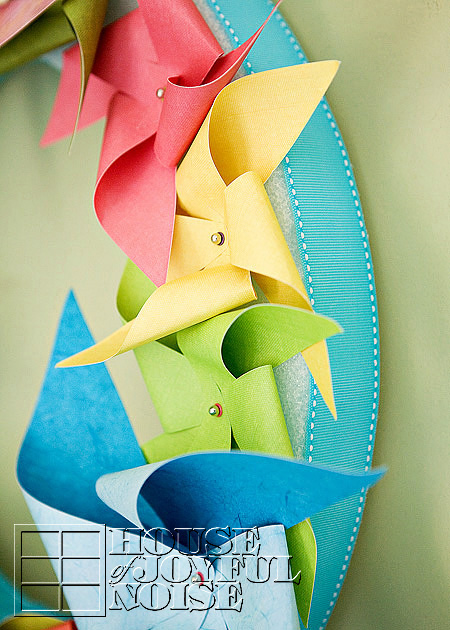
And that is the gist of how my pinwheel wreath was made!  Now you can just enjoy several photos of the finished project!

012_pinwheel-wreath-decor

013_button-ribbon-hanger

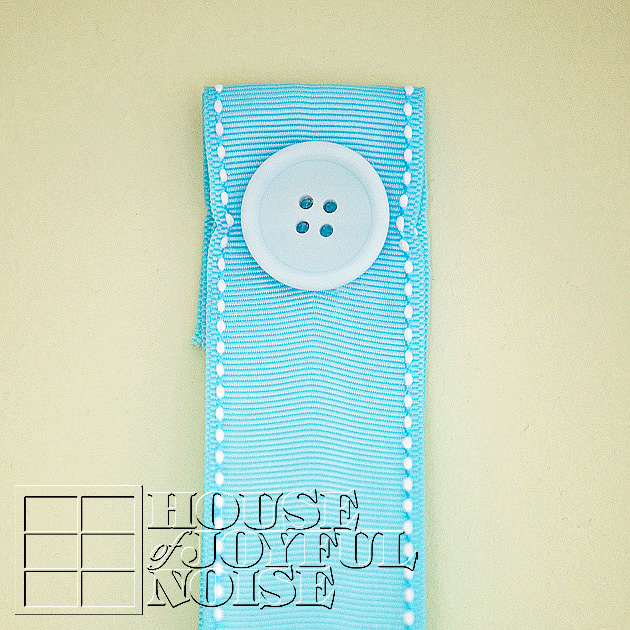
Ahhh yes…..My husband used a flat head nail, and nailed right through the ribbon to hang the wreath. Then, I just glued a big cute button on the nail head!  Love buttons!  I think it adds such a cute element, and I also really dig the white stitching on my pretty ribbon too.


017_pinwheel-wreath
014_pinwheel-wreath

015_pinwheel-wreath

016_pinwheel-wreath

018_pinwheel-wreath-decor My summer-fun pinwheel wreath is hung in our sun room, as a fun and cheery welcome on the wall right in front of anyone who walks into our home through our front door.   I not only love it, but our kids do too, of course!   I hope you are inspired to do a project as fun as this one.

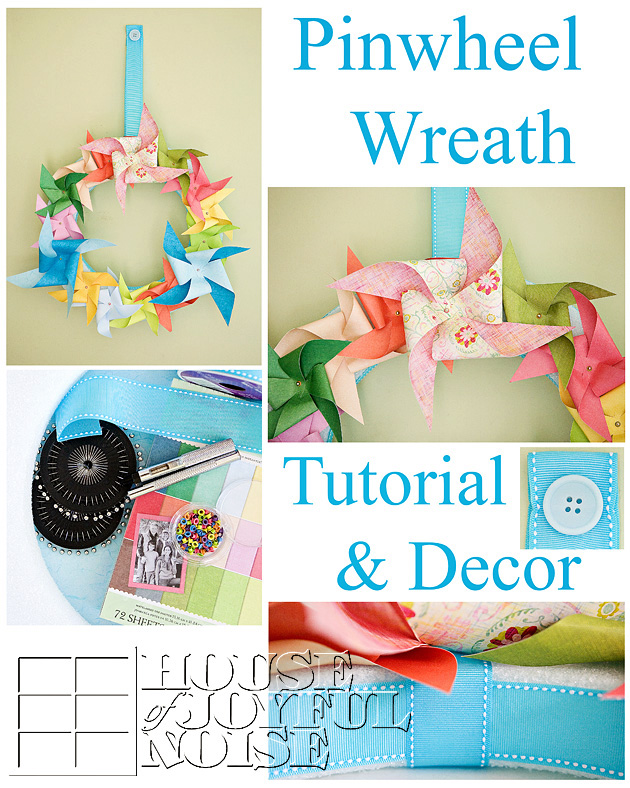
pinwheel-wreath-tutorial-decor Speaking of pinning, feel free to pin this collage to Pinterest, if you are on there! I will be!  We also have added a new ‘P’interest social button in the header, and I’d love it if you’d like to follow me on there as well!

I hope you enjoyed this tutorial.  I invite you to leave me your thoughts or questions! Happy Summertime!

* Come follow us where you are! Or subscribe!
> Buttons at the top of the right sidebar!


Filed Under: Crafts & Creations, DIY (Do-It-Yourself) Project, Home Decor, The Homestead, Tutorial Tagged With: craft-tutorial, crafts-with-double-sided-scrapbooking-paper, eyelet-brads, fiskar-paper-trimmer, home decor, how-to-fold-a-pinwheel, how-to-make-a-pinwheel, how-to-set-eyelets, pinwheel-crafts, pinwheel-tutorial, pinwheel-wreath, pinwheel-wreath-tutorial, summer-decor, summer-home-decor

Our Antique School Desks and Books

May 21, 2012 By Laura 20 Comments

001_chalk-old-school-desk-300x214

Lately, I’ve been putting time into some things I can’t speak much of, yet.  Well, I could. But there has been too many time in my life, when I have spoken too soon, about many things, that never really came to be, in the end. So I am finally starting to remember to keep my mouth shut about some things, until they are a little more certain! How about that, huh? I’m only in my 40’s.  Anyway, just so you know, I’ve been more creatively productive than it has seemed lately. ; ) Doesn’t it bug you when people speak so vaguely? Me too. I’m sorry. I do hope to share  more with you all, soon.

But today, I wanted to show you a couple of home treasures of ours, that I love.  They are some old little school desks. If you like antiques, and/or you like old school things, you may find these pieces interesting.

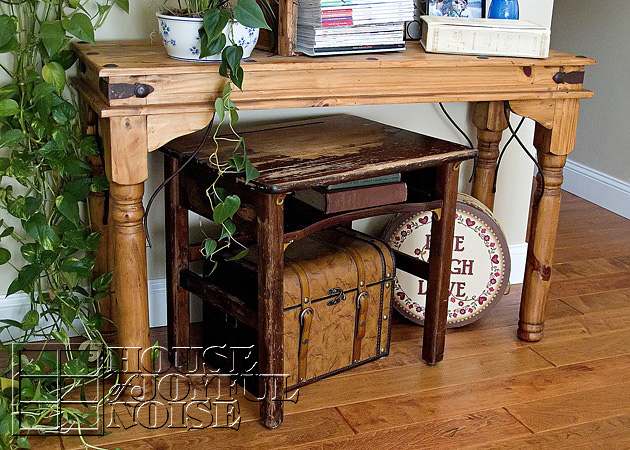
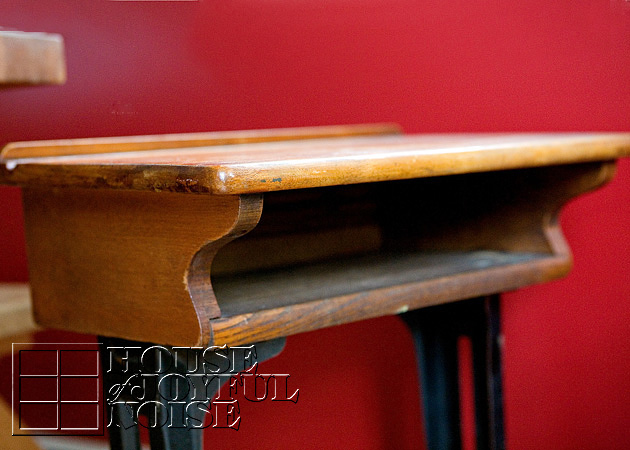
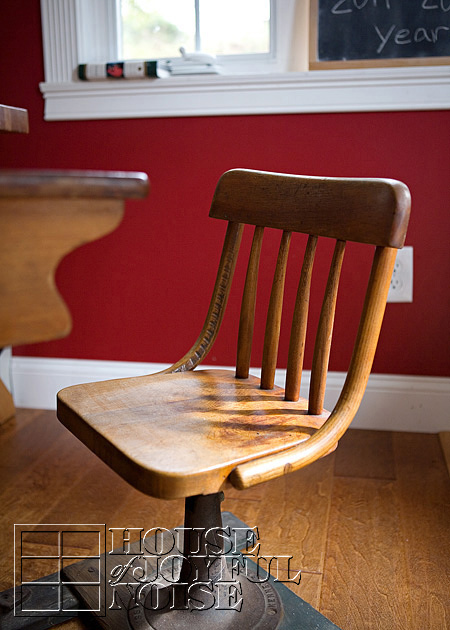
002_vintage-antique-school-desk This first school desk is one my husband, Michael, picked up at a yard sale he stopped at.  He saw it, and knew I would love it.  Because I not only love antiques, but love all things ‘old school days’ related! He paid $15 for it, and once he did, the seller told him it was made around 1932.   It’s all solid wood, and pretty small, as it seems most school desks were back then.  As you can see, I just have it set tucked in under a wall table.  


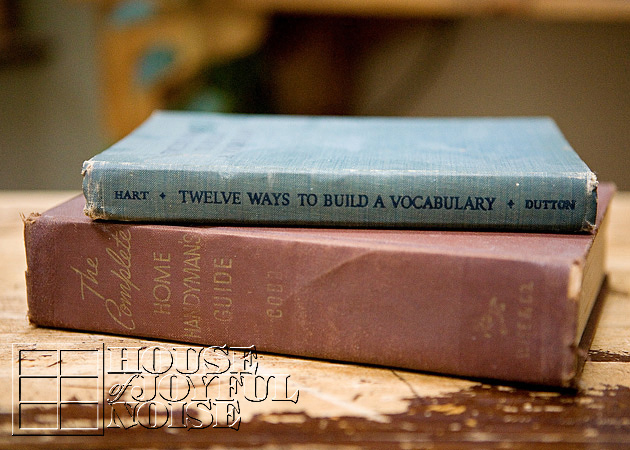
003_antique-books Just inside the desk, are these two really old books.

004_antique_vocabulary-school-book

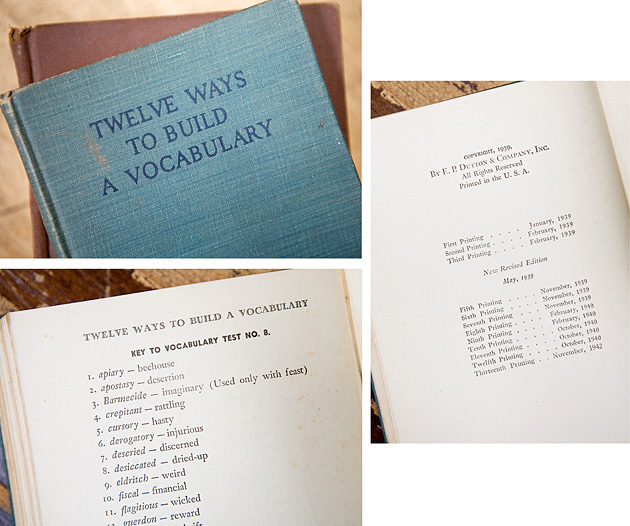
This book, Twelve Ways to Build a Vocabulary, is by Archibald Hart, with a foreword by Johnson O’Connor.   I came across it at a tag sale, on a table with a lot of other books, and bought it for $1.00!  The kids and I love vocabulary, and this book is just interesting to read through.  Printed in 1939, it has an old worn linen cover, fragile binding, and yellowed pages throughout.


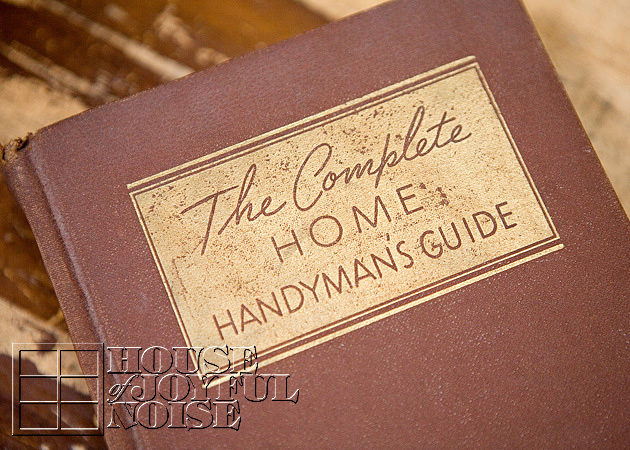
005_antique_handyman-book This one, titled The Complete Home Handyman’s Guide, was Michael’s grandmother’s.   I couldn’t tell you if she ever read it, but I did have the blessing of getting to know her in the years before she passed, so I can tell you this much; she was as good as any handyman around!  She did all of the work of the greatest of handymen, and well into her 70’s!   Michael said he grabbed this book out of a box of others his parents had. It was printed in 1948.

We have other wonderful old books in our home as well. Some more meaningful than others. But all of them make my nose tingle, when I flip through them. What’s up with that?

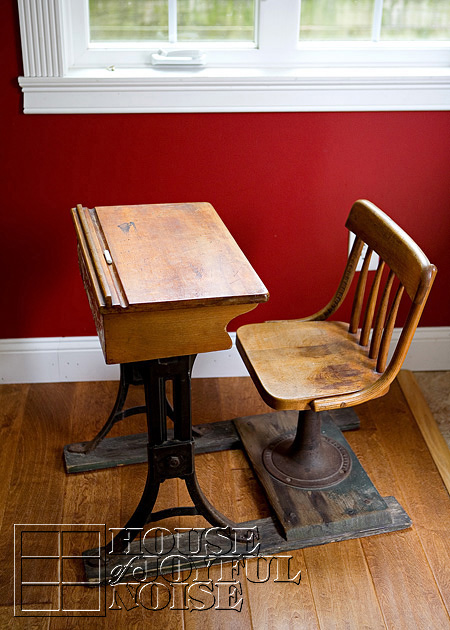
006_antique-vintage-school-desk-kenney-bros-ang-wolkins
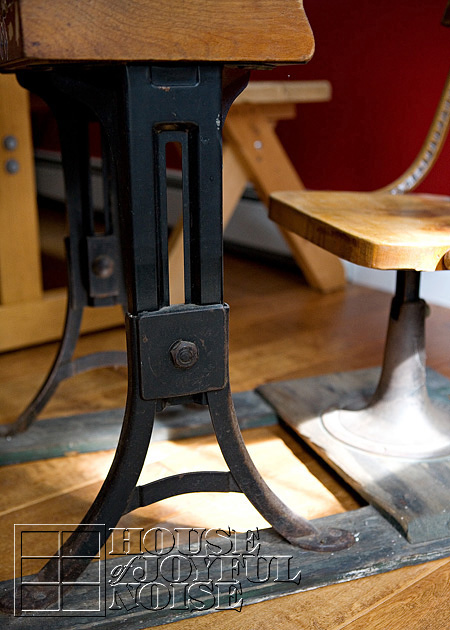
Our second desk is a little more sentimental.  Michael used this desk as a little boy.  He tells me that it originally came from his aunt’s home, who had 5 girls.  He recalls when he was little, that they had about 3 of these little desks, as well as teacher’s desk.  They did not home school, but just used all of the school furniture in the playroom, to pretend with.   At some point, one of them ended up coming to Michael’s family’s home, and he used it in his bedroom, while he was in early elementary school.


007_antique-vintage-school-desk-kenney-bros-ang-wolkins

Through the years Michael and I were dating, Ido recall seeing it in his parent’s basement. It was of no interest to me at the time. When his parents sold their home and moved away, Michael took the desk, and it then sat in our own basement for years. Eventually, I fell in love with home schooling, all things from old schooling days, and antiques in general. When I remembered we had this old school desk of Michael’s in the basement, I couldn’t wait to bring it upstairs!


008_antique-vintage-school-desk-kenney-bros-ang-wolkins

Although I have to admit, we truly have no room for it in our school room, and it is constantly in the way! It’s far too small for any of our kid’s to really use. And believe it or not, it’s heavy! Still, I love to see it.  It’s charming, isn’t it?

Well, most of it. There is a reason I have only showed you the desk on this angle, so far.

Here, let me show you the other sides……

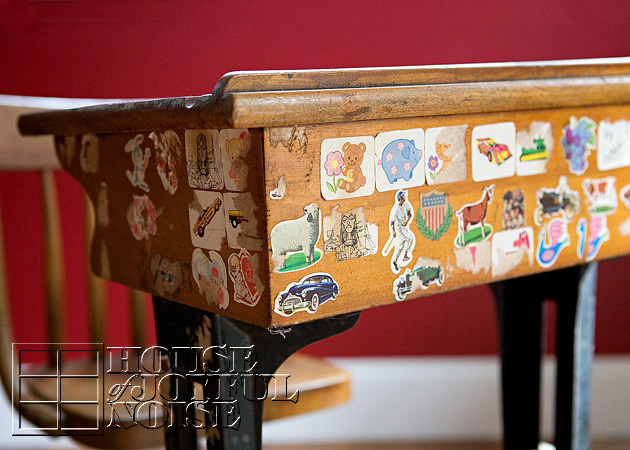
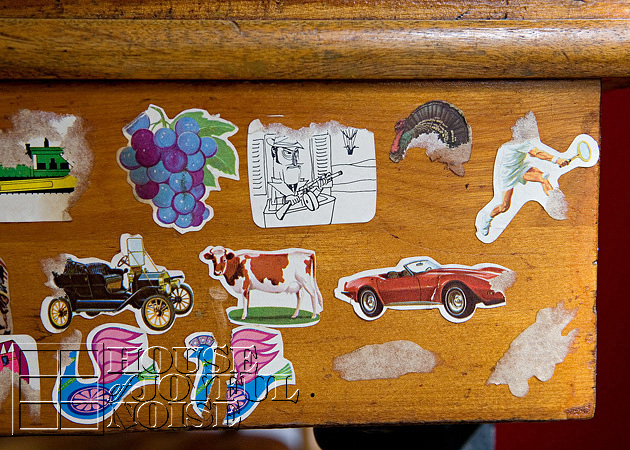
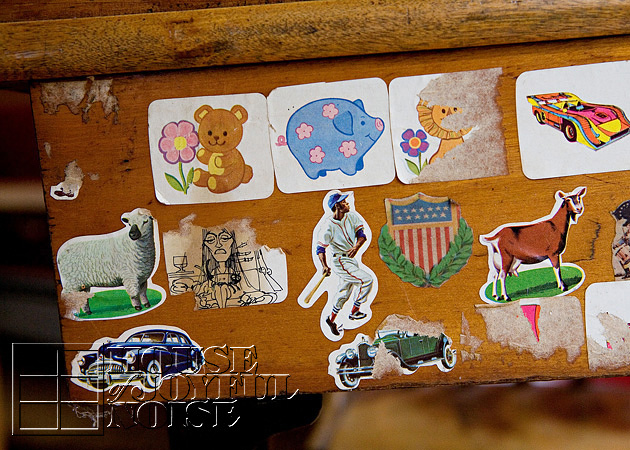
009 Can you believe this mess? Guess who did this? Michael! When he was little, and the desk was his in his bedroom, he put all of these stickers on it. He says they were the stickers he got in school from the teachers, and when he came home, he would put them on his desk.


010 I think for the years this desk was in the basements at his old home and ours, the stickers is all I saw when I looked at it. It’s pretty much baffling to me. I have always told my kids, “We only put stickers on paper! Never on walls or furniture!”. Guess Michael never got that memo.  Even the kids were like, “DADDY did that? Oh my……gosh!”.


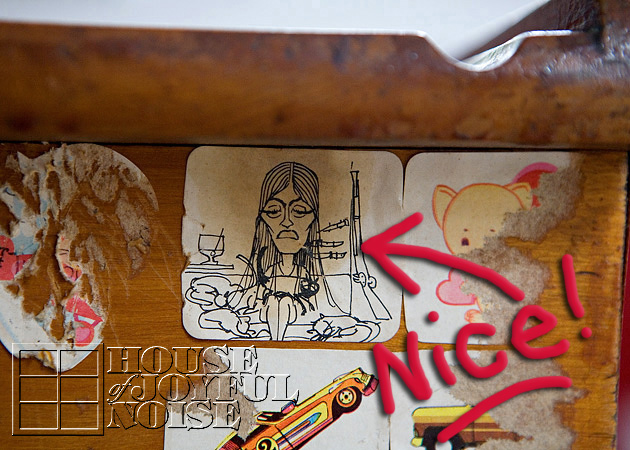
011 I told Michael, “Guess who’s cleaning them off? I don’t care if you’re 43 now.” ; )  Of course, they are still on there, so far.  He’s not that afraid of me, much. But I haven’t really put my foot down yet either.  In a way, I find it endearing to know he did all of this as a little boy. I bet he was so cute. And now we have the whole piece in our home, with 4 of his own little children.  But then, did you really look at all of the stickers closely?…..


012 What-in-the . . . . . .  Really?  A teacher was passing these out in school?  Lord have mercy. That’s a little disturbing. Don’t you think?  I don’t even get it. What does it mean?  I do know, that every time I look at it, I look for the woman’s arms. Where are her arms? Further disturbing.  Yeah, he needs to clean these off.  It would be nice cleaned up and refinished to it’s natural state anyway. Meanwhile, I keep this side turned to the wall.


013_antique-vintage-school-desk-kenney-bros-ang-wolkins

Another feature about this desk, is that it’s on boards.  I guess they used to screw the desks to the floor, so the kids weren’t moving them all over the place.  Or something.  I just tell mine to sit still. Anyway, this desk is so different than our other one we showed you, that is all wooden. Isn’t it?


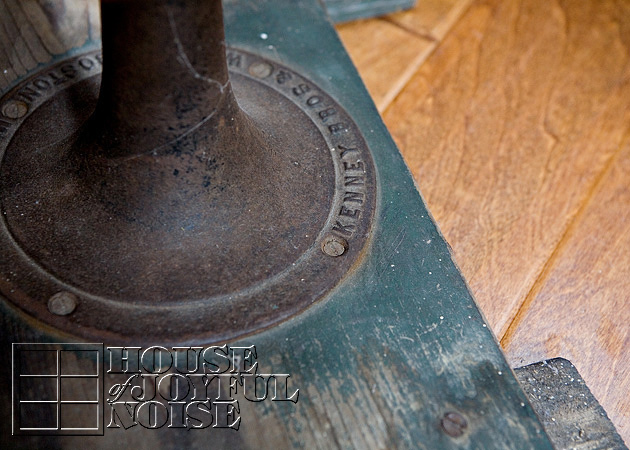
014_antique-vintage-school-desk-kenney-bros-ang-wolkins I have no real year of this desk, but we can see on the base that it was made by Kenney Bros. and Wolkins, a manufacturer in Boston.  I did some research online and looked at hundreds of photos of old desks, but never found any just like the two we have. Still, I don’t imagine they are anything that unique or valuable in worth.  They are kind of special to us though, and that makes them worth something.

Could you tell us anything about the two desks we have here?  Do you enjoy antiques, or love old school pieces too? I really do. I bet there are other home schoolers who do, too.  If not, we hope you at least enjoyed seeing ours, today.  Thanks so much for coming by, and visiting us.


Save

Save

Filed Under: Home Decor, Homeschooling, Language Arts, The Homestead Tagged With: antique-school-desks, antique-school-furniture, antiques, archibald-hart, decorating-with-antiques, home decor, Home Schooling, homeschooling, Kenny-Brothers-and-Wolkins, old-books, twelve-ways-to-build-a-vocabualry-book, vintage-finds

How We Used a Unique Medium to Letter/Embellish Our ‘Doors To Storage’! (A Tutorial)

October 27, 2011 By Laura 5 Comments

09_wood-monogram-214x300

Our Doors to Storage home project, has been a bigger hit than we ever dreamed!  I’ve even run across it on Pinterest a few times now! CraZy-Ness!   Well, we knew there would be people who thought it was a pretty cool idea, out there somewhere. But we’re glad so many have loved it, and what’s more, have been inspired to make some benches and shelves, using old doors, in their home.  Sharing and inspiring is what ‘s all about, people! Love it!


07_bench-message
That project post was big enough as it was, so we told you were would share how we went about embellishing the bench with lettering in a future post, and this is it! : )   I apologize that it took a little while here.  The last quarter of the year gets a little busier with my photography business (in addition to our normal schooling & practice/game schedules and l i f e.)  It’s a fine line between keeping the blog going, and getting fired by my clients. ; )    But you know I always come back around.  Thanks for sticking with us.

02_lettering-stencil
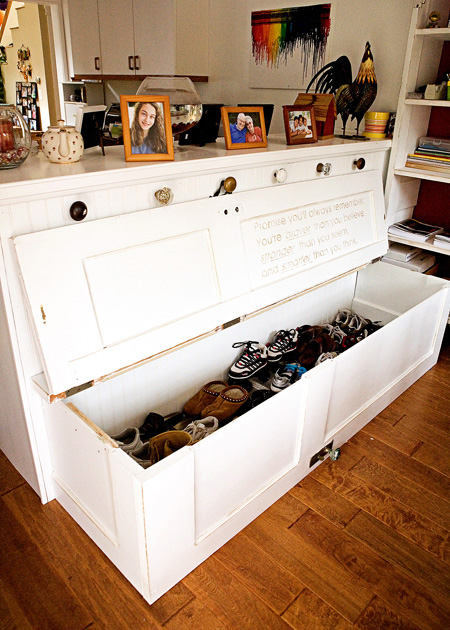
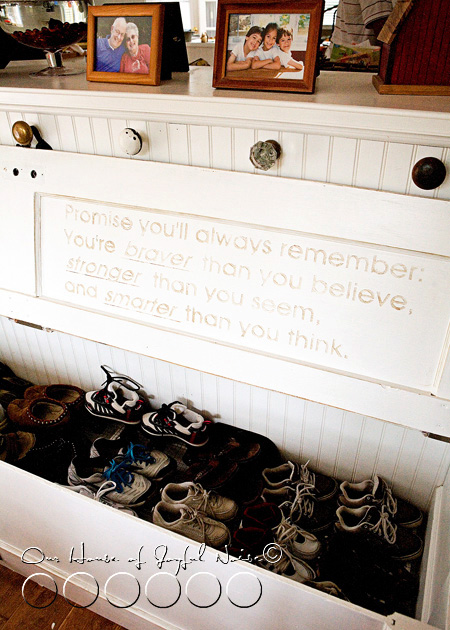
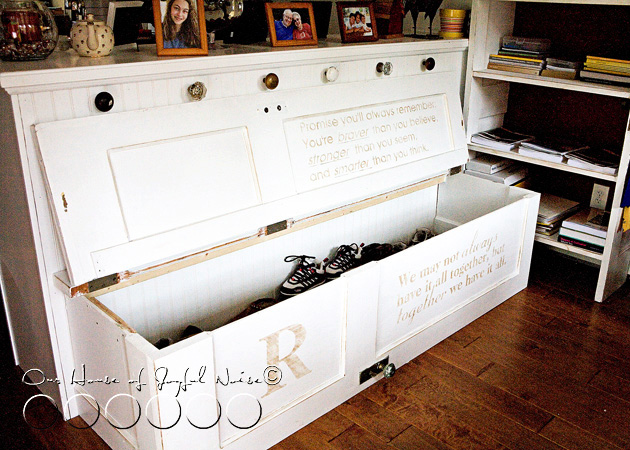
The first lettering was to be applied on the inside of the bench, to be seen when the bench seat was open.

To start, we laid out our lettering in a design program in the computer, and cut a mask out.  Michael has been a letterer (of large company trucks, signs, boats and windows) since we met (in art school.)  So he has a program of his own, and a huge plotter/cutter machine.  But I know many of you crafters  have similar little machines now. (Silhouettes, Cricuts, etc).   This can be done with that equipment as well.
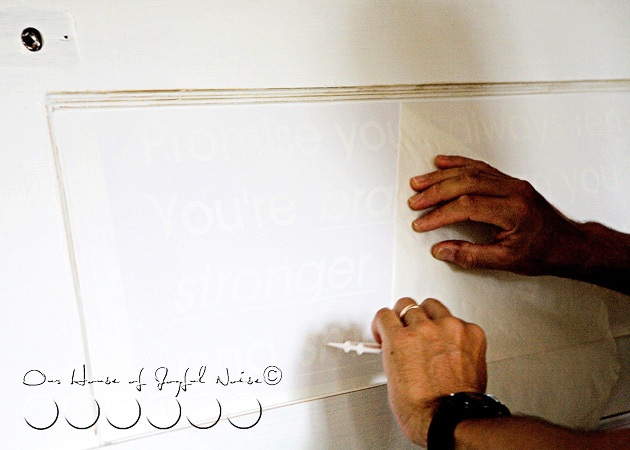
After weeding the letters out of low-tack vinyl we used, and covering it with transfer tape, Michael peeled off the backing and applied the mask centered, onto the inside of bench panel.

I wanted the lettering itself, to be subtle-ish.  Under-stated, and worn-looking.  So rather than painting in the lettering, I had the idea to try using something in a whole new way…..

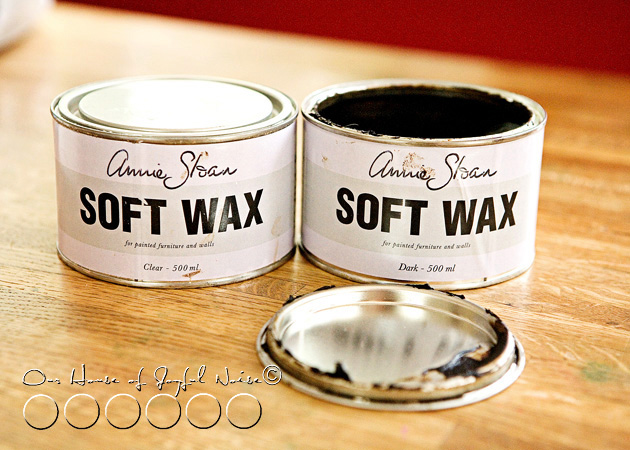
03_annie-sloan-wax-use Annie Sloan Waxes. Both the Clear and Dark.

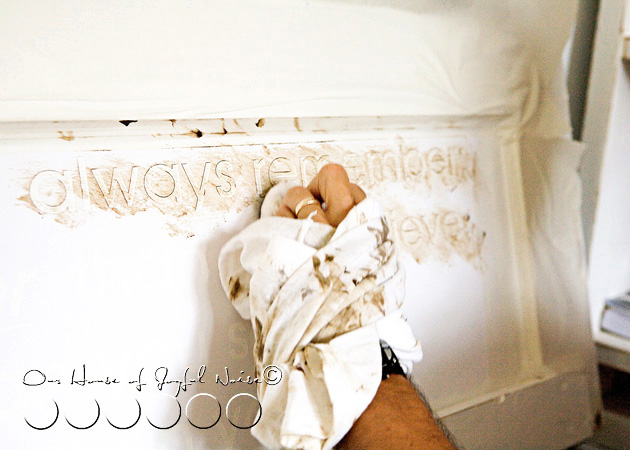
First, with a soft old t-shirt, we rubbed a thin layer of the clear wax all over the cut out letters of the mask, and really rubbing back off, all we could.  The reason we did this, is because we didn’t want the dark wax to overly stain the white door, to a point that it came out too dark and unable to remove.  Applying and rubbing off the clear wax, would allow us to control how much of the dark we rubbed off.   Because again, we wanted it light and subtle lettering.


04_lettering-mask Then, we applied the dark wax.  But this time, as we applied it, we did so in one slanted direction, to try to (and try is the key word in this project, lol…) simulate light.  We really used very little dark wax, pretty much trying to wipe most of it back off. We also intentionally had darker and lighter areas of lettering.


05 Then we carefully removed the masking, and this is how it came out!  So why the inside of the bench, you may be asking?


06_bench-message

The quote is a message specifically for our kiddos. A subliminal message of sorts, for our kids to read and remember, every time they get their shoes. (And if they know what is good for them…..put them away too. ; )  Now who’s quote is it?  Apparently, it’s something Christopher Robin once said to Pooh Bear.  Now I’m all for quoting and giving credit to the authors of such wise words.  But, let’s be honest here. Christopher Robin is not real, and neither is Pooh Bear. (I hope I didn’t just ruin anyone’s reality saying that out loud.  Yikes!).  The thing is, I just didn’t want it to say “Christopher Robin” on my bench. You know?  I’m not hiding, that he said it first.  I’m admitting it right here and now.  I just didn’t want to complicate the power of the message, with such….characters.  It is indeed wise words though, that I would like my children to remember. So I am borrowing them.

Thanks, Chris.

07_bench-message
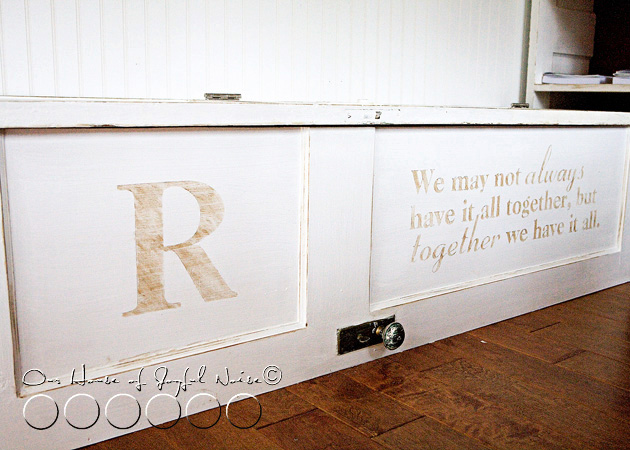
Of course, we wanted to have some lettering design on the outside, as well.  This time, we did so on the panels of the front of the bench.


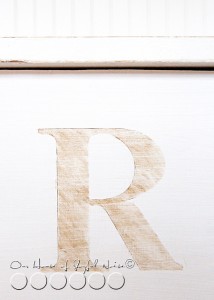
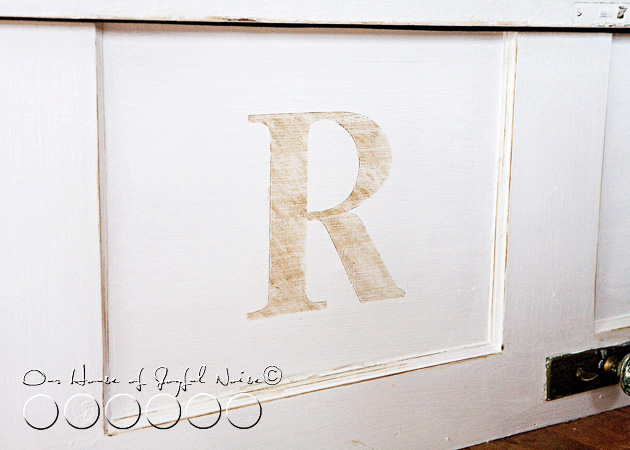
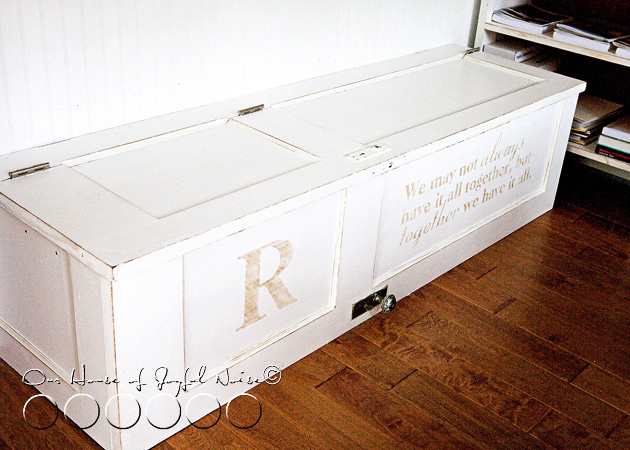
08_bench-monogram In the first smaller, more square-ish panel, we very simply monogrammed with our last name initial.


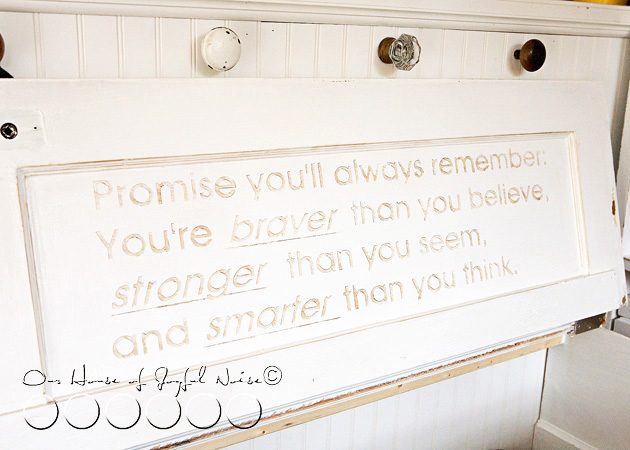
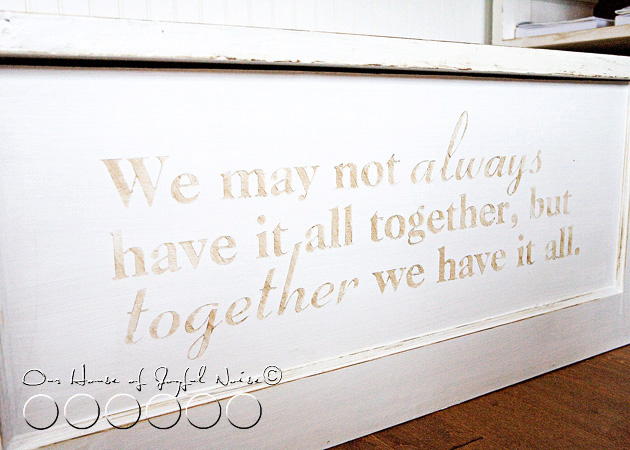
10_home-personalizing Continuing to use the same techniques, beginning to end, this is the saying we chose for the longer, more rectangular panel.   It was so hard, choosing which quote/saying, to use!  There were so many I wanted to.  But we had to keep in mind others coming into our home and reading what it said as well, (lol…), and we had to narrow the options down to one.    This was the one that won.

True ‘Dat!


11_unique-storage-bench A look at the entire front, complete.

12_home-bench I like it, I like it!  You?

13_doors-storage-bench
We’ve had our storage bench now for a couple of months, so we can officially say, it has worked out really really well!  It’s been the perfect solution for us, actually, to keep our daily-used family shoe collection in (out of sight), and the shelving next it has been so efficient for our school supplies. The door-knobs have been handy and quick for the kid to hang up their outerwear, as well. Overall, it was not only a big, fun project, but we think it all adds another unique feature to our home, and the lettering just further personalizes it.

So, now that we’ve tested this new idea out, you can consider wax, as another medium option, for subtle lettering/designing some surfaces.  I think it really has a nice tea-stained look to it, on this project, that’s appealing.

Have you ever used a medium, in a different manner, than it’s actual purpose?  What was it, and how did it come out? Tell us about it! (And share a link, if you’ve got one!)

* * * * * *


Save

Save

Filed Under: Home Decor, Home Improvement, Home Projects, Organization, Re-Purposing, The Big Picture, The Homestead Tagged With: embellishing, embellishing-how-to, embellishing-tutorial, lettering-home-decor, lettering-storage-bench, lettering-with-wax, tutorial, use-for-annie-sloan-wax, vinyl-cut-project

  • « Previous Page
  • 1
  • …
  • 7
  • 8
  • 9
  • 10
  • 11
  • …
  • 15
  • Next Page »

We are wicked happy to have you here! We hope you find much inspiration, help, humor and enjoyment here.


Archives


POPULAR POSTS

* * * * * *

SUBSCRIBE to House of Joyful Noise blog! Every new post, delivered right to your email box!


Privacy Policy

Amazon Affiliates

Never at any additional cost to you, we may earn a small commission for our endorsement, recommendation, testimonial, and/or link to any products from our website. Your purchase through our links helps support our family, while sharing with you the products we authentically use and recommend, for various ideas, and letting you know where you can purchase them. Thank you for your support!

[footer_backtotop]

Copyright © 2026 HouseOfJoyfulNoise.com · Genesis Framework by StudioPress