• HOME
  • {A}’s Chipmunk Training Archives

 Homepage

  • The Homestead
    • Home Projects
    • Home Improvement
    • Home Decor
      • Seasonal Home decor
        • FALL Home Decor
        • WINTER Home Decor
        • SPRING Crafts and Creations
        • SUMMER Crafts and Creations
    • Our Chickens
    • Gardening
    • Organization
    • Re-Purposing
    • Furniture Refinishing
    • Budget
  • Crafts & Creations
    • Seasonal Home decor
      • FALL Crafts and Creations
      • WINTER Crafts and Creations
      • SPRING Crafts and Creations
      • SUMMER Crafts and Creations
    • DIY (Do-It-Yourself) Project
    • Kids Arts and Crafts
    • Homemade/Handmade Gift Ideas
    • Holiday Crafts
    • Fan Pulls
    • Free Printable/Downloadable
    • Sewing Projects
    • Giveaways
    • Business Features
  • Recipes/FoodFun
    • Breakfast
    • Lunch
    • Main Dish
    • Sandwiches
    • Appetizers
    • Slow Cooker
    • On The Grill
    • Side Dishes
      • Soups
      • Salads
    • Baking
      • Breads, Rolls and Muffins
    • Snacks
    • Treats
    • Desserts
    • Drinks
  • Homeschooling
    • Elementary Homeschooling
      • Elementary Homeschooling READING
      • Elementary Homeschooling MATH
      • Elementary Homeschooling LANGUAGE ARTS
      • Elementary Homeschooling SCIENCE
      • Elementary Homeschooling HOME ECONOMICS
      • Kids Arts and Crafts
    • Middle School Homeschooling
      • Middle School Homeschooling SCIENCE
      • Middle School Homeschooling HOME ECONOMICS
    • Language Arts
    • Math
    • History / Social Studies
    • Geography
    • Foreign Language
    • Field Trips
    • Games
    • Nature Study
  • The Big Picture
    • Life In General
    • Celebrations
    • Faith
      • Into the Light; The Series
    • Giveaways
    • Reviews & Sponsors
  • Photography & Lettering
    • Photography
    • truck lettering
    • vehicle graphics
    • Newborns
    • Kids
    • Engagement
    • High School Senior Pictures
    • High School Senior Pictures Sneak Peeks

Jalapeno Jack and Cheddar Macaroni and Cheese Recipe

September 11, 2013 By Laura Leave a Comment

Do you have a recipe that you are known for?  You know…a recipe that others consider ‘yours’.  Maybe one that’s requested by others for family and friend gatherings, with such expressions as, “Oh, can you make and bring your ___________?”. 
My mother was known for her baked beans.  Some even called them “Jean’s Beans”.  My husband is already known for his homemade pizza; which is actually his family’s recipe, handed down.

I wondered for some years if I would ever have a recipe others thought of as ‘mine’, until I did. My Jalapeno Jack and Cheddar Macaroni and Cheese!  Granted, I think it might only be my own little family here who knows of and requests my fabulous macaroni and cheese but hey….we all start small. And home is always a heartfelt place to start.   Oh wait, come to think of it, I did make a huge batch of this Macaroni and Cheese (double this recipe=LOTS) to our friend’s 4th of July bash this year; and not only were people eating it up, but she messaged me at 11 p.m. that night to tell me she was eating the leftovers.

But I’ve never given anyone the recipe until now. I’m happy to share it with you; our following-friends.
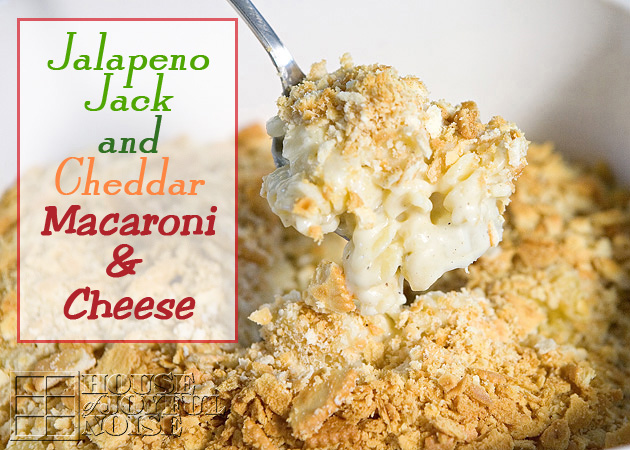
(You will want to save this recipe, so you might as well Pin this post with the photo above, now. 
There is a printable recipe at the bottom, that you can come and get anytime.)

Whether served for dinner after a brisk day, on a football Sunday afternoon, or just because you need some (it happens….right?), my recipe, Jalapeno Jack and Cheddar Macaroni and Cheese, is the epitome of comfort food. Mine has a little *kick* to it, because of the jalapeno jack cheese. (I also had extra black pepper to it. We love our black pepper.)
Make it once, and you may find your loved ones keep asking for it again and again, too.

I’m just going to walk you through the steps here as a visual aid, and then I’ll give you the printable recipe at the end of the post.
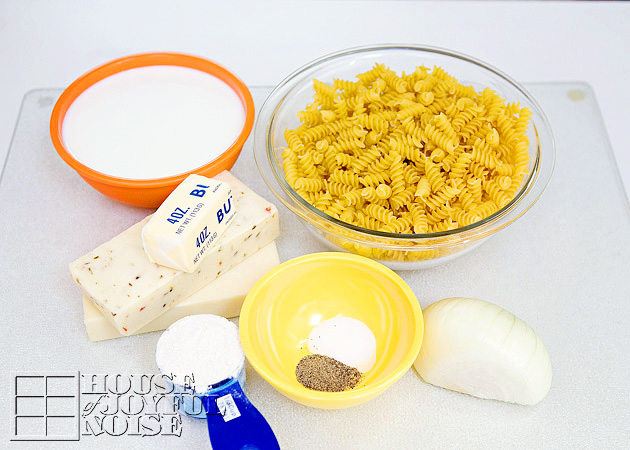
Participating Ingredients
1 box/lb. Rotini Pasta
1/2 stick or 4 Tbs. of Butter
1 medium. Onion, chopped
1 Tsp. of Salt
1/2 Tsp. of Black Pepper
1/3 C. of All Purpose Flour
3-1/2 C. of Milk
8 Oz. of Jalapeno Jack Cheese; rough into small blocks ~ 1-1/2″ or so
8 Oz. of Sharp Cheddar Cheese; rough into small blocks ~ 1-1/2″ or so

Also…..
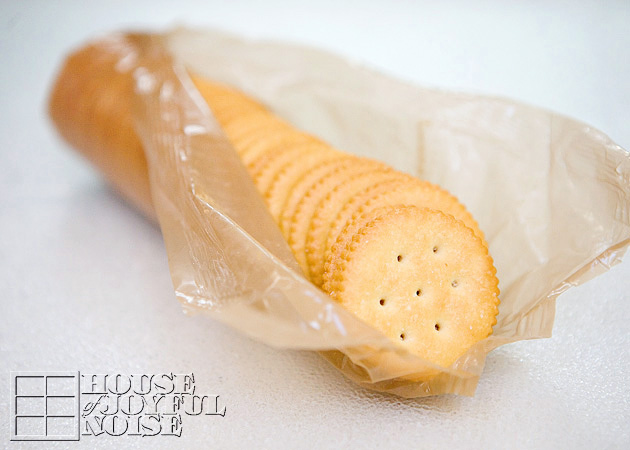
  . . . . a sleeve of Ritz Crackers.

Place the crackers in a zip lock bag, and seal it, removing any air as best you can.
Then just crush the crackers all up.  Any bits of bigger pieces is fine. See photo above? Good enough.

Bring a sauce pan of water to a boil and cook pasta to al dente;  7 minutes, and drain.  Put pasta back in (same) rinsed pan.

But while you are waiting for the water to boil . . . .
In a skillet over medium heat (stove depending), stir butter, chopped onion, salt and pepper until the onion is tender, and appearing more translucent. 
 
*Slowly sift in flour, blending it in to the mixture as you go. 
*This will be the hardest part, because the mixture gets dry and crumbly, and it’ll really seem like you don’t need any more flour, when you still have lots to sift in. Just keep working with it. Add a little more butter if you feel you need to, but use at least most of your flour. Because remember, this is the base of your cheese sauce you’re about to make, and the flour adds to it’s thickness.

Next, and not shown in photos, once the flour is all mixed in, remove from the heat and slowly pour in your milk, stirring as you do.
Place back on heated burner, stirring constantly, and bring just to a boil.
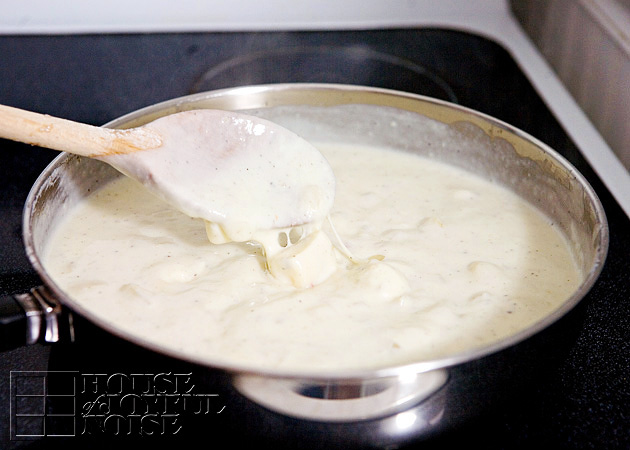
 Remove from heat again, and add all of your cheese cubes.  Stir immediately, and place back on heated burner.
Continue to stir until all of the cubed cheese is melted.  (Don’t confuse the other lumps with your onions. 😉

— This is a good time to preheat your oven to 375º. —
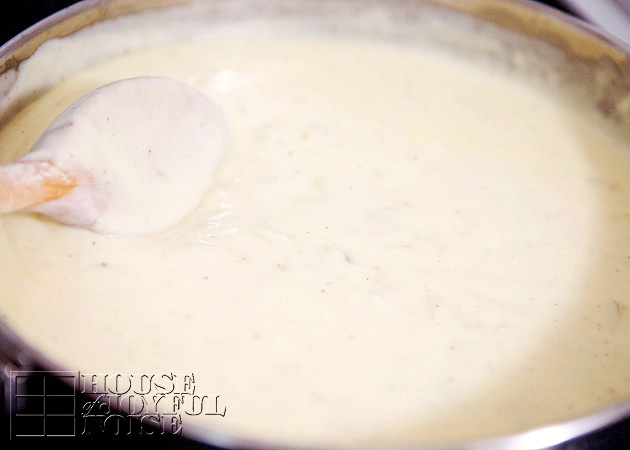
Cheese sauce will be nice and smooth.

Pour all of your cheese sauce into your pan of pasta.
Scrape out every last bit, and mix with the pasta well.

Pour all of macaroni and cheese mixture into an ungreased 1-1/2 or 2 qt. casserole dish.
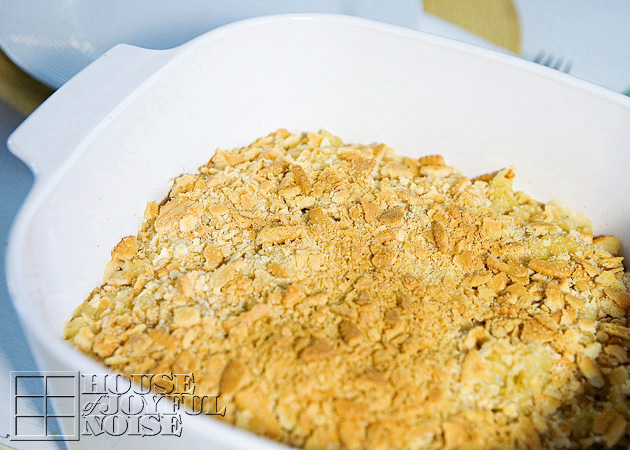
(Seen in photo above is a 2 qt. casserole dish.)
Then sprinkle the crushed crackers all over the top, covering it well.

Bake uncovered at 375º for 20 minutes.
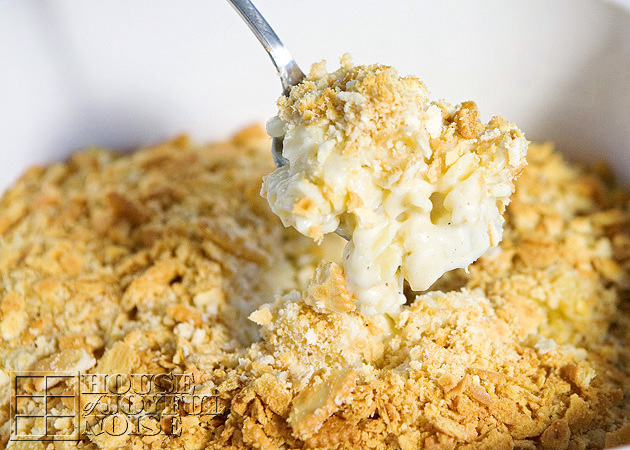
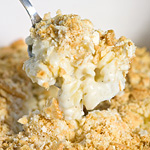
Look at that!  Creamy and cheesy and soooo good, you can only imagine, until you try it!
Serve, enjoy and be ready for rave reviews!
This dish also reheats well. (If you have any left.)

The buttery Ritz crackers have a slightly sweet taste in complimentary contrast to the slightly spicy macaroni.
The heat does build in your mouth some as you eat. But we don’t mind.  😉
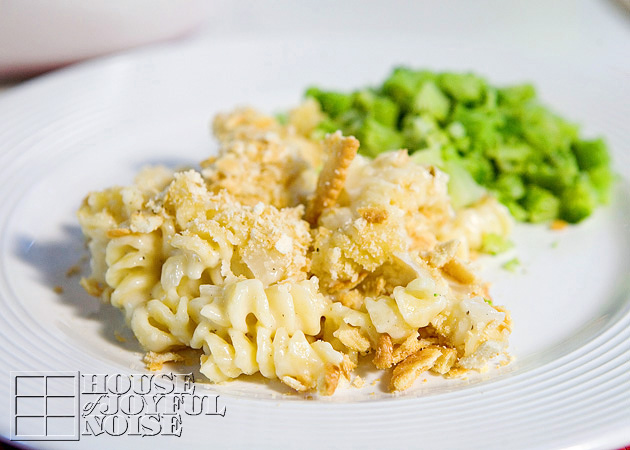
Hope you love it as much as we do! 

CLICK HERE FOR PRINTABLE RECIPE

~ Laura

* * * * * *

Please come follow me here and there:

Save


Save

Filed Under: Main Dish, Recipes, Side Dishes Tagged With: comfort-food, homemade-baked-macaroni-and-cheese, homemade-macaroni-and-cheese, jalapeno-jack-and-cheddar-macaroni-and-cheese, macaroni-and-cheese-recipes, main-dish-recipes, pasta-dishes, recipes, side-dish-recipes, spicy-macaroni-and-cheese-recipe

Cherry Tomato and Cucumber Summer Salad | Recipe

August 12, 2012 By Laura 2 Comments

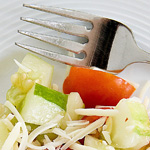
000_salad-fork

 When it is summertime, I want meals that are as simple and quick to make as possible. If we don’t have a tight schedule that day, then we’ve spent the day involved in some project or other. Especially on weekends, when Michael is home too. Usually it’s been it’s blazing hot out all day too, being summertime and all. And let’s face it, the heat and humidity really has a way of draining anyone’s energy and ambition that much more.

That’s exactly how I happened to come up with this simplest of salads. Dinner was not even planned, never mind started!  Michael threw some steaks on the grill, and I just grabbed the vegetables we brought in from the garden that day, off of the counter, and threw together a cold side dish. I was not going for anything grand.  And anyway, my kids pop cherry tomatoes in their mouth off of the vine, and they love cucumber spears, with or without a dash of pepper.

The big surprise was that it was far more delicious than I had even begun to anticipate, and it was the talk of dinnertime too.

Long term, it’s a fabulous dish for the whole family to love this much for another reason:
We need to have a variety of options, to use the abundance of certain vegetables we get out of our garden almost daily, in the summertime.

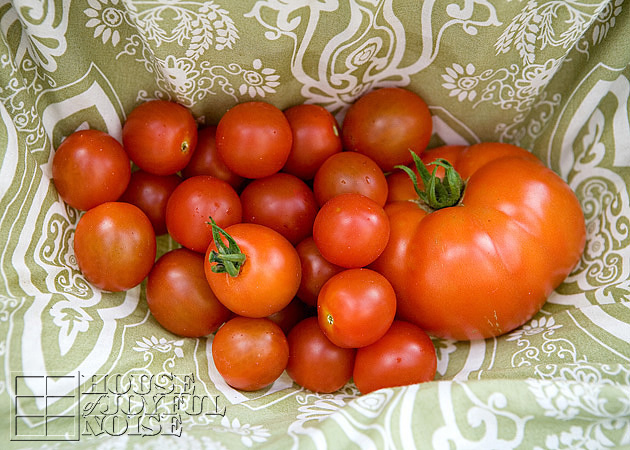
001_garden-tomatoes-in-skirt  Here’s one day’s picking, carried in my skirt.

It’s likely that the next day will harvest about same amount, ready for picking, again.
Especially given that Olivia has her own garden this year, too, and is also growing cherry tomatoes.

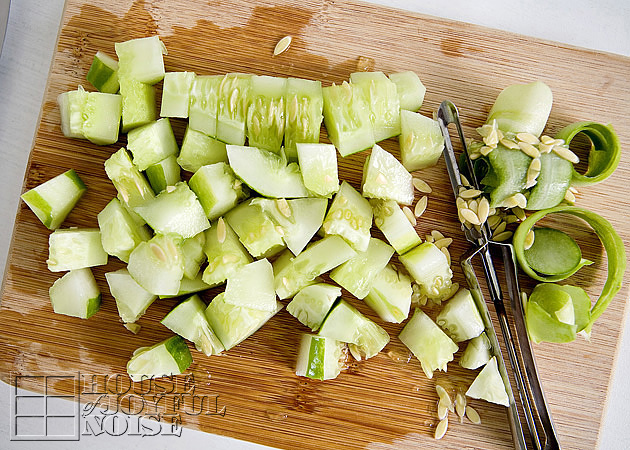
002_chopped-cucumber  She’s growing the cucumbers alone, but she shares with her siblings at lunch sometimes, or for a snack, and she’s happy to offer one for our dinner anytime, as well.

Those 2 vegetables, were the simple main staples for this recipe:

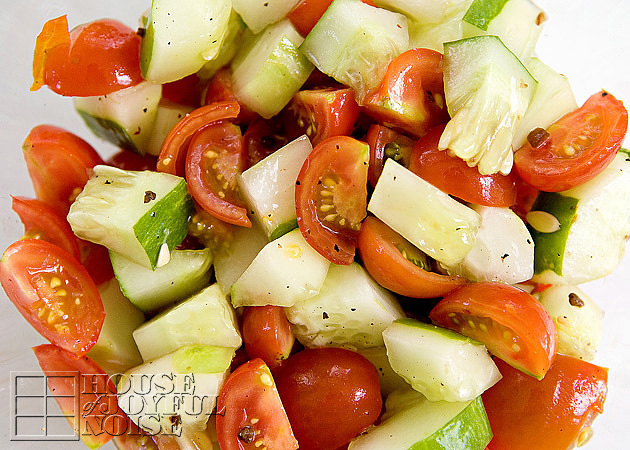
Quartered Cherry Tomatoes.
Cucumber, quartered the long way, and then chopped.

TIP: I always stripe my cucumbers with the peeler. It makes them a littler fancier looking, and even more enjoyable.

simple-summer-salad-recipe Throw in a dash of kosher salt, and drizzle all over with Balsamic Vinegar Salad Dressing.  We also add black pepper, because we love it, and put it on just about everything. The dressing, as opposed to straight up balsamic vinegar, has all kinds of little bits of seasoning goodness already in it.  Give it a quick toss.  I like to let it marinate just like that for a few minutes.

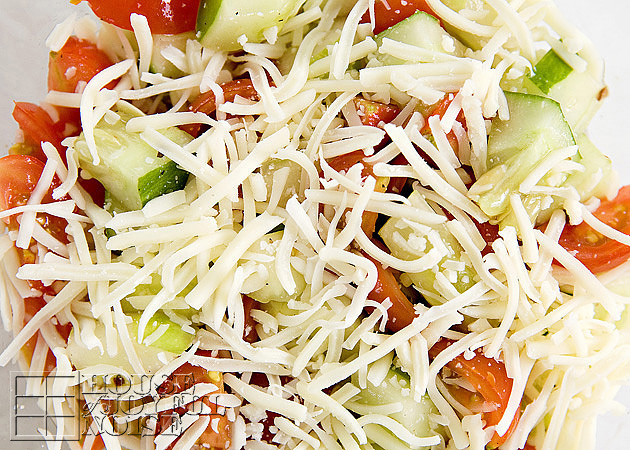
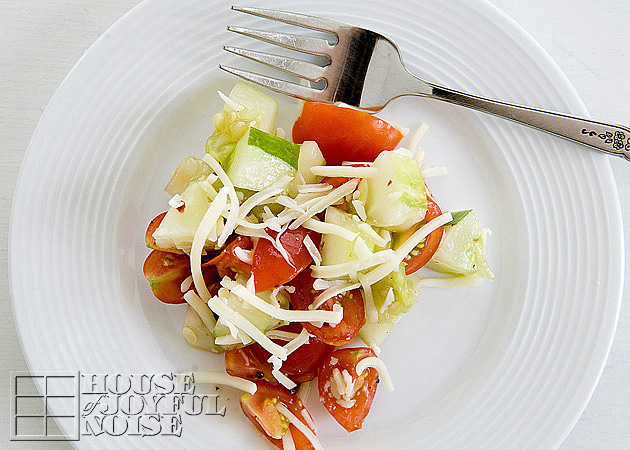
simple-summer-salad-recipe-1 When it’s time for dinner, I throw some shredded mozzarella cheese on top.

It’s done.  Does it sound plain, to you? Well I’ll tell you what . . . . . .

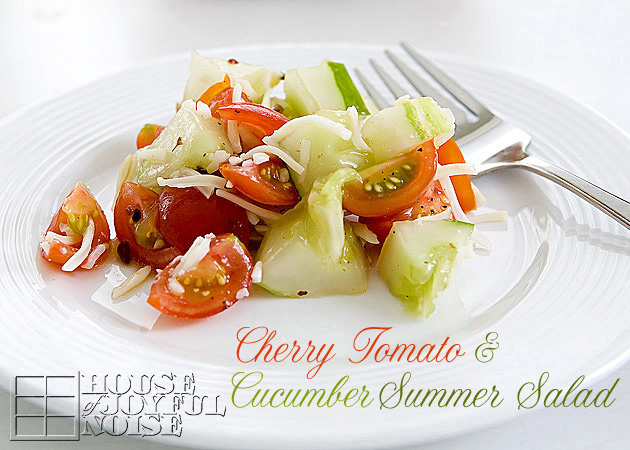
simple-summer-salad-recipe-3 It’s simple all right, but it’s sure not plain tasting!  The tang of the Balsamic Vinegar Dressing, really brings out the sweetness of the cherry tomatoes.  The combination of the two compliments each other so well. The fresh cucumber, and the soft and subtle flavor of the cheese adds a new texture, and another surprise taste.

We have also used this salad, rolled up in a tortilla, with grilled chopped chicken. Also simple, quick, and delicious.

simple-summer-salad-recipe-2 This is what summer tastes like.

It’s that simple.

What is your simplest summer dish?


Save

Filed Under: Recipes, Salads, Side Dishes Tagged With: cherry-tomato-cucumber-salad, cold-salads, light-salad-recipes, quick-salads, recipes, salad-recipes, salads, simple-summer-salad, summer-salads

Oven Cooked Corn on the Cob – Perfect!

August 5, 2012 By Laura 45 Comments

cooking-corn-on-the-cob-perfect

 For the 20+ years Michael and I have been together, we have been trying to figure out how to cook corn on the cob, so it comes out just right.  Sometimes it has come out really good, but most times it hasn’t.  It’s just a gamble. We have tried cooking it a few different ways; over the fire with wet husks, steamed, and boiled.  The fire method corn came out amazing the first time, and not as much the second.  The steamed method we only did once, because we didn’t like how it came out. More times than not, we have boiled it.  For us, perfectly cooked corn is- when the kernels are popping right off the cob as you eat it. But we usually don’t seem to cook it for just the right amount of minutes.  Then we can’t figure out:  Is it over-cooked? Or did we not cook it long enough?

So most every time we have gotten corn, and the kids got it all husked, the conversation usually goes something like this:

Me: “Honey, how long do we boil the corn for again?”
Michael: “Oh my gosh…there’s that question again! We never remember. How long did we boil it for last time? Did it come out good?”
Me: “I don’t remember now. Do you?”
Michael: “Not really.”
Me:  “Is it 7 minutes? Remember the guy at the Butcher Block told us most people over cook it?”
Michael: “Kind of. But I don’t remember how long he said. I don’t think 7 minutes is long enough, though.”
Me: “Wait, I think it’s 10 minutes.”
Me again:  “Or, is that boiling eggs.  Hmmm. No, I think it’s 10 minutes .”
Michael: “Did we bring the water to a boil first, and then put the ears of corn in?”
Me:  “No, that’s lobster. And Ramen Noodles.”
Michael: “Why don’t you Google it and see how long it’s supposed to be.”

And that, is about how it has gone, for years.  We get so excited to have corn on the cob, but that is because we only tend to remember the times it came out perfect and delicious.

Finally, we have found the absolute easiest method to cook corn on the cob, perfectly. 
And that is, perfectly, every time.  It’s crazy how easy and hassle free this is.  So at this time of year, when corn on the cob is such a popular summer side dish, we thought we should share with you the method that will be our one and only from now on.

Pre-heat your oven to 350°

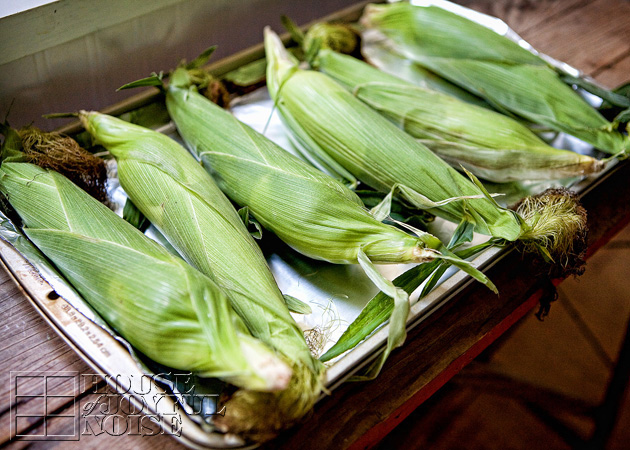
cooking-corn-on-the-cob-perfect-1 You have 2 options here:

1) You can lay your corn, unhusked, on a cookie sheet. (Tin foil or not is also optional.)

-OR-

2) You can put the corn right in your oven on the racks. If you choose that way, it is a good idea to cut off all of the silk hanging out, so it doesn’t catch on fire. << Important Tip there, I think. ; )

Both ways, the corn cooks wonderfully.  I use method 1, because it is easier for me. I can put the whole pan with all of the corn in, and take it out, quickly and easily. Plus I can’t reach in the oven very far, and my hands burn easily.  Michael prefers method 2, because he doesn’t want to get the pan out, or wash it, and he has longer arms.  He throws the corn cobs, in and take them out one at a time when the timer goes off, just grabbing them without even using an oven mitt. Because he doesn’t want to get the mitt out either. Even though the corn is piping hot.  He just doesn’t take precautionary safety measures, as a general rule of the fool.  You know . . . . . . protective eye wear when cutting wood, a face mask when spraying toxic paint fumes, or using oven mitts to take hot things out of the oven, for gosh sakes! It been an argument between us for years. I remember his father was the exact same way, about all of the same safety measures, including taking hot things out of the oven mitt-less. His mother would squabble at the father about it too, after he’d say “Ow!!” Throw the thing down quick. (Chuckle.) “That thing is hot!!”  Well HELLO!! What I don’t get, is why I thought my in-laws were so cute when they were bickering, and I get so aggravated at Michael about it, and I’m not feeling as cute. Honestly, I love my husband dearly, and I am thankful he is still alive, and well, in one piece. By the grace of God; this I know!  Anyway, you choose the method that works best for you, and I’ll leave you alone about it.

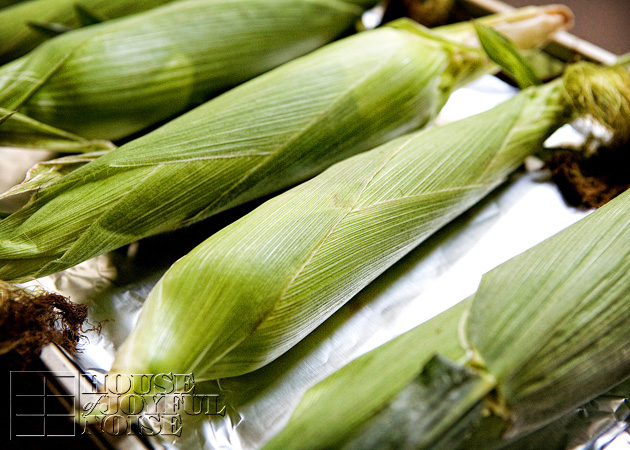
cooking-corn-on-the-cob-perfect-2  So put the corn in the oven however you choose to, and set the timer for 30 minutes. Oh how I love the smell of the corn cooking this way. A real roasted smell.
After 30 minutes, remove the corn from the oven.
You can leave it in the husks if the rest of your dinner is not ready. But if you are just about ready to all sit down and eat, here is what you do next:

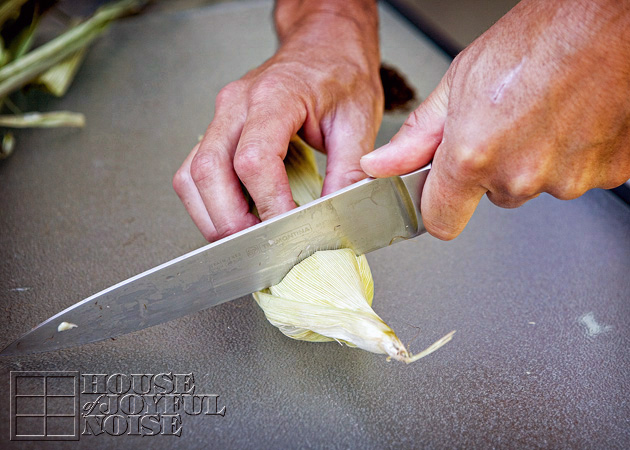
cooking-corn-on-the-cob-perfect-3 You simply take a big knife, and cut off the tip of the corn, unhusked,  about an inch or so into the cob.

This is where it just gets amazing to me . . . . . .

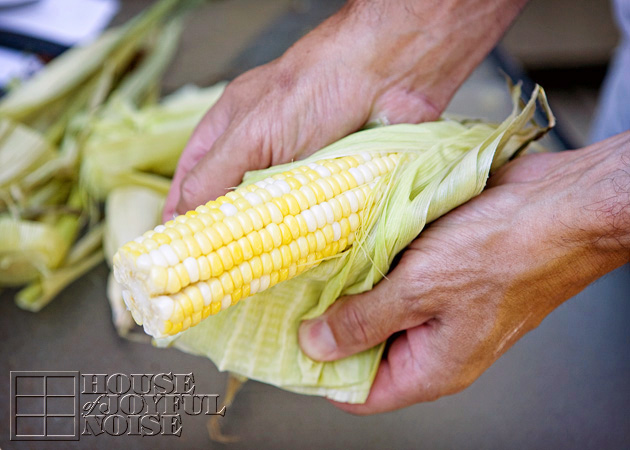
cooking-corn-on-the-cob-perfect-4 Then you just peel back and off the husks, which come off so easily. And, pretty much all of the silks come right off with it! 
Break off the other end, and season as you wish!

cooking-corn-on-the-cob-perfect-5 We love it with butter and pepper.  Sometimes a little salt. OH SO GOOD! So very easy, and perfect.

Every time.

If you haven’t tried cooking corn in your oven, you must try it this way!

What is your usual way of cooking corn on the cob, so it comes out just right for you? And for how long do you cook it? 

We know there are many methods, and we’d love for you to tell us what has worked for you.

P.S.  As an update, if you want to make the husking even EASIER STILL, you can cut off both ends of the cooked corn (in other words, stem end included), and cob will just roll out of the husks and the silks practically fall off.  But whether you chop both ends or just the tip, stripping the cobs after cooking them (in the oven) is much easier than shucking ahead of time!
We are loving those of you coming back to give us your report! ~ The Richard Family


Save

Save

Filed Under: Recipes, Side Dishes Tagged With: best-way-to-cook-corn-on-the-cob, corn, corn on the cob, how-to-cook-corn-on-the-cob-perfectly, oven-cooked-corn-on-the-cob, perfect-corn-on-the-cob

Striped Cucumber Salad | Recipe

August 26, 2011 By Laura 4 Comments

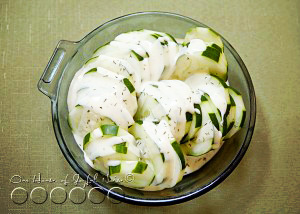
cucumber-salad-recipe-4

It’s a wonder, that our children have not turned into cucumbers, this summer. They love them, and our gardens have been so generous with them, that the kids have happily eaten them many days for lunch, dinner, and sometimes even as a snack.  They’ve had them as spears, sliced the long way and added to their tomato sandwiches, chopped up in a garden salad, and as this Cucumber Salad, which we are sharing with you today.

We know. It’s not the most inventive recipe, if we can even call it that. The ‘recipe’ is actually more about the dressing it’s in.  It’s one that I imagine has been around a long time, as my mother used to make it while I was growing up.  Recently we were at our friend’s house, getting our families together, and they made us the most de-li-cious dinner.  Part of that meal was a simple romaine salad with sliced fresh strawberries, and a dressing very similar to this one. So as you take note of this dressing, keep in mind the various or creative ways you can use it for, too.  This dressing, and this salad, is a perfect summer-side, to a light meal.

Striped Cucumber Salad


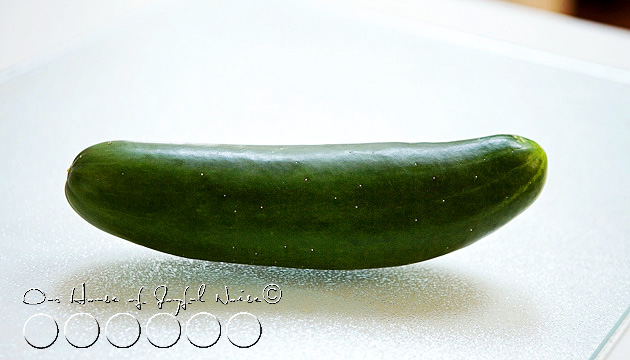
cucumber-salad-recipe Our Cucumber Salad begins with a fresh organic cucumber, from our own gardens.


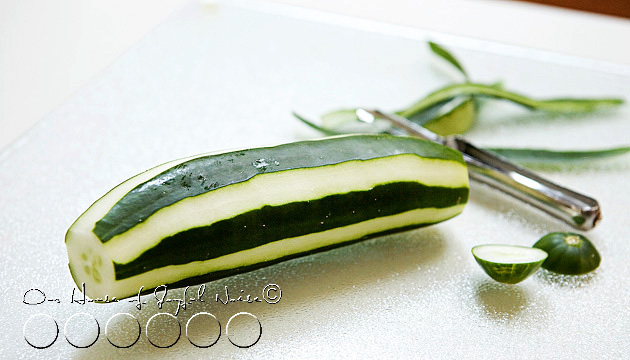
cucumber-salad-recipe-1 I have always, peeled cucumbers in stripes.  But there have been 2 separate reasons I have done so.

In the off-season, I have peeled the grocery-store bought cucumbers this way because, as we all know, the majority of the vitamins & minerals are in the skin, and I want to get all I can into my kids/family. But also, before we ate organic, the cucumbers from the store were usually waxed.  Man I hated that! I couldn’t stand the feel of it trying to wash them, (the wax never came off), and the funny feeling it left on my hands too. Also, we just weren’t partial to eating wax. You?  😕 So, peeling the skin in stripes, was a compromise, of sorts.

But even when the cucumbers are organically right from our gardens, I think the stripes just make them fancy & pretty.  So I chop off the ends, and stripe peel them.

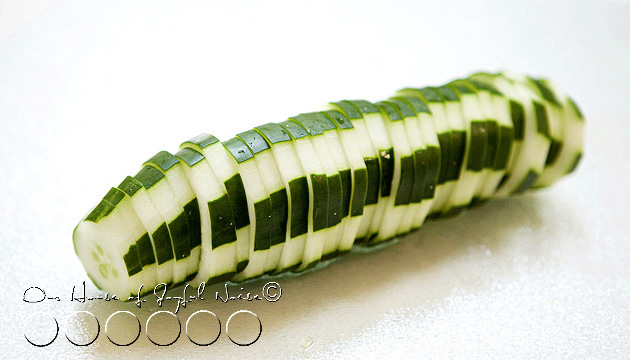
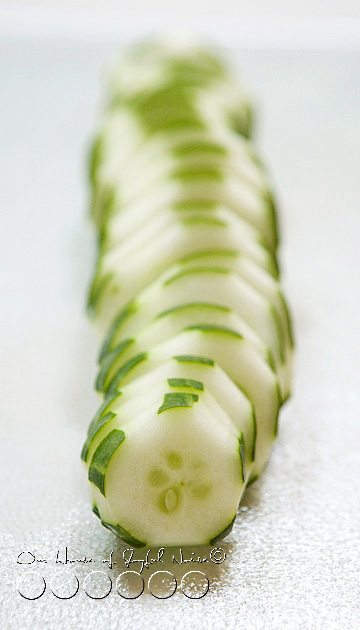
cucumber-salad-recipe-2 And then I slice it.


cucumber-salad-recipe-3  

And maybe I’ll have fun taking photos of it. It’s a cucumber caterpillar!!

So much for not playing with my food.

Now I know this is silly, but, I didn’t take photos of making the dressing.  It would have been boring, and unnecessary.  It’s so simple though, and there isn’t actually ‘correct’ amounts of any one ingredient. It just matters more of how thick you want the dressing, and how much you like this or that ingredient.  All to your preferred taste.  But this is generally my winged recipe, I mix in a bowl well, with a fork.


Cucumber/(Salad) Dressing

  • 1/2 c. mayonnaise (Hellman’s Real, for us)
  • 1/4 c. white sugar
  • 4 tsp. distilled vinegar

dashes of:

  • dill weed
  • seasoned salt
  • black pepper

Of course….all of these amounts will vary with how many cucumbers you cut up.  I like it to just coat the cucumbers. My mother made enough, that it was more of a soup, that the cucumbers sat in.  She made a lot! LOL


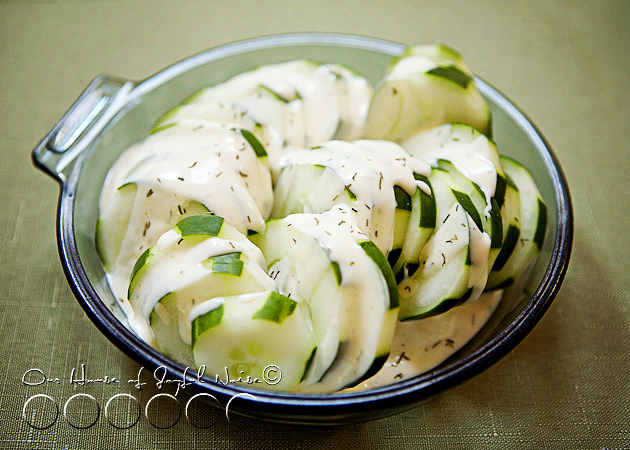
cucumber-salad-recipe-5 In my antique blue Pyrex dish (missing the handle), that was once my grandmothers, I arrange all of the cucumber slices, and drizzle the dressing right over it.  Then I throw another dash of dillweed on top. This dish is light, tangy, sweet, with a tad of salty.  All at once.  More importantly, it’s FRESH, light, delicious, easy, and well……COOL!  It’s a perfect side for summer grilled dinners, etc.

I’ll warn you, with the same wise words my mother-in-law once warned me with, and of which I shared with my kids recently, and they have found absolutely hysterical, and love to say it now every time they have cucumbers:

“Be careful now. Cucumbers tend to repeat on you, later.”

From what I can tell, no one minds repeating around here, except me.  ; )

Save

Save

Filed Under: Recipes, Salads, Side Dishes Tagged With: cucumber-recipes, cucumber-salad, dressing-recipes, light-dressing, light-salad-dressing, light-salads, light-side-dishes, recipes, summer-salads

7 Layer Salad, with Sides – Summer Light & Just Right | Recipe

July 18, 2011 By Laura 3 Comments

7-seven-layer-salad-recipe-5

If you live in a climate where summers can be hot & humid, than you probably have days like me when you can’t even think of cooking dinner, in a hot kitchen.  You’re looking for a meal that is cool, light, and delicious.  We probably all have our regular stand-bys, but I just discovered a new favorite, and I’m here to share it with you!

One of the best parts of having link-up party on Tuesdays, has not only been the simple home decor or craft ideas, but the recipes shared!  This ‘7 Layer Salad’ was a link-up, and I thought it was so enticing, we made it right away, and then featured it! >  Because our whole family loved it!  As I said in the feature, even the kids were ‘scoffin’ & commentin’ through the whole meal, and were thrilled to have leftovers the next night.  (Honestly, they cheered.)

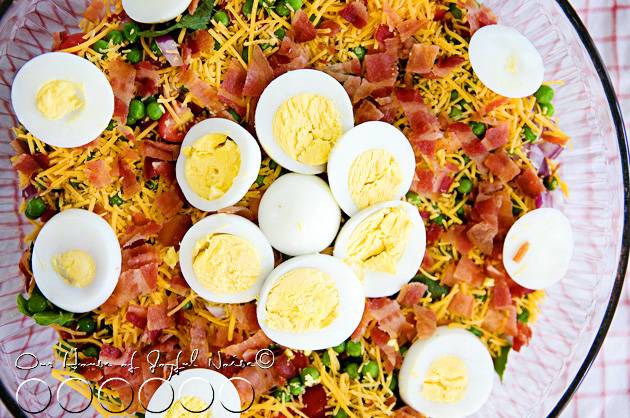
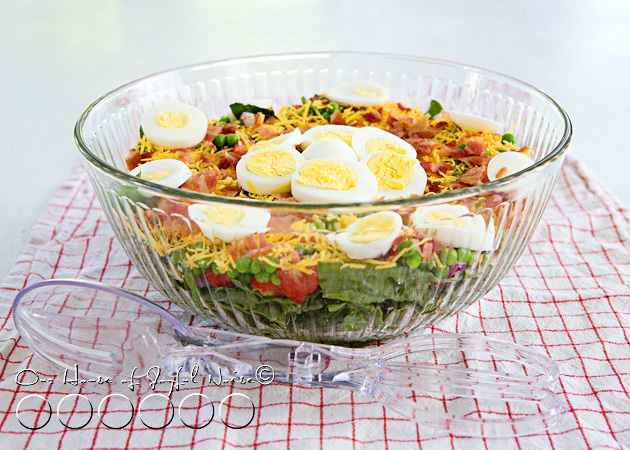
7-seven-layer-salad-recipe I think the name alone, 7 Layer Salad, is FUN, and sound enticing.  And the great thing is, if you don’t care for one of the ingredients/layers, you can substitute it with something you prefer, and still call it 7 Layer Salad! But we made it just like the recipe called for, and it was a hit in our mouths, and our bellies.

Here’s the recipe, layer-by-cool & easy-layer:

7-seven-layer-salad-recipe-1 7 Layer Salad

*In order that ingredients are put into the bowl, building bottom to top:

  • 6 cups fresh, washed Spinach
  • 2 cups Grape Tomatoes, halved (Cherry Tomatoes would work too.)
  • 1 cup Red Onion, chopped
  • 1-1/4 cup frozen Peas, thawed & drained
  • 1 cup Cheddar Cheese, shredded
  • 6 slices Bacon, cooked & chopped*
  • 3 Hard-Boiled Eggs, quartered or sliced

* Use microwavable bacon!  Remember, we not cooking tonight! ; )

Then, I added a few perfect sides, still keeping the meal cool & light:

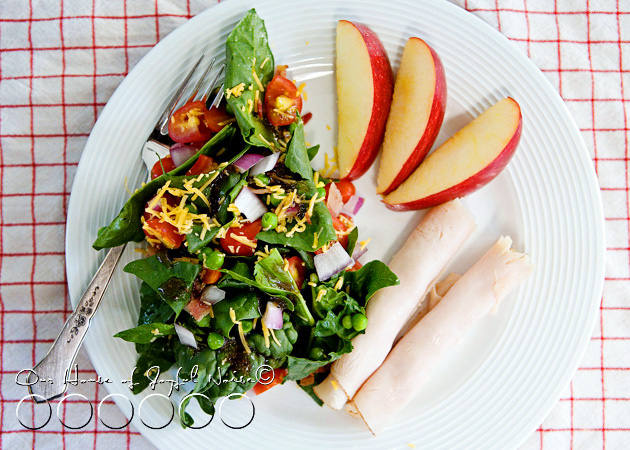
7-seven-layer-salad-recipe-4 Some fresh and cold rolled-up Turkey meat & Apple slices.


7-seven-layer-salad-recipe-2

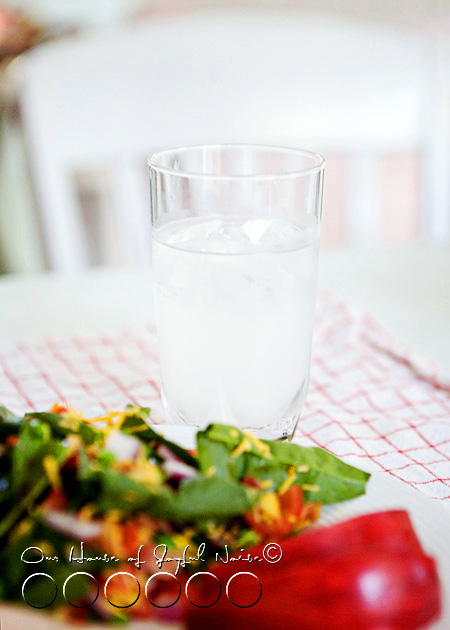
Serve with a tall glass of cold lemonade, and you have yourself a perfect and light summer meal!  Lunch or dinner!

(OK, that particular glass in the photo, happened to be my Mike’s Hard Lemonade. But, you know, can do Country Time if you’d like!)

As a salad dressing, consider Balsamic Vinegar, or a Raspberry Vinaigrette.  My kids love both, but yours may prefer their regular favorite.

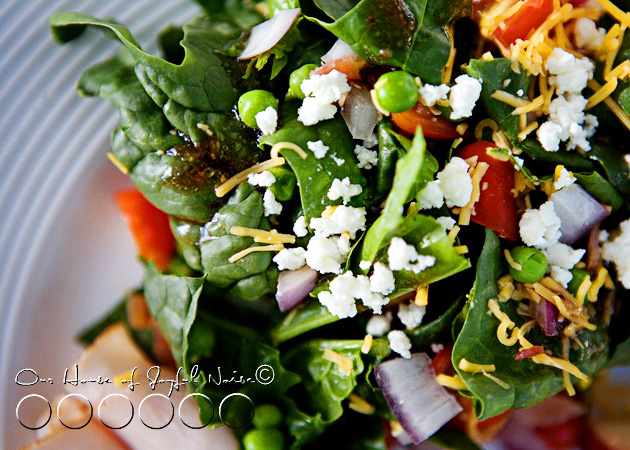
7-seven-layer-salad-recipe-3 As if this meal wasn’t perfect enough to me, I added my favorite topping.  Most every salad is ‘betta, with Feta’.

Scrum-de-licious!

Of course, you have the option of swapping out any ingredient layer you don’t care for, and swapping in one you do!
What changes might you make to your layer salad?


Save

Save

Save

Save

Filed Under: Lunch, Main Dish, Recipes, Salads, Side Dishes Tagged With: 7-layer-salad, light-summer-meal, salad, salad-recipes, seven-layer-salad, summer-dinner, summer-salad

  • 1
  • 2
  • Next Page »

We are wicked happy to have you here! We hope you find much inspiration, help, humor and enjoyment here.


Archives


POPULAR POSTS

* * * * * *

SUBSCRIBE to House of Joyful Noise blog! Every new post, delivered right to your email box!


Privacy Policy

Amazon Affiliates

Never at any additional cost to you, we may earn a small commission for our endorsement, recommendation, testimonial, and/or link to any products from our website. Your purchase through our links helps support our family, while sharing with you the products we authentically use and recommend, for various ideas, and letting you know where you can purchase them. Thank you for your support!

[footer_backtotop]

Copyright © 2025 HouseOfJoyfulNoise.com · Genesis Framework by StudioPress