
• HOME
  • {A}’s Chipmunk Training Archives

 Homepage

  • The Homestead
    • Home Projects
    • Home Improvement
    • Home Decor
      • Seasonal Home decor
        • FALL Home Decor
        • WINTER Home Decor
        • SPRING Crafts and Creations
        • SUMMER Crafts and Creations
    • Our Chickens
    • Gardening
    • Organization
    • Re-Purposing
    • Furniture Refinishing
    • Budget
  • Crafts & Creations
    • Seasonal Home decor
      • FALL Crafts and Creations
      • WINTER Crafts and Creations
      • SPRING Crafts and Creations
      • SUMMER Crafts and Creations
    • DIY (Do-It-Yourself) Project
    • Kids Arts and Crafts
    • Homemade/Handmade Gift Ideas
    • Holiday Crafts
    • Fan Pulls
    • Free Printable/Downloadable
    • Sewing Projects
    • Giveaways
    • Business Features
  • Recipes/FoodFun
    • Breakfast
    • Lunch
    • Main Dish
    • Sandwiches
    • Appetizers
    • Slow Cooker
    • On The Grill
    • Side Dishes
      • Soups
      • Salads
    • Baking
      • Breads, Rolls and Muffins
    • Snacks
    • Treats
    • Desserts
    • Drinks
  • Homeschooling
    • Elementary Homeschooling
      • Elementary Homeschooling READING
      • Elementary Homeschooling MATH
      • Elementary Homeschooling LANGUAGE ARTS
      • Elementary Homeschooling SCIENCE
      • Elementary Homeschooling HOME ECONOMICS
      • Kids Arts and Crafts
    • Middle School Homeschooling
      • Middle School Homeschooling SCIENCE
      • Middle School Homeschooling HOME ECONOMICS
    • Language Arts
    • Math
    • History / Social Studies
    • Geography
    • Foreign Language
    • Field Trips
    • Games
    • Nature Study
  • The Big Picture
    • Life In General
    • Celebrations
    • Faith
      • Into the Light; The Series
    • Giveaways
    • Reviews & Sponsors
  • Photography & Lettering
    • Photography
    • truck lettering
    • vehicle graphics
    • Newborns
    • Kids
    • Engagement
    • High School Senior Pictures
    • High School Senior Pictures Sneak Peeks

Veggie Pockets – Lent Meatless Meal – Recipe

February 27, 2009 By Laura 5 Comments

meatless Lent meal ideas

Here’s a delicious meatless meal for the Fridays of Lent, or for any day, for either lunch or dinner! My kids love most vegetables, so these pocket sandwiches are always a real hit with them! They always cheer when they ask what we are having, and they always ask for 2nd one!

I didn’t take any photos in the early stages, as I usually do just for fun. But I think you’ll be able to follow along just fine without them.

Ingredients:

  • red peppers
  • zucchini
  • summer squash
  • broccoli
  • vegetable oil
  • American cheese
  • whole wheat pockets

~ Naturally, you can use any stir-fry type vegetables your family likes best.

1.)   Wash *all vegetables well, of course.  : )

*How many of each vegetable you use depends on your family size. Use your best judgement. Once it’s all in the pan you’ll get a better idea.

2.)  Clean out red peppers, and dice.

3.)  Zucchini and summer squash:

>>>   a.) Cut off ends.

>>>   b.)  Cut length-wise in half

>>>   c.)  Cut again lengthwise,  cutting halves into half.  Now you have 4 quarters of lengthwise slices. (Aren’t I great at explaining these things?  Maybe I should have taken photos of this part too. lol)

>>>   d.)  Now slice the quartered lengths the short way, about 1/4″ thick.  You will have nice quarter-0f-a-slice pieces.

4.)    Cut up broccoli into medium sized pieces, chopping off ends first. (You will chop it all up later.)

5.)    Get broccoli going in a steamer. (We have a Black & Decker Handy Steamer. But you can steam however you do.)

6.)   Heat a large stir-fry pan at medium-heat, and add 1-2 tablespoons of vegetable oil.

7.)   Add red peppers, zucchini and summer squash to pan, and stir up.

8.)  Cook all vegetables in steamer and pan, to desired tenderness.  (We call it done when fork inserts nicely.   Be careful not to overcook.)

9.)  Remove steamed broccoli from steamer, and put on cutting board.

With a large chopping knife, chop up into smaller pieces, and then add to the pan on stove-top, with other vegetables.

Stir all vegetables together.
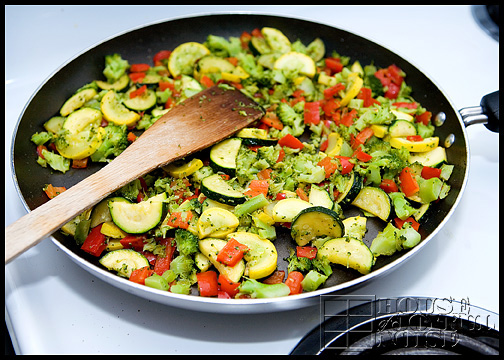
meatless Lent meal ideas

So happy to-ge-THERRRRRRRR! (Name that tune!)
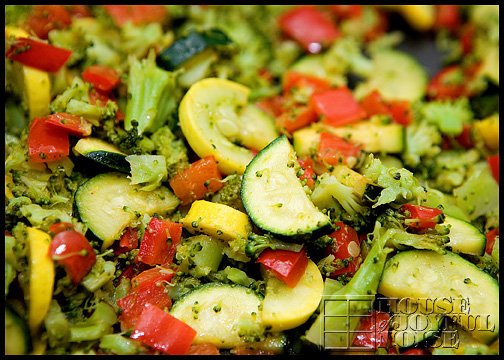
meatless Lent meal ideas

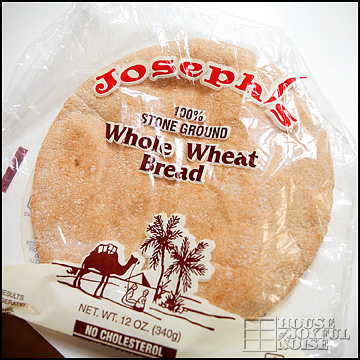
For pockets, we use this brand:

meatless Lent meal ideas

10.)  Take a bread disc out, and cut in half.

11.)  Lay some slices of American cheese in the pocket half.  Break slices up to fit nicely.  (Us grown-ups sometimes put some Pepper-Jack in too, for some kick! But it’s delicious just with American.).

12.)    *Fill pocket up with vegetables.

* For the little ones, we don’t overload it, because it’s a wide/big pocket, and a little bit difficult to for little hands to handle. Reminders to eat over plate are a good idea, with these babies!   But what falls to the plate can be eaten up with a fork, after.

**  Us grown-ups really fill it up.  : )
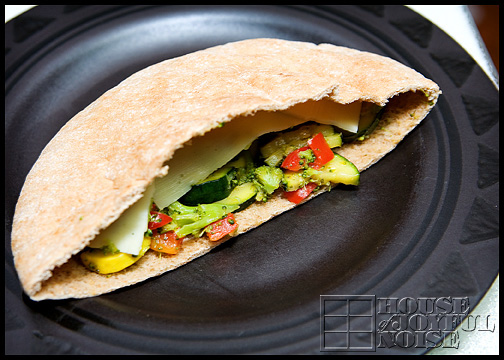
meatless Lent meal ideas

Filled just right for a kiddo.

13.)  When they eat it all up, and ask for another, SAY YES!!  A kid can never eat too many vegetables!   : )

ENJOY!!

Save

Save

Filed Under: Faith/ Catholic, Lunch, Main Dish, Recipes, Sandwiches Tagged With: Catholic, Catholic-blogs, Catholic-families, Catholic-family, Lent, meatless meals, Meatless-meal-ideas-for-Lent, recipes, veggie-pocket-recipe

One Fine Bread Maker! – A Homemade Bread Recipe

February 9, 2009 By Laura 10 Comments

bread-maker-1

That’s MY bread maker!

He’s a fine bread maker.

And a fine bread maker, too. lol

9_photos-of-making-homemade-bread

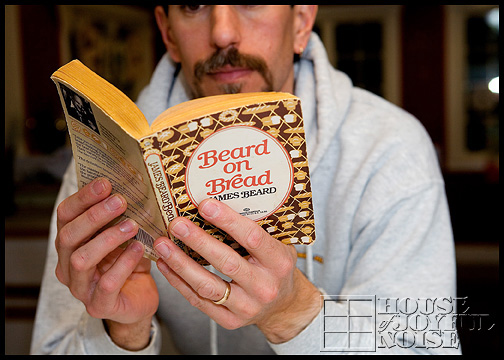
The bread we go through is crazy, and it’s seemed one of those things you can’t buy enough of, and it’ll go just as quick.  We’re not ‘white bread’ people either, so what we spend on bread can get….tiresome.  So a few weeks back, my hubby decided he’d try making some. After all, he makes a mean pizza dough.  And he had a good book that his parents let us have. (I think.  I’m afraid we borrowed it, and never returned it, but he says no.)  Anyway, they’re experienced…everything makers.

13_Beard-on-Bread-book

Anyway….I can’t tell you how many loaves he has made now, in the past few weeks. He loves doing stuff like that anyway. (What a blessing. lol)  The rest of us love eating it up!!

The recipe we use is a version of a James Beard bread recipe. However, we like to replace 1 cup of the flour called for, with some whole wheat flour, for a bit of a healthier and heavier bread.
We’re sharing our version of the recipe with you today, at the end of this post.

If you happen to have the old book Beard on Bread (shown above), you can find the original recipe Basic Home-Style Bread, on Page 30.

I took photos one Saturday or Sunday not long ago, along the way, from flour and yeast, to our home smelling like something possibly from Heaven.  Is there ANYTHING that smells as good as baking bread??  Few things, I reckon.

1_photos-of-making-homemade-bread

Working together the flour, proofed yeast (with milk and sugar), and salt.

~~~~~~

2_photos-of-making-homemade-bread

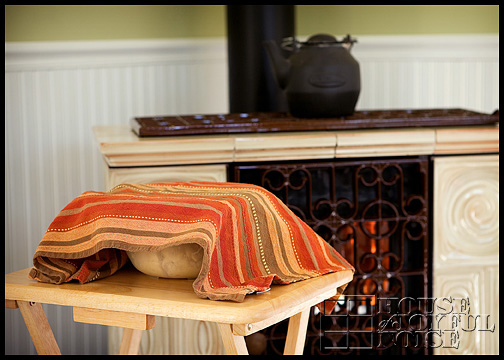
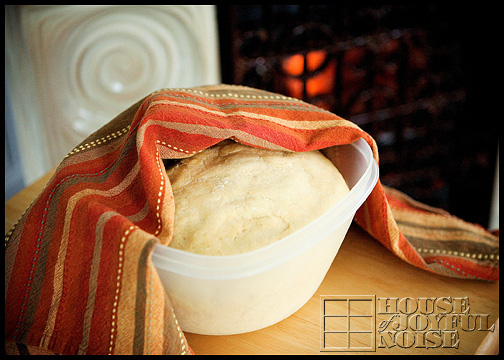
Rising.

~~~~~~

3_photos-of-making-homemade-bread

Doubled and ready for round 2!

~~~~~~

4_photos-of-making-homemade-bread

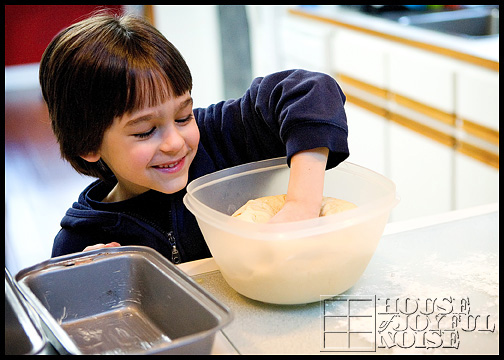
{JM} is the lucky kid who was around to punch it down!  These little things make them SO happy, you know.

~~~~~~

5_photos-of-making-homemade-bread

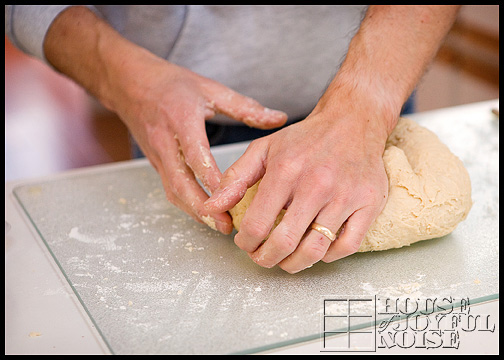
Kneading some more.

~~~~~~

6_photos-of-making-homemade-bread

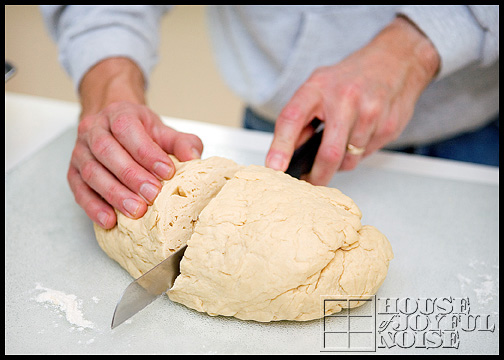
Dividing for 2 loaves.

~~~~~~

7_photos-of-making-homemade-bread

8_photos-of-making-homemade-bread

Rising for a second time.

~~~~~~

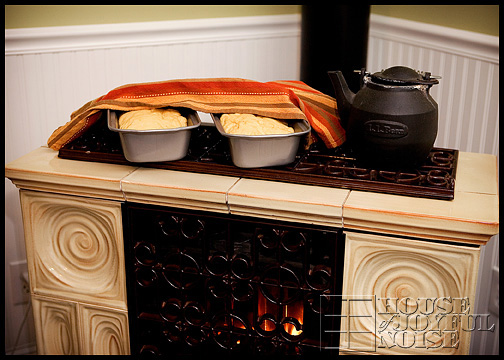
breadmaker-2

Hanging around, just looking good, while the bread bakes in the oven. He was so tired, I could tell, having chopped a lot of wood that day too.

Beep!  Beep!  Beep! (Timer goes off.)

~~~~~~

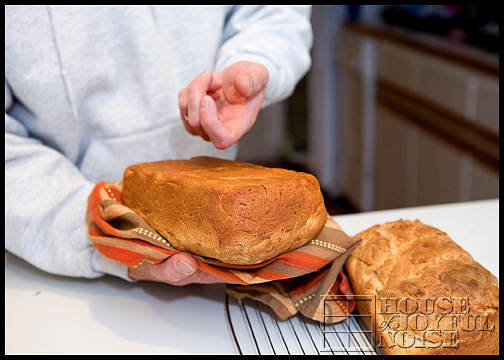
10_photos-of-making-homemade-bread

Knock-knock-knock! It sounds done.

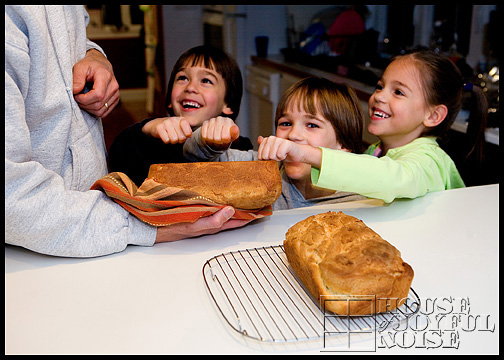
11_photos-of-making-homemade-bread

But when the kids hear the timer go off , and the knocking….they come calling, to check for themselves.  Everyone has to get into the knocking, you know. These little things make them SO happy, you know.  : )

Sounds ready!!

9_photos-of-making-homemade-bread

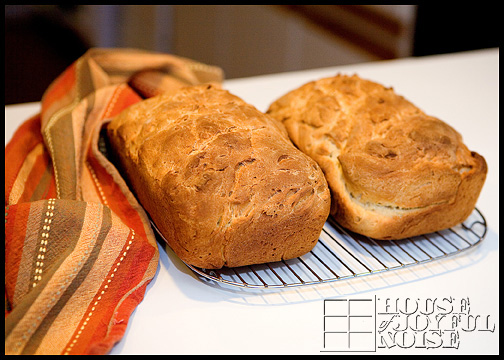
Not quite perfectly formed, but that’s what happens when kids help. The family love that went into them is perfect! And oh….if you could smell our home right about now.   For those of you who bake bread daily (I know you’re out there..) you know what I’m talking about. For those of you who buy fresh baked bread, you know what I’m talking about too.  It’s the smell of a bakery. lol

~~~~~~

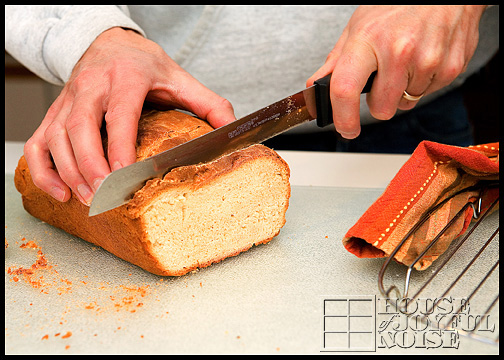
14_slicing-homemade-bread


Basic Home-Style Bread
 
Print
Prep time
4 hours
Cook time
45 mins
Total time
4 hours 45 mins
 
A basic simple homemade bread, based on a James Beard recipe, adding some more wholesomeness with a bit of whole wheat flour, and lot of homemade love.
: House of Joyful Noise (.com) blog / Based on James Beard Recipe
: Baking
Serves: 2 loaves
Ingredients
  • 1 package of active dry yeast
  • 2 cups of warm milk (100 to 115 degrees, approximately)
  • 2 tablespoons granulated sugar
  • ¼ cup melted butter
  • 1 tablespoon salt
  • 1 cup whole wheat flour
  • ~ 4 cups all-purpose flour
  • *additional flour as needed when kneading
Instructions
  1. *NOTE: The directions below are all done by hand. However, if you have a Kitchen Aid or other large mixer, as we do now, it is much faster to make this dough!
  2. Warm 2 cups of milk.
  3. Add the yeast to ½ cup of warm milk, along with 2 tablespoons of sugar, and stir well until the yeast is completely dissolved. Allow yeast to proof.
  4. Place the remaining milk, the melted butter, and the salt in a large bowl.
  5. Stir in the flour, *1 cup at a time, with a wooden spoon.
  6. *Start with first cup of whole wheat flour, and then for rest of recipe use all-purpose.
  7. After the third cup of flour, add the yeast mixture.
  8. Continue stirring in flour until the mixture is rather firm, which should take ~ 4 cups.
  9. Remove the dough to a floured board or smooth surface, and knead, adding more flour as necessary if it gets sticky, until it is satiny and no longer sticky.
  10. Butter a bowl and place the dough in it, turning and using your hands to coat all sides with the butter. Cover with a with a kitchen towel or other suitable covering.
  11. Options for Rising:
  12. Place covered dough bowl in a warm, draft-free spot until doubled in size (approx. 1.5 - hours)
  13. -OR-
  14. Heat oven to 170 degrees, and when it reaches temperature, turn the oven OFF, and place the covered dough bowl in the oven. ( ~ 1 hour)
  15. Once dough is doubled in size, punch it down firmly 2 or 3 times, and return to floured surface.
  16. Knead 4 or 5 minutes more.
  17. Divide dough into 2 equal parts, and shape into loaves.
  18. Place each in well-buttered 9 x 5 x 3-inch loaf pans.
  19. Cover and allow to rise again, in a warm, draft-free spot (or warmed/off oven again) until doubled in size.
  20. When loaves are risen, preheat oven to 400 degrees.
  21. Slash the loaves with a sharp knife.
  22. Bake in 400 degree oven for 40 - 45 minutes, or until bread sounds hollow when taped on with knuckles on the bottom.
  23. Optional: Remove from pans and put them in oven a few more minutes longer to become crisped.
  24. ENJOY!
3.4.3177

15_homemade-bread-toast

 What a delicious bread! Great for sandwiches. Toasted, is how I like mine.

Save

Save

Save

Save

Save

Save

Save

Filed Under: Baking, Breads, Rolls and Muffins, Recipes Tagged With: Baking, baking-recipes, homemade-bread-recipes, James-Beard-bread-recipes, recipes

Hot Cider Drink Recipe – Wassail

January 22, 2009 By Laura 6 Comments

hot cider recipe

Many of you did indeed request the hot cider drink recipe, that was simmering on our stove the other day.  Also known as Wassail. I must say, our kids can’t get enough of it.  We all started a WICKED FUN project out in the bitter cold and snow today. (That’ll be coming up in a few days or so, on the blog here.)  Soon after we came in to warm up, we decided to make another batch of this cider to enjoy.  It smells and tastes SO good.  We hope you enjoy the recipe as much as we do.

Please note:  The ingredient amounts listed below must make one-big-batch!  We’ve been making it by halving the amounts, and it’s been plenty enough for at least 2 cups each, for our family of 6.  But for many more people, it might be best to make the whole batch.  This WOULD be a GREAT treat to serve, if you are entertaining a small party.  I think guests would be impressed with such a delightful warm beverage, and appreciate it coming in from the cold too.  So here it is.  If you make it, let us know what the verdict is at your home!

~~~~~~~~~~~~~~~~~~~~~~~~~~~~~

Spiced Cider Wassail
(Makes about 4 quarts)
2 quarts apple cider
1 quart orange juice
1 quart apricot nectar
1/2 cup fresh lemon juice
6 broken pieces of cinnamon
1 tablespoon whole cloves
one orange, sliced thin
one lemon, sliced thin
whole cloves
 
In a stainless steel pan, bring to a boil the cider, juices, cinnamon and cloves. Simmer over low heat for 20 minutes. Transfer to a punch bowl if you’d like.  Stud the orange and lemon slices with whole cloves and float them in the wassail. Serve in punch cups or small mugs.

~~~~~~~~~~~~~~~~~~~~~~~~~~~

I must admit, I haven’t used the word ‘Wassail’ yet.  It’s a bit too fancy for my simple tongue. Not to mention my simple mind, because I had no idea what that word was.  So since I was posting the recipe, I thought it might be wise to look it up first. Here’s the definition, for what it’s worth.  But just feel free to call the drink whatever you want, like I do.  : )

Main Entry:
1was·sail
Pronunciation:
\ˈwä-səl also wä-ˈsāl\
Function:
noun
Etymology:
Middle English wæs hæil, washayl, from Old Norse ves heill be well, from ves (imperative singular of vera to be) + heill healthy — more at was, whole
Date:
12th century
1 : an early English toast to someone’s health 2 : a hot drink that is made with wine, beer, or cider, spices, sugar, and usually baked apples and is traditionally served in a large bowl especially at Christmastime 3 : riotous drinking : revelry

CHEERS!!

Save

Filed Under: Drinks, Recipes Tagged With: cider, drink-recipes, hot-cider-drink-recipe, hot-cider-recipe, recipes, warm drinks, Wassail, winter drinks

How to Make Chocolate Dipped Pretzels

January 21, 2009 By Laura 8 Comments

We thought you all deserved some nice treat ideas.  So we’d like to share some steps on how to make chocolate dipped pretzels!
It’s a fun treat to make and eat!

How to make chococlate dipped pretzels

Last year for our Christmas gathering with some family, we made these pretty pretzel rods drizzled with chocolate.  Our visiting family even wanted to get in on the fun, and make their own! We simply melted chocolate, and drizzled it over the rod, slowly turning it as we did so.  Then we sprinkled on some of our favorite decorative sprinkle balls!

This year, we’ve done something similar (a few times!), but with a TWIST!!  : )

How to make chococlate dipped pretzels
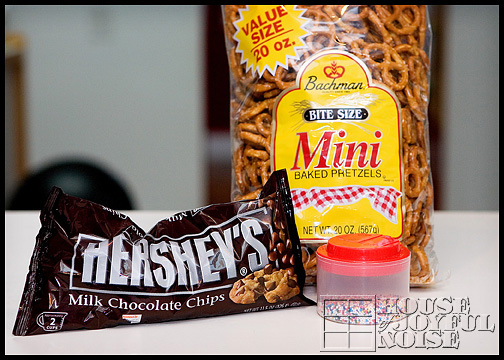
Participating Ingredients.

Get it??  With a TWIST??   (ROFL…..perhaps by myself.  I should probably get up now.)

3 Ingredients!:

  • Mini Pretzel Twists
  • Hershey’s Chocolate Chips
  • Decorative Sprinkle Balls

These are SO easy to make, and your kids will have SO-MUCH-FUN helping!!  Our kids sure do!  Here we go……

How to make chococlate dipped pretzels

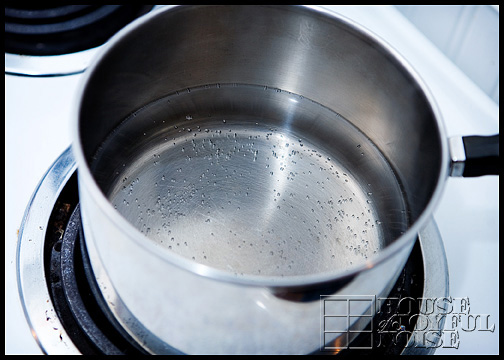
Get some water in the bottom portion of a double boiler pan.  You want to put the burner on MEDIUM, and wait for the water to be ‘just about ready’ to boil.  Once it’s to that point, it’s good enough to turn it down to LOW, and put the top portion of the double boiler pan on.

How to make chococlate dipped pretzels

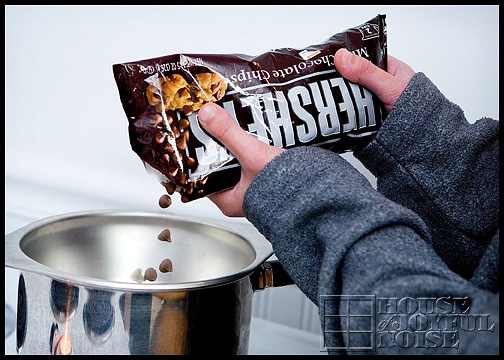
Now pour in the top pan, a small amount (maybe equivalent to a couple of handfuls…but exactness is not that important) of chocolate chips into ONE SIDE of the pan.  You kind of want them in a small pile, so that it makes dipping easier.

How to make chococlate dipped pretzels

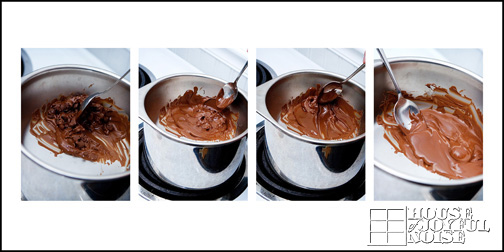
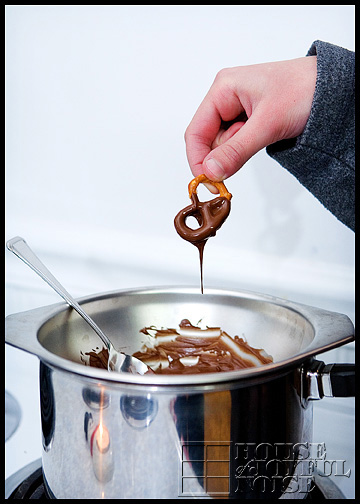
Use a spoon, and keep stirring the chips, letting them slowly melt, until the chocolate is really melty and smooth.  Once it is, you’re ready for ……..

How to make chococlate dipped pretzels

….some dipping!!

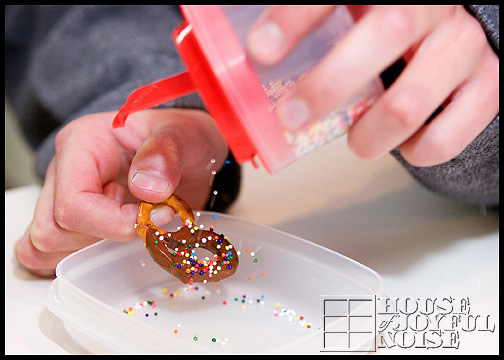
Bring the just dipped pretzel (or 2, if you can do 2 at once) over to a counter space, and sprinkle your sprinkles onto the wet hot chocolate.

How to make chococlate dipped pretzels

We suggest doing this over an empty container.  They are very bouncy……so otherwise you’d be finding them all over the place  until Easter 2012.   You can also re-use what you catch in the container for other pretzels, over another container.

How to make chococlate dipped pretzels

Simply place them on a wax paper lined cookie sheet – spaced nicely so they don’t touch each other.

Just another photo, because I had to take it.

How to make chococlate dipped pretzels

Repeat this process of dipping, sprinkling and laying, adding more chips to your pan as needed, and giving it little stirs to keep it melty and smooth as you go.

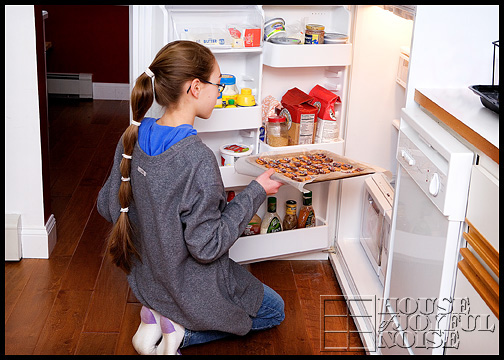
Once a tray is full………

How to make chococlate dipped pretzels

….pop it into the refrigerator. (And begin a new tray, of course!)  Putting them in the fridge will help the chocolate harden.  Generally speaking, they need to be KEPT cool, until they are popped into your mouth, or the chocolate on the pretzels will get melty on your hands. (unlike m&m’s….and we know why.  They do not have that hard candy shell. lol)  (These don’t talk either. Sorry.)

How to make chococlate dipped pretzels

We think they are pretty enough (and tasty enough) to give as little gifts too!  We used these nice little clear bags, found in the stores where they sell chocolate melts, and supplies to make chocolate lollipops, etc. (In our case, our local Michael’s Arts & Crafts) We tied them off with silver twist ties. Who doesn’t love chocolate?  Warning though:  the sweet then salty thing going on, may keep you popping more in your mouth than you meant to!

How to make chococlate dipped pretzels

Sweet, huh??

Save

Save

Save

Save

Save

Filed Under: Homemade/Handmade Gift Ideas, Recipes, Snacks, Treats Tagged With: chocolate-dipped-pretzels, chocolate-treats, food photography, food-gift-ideas, food-gifts, how-to-make-chocolate-dipped-pretzels, party food, Treats

Taco Soup Recipe

December 11, 2008 By Laura 1 Comment

taco soup recipe

Here’s a soup recipe that’ll be sure to warm your chilled bones.  If you love tacos, you’ll love this taco soup! I do love tacos, and I also love soup. Good soups – which are usually home made of course. I also LOVE Panera Bread’s Broccoli Cheddar Soup (and so do our kids). I had some today as a matter of fact. It was just the pick-me-up I needed in between the stores of a little Christmas shopping.  Ate it in a quiet van.  It was the weirdest experience! lol

Now I didn’t invent this Taco Soup recipe, but I did revise it a bit to make it…well, better!  No one needs as many beans as was in the original recipe, to start. Unless you just want a bowl of beans, with a little burger mixed in.  My kids keep asking me when I’m going to make my Vegetable Soup again. (That was another altered version of a recipe. )  But I just feel like that’s a spring/summer soup…when vegetables are fresh and more locally grown.  This is a heartier soup that suits winter meals, and they love this one too.  So here’s how I make it, and I hope you give it a try if it sounds good to you:

Ingredients:

  • 1 lb. extra lean ground beef (I use 85%)
  • 1 onion, chopped
  • 1 15.5 oz can pinto beans / undrained
  • 1 8 oz can *Green Giant Niblets Corn / undrained * (we use this brand because it’s sweet and and has snap)
  • 2 8 oz tomato sauce
  • 1 pkg. Taco Seasoning Mix
  • 1 1/2 C water
  • Shredded Cheddar Cheese

Brown beef with onions in large saucepan; drain.

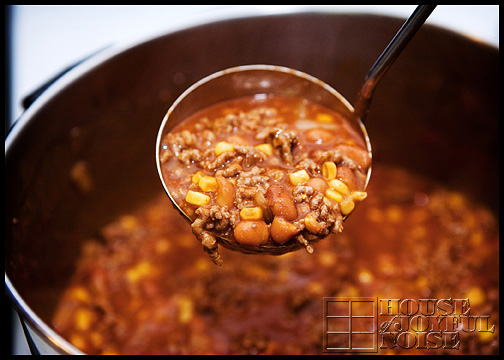
Add all remaining ingredients except cheese; stir. It’s important NOT to drain the cans of beans and corn! That’s where some of the flavor and liquid comes from.  Bring to a boil. Simmer on medium-low for 5 minutes, stirring occasionally. At this point it’s ready to eat really, but I like to turn it to low and let it continue to simmer, still stirring occasionally – letting all of the ingredients get to know each other a little better.

“Hello!”  “Hi there!”

taco soup recipe

Then just serve up in bowls, and top with as much shredded cheddar as you’d like.  We like a lot. : )

taco soup recipe

If you try it out, let us know how many gold spoons your family gave this recipe.  : )

Filed Under: Recipes, Soups Tagged With: mexican soup, soup-recipes, soups, soups-for-cold-weather, taco soup, taco soup recipe

  • « Previous Page
  • 1
  • …
  • 13
  • 14
  • 15
  • 16
  • 17
  • Next Page »

We are wicked happy to have you here! We hope you find much inspiration, help, humor and enjoyment here.


Archives


POPULAR POSTS

* * * * * *

SUBSCRIBE to House of Joyful Noise blog! Every new post, delivered right to your email box!


Privacy Policy

Amazon Affiliates

Never at any additional cost to you, we may earn a small commission for our endorsement, recommendation, testimonial, and/or link to any products from our website. Your purchase through our links helps support our family, while sharing with you the products we authentically use and recommend, for various ideas, and letting you know where you can purchase them. Thank you for your support!

[footer_backtotop]

Copyright © 2026 HouseOfJoyfulNoise.com · Genesis Framework by StudioPress