• HOME
  • {A}’s Chipmunk Training Archives

 Homepage

  • The Homestead
    • Home Projects
    • Home Improvement
    • Home Decor
      • Seasonal Home decor
        • FALL Home Decor
        • WINTER Home Decor
        • SPRING Crafts and Creations
        • SUMMER Crafts and Creations
    • Our Chickens
    • Gardening
    • Organization
    • Re-Purposing
    • Furniture Refinishing
    • Budget
  • Crafts & Creations
    • Seasonal Home decor
      • FALL Crafts and Creations
      • WINTER Crafts and Creations
      • SPRING Crafts and Creations
      • SUMMER Crafts and Creations
    • DIY (Do-It-Yourself) Project
    • Kids Arts and Crafts
    • Homemade/Handmade Gift Ideas
    • Holiday Crafts
    • Fan Pulls
    • Free Printable/Downloadable
    • Sewing Projects
    • Giveaways
    • Business Features
  • Recipes/FoodFun
    • Breakfast
    • Lunch
    • Main Dish
    • Sandwiches
    • Appetizers
    • Slow Cooker
    • On The Grill
    • Side Dishes
      • Soups
      • Salads
    • Baking
      • Breads, Rolls and Muffins
    • Snacks
    • Treats
    • Desserts
    • Drinks
  • Homeschooling
    • Elementary Homeschooling
      • Elementary Homeschooling READING
      • Elementary Homeschooling MATH
      • Elementary Homeschooling LANGUAGE ARTS
      • Elementary Homeschooling SCIENCE
      • Elementary Homeschooling HOME ECONOMICS
      • Kids Arts and Crafts
    • Middle School Homeschooling
      • Middle School Homeschooling SCIENCE
      • Middle School Homeschooling HOME ECONOMICS
    • Language Arts
    • Math
    • History / Social Studies
    • Geography
    • Foreign Language
    • Field Trips
    • Games
    • Nature Study
  • The Big Picture
    • Life In General
    • Celebrations
    • Faith
      • Into the Light; The Series
    • Giveaways
    • Reviews & Sponsors
  • Photography & Lettering
    • Photography
    • truck lettering
    • vehicle graphics
    • Newborns
    • Kids
    • Engagement
    • High School Senior Pictures
    • High School Senior Pictures Sneak Peeks

Pots and Pans – DIY Organization Hanger

October 20, 2015 By Laura 1 Comment

We have always made eating dinner all together around the table every night, a high family priority. But quite honestly, making yet another family meal/dinner, is not always Michael or I’s favorite thing to do around here, towards the end of the day. Especially when both or either of us are in the middle of work, or some project, and need to stop what we are doing to go cook in the kitchen. But our disgruntled state can go from bad to worse, by the time we get the pots and pans we need out!  Ugh!

I don’t know where you store your pots and pans. But we have had ours in a cabinet on the floor under the counter, for years. Forever, for as long as we’ve lived in this house, actually. So to start, we’ve had to bend way down there, or just go head and get on the floor, to get what we need out. Or, to put clean pots and pans away, for that matter!  They only pile and nest so well, with some being the same diameter as others, but deeper pots. So there’s always a real tipping-factor going on.  And then there are all of the covers!!  So if all of the clinging and clanging isn’t enough to frazzle the nerves, everything falling out of the cabinet onto the floor, or sometimes onto our toes, will!

It’s about that time I remember THE WINE.
I don’t know what it is about a glass of wine, or something a little alcoholic, that makes cooking so much more bare-able. Sometimes even enjoyable, if you drink enough!  Ha haha!

But I had gotten to the point where I had really had it, dealing with the pots and pans cabinet. And for years Michael and I had randomly mentioned getting one of those grand pots and pans racks, that suspend from the ceiling. But you know, time really gets away, when we both hate spending money.  So on a recent Saturday, as I was headed out shopping with my oldest girl, I eluded to our pile of pallets outside by the wood shed, and said, “Just whip out something, please! It doesn’t have to be beautiful! I love rustic.”  (Because this is most always a point of contention, between us.).

By golly, he did it! [Read more…]

Filed Under: Home Decor, Home Page, Home Projects, Organization, The Homestead Tagged With: diy, do it yourself, hanging-pots-and-pans, kitchen-ideas, kitchen-organization, kitchen-organization-ideas, kitchen-tips, organization, organizing-pots-and-pans, pots-and-pans-hanger

Fall Themed Candles Embedding Real Leaves

October 10, 2013 By Laura 21 Comments

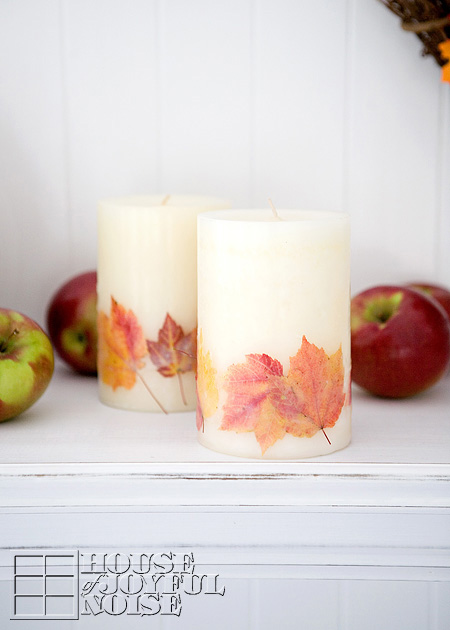
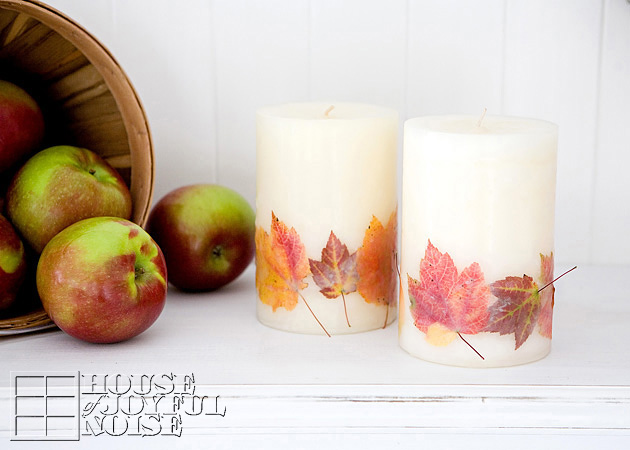
Today, I’m going to show you one way to preserve those beautiful Fall leaves you found, and make something beautiful to add to your warm Autumn home decor. Candles! Embedding real leaves.


We’re simply taking store-bought medium-pillar candles, and embedding the real leaves as a beautiful decorative element.
To do this, I’ll be using a separate wax medium.  The reason I am choosing to not just glue the leaves on, or seal them in with Modge Podge or something, is because those mediums are flammable.  I likely will be burning these candles. While I won’t burn them very low, I didn’t want to take the chance of having anything chemically-flammable as part of the candle, when it is easy enough to avoid that. Also, embedding the leaves within the sides of the candles will give the look I am trying to achieve.

All you’ll need for this project is some pillar candles of some sort, some plain melting wax (for candle making), your pressed leaves that you collected, and some pans. (A few other optional supplies will be mentioned along the way.)

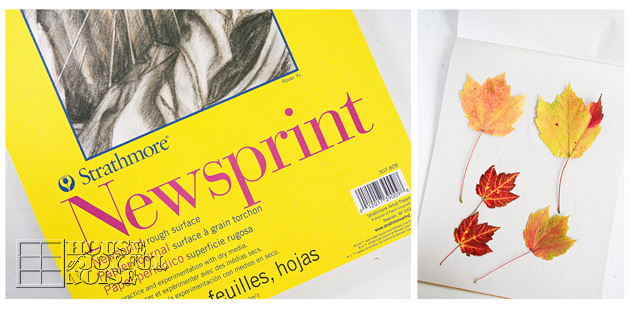
The first step in working with real leaves, is to ‘press’ them.  This not only flattens them, but somewhat preserves their moisture for a bit, yet keeps their pliability to be able to work with them well.   I press them by placing my leaves between the pages of a newsprint pad of paper, and putting a small pile of magazines, or whatever for weight, on top.  A few days will do.

–

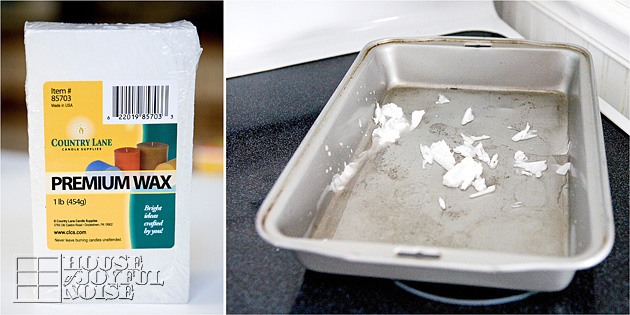
You’ll want to melt your wax over some kind of consistent heat. Making do with what I had, I cut some chunks off of my premium wax block, and put it in a roasting pan, over 2 burners on my electric stove on a very low heat. Possibly even the simmer setting. Start at the lowest and increase the heat as needed. Every stove is different, but generally speaking, you want the wax just liquid-y, but never to the point of bubbling. How much wax you melt depends on how many leaves you’ll be adhering, how many candles you are decorating, etc.  But regardless, you certainly want the wax deep enough to completely submerge a leaf.

  Once your wax is melted, you’ll want to have your pillar candles and leaves readily available to work with. Also, have a sheet of wax paper on a flat surface nearby, to be able to put your candle down as needed.

*This is a very important tip!
You need to keep your pillar candle itself somewhat warm to apply the dipped, hit-wax leaves successfully. The reason being is that lying your hot waxed leaf on the cold surface of the candle immediately sets the wax, and it does not apply well at all. 

But I have two great tips to choose from, for keeping your pillar candle warm:

1)  Have a heating pad on high on your nearby counter-top, with a sheet of waxed paper on it. You can roll the whole thing up with your pillar candle in it (in the waxed paper), or, you can simply lie the candle on it’s side, keeping warm on the side you’ll be applying to.

Or you can go with second option, which is what I ended up doing:
2) Simply lie the candle on the warm stove, beside the working burners to keep it warm. Obviously you don’t want your pillar candle to melt. But your burners should not be high enough to do that. This method worked well for me, as long as I did apply the just-dipped leaves to the warm area of the candle.

So here we go!

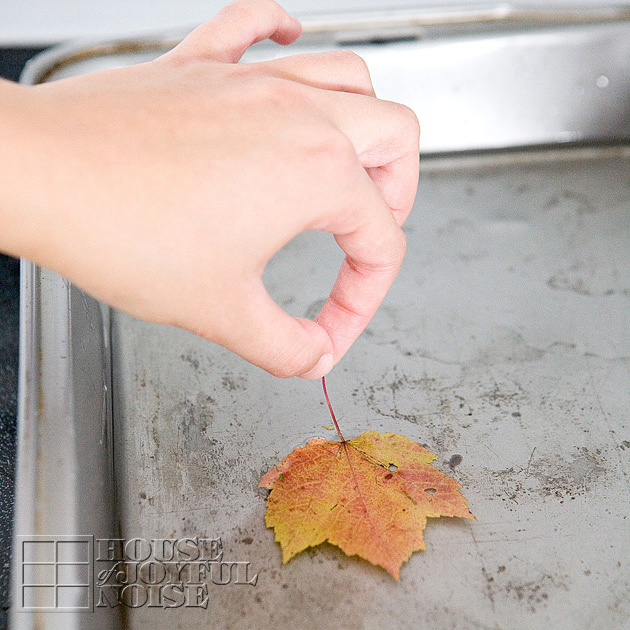
Dip your leaf in the hot melted wax, holding it completely submerging in the wax for a few moments. Keeping it submerged for a few moments (as opposed to dipping and retrieving) will really help the leaf get limp, which will be helpful in applying to the candle.

(View images left to right.)
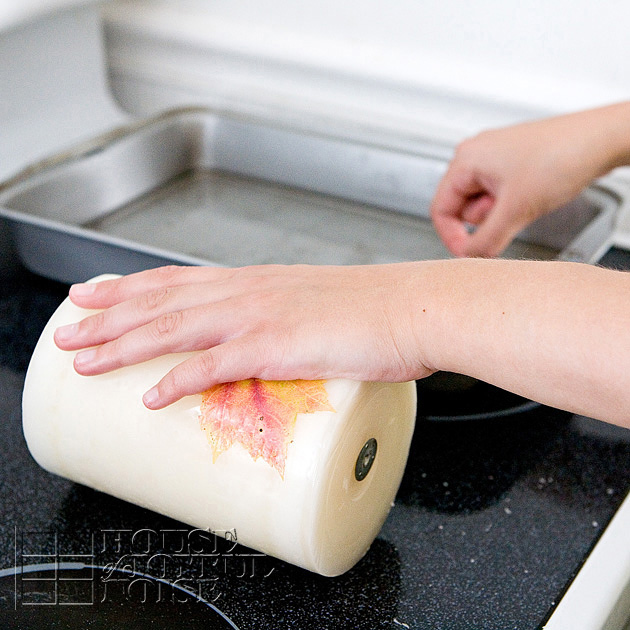
Then quickly but carefully lie and really ‘cling’ your whole leaf to the candle, and begin to rub down all over as you can.  I say as you can, because it is hot!  And yet you want to press it down as much as you can, before it starts to set. So gently press it down all over, without rubbing hard in any way, and then really just lay your hand down over it as soon as you can while it sets.

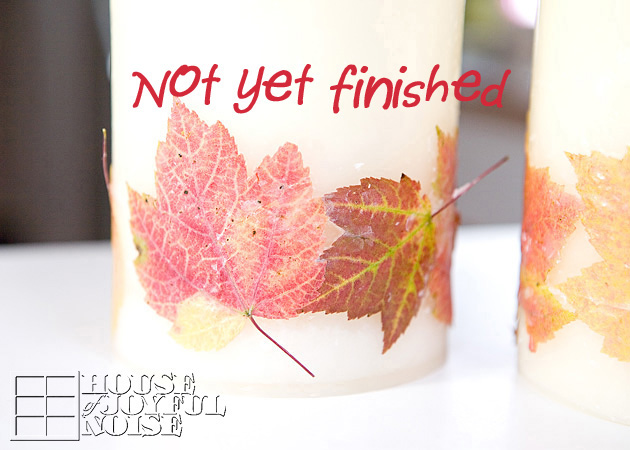
Continue adding leaves for your overall design. It is alright to overlap some pf the leaves as well.
Remember to warm the candle in between, as you’re dipping your next leaf.

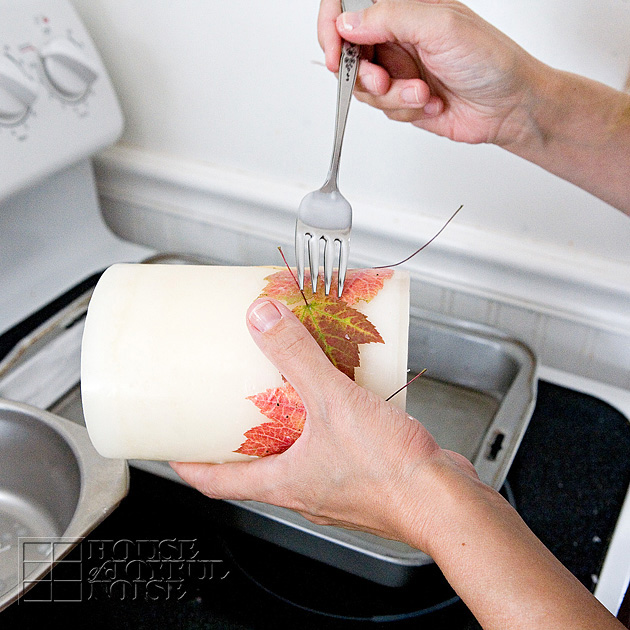
Now if you find the wax has set in an area that the leaf is not stuck down well, here is a little trick to re-work it:
Dip a fork into your hot melted wax, and drip it onto the area of your unsealed leaf that needs fixing.
Then press down again with your fingers.
The stems are optional to keep as is, cut shorter, or cut off at the base. I rather like them, and am leaving them for as long as they don’t break off on their own.

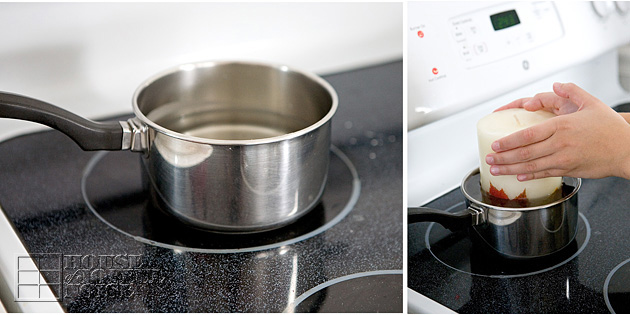
Once all of the leaves are applied, you might consider your candles done. But I really wanted to further seal the leaves onto the my pillar candles, so that they may better hold up for a longer period of time, without the leaves coming off.   The layer of wax over your leaves on your candle at this point is very thin, and that leaves (no pun intended) your decorative surface very fragile and at risk of being damaged.  It’s also somewhat bumpy from all of the pressing on. So another sealing coat is a good idea, and it’s easy to do!
Just heat up more wax in a sauce pan at a reasonable depth, and dunk the whole candle!  Use a size appropriate pan for the size of your handles, and no wider than you need, or you’ll need to use way too much wax to bring the level up.
Now….you also want to keep in mind that the submerging of your candle is going to drastically rise the level of your very hot melted wax. So, be mindful of the amount you melt.  My goal was to melt enough to dunk the candle to just over the leaf tips, without overflowing the wax all over my stove top range. I barely made it…missing just the tips of the leaves.

*Dunk it only once, (holding it submerged for a moment or two like the leaves), as double-dipping may create such a layer of wax, that it’ll become too difficult to see the beautiful shapes and colors of your leaves.
Once lifting them up out of the pan, just carefully set them down on that sheet of waxed paper, until the whole candle cools and sets.

Now they are finished, and ready to add some Fall beauty to your home wherever you choose to display them.  You can enjoy them long after the leaves outdoors have dried up and crumbled away.
I hope you enjoyed this tutorial too, and will consider having fun making some Fall candles with real leaves yourself.

* * * * * *
Please come follow me here and there:

Save

Filed Under: Crafts & Creations, DIY (Do-It-Yourself) Project, FALL Crafts and Creations, FALL Home Decor, Home Decor, Seasonal Crafts and Creations, Seasonal Home decor, The Homestead, Tutorial Tagged With: add-fall-leaves-to-candles, autumn-crafts, candle-crafts, candle-detailing, candles, crafts, decor, dipping-leaves, diy, elementing-candles, fall-crafts, fall-decor, fall-leaves, home, home-decor-projects, how-to-wax-real-fall-leaves, leaf-crafts, leaves, pillar-candles, waxed-leaves

Terracotta Flower Pot Wind Chime | Tutorial

July 22, 2012 By Laura 105 Comments

terracotta-flower-pot-wind-chime-craft-3

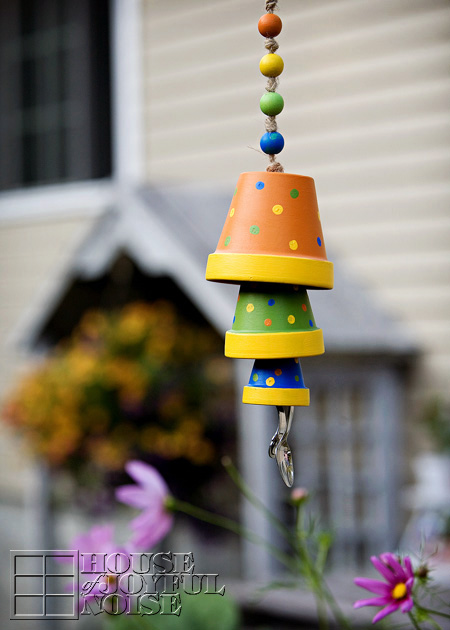
Making this flower pot wind chime was a fun and simple project to do with my kids. I was really looking forward to hanging out with them and painting, and I knew I would also love seeing the wind chime in my gardens, where I had every intention of hanging it, when it was done.
While I think we kind of ‘made it our own’, this flower pot wind chime was not at all my idea. I have seen them so many times at crafty website now, and so many style-versions of it, that I’m not sure which style I saw first, or where! Someone must have come up with this adorable idea first, but I’ll be darned if I know who! Whoever did, we thank them for the fun inspiration, to make something (else) to have around, that makes me smile inside, every day.

Here’s the basics on how we made our terracotta flower pot wind chime.

001_terracotta-pots
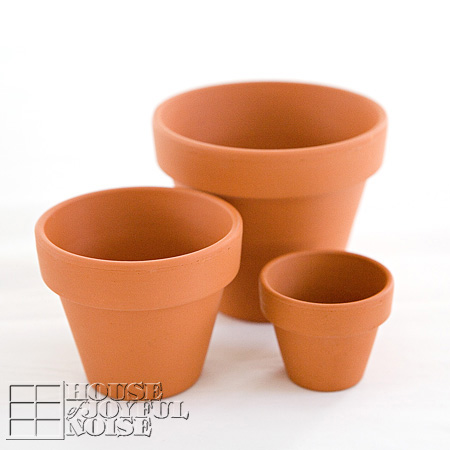
We started with 3 different sized terracotta plants, that have drainage holes in the bottom.
The smallest is tiny, at 1-1/2″ tall. Then the 2 next sizes up: 2-2/3″ and 3-1/2″.

002_synthetic-flat-brushes
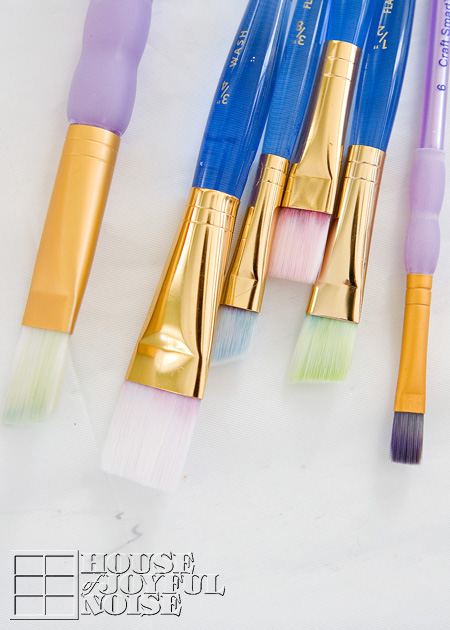
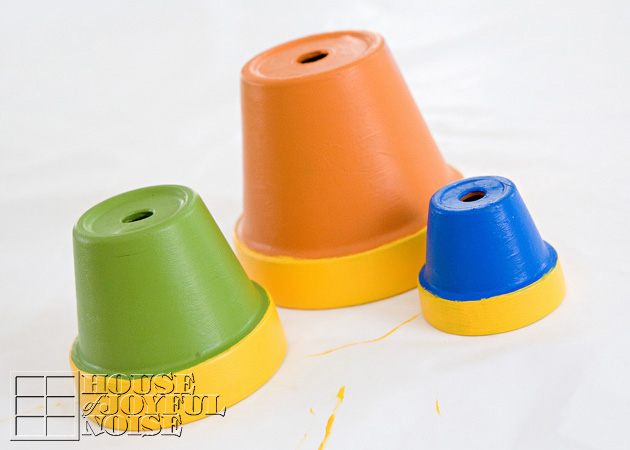
Using our little collection of synthetic brushes, we got to painting our pots.

003_paint-palette
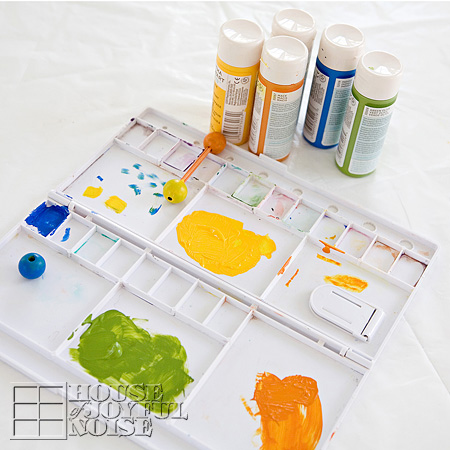
We used Martha Stewart Craft Paints, which are an acrylic paint. We also looked around and found what wooden beads we had in the house, which we wanted to use on our wind chime as well. After choosing our colors of paint and how we were going to paint the pots, we wanted the beads the same colors. One we had already was the correct color-green. The other 3 we had were not, so we painted them correct colors. If you can imagine, painting small wooden beads was not that easy. But we quickly figured out a helpful trick: We stuck 2 toothpicks in the bead holes, to hold them while we brush painted them the colors we wanted them to be. You can see them resting on the palette, drying.

004_painted-terracotta-pots I really wanted to take photos of the kids painting, for me! But they were done and back outside, on the other side of my window, swimming again, before I ever got photos of them painting. But, since they weren’t paying any attention to me anymore, I did clean up the edges of their pot-rim painting, just a little. ; )

005
Our original idea, was to decorate our pots with little garden bugs.  Like butterflies, ladybugs, dragonflies, etc. It would have been so cute! Don’t you think? But none of us felt we could paint them that well, that small, and we couldn’t find any stickers or decals of any sort, to kind of Modge Podge them on. So, when it came time to decorate the pots, the boys were busy playing something else, and Alexis was at work. So O (Olivia) and I decided to just polka dot them.  I love polka dots, so I was sure I’d love it as much as the garden bugs idea.

006
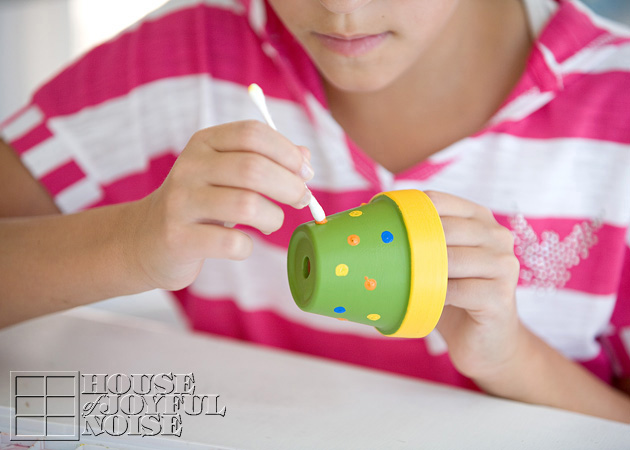
Applying the polka dots could not have been easier. Since we wanted the dots very small, on our small pots, we just used q-tips! We dipped the tip in the paint, and then dotted it right onto the pot! The hardest part was spacing the colors. I always drive myself crazy with that…..not wanting the same colors right near each other, and trying to get even spacing too. But we did a well enough job!

0071 O and I worked together, polka-dotting, and our q-tip trick worked like a charm.

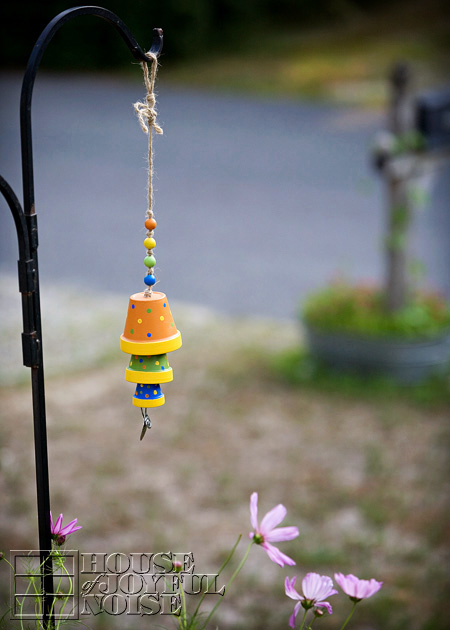
Now, I didn’t take photos of the assembly. But it’s easy enough to explain:  We used jute twine, and strung it through the holes of the pots. We tied big enough knots on the string, to hang the pots on the string as we wanted.  So each knot was inside the pot underneath the drainage hole.

terracotta-flower-pot-wind-chime-craft
Now, some crafters who have made flower pot chimes, opted to have the string come down out of the pot, with a wooden bead on the string (held in place with a knot before and after the bead) to act as the ‘ringer’, that would hit the pot when the wind blows. So they designed it that way, spacing their pots out more.  We chose to use the pots themselves, to be the ringers, so that when the wind blows hard enough, the pots hit each other. That required (visually) setting the pots overlapping each other a little.

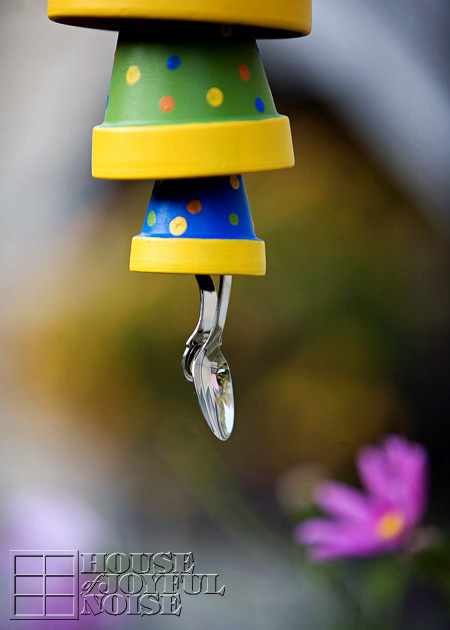
As an afterthought too, I decided I wanted to give the chime a quick UV protectant spray coat of clear acrylic.  Since my chime was all already assembled, I just put some tin foil over the spoon, and sprayed it anyway, getting some up into the pots as well. I do recommend spraying the painted pots before assembly, if you wanted to. But no big deal.  It’s an aerosol, so it worked easy enough afterwards.

terracotta-flower-pot-wind-chime-craft-1
Aside from the paint design, the other touch that made it more ‘our own’, was that we added a stainless steel baby spoon as the bottom ringer. It really is a special touch, to me, with the memories of giving Alexis her first baby food, and then the triplets coming along, and the 3 little mouths we were trying to keep up with come the spoon- feeding age, with them. We didn’t bother having 3 bowls and 3 spoons, or we’d spend as much time picking up and putting down bowls and spoons, as we did putting spoons in sweet little open-waiting mouths.  Go ahead. Imagine that for a moment. No…..1 spoon, 1 bowl of food….down line of sweet, messy mouths we went. And then started at the beginning again.  Gosh I miss those days.

Wait. How did I end up talking about feeding my babies? Oh yes….the baby spoon, and the happy memories it brings me.

terracotta-flower-pot-wind-chime-craft-2

 So, it was simple as that. Anyone can make an easy and whimsical wind chime, even if you’re not that crafty. It’s a breeze.
Anyway, we’re happy you caught wind of this little fun project, and came to take a look.  Even if you’re just blowing through.

Ok, I’ll stop now.

P.S. Feel free to chime in, in the comments.
(Oh my gosh! Somebody stop me!)


Save

Filed Under: Crafts & Creations, Kids Arts and Crafts, Re-Purposing, Tutorial Tagged With: baby-spoon-chimes, crafts, diy, flower-pot-wind-chime, garden-decor, homemade-wind-chimes, kids crafts, Martha-Stewart-Craft-Paints, Plaid-products, polka-dot-crafts, terracotta-pot-crafts

Boys’ Hardware Accessories

May 14, 2012 By Laura 24 Comments

004_boys-hardware-bracelets-accessories-300x214

It seems to be somewhat easier, to come up with crafty ideas for my girls. But the other equal half of my kiddos, are boys!  I know they get just as excited when I am making something for them, too. So I try to see what cool ideas I can come up with, that they’ll dig.

     Something recently got me thinking about hardware.  Hardware is just cool, and definitely boyish! With all the various sizes and shapes that it comes in, for all kinds of building and fix-it projects, I got brainstorming what cool projects I could come up with for my boys.  In this post, I’m sharing some hardware jewelry and belts I made for them.

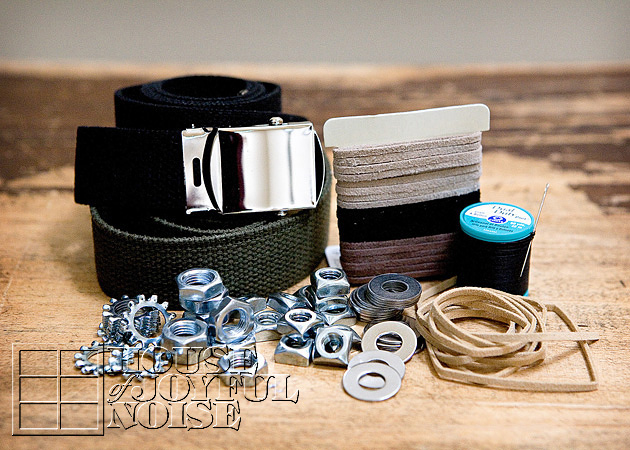
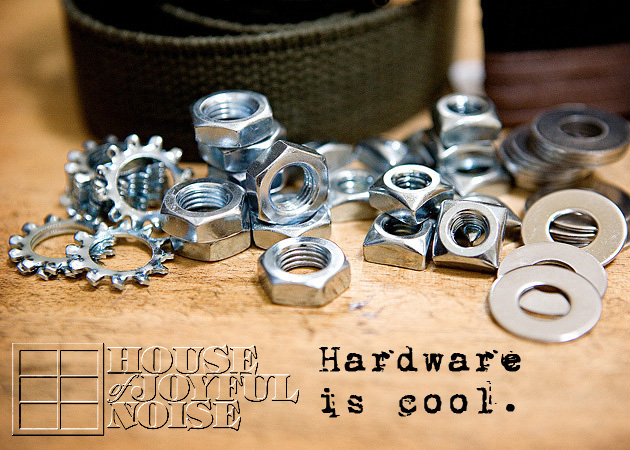
001_boys-hardware-accessory-supplies         I picked up a couple of adjustable belts at an army surplus store, and some suede string in a few different boyish colors, at the craft store.  I also gathered some heavy duty sewing thread, a sturdy quilting needle, and of course, a variety of hardware!


002_boys-hardware-accessories       I have to say, picking out the hardware was pretty darn fun! I went to the hardware store with all of my kids in tow, and we were there for a good while! I think we were making the store clerk a little nervous that we’d mix up the hardware in the 2 aisles of tiny organized drawers of hardware!  But we didn’t. ; ) 

     I knew I’d be getting some good ole hexagon bolt nuts and flat washers. But I was eager to see what other cool little shapes I could find as well.  I thought the square nuts and star lock washers were very cool, so I got a bunch of them as well. Now, if your husband is handy as mine is, you may already have some of this kind of hardware at home. My husband did have a big tin of hardware, but they were really old and dirty. While it would have been great to recycle that, I wanted new and shiny pieces for these projects.


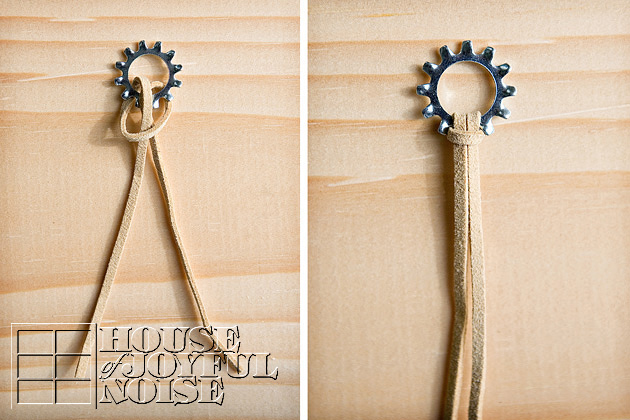
003_suede-string-loop    To make bracelets, choose a hardware element, and then figure out how much suede string length you’ll need to tie round one side of a boys wrist, and double that length, with a little extra for tying. Do the same with a piece for the other side of your hardware element. For a necklace, cut a single piece long enough for the desired length and tying.  The above photo demonstrates how you can attach the suede string to the hardware:  with your piece of string folded in half, feed your two loose end through the backside hole of your hardware, out of the front, and then bring those ends  in between and through the loop on the opposite end. Pull and the loop will close onto the hardware, as seen.

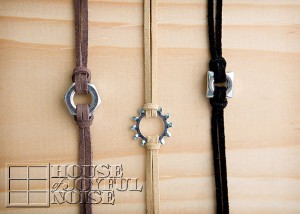
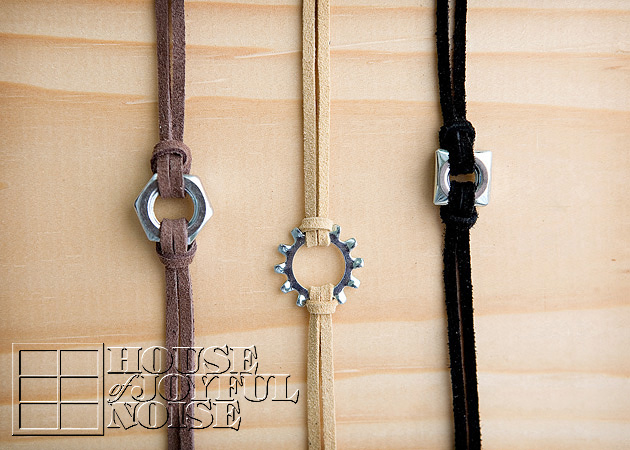
004_boys-hardware-bracelets-accessories   Here are three finished bracelets, using a single piece of hardware.  If you prefer, the end of the strands for any of the jewelry shown, could be finished with clasps, but we didn’t bother.  We just tie them on.  It adds to the casual feel!  (Warning: You do need to tie them tightly though, or they tend to just come untied.)


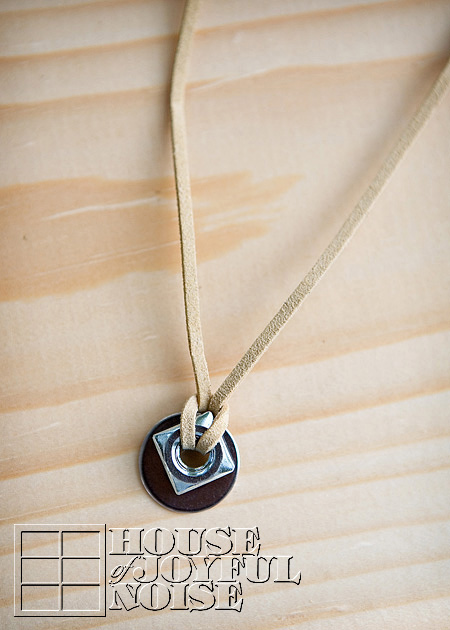
005_boys-hardware-necklace-accessories
Here is a necklace, using a flat washer and a square nut.
It’s fun to play around with the hardware, and seeing what combos you can come up with, for a different design or look.


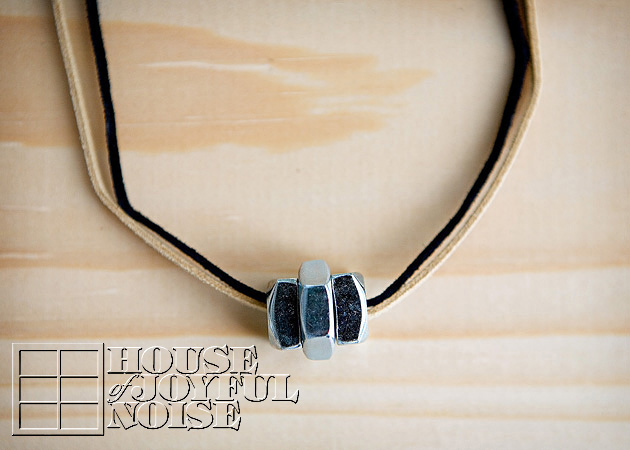
006_boys-hardware-necklace-accessories This is the front view of another necklace, using a double strand of suede in 2 different colors, holding a hex-nut in the middle and square nut on each side.


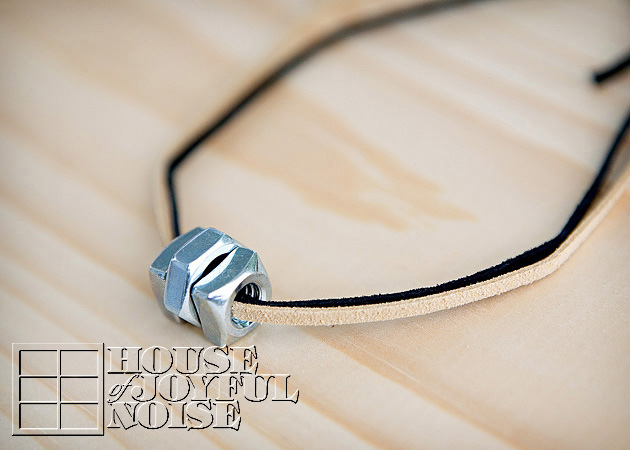
007_boys-hardware-necklace-accessories This is a side view of the same necklace.

    Now, for the tricked out adjustable belts!  These take just a little more time and simple effort! But if you get the smiles from your boys that I did, it’s well worth it! Well, actually it’s only fair to admit that their big sister asked me if I’d like some help sewing the hardware these, and I happily said “yes!”  So maybe you’ll have a helper too, but might I at least suggest that you at least use the help of a thimble! Pushing a needle through the material of these belts can result in some sore fingertips.

     These first couple of steps that I explain next, are actually easy to do, and probably steps you’d figure on your own would be helpful to do first. But, I thought I’d just suggest them just in case. More than anything, they are most complicated for me to explain! So bare with me. (Or skip the directions if you don’t plan on needing them.) :


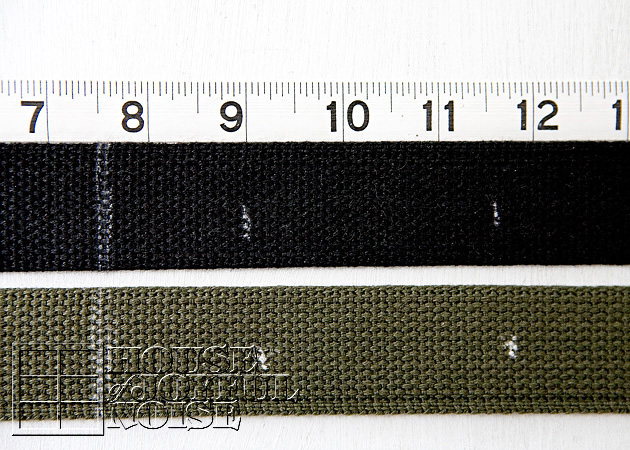
008_boys-hardware-accessories-how-to   The first tip I have for you, is to get a waist measurement of the belt wearer, if you can.  Or, you can just use the belt on the boy(s) to figure things out, which is what I did! These adjustable belts can be cut to length, so that is a wonderful thing. But because of the hardware elements you’ll be hand sewing on, you need to know where that buckle is going to be on the belt!

Here’s how I did it: 
I simply slid the belts right through the loops of my boys pants that they had on, just sort of overlaying the excess of the belt over the buckle, to figure out how much of the belt you’ll be needing. Slide the buckle along the belt, and determine how much of the belt end would be fed through the buckle, when putting it on. By doing that, you’ll get an idea of where to lock the buckle into place, with the toothed lever underneath. Mark each side of the buckle with chalk. Then you can really feed the belt through the buckle, and mark off where the ‘tail’ of the belt is, that is coming out of the buckle, and which is actually the opposite end of the belt. You are marking it off with chalk, because you don’t want to sew any hardware on that area, or it will not fit through the buckle. (Think about it. 😉   So you’ll only want to be sewing elements on the area of that will actually be around their waste – not the piece that will be going through the buckle.  (Am I over-explaining here? This is the longest paragraph in the whole post – I swear. 😉 Once you have the buckle in place on the belt, with the right amount of tail, you will see the excess of belt material that you can cut off.  Be sure to cut the right end, that is already a rough end!  It’s the end closest to where the buckle is. You do not want to cut off the sealed end with the metal piece! 

     Once the buckle area is chalked off, and the tail is marked off, you can make a couple of tick marks between belt loops if you’d like, so you generally where the are of belt will be showing. This is not necessary, but an added step if you want the hardware to show in just the right places, and not hiding under any loops. Then you can remove the belt off the pants, and cut off that excess material you won’t need. They come pretty long from the army surplus store, even at the shortest length.  Them I took off the buckle for the time being, to be able to work with the belt easier.  Next, I laid the belts flat on the table, and I figured out how spaced I wanted the hardware pieces, by just generally laying them out, and then measuring the estimated space.  After marking where I wanted my first piece, I measured and made a tick mark about every 2 1/2 inches from there.

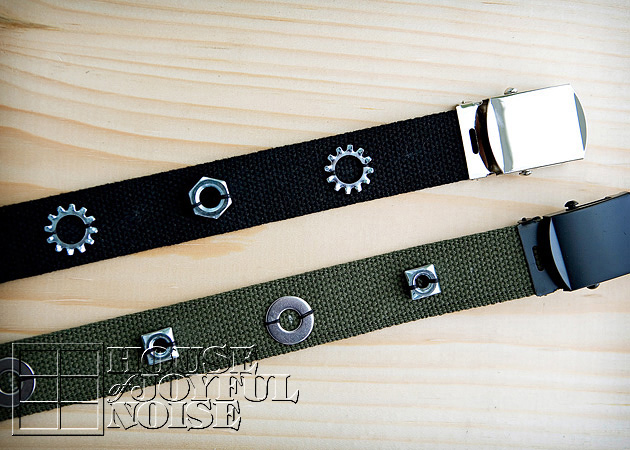
009_boys-hardware-belts-accessories Here are a couple of finished belts.  The hardware pieces are just quickly hand sewn on. I secured each each side of the hardware with 2 stitches, using the heavy duty thread. I also did one stitch in the center of the hole (of the hardware) just through the belt material, to take up some thread slack on the back side, while crossing over from one side of the piece of round hardware to the other. This allowed me to sew on a whole piece of hardware at a time, before finishing off the stitch and cutting the thread. (I started with long doubled thread, so that I could sew on and finish off a few pieces of hardware at a time, before really needing to re-thread a new strand of thread.)

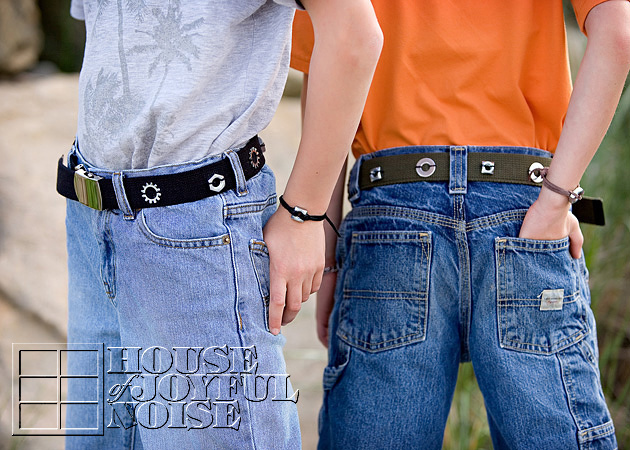
     I’m happy to say, my boys were thrilled with their new accessories!  So much so, that they were happy to model for me, so they could show you how cool it looks sporting these hardware accessories.  Take a look for yourself…..

  010_boys-hardware-accessories
Yup, this is Mama’s boys. And I love it! (Although their triplet sister, and big sister, are just as much my blessings!)


011_boys-hardware-accessories I think they’re looking cool (with or without accessories), and I think they know it.  Rico Suave 1 and 2……no?  ; )  lol.


012_boys-hardware-accessories      They don’t normally tuck shirts in, but they’ve been wanting to, to show off their belts. Their Daddy tucks his shirts in, all lot of the time. I don’t get it, but I love him anyway. lol

013_boys-hardware-accessories      So there you go: My boys sporting their cool new accessories, Designed by Mama! And yes, I did edit out all of their bumps, scrapes and bruises, acquired by all of the ways boys full of antics get them! But tell me what you think;  Is wearing hardware possibly the new cool?  Or do my boys just make it look good?


Save

Filed Under: Crafts & Creations, DIY (Do-It-Yourself) Project, Tutorial Tagged With: boys-accessories, boys-belts, boys-fashion, boys-hardware-accessories, boys-jewelry, boys-styles, crafts, crafts-with-hardware, diy, do it yourself, handmade-gifts-for-boys, repurposed-hardware

Rustic Makeshift Potting Bench | Gardening Solution

June 15, 2011 By Laura 7 Comments

potting bench

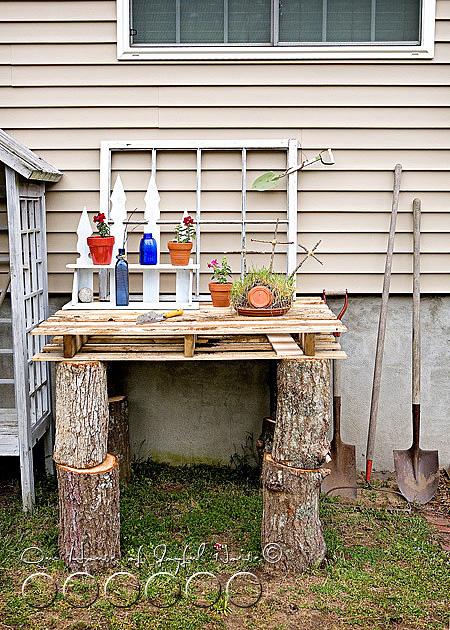
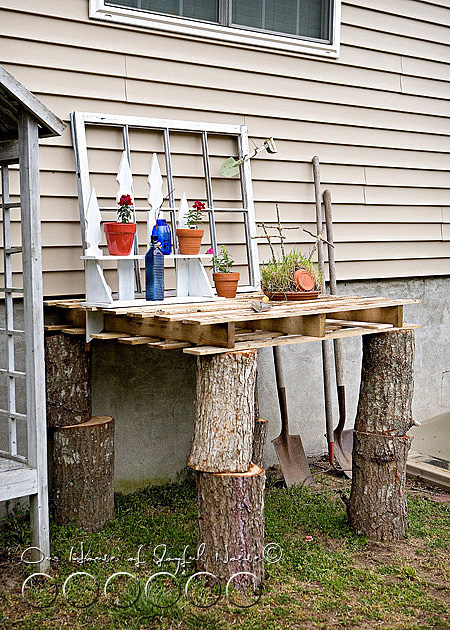
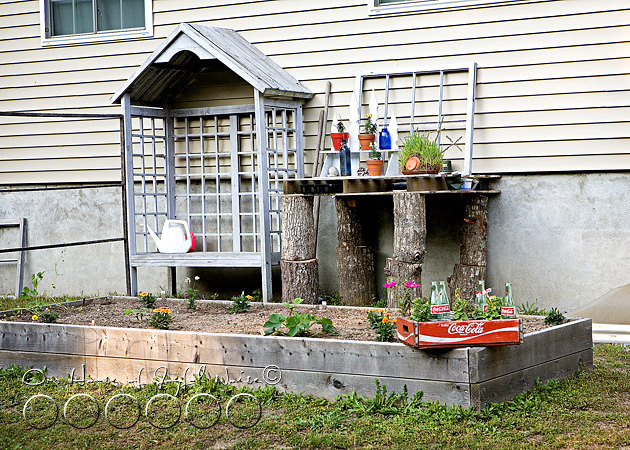
When you need a potting bench, and you don’t have one, you just have to make do. And that’s how this rustic makeshift potting bench came to be.

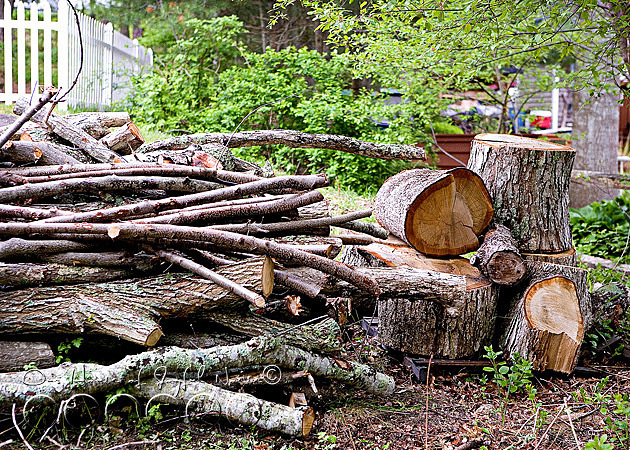
We’ve been blessed time and time again, with wood to burn in our wood stove through the cold seasons of the year.  Having a cozy fire going in our home, is definitely our preferred source of heat, and we’ve hardly had to invest much in keeping it going.  Oak pallets are dropped and stacked beside our driveway regularly through the winter, by Michael’s supply company, who is always looking to get rid of them.  They burn nice, hot & slow.

potting bench This load of tree wood is from the guy a few houses down, who was clearing off his lot behind his home. He had no need for it, so we took it.  Naturally, I knew we could burn a lot of it. It needs to be split & stacked still, of course, but there’s plenty of time for that.  There was some nice logs in there, and I had another idea for some of it. Explaining what I wanted to Michael, was the biggest trip.  Eventually, I had to just direct him through the process, because he was not getting ‘my visual’ so to speak.


potting bench

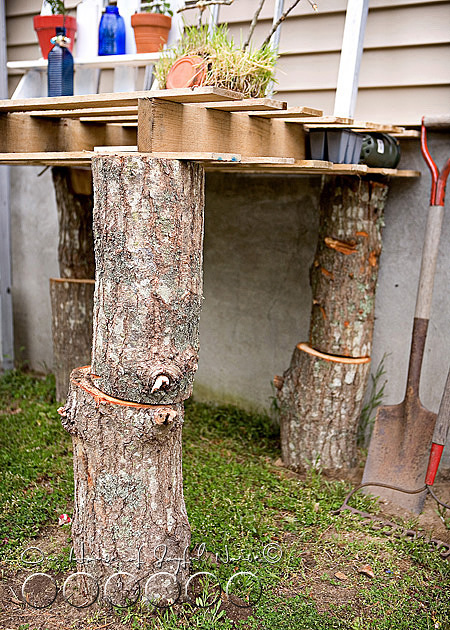
What I wanted, was a potting bench put together, using cut logs, and a pallet.   A rustic makeshift table of sorts, near our gardens, to re-pot plants on, work at, or place our fresh picked produce as we went along.

He got the visual, about the time it got done.

potting bench
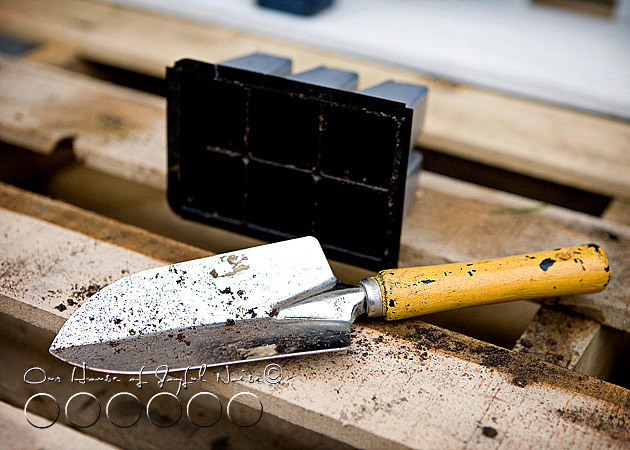
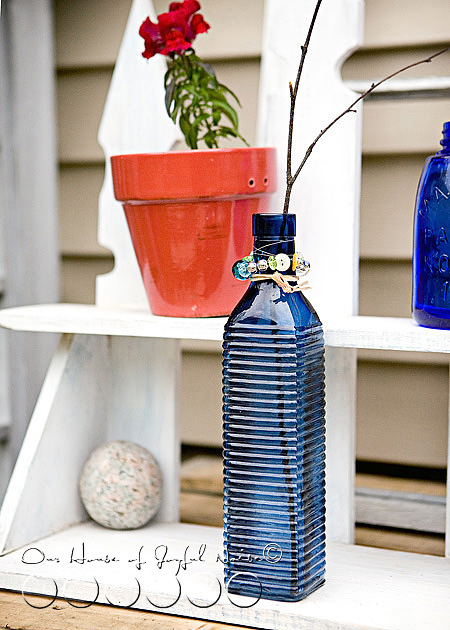
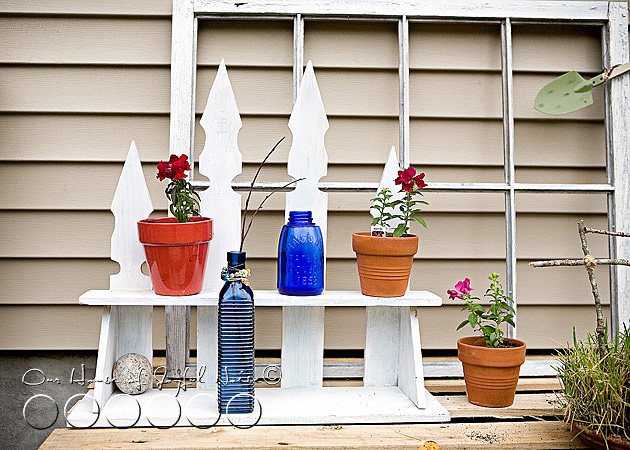
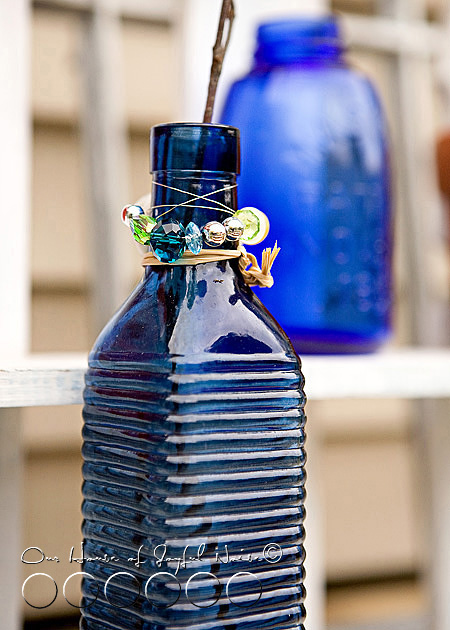
Of course nothing looks like much of anything, without a little touch of decor pretty. I had a few things I had picked up here and there for next to nothing, that looked perfect on the table top.  Added a few of my smaller potted flowers, and I loved it. Just what I had pictured.  Even Michael loved it.


potting bench The bench has proven handy, indeed.   I use it all of the time.


makeshift-potting-bench-5
Country-ish, charming, and functional.

What’s not to love?

makeshift-potting-bench-6 I know the decor will change and evolve, over and over again. Because it’s just a great place to put the interesting little things we find, on our walks along the seashore, and stuff like that.  That rock you see in the back corner of the shelf, is like a perfect round ball. So cool.


potting bench
So what do YOU think of this set-up? 
We live on a dead-end road, with very few neighbors.

But if you were driving by, would you see it and think….“WHAT the HECK?”

potting bench Because I don’t know….I just love seeing it there.
Call us rednecks.

Maybe because it’s so simple.

makeshift-potting-bench-9
It’s really just the simple little details in life, that make me so happy inside.
Thanks or coming to check it out. Happy Gardening!


Save

Filed Under: Gardening, Home Decor, Re-Purposing, The Homestead Tagged With: diy, Gardening, makeshift-potting-bench-ideas, pallet-projects, pallet-recycling, potting-benches, repurposing

  • 1
  • 2
  • Next Page »

We are wicked happy to have you here! We hope you find much inspiration, help, humor and enjoyment here.


Archives


POPULAR POSTS

* * * * * *

SUBSCRIBE to House of Joyful Noise blog! Every new post, delivered right to your email box!


Privacy Policy

Amazon Affiliates

Never at any additional cost to you, we may earn a small commission for our endorsement, recommendation, testimonial, and/or link to any products from our website. Your purchase through our links helps support our family, while sharing with you the products we authentically use and recommend, for various ideas, and letting you know where you can purchase them. Thank you for your support!

[footer_backtotop]

Copyright © 2025 HouseOfJoyfulNoise.com · Genesis Framework by StudioPress