
• HOME
  • {A}’s Chipmunk Training Archives

 Homepage

  • The Homestead
    • Home Projects
    • Home Improvement
    • Home Decor
      • Seasonal Home decor
        • FALL Home Decor
        • WINTER Home Decor
        • SPRING Crafts and Creations
        • SUMMER Crafts and Creations
    • Our Chickens
    • Gardening
    • Organization
    • Re-Purposing
    • Furniture Refinishing
    • Budget
  • Crafts & Creations
    • Seasonal Home decor
      • FALL Crafts and Creations
      • WINTER Crafts and Creations
      • SPRING Crafts and Creations
      • SUMMER Crafts and Creations
    • DIY (Do-It-Yourself) Project
    • Kids Arts and Crafts
    • Homemade/Handmade Gift Ideas
    • Holiday Crafts
    • Fan Pulls
    • Free Printable/Downloadable
    • Sewing Projects
    • Giveaways
    • Business Features
  • Recipes/FoodFun
    • Breakfast
    • Lunch
    • Main Dish
    • Sandwiches
    • Appetizers
    • Slow Cooker
    • On The Grill
    • Side Dishes
      • Soups
      • Salads
    • Baking
      • Breads, Rolls and Muffins
    • Snacks
    • Treats
    • Desserts
    • Drinks
  • Homeschooling
    • Elementary Homeschooling
      • Elementary Homeschooling READING
      • Elementary Homeschooling MATH
      • Elementary Homeschooling LANGUAGE ARTS
      • Elementary Homeschooling SCIENCE
      • Elementary Homeschooling HOME ECONOMICS
      • Kids Arts and Crafts
    • Middle School Homeschooling
      • Middle School Homeschooling SCIENCE
      • Middle School Homeschooling HOME ECONOMICS
    • Language Arts
    • Math
    • History / Social Studies
    • Geography
    • Foreign Language
    • Field Trips
    • Games
    • Nature Study
  • The Big Picture
    • Life In General
    • Celebrations
    • Faith
      • Into the Light; The Series
    • Giveaways
    • Reviews & Sponsors
  • Photography & Lettering
    • Photography
    • truck lettering
    • vehicle graphics
    • Newborns
    • Kids
    • Engagement
    • High School Senior Pictures
    • High School Senior Pictures Sneak Peeks

“I Am Third” | A Wood Pallet Sign

December 5, 2012 By Laura 9 Comments

It’s always a great day, when I finally get something OUT of my head, and am able to find the time to bring it to life, and have it real and in front of me.  It makes me happy because, there’s a whole lot in my head, that never (ever) gets out!  I wish I could do all of the projects that I actually think of, but I have other joyful obligations too, than just being all artsy 24/7.  So only a small percentage of my notions ever actually come to be.
I’m really glad this one did though, because it’s a meaningful one in our home.

The vision was a wood pallet sign.  And we usually have no shortage of those, as this is what our driveway often looks like . . . . . .
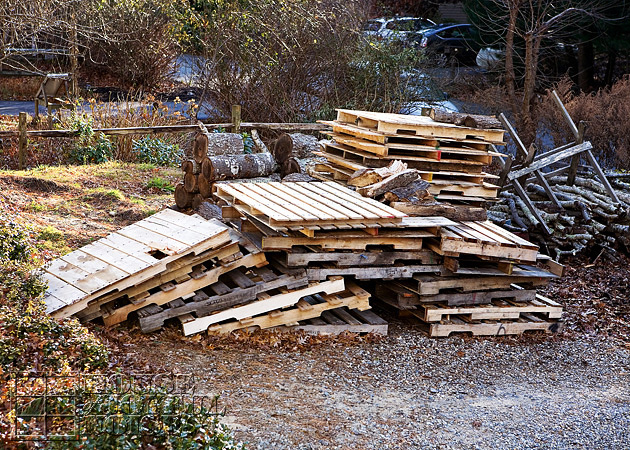
. . . . and there’s more where those came from.  Michael is able to get them from work by the load anytime.  Many of them he chops up and we burn in our wood stove. Free wood is always good!  But they are great for many other things too.  And a pallet was perfect for my idea for the sign I wanted to make.

The theme of the sign is a phrase we are fond of in our family, and try to live by, and it is this:
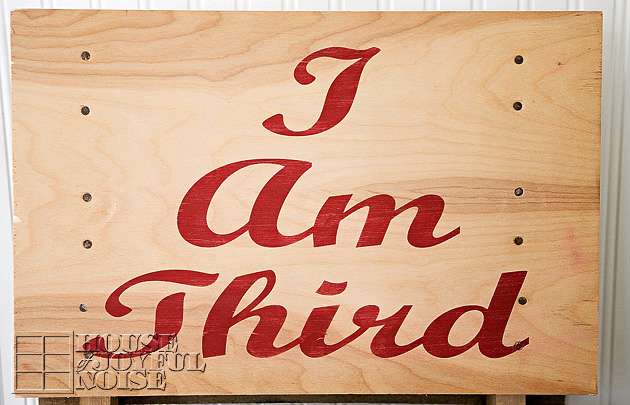
 
I am third.

You may well guess all on your own.
Like all families with many kids, one of my tasks as a parent is to teach my children to always put God first, be compassionate of others, and make great efforts to be selfless whenever possible.  Having triplets, you can imagine we’ve had many teachable moments and conversations about this kind of thing from toddler-hood on up, while encouraging them to share, and not grow with any kind of mindset that our own wants and needs should always or ever be first. That’s just not how we roll, as Christians.  Of course, this philosophy of serving, goes far beyond the constraints of our family, and the walls of our home. It applies to our world and every day we live in it, and with all whom we interact with across the board, from absolute strangers, to acquaintances, to loved ones a part of our personal lives, and everyone in between whom we happen upon daily .  I want that to stick with my kids, as they grow older in their faith, and take on this world, with all of their plans and dreams before them. It can only help, for each one of us to be reminded often.
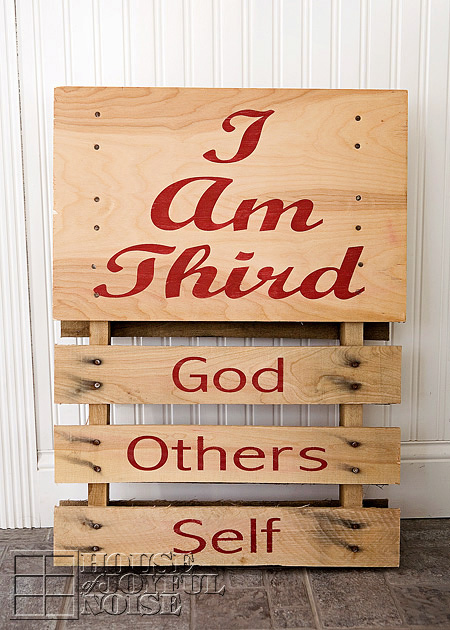

And so with another an extra piece of plywood, some old extra nails we had on hand, and some paint and a brush, the pallet sign I saw in my head for so long, was created:


Because of the list form of my idea, I saw the pallet as the perfect material for the sign.
It was cut down to a size of about 20″ x 27″.
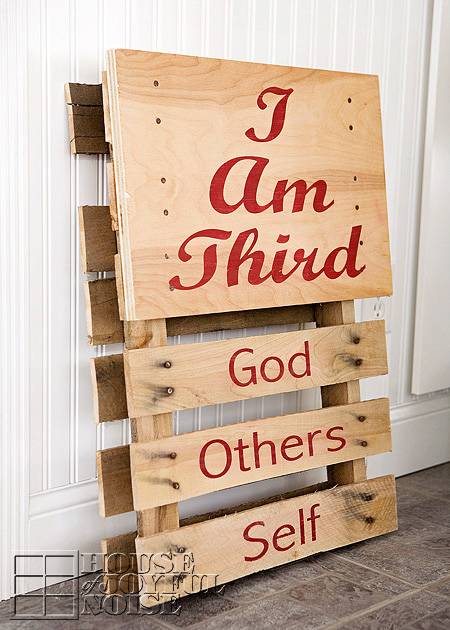

I wanted it kept as simple as possible. Rustic, raw, and straightforward. Sure, it may not always be easy to live the message.
But God always forgives us, and we always have the opportunity to keep on trying.
It is a simple concept to remember, in terms of the priorities we want to strive to serve in our life:
God
Others
Self
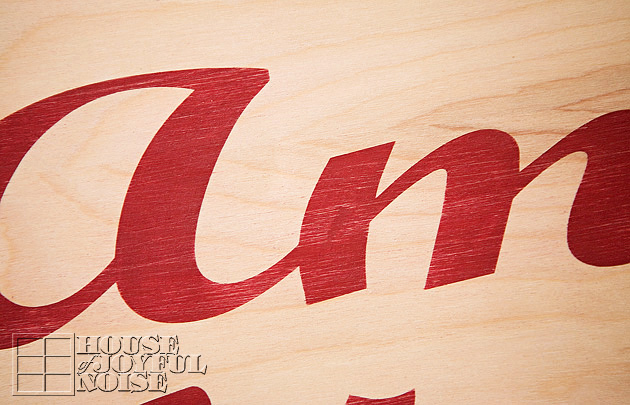
For some reason, I always saw it in this darker red.  When it came time to paint, I stopped and considered other colors.
But I really needed to create it just as I had envisioned it for so long. Or else I could go crazy.
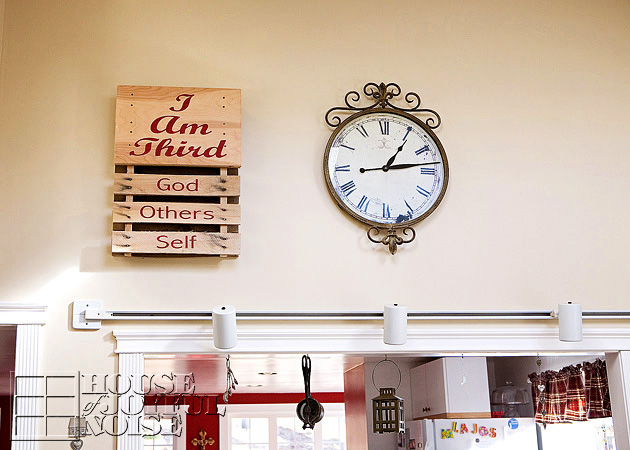
Michael hung it up the very same day. Right there where we all see it, again and again, every day.  He loves it as much as I do.
I suppose others may come into our home, start to read it, and be a little perplexed.  But one of the most cherished things about having a home to me, is making it a place that is meaningful to our family. It’s the little things, that are personal and of the heart, that make it feel like home.  And this sign….. and all it says….it means something to us.  It’s an awareness that we want to be reminded of, again and again. Not just the kids. But all of us. I know I can use such a gentle reminder, as often as anyone else.
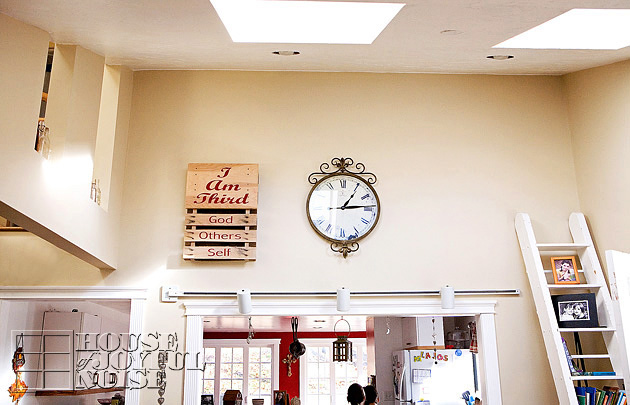
There is lots more space on this particular wall in our open living space, up there with the clock. The wall is much bigger than it even appears in this photo, with the cathedral ceiling.  We realize the sign is so flush left, and leaves the wall as a whole quite unbalanced. But we’re ok with that for now.  Soon enough, the wall all around the clock will be filled with other things that mean something to us. Maybe more signs.  Who knows. But we have no desire to rush these things, just to fill up and balance the wall. It’s what is hanging there, that matters to us.
All of the space? Well, that’s what I call inspiration. Like a blank sheet of lined paper, or a canvas.  The possibilities are endless, and exciting.

The kids have really embraced the lesson, most days. But when they are together and it’s needed, because one, or some, or all are reverting back to looking out for themselves over little things,  I like to remind them:
“If everyone put everyone else second, you’ll always actually be second, too! Not third. Right? So just be a good example.”  ; )
I’m a tricky Mama. ; )
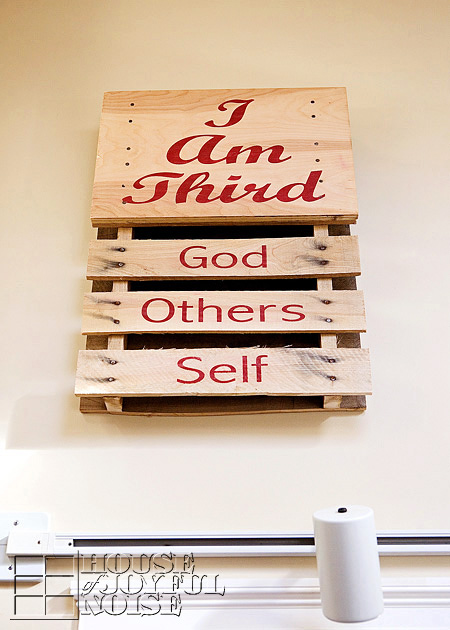

I wonder what I’ll be able to get out of my head, next.

* * * * * *

Please come follow me here and there:

Save

Save

Save

Save

Save

Save

Filed Under: Crafts & Creations, DIY (Do-It-Yourself) Project, Faith, Faith/ Catholic, Home Decor, Into the Light; The Series, Life In General, Parenting, Re-Purposing, The Big Picture, The Homestead Tagged With: Christianity, Faith, God-first, home decor, pallet-ideas, pallet-projects, Parenting, rustic-signs, signs, wall-signs, wood-pallet-signs

Christmas Advent Calendar Idea for the Home

November 25, 2012 By Laura 9 Comments

        As I type this post, it’s the end of the weekend following Thanksgiving, and the last weekend of the month of  November.  For many families, this is the weekend their home gets decorated for Christmas!  While it probably would have been nice to share this idea with you just a little sooner, I personally prefer to get past Thanksgiving, before I can (or even want to) focus on Christmas.  That being said, there still are several days to spare before the first of December is here, so you still have time to do this simple and beautiful idea, for a Christmas Advent Calendar in your home.  This idea is something I created  two years ago, and I thought I’d share it with all of you, in case it’s something you’d like to try for your own kids.


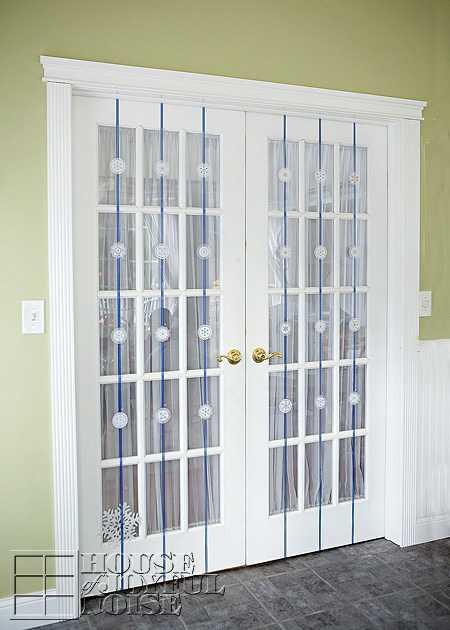
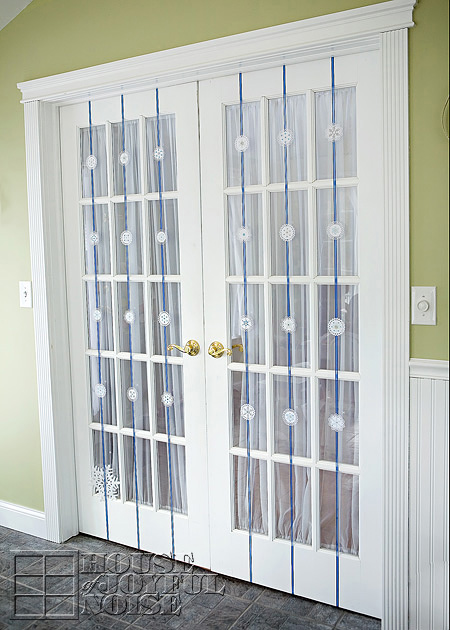
If your a frequent visitor here at our blog, you may have seen us decorate our french doors like this before.  Using door length ribbons, and placing a decorative element on the ribbon strand in each window, I call these ‘fancy strands’.  I’ve made them for the season of spring, and also Halloween. So this project started out with the same single intent of dressing up our French doors, in this case for the festive season winter, but immediately turned into the idea of using it as a home Christmas Advent Calendar for the kids. For us, December and the the Christmas Advent Calendar is not so much about the countdown until Christmas Day, but celebrating the whole season each day.  This idea made every day really fun for our kids.

You don’t need French Doors in your home, to adapt this idea!
You can do the same thing using other areas or parts of your home. Some suggestions are using regular doors, a large wide window, the banisters of the stairs in your home, or even a wall.  Look around your home and find your options, and then just make it work for you!  In addition, you can create this using any theme or colors. You may want to use red and green ribbon, with paper gift elements, or gold ribbon and ornament shapes.  The theme and look of it is part of the creative fun.  I wanted mine to work throughout winter. When Christmas was over, we simply peeled off the numbers on the windows, and the strands stayed through February or so.

I’m going to tell you how I made this Advent Calendar so simply.


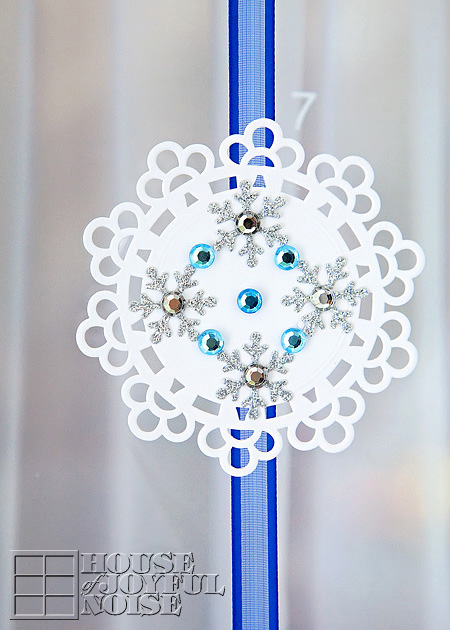
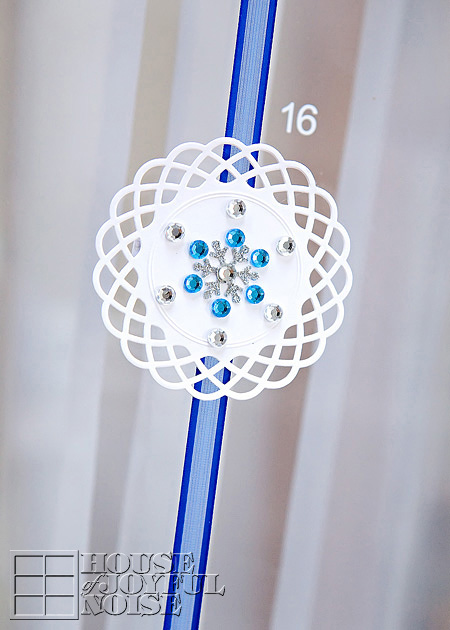
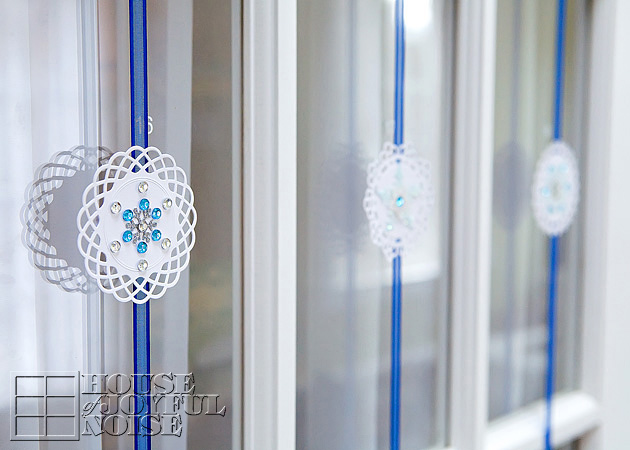
The snowflakes were fun to make. I actually did not just buy them this way.  The white paper snowflake alone, are die-cuts I bought packaged loose, in the scrapbooking area at Michael’s Arts and Crafts.  To give them some sparkle and make them more beautiful, I also found sticky some snowflake-ish elements of glitter and rhinestones, and put them together to make my own specially designed snowflakes. So easy and fun, creating each one!

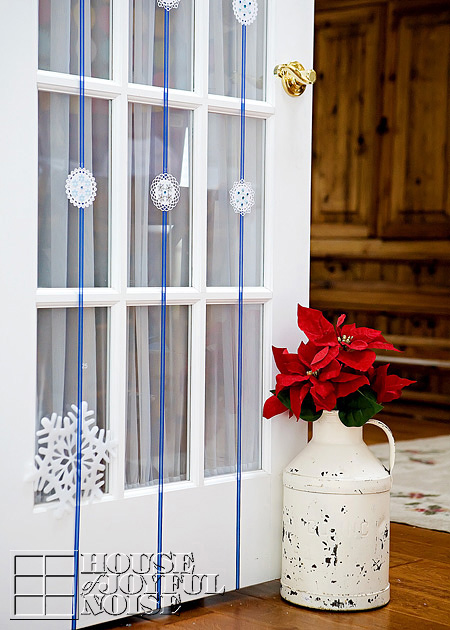
I chose blue ribbon for my winter theme, and placed a single 1-piece length from the top to the bottom (underneath) of the door, down each row of window frames of my doors.
I measured the height of the doors, and made sure I bought enough ribbon spools for 6 whole full lengths. We have 30 window panes, so plenty for the 25 days until Christmas.


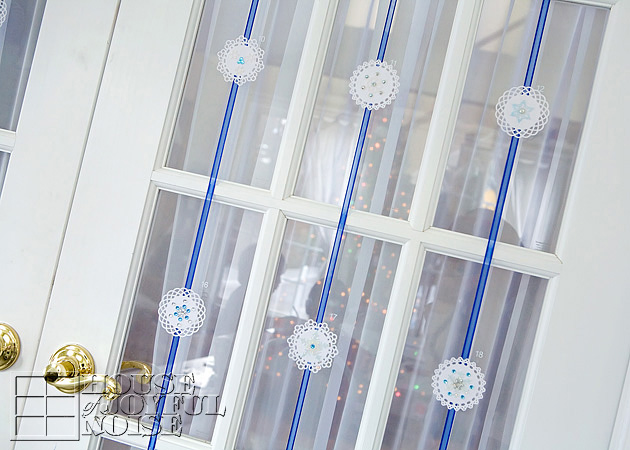
To number the Calendar for the days of December, we cut small white vinyl numbers, and simply put them on the glass besides the upper-right of each snowflake.
However, if you are creating your advent calendar elsewhere in your home, the number can certainly be put ON the paper elements.
On front side of the snowflakes, it’s just pretty.
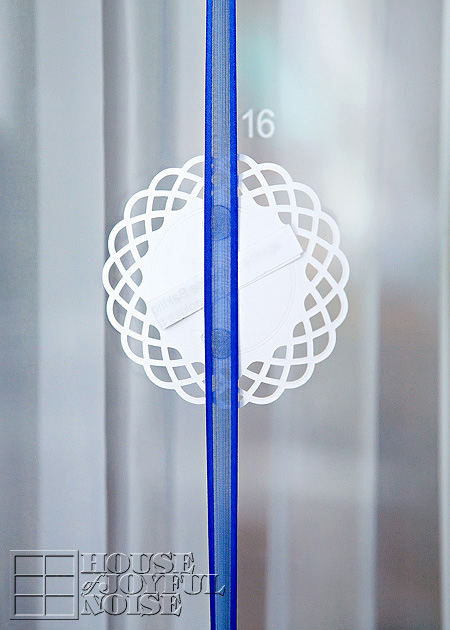
But on the backside, it was designed to serve a purpose.


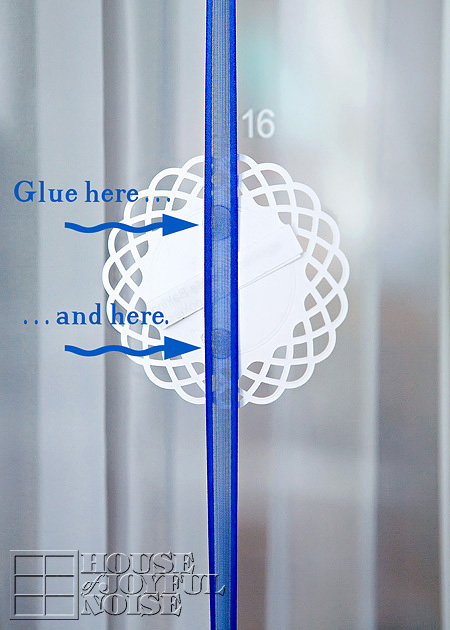
When attaching the snowflake to the ribbon, I was sure to put two dabs of glue; one at top of the snowflake, and one on the bottom, leaving a space without glue in between.


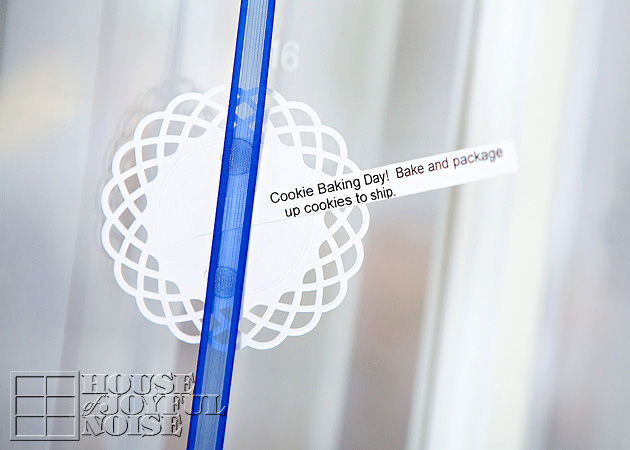
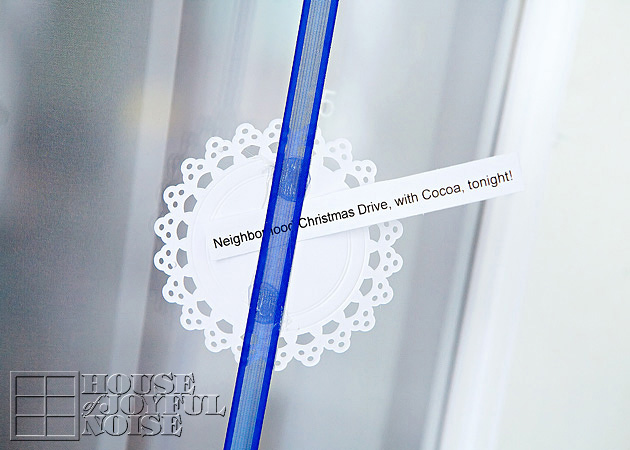
Did you notice the little slip of paper slid under the ribbon? There was one for each snowflake, and each little slip expressed something different for that day.

Again, we’re simple folks. Our holidays are kept pretty simple too, and our days of any season are focused on faith and our family. For Christmas, it’s about pondering and celebrating Jesus’ birth, the time we spend together being creative, making things for others, and generally just having fun together as a family.

So our slips of paper behind each snowflake reflected those kinds of things.  Some were a surprise activity for the day: maybe a task for serving others. Some were a small treat, and others were a Scripture to remember and reflect on. A good variety of that kind of thing. Again, you can come up with what you want for your family, throughout the month of December, as you prepare for Christmas, and enjoy the season.  


Just type up a list in small print on your computer, skipping a line in between, print it out, and cut them into strips to fit behind your elements.

The kids took turns taking out the slip and reading it to the others each morning. That way they knew what was in store for the day.
It really takes very little to get our kids all excited. You would not believe the fun we have each year, just driving around neighborhoods checking out people’s home Christmas lights and displays, with our cocoa and snacks!


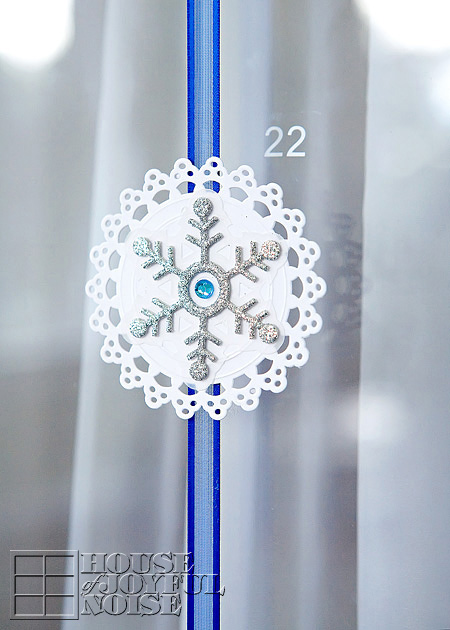
The big snowflake represents December 25th – Christmas Day.

I thought it all came out very pretty, and of course the strands themselves are reusable again every year.
It takes no time at all to cut out some new little numbers, and apply them.  The slips of paper can be used again if they re saved as well.
Mix them up, add new ones, or create a whole new set. I like to keep our kids on their toes.


This Christmas season, make the most of every day with your family, and keep the spirit and love of what Christmas is truly all about, alive in your hearts and homes.
We hope you find this idea inspiring. Thanks for coming by.

* * * * * *

Please come follow me here and there:


Save

Filed Under: Crafts & Creations, DIY (Do-It-Yourself) Project, Holiday Crafts, Home Decor, The Homestead Tagged With: advent-calendar-craft, advent-calendar-for-the-home, advent-calendar-ideas, advent-calendars, Catholic-blogs, Catholic-families, Christmas-advent-calendars, Christmas-craft-ideas, Christmas-decorating, December-home-decor, door-advent-calendars, home-advent-calendar, homemade-advent-calendar, how-to-make-an-advent-calendar

Thanksgiving Place Card Holder Turkey / Free Personalizable Place Cards Printable

November 17, 2012 By Laura 9 Comments

I’m so happy to offer you some free printable designs I created just for you:
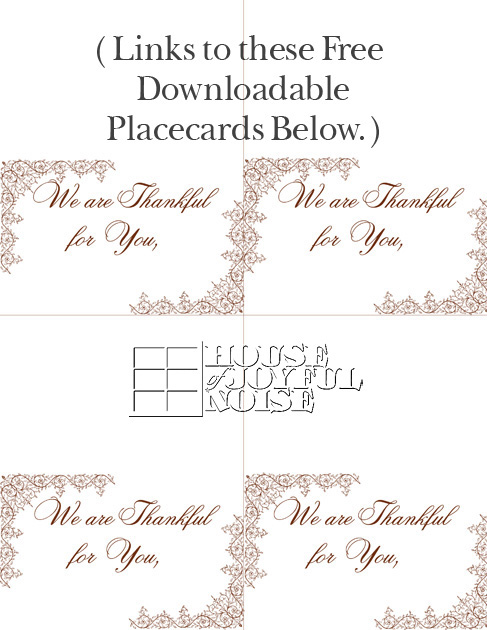
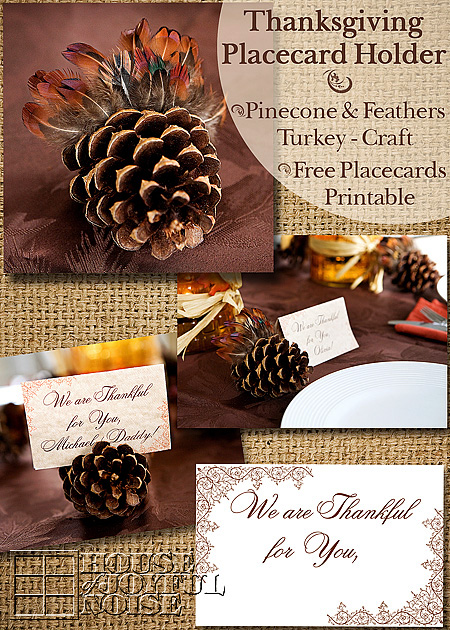
Thanksgiving Place Cards

 as well as an adorable turkey craft to hold the cards, or as beautiful added detail to your table, if you’d like.

Thanksgiving is only days away.  If you are still scrambling to add a little ‘fancy’ detail to your Thanksgiving table setting, here’s an idea for you.  This idea is one I came up with for my own Thanksgiving table setting from last year that I never got a chance to share with you all.  Our guests loved them, and hopefully you will too.

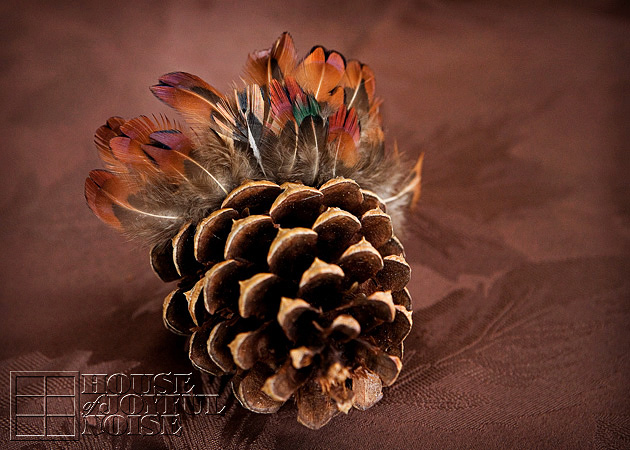
Turkey Place Card Holders

I think they are just simple, yet classy and beautiful looking.  They are easy to make, and require minimal supplies.  It’s so easy, there is no point in even showing you how to make them, when I can simply tell you in a few words:

I got a net bag of plain, natural pine cones at Michael’s Arts & Crafts.  They are for crafting and decor. I recommend not using the pinecones from any kind of potpourri, because they can be so strongly scented, and really clash with the otherwise enjoyable aromas of your Thanksgiving dinner.

The feathers were also bought at the same craft store, and come loose in a clear, flat cellophane bag.

The kids and I simply put some glue right between the last two rows of blades, on the backside of the second to last row. Then we simply stuck the feathers onto the backside there, starting in the middle and working our way outwards to the sides,being sure they were facing forward, and fanning nicely as we worked across. That was it!  These particular feathers are very fine, so it took just a little patience.  But I chose them because I loved the colors in them. We used toothpicks to be able to maneuver the feather into the position we wanted on the still wet glue, without using our fingers and getting glue all over them.

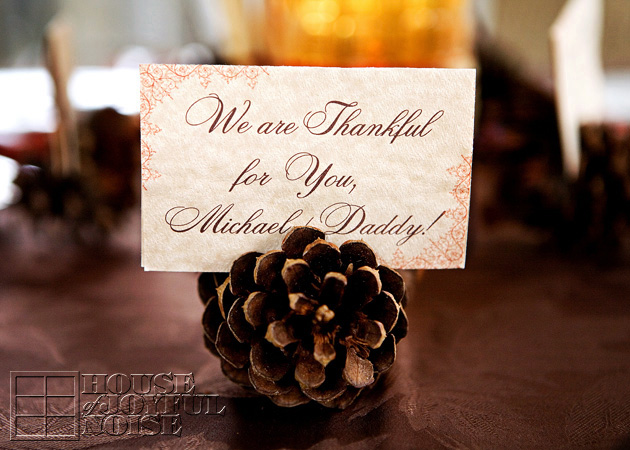
I made them to be place card holders, so I needed to make some of those too . . . . . .
. . . . . . and I’m going to share that customize-able printable with you too, so you can have your own personalized settings like this.
I printed them out on sheets of card stock that a variegated warm beige color to it, rather than bright white.

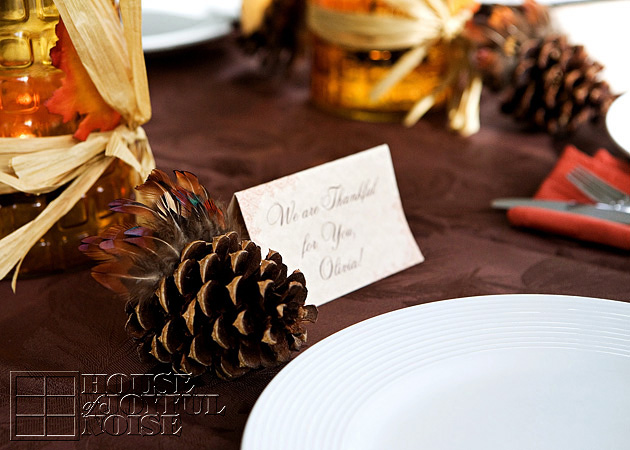
  Of course you also have the option of putting the place card on the table, beside the turkey, as seen in the photo above.

We also did something special on the inside of these place cards
; and so this is another idea or suggestion for you:
In light of Thanksgiving, and being most thankful for the blessing of those we love, the 6 of us in our family wrote a little something on the idea of each person’s card, expressing something about that person that we love or are thankful for.  It was an unexpected surprise for those joining us around the table this holiday; my father, brother, and a family friend. And I’ll tell you what; they all cried, finding more inside, and reading it!  The kids wrote the sweetest things.

If you would like to add a more whimsical flair to your turkeys like these, for just the kids or for everyone, you could add some googley eyes on white cardstock, and an orange waddle with felt, foam or construction paper.  I just happened to love the more subtle indication of a little turkey.
–

Free Thanksgiving Place Cards Printable

O.k., here is the customizable/personalizable place cards printable I promised you, but you must get it using one of the links to the downloadable file (you choose) below . . . . . .

PSD FILE:  This version is still in layers.  If you use Adobe Photoshop or any other program that works with PSD files, you can add in each persons name, to personalize each card. The color for the font is hexcode #6f3014, and the font style I used is Cecily.  I forget the font size, but if all I just mentioned didn’t go over your head. I’m sure you’ll figure it out. Ha ha.
-or-
JPG FILE:  This version is flattened, and ready to print as is. You can simply write in each person’s name with a marker.
Specs:  8.5 x 11 printable – Use same size card stock; I’m suggesting a light and warm or compatible color, perhaps that goes with your table setting.

And now for a little Giddy-Diddy:

If you love this idea . . . . .
Just SHARE it however you do!
But most of all please know this year . . . .
We’ll be giving THANKS for YOU!

* * * * * *

Please come follow me here and there:


Filed Under: Crafts & Creations, FALL Crafts and Creations, FALL Home Decor, Free Printable/Downloadable, Holiday Crafts, Home Decor, Kids Arts and Crafts, Seasonal Crafts and Creations, Seasonal Home decor, The Homestead Tagged With: crafts, free-printables, holiday-crafts, November-crafts, pinecone-crafts, place-card-holder-idea, printable-Thanksgiving-place-card-holders, Thanksgiving, Thanksgiving-crafts, Thanksgiving-free-printable, Thanksgiving-place-card-holders, Thanksgiving-table-decor, Thanksgiving-table-setting-details, turkey-craft

Decorating with Autumn Leaves; Door Garland and Candle Jars

November 10, 2012 By Laura 26 Comments

I think you’d be hard-pressed to find anyone on God’s green earth, who appreciates the foliage that Autumn brings, more than I do.  I am mesmerized by the leaves, from beginning to end.  Ask my kids.  They are often amused at how taken I am, with the beauty of this season.  And they’ve certainly come to understand that I don’t want them to miss one bit of it, any more than I do. I get especially excited when we are driving here and there, which with 4 kids I can tell you, we do a whole lot of.  “Oh!! There’s a tree starting to change right there! Do you see it guys?” And as fall progresses., each week is more full of awe than the last. As we go along, I’ll burst out “LOOK!….at that GORGEOUS tree guys!! LOOK AT THE COLORS ON THAT THING!!”  I’ve startled them. And they’ll be like, “We know Mama! Watch where you’re going!”  It’s true. I probably shouldn’t be driving at all in the Fall. Certainly not during peak foliage week.  There is just a span of weeks in this season, where the trees are all I can talk about, everywhere we go. Sometimes, I feel God made Autumn, just for me. Perhaps not. But gosh, it sure feels like such a gift of love.

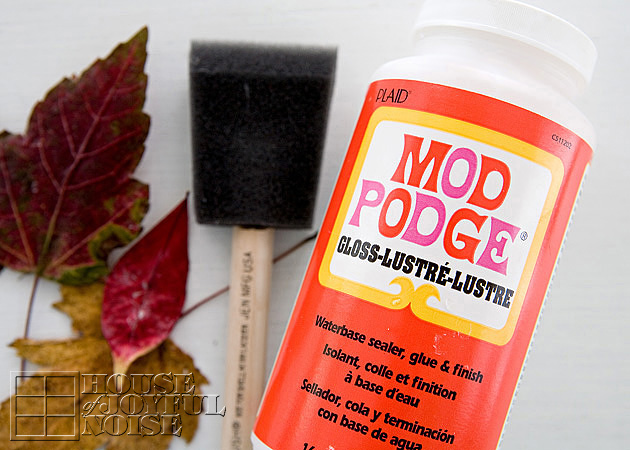
The peak beauty of the season, is really all too fleeting for me.  I want it to stay just as it is in those weeks, forever.  At least, I want to save as many beautiful leaves as I can.  But I’ve never found a great way to preserve them for a while, until this year. Oh yes, there was the waxed paper trick but, I heard that never worked all that well.  And besides…..Confession of Domestic Shame:  I really hate ironing.  So when I learned that using Glossy Modge Podge really worked well, I was so excited to try it.  And I immediately started dreaming up a very simple, very rustic leaf garland for my home.

 The kids helped me Modge Podge countless leaves they had collected for me, over the weeks.  We had them drying and being pressed between the pages of newspapers and magazines all over the house. I’m willing to bet we’ll be finding several we missed finding again, well into spring.  But I found you can actually Modge Podge a fresh leaf right away, anyway.  I do recommend the Glossy medium. I tried the Matte finish just as a test, and it seemed to strip the color, and not look very impressive once it was dry either. Something about the Glossy really does enhance the color of the leaf, and add lustre.  To Modge Podge (MP) the leaves, we just poured some MP in a non-pourous bowl, and used foam brushes to apply it to our leaves, doing the back of the leaves first.  Then you can lay them on newspaper or whatever, until they dry. They don’t really stick anywhere as drying, because they are not flat or heavy.  MP is so easy to clean up anyway.


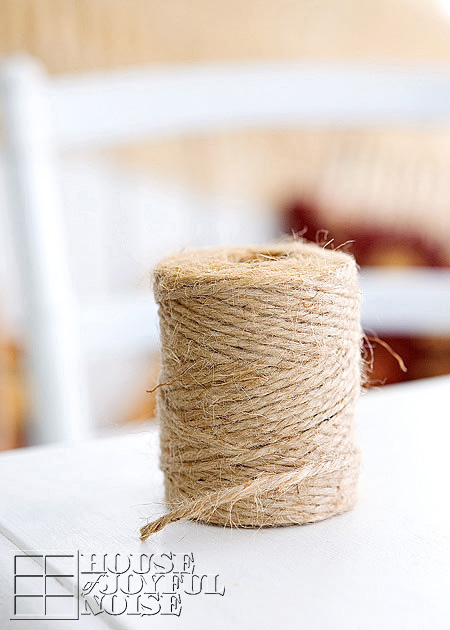
I wanted my garland extremely simple and rustic.  Jute was just the kind of string for the job. I love this stuff.

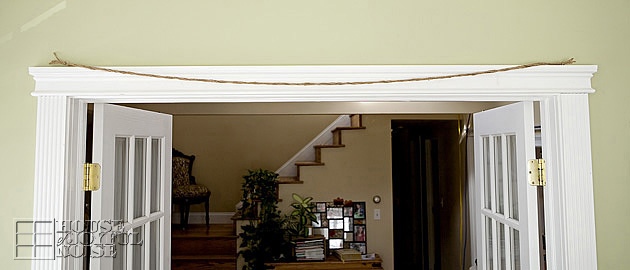
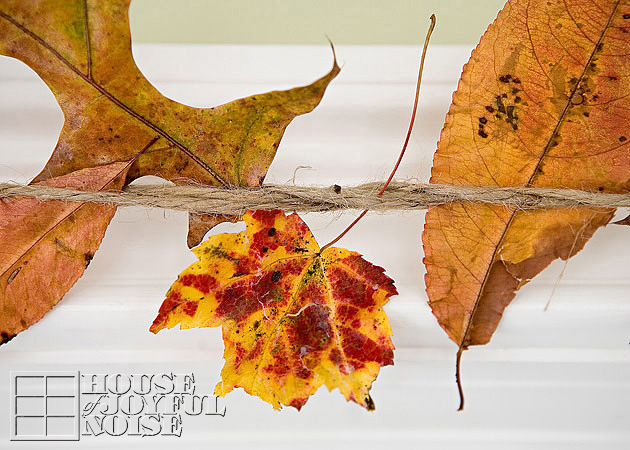
 I took 4 pieces of equal lengths of the jute, knotted the ends, and twisted the quadruple strand quite a bit before push-pinning it over the frame of our sun room french doors.

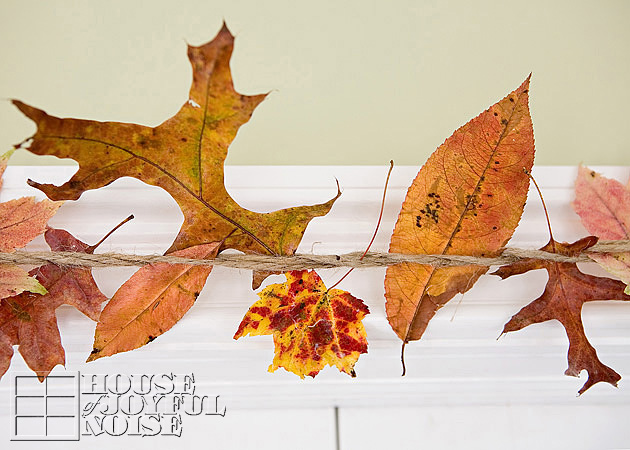
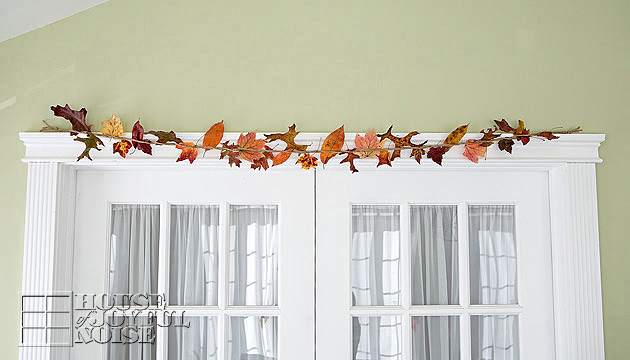
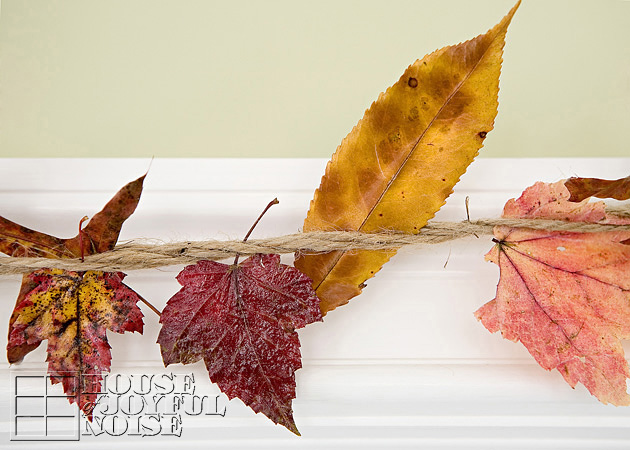
 Then, I just stuck my leaves in between the twisted jute string, arranging as I wanted to, all the way across.

 There it is. Done in like, . . .a couple of minutes.
And I didn’t fall off while standing on the chair I had to keep moving, even once.
(Although I think I had my husband and kids nervous, because they kept reminding me to be careful. That might have to do with the many happenstances I have had. But not this time!)

 Look how pretty!  Honesty….my heart is racing a little bit right now, just looking at them.
No two alike….such beautiful shapes and colors.

 Do you see that long pointy leaf? After being out and about collecting leaves, the kids came running in, so excited to give me that one. They call it my giraffe leaf.  I love giraffes, and they saw a giraffe skin pattern in it. I do too now.  I felt the love, and that leaf makes me smile even more than all the rest now.

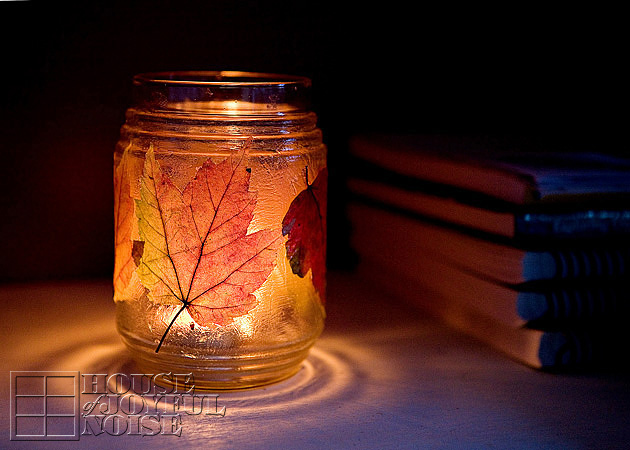
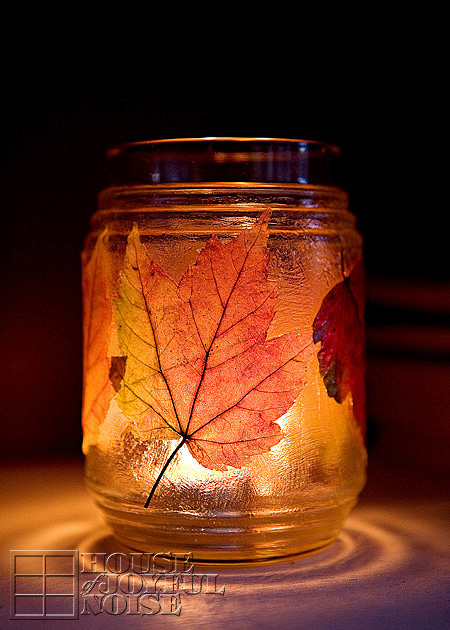
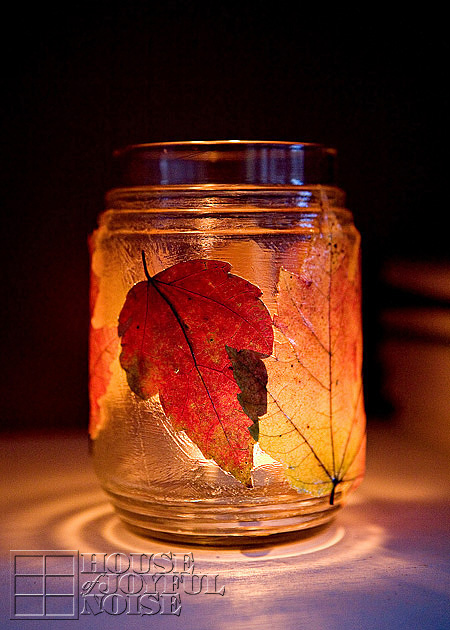
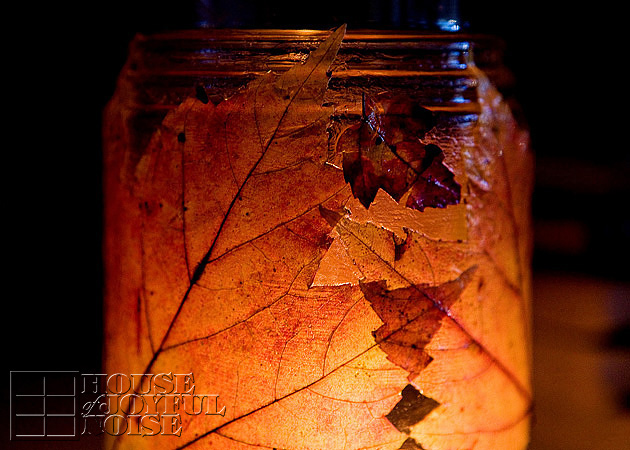
I also used the glossy Modge Podge to apply more leaves to jars.  I love that you can just slap that MP all over the jar with a foam (or flat bristle) brush, and everywhere it dries where there is not a leaf, it looks like frosted glass.

Isn’t it beautful?
I’ll warn you that this project took a little more patience than I had anticipated. Certainly not as easy as my garland! It’s worth the little bit of trouble I think though! It’s just that the leaves, which I had MP’d the back of, as well as the jar, don’t want to lay down flat right away. It’s all kind of slippery. It’s only once the MP glue starts setting a little, that is starts sticking as you need it to.  You need to MP over the leaves too anyway, so I kept kind of poking the leaves down where they were sticking up. Once the whole jar was dry, I did one more final coat.  Oh and I just let stems hang free off the glued down leaf. I liked them that way anyway, if they didn’t want to stick.

 They give such a warm glow of radiance.

 I can see myself doing these same projects with leaves every year, from now on. And other preserved leaf projects I’ll think of I’m sure now too.
I so enjoyed every minute of working with the leaves, and I am so very happy I found a way to preserve them, and let the beauty live on in my home, as the world around us outdoors drains colorless.

Thanks for coming by, and listening to me go on and on about my love for the colors of Autumn.
It sure was an amazing Fall season this year, and I thanked God for it every day.
Do you get a colorful foliage season where you live, in the Fall? And if so, have you done anything with the leaves?

Come follow me here and there:
Save

Save

Save

Save

Filed Under: Crafts & Creations, FALL Home Decor, Home Decor, Seasonal Home decor, The Homestead, Tutorial Tagged With: autumn decor, autumn-crafts, decorating-with-leaves, door-garlands, fall-craft, fall-decor, leaves-candle-jar, leaves-garland, Modge-Podge-crafts, modge-podge-projects, seasonal-decorating, simple-rustic-decorating
Rustic Autumn Wreath | A Simple Craft

September 24, 2012 By Laura 20 Comments

000_autumn-decor-150x150

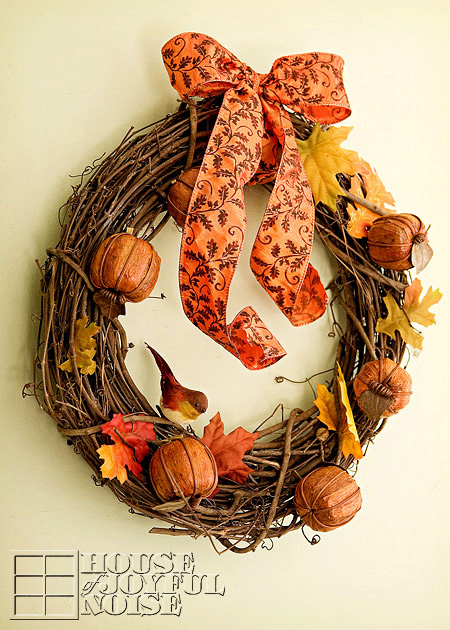
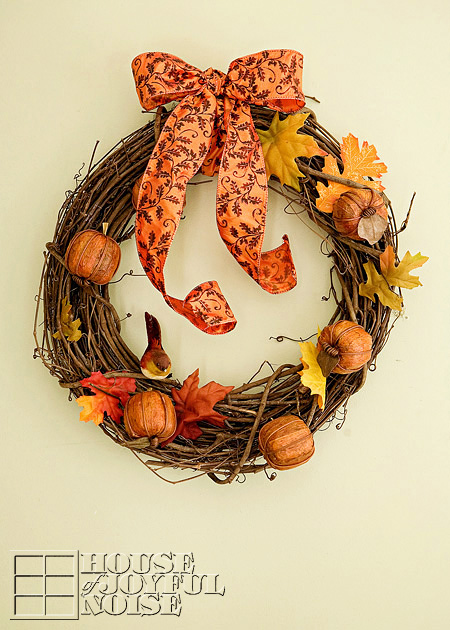
 If you’d like to add a touch of crafted Autumn decor to your home, but don’t have a lot of time or energy right now, this wreath is for you! It is so very simple and quick to make.  I think it’s beautiful, and has a real rustic flair that fits right in here at our homestead.

002_autumn-decor-crafts
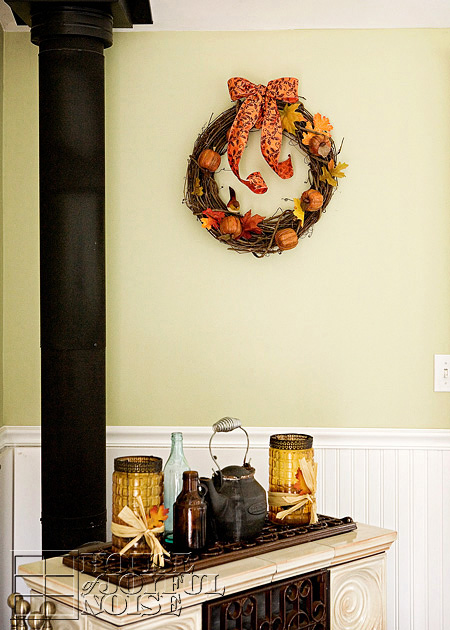
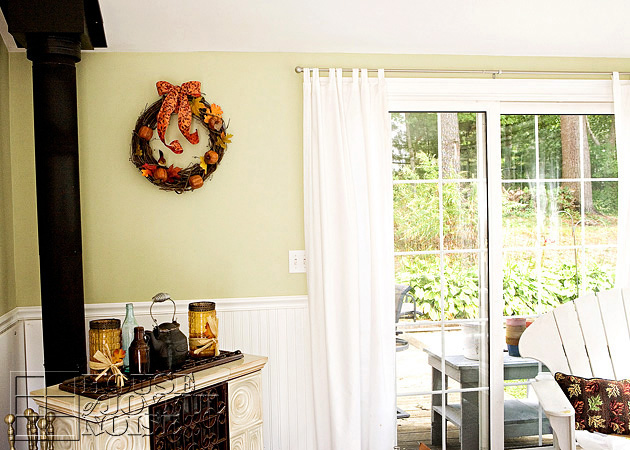
I hung our wreath in the sun room, on the wall directly in front of anyone coming in through our front door.

It’s so very simple to make, you really don’t even need to be shown how.
But I will tell to you how, and give you a couple of tips as well.

003_fall-wreath
Start with a stick/branch wreath, which can be found ready-made at your local craft store.

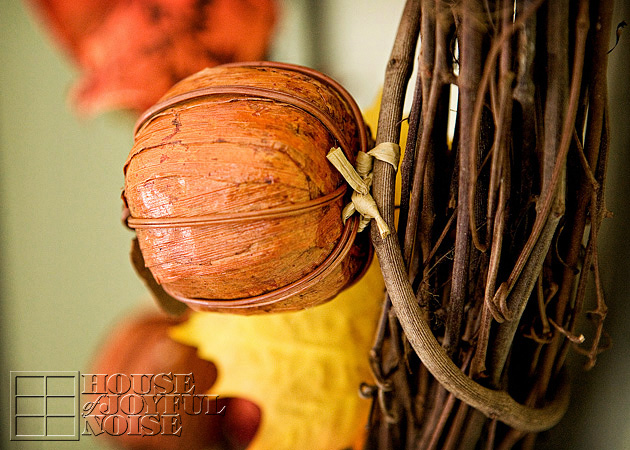
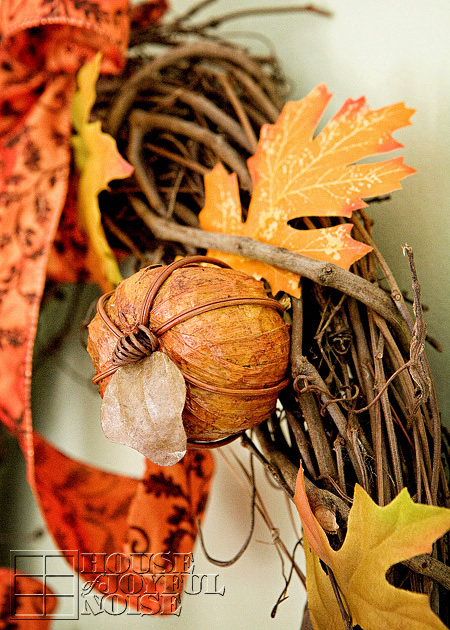
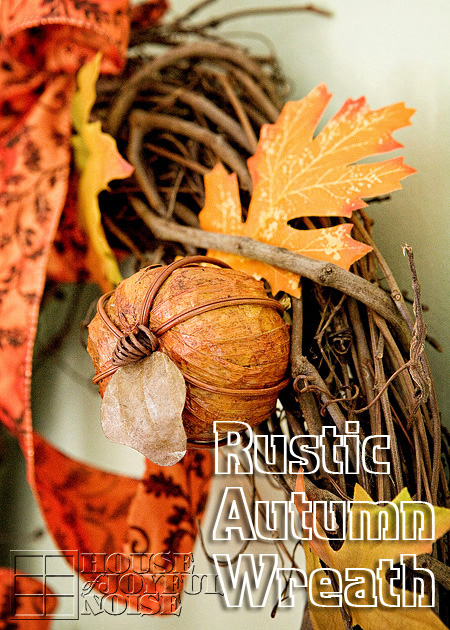
The pumpkins I also found at the craft store. They are very light in weight, made of a paper medium, and some kind of painted wire.  They are finished with a shellac, and they came as a bunch in a net bag, much like potpourri comes. So you may want to look in that area.

005_fall-home-decor-crafts To attach them to the wreath, I used a small piece of raffia! I simply slipped it under the wire on the bottom/underside of the pumpkin, and tied it onto a branch where I wanted the pumpkin placed. How easy is that? I cut any excess tails of raffia I didn’t need, but I don’t even care if it is seen, because it just adds to the simple rustic charm of  the wreath, in my opinion.

004_autumn-decor-accents
Then I added some nice looking faux fall leaves.  You can simply just tuck them under the intertwining sticks of the wreath. But if you want to be sure they stay, and/or plan to save the wreath to use year after year, I recommend using a dab of glue from a glue gun at the base of the leaf or stem area, and stick in between branches in an inconspicuous place.  The leaves don’t need to be any more attached than that, and keeping the leaves loose gives it a more natural look.

006_autumn-wreath-decor-crafts
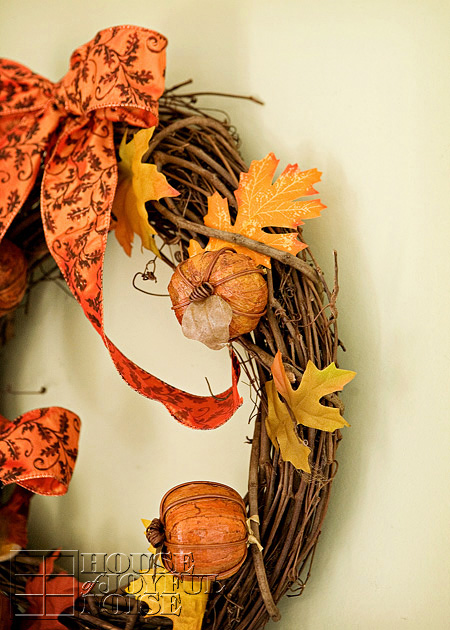
Just follow that technique with leaves and pumpkins, all the way around.

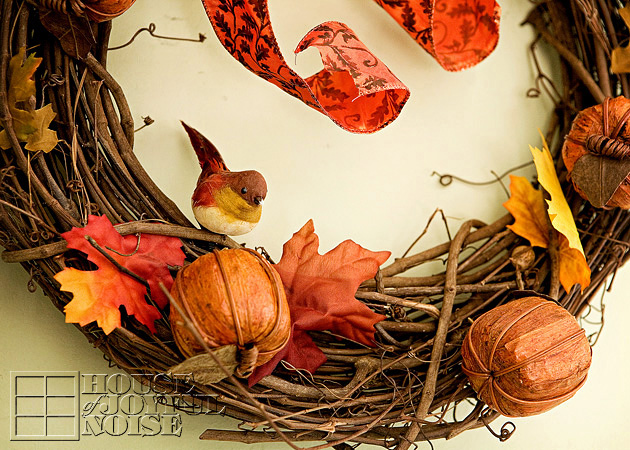
007_autumn-crafts-decor The little birdie is just a clip on, and was also picked up at the craft store at some point. It was one we had, and it not only went perfectly with this wreath, with it’s warm tones, but added new interest.

008_fall-wreath
The wide ribbon is wired, which can be a little difficult to work with, when tying bows or making nice curls. But I found a trick I’ll share with you.
TIP:   When working with wired ribbon, use an aluminum can, cup, or any cylinder object to make nice curls for the tail of your ribbon, or uniform loops in your bows.  Simply choose an appropriately sized cylinder object, relevant to the size you’d like your curls or loops, and use it to shape your ribbon.  You can place the cylinder into the loops to make them nice and round where they curve around, and/or wrap the ribbon around the tails to make nice curls.

009_autumn-home-decor It’s really as easy as that! It can literally be done in 10 minutes.

010_rustic-autumn-wreath
It’s not only a simple and beautiful wreath for this awesome season, but you can say you made it yourself.

Save


Save

Filed Under: Crafts & Creations, DIY (Do-It-Yourself) Project, FALL Crafts and Creations, FALL Home Decor, Home Decor, Seasonal Crafts and Creations, Seasonal Home decor, The Homestead Tagged With: autumn home decor, autumn-crafts, Autumn-decor-ideas, autumn-wreath-tutorial, autumn-wreaths, fall-crafts, fall-decor, fall-home-decor, fall-wreath-tutorial, fall-wreaths, rustic-wreaths, seasonal-crafts, seasonal-decor, seasonal-wreaths

  • « Previous Page
  • 1
  • …
  • 5
  • 6
  • 7
  • 8
  • 9
  • …
  • 15
  • Next Page »

We are wicked happy to have you here! We hope you find much inspiration, help, humor and enjoyment here.


Archives


POPULAR POSTS

* * * * * *

SUBSCRIBE to House of Joyful Noise blog! Every new post, delivered right to your email box!


Privacy Policy

Amazon Affiliates

Never at any additional cost to you, we may earn a small commission for our endorsement, recommendation, testimonial, and/or link to any products from our website. Your purchase through our links helps support our family, while sharing with you the products we authentically use and recommend, for various ideas, and letting you know where you can purchase them. Thank you for your support!

[footer_backtotop]

Copyright © 2026 HouseOfJoyfulNoise.com · Genesis Framework by StudioPress