• HOME
  • {A}’s Chipmunk Training Archives

 Homepage

  • The Homestead
    • Home Projects
    • Home Improvement
    • Home Decor
      • Seasonal Home decor
        • FALL Home Decor
        • WINTER Home Decor
        • SPRING Crafts and Creations
        • SUMMER Crafts and Creations
    • Our Chickens
    • Gardening
    • Organization
    • Re-Purposing
    • Furniture Refinishing
    • Budget
  • Crafts & Creations
    • Seasonal Home decor
      • FALL Crafts and Creations
      • WINTER Crafts and Creations
      • SPRING Crafts and Creations
      • SUMMER Crafts and Creations
    • DIY (Do-It-Yourself) Project
    • Kids Arts and Crafts
    • Homemade/Handmade Gift Ideas
    • Holiday Crafts
    • Fan Pulls
    • Free Printable/Downloadable
    • Sewing Projects
    • Giveaways
    • Business Features
  • Recipes/FoodFun
    • Breakfast
    • Lunch
    • Main Dish
    • Sandwiches
    • Appetizers
    • Slow Cooker
    • On The Grill
    • Side Dishes
      • Soups
      • Salads
    • Baking
      • Breads, Rolls and Muffins
    • Snacks
    • Treats
    • Desserts
    • Drinks
  • Homeschooling
    • Elementary Homeschooling
      • Elementary Homeschooling READING
      • Elementary Homeschooling MATH
      • Elementary Homeschooling LANGUAGE ARTS
      • Elementary Homeschooling SCIENCE
      • Elementary Homeschooling HOME ECONOMICS
      • Kids Arts and Crafts
    • Middle School Homeschooling
      • Middle School Homeschooling SCIENCE
      • Middle School Homeschooling HOME ECONOMICS
    • Language Arts
    • Math
    • History / Social Studies
    • Geography
    • Foreign Language
    • Field Trips
    • Games
    • Nature Study
  • The Big Picture
    • Life In General
    • Celebrations
    • Faith
      • Into the Light; The Series
    • Giveaways
    • Reviews & Sponsors
  • Photography & Lettering
    • Photography
    • truck lettering
    • vehicle graphics
    • Newborns
    • Kids
    • Engagement
    • High School Senior Pictures
    • High School Senior Pictures Sneak Peeks

Photos from Around the Homestead – May, June, July 2015

July 9, 2015 By Laura 6 Comments

*Hello Friends!  First, there are a whole bunch of photos to this post here, so you really need to NOT scroll, and just let them load for a minute. Therefore, you might as well just read this brief intro, if you are one who usually just looks at the pictures.  ๐Ÿ˜‰

About the title: I always use the term ‘homestead’. So just so you know, yes, we do understand that we do not technically live on a true homestead, by definition. But we still have taken to the word. We are simply referring to our home and the little tiny property we live on. We’re going to keep using it, because it works for us.

Lastly, it’s been quite an unusual spring and early summer for us all.  Kind of tough, but it’s all good. I am finally starting to get around on my own two feet, following my wicked broken ankle and torn ligaments in mid-April. That kept any usual projects and activity off the table. But God has taught me much through it all, as I knew He would. Things like patience, Psalm 46:10, and all of that good and hard stuff. I didn’t realize how much transforming I had to do but, um….I see it in full color now!

Anyway, the photos are probably loaded now. Just some brief descriptions from here on out. Hope you enjoy……
  [Read more…]

Filed Under: Gardening, Our Chickens, Photography, The Big Picture, The Homestead Tagged With: calibrachoa, chickens, family-life, flowers, geraniums, homestead-photography, pansies, photography, photos, verbenas

Our Fall Mantels 2013 | Home Decor Ideas

October 29, 2013 By Laura 4 Comments

Today, I wanted to share with you our mantels, decorated for Fall!  Alright, so I realize Fall is a month in here, and many are maybe so over it. But you know….there is two months more of the Fall season to go, you know! (Can you even believe it is the Fall season until December 20th?)   Yes, in the bloggers’/crafters’ world, I could be a little late with this. But that’s OK! I figure, you can pin it for some ideas on Pinterest for next year!  Or find a little inspiration in it for your Thanksgiving mantels.  Regardless, I am really enjoying the mantels I put together for our home decor and for my family, and I hope you enjoy seeing them as well.

By the way, I actually did ‘Back-to-School’ mantels, you never got to see. YET.  That’s a season shorter lived than Fall!  BUT….take heart, I did take photos to share with you next year, in a timely manner, that would allow time to be inspired.  But let’s get back to our mantels decorate for Fall here, shall well?

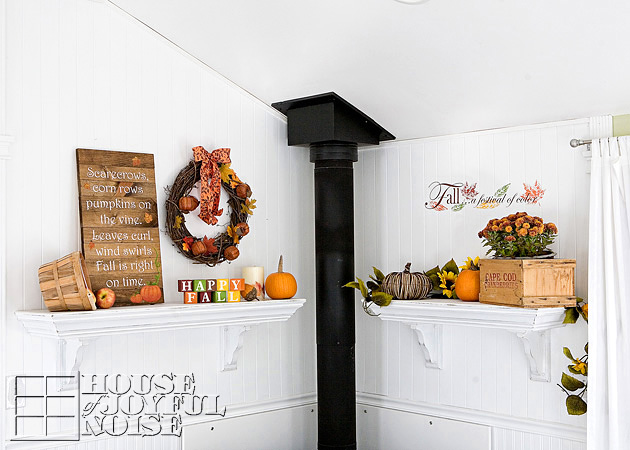
Here’s an overview of our Fall double mantels.

Can’t tell you how much I love having double-mantels.
–


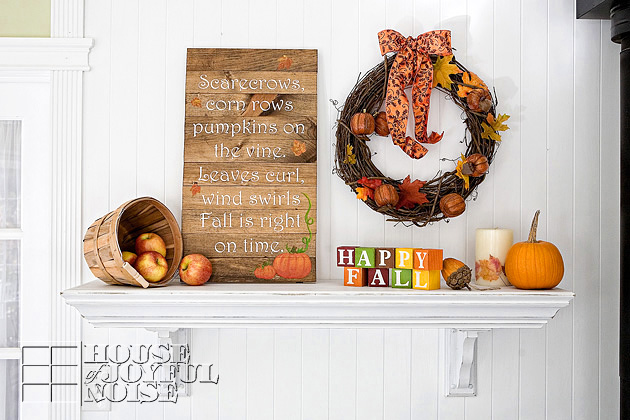
A closer look at the first mantel….

Now for some details . . . . . . (I so love details . . . .) . . . .
By the way, I made four of the objects on this mantel. I’ll discuss a little about them along the way here. Pay attention if you care to. ๐Ÿ˜‰
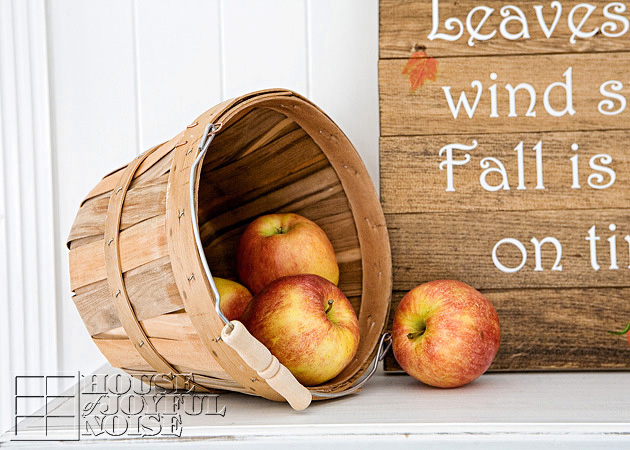
A simple basket of apples.  Which wasn’t quite as simple as you think.  You see, my Fall mantels have been done for some time, except for one project I was working on. So while I wanted this basket of apples to be part of my decor, I also wasn’t going to make it off limits for my kids to eat. Because….they just seem to always be hungry, always looking for food, and always eating. So I told them, “Hey, go ahead and grab an apple off the mantel whenever you want. I don’t want them on the mantel going bad.”  Well, I think I had to buy more apples and resupply this basket four times already. And the cycle will continue until, well, I guess December!


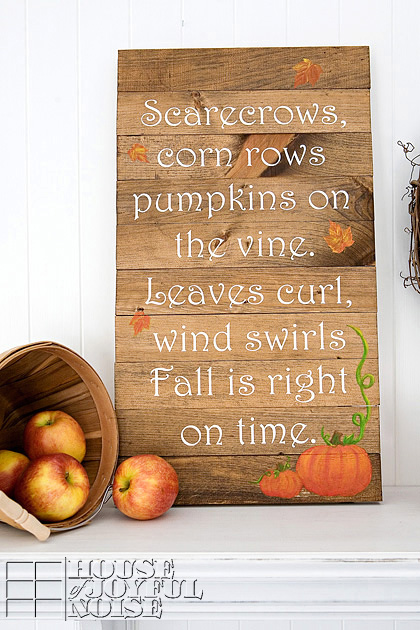
This sign; I did make it.  I’ll do a separate short and simple post about it, such as what inspired it and how I made it, at some point soon. 
I can tell you now, that I love it.  It’s not quite as elaborately simple as I had intended….more simply simple in the end….but I love it nonetheless.
–
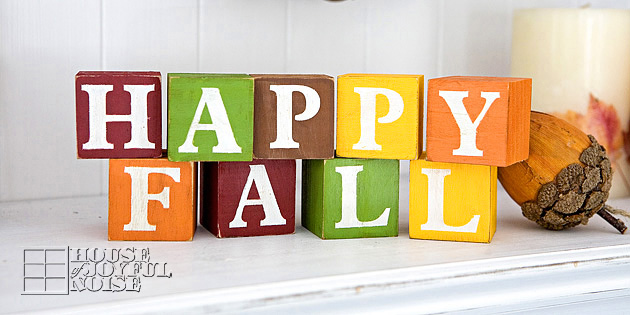
  I also made this set of greeting blocks, which were so fun to make!  And…..there is much more than meets the eyes with these!  I can’t wait to show you how versatile they are!  I took photos along the way, and will have a whole tutorial for you on this project as well.

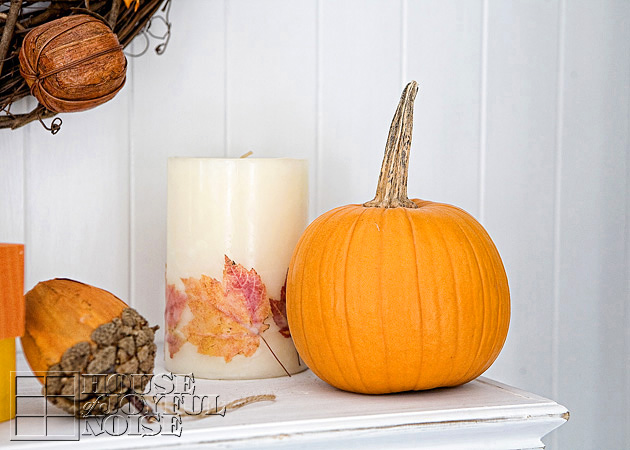
I did not grow the pumpkin, because, well, if you follow me on our Facebook Page (please come ‘LIKE’ us if you’re on Facebook!) you may know that our pumpkin patch bit the dust hard and early this year!
(Vine borers…..I despise them oh so much!)
BUT, I did indeed make the candle a bit behind the pumpkin, with real leaves embedded. I made two, and gave one to my sister.
You can find the post with directions about how I made them HERE.

This rustic Autumn wreath is the fourth homemade item I made last year, as of the date of this post  Simple, simple, simple. It’s more….assembled, than homemade.
You can see just how I did that, what I used, and from where, in this post on this wreath HERE.

And that concludes the details of the first mantel.
–

On to the second mantel….

 for which I made nothing for, with my own hands. But I can share some ‘where to get’ info, for this year anyway.

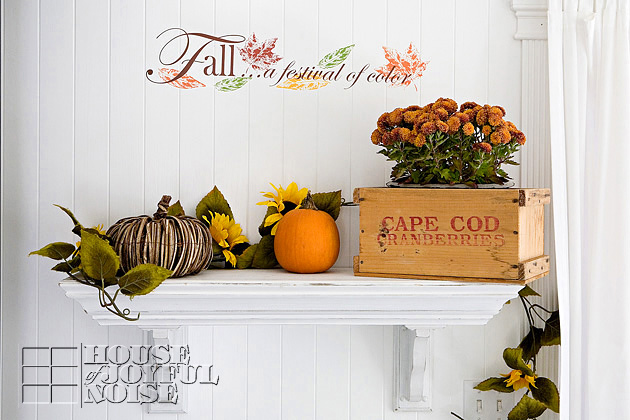
The overview, of mantel #2.

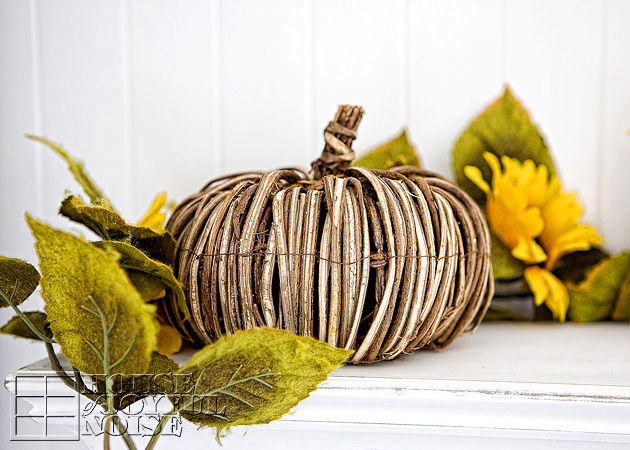
I spotted this pumpkin, adored it, and purchased it at the Home Goods dept of TJ Maxx.
I think it has a really high cute-factor, and I love the rustic qualities of it.
–

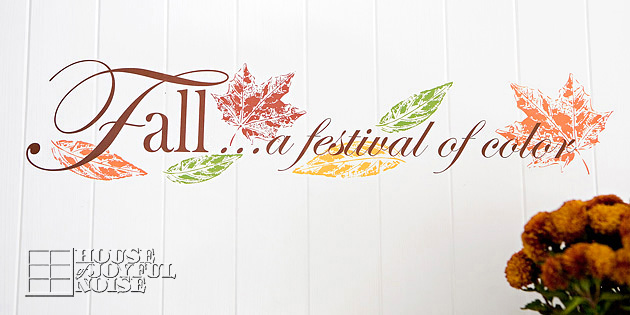
Now, you all may know custom lettering is at the snap of my finger!  As my husband, Michael is a professional truck letterer / sign maker. But, I saw this wall adhesive at Michael’s Arts and Crafts, and fell right for it!  It not only expresses one of the many things I love about Fall, but I really loved the leaves accents.  So while I could have asked Michael to whip this up for me, why, when this was $1.99! And ready to go!

Here’s what’s even greater about it:  I had imagined I would stick it on one of our painted walls.  But when I got it home, I just though the best placement for it, was within the theme of our mantels. I wasn’t sure how well it would work on the bead board though, with all of the grooves.  So I was very pleased to discover it worked beautifully! And I was really impressed with how discreet the fact that it’s a one-piece adhesive, is. People come into our home and when they see it, they get right up close to try and figure out…how did we do that? LOL. It’s a cool thing, and a very nice accent for the walls behind mantels!  I always try to have some accents on the walls, behind the mantels, somewhere. Such as the wreath as well. It really just extend all of the beauty, and adds dimension with the various levels. It’s more pleasing to the eye.

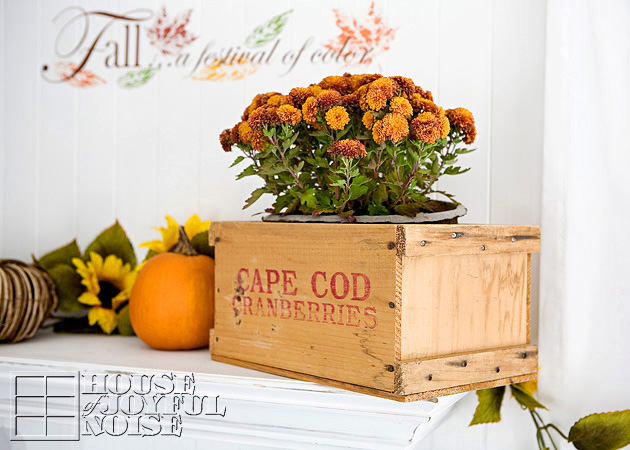
Lastly, I simply placed a pot of warm orange colored mums in an old cranberry crate Michael brought me home one day. (Actually, he brought me home two.)  I love these crates, and I love that he found them in shed he was hired to clean out at the parish he was working for, and thought of me.

And that’s the end of our Fall mantels tour.

I may mix things up just a little for Thanksgiving, but I haven’t decided yet. I do know that I am enjoying my mantels as much as I dreamed, from putting them together through these various seasons, to the holidays we celebrate. I hope you’ve enjoyed seeing them as well, and have found any bits of inspiration in them, for any areas or even shelves in your own home. PIN away!

I plan to share the tutorials or details of some of the projects on mantel one, soon. So please share your thoughts, hopes, or questions of what you would like to know in those posts coming up, in our comments below!  You are automatically notified by email if I reply to you, or if more fitting, I will address those questions in the posts coming up.

 Hope you are relishing in all of the gifts of Fall, as much as we are!


Save

Save

Filed Under: FALL Home Decor, Home Decor, Mantel Decorating (Ideas), Photography, Seasonal Home decor, The Homestead Tagged With: autumn decor, decorating-with-theme, fall-decor, fall-decorated-mantels, fall-decorating, fall-mantel-decorating-ideas, home-decorating-mantels, mantel-decorating-ideas, mantel-decorating-tips, mantels

Dream Craft Art Studio: Reveal – Move In Ready! – Part 3

September 16, 2013 By Laura 6 Comments

Good gosh!  Is it me, or has this been a long. time. coming?
I am THRILLED to say, the art studio is DONE!!
Construction and carpentry-wise, anyway.  I’m sure we’ll have a few more organization units to install, but I’ll figure out just what I need  in the process of moving in with all of my stuff!

Before you scroll down and see, you may want to see the previous states of progress, to really appreciate all it is now.  It’s still just a little bit hard to show you because….I’m afraid you all just might be bored by it!  It’s the reason I haven’t shared more of the progress along the way.  I’m the type who has the whole finished version in my head along the way, and so knowing where it’s going….anything prior to that is somehow……less than.  But, I did give you a few couple of progress updates as you know! It’s just that, it’s a whole lot of whiteness right now; as I said was my plan all along. My dream was a bright white canvas to work in and on, and to photograph in, with a whole lot of color accents.  And I must say, I do love it already, even just as all white at this point!  The light being thrown around, is divine!

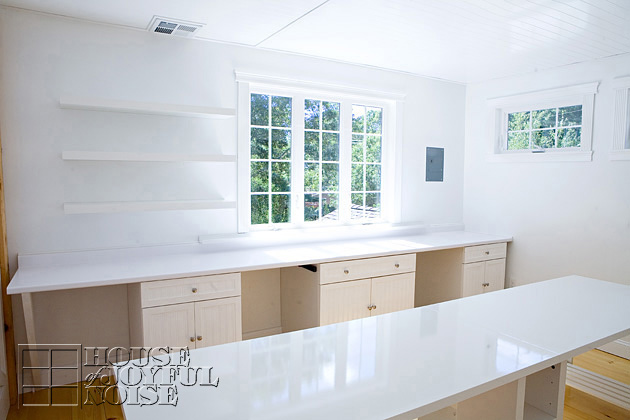
Here’s a look inside now!

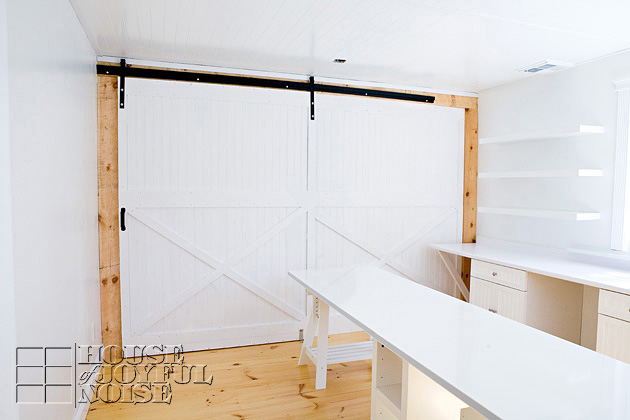
A view from the entry door! 
It’s instant cheer for me, just walking in.
The bright natural light in the mid-day all through the afternoon, is phenomenal!  And if you all know me, I need light.

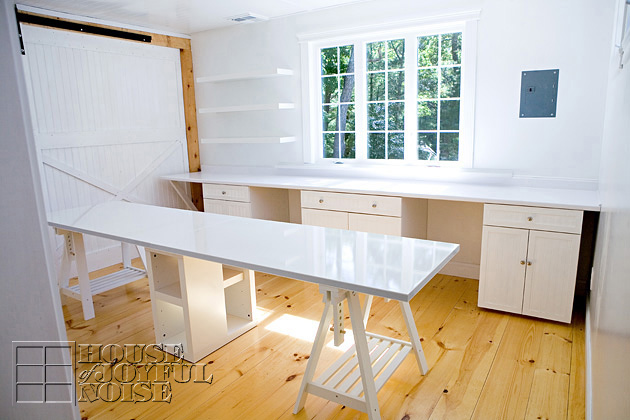
The creative space/room is 13′ 8″x 12′.
One of the biggest features you may notice here, is that the single window was finally replaced with the larger (relocated) picture window, as planned.  It made the world of difference in the light that it lets in, as I knew it would.  

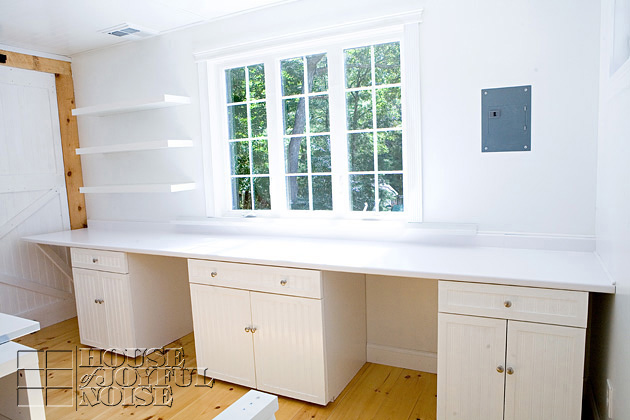
Those very simple shelves to the left are from Ikea; love them! While the plan was to build cabinetry, I realized we had white cabinets in 2 different rooms of the house that were emptied (of my craft stuff that was packed up), and they needed to get out of the rooms they were in.  After talking with Michael, we realized we could definitely re-purpose them into this art studio, and keep true to our original plans of white storage cabinets, drawers, cubbies, and one single counter space all along that wall. It worked!  The counter-top was custom-ordered through Lowe’s, and delivered. It is 13’4″.
We have a couple of white stools that fit well right under those cubbies, and are the perfect height for sitting and working. But I believe I’ll also be ordering some roll out paper storage, for the loads of paper I have in stock.
Also on the right wall will definitely be some art or a sign, over that control panel, and possibly another shelf or 2.

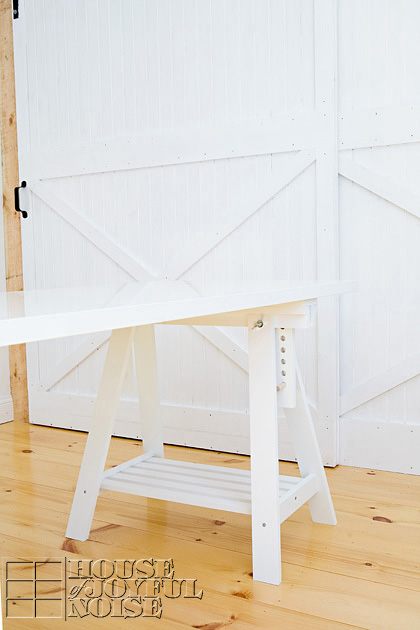
The crafting table is long!  From Ikea: it’s actually two (60″) tabletops combined for a total of 10′ of workspace. 
There is space for 6 people to sit and work comfortably, with foot room and all.
I’ve picked out the chairs, but still need to order them.


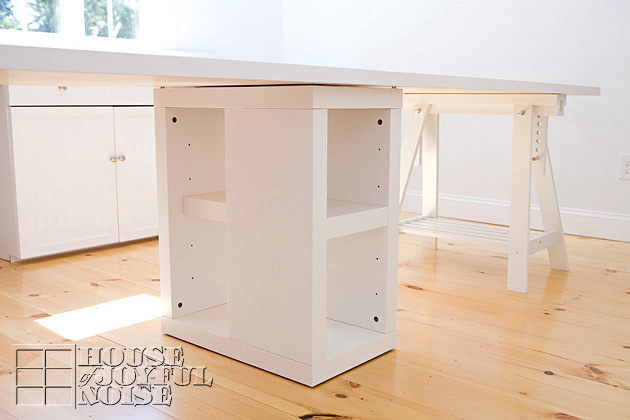
Also from Ikea, to support our tabletops:  2 work-horses, with cute storage shelving.
–

As well as this unit, that offer even more storage shelving.

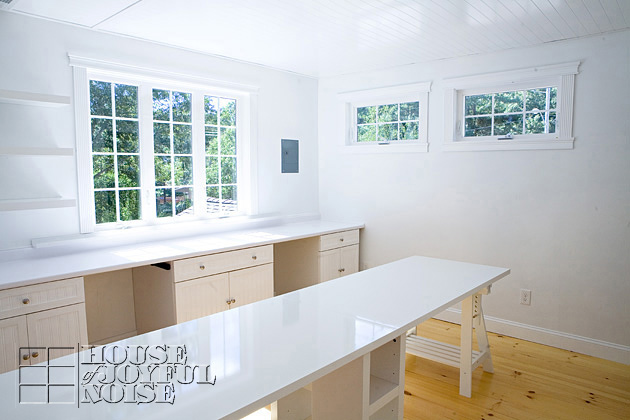
So yes, the length of the work table is almost as long as the room; just like I wanted. The surface is perfect!  Quite stain and generally scratch resistant. 
But we’ll likely always protect the surface with newsprint or something just in case anyway.
In this photo you’ll also notice the 2 additional windows we have, to welcome more light in the late afternoon light.
Under the windows will likely be more shallow storage units of some kind, or something like that. I’m still unpacking, setting up, and figuring out what else I need.

I’ll be storing the big, ugly and/or cumbersome items for our crafting projects. The drawers are deep and hold lots of little and long stuff.  As I said, there will be more storage worked into underneath the cubbies, but will also offer additional seating, if necessary.  My husband will be doing a lot of his designing and cutting at the end on the far left, and be able to weed material easily on the table. (If I don’t have a project mid-mess, of course.)

Speaking of Michael, I am SO THANKFUL to him for all of the many hours of hard work he put in, making this dream of mine come true for me, and for our family. I am so very blessed for the many ways in which he is a wonderful husband to have.

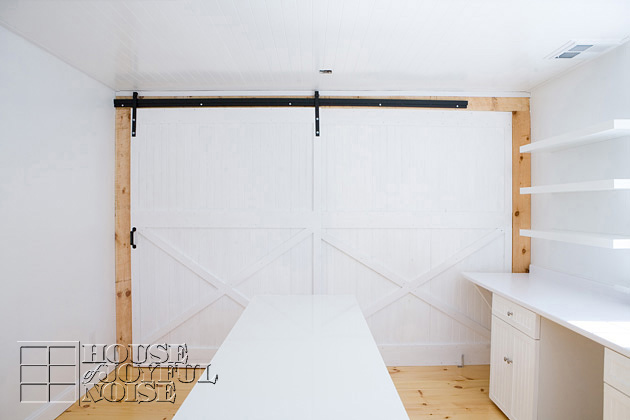
Did you notice the amazing barn doors?….
Michael completely designed, custom-built and installed those, too!
No small project!  I love them.  Perhaps I will do another post just on those, and give you a closer look with more verbal details.
And then there is yet another reveal behind those barn doors: one of our boy’s awesome bedroom!  He’s all moved in, and loving it.

My art studio reveal is not done though! 

There will be one more, showing you what it looks like all moved in!  Expect lots of COLOR added!  And instant happiness and inspiration. We actually started moving stuff in right after taking these photos for this post.
We are so thrilled with how it’s all coming together. What do you think?  Do you have a dedicated space to get creative? Tell us about it or share your links, please.
And be sure you are following us for our next art studio reveal!
Thanks for coming over, Friends.

* * * * * *

Please come follow me here and there:

Save

Save

Save

Filed Under: Crafts & Creations, Home Improvement, Home Projects, Organization, Photography, The Homestead Tagged With: art-studio-ideas, art-studios, craft-art-organization, craft-room-ideas, craft-rooms, craft-spaces, craft-studios, craft-tables, crafting-furniture, dream-art-studio, dream-craft-room, home-renovating, Ikea, Improvement, organization

Our Summer Mantels | Home Decorating Ideas

July 10, 2013 By Laura 9 Comments

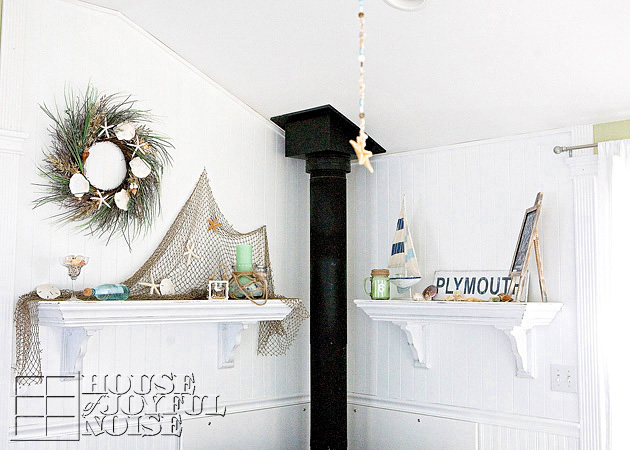
We’re three weeks deep into the summer season, so I thought it was high time I got our summer mantels decor on the blog.  It’s not only fun to show, but hopefully it gives someone some home decorating ideas. And if you aren’t aware of it, mantel decorating is twice the fun around here, because we have double mantels! Courtesy of the hard-working hands of my carpentry-able husband. So the mantels inspiration, ideas, photos, decor, fun….is always x2 here at the House Of Joyful Noise! 

I knew the season of summer was going to be fun to work with. Once I got thinking about it, I started getting all kinds of ‘theme’ ideas that fit the summertime season! But, where we live right by the ocean, it only seemed to right to go with the beach/nautical/seaside authentic decor, this first summer with our new mantels. I am sure as the years go by, I’ll continue to get this thrill from the creative process of putting together pieces to decorate the mantels, and so it will always be somewhat difference from year to year and season to season. And by seasons, I am referring to both the four seasons of New England climate, as well as holidays. In other words, no 2 summer double-mantels will be just the same.

That said, I AM so in love with my finished summer mantels right now, that I can’t imagine ever taking it down, or putting it back together just like this, next year.

Do you love them too?  
I just love seeing them. Whether on accident as I breeze through, or just sitting there, looking them over, and enjoying them.
I realize Autumn will descend on us at some point, and I’ll have new excitement and inspiration for that season (which I love), but for now, I am digging summer. A LOT. In all kinds of ways.

Oh you know I took details photos, so I can tell you [Read more…]
Filed Under: Home Decor, Mantel Decorating (Ideas), Photography, Seasonal Home decor, SUMMER Home Decor, The Homestead Tagged With: decorating-mantels, decorating-with-theme, home-decorating-mantels, mantel-decorating-ideas, mantel-decorating-tips, mantels, nautical-decorating, ocean-decor, seaside-decorating, summer-decorated-mantels, summer-mantel-decorating-ideas

Home Improvement; Dream Craft Art Studio Progress Update; Part 2

May 20, 2013 By Laura 1 Comment

 Here we are in May, and I am finally giving you all a progress update on the building of our grand craft/art studio. It was back in January when we first revealed this big and exciting home project of building a custom studio, which has been a dream of mine, ever since I was a little girl.  There is no doubt that this creative space will get a whole lot of use. In fact, I can easily see it becoming the most occupied room, in the whole house, by our whole family.  I am always going at craft or art projects, and Michael’s design, cutting and lettering prepping work space will be in here too. The kids are often crafting with me, or doing their own thing, and I can imagine they’ll be doing some school work up here as well. If they have independent work to be done after the lesson is taught, I might as well be productive! They’ll be plenty of room for all of us, and everything, if it’s designed and laid out well. And it will be.

So before I show you how much progress we’ve made, let me show you first where we were when we first shared our plans.  [Read more…]

Filed Under: Crafts & Creations, Home Improvement, Home Projects, Organization, Photography, The Homestead Tagged With: art-studios, craft-art-organization, craft-rooms, craft-spaces, craft-studios, home-renovating

  • 1
  • 2
  • 3
  • …
  • 10
  • Next Page »

We are wicked happy to have you here! We hope you find much inspiration, help, humor and enjoyment here.


Archives


POPULAR POSTS

* * * * * *

SUBSCRIBE to House of Joyful Noise blog! Every new post, delivered right to your email box!


Privacy Policy

Amazon Affiliates

Never at any additional cost to you, we may earn a small commission for our endorsement, recommendation, testimonial, and/or link to any products from our website. Your purchase through our links helps support our family, while sharing with you the products we authentically use and recommend, for various ideas, and letting you know where you can purchase them. Thank you for your support!

[footer_backtotop]

Copyright © 2025 HouseOfJoyfulNoise.com ยท Genesis Framework by StudioPress