• HOME
  • {A}’s Chipmunk Training Archives

 Homepage

  • The Homestead
    • Home Projects
    • Home Improvement
    • Home Decor
      • Seasonal Home decor
        • FALL Home Decor
        • WINTER Home Decor
        • SPRING Crafts and Creations
        • SUMMER Crafts and Creations
    • Our Chickens
    • Gardening
    • Organization
    • Re-Purposing
    • Furniture Refinishing
    • Budget
  • Crafts & Creations
    • Seasonal Home decor
      • FALL Crafts and Creations
      • WINTER Crafts and Creations
      • SPRING Crafts and Creations
      • SUMMER Crafts and Creations
    • DIY (Do-It-Yourself) Project
    • Kids Arts and Crafts
    • Homemade/Handmade Gift Ideas
    • Holiday Crafts
    • Fan Pulls
    • Free Printable/Downloadable
    • Sewing Projects
    • Giveaways
    • Business Features
  • Recipes/FoodFun
    • Breakfast
    • Lunch
    • Main Dish
    • Sandwiches
    • Appetizers
    • Slow Cooker
    • On The Grill
    • Side Dishes
      • Soups
      • Salads
    • Baking
      • Breads, Rolls and Muffins
    • Snacks
    • Treats
    • Desserts
    • Drinks
  • Homeschooling
    • Elementary Homeschooling
      • Elementary Homeschooling READING
      • Elementary Homeschooling MATH
      • Elementary Homeschooling LANGUAGE ARTS
      • Elementary Homeschooling SCIENCE
      • Elementary Homeschooling HOME ECONOMICS
      • Kids Arts and Crafts
    • Middle School Homeschooling
      • Middle School Homeschooling SCIENCE
      • Middle School Homeschooling HOME ECONOMICS
    • Language Arts
    • Math
    • History / Social Studies
    • Geography
    • Foreign Language
    • Field Trips
    • Games
    • Nature Study
  • The Big Picture
    • Life In General
    • Celebrations
    • Faith
      • Into the Light; The Series
    • Giveaways
    • Reviews & Sponsors
  • Photography & Lettering
    • Photography
    • truck lettering
    • vehicle graphics
    • Newborns
    • Kids
    • Engagement
    • High School Senior Pictures
    • High School Senior Pictures Sneak Peeks

Home Improvement Reveal; A Dream Come True; Part 1

January 15, 2013 By Laura 9 Comments

I have had a childhood dream, that has never faded away. Not even with the passing of decades of years, this dream has lived through.
Well, that childhood dream, is about to come true for me.


♥ I am getting a completely customized art studio! ♥

It’s in-home, and already in the works. I thought I would take photos of the progress, in case some of you might enjoy watching it come to life along the way.

I was in kindergarten, when I decided I was going to be an artist when I grew up.
That plan never waivered all through my schooling years.  As a kid, I used to see little empty shops with real estate signs around town, and dream of what it would be like, to have my own studio space in there. When I graduated from high school, I went on to commercial art school for the next 3 years.  In the past 22 years since then, I have been a freelance artist and photographer.  Following art school, in my early 20’s and back home, my parents were kind enough to give me an extra room in the house for my drawing table and such.  I probably did 100 commissioned, illustrated large portraits out of that little room. And I’ve had a cozy little in-home photography studio in our finished lower level here, for many years, until a year ago. But never….anything like this, that I’ve got coming.

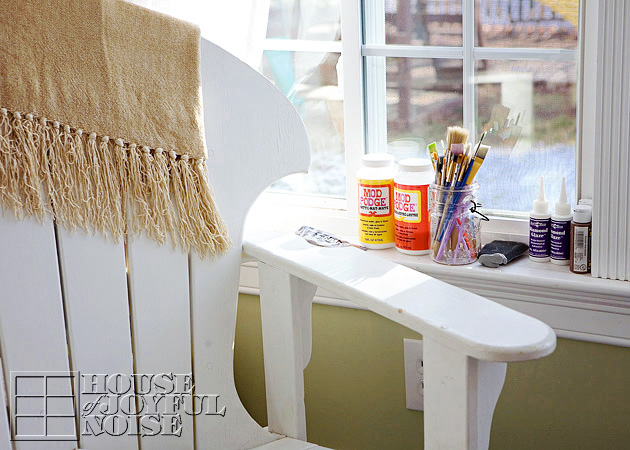
Between Michael and I, we always have (all kinds of) projects going on. All over the house. And because I haven’t had a dedicated space, I have craft supplies  stored all-over-the-house too.  It is a wild-goose-chase to ever find what I need, when I need it.  Let me show you just a glimpse of what I mean.
But before I do, TAKE NOTE: *In these photos below, I had already started pulling stuff out, sorting, throwing away, and packing stuff up – for the new studio in development. So these areas have never looked like this big mess, unless you looked behind the curtain into the closet or in the cabinets.

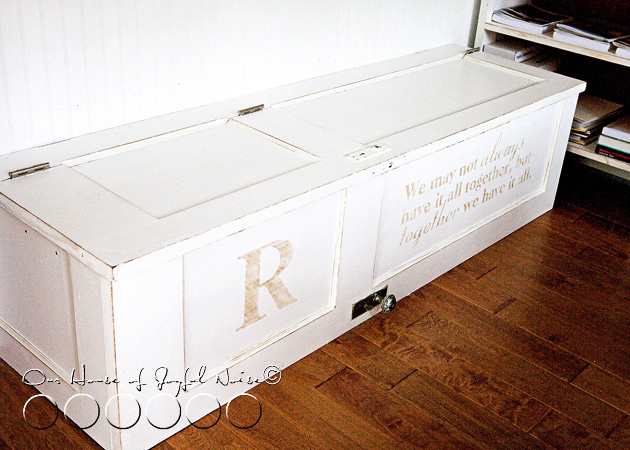
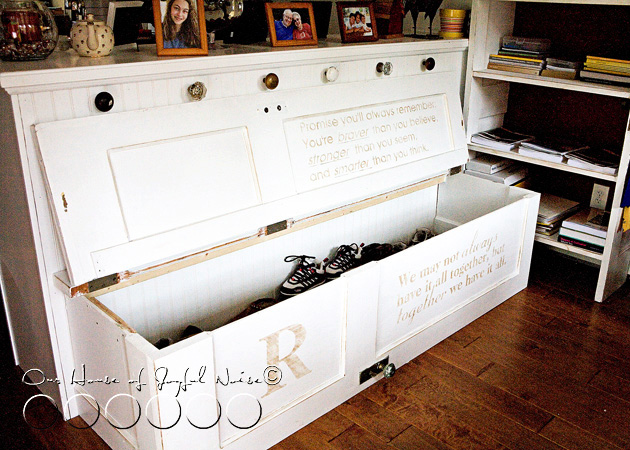
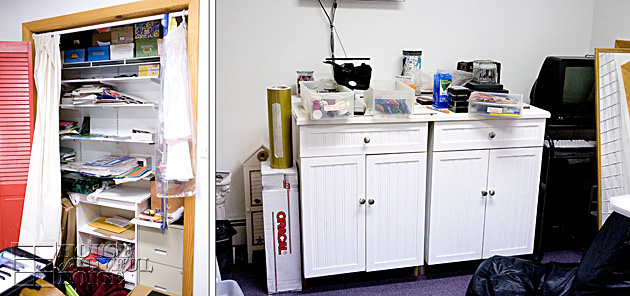
But anyhoo, this is one end of my former photography studio in the lower level of our home.  You can see, one closet that’s been chock full. Those shelves were packed. So frustrating finding anything, or getting anything out. Much is already pulled out of the closet you see here, and on the floor and in bins now, not visible in the photo. Across from that closet, is 2 floor cabinets, with drawers, which have stored more craft supplies.


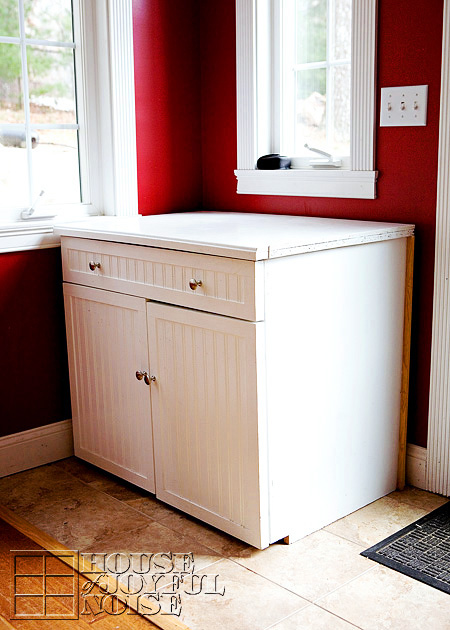
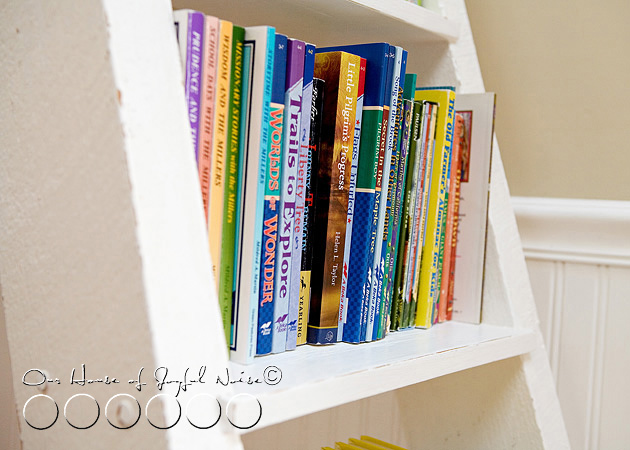
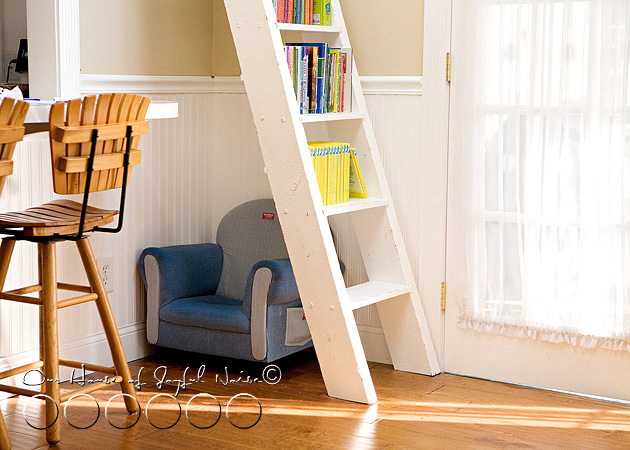
Another cabinet upstairs in  in the corner of the school room by the back door, holds yet more supplies.

But wait…..there’s more….
Our cramped little laundry room on the mid-floor, has still-more-supplies.

And, there are various other little places around the house, where there are tools and whatnot.
So as I’m sure you have gathered with just this much observation, that there is great need, for ONE LARGE STUDIO, that is organized, functional, and inspiring, to do our thing.
Art is a huge and active part of our lives and work fields.

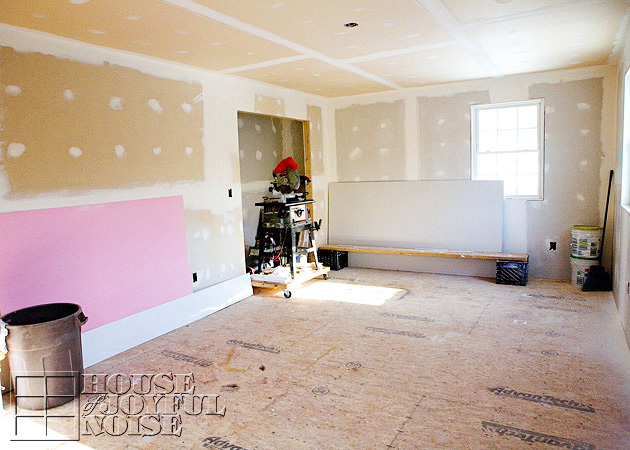
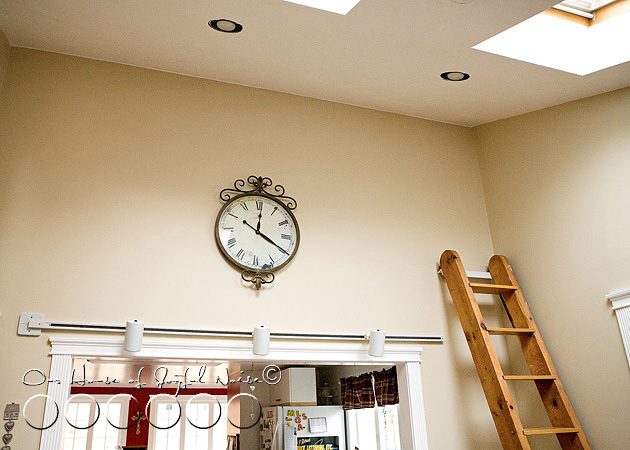
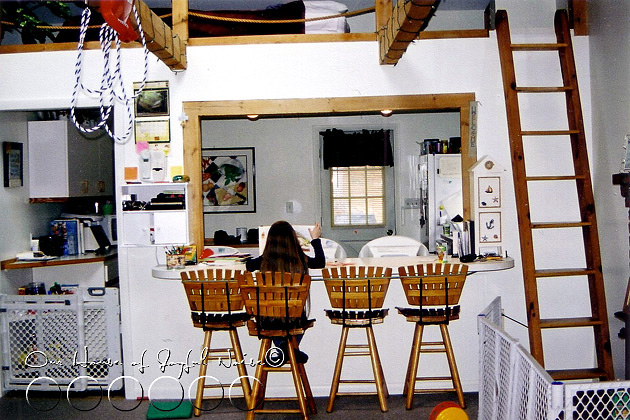
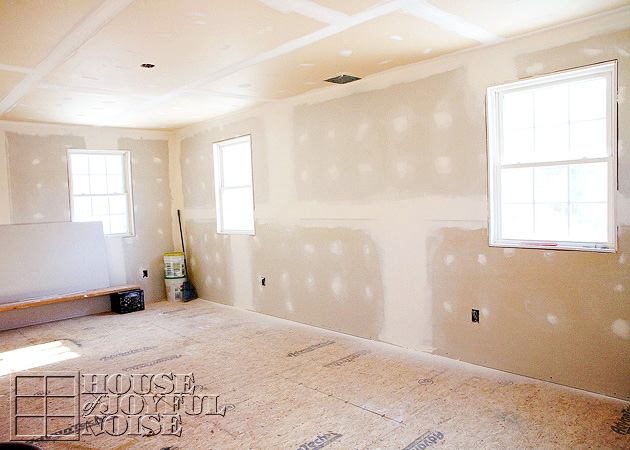
This space in the upper level of our home, is where the new art studio will be. There is mega natural-light, and it is 12′ x 22′. The ceilings are 8′ high.  That’s great space!
So this is the view walking into the room.

It’s funny how this came to be.  We have been trying to work on our unfinished house for the past 6 years. It’s been held up many times, due to finances, or lack of time. And then it was held up for a bit more, while we re-pondered our original plans, and the intent of each room in our home.  The girls’ rooms have been done for quite some time, and I do plan on sharing those. But we realized that this one great big space that we had planned on making the boys’ room to share, would be of much wiser use, as the art studio that we desperately need. It would be much more appreciated and well-used, on a daily basis.  Although it’ll be my studio, and I’ll be spending the most time in it, it will actually be a great space for all of us.  It is such a grand space, that even Michael will be able to do his sign work in here as well.  The boys will still get awesome rooms, but of their own.  But much of this space, will be a new art studio. We’re back on track to finishing it now until it’s done.  And it’s well on it’s way, as you can see.

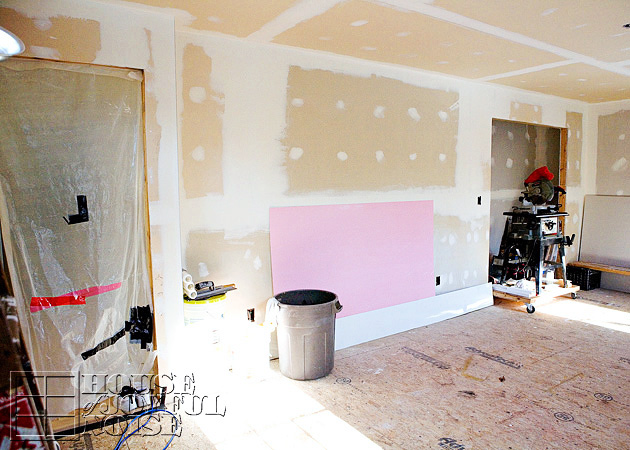
The opposite end; which will actually be used for another purpose, and I will tell you more about that at another time.
I know none of these photos are pretty or exciting now – but they will be. Right now, it’s a matter of imagination. : )

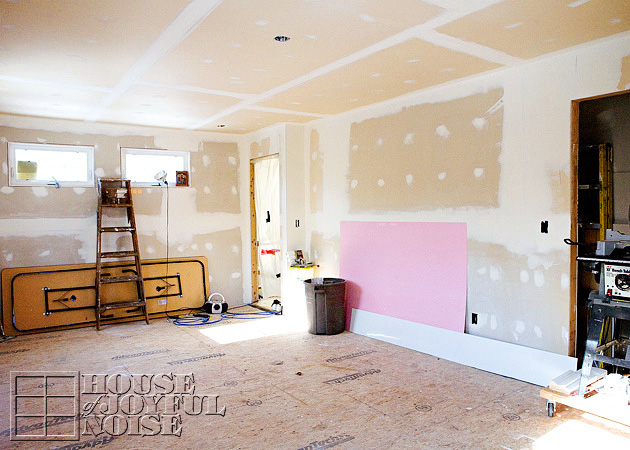
The other side of the room, the long way.
On the left is the entry door.

Viewing from the end we first saw, back towards the entrance.

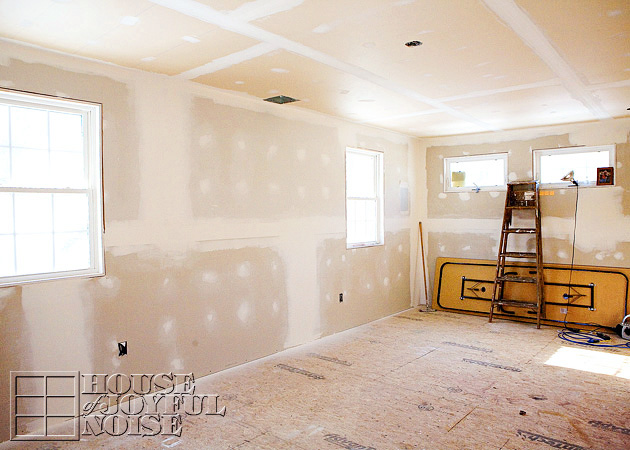
This wall, seen when you first come into the studio, is going to be great.  The single window on the far right, is actually going to be replaced with a picture window, which we are removing from a side of the school room downstairs (which will become a wall.) We have regretted putting that window there downstairs.  It looks out at nothing, gives us no natural light, and would be of more use and more attractive as a wall.  Deciding we need one of these windows to be larger up here in the studio-to-be, gave us the perfect way to make use of the one we take out downstairs.  However, even with the windows, it is going to be a very functional area to work, as well as have a whole lot of storage and work space

We are still in the planning stages as far as design and layout.
But here’s what I can tell you for sure:

  • It will be all white: walls, ceiling, table tops, shelving, cabinets, etc.
    • There will be splashes of color everywhere, from the supplies, materials stored and organized, much out and accessible, as well as the artwork we create.
    • It will have natural pine floors.
    • It will have specialty lighting installed, for dark days, night-time work, and photography.

There will be:

    • A lot of flat working areas everywhere, for various needs.
    • An island block on wheels, with a large flat surface, cubby shelves on the sides, and additional storage inside.
    • Custom built storage spaces in various areas for specific supply-organization needs (paper, ribbon-spools, etc.)
    • An area specifically set up for photographing anything I need to.
    • A large, old drawing table.
    • Dedicated seating for the kids, to do their crafting, and sometimes, possibly their school work, too.

In this studio, designed correctly, here are some of the creative projects we’ll be able to do in here, and store all of the supplies/machinery to do them:

      • all illustration work
      • designing
      • crafting
      • scrapbooking and card-making
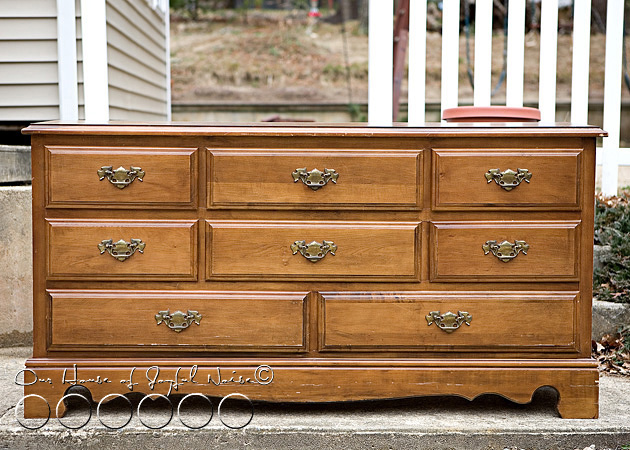
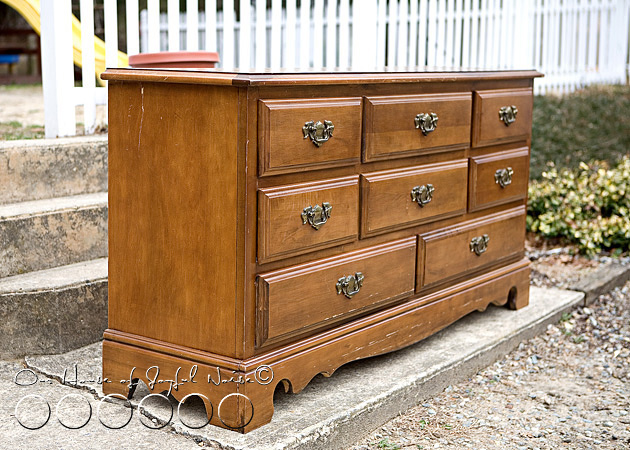
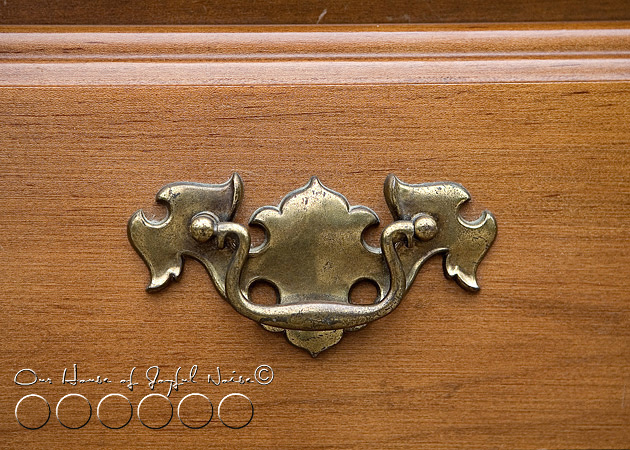
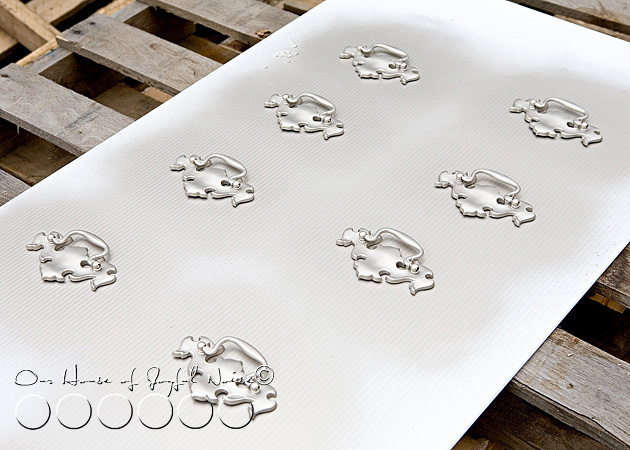
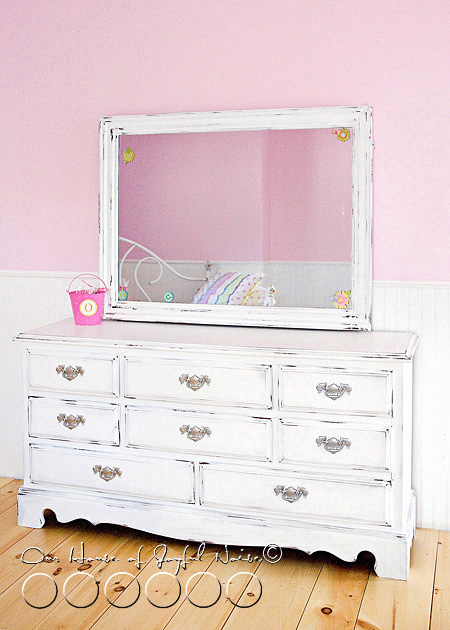
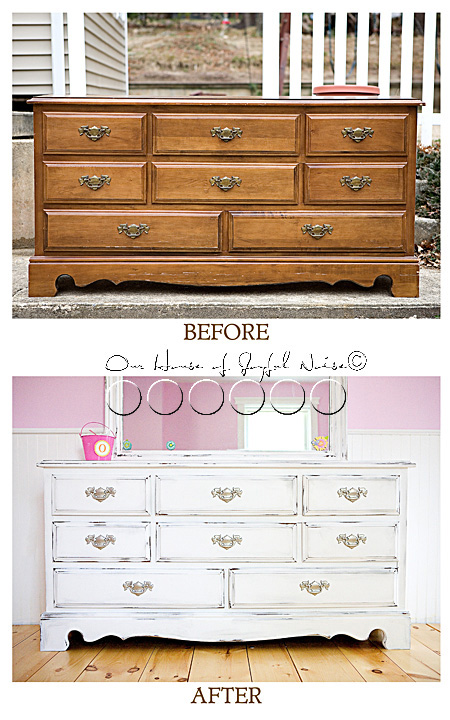
      • small furniture refinishing
      • sewing
      • sign-making
      • vinyl-work (large cutter/plotter
      • photography

                                   . . .  and more.

And here’s my man, who is making it all happen . . . . . .


If you follow us, you’ve seen he’s capable of some amazing carpentry work.  One of his greatest builds I haven’t even shown you all yet. But I will in time. Nonetheless, he is capable of making this space into absolutely anything I want it to be.  I couldn’t be more grateful. We’re a pretty good team too, and have a lot of fun bringing our little brainstorms to life.  He works about 50-60 hours a week, so he works on our house when he has time. Usually the weekends. But it should move along now, I think.

I plan to document the progress of this studio, to share with you all. if you’d like to follow along.  Not every little boring step, but a quick update here and there on how things have come along.  We would love your input and ideas along the way!  We know some of you have creative spaces of your own, as well, and we’re sure you have opinions and advice, that you could share with us.
I have already started a Pin board, just gathering some bits of ideas, options, and inspiration for storage and such.  And my brainstorming is on over-drive. As always.

We’re all too excited! It’s not every day a childhood dream comes true.
And by the way, the re-pondering of our home and the rooms/space it offers, will be resulting in ‘Musical Rooms’ of sorts (like Musical Chairs, but Rooms), and some fun redecorating too.
So there is more room make-overs, besides this one, coming as well.
We hope you’ll enjoy following along with us, as we go.
Got any tips or ideas for us already? Let us know anything you’d like to say, in the comments!
And as always, thanks for coming by. : )

* * * * * *

Please come follow me here and there:


Filed Under: Crafts & Creations, Home Improvement, Home Projects, Organization, Photography, The Homestead Tagged With: art-studios, craft-art-organization, craft-rooms, craft-spaces, craft-studios, home-renovating

The House Of Joyful Noise Top 10 Projects of 2012 Countdown!

December 29, 2012 By Laura 1 Comment

The year of 2012 is coming to a close, and my-my-my, what an amazing and unpredictable year it has been for us! It truly taught us to have faith, and hold on for the ride!  We are way excited for the coming new year of 2013, because we have some big (huge!) and exciting projects that we will be doing, documenting, and sharing, with you!  In fact, many. But before we get to all of that, we thought it would be fun to just reflect on this past year, for which we are so grateful for.  Both in regards to the blog, and ‘The Big Picture’ of our day to day family life.  And THEN, have a little countdown of our most popular projects of the past year. Won’t that be fun?  We think so. : )

But you are quite free to skip right down to Top 10 Countdown if it’s what you are most interested in!

 Bloggin’-So what a year it has been, for our little (teeny-tiny) corner of the internet world, here!  With my putting my photography business on hiatus, to focus more on my kiddos and their schooling, and having just that bit more of time to put into the blog with a bit more business approach too, it has grown more than ever. My goal this year has really been to just make any bit of income I could, to help out Michael, while putting what comes first in our life, first. While blogging hasn’t exactly raked in the piles of cash that my photography business did, it hasn’t been too bad. And it also hasn’t taken the huge amount of time away from my kids, their schooling. and our family as a whole either, the way my photography business really did.  It was just very time-consuming, and took more people-skills than I truly had some days. I just wanted to keep doing what we do anyway, and blog a little more of it, and then put a little more into the marketing end of it, and see what happens. We’re happy with what has happened, and God-willing, it’ll keep growing. But we wouldn’t have gotten to this point this year, without you all.  Your visits, interest, comments, sharing, and general support of our projects, have made it a joyful journey. It’s meant a whole lot to us. Yes, every once in awhile I do start talking about throwing in the blogging towel. There are just some difficult personal aspects of it that can be hard on the heart, at times.  But whenever I start talking such smack about quitting, my husband and oldest daughter throw a little fit, and demand I keep it going. Not only is it our family blog, but inside, they know how much I enjoy the whole creative process of not only the projects that we do, but the photography and blogging of it all. And the connections we have built, with you.  So, it’s been wonderful in that way.

Family-Life– Our year has really transformed over the course from beginning to end!  In really wonderful ways.  Michael has made the biggest changes, professionally, that has ultimately been the best thing for our whole family. It’s given us stability that we haven’t known, for many years.  In all of our married years, Michael has pretty much soley focused on his truck lettering and sign-making business, as our main source of income. It’s a work field he has loved, and as a second-generation track letterer/sign-maker, it has meant a lot to him, to follow in his father’s footsteps. More than ever, since losing his father a couple of years ago. He wanted to be sure to keep his father’s trade alive. But the economy and the struggling businesses of many companies, really effected the business enough, that we were very much financially struggling. He toughed it out as long as he could. I never wanted to take that away from him. But it came to a point where he needed to put the fight for income aside, and do something else, to best provide for our family. To skip the details and make a long story short, he transitioned to working a full time salary job. WHAT’S MORE . . . Michael’s own business is still there! His clients, have remained loyal to him, and patient.  They understand he has another full-time job now, and are willing to wait the few extra days, to get their trucks lettered and what-not. So all-around, Michael is very content. The financial stress is gone (because are needs are not that great, anyway), and the enjoyment of what he is doing, keeps him going. He is working more than ever, but to see him so relieved of the financial stress and worry, makes me feel a whole lot better, and gives him the drive of feeling so good about what he is doing.

Our children have really thrived this year. too. They have had some beautiful and amazing accomplishments, and it has been a true blessing and joy to watch them grow.
BUT,  this post is long enough, with too much more to go. I know I never shut-up when it comes to my kiddos, so we’ll save some of that for another time. Shall we?

Let’s just get down to the projects that all of YOU, our readers and visitors, loved most!  This countdown is based on the most page views.  Not the most comments, or anything like that. Just sheer traffic that the project drew, from out there on the net. We’ll start with the 10th most popular, and count down to #1 project that drew the most hits this year!
Y’all ready for this?
(And if y’all have a song playin’ in your head now, you’re a lot like me! ; )

Here we go!

(*TIP- To see full posts, click on highlighted titles; not photos.)

10.
My Custom Built Farmhouse Home Office Desk
For sure, this is THE project I was most excited to share with you all, this year. Personally. It was nothing short of a little dream for me.  And to be blessed with a husband who is so talented to whip out my greatest desires, is something I am thankful for every day.  I think the fact that so many like me love anything farmish, and maybe some envy, is what made this such a popular project to be drawn to. But it’s the details, and the story behind all of it’s parts, that makes it so meaningful to me.  Come to think of it, I still need to take a photo of it ‘in use’ now, for you all. *Note to Self: Do that.

* * * * * *


9.

Pinwheel Wreath / Tutorial and Decor
This was flat-out fun to create, and proved to be fun & cheery home decor in our sun room, through the spring and summer months.
You can make this too, with my easy to follow instructions, photos and tips.

* * * * * *

8.
Recipe for Apple Pie Pops
As I said in the post, this wasn’t even my recipe! I just needed to make them. I think it’s their cuteness that made this a popular visit.
But I did pretty much show you how to make them and give you the recipe.

* * * * * *

7.
A Snowman Christmas Tree Ornament Tutorial
Now this is a fairly new project on the blog. And yet it’s #7!  Again, cuteness is a powerful thing.
I had way too much fun making this. Like a kid, building a snowman! Minus the miserable cold.

* * * * * *

6.
Our Antique School Desks and Books

Well this wasn’t even a project, or anything we did! But as it turns out, old school desks are pretty heavily researched! Still, one of the desks we discussed was one of Michael’s when he was little, and it got pretty hilarious. One visit to the post and a quick scroll through the photos, will show you why. ; )  Goodness.  It still makes me laugh.

* * * * * *
5.
Decorating with Autumn Leaves / Door Garland and Candle Jars
Not much to say, except that people loved it.
And that I’m beginning to feel like Casey Kasem.

* * * * * *
4.
Heart String’s / A Valentine’s Craft
I can tell you right now, how this one made the list.  And it probably just made it the other day!  It seemed to be shared by someone on some popular Slovakian Facebook Page, and that was it! It was fun reading the translations of the comments.  But anyhoo, it was a whole lot of fun to make with the kiddos.  Anything with melting crayons, is going to be fun. Taking photos of crayon shavings was also fun. We’ve saved this craft project and hung it up 2 years in a row, too! Hoping it’s still in good enough shape to give a 3rd.

* * * * * *
3.
Boys’ Hardware Accessories
This project was just playing around, and seeing what I could make for accessories, for my boys’. (Who do love accessories.) It seems I’m always making their little sister something, so it was their turn. I just brainstormed what might be boyish, and came up with hardware. I made them both jewelry and belts.  Half the fun was photographing my little men, wearing what I made. Like a magazine shoot. Planning and setting up photo-shoots, and photographing such a wide range of things, is huge part of the thrill of blogging for me. Throw my kids in, and I’m a Mama having more than her share of fun! 😀  (You really need to visit the post, and see how handsome and boyish they were. ; )

* * * * * *
2.
Glass Tile Handmade Gifts / Necklace Pendants and Magnet Sets
I’ve gotten great traffic on this one, ever since I blogged it. Such a fun project. The key really is working with high quality white glass tiles. I have a great supplier, who I’m about to use again. I tried another, only because she had some kits I wanted to try. It was a huge mistake. The quality of the materials I was working with, didn’t come close. So if you do this, use my supplier, mentioned in the post. Check out the gorgeous pendants and magnet sets I made.

* * * * * *
and FINALLY…..OUR TOP MOST POPULAR PROJECT POST OF 2012 IS . . . . . .
. . . . . . just the craziest thing  . . . . . . I mean, I loved the project and had a great time doing it but . . .
. . . . . .I don’t know that it’s the best thing we’ve done this whole year!  Actually . . . . . .
this is a project I did all by myself. I DID put a whole lot of love into it. The funniest thing about it being #1 is . . . . .
the idea to blog it was not even a plan at first! It was just a special gift I wanted to make, and taking photos to blog it was an after-thought.
And POOF!! It’s a HOT ONE!!
The top-traffic project of the year IS . . .
.

.
1.
A Doodle Journal; Made with Love
This was a personal and customized gift, that  I made for my God-Daughter. I happened to submit the blog post project to a (very popular) craft site, and the photo apparently intrigued people TO NO END. I still get traffic every day, from this baby.  Who knew? I think deep inside, everyone loves doodling. Even if they say they don’t know how, WHICH is impossible. I promise you, everyone can doodle. Just pick up a pencil or pen, and let your tool of choice go crazy on paper. Frankly, it’s therapeutic. My mother was a chronic doodler.  She even doodled on the cards and school projects us kids made for her. She truly couldn’t help herself. I find it great fun, and it really exercises the artist in us all. That’s why I wanted my God-Daughter to have this journal, to get her own DOODLE ON! And to express the beautiful little chickadee that she is. I hope she’s using it and enjoying it.

And THAT my friends, concludes this year’s countdown. Join us again next year, for another, if we’re still here. (Just going to roll with God’s plan, as always.) And if I do this countdown again. This was my first time ever.  HOLY….that was a lot of work! I sure hope you enjoyed it!  It took me just about all day! I think I’ll take the rest of the year off.  ; )
Incidentally, I wanted to mention that the actual #2 spot, was our home page!  That means just plain old visits to our blog, to check in if you know us, or see who we are if they don’t, and see what nonsense we’re all about. That’s good to know!

Thank you all so much! For being there for us, and digging what we do.
Now….who’s up for another year of this?

 ******

Please come follow me here and there:


Filed Under: Crafts & Creations, Home Projects, Photography, Re-Purposing, Recipes, The Big Picture, The Homestead Tagged With: Catholic-blogs, Catholic-families, crafts, top-ten-10-blog-post-projects-of-2012

How We Used a Unique Medium to Letter/Embellish Our ‘Doors To Storage’! (A Tutorial)

October 27, 2011 By Laura 5 Comments

09_wood-monogram-214x300

Our Doors to Storage home project, has been a bigger hit than we ever dreamed!  I’ve even run across it on Pinterest a few times now! CraZy-Ness!   Well, we knew there would be people who thought it was a pretty cool idea, out there somewhere. But we’re glad so many have loved it, and what’s more, have been inspired to make some benches and shelves, using old doors, in their home.  Sharing and inspiring is what ‘s all about, people! Love it!


07_bench-message
That project post was big enough as it was, so we told you were would share how we went about embellishing the bench with lettering in a future post, and this is it! : )   I apologize that it took a little while here.  The last quarter of the year gets a little busier with my photography business (in addition to our normal schooling & practice/game schedules and l i f e.)  It’s a fine line between keeping the blog going, and getting fired by my clients. ; )    But you know I always come back around.  Thanks for sticking with us.


02_lettering-stencil
The first lettering was to be applied on the inside of the bench, to be seen when the bench seat was open.

To start, we laid out our lettering in a design program in the computer, and cut a mask out.  Michael has been a letterer (of large company trucks, signs, boats and windows) since we met (in art school.)  So he has a program of his own, and a huge plotter/cutter machine.  But I know many of you crafters  have similar little machines now. (Silhouettes, Cricuts, etc).   This can be done with that equipment as well.

After weeding the letters out of low-tack vinyl we used, and covering it with transfer tape, Michael peeled off the backing and applied the mask centered, onto the inside of bench panel.

I wanted the lettering itself, to be subtle-ish.  Under-stated, and worn-looking.  So rather than painting in the lettering, I had the idea to try using something in a whole new way…..

03_annie-sloan-wax-use Annie Sloan Waxes. Both the Clear and Dark.

First, with a soft old t-shirt, we rubbed a thin layer of the clear wax all over the cut out letters of the mask, and really rubbing back off, all we could.  The reason we did this, is because we didn’t want the dark wax to overly stain the white door, to a point that it came out too dark and unable to remove.  Applying and rubbing off the clear wax, would allow us to control how much of the dark we rubbed off.   Because again, we wanted it light and subtle lettering.


04_lettering-mask Then, we applied the dark wax.  But this time, as we applied it, we did so in one slanted direction, to try to (and try is the key word in this project, lol…) simulate light.  We really used very little dark wax, pretty much trying to wipe most of it back off. We also intentionally had darker and lighter areas of lettering.


05 Then we carefully removed the masking, and this is how it came out!  So why the inside of the bench, you may be asking?


06_bench-message

The quote is a message specifically for our kiddos. A subliminal message of sorts, for our kids to read and remember, every time they get their shoes. (And if they know what is good for them…..put them away too. ; )  Now who’s quote is it?  Apparently, it’s something Christopher Robin once said to Pooh Bear.  Now I’m all for quoting and giving credit to the authors of such wise words.  But, let’s be honest here. Christopher Robin is not real, and neither is Pooh Bear. (I hope I didn’t just ruin anyone’s reality saying that out loud.  Yikes!).  The thing is, I just didn’t want it to say “Christopher Robin” on my bench. You know?  I’m not hiding, that he said it first.  I’m admitting it right here and now.  I just didn’t want to complicate the power of the message, with such….characters.  It is indeed wise words though, that I would like my children to remember. So I am borrowing them.

Thanks, Chris.

07_bench-message
Of course, we wanted to have some lettering design on the outside, as well.  This time, we did so on the panels of the front of the bench.


08_bench-monogram In the first smaller, more square-ish panel, we very simply monogrammed with our last name initial.


10_home-personalizing Continuing to use the same techniques, beginning to end, this is the saying we chose for the longer, more rectangular panel.   It was so hard, choosing which quote/saying, to use!  There were so many I wanted to.  But we had to keep in mind others coming into our home and reading what it said as well, (lol…), and we had to narrow the options down to one.    This was the one that won.

True ‘Dat!


11_unique-storage-bench A look at the entire front, complete.

12_home-bench I like it, I like it!  You?

13_doors-storage-bench
We’ve had our storage bench now for a couple of months, so we can officially say, it has worked out really really well!  It’s been the perfect solution for us, actually, to keep our daily-used family shoe collection in (out of sight), and the shelving next it has been so efficient for our school supplies. The door-knobs have been handy and quick for the kid to hang up their outerwear, as well. Overall, it was not only a big, fun project, but we think it all adds another unique feature to our home, and the lettering just further personalizes it.

So, now that we’ve tested this new idea out, you can consider wax, as another medium option, for subtle lettering/designing some surfaces.  I think it really has a nice tea-stained look to it, on this project, that’s appealing.

Have you ever used a medium, in a different manner, than it’s actual purpose?  What was it, and how did it come out? Tell us about it! (And share a link, if you’ve got one!)

* * * * * *


Save

Save

Filed Under: Home Decor, Home Improvement, Home Projects, Organization, Re-Purposing, The Big Picture, The Homestead Tagged With: embellishing, embellishing-how-to, embellishing-tutorial, lettering-home-decor, lettering-storage-bench, lettering-with-wax, tutorial, use-for-annie-sloan-wax, vinyl-cut-project

Doors to Storage. (Literally.)

September 28, 2011 By Laura 34 Comments

We are so excited to show you a couple of major storage solutions we came up with for our home, that has made a huge help to us!
Not only do we feel much more organized, but these are unique projects where we re-purposed old doors.

005_old-door_300


We’re guessing many of you love to see little home transformations, and creative spaces, as we do, and that’s just what we hope to share with you today.  The photos we share will likely explain what we have done. But if you have just a bit of time, grab a drink of choice, and let us amuse you with a little more about the birth of this project.

We’ve heard some people try to ‘ keep up with the Jones’. But that’s not our style.  I’m sure they’re really nice peeps, and all. But they don’t run in our circles, and even if they did, I doubt we’d want or care what they have, even if we could  afford a thing.  No, our wants and needs are really quite simple. If not a little off-beat sometimes, I suppose.

What we would love to keep up with, is ourselves, and our own plans and ideas.  Michael and I enjoy walking around our home and yard, chat, brainstorm, and hatch a plan, that continues to make the best of our little piece of the world. Our ideas always have a purpose, whether they are to create a sense of decor, efficiency, organization, to save money, or simply to amuse ourselves because we think it’s cool. Many times, it’s all of the above. One thing is for sure; 100’s of plans have been laid out between us, in detail, and never come to fruition, whether it was intended to be done right away or not. Time and/or funds usually hold up the process a bit, until we’ve forgotten we even had the plan!  Sometimes, new plans and ideas have been made over the old ones we forgot, or remember we had.  And we always have more, than we could ever realistically get to, anyway.  It’s craziness, actually. So priority is the key, and some things just need to be dealt with once and for all.


001_shoe-storage-problem

Case in point is this hot mess, known as our shoes issue.  First, you should know, “I” am the kind of person, that really prefers one take off their shoes, before walking around the house.  Not because we have any fancy home, or carpet that mustn’t get dirty for appearances sake.  But, because of the things I notice in the world around me, the things I think of, and the things I know dang well those shoes have walked through.

Take for example, (just to make the most of my point), those teenage/adolescent boys you see walking through parking lots from point A to B, when you suddenly see and hear them do a big collecting sniff of sorts, hack it up, and just let it fly out onto the parking lot ground.  It turns-my-stomach. I’ve seen/heard it hundreds of times, and I have told my boys every time, “Don’t you EVAH, in your life time, do that.  I don’t care if you are 36. That is absolutely dis-gust-ting, rude and UNacceptable.” To which they reply, “We know Mama. You tell us that every time.”  So along with 100 other examples I could give (I’ll spare you), I simply know it’s a small sample of what is on the bottom of anyone’s shoes, and I really do not want to know such disgust is all over the floors of my home.

I’ll take earth-dirty-feet over that kind of what-nots, any day of the week.

So that helps explain all of the shoes, along the walls of our sun room, right inside our front door.  Keep in mind, this is also the room with our wood stove, and one of our family tables where we often eat and school, half the time. We originally imagined it as a cozier room for reading and such, possibly with a chaise lounge chair or 2, and an area rug under the table. Not the feel we had going here. Using the table for eating and schooling the other half of the time, it is the room we enter when we come home, and through which guests come as well. With only our shoes for that season out, with 6 of us, it’s too many. Any, is too many, for me.  It’s actually worse then you see. At the time of this photo, some had just been put away, and 5 other pairs were busy walking around in the world of what-not.  The bottom line is this:  the sight of these shoes always puts me in a bad mood. It looks terrible, and we are always tripping over them.  So, for a couple of years now, our plan was to build a storage bench along the wall you see. We had designed it right down to the details, and frankly, the shoes could never let us forget that plan.  It’s just been on a list of many things we’re been trying to get to.  But we finally did, with a whole new spin, and we’re about to show you.

But completely related, you need to see this…..

002_antique-typewriter This is in (in part) our school room. If I ever took photos of these floor cabinets Michael built for our school room 4-5 years ago, I cannot find them.  So this photo and the one below, will have to give you an idea.  There are 3 of them along the 1/2 wall adjoining the kitchen.

003

If you can possibly look past one of our adorable boy when he was starting 1st grade, you will better see the size of these cabinets.  Michael did an great job, and they served us well in this room for 5 years.  But as of late I decided they are really (way) more specious inside, than we actually need, for our school books and materials. Very roomy.  And we probably did not need so much table-top space either.  As a whole, they take up a lot of space in this room, where there is also another long table and chairs, and where we also tend to gather to eat and school.

Since the sun room was meant to be cozier and lounge-ier than it is, we thought a good first step, is to not let it be the door we come inside the house through, for one.  The back door would probably be better for that.  More like a mud room. But there was still the countless shoes issue! We still needed somewhere to sit down and take our shoes off, and somewhere to store all of those shoes. What we did not need, was quite so much storage space, for all of our schooling materials.   I forget now exactly when, but the 2 matters collided at some point in my head, and ideas started rapidly coming together.  It was likely in the shower, which tends to be my most productive think-tank, but if that is TMI for you, disregard.

The gist of it all was….get rid of the big spacious cabinets in the school room, build some kind of more shallow shelving instead, and move this whole storage bench idea to the school room, where we should really enter the house from now on. A-hA!!  Then we can do better with the sun room! But that would be getting ahead of ourselves here.

004_old-doors

I also had an idea of how/where else we could use the big cabinets, but that too is for another time. In a nutshell, they were moved elsewhere, and it occurred to me that it would probably come out pretty cool, and save us big-time in material costs, to build our storage bench and shelves, out of old doors.

In a matter of days, we had found 4 doors on ebay offered for dirt cheap, just a hop, skip, and maybe 2 jumps, from us. Michael arranged to meet the guy to take a look, and he brought them home. (2 of them from this photo were already moved to the school room.) The doors were dirty, and somewhat mismatched, but that was all workable.

Show and tell will go fast from here I think.All 4 doors were re-purposed in this project(s).

005_old-door I loved the features on these old doors, and I knew I’d probably rough things up some more, from here.

006 First Michael relocated the huge cabinets to other locations. The floor space we gained just doing that, was unreal. Then, put up some leftover bead-board we had, as the back wall.

Then a bit of measuring and taking a moment to think things through, and we started to build.

007_old-door-repurposing-bench
The doors were sawed into half the long ways, as well as proper sized-pieces, for various parts, and we were able to start putting it together.   We wanted it a good height to sit on, and have as much room on the inside, to store/hide the abundance of shoes.


008_shoes-storage-bench As you can see, the bench unit, using the doors, was built 3 sided, simply using the back wall as the back of the unit.   And all of our shoes fit in there perfectly.

009_storage-bench Without all of the shoes inside yet, here is what the bottom looks like.  These removable racks are a feature we came up with, even when the plans was to build traditional storage benches in the front sun room:   The shoes we take off when we come indoors are not only dirty/sandy, but often times wet too.  I know what a mess the elements from the shoes made on the floor, so I had thought of that in terms of the inside of the bench, and what a pain it would be again, to move each pair of shoes, to vacuum up the sand and dirt.

010_storage-bench So we built these shoe racks out out of strapping and chicken wire, so that a whole rack with shoes on it, could be lifted out, and we could vacuum underneath.  They would also keep the shoe off the floor of the bench, so they could dry easier.

011_old-doors-repurposing
At the same time, we were not only building the storage bench with our old doors, but wall shelves beside it, for all of our school books and materials.


012_old-door-shelves
I know it’s quirky, but I really love this part of the door-shelves.  I knew the doorknob would serve purpose, aside from looking cool. The sharpener simply needed to be relocated from elsewhere, as it ended up being located in such a way they we could no longer use it, without moving it, and this was the best place for it.

As you can see, a lot of the doors were beat-up, and the dark wood of the original door showed through. I liked that.  But a few parts of the structures were also necessarily built with new wood.

013
Such as the shelving itself, built with new wood.  So there was still some distressing and aging to do anyway, on new wood and not, which I did with course sand paper, and dark wax, to properly stain and age the new wood, with the old.


016_doorknob-hangers Here is the lid to the storage unit open, pre-distressed. Obviously a door, but this side was painted by the original owner more recently, it appeared.  To add interest, and of course organization and function, we added a collection of old and mismatched doorknobs along the wall above it.

017_storage-doors-bench Here’s a better look as you step back and look at it as a whole. Again, we obviously used doors, and we intended for it to remain obvious, keeping every lock , doorknob and door feature we could.

Coming into the house using the back door, we come in and sit down on the bench to take off our shoes, and put them inside.  I should add, we will be putting down a mud runner, from the backdoor to along the front of this bench.  The little kids can hang their jackets and hats on the doorknobs, which is much easier for them as they cannot reach well in the coat closet that is in the room.  Yes, some coats will be too long to hang completely, leaving the bottom of the coats to sit on the bench, but that’s fine.  Scarves, bags and all kinds of accessories can be hung on the knobs too.

018_old-doorknob-repurposing

019_old-door-shelves The top shelves are for what you can see, as well as some of our music books.  I have many more of my teacher and resource school books that I plan to move from other shelves in the house to these upper ones, for my own use. But the depth we made the door shelves was just right for our needs.

020_old-door-storage The lower shelves are for the kid’s school books, and more of my every day teacher books.  As you can see, we found immediate use for this original doorknob, as well.

020_old-door-storage The kids hang their recorder instruments there. Perfect!

022_old-doors-bench I forgot to take photos of the bench with the lid closed, before we embellished it just a little bit.  But in closing this post, I wanted to give you a better look at the finished bench and shelves.

023_old-doors-bench

In an upcoming post, we will share with you the embellishments details you see, and how exactly we did it, with a surprise inside as well! But that’s pretty much the finished project as a whole.

We have found the entire project to serve us much better. It’s all so much more convenient, functional, and we think, has a cool factor.  I would think it’s the kind of thing that one would either love, or hate.  And I wonder, would features such as these, have a negative 0r positive impact on the ability to sell a house, should the time arise?  What do you think? We personally love the uniqueness and interesting features of people’s homes, and this fits right in with why we love ours. Everyone’s tastes vary, and so our feelings could never be hurt. But we’re curious to know what you think of this idea?  Is it cool, creative, or downright crazy?

* * * * * *

Come follow us here or there:


Save

Save

Save

Save

Filed Under: Budget, Furniture Refinishing, Home Decor, Home Improvement, Home Projects, Organization, Re-Purposing, The Big Picture, The Homestead Tagged With: antique-door-knobs, bench-seats, best-repurposing-ideas, custom-built-storage-benches, home, Home Improvement, home-organization-ideas, old-door-shelfs-shelving, organization, repurposing-old-doorknobs, repurposing-old-doors, shelving, shoes-storage-solutions, storage-benches, unique-shelving

Big Furniture Refinish } A Work of Heart

May 10, 2011 By Laura 51 Comments

 This is the biggest furniture refinish I have done, yet.  (Well, my husband did very kindly help me. I worked pretty hard on it too, though.)
But as big of a job as it was for my hands, it was a much bigger job, for my heart.

refinishing furniture
(‘Before’ thumbnail. The ‘After’ is a must see!)


refinishing furniture This is my mother’s dresser.  My mother passed away very suddenly, in 2005.  Her passing hit me like a train, and threw me into a grieving like I had never known. In the state of fog & hurt I lived in, one month after another, the only other thing I was aware of at all, was the depth of grief my father was in. It was hard to watch him go through all he was. I honestly don’t know which hurt more.

This dresser was the only one my mother ever had, in all of my years growing up, since the day I was born.   Except for a few sets of sheets, the drawers of it have been empty for the past several years, since my sister and I cleaned out my mother’s clothing together. But the rest of the house my father has kept exactly, as my mother had it. People say things to him about that, but he can’t understand why anyone thinks he would change anything.

My youngest daughter had moved out of the bedroom she had shared with her triplet brothers, and into her very own room.  I gave her my old white iron twin daybed, from my adolescent years, but she still needed a bureau of some kind.  One night, as I lay in bed, unable to sleep, I got to thinking about what kind of dresser would go best in her room, and when I came up with a long dresser with a mirror, I immediately got thinking about my mother’s.

refinishing furniture My intention right along, had been to find an antique or used dresser somewhere in my hunting, and refinish it.  We don’t buy much of anything new.  But when I remembered my mother’s, I knew I had more thinking to do.  You see, I knew my father wasn’t going to use it again.  He has the tall dresser, that goes with this one. When he sells the house, I knew he would either sell the dresser in an estate sale, or sell it with the house.  But one way or another, he wouldn’t be taking it with him, because he didn’t need it.

My issue was, the dark finish and style of the dresser, didn’t go with {O}’s room at all, or our home’s farmhouse style in general.  But, when it comes to sentimental matters, I am also the type, that doesn’t like things to change. I want everything to stay the same – which is why I take such comfort in going to my parent’s home, where my father is, and everything is just as my mother left it. My mother would be there too, if I had any say in that.

refinishing furniture So the idea of refinishing this dresser, of my mother’s, was hard to think about.  Just the vision of it, just as it is, with every detail, brings back memories. It’s such a part of my history, and my parent’s.  But it was either take it and refinish it, or let the whole thing go to some stranger, who never even knew my mother.   I decided changing it was a easier to handle, than letting it go altogether.

I talked to Michael about it the next morning, and called my father that afternoon, to ask him about it.  I was tentative, to tell him about the refinishing part.  (Yikes!) He did pause for a second of silence, when I got to that part of my plan.  But I wasn’t sure in the moment, if it bothered him because it was my mother’s, or if he didn’t get why I would do that.  I guessed it was the latter, knowing him pretty well, and a couple of questions later, I found I was right.  I figured, even if he was OK with me refinishing it, he wouldn’t understand why I would bother.  (Because he wouldn’t even think of it….because it works as is!)   “Why would you do that?”  “Because Dad, it doesn’t go with her room.  At all.”  I could hear him trying to wrap his brain around it.  He’s just a simple guy, who is not at all about home decor, etc.  If it works, it’s good! If it’s comfortable, it doesn’t matter what it looks like.  But he was fine with whatever I wanted to do with the dresser.  And he insisted on bringing it down to us, even though Michael had every intention of going out to western MA to get it.

I knew he would insist on driving it down, and as soon as possible.  He always makes sure we understand, “Anything you guys ever need, just ask me.  I mean it.” He means it.  There is nothing he wouldn’t do for us.  The dresser arrived in the back of his van, which arrived in our driveway, that weekend.

It was a beautiful day, so we got right to sanding it down, before it even came into the house. I did need to take a deep breathe, and push my hesitancy away, before I let the sander hit the surface.  But after I took some ‘before’ photos!

refinishing furniture I could see the dresser, all refinished just as I wanted it, in my head.  I went to Home Depot myself that week, and found what I was hoping I would, for the original hardware – which I definitely wanted to keep!  It was the design of the hardware, that that really marked the dresser as my mother’s, and part of my parent’s set.

The spray paint I chose, was brushed nickel.

refinishing furniture The tone was so beautiful.

The dresser itself, was a whole lot of work.  A lot.  Sanding, painting, steel wooling, and the high & smell of denatured alcohol, that was stuck in my head.  It was a big piece to work on. So much to it. My hands took a beating.

But the labor of it all, was therapeutic in a way, too.  It was a process I needed to go through.  Accepting change, and looking it in the eye, whether it is easy, or welcome, or not.  Knowing inside, that the only thing that is ever guaranteed to never change, is the memories born in the minutes and years that pass by.

Time marches on.

refinishing furniture The dresser came out absolutely beautiful, I think.  I totally love it, refinished.  It now goes so perfectly, with the rest of {O}’s bedroom.

But it’s funny to me that, as completely different as it looks now, I somehow still see my mother’s dresser.

refinishing furniture Every time I see the hardware, I am back in my parent’s bedroom(s), or I actually hear in my head, the clinking sound it makes, when the drawer is closed and the handle is let go.  I heard it for 21 years, or something.

refinishing furniture The dresser has new history now.

{O} now has her grandmother’s dresser, and she watched her parent’s refinish it with love, just for her.

refinishing furniture

I can’t tell you how many times, I used this big mirror myself, growing up in a house with 5 kids, and one bathroom.

I can even easily imagine the many things of my mother’s on the dresser top, that were there for so many years.

refinishing furniture {O} is slowly covering it, with her own things, now.

She knows it’s her Meme’s dresser, and it makes her happy to have it in her room, and call it her own, now.

Things change.  It’s a part of life.


refinishing furniture
And yet some matters of the heart, inside, never do.

No matter what it looks like, on the outside.

refinishing furniture Sometimes, letting go, is all we can do.

While we hold on to whatever we can, as best we can.

I’m so happy I thought of getting my mother’s dresser, before it was too late.

I miss her so very much,  and it was hers.

Nothing I do to it, can ever change that.

******

Did you enjoy this post? They aren’t all this long, but they always have lots of photos!

Come ‘LIKE’ us at our Facebook Page!


Save

Save

Filed Under: Budget, Crafts & Creations, DIY (Do-It-Yourself) Project, Furniture Refinishing, Home Projects, Into the Light; The Series, Life In General, Refinishing, The Big Picture, The Homestead Tagged With: furniture-makeover, painting furniture, refinishing-furniture

  • « Previous Page
  • 1
  • 2
  • 3
  • 4
  • 5
  • Next Page »

We are wicked happy to have you here! We hope you find much inspiration, help, humor and enjoyment here.


Archives


POPULAR POSTS

* * * * * *

SUBSCRIBE to House of Joyful Noise blog! Every new post, delivered right to your email box!


Privacy Policy

Amazon Affiliates

Never at any additional cost to you, we may earn a small commission for our endorsement, recommendation, testimonial, and/or link to any products from our website. Your purchase through our links helps support our family, while sharing with you the products we authentically use and recommend, for various ideas, and letting you know where you can purchase them. Thank you for your support!

[footer_backtotop]

Copyright © 2025 HouseOfJoyfulNoise.com · Genesis Framework by StudioPress