• HOME
  • About Us
  • {A}’s Chipmunk Training Archives

 Homepage

  • The Homestead
    • Home Projects
    • Home Improvement
    • Home Decor
      • Seasonal Home decor
        • FALL Home Decor
        • WINTER Home Decor
        • SPRING Crafts and Creations
        • SUMMER Crafts and Creations
    • Our Chickens
    • Gardening
    • Organization
    • Re-Purposing
    • Furniture Refinishing
    • Budget
  • Crafts & Creations
    • Seasonal Home decor
      • FALL Crafts and Creations
      • WINTER Crafts and Creations
      • SPRING Crafts and Creations
      • SUMMER Crafts and Creations
    • DIY (Do-It-Yourself) Project
    • Kids Arts and Crafts
    • Homemade/Handmade Gift Ideas
    • Holiday Crafts
    • Fan Pulls
    • Free Printable/Downloadable
    • Sewing Projects
    • Giveaways
    • Business Features
  • Recipes/FoodFun
    • Breakfast
    • Lunch
    • Main Dish
    • Sandwiches
    • Appetizers
    • Slow Cooker
    • On The Grill
    • Side Dishes
      • Soups
      • Salads
    • Baking
      • Breads, Rolls and Muffins
    • Snacks
    • Treats
    • Desserts
    • Drinks
  • Homeschooling
    • Elementary Homeschooling
      • Elementary Homeschooling READING
      • Elementary Homeschooling MATH
      • Elementary Homeschooling LANGUAGE ARTS
      • Elementary Homeschooling SCIENCE
      • Elementary Homeschooling HOME ECONOMICS
      • Kids Arts and Crafts
    • Middle School Homeschooling
      • Middle School Homeschooling SCIENCE
      • Middle School Homeschooling HOME ECONOMICS
    • Language Arts
    • Math
    • History / Social Studies
    • Geography
    • Foreign Language
    • Field Trips
    • Games
    • Nature Study
  • The Big Picture
    • Life In General
    • Celebrations
    • Faith
      • Into the Light; The Series
    • Giveaways
    • Reviews & Sponsors
  • Photography & Lettering
    • Photography
    • truck lettering
    • vehicle graphics
    • Newborns
    • Kids
    • Engagement
    • High School Senior Pictures
    • High School Senior Pictures Sneak Peeks

Our New (Second) Bathroom – Finally!

June 15, 2014 By Laura 4 Comments

 Now, to all of you, this is likely just going to look like an ordinary bathroom. And in many ways, you’d be right.
But to our family of 6, who has lived with one bathroom all of our growing family life, it is . . . . . .
the end of never using the bathroom, without someone waiting just outside the door. 
Or, 2 or 3 people in the bathroom at the same time, getting reading to go somewhere.  At least the one bathroom we’ve had is large, and has a great sharing-layout, with the sink and vanity on one side, and the toilet and shower on the other side of a vertical half wall.  So there’s been privacy on both sides, with proper communication, at least.

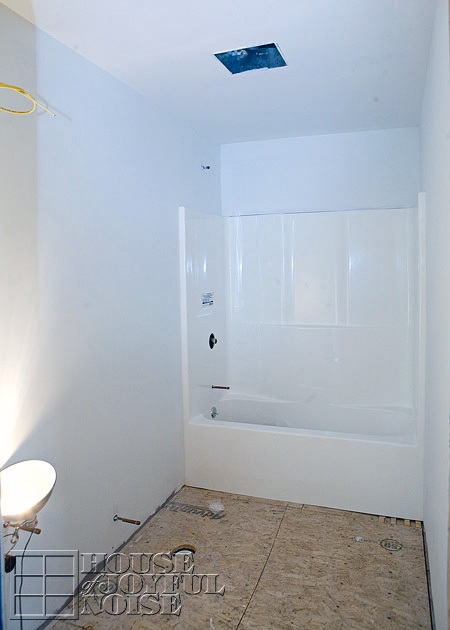
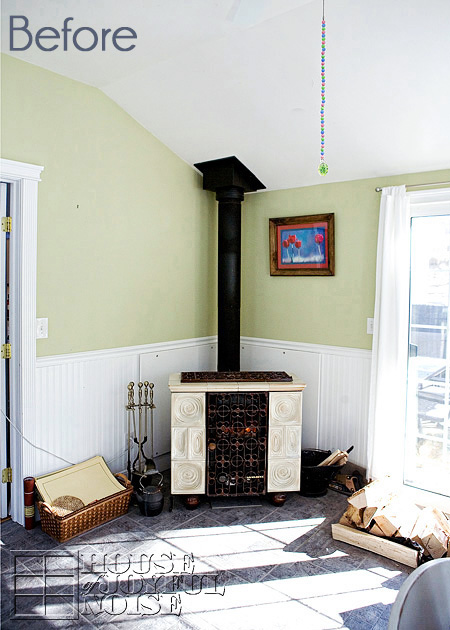
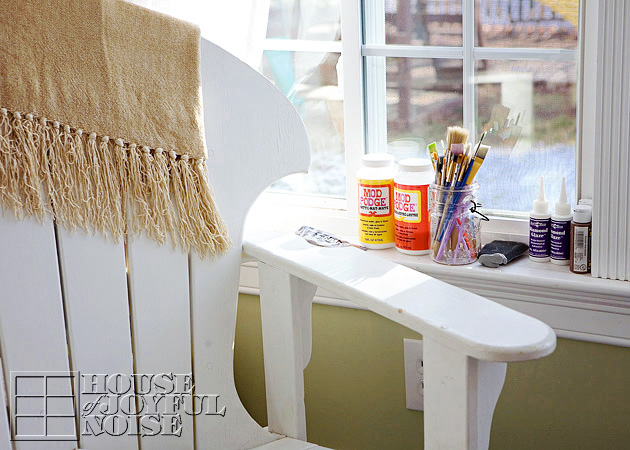
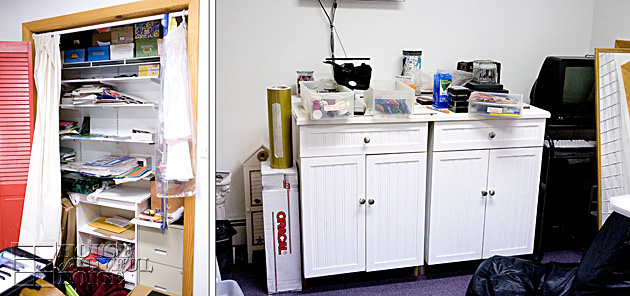
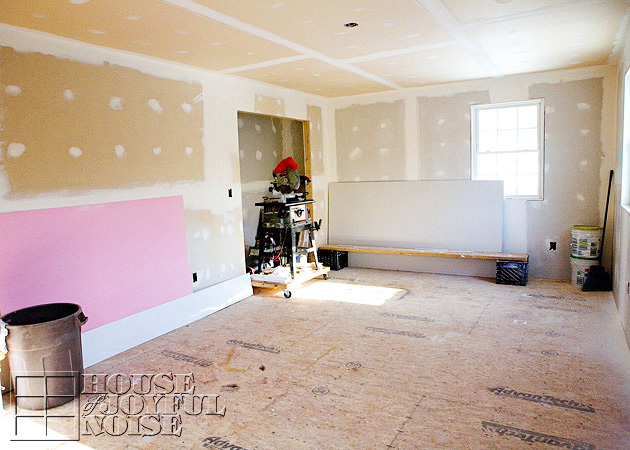
This second/new bathroom is far simpler, and smaller at 5×10′. It’s been waiting to be finished for . . . . . . too many years.  It was just a plywood floor, studding walls, and the tub, behind a sheet of plastic, at the top of the stairs. Where paint cans and milk crates of art supplies collected. We either didn’t have the money, or the time, or both, to finish it after the expansion of our home in 2006.  But life has gotten easier, as God has continued to bless us, and we’ve finally been getting our house done room by room.  Who would think a bathroom would be so exciting?
We’ll be sure to appreciate it in the moments of urgency, that are bound to come.
It’s considered the kids’ bathroom, as it is upstairs where 3 (out of 4) of their bedrooms are.


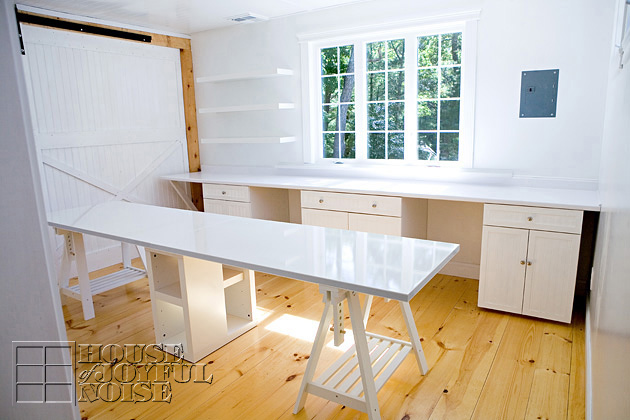
Once Michael got going, it came together quickly.
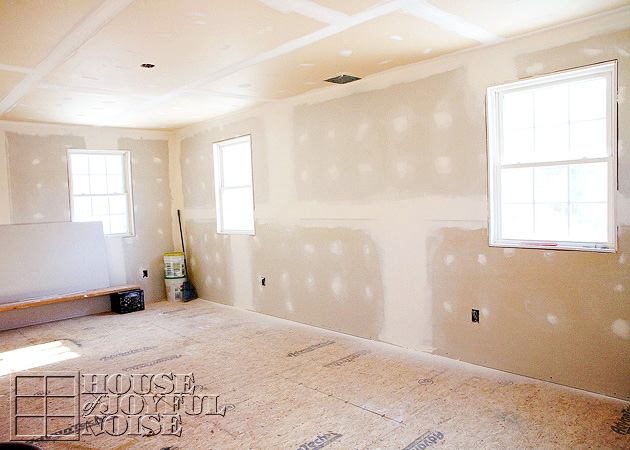
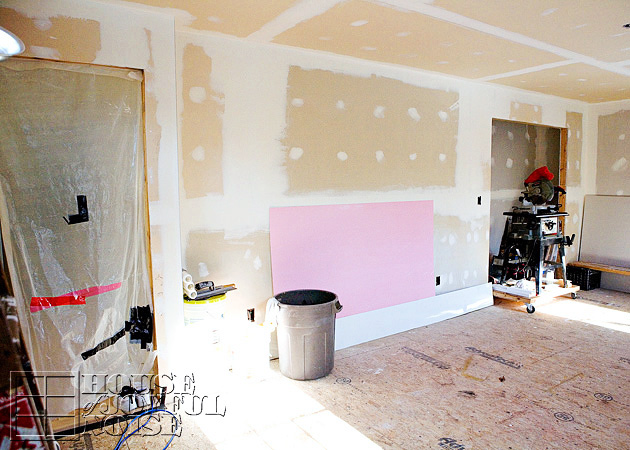
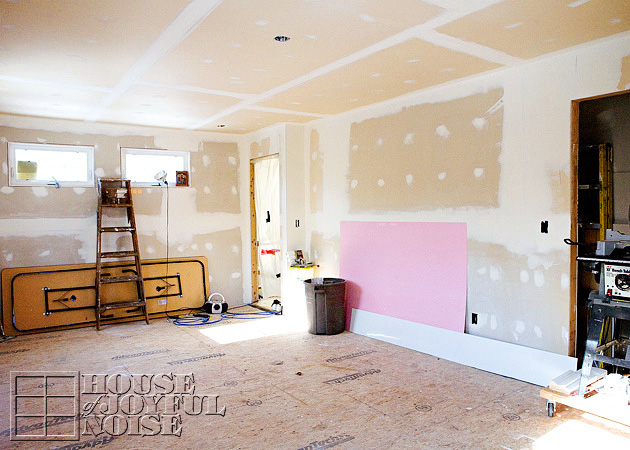
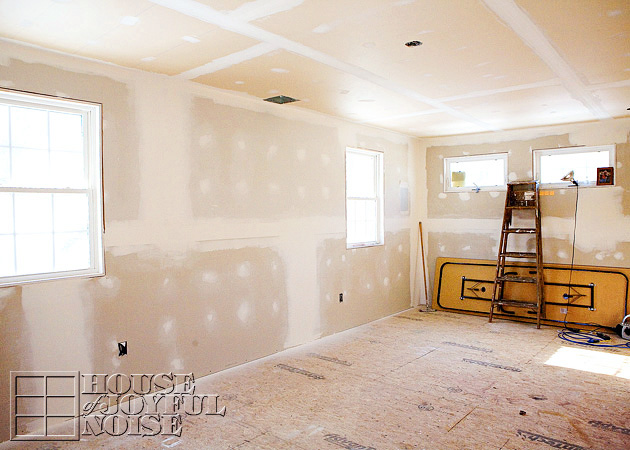
Here it is in the very beginning stages, sheet-rocked and plastered!

(Ironically, as I type this blog post right now, I just heard, “Are you almost done? I have to go to the bathroom. BADLY!!”
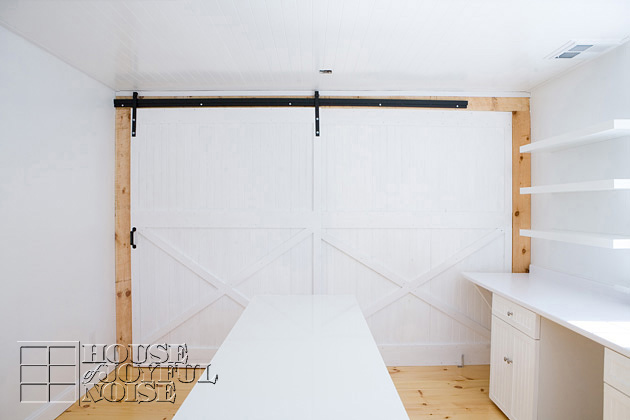
Michael has been building the custom farmhouse door today, for this new bathroom, and it should be up and swinging by tonight.)

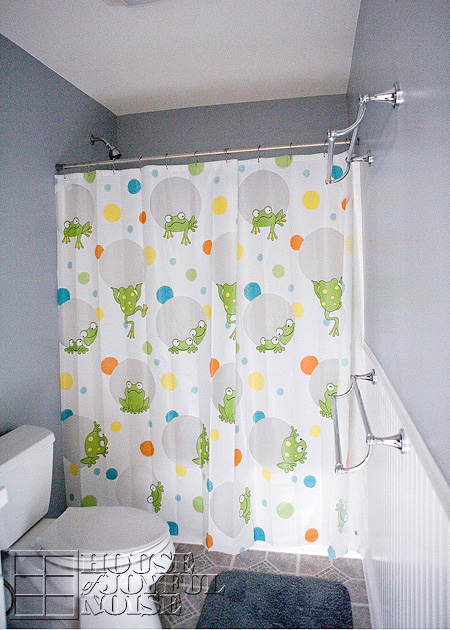
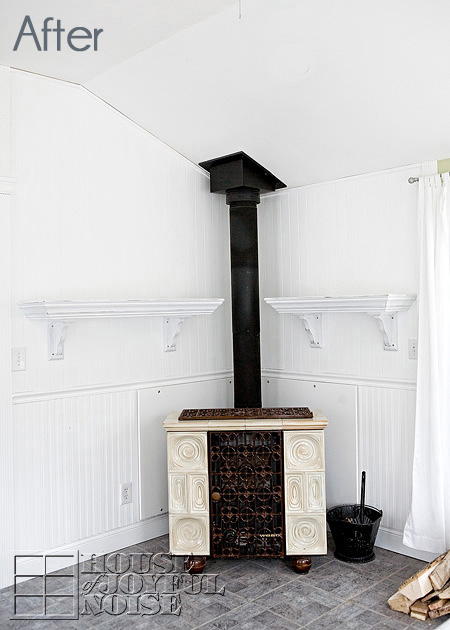
So now let’s take a look at the bathroom all done.


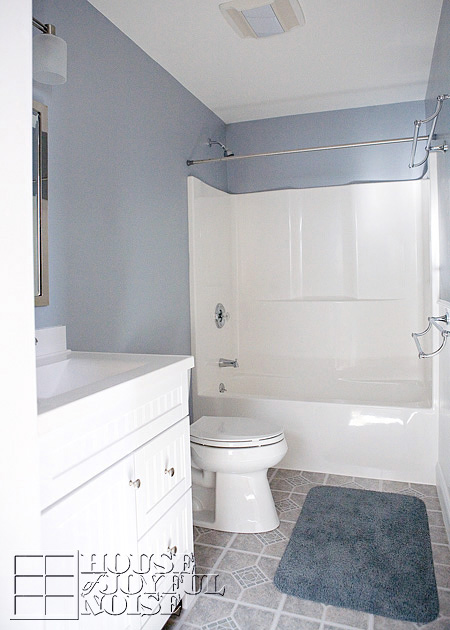
This is the best shot I could get in such a small space, of the bathroom completed, by shooting from just outside of the doorway.
We’ll be stepping inside in just a moment to take a closer look at some details. 
I chose a cool gray paint color for the walls, feeling it was a nice neutral color for boys and girls. 
(Not sure of the name of the color at the moment, but it was a Valspar Signature paint.)


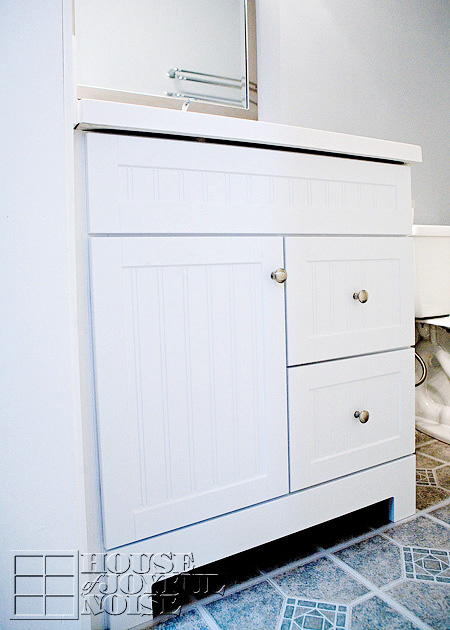
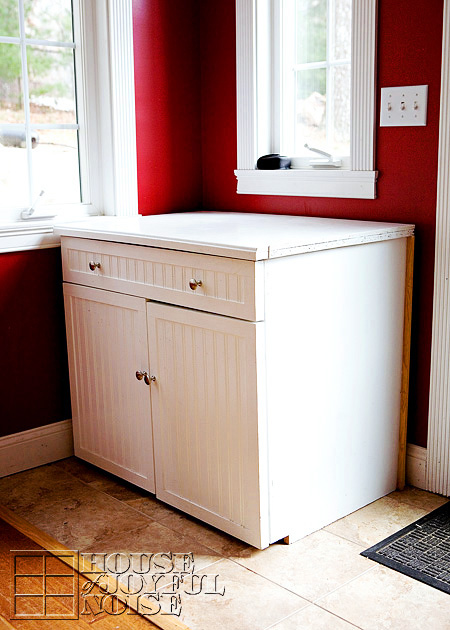
The bead-board style vanity cabinet is in keeping with the style throughout our house.
–


It very much needed modifications, to fit and accommodate the special kind of sink we needed it fitted with.
Thankfully Michael is capable of problem-solving such challenges. It’s been built way out from the wall, and customized with a back splash.
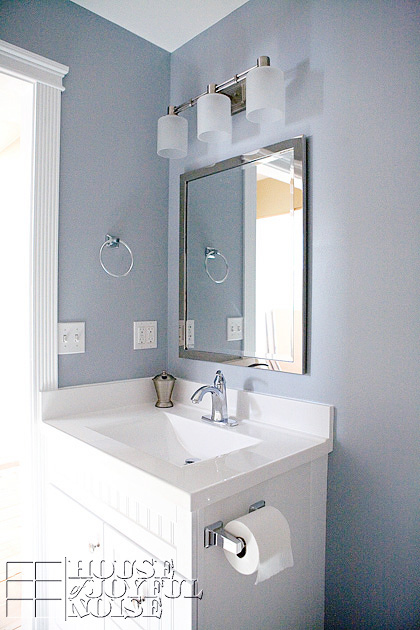
I really dig the style of the lights over the sink.

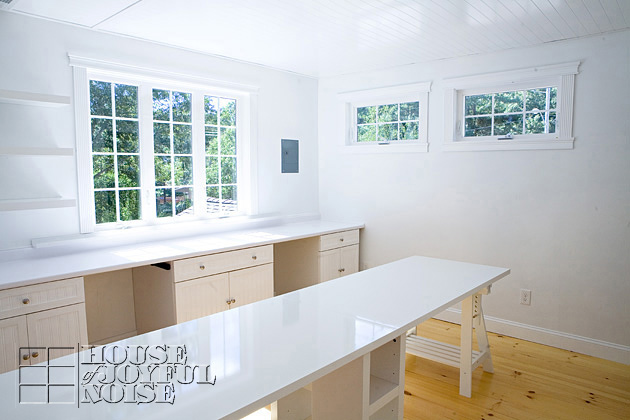
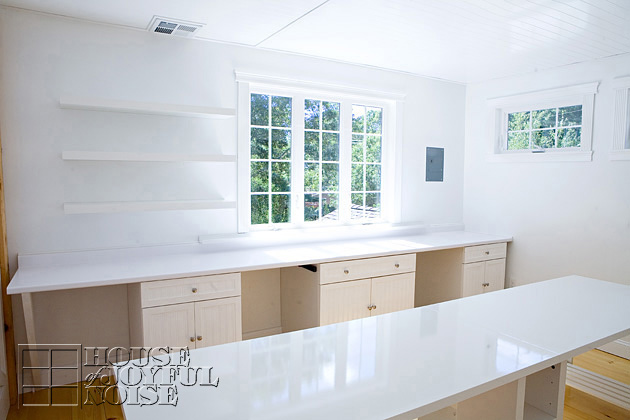
We had special requirements regarding the sink in this bathroom.  In addition to the regular use as this bathroom’s sink, it’s also the sink right beside the art studio. Because we are often working in the studio, and needing to dump and refill paint water buckets, wash our brushes and pallets, etc., we really needed this sink to be deep and wide enough to be able to do those things, and easy to clean as well!  We’ve been having to go down and use the kitchen sink.


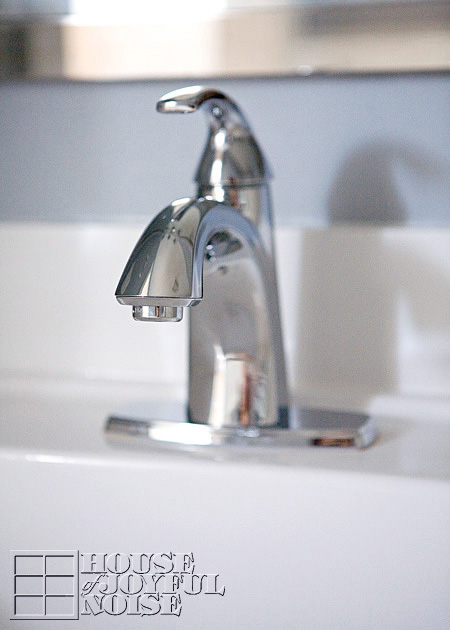
So I not only love the look of this faucet, but it’s height accommodates filling buckets, etc.

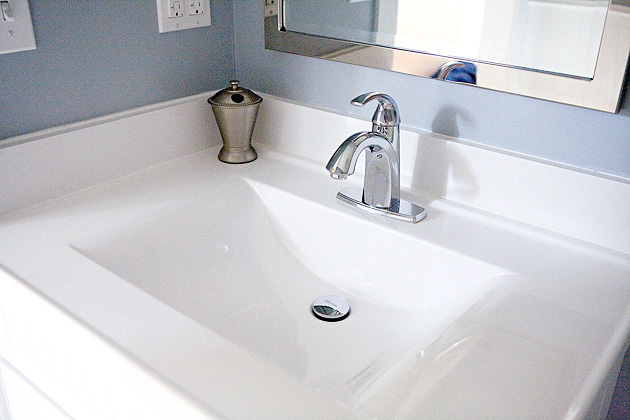
As I hope you can see, the sink is very wide, sloped in, and completely seamless to the vanity.
This will make easily accessible, and easy to clean when paint, and toothpaste, and whatnot, is everywhere.


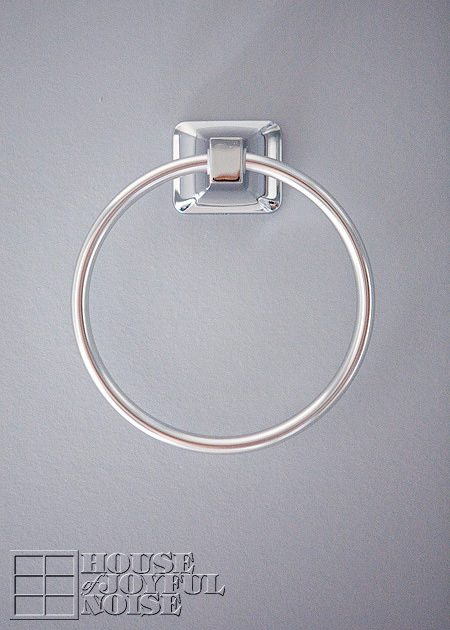
This is just the towel rack on the left wall of the sink area.
For some reason I thought it was a cool photo.
I still do.


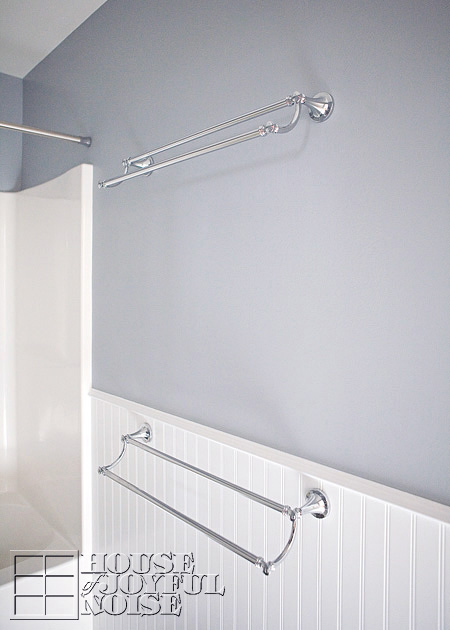
The bath towel double-racks.  There will be 4 towels always drying, so the kids and I were ecstatic when we found these.
We decided we needed to put them well-spaced, over each other, to prevent one from being partially behind the bathroom door, and always getting hit.

So, by now you’ve probably felt like you have the style of this bathroom pegged, right? 
How would you describe it so far?

Well if you ask me, and you think about it, it’s the shower curtain that really sets the mood or style of the whole bathroom. I didn’t know exactly what I wanted, but I knew it needed to either have some gray in it, or look nice with gray. And be gender-neutral, since the kids are 2 boys and 2 girls. Right? 
Interestingly, I wasn’t all excited about going shopping for the little things, much of what you’ve just seen, such as the towel racks, toothbrush holder, toilet paper holder and trashcan, etc.  This bathroom has been a project that has just needed to get done. Not fancy, not creative, just DONE.

But I was excited for finding a great shower curtain. I was looking forward to finding a design that I’d really love, and have it tie everything together beautifully.

The thing is, I took the kids with me, and that changed everything. We had let them have input in everything we had to pick out for this bathroom, but they were pretty non-chalant with their opinions, up until this point. But suddenly, they felt strongly about the shower curtain. Like, as much as I did!  And it was all 4 of them, against me! 

They insisted it’s their bathroom, and they should be able to choose the shower curtain together.
And so I let them . . . . . .


Ohhh…. my crazy kids!
You’d think this is rather…..elementary. A bit childish. Yes?
Especially for the almost 17 year old, right?
But “Oh NO,” they tell me, “it’s just FUN!”


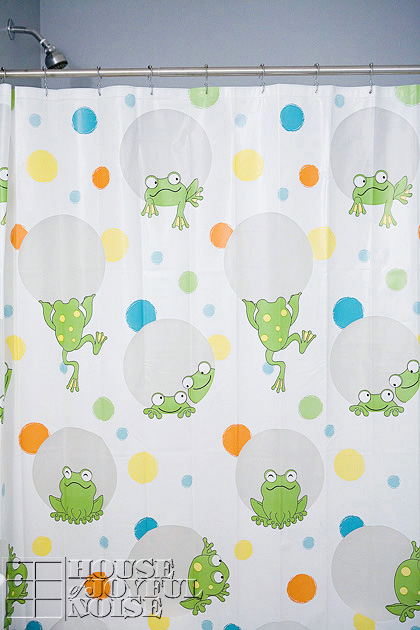
I have to admit, it looks pretty o.k. with the gray walls.
And it does make me smile inside, when I see it. The kids really love it, and that actually makes me smile on the outside, too.
It really speaks of just how silly our kids are. They really get a kick out of this stuff.
And hey…..shower curtains aren’t permanent.

There is just a touch of decor left to do. I haven’t decided what yet, but I think I’ll know it when I see it.
When those touches are added, I’ll be sure to take photos and share on our Facebook Page and InstaGram, so you can see.
(So hope you are following us there!)
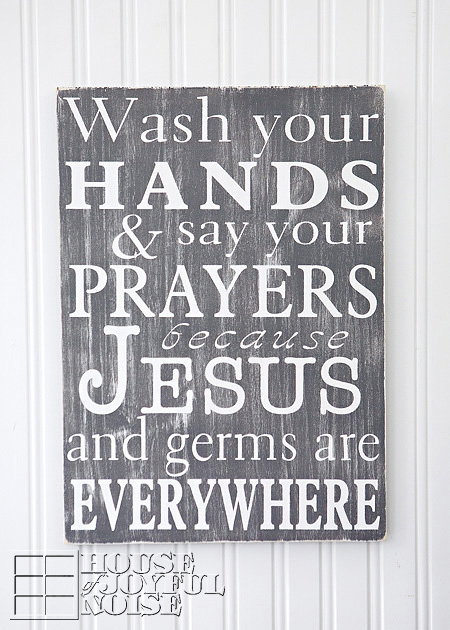
But I do believe I’ll be moving this sign from our current bathroom up into theirs, since I made it with them in mind anyway, and it matches……


And there you have it. The bathroom everyone has been waiting for!


Filed Under: Home Decor, Home Improvement, The Homestead Tagged With: bathroom, bathroom-fixtures, Catholic-blogs, Catholic-families, gray-bathroom, home-improvement-project, kids-bathrooms

Dream Craft Art Studio: Reveal – Move In Ready! – Part 3

September 16, 2013 By Laura 6 Comments

Good gosh!  Is it me, or has this been a long. time. coming?
I am THRILLED to say, the art studio is DONE!!
Construction and carpentry-wise, anyway.  I’m sure we’ll have a few more organization units to install, but I’ll figure out just what I need  in the process of moving in with all of my stuff!

Before you scroll down and see, you may want to see the previous states of progress, to really appreciate all it is now.  It’s still just a little bit hard to show you because….I’m afraid you all just might be bored by it!  It’s the reason I haven’t shared more of the progress along the way.  I’m the type who has the whole finished version in my head along the way, and so knowing where it’s going….anything prior to that is somehow……less than.  But, I did give you a few couple of progress updates as you know! It’s just that, it’s a whole lot of whiteness right now; as I said was my plan all along. My dream was a bright white canvas to work in and on, and to photograph in, with a whole lot of color accents.  And I must say, I do love it already, even just as all white at this point!  The light being thrown around, is divine!

Here’s a look inside now!

A view from the entry door! 
It’s instant cheer for me, just walking in.
The bright natural light in the mid-day all through the afternoon, is phenomenal!  And if you all know me, I need light.

The creative space/room is 13′ 8″x 12′.
One of the biggest features you may notice here, is that the single window was finally replaced with the larger (relocated) picture window, as planned.  It made the world of difference in the light that it lets in, as I knew it would.  

Those very simple shelves to the left are from Ikea; love them! While the plan was to build cabinetry, I realized we had white cabinets in 2 different rooms of the house that were emptied (of my craft stuff that was packed up), and they needed to get out of the rooms they were in.  After talking with Michael, we realized we could definitely re-purpose them into this art studio, and keep true to our original plans of white storage cabinets, drawers, cubbies, and one single counter space all along that wall. It worked!  The counter-top was custom-ordered through Lowe’s, and delivered. It is 13’4″.
We have a couple of white stools that fit well right under those cubbies, and are the perfect height for sitting and working. But I believe I’ll also be ordering some roll out paper storage, for the loads of paper I have in stock.
Also on the right wall will definitely be some art or a sign, over that control panel, and possibly another shelf or 2.

The crafting table is long!  From Ikea: it’s actually two (60″) tabletops combined for a total of 10′ of workspace. 
There is space for 6 people to sit and work comfortably, with foot room and all.
I’ve picked out the chairs, but still need to order them.


Also from Ikea, to support our tabletops:  2 work-horses, with cute storage shelving.
–

As well as this unit, that offer even more storage shelving.

So yes, the length of the work table is almost as long as the room; just like I wanted. The surface is perfect!  Quite stain and generally scratch resistant. 
But we’ll likely always protect the surface with newsprint or something just in case anyway.
In this photo you’ll also notice the 2 additional windows we have, to welcome more light in the late afternoon light.
Under the windows will likely be more shallow storage units of some kind, or something like that. I’m still unpacking, setting up, and figuring out what else I need.

I’ll be storing the big, ugly and/or cumbersome items for our crafting projects. The drawers are deep and hold lots of little and long stuff.  As I said, there will be more storage worked into underneath the cubbies, but will also offer additional seating, if necessary.  My husband will be doing a lot of his designing and cutting at the end on the far left, and be able to weed material easily on the table. (If I don’t have a project mid-mess, of course.)

Speaking of Michael, I am SO THANKFUL to him for all of the many hours of hard work he put in, making this dream of mine come true for me, and for our family. I am so very blessed for the many ways in which he is a wonderful husband to have.

Did you notice the amazing barn doors?….
Michael completely designed, custom-built and installed those, too!
No small project!  I love them.  Perhaps I will do another post just on those, and give you a closer look with more verbal details.
And then there is yet another reveal behind those barn doors: one of our boy’s awesome bedroom!  He’s all moved in, and loving it.

My art studio reveal is not done though! 

There will be one more, showing you what it looks like all moved in!  Expect lots of COLOR added!  And instant happiness and inspiration. We actually started moving stuff in right after taking these photos for this post.
We are so thrilled with how it’s all coming together. What do you think?  Do you have a dedicated space to get creative? Tell us about it or share your links, please.
And be sure you are following us for our next art studio reveal!
Thanks for coming over, Friends.

* * * * * *

Please come follow me here and there:

Save

Save

Save

Filed Under: Crafts & Creations, Home Improvement, Home Projects, Organization, Photography, The Homestead Tagged With: art-studio-ideas, art-studios, craft-art-organization, craft-room-ideas, craft-rooms, craft-spaces, craft-studios, craft-tables, crafting-furniture, dream-art-studio, dream-craft-room, home-renovating, Ikea, Improvement, organization

Home Improvement; Dream Craft Art Studio Progress Update; Part 2

May 20, 2013 By Laura 1 Comment

 Here we are in May, and I am finally giving you all a progress update on the building of our grand craft/art studio. It was back in January when we first revealed this big and exciting home project of building a custom studio, which has been a dream of mine, ever since I was a little girl.  There is no doubt that this creative space will get a whole lot of use. In fact, I can easily see it becoming the most occupied room, in the whole house, by our whole family.  I am always going at craft or art projects, and Michael’s design, cutting and lettering prepping work space will be in here too. The kids are often crafting with me, or doing their own thing, and I can imagine they’ll be doing some school work up here as well. If they have independent work to be done after the lesson is taught, I might as well be productive! They’ll be plenty of room for all of us, and everything, if it’s designed and laid out well. And it will be.

So before I show you how much progress we’ve made, let me show you first where we were when we first shared our plans.  [Read more…]

Filed Under: Crafts & Creations, Home Improvement, Home Projects, Organization, Photography, The Homestead Tagged With: art-studios, craft-art-organization, craft-rooms, craft-spaces, craft-studios, home-renovating

The Making of Mantels / Appeasing my Mantel Envy!

April 1, 2013 By Laura 8 Comments


A couple of weeks ago, I hinted on our Facebook Page about the weekend project we had in the works. I mentioned that I was all done dealing with the ‘mantel envy’ I have had going on, for years now. You know, mantels, the shelving surface that many homes have over their fireplace?  Many creative homemakers have great fun decorating their mantels for various seasons and holidays, switching it up all of the time. I wanted that, too!
We don’t have a fireplace, anymore. Years ago, before the little-house to big-house renovation, we had a built in coal and wood fireplace insert, with a brick mantel. But that was ripped out when our sun room was added on.
I wanted a mantel of my own to work with. And when I really want something, I usually figure out how to get it.
And you know how good I am at that?

I got me TWO mantels! HA!

I reckon some will have some envy for me, now. ; )  See, the good Lord blessed me, like Mary, with a carpenter of my own.  A very skilled carpenter, I might add, who can build just about anything I want. And because I am not only blessed, but possibly (possibly . . . ) spoiled, he does build me anything I want.

 
I had been telling my-personal-Joseph, how I thought it was a fine idea, for him to build me a great pair of corner mantels, over our beloved, ceramic wood burning, family-heirloom. I explained it to him in great deal, trying to paint the picture for him. I don’t think he was really getting my vision for awhile, because he kept looking puzzled, while assessing the area, and saying, “Really?”, every time I brought it up.  But then on the Thursday before said-prior weekend, I told him I just had to have it. And I’d love for him to get sketchin’, and bring home any materials he;d need for the weekend, home after work on Friday. And he said, “So let me get this straight. This is our new urgent project, that you’d like done right away, before I have even finished the last urgent project, that you’d like done right away? I’m supposed to stop that one, and do this one first, after stopping the one I was doing 2 projects ago, to do the last, new urgent project?”  And I said,
“Right. Honey.”

And so he got sketchin’,
and buildin’, and
yes, I helped quite a bit too.
Because I’m not that spoiled.

And by the next weekend, my mantel dreams had come true, x2.
And I was and am still, thankful.

WANNA SEE?!


Ok so this is the corner as it has been (before), when anyone is looking at, when they walk into our front door. On the left hand side there, is where our Prayer List Chalkboard has been hanging for years. (And we still use it, regularly.) For now, it’s moved to the wall beside the front door. But take not of the wall straight ahead.  It’s shorter . . . . .

. . . . than the corner wall perpendicular to it. This one is a bit longer.  So I’ll have two different lengths of mantels.
I also got thinkin’ about how much I’ll be photographing the mantels as it changes for our home decor. And it hit me that the backdrop will always be the same, and green. And the simple (right?…) mantels project instantly grew. I wanted a wider bead board like wall as a backdrop.
See? Spoiled. Possibly.

I knew if my Joseph built me these, I would be so grateful. I’d be happy to finish them myself. Of course, I wanted them to not look new. Or fresh. And for my vision, distressing on fresh wood was not going to work. So I researched how to weather/age the wood, before painting and distressing, and was pleasantly surprised to find a way to do it. That worked!
It’s fairly simple too.  You ‘paint’ the wood with tea, first. I made a big strong batch, soaking my tea bags over night.

So I brushed the tea on all over my two built mantels, and let them dry. There was no difference to see. 
But the tea is only applied to react with the next strange solution brushed on.


I had to cover very fine steel wool (#0000) with straight distilled white vinegar.  And just let it soak, at least for overnight. 
The next day, it didn’t look much different in the jar. I know in time, that wool would rust. (It has since…). But anyway, while applying it to the mantels (already treated with the tea), I could see the instant reaction happening. Very cool. Almost magical!

To see the dried wood after the vinegar/steel wool solution treatment, click on any image in the gallery below, use arrows to see each next, and then your ESC button to close.

[Show as slideshow]
07_weathering-wood-technique
08_weathering-wood-technique
09_weathering-wood-technique
10_weathering-wood-technique

Interestingly, even after the wood had been dry and I took the above photos, the wood seemed to turn even a bit greyer. which I was happy about. For a darker finish, I could have brushed on a second treatment, but I was quite happy with the results after just one, for this project.

So then it was time to paint both mantels, white.  I used about 3-4 parts paint to 1-part water.
And then a whole lot of sanding and distressing.

Meanwhile, Michael, a.k.a my Joseph in this post, was taking care of the walls to my every wishes.


And I’m pretty much done talking, and ready to show you lots of photos of this exciting home improvement project!
Here we go!


Now for anyone concerned, we were sure to make certain these mantels met fire code.  They needed to be at least 6 inches from the stove-pipe, and they are. It’s hard to tell in these photos, but trust us. We have the most to lose! That is why they don’t wrap around behind the pipe.  The mantel shelves are very thick, and keep in mind too, that the stove is only in use maybe 1-1/2 seasons a year.

So yes, while narrow bead-board goes all the way around the lower half of our green sun room (as of this post), the wider bead board (v-groove) type paneling is just in this corner.  I think because of where we let it end, and because of the molding we used, it works nicely! 
And how about those mantels?
I love that I have two to work with! Because sometimes you get going on a theme, but you really have another idea that kind of ties in too.
So that is going to be way fun.  One is 48″ and the other is 35″.
Let’s take a closer look at the beauty of the craftmanship of my husband, shall we?

He used  1×12″ and 1×10″ pine boards, crown molding, and base cap.

And these awesome pre-assembled 9×7″ shelf brackets. Which, I love.

Do you see how the wood looks older, peeking out from underneath the (supposed) worn paint?
Love it!
A few more photos . . . .


Beautiful, no?

 I am SO happy with them. Of course, the whole point of having them, was to decorate. They are looking kind of NAKED in these photos.
But as you can see peaks of in a few photos above, I have indeed gotten my Spring mantels together!
So my Spring Mantels…..that is a next post coming up!
Detail photos of what I adorned these mantels with, for this season, are on their way. Which I believe will really help you pull the whole vision together.
They are gorgeous, and so homey, all decorated. I can’t wait for you to see!
But this post is about the craftmanship of Michael’s work, and his ability and willingness to build my little dreams.
Please leave him your thoughts!
And then look for the Spring Mantels post real soon.! ; )

* * * * * *

Please come follow me here and there:


Filed Under: Furniture Refinishing, Furniture Refinishing, Home Decor, Home Improvement, Home Projects, Mantel Decorating (Ideas), The Homestead Tagged With: carpentry, corner-mantels, custom-mantels, home improvements, making-mantels, mantel-decorating, mantels, shelving, weathering-new-wood, wood-stove-mantels

Home Improvement Reveal; A Dream Come True; Part 1

January 15, 2013 By Laura 9 Comments

I have had a childhood dream, that has never faded away. Not even with the passing of decades of years, this dream has lived through.
Well, that childhood dream, is about to come true for me.


♥ I am getting a completely customized art studio! ♥

It’s in-home, and already in the works. I thought I would take photos of the progress, in case some of you might enjoy watching it come to life along the way.

I was in kindergarten, when I decided I was going to be an artist when I grew up.
That plan never waivered all through my schooling years.  As a kid, I used to see little empty shops with real estate signs around town, and dream of what it would be like, to have my own studio space in there. When I graduated from high school, I went on to commercial art school for the next 3 years.  In the past 22 years since then, I have been a freelance artist and photographer.  Following art school, in my early 20’s and back home, my parents were kind enough to give me an extra room in the house for my drawing table and such.  I probably did 100 commissioned, illustrated large portraits out of that little room. And I’ve had a cozy little in-home photography studio in our finished lower level here, for many years, until a year ago. But never….anything like this, that I’ve got coming.

Between Michael and I, we always have (all kinds of) projects going on. All over the house. And because I haven’t had a dedicated space, I have craft supplies  stored all-over-the-house too.  It is a wild-goose-chase to ever find what I need, when I need it.  Let me show you just a glimpse of what I mean.
But before I do, TAKE NOTE: *In these photos below, I had already started pulling stuff out, sorting, throwing away, and packing stuff up – for the new studio in development. So these areas have never looked like this big mess, unless you looked behind the curtain into the closet or in the cabinets.

But anyhoo, this is one end of my former photography studio in the lower level of our home.  You can see, one closet that’s been chock full. Those shelves were packed. So frustrating finding anything, or getting anything out. Much is already pulled out of the closet you see here, and on the floor and in bins now, not visible in the photo. Across from that closet, is 2 floor cabinets, with drawers, which have stored more craft supplies.


Another cabinet upstairs in  in the corner of the school room by the back door, holds yet more supplies.

But wait…..there’s more….
Our cramped little laundry room on the mid-floor, has still-more-supplies.

And, there are various other little places around the house, where there are tools and whatnot.
So as I’m sure you have gathered with just this much observation, that there is great need, for ONE LARGE STUDIO, that is organized, functional, and inspiring, to do our thing.
Art is a huge and active part of our lives and work fields.

This space in the upper level of our home, is where the new art studio will be. There is mega natural-light, and it is 12′ x 22′. The ceilings are 8′ high.  That’s great space!
So this is the view walking into the room.

It’s funny how this came to be.  We have been trying to work on our unfinished house for the past 6 years. It’s been held up many times, due to finances, or lack of time. And then it was held up for a bit more, while we re-pondered our original plans, and the intent of each room in our home.  The girls’ rooms have been done for quite some time, and I do plan on sharing those. But we realized that this one great big space that we had planned on making the boys’ room to share, would be of much wiser use, as the art studio that we desperately need. It would be much more appreciated and well-used, on a daily basis.  Although it’ll be my studio, and I’ll be spending the most time in it, it will actually be a great space for all of us.  It is such a grand space, that even Michael will be able to do his sign work in here as well.  The boys will still get awesome rooms, but of their own.  But much of this space, will be a new art studio. We’re back on track to finishing it now until it’s done.  And it’s well on it’s way, as you can see.

The opposite end; which will actually be used for another purpose, and I will tell you more about that at another time.
I know none of these photos are pretty or exciting now – but they will be. Right now, it’s a matter of imagination. : )

The other side of the room, the long way.
On the left is the entry door.

Viewing from the end we first saw, back towards the entrance.

This wall, seen when you first come into the studio, is going to be great.  The single window on the far right, is actually going to be replaced with a picture window, which we are removing from a side of the school room downstairs (which will become a wall.) We have regretted putting that window there downstairs.  It looks out at nothing, gives us no natural light, and would be of more use and more attractive as a wall.  Deciding we need one of these windows to be larger up here in the studio-to-be, gave us the perfect way to make use of the one we take out downstairs.  However, even with the windows, it is going to be a very functional area to work, as well as have a whole lot of storage and work space

We are still in the planning stages as far as design and layout.
But here’s what I can tell you for sure:

  • It will be all white: walls, ceiling, table tops, shelving, cabinets, etc.
    • There will be splashes of color everywhere, from the supplies, materials stored and organized, much out and accessible, as well as the artwork we create.
    • It will have natural pine floors.
    • It will have specialty lighting installed, for dark days, night-time work, and photography.

There will be:

    • A lot of flat working areas everywhere, for various needs.
    • An island block on wheels, with a large flat surface, cubby shelves on the sides, and additional storage inside.
    • Custom built storage spaces in various areas for specific supply-organization needs (paper, ribbon-spools, etc.)
    • An area specifically set up for photographing anything I need to.
    • A large, old drawing table.
    • Dedicated seating for the kids, to do their crafting, and sometimes, possibly their school work, too.

In this studio, designed correctly, here are some of the creative projects we’ll be able to do in here, and store all of the supplies/machinery to do them:

      • all illustration work
      • designing
      • crafting
      • scrapbooking and card-making
      • small furniture refinishing
      • sewing
      • sign-making
      • vinyl-work (large cutter/plotter
      • photography

                                   . . .  and more.

And here’s my man, who is making it all happen . . . . . .


If you follow us, you’ve seen he’s capable of some amazing carpentry work.  One of his greatest builds I haven’t even shown you all yet. But I will in time. Nonetheless, he is capable of making this space into absolutely anything I want it to be.  I couldn’t be more grateful. We’re a pretty good team too, and have a lot of fun bringing our little brainstorms to life.  He works about 50-60 hours a week, so he works on our house when he has time. Usually the weekends. But it should move along now, I think.

I plan to document the progress of this studio, to share with you all. if you’d like to follow along.  Not every little boring step, but a quick update here and there on how things have come along.  We would love your input and ideas along the way!  We know some of you have creative spaces of your own, as well, and we’re sure you have opinions and advice, that you could share with us.
I have already started a Pin board, just gathering some bits of ideas, options, and inspiration for storage and such.  And my brainstorming is on over-drive. As always.

We’re all too excited! It’s not every day a childhood dream comes true.
And by the way, the re-pondering of our home and the rooms/space it offers, will be resulting in ‘Musical Rooms’ of sorts (like Musical Chairs, but Rooms), and some fun redecorating too.
So there is more room make-overs, besides this one, coming as well.
We hope you’ll enjoy following along with us, as we go.
Got any tips or ideas for us already? Let us know anything you’d like to say, in the comments!
And as always, thanks for coming by. : )

* * * * * *

Please come follow me here and there:


Filed Under: Crafts & Creations, Home Improvement, Home Projects, Organization, Photography, The Homestead Tagged With: art-studios, craft-art-organization, craft-rooms, craft-spaces, craft-studios, home-renovating

  • « Previous Page
  • 1
  • 2
  • 3
  • 4
  • 5
  • Next Page »

We are wicked happy to have you here! We invite you to connect with us anywhere you are, too!


SUBSCRIBE to House of Joyful Noise blog! Every new post, delivered right to your email box!

Archives

Find Us on Facebook

SuperWebTricks Loading...


POPULAR POSTS

* * * * * *

SUBSCRIBE to House of Joyful Noise blog! Every new post, delivered right to your email box!


Privacy Policy

Amazon Affiliates

Never at any additional cost to you, we may earn a small commission for our endorsement, recommendation, testimonial, and/or link to any products from our website. Your purchase through our links helps support our family, while sharing with you the products we authentically use and recommend, for various ideas, and letting you know where you can purchase them. Thank you for your support!

[footer_backtotop]

Copyright © 2023 HouseOfJoyfulNoise.com · Genesis Framework by StudioPress