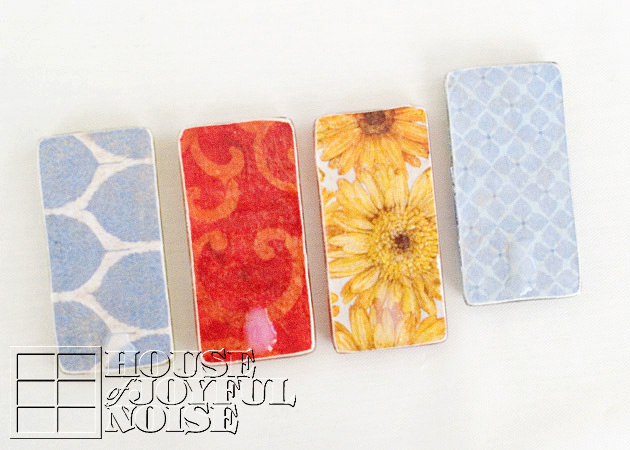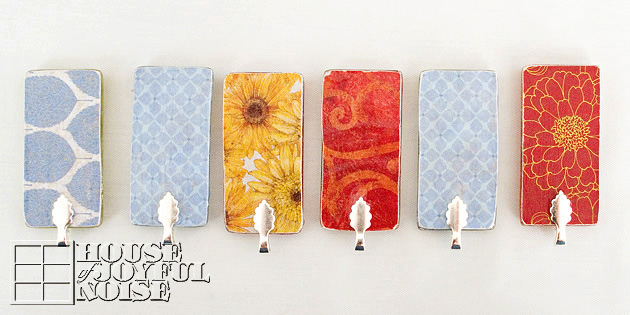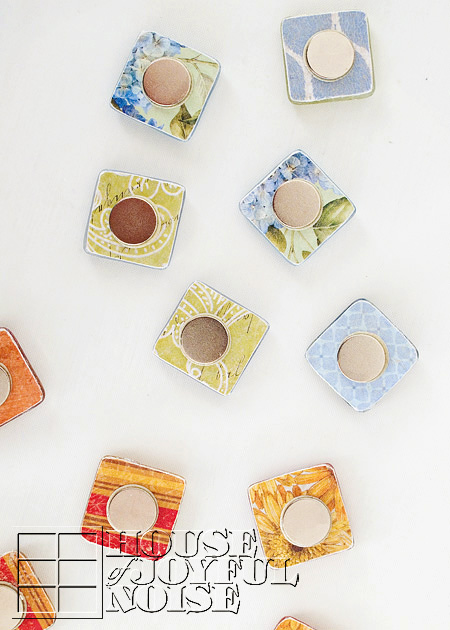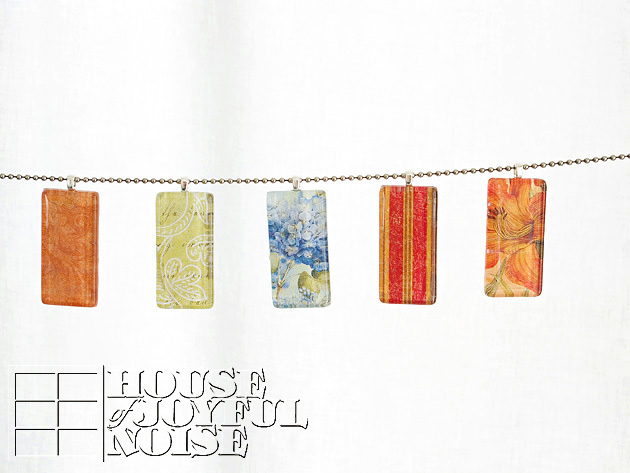
• HOME
  • {A}’s Chipmunk Training Archives

 Homepage

  • The Homestead
    • Home Projects
    • Home Improvement
    • Home Decor
      • Seasonal Home decor
        • FALL Home Decor
        • WINTER Home Decor
        • SPRING Crafts and Creations
        • SUMMER Crafts and Creations
    • Our Chickens
    • Gardening
    • Organization
    • Re-Purposing
    • Furniture Refinishing
    • Budget
  • Crafts & Creations
    • Seasonal Home decor
      • FALL Crafts and Creations
      • WINTER Crafts and Creations
      • SPRING Crafts and Creations
      • SUMMER Crafts and Creations
    • DIY (Do-It-Yourself) Project
    • Kids Arts and Crafts
    • Homemade/Handmade Gift Ideas
    • Holiday Crafts
    • Fan Pulls
    • Free Printable/Downloadable
    • Sewing Projects
    • Giveaways
    • Business Features
  • Recipes/FoodFun
    • Breakfast
    • Lunch
    • Main Dish
    • Sandwiches
    • Appetizers
    • Slow Cooker
    • On The Grill
    • Side Dishes
      • Soups
      • Salads
    • Baking
      • Breads, Rolls and Muffins
    • Snacks
    • Treats
    • Desserts
    • Drinks
  • Homeschooling
    • Elementary Homeschooling
      • Elementary Homeschooling READING
      • Elementary Homeschooling MATH
      • Elementary Homeschooling LANGUAGE ARTS
      • Elementary Homeschooling SCIENCE
      • Elementary Homeschooling HOME ECONOMICS
      • Kids Arts and Crafts
    • Middle School Homeschooling
      • Middle School Homeschooling SCIENCE
      • Middle School Homeschooling HOME ECONOMICS
    • Language Arts
    • Math
    • History / Social Studies
    • Geography
    • Foreign Language
    • Field Trips
    • Games
    • Nature Study
  • The Big Picture
    • Life In General
    • Celebrations
    • Faith
      • Into the Light; The Series
    • Giveaways
    • Reviews & Sponsors
  • Photography & Lettering
    • Photography
    • truck lettering
    • vehicle graphics
    • Newborns
    • Kids
    • Engagement
    • High School Senior Pictures
    • High School Senior Pictures Sneak Peeks

Last Minute May Day (Baskets & Delivery) Tips & Ideas!

April 26, 2012 By Laura 9 Comments

tips-ideas-may-day-baskets


May Day is less than a week away.  But if you really want to touch some hearts and make some older folks in your life feel so unforgotten, this is a wonderful thing to do with your children!  It not only has the potential to teach them a bit of History, but it teaches them about kindness and compassion, as well.  What’s more, it couldn’t be more fun and exciting!  


PLANNING YOUR MAY DAY CONTAINERS

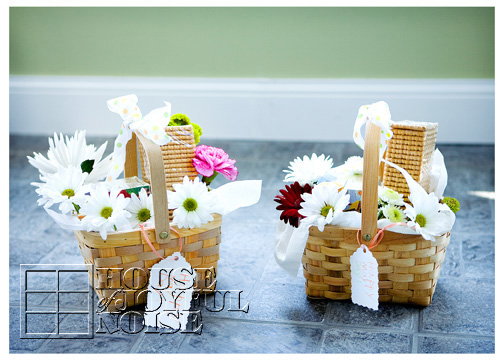
    Planning, putting together, and secretly delivering  May Day Baskets, is something we have done with our kids for the past 4 consecutive years, from 2008 – 2011.  Every year, the number of our recipients has grown. It can be done as simply or as involved as you choose, depending on the time or expense you’d like to put into it. While the traditional May baskets years ago were simply filled with wild flowers, picked special just for the recipient, we have really tended to get into the ideas for our basket contents! (Cheap affordable baskets can be found at any low budget department stores, such as Wal*Mart, as well as places like the Christmas Tree Shoppes.)  But you don’t need to.  The thought and fun behind it is not more or less, no matter what you give in the basket. It’s what you give from your heart, to their’s, that matters most.  

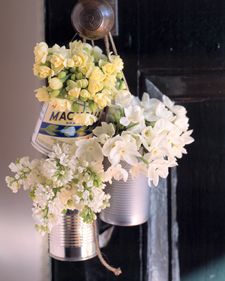
    So if just delivering a beautiful bunch of flowers is more the way you’d like to go, here are a couple of other simple container ideas I found on Pinterest:
7eaf7d53e132e11af4a20b3596c1188c

Most everyone has some cans in the house!  Wash them out, get rid of any sharp edges, punch some holes in the side and thread with some lovely ribbon or rope for a handle, and fill with flowers!  If you really want to dress it up, create a label of your own.  Consider having your kids make some drawings, and glue them on!
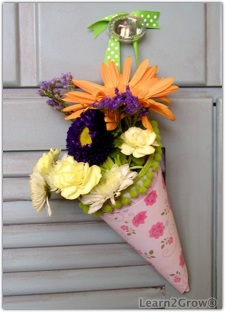
 

finishedtussiemussie_225x312-ashx_

Another idea is the traditional way…..making a simply paper cone.  There are beautiful scrap booking papers in any craft store that you can use.  Add some pretty trim, a handle, and the flowers, and you have a beautiful May Day surprise!

   Today, as we share photos from our baskets over the years throughout this post, we’d also like to share some other tips and ideas, in the hopes that you will be inspired to really make some older folks day!  You must know how much the little things mean to them, and this big surprise they find on their doorstep or door handle will be something that talk about for a long time to come.
 

tips-ideas-may-day-baskets-1
WHO WILL RECEIVE YOUR MAY DAY BASKETS?

May Day baskets were typically delivered to older folks years ago (on May Day of course), so this is a tradition they will well remember and appreciate.  Think of what older folks are in your life, who your children might want to deliver to.   Once you determine how many recipients you’ll have, you’ll know how many baskets (or other forms of containers) you’ll need. Some people to consider:

  • Grandparents
  • Older Neighbors
  • Older Folks you know from Church
  • Other Friendly Acquaintances
  • Anyone you suspect could be lonely or need a smile.

Naturally, for doorstep delivery, you’ll need to know where these folks live! Normally, the idea is for the children to sneak up to the door, hang the basket on the doorknob (or place on the porch where the recipient will see it when they open the door), ring the doorbell, and run like the dickens!! With any luck, they’ll get away without being seen, and the recipient will only find a lovely basket of flowers and/or goodies.

     BUT, another very thoughtful idea is to deliver them in person, to random folks in a nursing home.  Many older folks feel quite forgotten at such homes, with few visitors.  Just seeing your children’s faces will feel like such a blessing to them.  Getting flowers and/or other goodies will do their hearts so good. (And yours too!).  This is a great alternative if May Day turns out to be rainy too.   Consider calling a home to let them know you are coming ahead of time, and ask them to put together (your number) of recipients who do not have loved ones to visit them.
tips-ideas-may-day-baskets-2


MAY DAY BASKET CONTENTS

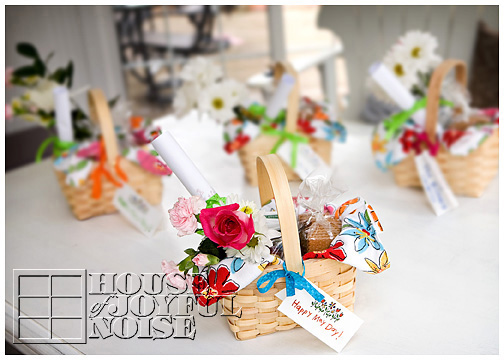
If you’ve decided to fill your baskets with goodies beyond wild flowers, here are some content ideas we have used over the years:

  • A Tea Bag Variety
  • Hard Candy (Consider sugar-free for possible diabetics)
  • Baked Goods from your own kitchen (Mini loves, muffins, cookies, cupcakes)
  • Pocket Tissue Packets
  • Prayer Cards
  • Small Short & Uplifting Story Books
  • Cross Word Puzzle Books
  • Tea Biscuits
  • Flowers
  • A scroll explaining the tradition of May Day Basket Delivery (A great time to educate the kids about this tradition)

Basically, anything that fits in the basket!  What creative ideas can you and your kids come up with?

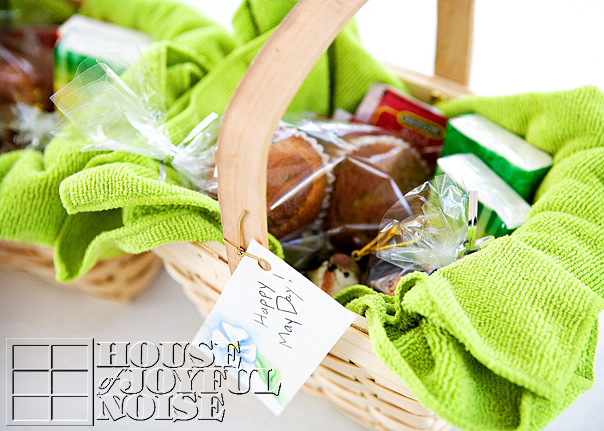
Lining your baskets before filling, is another option.  You can use tissue paper, an open napkin, a cloth napkin, or even a new kitchen dish towel, which is a gift in itself!


BASKET TAGS

It’s nice to have a tag attached, that wishes them HAPPY MAY DAY!  That tends to remove any confusion of why the basket was left. They will realize it is May 1st soon enough, and put it all together. (And them SMILE, no doubt!)   Whether you sign your tag or not is up to you. Sometimes there is concern that the recipients will be frightened, or be afraid to eat the contents.  So if that is a real concern, you can sign them.  But the real fun is to let it be a mystery!  It’s also a wonderful lesson for your children, that we can do kind things for others, and not need to get credit.

    Here is a free printable tag I made one year, that I am happy to share with you:   MAY DAY BASKET TAGS
PLANNING DELIVERIES

This year (2012), May Day falls on a (this) Tuesday.  Since we homeschool, we have always rearranged our school work for the day, and made our deliveries in the morning, usually between 9:00-11:00 a.m.  But if your kids are in school, evening delivery is just as acceptable!

    Before leaving home, plan out your delivery route, according to where your recipients live.  Knowing the order of stops ahead of time makes for smoother deliveries. 

   Also important is to plan ahead WHO will be running up to which doors, and running.  We have 4 kids.  So rather than they all go up to each door, risking injury and getting caught, by tripping over each other, they decided among themselves who would do which homes.  This saved any arguing about the matter in the vehicle too, which could really suck the fun out of it all!
 

tips-ideas-may-day-baskets-4
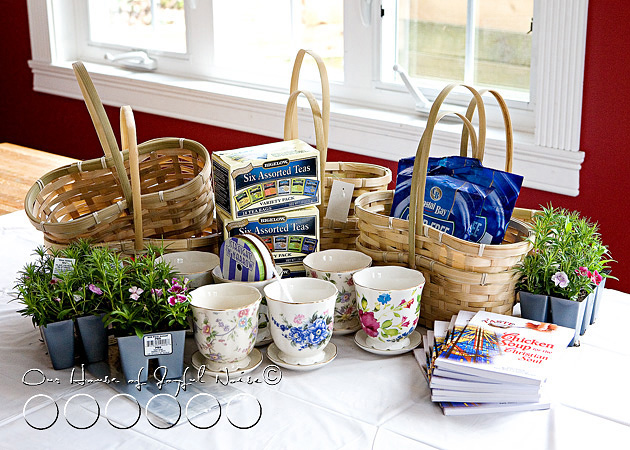
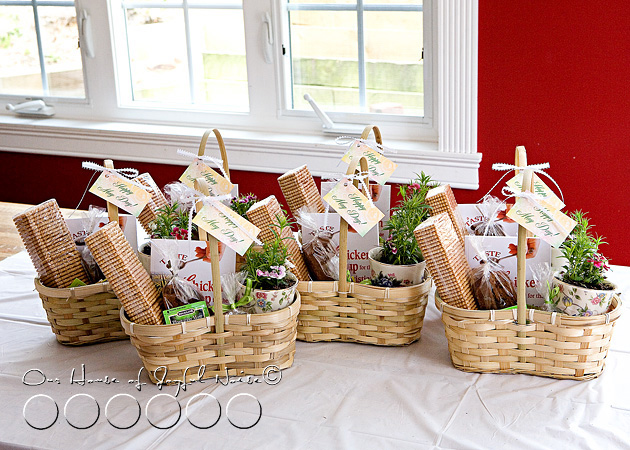
I especially loved one idea we had last year:  Making little flowering window sill tea cup plants.  Along with some perfect size Chicken Soup for the Soul books!  The above photo is all of the basket contents, pre-assembly.  The photo below is them all together.
 

tips-ideas-may-day-baskets-5

Naturally, every year around May Day, I have taken lots of photos, from basket assembling, to the secret deliveries themselves.  Going through those posts always make me smile.  Especially when the kids were so little! So if you care to, you are free to visit the previous years blog post links, and hopefully dig up some more inspiration, to deliver some love, yourselves.

  • 2008
  • 2009-1
  • 2009-2
  • 2010-2011 – Did not blog deliveries, but last year’s basket photos are shown above.

     Following May Day last year, we decided it was likely our last year of planning and delivering May Day Baskets.  Reason being, 1) the kids are getting a little too old (and big! for this particular serving in secret, and 2) after 4 years, we’re not such a secret anymore! When you start getting thank you cards in the mail, you know they’ve finally figured you out! ; )  But, the lessons have been good for our children, and there is nothing better than the feel-good-feeling, of giving in secret! Our hearts are always open to new ideas and ways in which we can serve others, as God calls us all to do.  The possibilities are endless, and there are always daily opportunities in our lives, and yours.

  Acts 20:35
“In everything I showed you that by working hard in this manner you must help the weak and remember the words of the Lord Jesus, that He Himself said, ‘It is more blessed to give than to receive.'”

Matthew 25:40
“And the King will answer and say to them, ‘Truly I say to you, to the extent that you did it to one of these brothers of Mine, even the least of them, you did it to Me.’
Save

Save

Save

Save

Filed Under: Celebrations, Crafts & Creations, DIY (Do-It-Yourself) Project, Free Printable/Downloadable, Free Printables, History / Social Studies, Holiday Crafts, Homeschooling, The Big Picture, Traditions Tagged With: Chicken-Soup-for-the-Soul, Holidays, homeschooling, kids-serving, May Day, May day baskets, May-Dak-basket-delivering, May-Day-Basket-ideas, May-Day-basket-ideas-tips, may-day-basket-photos, serving others, tea-cup-plants

An Armoire Refinish

April 19, 2012 By Laura 6 Comments

furniture refinish


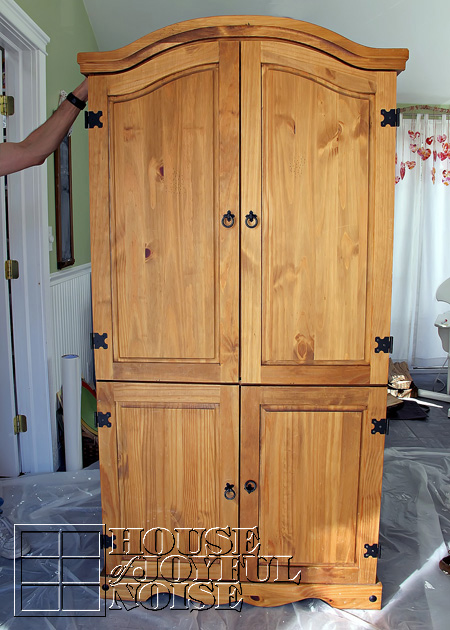
It’s been awhile since we’ve shared a furniture refinish project with you.  Unlike the last one which was extremely meaningful and refinished with much love, my mother’s dresser, this one is not so special.  It’s a useful piece for our home, but it’s just a piece we picked up years ago at some department store or other.
  Regardless, it has been in a room we wanted it out of.  The only other place we could figure that it could be used and where we also would have room for it, was in our youngest daughter’s bedroom.  Yes, the same bedroom my mother’s dresser was refinished for.  And I was NOT putting this darker piece up there, in that bright, fresh and airy room. So, it needed to be refinished to fit in up there, first.


furniture refinish
I’d always thought this piece was cheap quality, because it’s just seemed so, to me. Maybe because I have since bought another armoire (years ago also, but after this piece), that to me, has a lot more character than this one.  I just love the latter one more.  I’m not positive what type of wood this one is made of, but my husband’s guess is Poplar.  After researching his guess, I’m guessing he is right. Because something about it has reminded me of something like ‘balsam type wood’.  It’s not light in weight, but it is hella-absorbent!  Lord have mercy, painting it was no fun at all.

I have to admit, my heart was not in the refinish of this piece at all, as it was with my mother’s dresser, but it simply had to be done, = chore.  So I begged my oldest to help me paint it.  She agreed, but she wasn’t having any more fun than I was. So we were miserable together. We don’t have a paint sprayer and compressor yet, but this piece has really encouraged me to get one!  We had at it with good old paintbrushes and rollers.   And because of all of the hardware, it needed to be taken apart. Ugh.

I thought using a paint and primer in one, would keep it from needing to be painted twice, but no such luck.  Poplar = Sponge!  Maybe there is a prep trick to help with that, but I’m just an amateur learning. And what I learned this round was…..look into that before painting poplar again!

furniture refinish

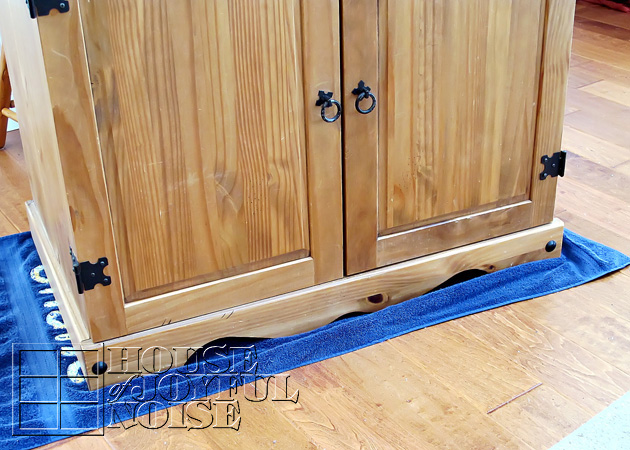
Here, I just wanted to show you a little trick for moving heavy furniture on hard flooring. Put a large enough sized towel or blanket under the piece.  It makes it easy to just slide across the floor, without the need to literally pick it up and carry it.  (Unless steps or carpet are involved, of course.)   In this moment, we were just moving it through the family room into the sun room to be painted.  But then….it did need to go up a flight of stairs.

I did not take photos of the painting process. Not much to see but 2 busy people pouting, with paintbrushes. But the goal was to make it match, or at least coordinate, with my mother’s dresser in the same room it would be in. Although, I had no intentions of using the same entire refinish process as my mother’s piece.  And also…..the two pieces are completely different kinds of wood, as well as two completely different colors of original wood. But my hope and goal, was that somehow, they would pair well enough together.  You’ll see they did, if you stick with us here.

furniture refinish


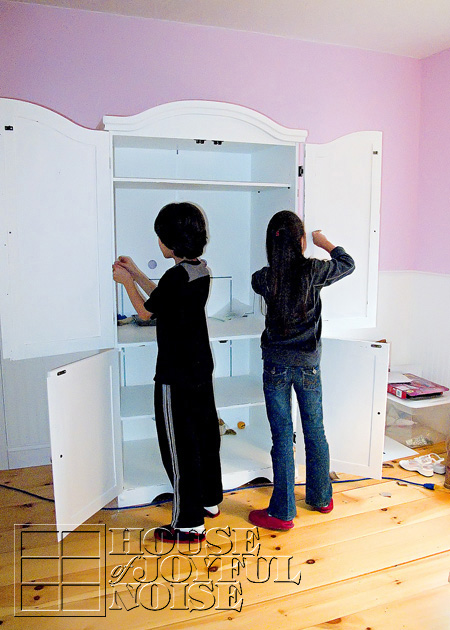
Once it was completely painted, it went right upstairs, because we needed it out of the way where it was painted in the sun room.  But it still needed to be distressed.  If you know me, I’m not much into uniformly and perfectly painted pieces. Luckily, I had a couple littles who were begging to help.  I thank my lucky stars daily, that they think helping with most anything, is fun.  So I gave them some course pieces of sandpaper, and showed them all of the edges I wanted done.  We worked together until it was done. 

They were willing to work for free, but I gave them great big XOXO’s for the help. ; )

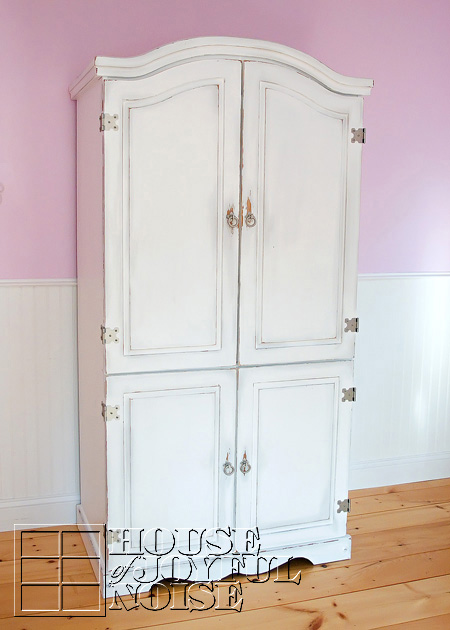
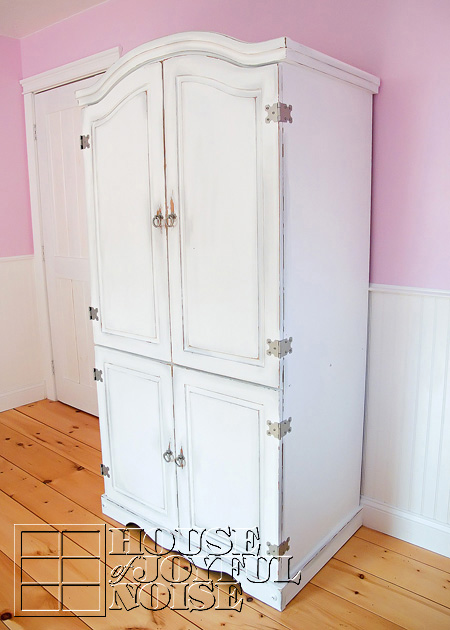
Here is a look at the finished piece, but then I’ll show you some details and another little step I took with it:

furniture refinish

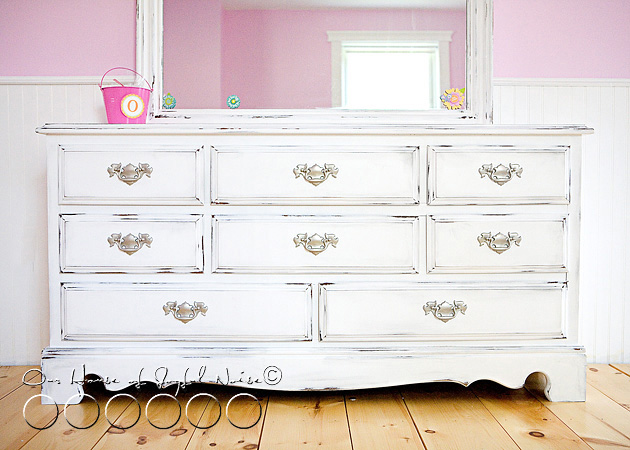
furniture refinish This is my mother’s dresser. But you really should check out the whole post to see the amazing transformation.

armoire-furniture-refinish-4
They go together pretty well enough, don’t you think?

I did two things to really help age the look of the armoire, and help it tie in with my mother’s dresser. 

furniture refinish
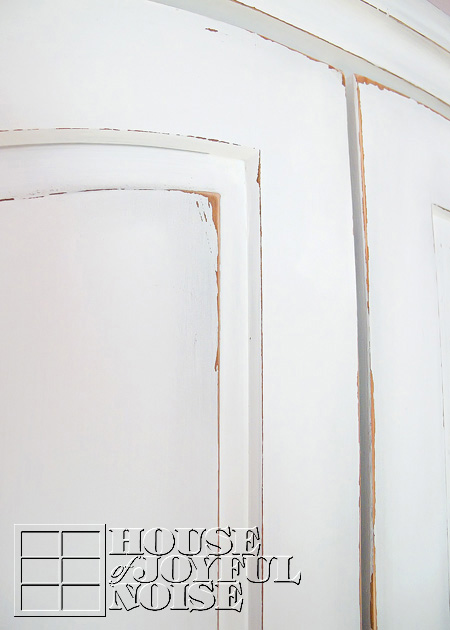
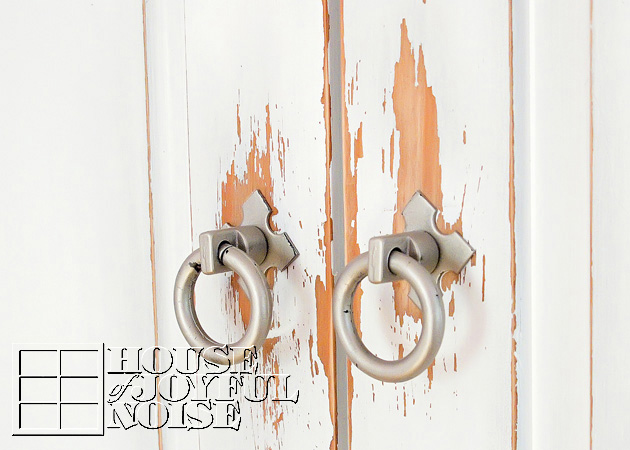
The first as I said, was the sanding of the edges, to wear down or chip off the paint. That’s what the kids helped me with. 

furniture refinish
There were a lot of edges, inside and out!


furniture refinish

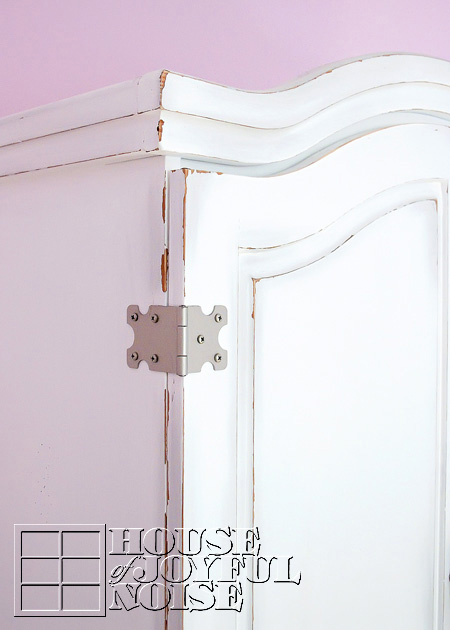
We also spray painted the hardware the same nickle color as the hardware on my mother’s dresser. It’s nicking off some on the handles here, but that only adds to the charm of it, to me.

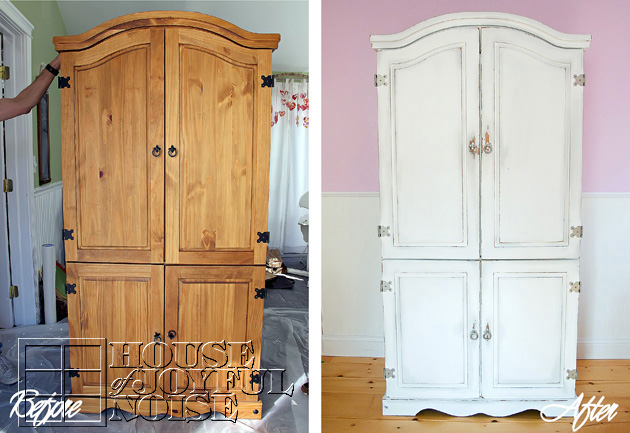
 Lastly, if you notice the aged color to it in the photos of the whole piece, where it looks kind of dirty, (not done yet in closer detail photos above), as opposed to all fresh white, this was done with a plain old dry piece stainless steel wool. It really, really changed the look of the whole armoire, and made me finally love it! I think I do!  And here, is the Before and After….

furniture refinish In the end, it was really worth it, I think.  But only because I had lots of help! What are your thoughts?  I’d love to know, just out of curiosity. I learned in my research, that Poplar wood is meant to be a beautiful natural wood. So maybe most would never venture to paint it. (Or maybe they know how absorbent it is!).  But I didn’t hesitate. Would you?


Save

Filed Under: Crafts & Creations, DIY (Do-It-Yourself) Project, Furniture Refinishing, Furniture Refinishing, Refinishing, The Homestead Tagged With: antiquing-furniture, armoire-makeover, armoire-refinish, furniture-makeovers, furniture-painting, furniture-refinishing

Chocolate Covered Sunbutter Eggs Recipe| Peanut-Safe Alternative to Reese’s

April 2, 2012 By Laura 9 Comments

sunbutter-eggs-alternative-to-reeses-peanut-safe-alternative
Last week I was visiting one of my favorite blogs, TidyMom. (It truly is a place for everything! ; )  Cheryl over there was sharing a recipe for her Homemade Peanut Butter Eggs.  Ohhhh, how I wanted one!  In fact, I have been missing Reese’s Peanut Butter Cups, and the Reese’s PB Eggs that come out every Easter, for years now!  But peanut and peanut butter anything has been removed from our life, since we discovered our son has a severe, life threatening allergy to it.  It was a hard pill to swallow, for this life-long-die-hard-peanut-butter-lover.  But Sunbutter has helped me survive. And anyway, I love my son way more, and keeping him has been worth the sacrifice!   Sunbutter can be found in the organic section of most grocery stores.  We love it so much, we order it online by the case, and also because it is cheaper that way.

     Now, as anyone with a peanut-allergy child knows, Easter and Halloween especially, can be quite the challenge, when it comes to finding a few treats and candy for our kids!  This is because so much of anything with chocolate, has a real risky potential to be contaminated with peanuts, within the factory manufacturing. And most packaging even says so. 

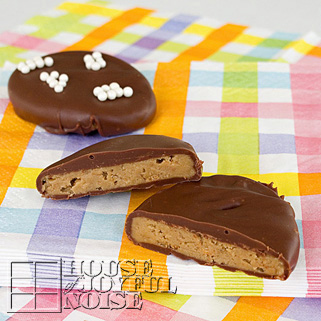
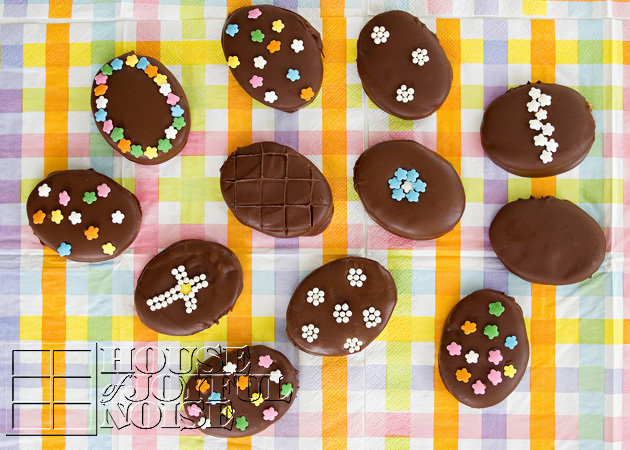
     That being said, I have wondered right along, how well any recipe that calls for peanut butter, could be substituted with Sunbutter!  When I saw TidyMom’s Homemade Peanut Butter Eggs, I knew it was time to find out!  And guess what?  It was a delectable success!  Sunbutter tastes very similar to peanut butter, to us, and these eggs bring all of the joy to our mouths, that Reese’s Peanut Butter Cups/Eggs ever did.   This is how they came out lookin’!…..


sunbutter-eggs-alternative-to-reeses-peanut-safe-alternative-13      So, I thought I’d share how we did it with you all.  Now, if peanut allergies are not an issue for your family, and you’d like  to make your own peanut butter eggs, you are welcome to follow (Cheryl’s) TidyMom’s Recipe.  If you’d like to try the Sunbutter version, you can follow ours right here.  Our recipe using Sunbutter here, was experimental, but we were just switching out the peanut butter from Cheryl’s recipe.  (I  did make one little tweak I’ll mention.)  I got a little help from my husband, because I needed to take photos too.  But we might have done some things a tad differently, just trying to find to make it work for us. It did get messy as Cheryl said it does, but like any project, once we get going and figure things out, we find our groove.


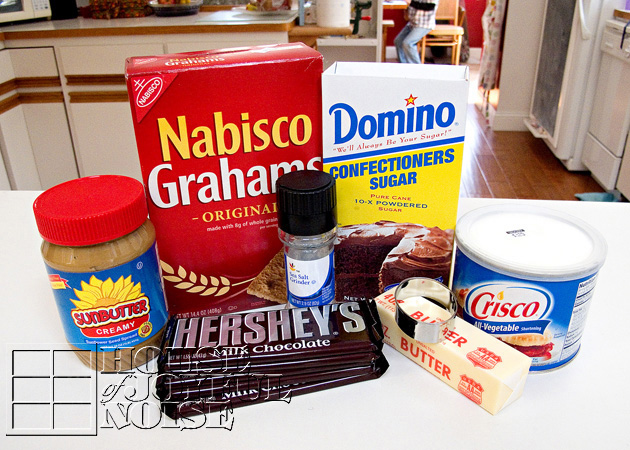
sunbutter-eggs-alternative-to-reeses-peanut-safe-alternative-1 Participating Ingredients:

  • 1 1/4 cup of Sunbutter
  • 5 Tablespoons unsalted butter, softened
  • *1 Cup graham cracker crumbs

     (*-Cheryl’s recipe calls for 3/4 cups, but the Sunbutter seemed so sticky, we added a little more.)

  • 1 Cup powdered sugar
  • 1/2 Teaspoon Sea Salt
    **14 ounces of chocolate (milk, semi-sweet or chocolate)

   (**-We used the flat Hershey bars with the squares to break, and they worked perfectly!  The ones with the squares are peanut-safe!)

  • 1 Tablespoon shortening
  • an appropriately sized egg-shaped cookie cutter–

sunbutter-eggs-alternative-to-reeses-peanut-safe-alternative-2    
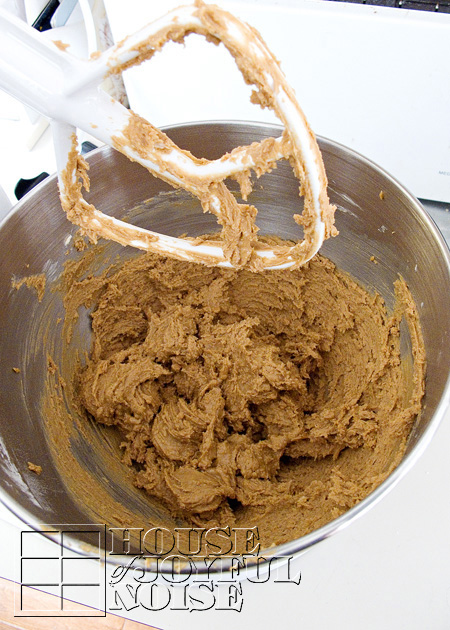
In a large bowl mix together peanut butter, butter, graham cracker crumbs, powdered sugar and salt until well combined. We used our Kitchen Aid, stopping it once and using a spatula scraper to get it all to the middle and off of the attachment.  It was while mixing that we decided to add that extra 1/4 cup of graham cracker crumbs, for a total of 1 cup, to make it a little less sticky.

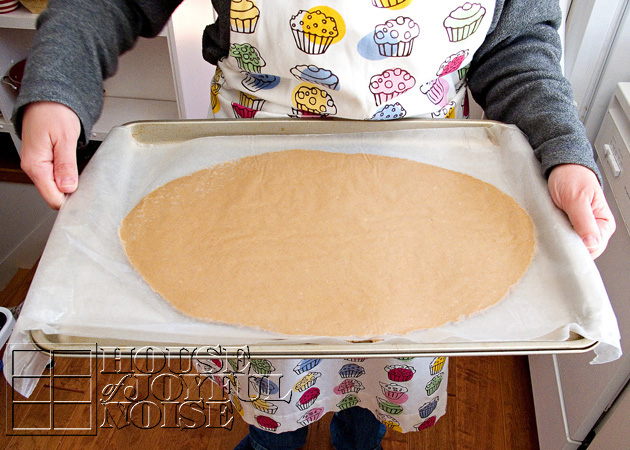
      Next, put the whole (Kitchen Aid) bowl into the freezer for a few minutes, to get it easier to work with. Then we plopped the whole mix on a big piece of wax paper, covered it with another piece, and rolled it out.  Then we placed the whole rolled out dough between the wax sheets, on a cookie sheet.


sunbutter-eggs-alternative-to-reeses-peanut-safe-alternative-3 We then placed the whole cookie sheet back into the freezer, to help really firm it up. We left it in for maybe 15 minutes.

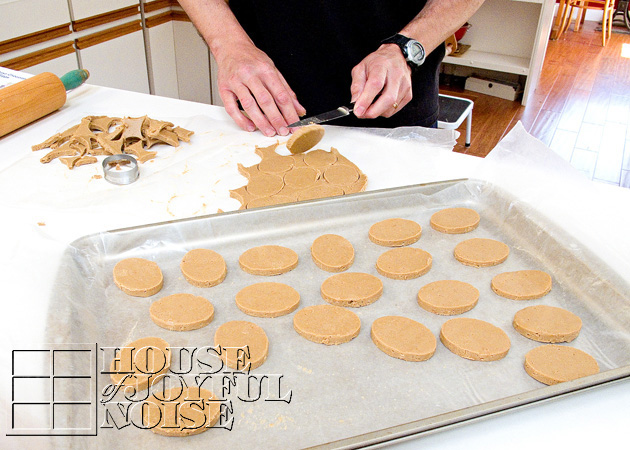
sunbutter-eggs-alternative-to-reeses-peanut-safe-alternative-4   After removing the tray from the freezer, we put the wax papered dough onto the counter, peeled off the top sheet, and got cutting with our little egg cutter, right away.  It’s important to work quickly, because the dough softens quickly, depending on how warm it is where you are working. We rubbed just a dab of shortening all over the cutter, and because the dough was really firm from the cold, and the eggs cut out really nicely.  We placed them on another cookie sheet lined with a fresh sheet of wax paper.

   Again (not shown), we put the cut eggs back into the freezer to firm up once again.

     Meanwhile, we broke up all of the Hershey chocolate bars into a bowl with a tablespoon of shortening, and melted it.  Using the microwave, put the bowl in on high for 20 seconds to start.  Remove, and stir with the handle of a wooden spoon. It’ll still be chunky at this point.  Put in for another 10 seconds, and another 10, always stirring in between intervals, until the chocolate is all smooth.


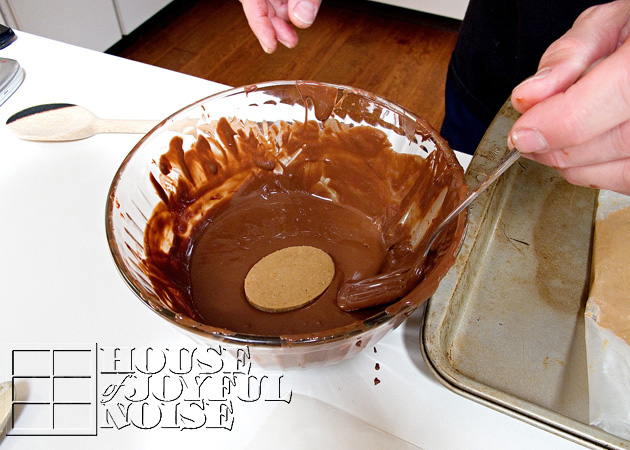
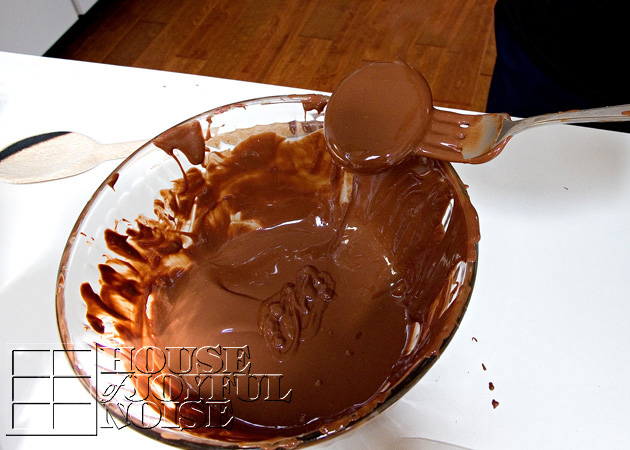
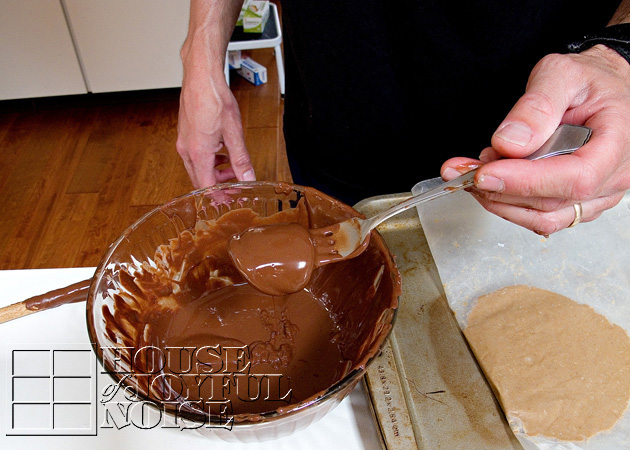
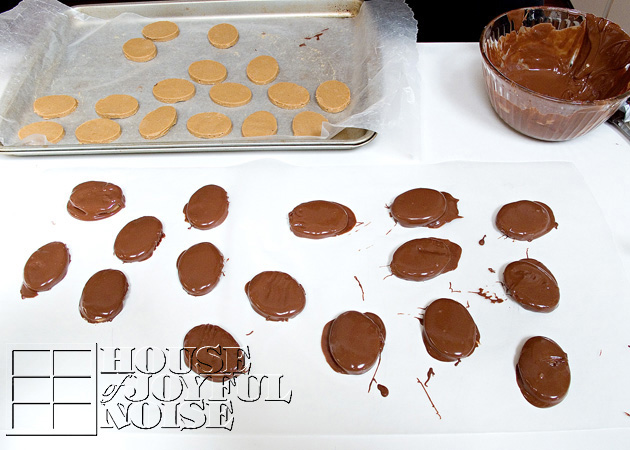
sunbutter-eggs-alternative-to-reeses-peanut-safe-alternative-5    By the time the chocolate is melted nicely, the eggs should be nice and cold.  So remove the tray, have another freshly lined tray ready, and get dipping!  Now remember, the chocolate is pretty warm, and you want your eggs to stay as firm as possible, so you need to get that egg in and out of the bowl quickly! We just let them belly-flop in one at a time, flipped it over and lifted it out with a fork, as seen in the next photo as well.


sunbutter-eggs-alternative-to-reeses-peanut-safe-alternative-6    Just tap the fork on the side of the bowl to remove the excess dripping chocolate off as best as you can, and then gently let the chocolate covered egg onto the cookie sheet.


sunbutter-eggs-alternative-to-reeses-peanut-safe-alternative-7 This photo is just to show you what happens if you don’t get the egg out of the bowl fast enough.  It goes soft very quickly.  If at any point you think your un-dunked eggs are getting too soft work with, it never hurts to pop them back in the freezer, again and again.


sunbutter-eggs-alternative-to-reeses-peanut-safe-alternative-8 As you can see here, putting them down without making them a mess, is not easy!  We felt like we were really making a mess of things, and wondered if we would even have something to be proud of or be worth sharing when finished, but we did! Just like craft projects and the like, when you keep going, you get better at it and quickly find what works better.   And we did get much better at it as we went along……


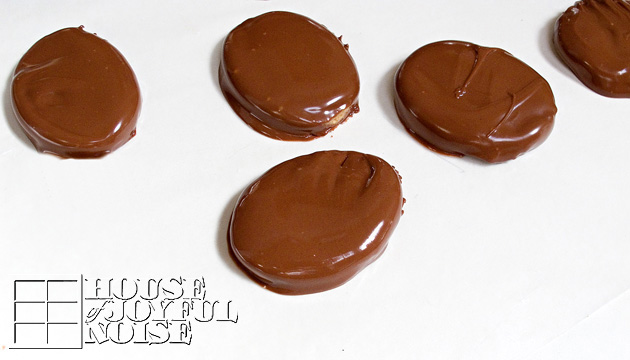
sunbutter-eggs-alternative-to-reeses-peanut-safe-alternative-9 Some we placed on wax paper directly on the counter for the time being…

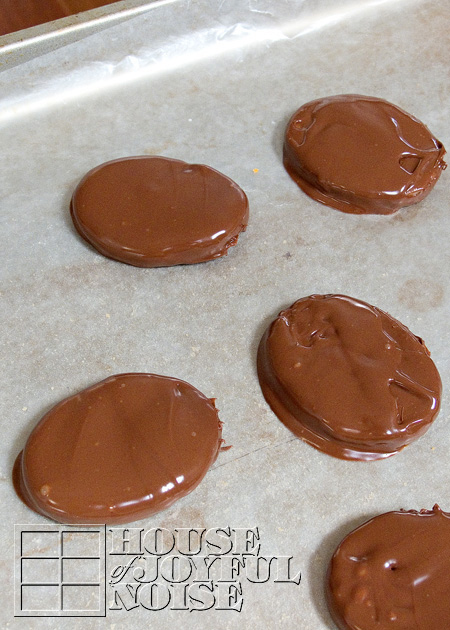
sunbutter-eggs-alternative-to-reeses-peanut-safe-alternative-10  

...and other went on a lined cookie sheet. 

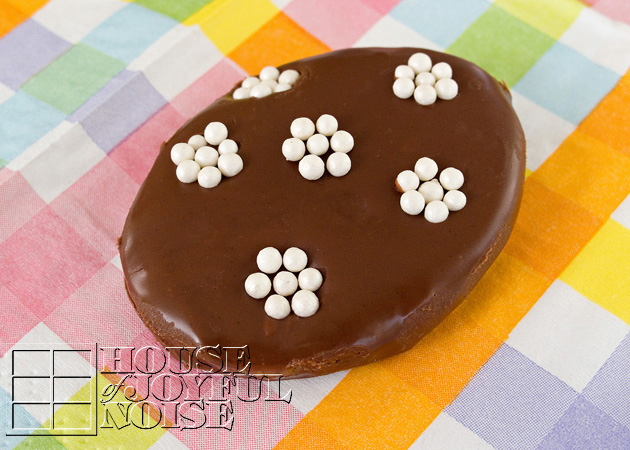
     Once they were all dipped, the first one’s chocolate was firming up enough, that we could decorate them a little.  We just used various sprinkles for some.  My oldest daughter is great at decorating. Such patience!  So she was in on the helping there.

     After we were done decorating them,  once again, we wanted to chill them again.  There was one more thing we wanted to do to ours, before taking some photos of them…..

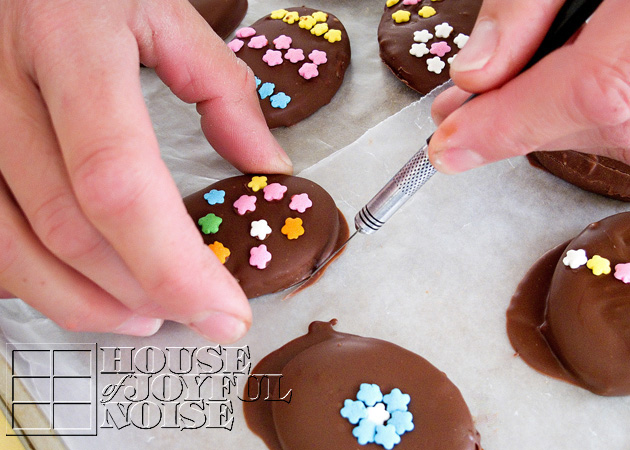
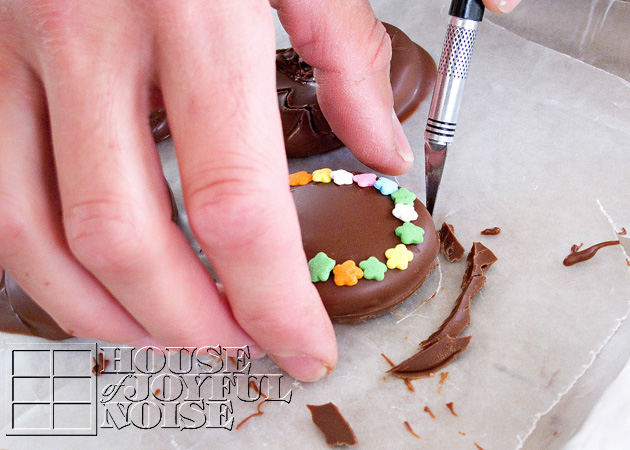
sunbutter-eggs-alternative-to-reeses-peanut-safe-alternative-11   If you like to try and perfect anything you can, when you can (raising my hand..), we figured out a way to clean our egg’s edges up a little bit….

sunbutter-eggs-alternative-to-reeses-peanut-safe-alternative-12 Using a clean x-acto blade, just trim off the excess chocolate that dripped down and spread when placing the eggs down. 

     We didn’t do it to every single one.  Just the ones that really needed it.

sunbutter-eggs-alternative-to-reeses-peanut-safe-alternative-13    These are just some.  Some of the eggs we left as plain chocolate, and others we kind of drew in with a toothpick when the chocolate was just firming up.  Do you see the criss-cross one?  That one I used a french-fry cutter plate.  Just placed it down, and lifted!  Look around your utensil and kitchen tools drawers, and see what you can find to use, to make some neat designs!

 We were really happy with how well they came out.   Cute!

sunbutter-eggs-alternative-to-reeses-peanut-safe-alternative-16
…and OH-SO-GOOD! 

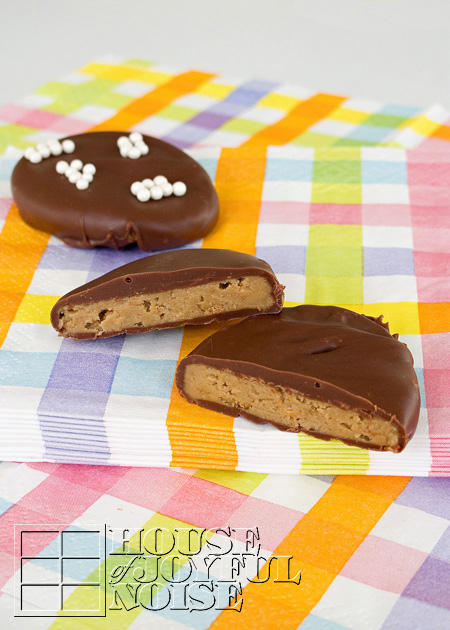
     The salty-sweet melty party in your mouth is just divine!  What I really love about them too, is the little crispy-crunch surprises, from the graham cracker!

sunbutter-eggs-alternative-to-reeses-peanut-safe-alternative-17  

      We have all already had some of these of course, and we’ll be enjoying and sharing the rest, right through Easter Day!  We’re also encouraged and inspired, to try more peanut butter recipes that we can substitute Sunbutter with!  One thing is for sure; we’ll be making these again with other holiday shapes and decorations! They are SO worth the mess. (Especially when your husband cleans it up for you. ; )

     Special thanks to TidyMom/Cheryl, for the inspiration, and allowing us to adapt your recipe!

—–

Love it? PIN it, or share it! And come join us on FACEBOOK! We’d love to have you.

  If you’d like to print this recipe, just cut & paste the whole thing to a document, and delete any photos or paragraphs you don’t need before printing.


Save

Save

Filed Under: Desserts, Fun Food, Recipes, Treats Tagged With: Easter, Easter-candy, Easter-desserts, Easter-menu, Easter-treats, homemade-candy, no-bake, peanut allergies, peanut-safe-candy, peanut-safe-Easter-candy, Reeses-peanut-butter-cups, Reeses-peanut-butter-eggs, Sunbutter, sunbutter-recipes, TidyMom

Maple Sugar House Field Trip | Homeschooling

April 1, 2012 By Laura Leave a Comment

maple-sugar-field-trip-homeschooling-16

            As a kid growing up in western Massachusetts, tapped maple trees and maple farms seemed to be everywhere.  Visiting maple sugar houses, and learning about the process of making maple syrup and sugar, were some of my favorite school field trips. 

     Living a significant shift away from that area now, maple farms are not as common around here. But this was yet another field trip I really wanted to take our kiddos on.   We almost arranged one out where I grew up, but the timing of getting out there would have risked missing the end of the season this year.  So I found Matfield Maple Farm, less than an hour from us, and we went on a beautiful day! It almost felt wrong from the get-go, with no snow on the ground though!  And that was not the only change in the picturesque scenes I have carried in my fond memories of maple sugaring. But I was still excited for the kids to learn all about today’s process of maple sugaring farms.

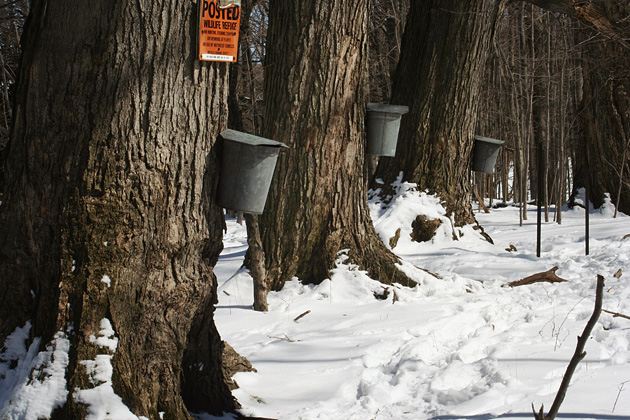
My visual memories of the maple tapping season are very much like this:

maple-sugar-field-trip-homeschooling-20      Metal pails on trees, catching the pure sap from the taps that were put into them. And always, as I recall, snow on the ground.   After all, one of the best parts of our class trips, was eating syrup on snow, inside the sugar house!  Maple tapping season is the few weeks of the tail of winter, and first weeks of spring, when the nights are still cold, but the days are warmer.  That’s when the sap starts flowing. But in western MA, near the Berkshires, we always got so much snow in the winter in those years, it simply had not all melted yet, come maple sugaring season.

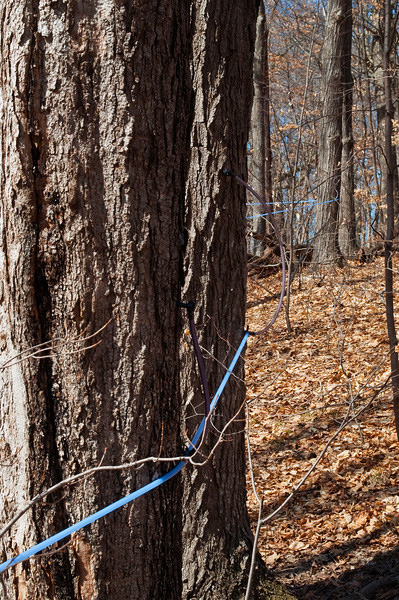
MY have things changed.  Not only are winters not as true as they used to be throughout the season , but maple trees being tapped for  sap at many farms, now look like this:

maple-sugar-field-trip-homeschooling
They are drilled and tapped much the same way, but tubes run connecting one tree to another, with all of the sap from all of the trees, running to one place.  I realize it’s more time efficient, and time is money after all. But I must say, I really miss the charm of good old fashioned pails on maple trees. 

     Watching and learning the whole process of how maple sap is collected, and boiled down into pure maple syrup, was still something I wanted my kids to see for themselves.  But I really hoped it would be just like how I learned about it, and I was looking forward to taking photos of the pails on the trees!  I did have an idea this farm used the more modern method, so it wasn’t a complete surprise. But I was hoping. They did say they also tap with pails, but we didn’t happen to see any. 

     Still, we were very much enjoying our trip, and it sure was a beautiful day for one.  Saturday was when the touring was, so Daddy/Michael was able to come too. It was a family field trip!

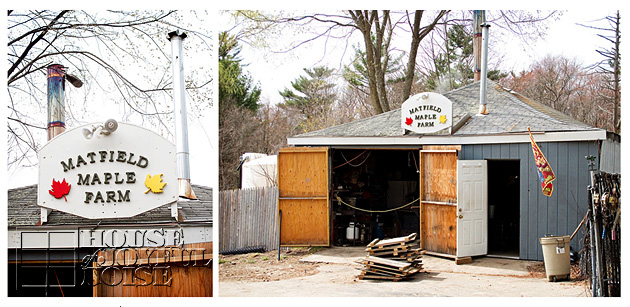
maple-sugar-field-trip-homeschooling-1       We had a chuckle at their cute sugar shack sign.  We’d recognize that shape anywhere!  Clever, recycling a basketball backboard into a sign! We  just love little family run businesses, and we always do all we can to support them, because we know all about having a little dream, and trying to make it work.

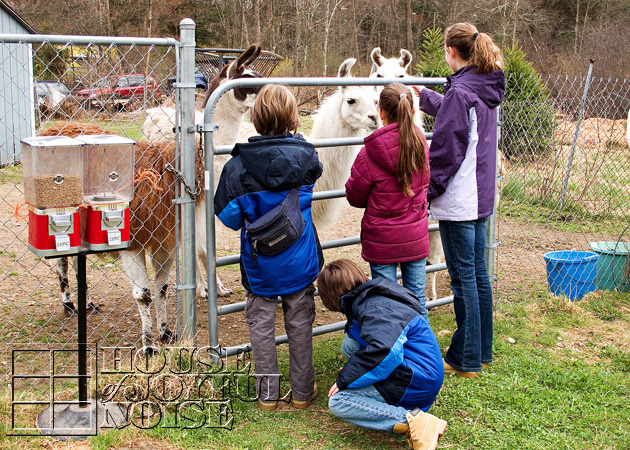
maple-sugar-field-trip-homeschooling-2      The kids fed the llamas, while a small crowd of us waited for the tour guide. {JM} was gathering clovers on the ground to feed them too.

    Soon, the owner/tour guide, and his daughter led us out into the woods, as he started telling us about the maple farm.

maple-sugar-field-trip-homeschooling-3

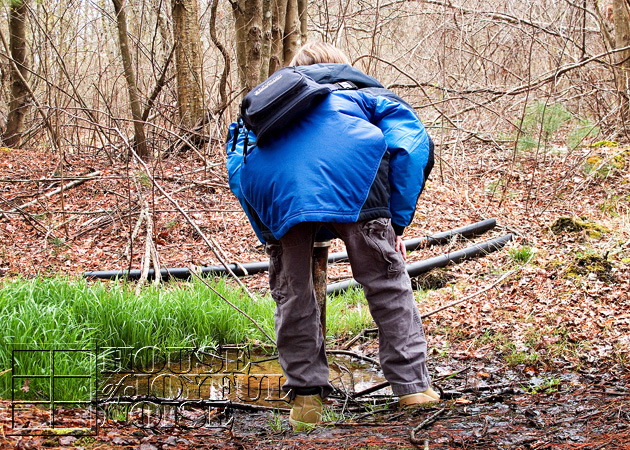
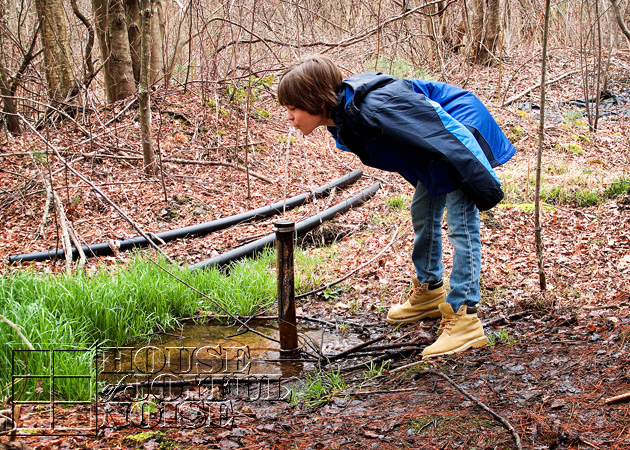
     The first stop was this natural spring. Do you see how vibrantly green that grass is?  The guide told us that is there even through the winter snow, because of the spring there. Imagine how pretty that must be. BUT….no snow for us! ; )

maple-sugar-field-trip-homeschooling-4       We were all offered to get a drink, and taste the fresh spring water. So I told one of my boys, who was going up first, that I wanted to get a photo of him getting some water. But all I got a bum shot!


maple-sugar-field-trip-homeschooling-5     Thankfully I have other kids, and got another chance.


maple-sugar-field-trip-homeschooling-6 We moved on, following each other on these wood-board paths. 

     A couple of times, we all had to duck under sap lines.  I personally thought of doing the limbo, but didn’t want to show off. ; )


maple-sugar-field-trip-homeschooling-7
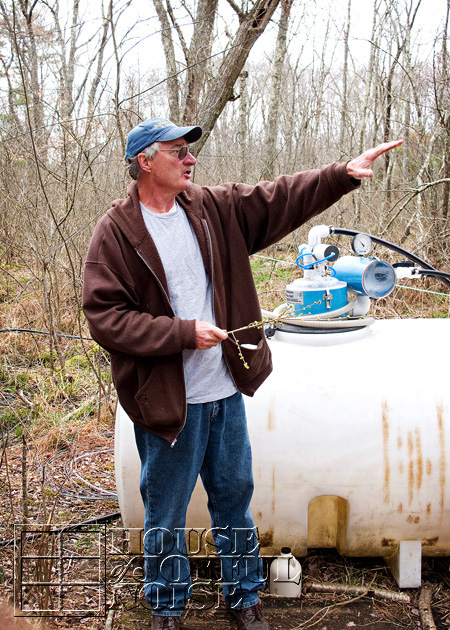
Next we stopped at the 450 gallon gathering tank, where all the lines run to.  Here, the guide told us about the easiest way to know what trees to tap.  They go out scouting trees in the warmer weather, and mark the maples, when the trees have leaves.  That is when they can quite obviously tell which trees are of the maple variety.  As opposed to the winter / early spring, when it’s harder to tell which are which.   See the jug down by his feet? In it was a little treat for us all.

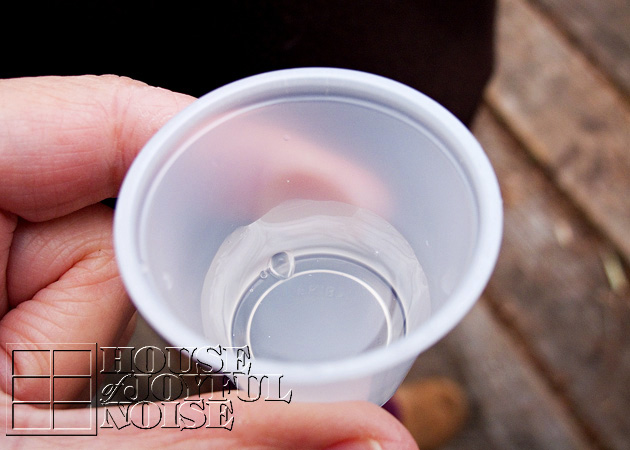
maple-sugar-field-trip-homeschooling-8     He passed out little sampling cups, and poured us all some pure maple sap, straight out of the trees. If you have never seen or tried it, maple sap looks just like water, and tastes almost as refreshing, with just a hint of sweet.  Sap straight from the sugar maple tree is about 98 percent water and 2 percent sugar, as well other nutrients, and minerals.  Maple syrup is derived by boiling it all down to the point where the process of evaporation leaves only about 33 percent of water and 67 percent sugar.


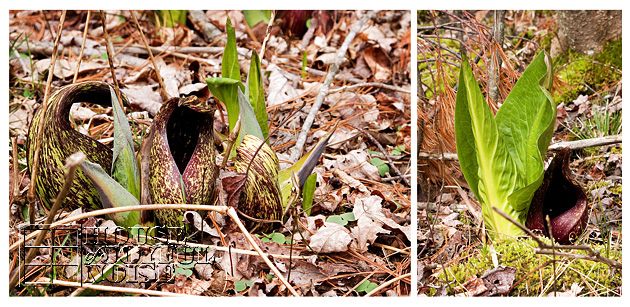
maple-sugar-field-trip-homeschooling-9      Do you know what this is? It’s called Skunk Cabbage. He broke off a piece for us to smell, but recommended we don’t let it touch our nose, whilst sniffing!  It’s named well. It stinks terribly! 


maple-sugar-field-trip-homeschooling-10
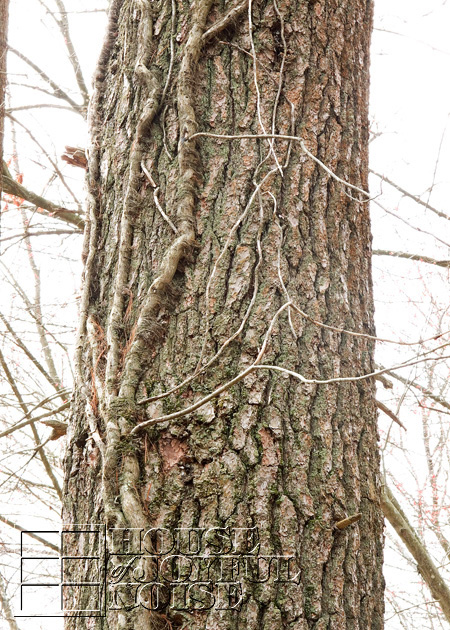
A poison Oak tree, evidences by the poisonous vine plant climbing it.


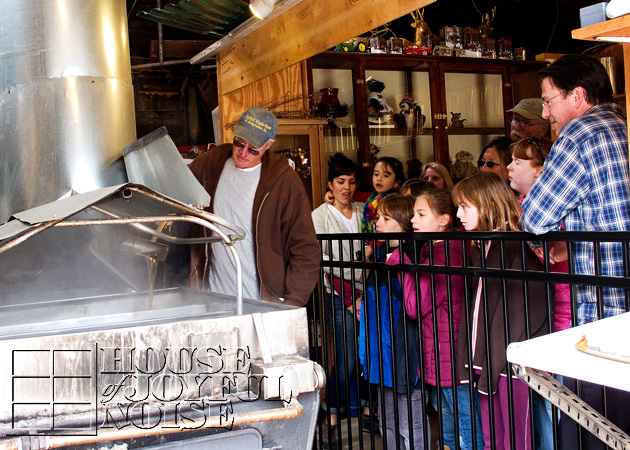
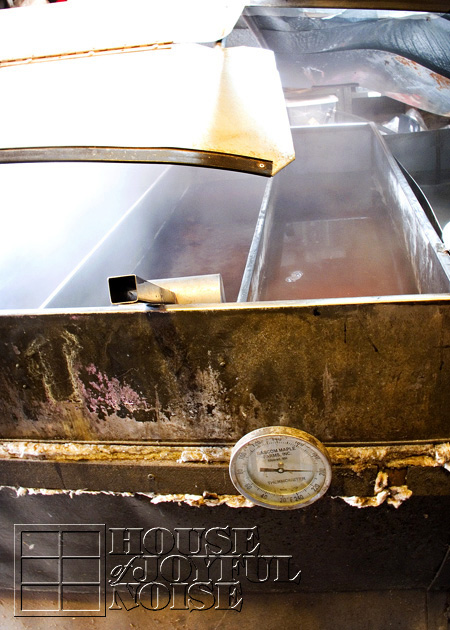
maple-sugar-field-trip-homeschooling-11  Back at the sugar shack, we all learned more about the process of boiling down the sap to the right consistency.  This is a wood burning boiler, bringing the sap to the boiling point of 212 degrees.  When it does boil, the steam rises up out of the sugar shack, and the syrup gets thicker and sweeter.


maple-sugar-field-trip-homeschooling-12
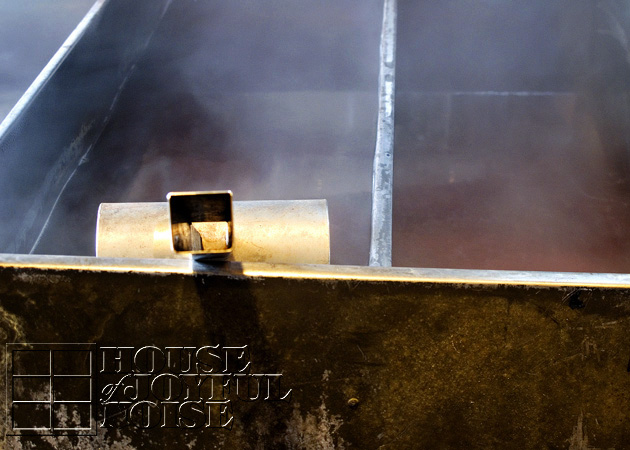
To the right of this shot is the pre-heating waiting area.  As it is moved into the boiling area, and getting to increasing thickened consistencies, it is moved over to the next holding well.


maple-sugar-field-trip-homeschooling-13
We found it interesting that it takes 40 gallons of maple tree sap, to make one single gallon of maple syrup!


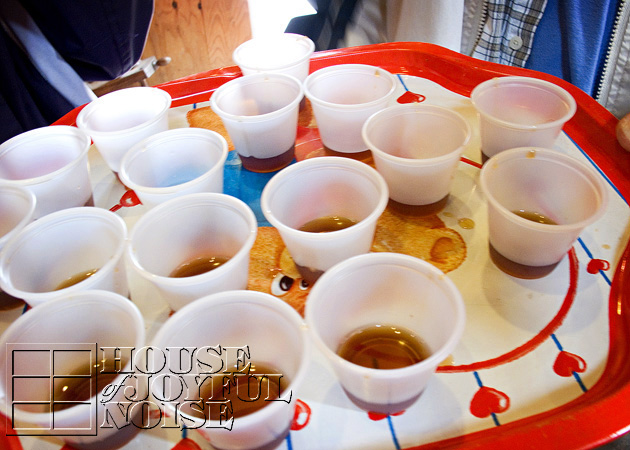
016       Samples of the finished product were shared with us as well. The kids were sure to get their own little cup, and immediately began asking about plans to have pancakes for dinner.  Honestly, there is no comparison between pure maple syrup, and the ‘syrup’ for pancakes that they sell at the grocery store, which is actually made of corn syrup!
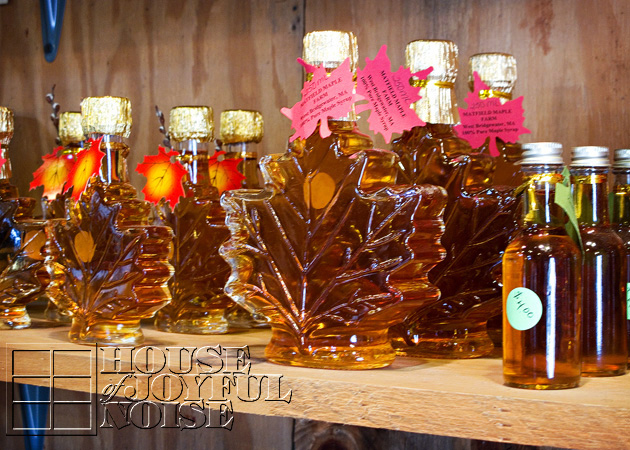
maple-sugar-field-trip-homeschooling-14      Another favorite part of field trips is always the gift shop! Here, what they sold was right behind us right there in the sugar shack, on some shelves.  Of course they sold pure maple syrup in fancy bottles, and there was some maple sugar candy as well, which is made by bringing the boiling process even further, removing an even higher percentage of water, until the sugar starts to crystallize. (I think.)

    A quick funny story about maple sugar candy:  As a kid on maple sugar house field trips, I always spent my spending money on buying maple sugar candy for my father.Every time. And I’d be so excited to give it to him, because I was under the impression he really loved it.  Then about a year or so ago he and I were discussing maple sugar houses, and I found out he hates maple sugar candy!  He says it’s far too sweet for him. But it just goes to show you how happy he pretended to be, so as not to hurt my feelings as a kid. (Thanks, Dad. : ) 

     I didn’t buy him any candy this time.

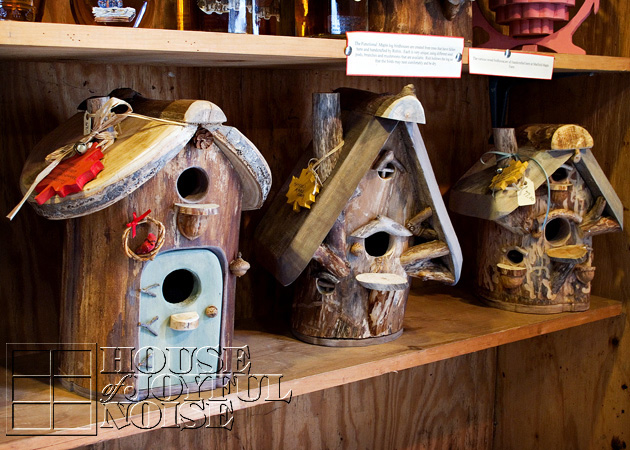
maple-sugar-field-trip-homeschooling-15 We thought these bird houses were cute too.


maple-sugar-field-trip-homeschooling-17
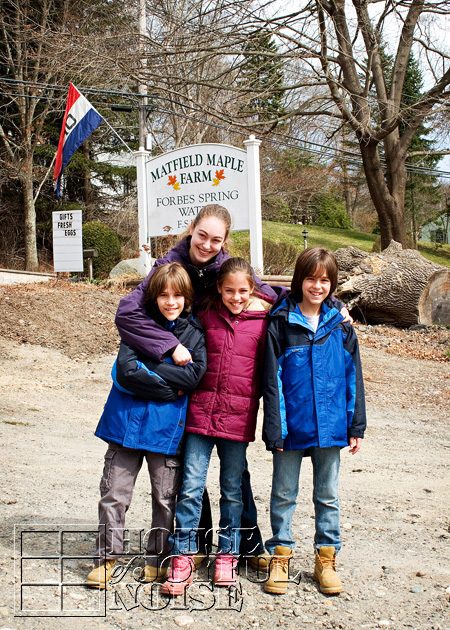
The kids had a great time, as you can tell by the smiles on their faces.


maple-sugar-field-trip-homeschooling-18      On the way home, we stopped lakeside, and ate our nice picnic lunch with the swans.

maple-sugar-field-trip-homeschooling-19      It was a wonderful day, and along with the memories, we brought home a bottle of pure maple syrup. Chosen not only for it’s contents, but of course for the fabulous bottle, with an embossed maple leaf in the glass!  I already have ideas of what I can do with it, for detail home decor come Autumn.  But before then, we have many pancakes and waffles to eat, drizzled with our pure maple syrup! 

      A planned meal for that night was quickly kicked to the curb, and we satisfyingly filled ourselves with blueberry pancakes. It was the kid’s first maple sugar house trip, but it won’t be their last! We will be getting to a maple sugar farm in the next couple of years, that still does things the good old fashioned way! But this place was still worth the trip, and no doubt the memories and lessons will be as sticky as the syrup on their plates.

     I know not everyone lives in the right climate, but have you all been to a maple sugar shack lately? Did they use the old or new method, and what your thoughts on the two? We’d enjoy it if you shared.


Filed Under: Field Trips, Homeschooling, Nature Study, Science Tagged With: homeschooling, homeschooling-field-trips, homeschooling-nature, homeschooling-science, maple-farm, maple-sugar-house, maple-sugar-shack, maple-sugaring, nature-study, pure-maple-syrup

Glass Tile Pendants and Magnet Sets | Tutorial | Handmade Gifts

March 25, 2012 By Laura 27 Comments

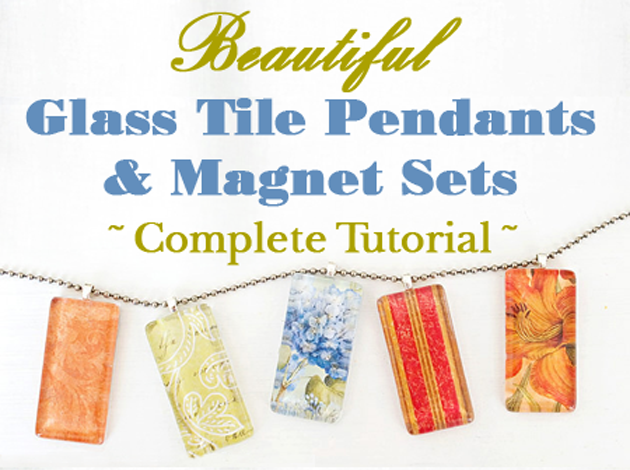
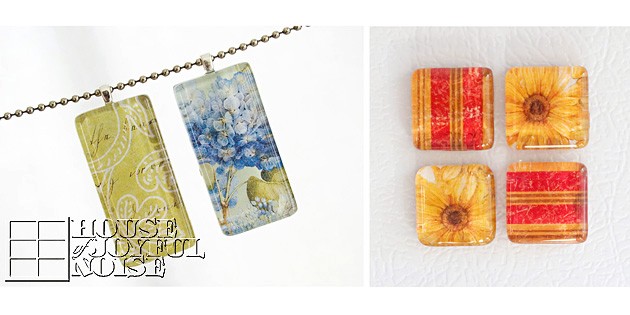
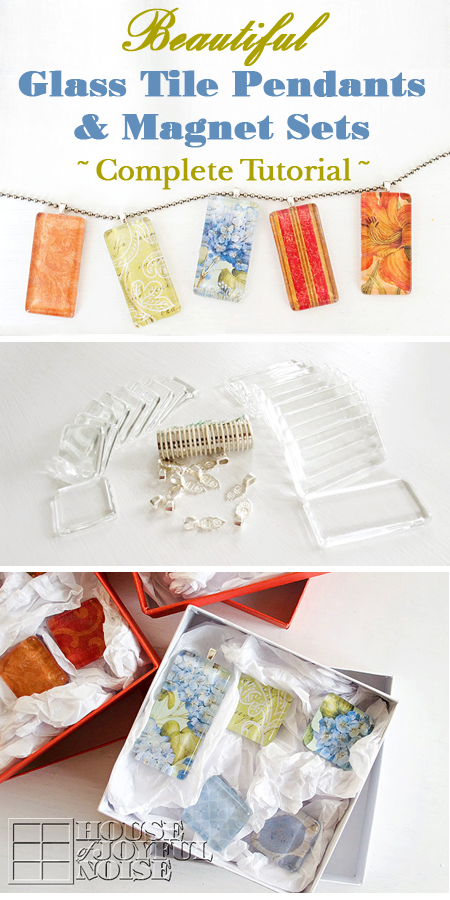
Glass Pendants and Magnet Sets Craft Tutorial

   
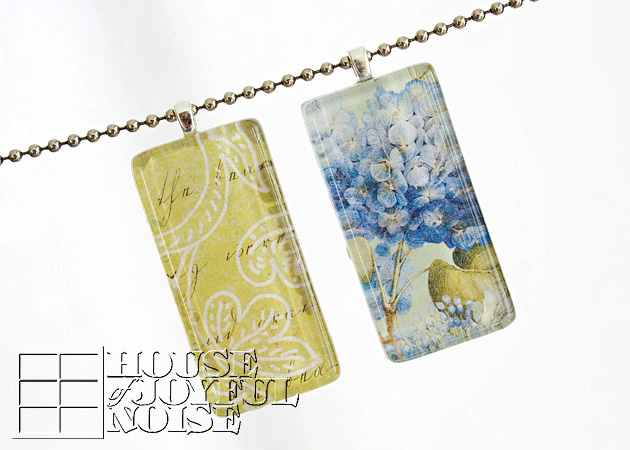
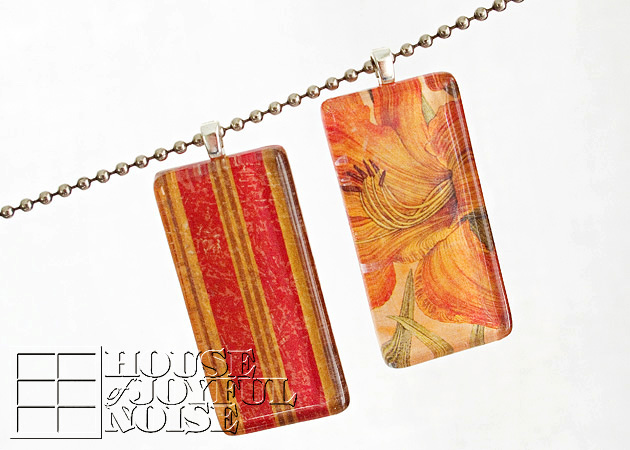
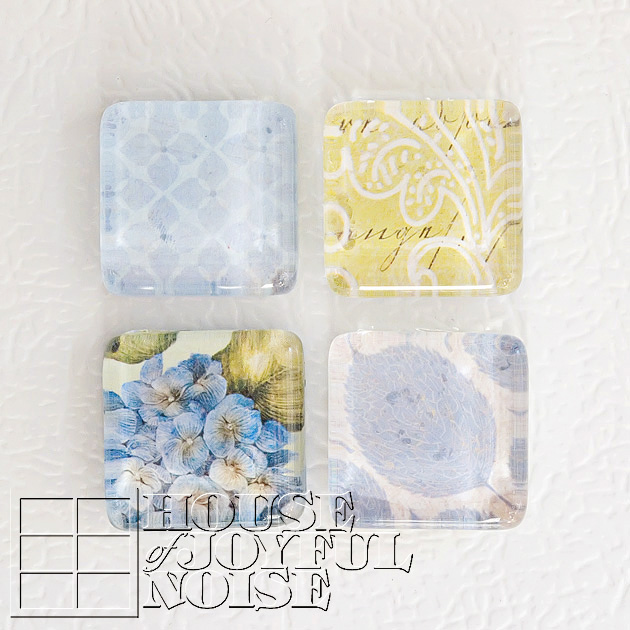
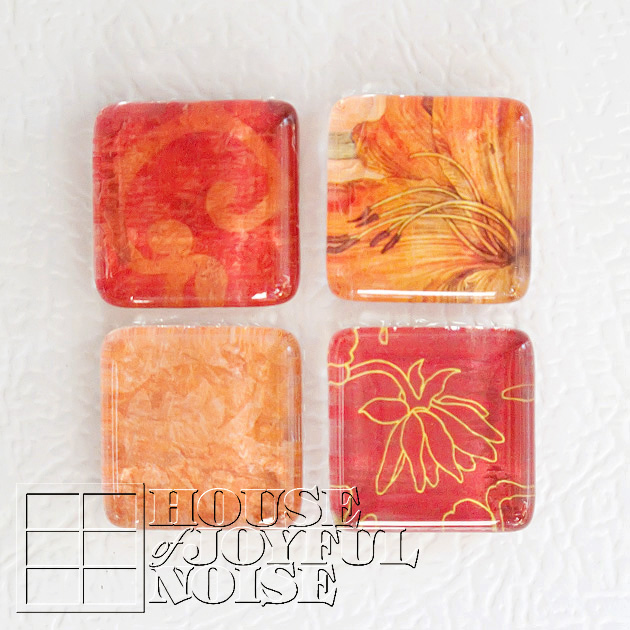
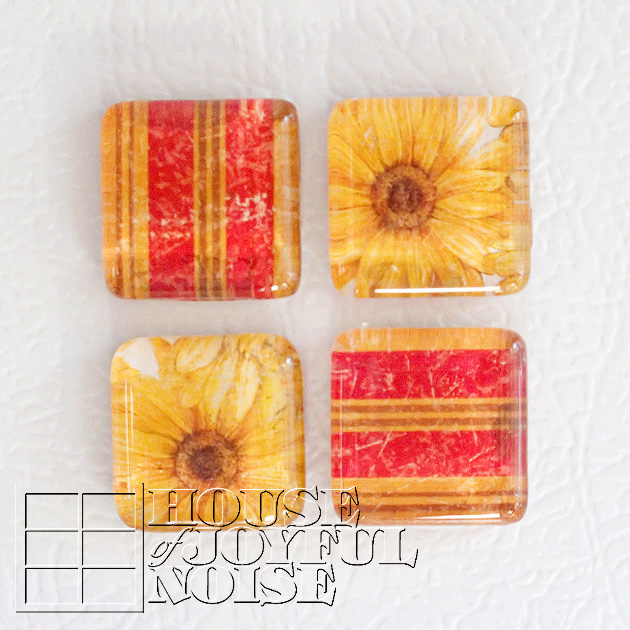
Today we’re going to show you how we made these beautiful glass pendants and magnets. They make such beautiful gifts, for women, as necklaces or magnet sets. I’m sure you could use the same technique to make other jewelry as well, such as cuff bracelets or rings.
You can choose any cardstock print you love, and the necklace pendants can be worn on any necklace chain, ribbon or cord.  So they can be very versatile in style, for you or your gift recipient’s liking.

duo-magnets-pendants    
This was the my first time doing this particular project. But in doing, so I learned lots of tips and tricks along the way, that I’ll be sharing with you throughout this tutorial.  Also, at the end I will share with you the specifications of the supplies, and the resource where you can get them, as I did.  So let’s get started:

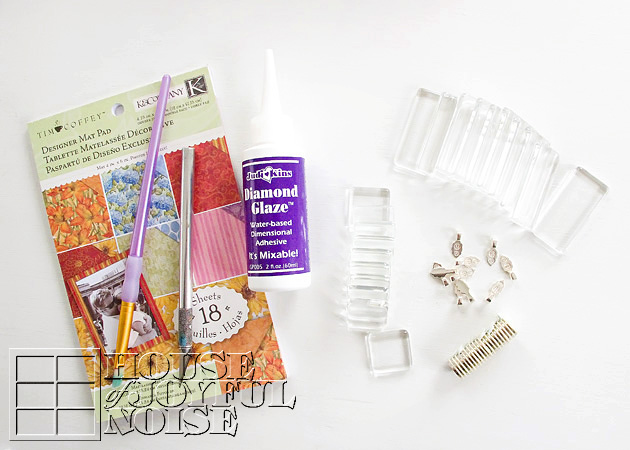
001_glass-tile-craft  Here are all of the supplies I used, but I’ll give more details and sources at the end, so you know exactly what to get, and where:

  • 2-sided designer card stock
  • glass tile rectangles
  • glass tile squares
  •  magnets, with adhesive
  • sterling silver plated bails
  • Diamond Glaze Dimensional Adhesive
  • an x-acto blade
  • a synthetic hair paint brush

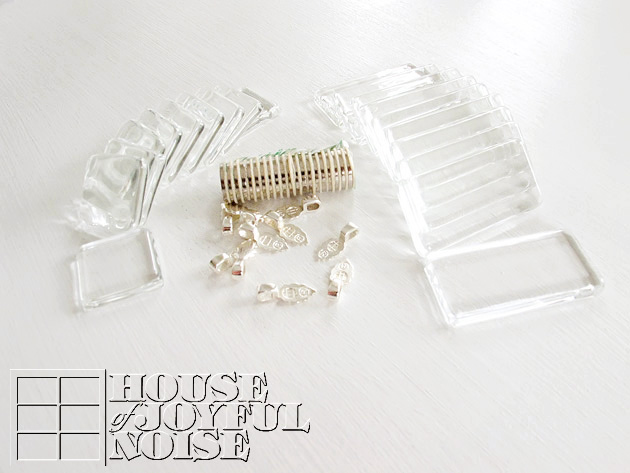
002_glass-tiles-bails-magnets Here is a closer look, at the beautiful tiles, bails and magnets I started with. 

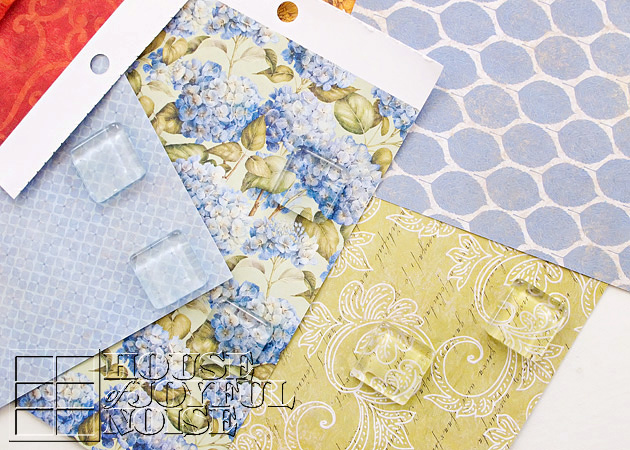
005_making-glass-magnets All of the tiles, both pendants and magnets, are made by adhering beautiful card stock paper behind the tile, which is then magnified through the glass in such a pretty way. 

So here’s a TIP to start:  Before applying any adhesive, I put each tile on the paper I’d be using, and moved it around and looked at the design coming through, so I could decide ahead of time, exactly where I wanted to place each tile. 

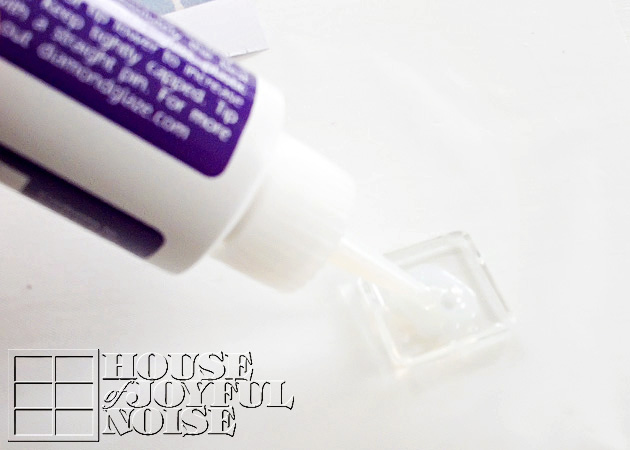
003 Once I decide that, I put a little Diamond Glaze on the center back (flat side) of a tile, and then spread it out with a little brush to the edges, pressing out any bubbles with my brush.  I’d give it a moment to get a little tacky and less wet, and then I’d place and press down onto the paper where I wanted it.

TIP:  Eventually I got tired of squeezing it out of the bottle, so I’d put a small puddle on a coated paper-plate, to work from with the brush. You can do that too, if you want to.

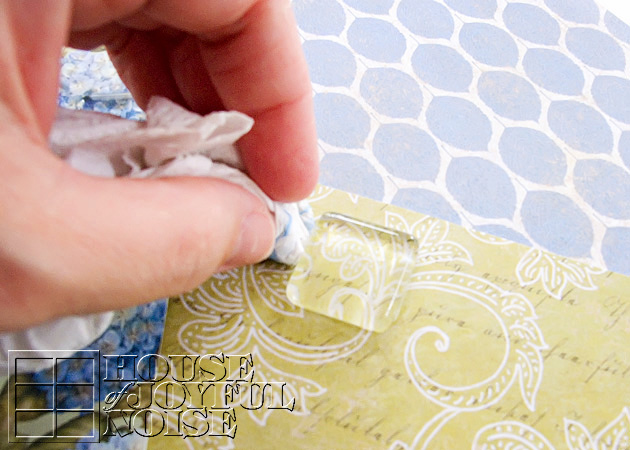
004_making-magnets TIP:  In pressing it down hard enough, to be sure there is no air bubbles, the adhesive smooshes out from underneath the sides of the tile little. You don’t want to leave it, because it hardens like glass!  And you’ll be trimming the excess paper off. So, I used little pieces of twisted paper towels, to clean/wipe the sides, every time.  If you leave it, you will not be able to trim the paper neatly.

Also, I often carefully picked up the paper with the tile on it, and rubbed the back down too, just to be sure it was smoothed out.  Any of the tiles may need to be pressed down repeatedly, as air bubbles tend to sneak in. So just keep checking them until they are drier.

One by one, get all of your tiles adhered to the paper.


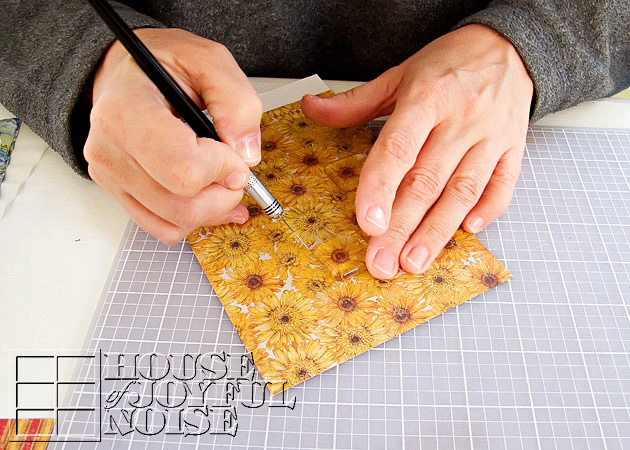
006_glass-tile-crafting Once they are all adhered and dried, it’s time to trim.

TIP:  To know if they are dry enough, simply touch the back-side of the tiles where the paper is, and if it is at all cool to the touch or damp feeling, leave them longer to dry.  I honestly do not have any time frames for you on drying time, because I made a LOT of tiles in a craft period spread over 2 days.

But once you know they are dry, trim the tiles out of the paper, very closely to the edge of the tiles. I always cut on my self-healing cutting mat. But you can use dense cardboard (not corrugated), if you need to.

Once all of the tiles are trimmed out, they look pretty done from the front!  You’ll see how beautiful they are already, and you’ll be inspired to make them wearable, or be able to place on a refrigerator.  So they need bails or magnets!

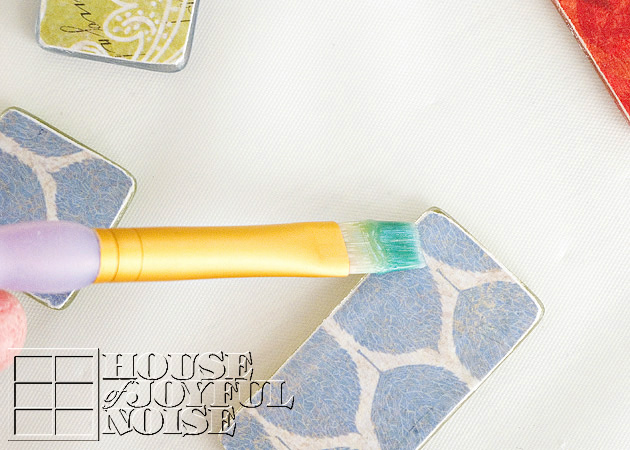
007_making-glass-pendant-necklaces Now I wanted to give the whole back-side of the tiles a coat of Diamond Glaze, as well, brushing just over the edges of the paper as well. The purpose of this is to protect the paper, seal the edges, and make the backs glass-like as well. 

TIP:  Whenever and where-ever you brush on this glaze, you want to use an adequate amount to let it settle to a glass-like surface. If you brush too thinly, just know it will leave a brush marks in those areas. Allow them to dry completely.

If you want to be sure they are thoroughly dry, leave them overnight before the next step.

 From there, I lightly sanded any rough edges of paper I felt, with fine sand paper,  just to make it feel smooth. I wiped off any fine dust from that.

008_making_designer-pendants Once all of the backs were dry, it was time to add the bails to the backs of the pendants.  Basically, I just added a dab of glaze straight from the bottle, onto the center back top of the pendants.

TIP: Be sure to look at the front design, to check that you won’t be adding your bail to the wrong end, leaving you with an upside down pendant! ; )   (I was proud of me for remembering to check that, before I made that mistake.)

009making-glass-tile-pendants Once it has tacked up just a bit, I pressed my bails on just like shown, and then cleaned up what smooshed out, with my brush.

TIP:  As you work throughout this whole process, you may want to clean your brush. The Diamond Glaze is washable, and so so is your brush!  Just wash with warm water (maybe a bit of dish soap if need be), rinse well, and dry.

010_making-magnets
For the magnets, add a small dollop of glaze to the center of the back of the magnets.   It will tack up a bit while you try to pry the magnets apart, and peel the adhesive backing off of one.  Then just press the sticky part down onto the center of the magnet.  Again, clean up any glaze that squished out, for a cleaner looking finished piece.

TIP: If you use too much glaze, the magnet will just slide off center. Just move it back in place. As the glaze tacks up, it’ll stay.  I can see a couple of mine above slid a little, and I missed it.

Another Tip: After all of the pieces were dried, I went back one more time, and added a bit of glaze around the magnets, and around the bails (and underneath the loop), then smoothing with the brush, just for a little more re-enforcement. Whether they really needed that or not, I don’t know.  But I just wanted to be sure the bail would not lift the paper if pressed on, or the magnets would not stay on the fridge and the tile be left in anyone’s hand without the magnet, when moving them!  So I took the time for that extra step.

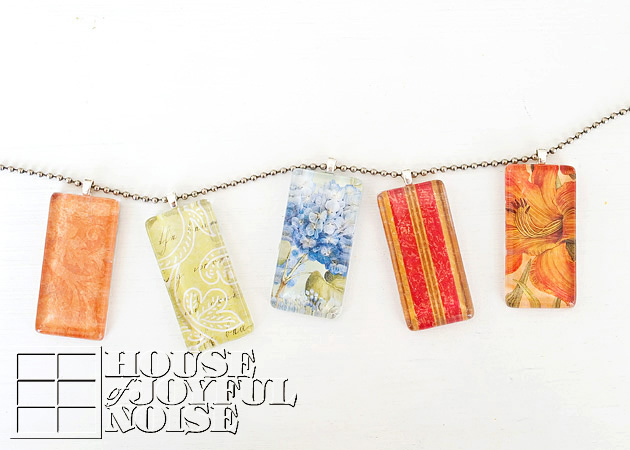
011_making-pendant-necklaces As I said before, they can be worn on a ball chain as a necklace. But they are so versatile for various outfit styles! Consider wearing them on box chains, suede string, leather cords, or a matching sheer or satin ribbon!

Closer peeks of pendants….

012_glass-tile-pendants

013_glass-tile-pendants

….and the magnets sets….

  014_glass-tile-magnets

015_glass-tile-magnets

016_glass-tile-magnets

017_glass-tile-pendant-necklaces-craft The chained pendants, lying on the table.

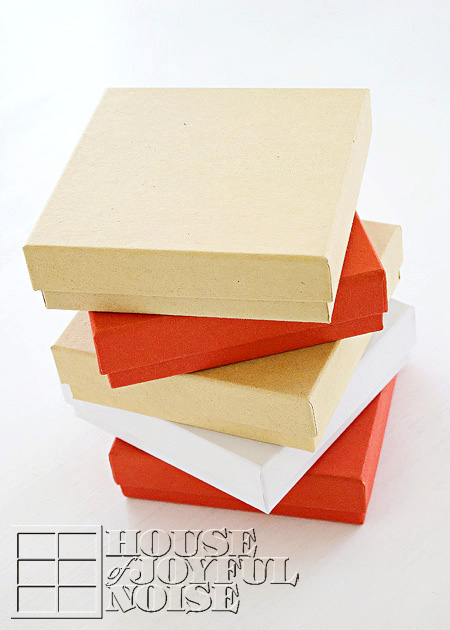
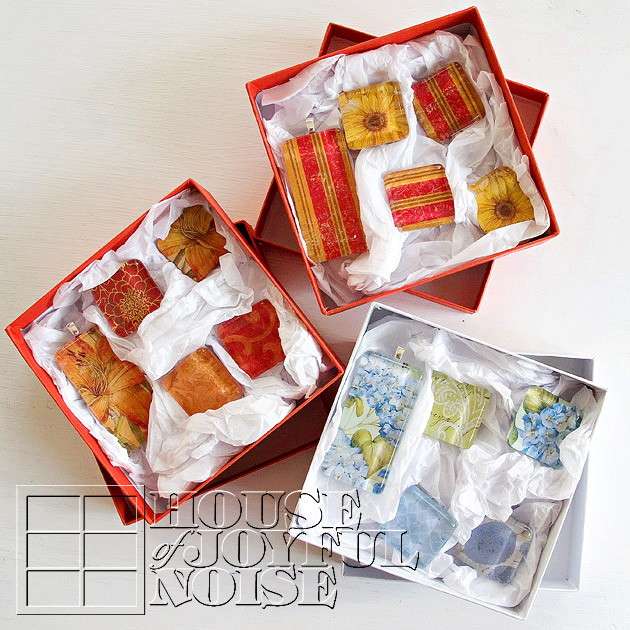
018_jewelry-boxes

I found the perfect boxes, to package these gifts in.


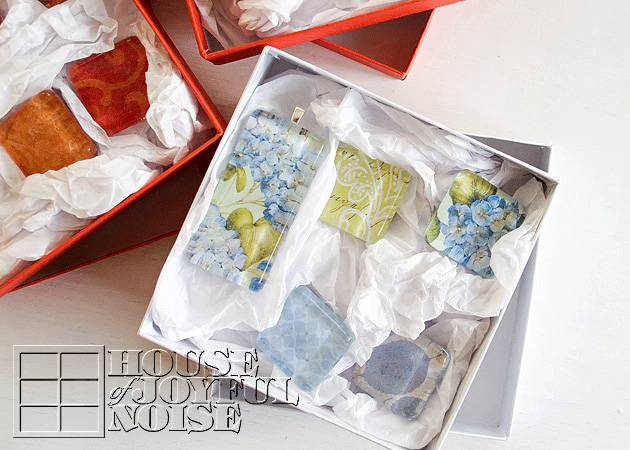
019_glass-tile-pendants-magnets I started, trying to fold the tissue paper.  But ummm….honestly, there needs to be a youtube filmage someday, on me and tissue paper, trying to work together.  I have NO = NONE = ZERO patience for it! It took me….seconds, to just crumble it up, and start stuffing it in the boxes!  But you know, in the end, the look kind of worked, with the slick glass pieces!

I was SO excited to finish packaging them up, and get them to the post office! 

020_glass-tile-magnets-pendants I was just thrilled, with how nice they all came out!  Granted, every piece was not absolutely perfect, but they were made with absolute love! That’s what anything homemade, is all about!

In closing, I’d like to give the the specifications and resources, if you’d like to try making these yourself. Because really, it’s quite easy, quite fun, and you’ll be amazed at what beautiful pieces you made all-by-yourself!  What a perfect gift for a special friend’s birthday, or as Mother’s Day or Christmas gifts! Someone, could be impressed with you. ; )

EXTRA TIPS:

CARD STOCK CHAT:  You do really need to use heavy designer card stock for these, as opposed to regular scrap booking paper. The layer of glaze would make regular weight paper very soggy and ripply, very fast. You’d have a hot mess on your hands, quickly.  The heavier stock holds up to the glaze much better. Also, I really loved using the 2 sided designer card stock, because the coordinating papers made really nice coordinating mixed sets of magnets! I had fun putting them together. The brand I used of the card stock were pads by K&Company.

MAGNETS: I got the 1/2″, ‘3 pounds of force’ Neodymium magnets for strength. Of course, I had no idea what that meant. I can tell you, they have some crazy force!!  I had a few comical happenings!  At times, they just kept pushing away from each other. Or, they would just pulling each other and piling up, with no sense of control! Chaos, I tell you! So maybe I got too strong? But it’s better than the frustration of weak magnets!

GLASS TILES:  I got/used 7/8″ Square Pure White Glass Hand-Cut Tiles, and 1-7/8″ x  7/8″ Rectangle Pure White Glass Handcut Tiles

BAILS: Sterling Silver, Standard Small. (There are various styles.)

DIAMOND GLAZE: 2 Oz. Bottle.  – This stuff can be used as a glaze, and also as an adhesive. As you know, I used it for both in this project!  It dries beautifully clear, and glass-hard! So it can also be used dimensionally!  For example, as raised glass dots on a piece, or to add pop to any design!  I can’t wait to work with it some more.

SUPPLY SOURCE:  Well, the card stock pad I got at Michael’s Arts & Crafts.  But everything else….the tiles, bails, magnets and Diamond Glaze, I got on Etsy!  I would start by searching look for a vendor who sells glass tiles, and in particular, search for ‘pure white glass’ tiles. They seem to be superior in quality, in my experience. I did have a specific vendor I could recommend, from whom I bought my supplies from, but she seems to be out of business now.

* That’s a wrap to this project!  I hope you loved what you saw, and find yourself inspired! You can do this!  Please feel free to ask any questions you may have in the comments and I’ll do my best to answer them for you, or just leave some love, if you’d like.  Thanks for coming by!

 Love it?  PIN IT!!

Save

Save

Save

Save

Save

Save

Save

Save

Save

Save

Filed Under: Crafts & Creations, DIY (Do-It-Yourself) Project, Holiday Crafts, Homemade/Handmade Gift Ideas, Tutorial Tagged With: craft-tutorials, crafts, Diamond-Glaze, glass-pendant-tutorial, glass-tile-crafts, glass-tile-magnets, glass-tile-pendants, handmade-necklaces, homemade-gifts, homemade-jewelry, jewelry-how-to, jewelry-tutorials

  • « Previous Page
  • 1
  • …
  • 26
  • 27
  • 28
  • 29
  • 30
  • …
  • 100
  • Next Page »

We are wicked happy to have you here! We hope you find much inspiration, help, humor and enjoyment here.


Archives


POPULAR POSTS

* * * * * *

SUBSCRIBE to House of Joyful Noise blog! Every new post, delivered right to your email box!


Privacy Policy

Amazon Affiliates

Never at any additional cost to you, we may earn a small commission for our endorsement, recommendation, testimonial, and/or link to any products from our website. Your purchase through our links helps support our family, while sharing with you the products we authentically use and recommend, for various ideas, and letting you know where you can purchase them. Thank you for your support!

[footer_backtotop]

Copyright © 2026 HouseOfJoyfulNoise.com · Genesis Framework by StudioPress