• HOME
  • {A}’s Chipmunk Training Archives

 Homepage

  • The Homestead
    • Home Projects
    • Home Improvement
    • Home Decor
      • Seasonal Home decor
        • FALL Home Decor
        • WINTER Home Decor
        • SPRING Crafts and Creations
        • SUMMER Crafts and Creations
    • Our Chickens
    • Gardening
    • Organization
    • Re-Purposing
    • Furniture Refinishing
    • Budget
  • Crafts & Creations
    • Seasonal Home decor
      • FALL Crafts and Creations
      • WINTER Crafts and Creations
      • SPRING Crafts and Creations
      • SUMMER Crafts and Creations
    • DIY (Do-It-Yourself) Project
    • Kids Arts and Crafts
    • Homemade/Handmade Gift Ideas
    • Holiday Crafts
    • Fan Pulls
    • Free Printable/Downloadable
    • Sewing Projects
    • Giveaways
    • Business Features
  • Recipes/FoodFun
    • Breakfast
    • Lunch
    • Main Dish
    • Sandwiches
    • Appetizers
    • Slow Cooker
    • On The Grill
    • Side Dishes
      • Soups
      • Salads
    • Baking
      • Breads, Rolls and Muffins
    • Snacks
    • Treats
    • Desserts
    • Drinks
  • Homeschooling
    • Elementary Homeschooling
      • Elementary Homeschooling READING
      • Elementary Homeschooling MATH
      • Elementary Homeschooling LANGUAGE ARTS
      • Elementary Homeschooling SCIENCE
      • Elementary Homeschooling HOME ECONOMICS
      • Kids Arts and Crafts
    • Middle School Homeschooling
      • Middle School Homeschooling SCIENCE
      • Middle School Homeschooling HOME ECONOMICS
    • Language Arts
    • Math
    • History / Social Studies
    • Geography
    • Foreign Language
    • Field Trips
    • Games
    • Nature Study
  • The Big Picture
    • Life In General
    • Celebrations
    • Faith
      • Into the Light; The Series
    • Giveaways
    • Reviews & Sponsors
  • Photography & Lettering
    • Photography
    • truck lettering
    • vehicle graphics
    • Newborns
    • Kids
    • Engagement
    • High School Senior Pictures
    • High School Senior Pictures Sneak Peeks

Strawberry Planting in Rain Gutters

May 22, 2014 By Laura 18 Comments

 We’ve have grown strawberries in our gardens going for five seasons now, and we have thoroughly enjoyed it!
While strawberry plants generally comes back and produce for 3-4 years before they are done, we managed to squeeze one more year out of ours. This year however, it was truly time to start over. And so, we decided to really change things up and start anew, by planting and growing our new strawberry plants in rain gutters. We’ll be sharing with you this fun gardening experiment and the progress of it all, with any of it’s failures or successes, as we go along here. We know we can always make improvements if need be, as we learn. Meanwhile, we enjoy the process so much. Isn’t that what it’s all about?
This is the first post on our strawberry plantings in rain gutters, and we’re starting with the construction and set up of it.


But before we dig into our new strawberry growing system, why don’t we briefly review our past strawberry growing years, of which we learned much and had much success with.  We’ve have many blog posts on our strawberries over the past years, but not everyone has been following us for that long. So allow me to mention the highlights, with links to the original posts where there is more info, since could be interesting or helpful information for someone.
If you’re just interested in getting right to the rain gutter method, just skip right down to that sub-headline.


Our Strawberry Growing History and Links to Those Past Posts

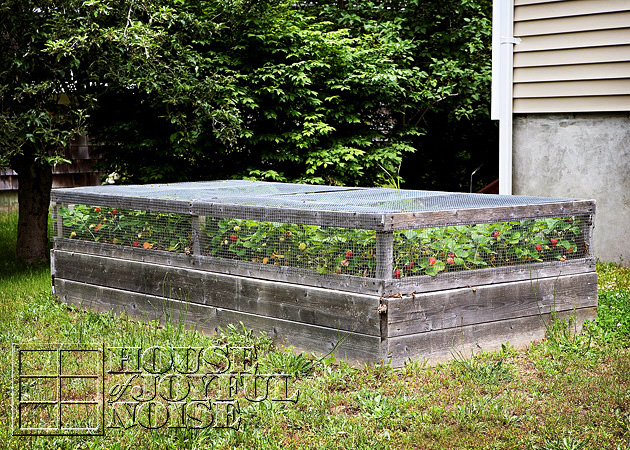
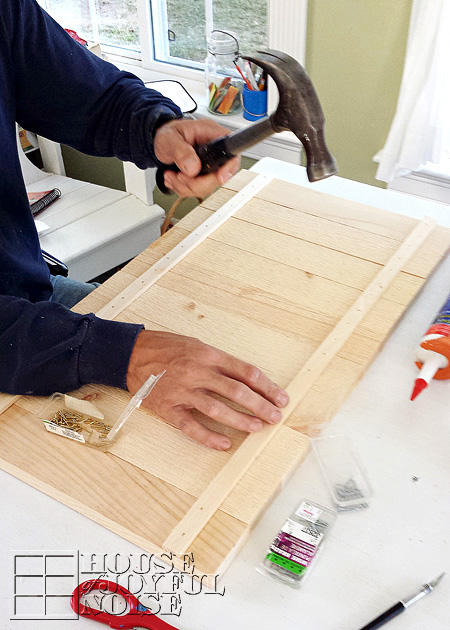
When we built our new strawberry bed in 2009, with new plantings in it, it wasn’t 24 hours before we realized squirrels and birds were going to be a problem!
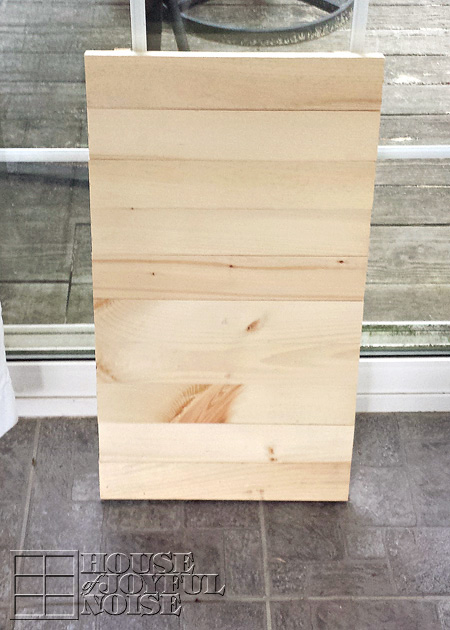
So that very first morning, Michael whipped us up a solution with his carpentry skills, that has served us quite well, protecting our strawberries from winged and furry creatures, every year since.
There was some real excitement over our first picked strawberry.

We shared many of our lessons learned while growing strawberries.
And we certainly enjoyed our delicious berries, having many-a-strawberry shortcake, learning to make and can jam, and other treats such as Strawberry and Chocolate Nachos, and this beautiful Berry Parfait.

All of those links above open in a new window, so feel free to bookmark or pin them on your interest boards for later.

Anyway, while we got a great crop of berries every year, our 4th year was probably the most abundant, and so we thought maybe we could get one more year out of them. And also, we knew it would be soon time to replace all of our garden beds, but we hoped to get one more year out of them as well. So we went for a fifth year, which was less productive, and confirmed to us that it was time to start over with some new baby starter plants.

Strawberry Planting in Rain Gutters

Which brings us to this season.
As I’ve mentioned, our garden beds were needing replacing.  Last season, we had some wood rot and termite problems insome of them, but we got through one more season with them, and they served their purpose and got us through one more year. But this past brutal winter really gave them the last kick in the pants, and they literally just started falling apart as spring broke.  That’s including our strawberry bed. But since it was time to start again with new strawberry plantings anyway, the timing was perfect to start everything all over from scratch.

So we got planning all of our new garden beds, and already have them built.  We’ll be sharing the rest with you in another upcoming post.
But for the strawberry growing, we decided to try using rain gutters!


I had seen this photo somewhere, and I was instantly intrigued.  I believe another Facebook Page shared it, and then I shared it to our Facebook Page.  Many of us got talking about it, and we trying to figure out the construction of it, how high they were, and how they were protected from birds and such, if at all.
All I knew was I really wanted to try something like it.

I showed Michael, and he liked the idea too. But he got drawing on paper (as he always does, if you’ve noticed with our projects over the years), and had his own tweeks.  While I always have ideas of my own, and we collaborate a lot, I trust him in the final decisions where the construction goes.

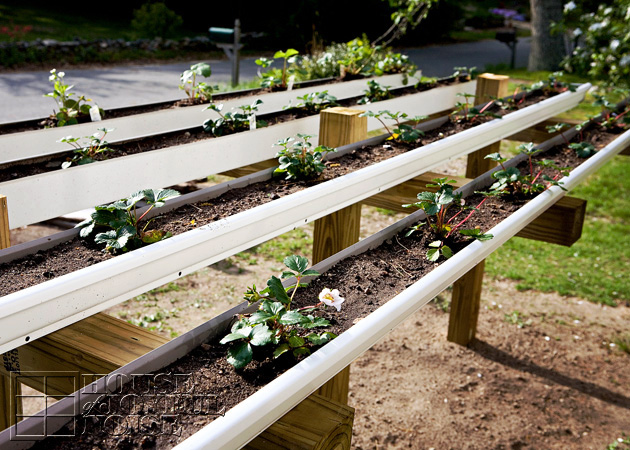
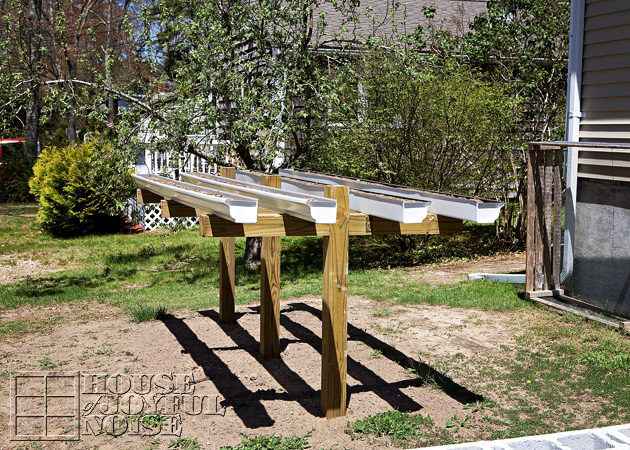
Here’s what he came up with.

Using 4×4′ pressure treated posts, he cut them into 6 ft. and 4 ft. pieces, constructing 3 T structures, all screwed together.
They support four 10 ft. sections of aluminum rain gutters, with end caps, which were bought separately.
They are screwed securely onto the horizontal posts.
I just imagined them higher, even though I knew it would be difficult to tend to the plants. But he thinks more height isn’t necessary. So we’ll see there if it is is better in the long run, to make them higher. But right now, I’m glad I can just stand there at them, and do my gardening thing.

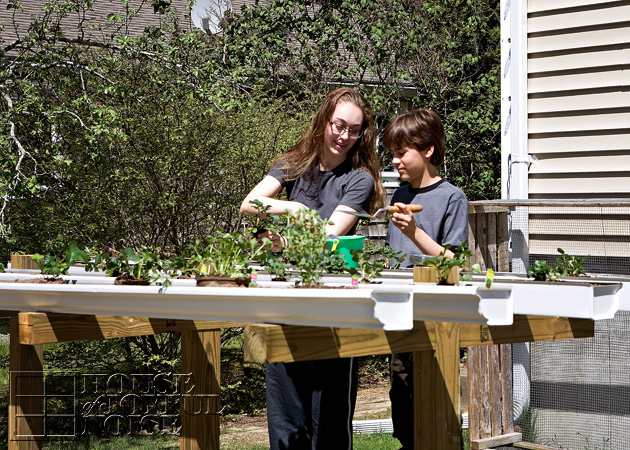
I planted a good many of our new plantings, but the sun was hit this day, and it was getting to me. So a couple of my helpers (also known as our kids) happily agreed to help finish getting them all done.

Although as I planted, I was wondering if the gutters were quite deep enough, having to plant right to the bottom, they seem to be doing all right!
As evidenced by home much we have seen them grow day to day, and by that little white bloom you see in the photo above. Which by the way, I cut off. Reason being, I really want to be sure the plants roots are well established, before the plant starts producing berries. So I usually remove the first flowers of every season, before I let them go ahead and produce berries.


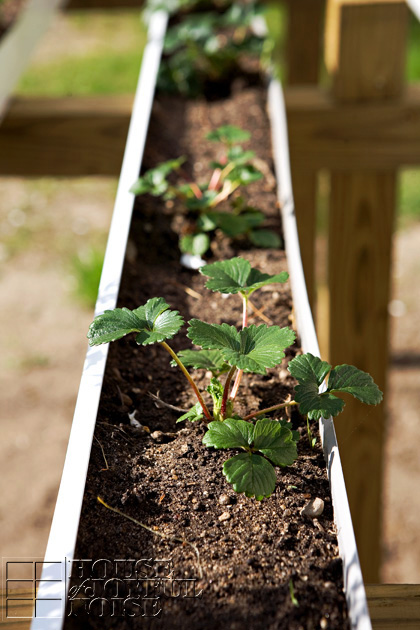
You can see they are thriving, and I am really excited to see how they grow, flow over, and produce.
The varieties we chose this year are compact plants. We’ll talk more about that in a minute.
–

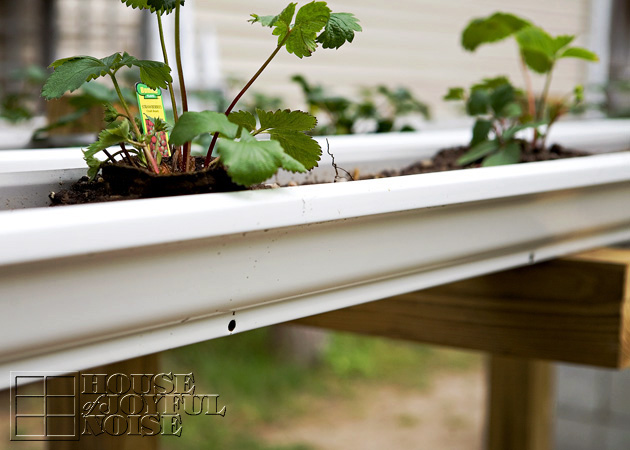
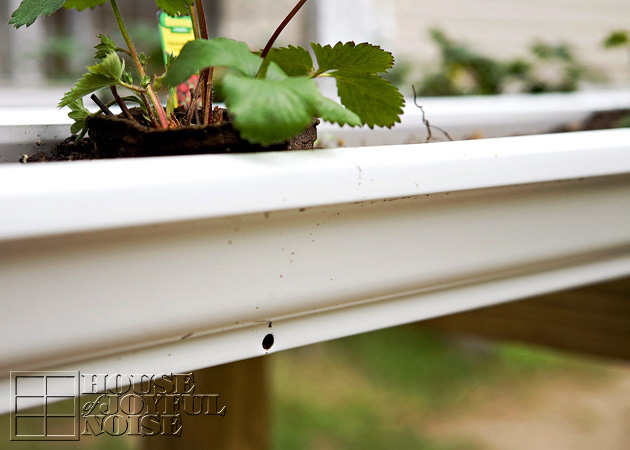
Michael drilled holes in the gutter towards the bottom, every 1-1/2′ or so, for proper drainage.

In the past in our strawberry bed, we grew berries of the June-bearing and Ever-bearing variety. In time we decided we just preferred the June-bearing, so we ripped out all of the Ever-bearing.

This time, considering we are growing them in rain gutters, we decided to try more compact plants.
These will produce few, if any, runners.  So I’m not sure quite what to expect, in terms of spreading or filling in the gutters.  But it’ll be fun to find out!
I did put all of the plants in with the upper part of the biodegradable cup intact, so it may be awhile before we really see them go anywhere.

None the less, I’ve done some research, and I expect we’ll be quite pleased with the varieties we chose.  Both are ever bearing varieties though, which should give us berries throughout the season. But I’m a tad nervous only because it was the ever-bearing we had decided we were less happy with in the beds.  But we’ll see how they do in the rain gutters!

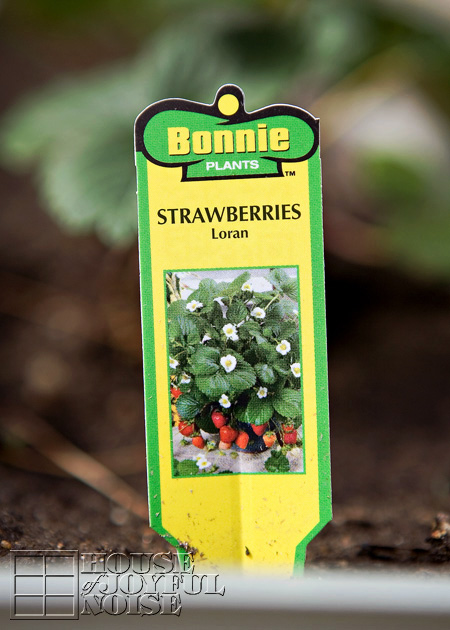
The Lorans produce the typical white bloom, and should give us rounder, plump, juicy berries.
–

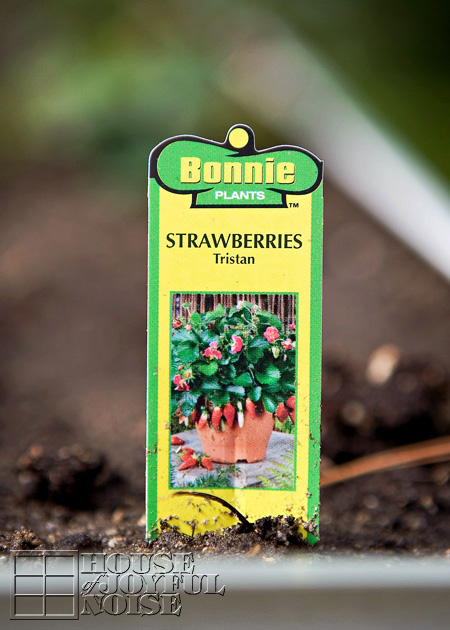
The Tristans are a little more unusual. They actually produce dark pink blooms, and the berries are an off shape as well. They are a bit elongated, and kind of pointy. But I’ve heard they too are delicious!
I can’t afford to have any more outlinks in this post, as I’m already afraid it’s going to go to the spam folders of our subscribers. But if you are interested, do Google for more info on these 2 strawberry varieties. BonniePlants(dot)com looked like a great resource. Then use the search tool there.

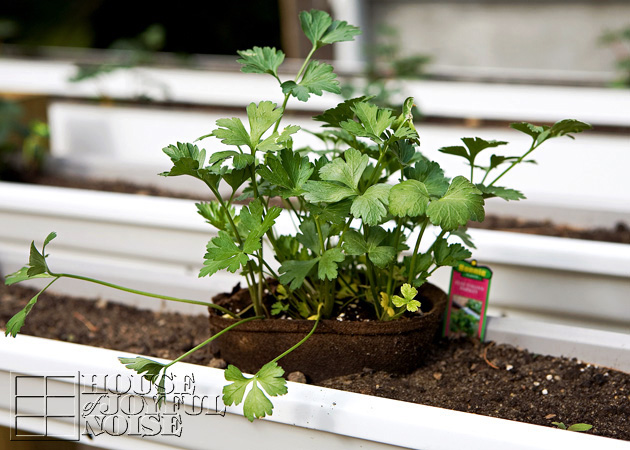
We had impulsively picked up a couple of herb plants too. Which is new territory for us.
Since we had a little room left in the gutters, and no other plans for the herb plants yet, we stuck them in the gutters too.
I’m not sure how well they will do there, but we can always dig them out and replant them elsewhere.

So we’ve got some Parsley……


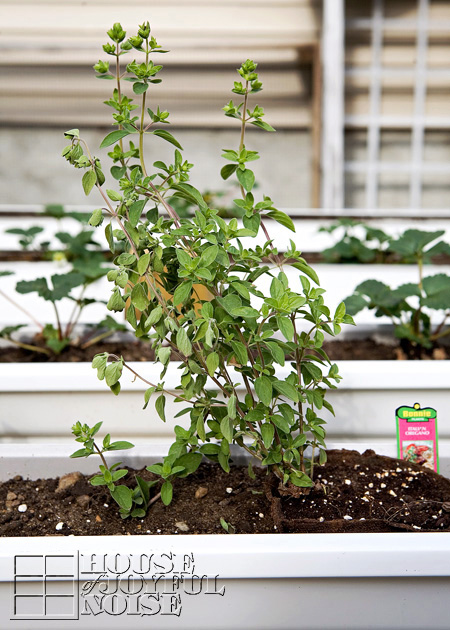
……as well as some Oregano. (Which will be delicious, on Michael’s pizza.)
–

So that’s concludes where we are at with our new experiment, of growing strawberry plants in rain gutters.
BUT, it’s not quite done!
As soon as we start letting the plants produce berries, we’ll have the next step to contend with:

UP NEXT on this topic:  Protecting them from birds, squirrels, and the like.
We do have a plan for that of course!  And we’re ready to go!
Be sure you are following us so you don’t miss that, the reveal of our other new garden beds, or the building of our chicken coop!
(SO excited to finally be getting chickens!)
Thanks for your visits!  Share your thoughts  or questions with us, if you’ve got some!  We always try to respond.

UPDATE:
Click HERE to see how these strawberry plants in rain gutters are looking one year later.


Save

Filed Under: Gardening, The Homestead Tagged With: garden-gutters, garden-ideas, Gardening, loran-strawberries, rain-gutter-strawberry-plants, strawberries, strawberry-planting-ideas, strawberry-plating-in-rain-gutters, tristan-strawberries

A Rustic Christmas Cards Display Idea

December 3, 2013 By Laura 1 Comment

 When the Christmas season arrives every year, and the cards start coming in the mail, what do you do with them?  Do you just put them in a pile and let them stack up? Or do you like to display them somehow, for all to see?  If you display them, how do you manage that? I bet you all have had some pretty creative ideas yourselves.

We’ve had a few solution ideas of our own over the years, for the Christmas cards we gratefully get in the mail. Way back, we just put them in a beautiful Christmas basket. That was kind of sad though, as we know many are really excited about their cards every year, and we’d hate for them to be hidden. Especially the ones with photos of kids and families, or the special notes.
We’ve also just tied a pretty ribbon across a beam in our main living area, and let them hang on that.
Getting more creative still, for a few years, we stood a white folding accordion door in the corner of the room, and the louvers (slats) worked beautifully for hanging cards. Of course, like with the string idea, the vertical cards hung horizontally. It was still a nice way to display everyone’s cards though. 

Last year though, I came up with a new idea, that I think we’ll stick with for some time. It’s very homemade and rustic, and I just love it.
Take a look . . . .


What do you think? 
It was actually just a long scrap of plywood we had on hand. (Repurposing at it’s best!).  
This one happens to be about 11″x 76″.   You can use any similar long board though.  You just want to be sure it is thin enough to be able to clamp clothespins on.


We also used some rough rope, in which I intertwined some thin satin rope around, just to add some pretty to the rough look.
The roping is mostly for decorative purposes, though. It will hold some horizontal cards well enough, but if it slides, it knocks other down. And that’s just frustrating.
I like the look of the clothespins, and it helps secure the cards of all sizes.


So this scrap board was painted white and then rough sanded. I didn’t put a lot of effort into that wood-finishing part at all, because really….I was hopeful that if enough people thought of us whilst filling out their Christmas cards, most of that board would be covered, anyway.  ๐Ÿ˜‰
The scrap blocks of wood (you see) on the back, at the top and bottom of the board, not only add stability to the board for it to sit well on the floor and lean against the wall.  There is a notch cut at the top and bottom of the board, for the rope to wrap around to the other side inset, and then there is hole through the block for the rope to go though and be secured to the other side. It sounds complicated, but it really is simple in design.  Sorry I forgot to get a pic of the back side for you. If you are confused and  have a question on this, go ahead and ask in the comments.


Completely optional tidbit: 
I soaked my clothespins in tea water overnight, to try and antique them some. It worked; but honestly, it’s too subtle for the effort in my opinion. Maybe I did it wrong?
I think at some point I will take these clothespins, and revert to what always works beautifully for me; a touch of my Annie Sloane Dark Wax. Love-that-stuff!

To really dress up the top, I added these large rusted-looking jingle bells, hung with twine. I love jingle bells! 

CONSIDER THIS: 
You could use this whole idea, and change the whole style of it depending on how you finish it and what you use as detail elements!
For example: paint a smooth new board with a clean white paint, omit the sanding, putty and paint your screw holes, and use a wide frilly ribbon down the board, with a big fancy bow at the top!
 But the rustic, farmhouse look suits us just fine.
–


Yes, just another crazy idea, from our house to yours! 
If you love it, bookmark it! You could try the idea yourself this year or some other coming year. Or simply share it with your friends who follow you on your social networks.  They’ll love you for it.
  And hey, while your here, say hello, and share your thoughts.

Hope your homes are feeling a little bit of your Christmas love!
These are the little things that make any house, a home, for the ones you love.
~Laura / The Richard Family

Save

Save

Filed Under: Crafts & Creations, DIY (Do-It-Yourself) Project, Holiday Crafts, Home Decor, Organization, Re-Purposing, The Homestead Tagged With: Christmas-card-display, Christmas-cards-display-solution, Christmas-cards-organization, Christmas-decor-ideas, Christmas-DIY, Christmas-organization-tips, how-to-display-your-Christmas-cards

Reversible Fall to Thanksgiving Home Decor Blocks Craft Tutorial

November 18, 2013 By Laura 8 Comments

 I’ve got one last Fall-themed project to share with you this season, before I move on.
You may remember I shared these happy Fall blocks in this post, in which I was giving you a little close-up tour of my Fall mantels. I mentioned that I had made these blocks, that they were more versatile than they appeared, and that I would share why when I got to that project post.

Well this is that post!

Here are the blocks already shown to you.   They were created to look well worn, long loved, and a bit old.
Just how I like everything.  ๐Ÿ™‚

And shown here, are the blocks backsides . . . .
I made the block to transition from every day Fall, to a Thanksgiving-themed message for those weeks in November.
What do you think?  Nice surprise? Good idea?  I was thinking so!

They are really simple to make.  I just found making these blocks fun and relaxing.
I tend to get a little Zen, working in my studio anyway.
So if you think you’d like to make some, sometime, I’m going to show you just how I did it, right now.
–

I started out with 10 blocks, just like these.
Well, actually, I started out with 8 blocks just like these. Then 9. And finally 10. But that is a frustrating story I’ll tell you about later on.   But the project took 10 blocks, anyway.
These simple wooden blocks come in various sizes; these are the 2″ blocks.   I got them at A.C. Moore’s. They are not available at my local Michael’s, anyway.
They are smooth and finished-feeling on 4 sides, except for what I considered the tops and bottoms.
–

I chose my favorite Fall hues of acrylic paint, and painted them all. They did take two coats.
–


Next I had Michael cut two inch letters out of vinyl, and weeded out the letters.
–

After covering that sheet with transfer tape, I cut each letter block to size.
–

Peeling off the back, I then applied them well to a face of each block, one at a time with a squeegee, and pulled off the transfer .
It was important to make sure the rough surfaces were not used. The vinyl would work as a mask.
–

I had a pile of scraps that looked like I had been working really hard, so I photographed it, and left it for awhile. ๐Ÿ™‚
–


White acrylic paint and flat brush, ready to go.
–

All painted in.  I think it required two coats.
–

Before the second coat dried all of the way, I carefully peeled off the mask.
–
Now while painting them was rather enjoyable for me, these next steps are the part I really love to do….
But I didn’t really photograph those steps. :/  Sorry!   It’s easy enough to tell you about though.
I’m talking about sanding and aging the blocks.

To sand, I used 100 grit sand paper on a sanding block. I use the sanding block because it keeps my sanding surface flat and hard, for my uniform sanding.  Also, it’s a lot easier on my fingers, which get torn up very easily.  Where do I sand?  I like to hit the surface, to wear that a little. But I really go at the edges and corners, where they would normally wear the most.
But after sanding, we are left with clean, bare new wood. Not good, for antique blocks. Right?

So next I rub around some dark wax, with an old t-shirt rag.  I-love-this-stuff! It really does age the look of the paint, and just dirty things up just right.
You rub it on and essentially, rub it back off to. While working not as hard to get it off, where you want to leave more.
Make sense?  The stuff is messy, as you might guess from that rag up there. And it stinks to high Heaven. But, somehow I don’t mind it much, working with it. It’s like the smell of creativity, at work!

Here’s a closer look at the effects of my sanding and waxing . . . .

And now, my blocks all on display . . . .

Ta-DAAA!!!  I was so happy not to have to put my blocks away, to make room for some Thanksgiving decor.
I’m already pondering making more block sets for other holidays and seasons. In fact, actually, I already have a set for spring (in a very different finishing style and size) I made last year and never shared. I plan to come spring though.
But, back to the here and now.

–

Because it’s the details I worked so hard for (in a fun/playing sort of way), that make these blocks look like maybe one of our grandmothers passed them down to us, I couldn’t stop photographing them . . . .

Ok enough of that. Now, you can skip this little story-paragraph if you want, right down to after the next photo.

But I’d like to explain the story of the 10th block: 
For weeks, I only had 8, and then 9, blocks. Because that’s all there was at the store!  In fact the first trip, I bought none, because there wasn’t enough to spell what I wanted!  I needed 10 to do this project. I inquired though, and the lady assured me that if they were low, more was coming in the next day. So I returned the next day, and there were still only 8!!  So I figured…I need to buy those, so they be sure to get more! (Because supposedly, it’s all electronic.)

Next trip, the bin there was still empty. I was desperate!! So I plopped down on the floor and pulled out all of the other sized blocks onto the floor, hoping to find some 2″ers  in the wrong bin.
And I found ONE!!  ARRGGG!!  So I worked with the 9 I had. I got those all done, and had enough to make my HAPPY FALL.  But I’d need that last one to complete GIVE THANKS.
Finally, a new shipment of them came in, and I got my last block, which I did start to finish, all by itself, just in time. It was the “A” in THANKS.

What to do with the other side? . . . .

I made an exclamation point!  To use from then on, with my HAPPY FALL(!).  Because if you all know me, you know it’s worthy of an exclamation point.  I do love Fall, that much!

If you love what I’ve done here, believe me when I say, (if you have a vinyl cutter of any kind), you can do this!  And if not, other crafters will love you for sharing the idea!

So go ahead and PIN the image below on Pinterest, share on Facebook – whatever!!


That’s a wrap for projects for this season this year. ( I think. ๐Ÿ˜‰  )   Time to start thinking about Christmas!
Thanks for making my day, and coming by! 
Hope you take a moment to share your thoughts, and say hello!
~Laura


Save

Save

Filed Under: Crafts & Creations, DIY (Do-It-Yourself) Project, FALL Crafts and Creations, FALL Home Decor, Holiday Crafts, Home Decor, Mantel Decorating (Ideas), Seasonal Crafts and Creations, Seasonal Home decor, The Homestead, Tutorial Tagged With: aging-painted-wood, antiquing-painted-wood, craft-tutorial, crafts, fall-crafts. fall-home-decor, fall-decor, finishing-wooden-blocks, making-wood-pieces-look-old-worn, sanding-painted-wood, thanksgiving-decor, using-dark-wax-on-wood, wooden-block-crafts, wooden-blocks-diy, woooden-decor-blocks

A Custom Fall Decor Sign

November 3, 2013 By Laura 6 Comments

The details of the season of Fall inspires me so much!
This time, it was to make a custom fall decor sign for our home.


–

I was going through some scrapbooking supplies recently, when I came across a handy little quote book.  Naturally I took the opportunity to take a break from the big task at hand, to read through it, because I was sitting in the middle of an overwhelming mess.  One of the quotes I came upon expressed some of the many little things I so love about the season of Fall, and I was immediately inspired to use that quote as a custom sign for my home decor. The quote read:

Scarecrows, corn rows, pumpkins on the vine.
Leaves curl, wind swirls, Fall is right on time.

There was no credit to the quote, so I did an internet search.  I found the quote has been widely utilized, which tells me I’m not the only one this beautiful little phrase speaks to. I had just never heard of it before.  Still, I found no credit, or else I would feel compelled to give credit where credit is due! (It’s only right to, Folks.)  Whoever you are though, thanks for such a lovely expression of the picturesque moments of Fall, and for the inspiration!

Here is a look at the finished sign, and then I thought I would share the makings of it with you today.


My mental vision of the sign was instant, really. There was no brainstorming session, although I did sketch out on paper the structure of the sign I was asking Michael, my husband, to build. Could I do these things myself? Yes, but why would a girl, when a girl doesn’t have to?  It would take me so much longer, and it probably wouldn’t come out as perfectly. Michael is happy to whip up these things for me in astonishing time, when I ask, and I say that with much appreciation.


The 14 x 25″ sign consists of 10 2.5 x 14″ slats of wood, secured together on the back as seen above, with 2 little strips of pine.
–


Finish build, and ready to stain.

I chose a dark stain.
(Minwax brand; Provincial)

The lettering was laid out in design to have a line of text on each slat of the sign, with a spare slat at the top and bottom, for any artwork.
The lettering was cut out and applied in vinyl.

My vision also involved some hand-painted artwork on the sign.  Oh, these grand ideas are always pulled off so very simply in our minds; aren’t they?  ๐Ÿ˜‰
I foresaw pumpkin vines climbing all the way up the side of the sign, and many leaves, swirling everywhere.
But my physical execution of painting these things, proved to be a bit more challenging than I managed so beautifully, mentally.

While, after much effort, I don’t think my pumpkins came out too bad in the end, my vines didn’t climb quite as high and wild, and I acquired far fewer leaves swirling about, than I had hoped as well.  Still, I am happy with the simplicity of the final outcome.

I’m also encouraged, because I realized when I was all finished with the painting project, that I really worked with a difficult medium.  They were acrylic paint tubes I had around and found in a baggie, but really poor and cheap quality.  They were very soft and clumpy, which really made it challenging to paint smoothly, and the paint application itself did not have any longevity for longer strokes.  Having painted with my more high quality acrylic paints on another project some days later, I really saw and experienced the difference, and I won’t make that mistake again.  I look forward to trying my hand at some more hand-painted work soon, with more cooperative paint, and I suspect I’ll have a more enjoyable time in the midst of it, with more pleasing results.

Nonetheless, I do love my sign, and believe I will include it as part of our Fall decor for many years to come.

If you saw the tour of our Fall decor mantels post, you may have noticed the sign then. It was one of four handmade items included on the mantels.
Did you guess any of the others?
I hope this inspires you to try making some simple signs yourself, or purchasing some to include in your own home decor.
~Laura

* * * * * *

Please come follow me here and there:

Save

Save

Save

Save

Filed Under: Crafts & Creations, DIY (Do-It-Yourself) Project, FALL Crafts and Creations, FALL Home Decor, Home Decor, Mantel Decorating (Ideas), Seasonal Crafts and Creations, Seasonal Home decor, Signs, The Homestead Tagged With: fall-crafts, fall-decor, Fall-decor-sign, fall-home-decor, Fall-signs, farmhouse-style-decor, handmade-signs, rustic-fall-decor, sign-home-decor, sign-making, signs

Our Fall Mantels 2013 | Home Decor Ideas

October 29, 2013 By Laura 4 Comments

Today, I wanted to share with you our mantels, decorated for Fall!  Alright, so I realize Fall is a month in here, and many are maybe so over it. But you know….there is two months more of the Fall season to go, you know! (Can you even believe it is the Fall season until December 20th?)   Yes, in the bloggers’/crafters’ world, I could be a little late with this. But that’s OK! I figure, you can pin it for some ideas on Pinterest for next year!  Or find a little inspiration in it for your Thanksgiving mantels.  Regardless, I am really enjoying the mantels I put together for our home decor and for my family, and I hope you enjoy seeing them as well.

By the way, I actually did ‘Back-to-School’ mantels, you never got to see. YET.  That’s a season shorter lived than Fall!  BUT….take heart, I did take photos to share with you next year, in a timely manner, that would allow time to be inspired.  But let’s get back to our mantels decorate for Fall here, shall well?

Here’s an overview of our Fall double mantels.

Can’t tell you how much I love having double-mantels.
–


A closer look at the first mantel….

Now for some details . . . . . . (I so love details . . . .) . . . .
By the way, I made four of the objects on this mantel. I’ll discuss a little about them along the way here. Pay attention if you care to. ๐Ÿ˜‰
A simple basket of apples.  Which wasn’t quite as simple as you think.  You see, my Fall mantels have been done for some time, except for one project I was working on. So while I wanted this basket of apples to be part of my decor, I also wasn’t going to make it off limits for my kids to eat. Because….they just seem to always be hungry, always looking for food, and always eating. So I told them, “Hey, go ahead and grab an apple off the mantel whenever you want. I don’t want them on the mantel going bad.”  Well, I think I had to buy more apples and resupply this basket four times already. And the cycle will continue until, well, I guess December!


This sign; I did make it.  I’ll do a separate short and simple post about it, such as what inspired it and how I made it, at some point soon. 
I can tell you now, that I love it.  It’s not quite as elaborately simple as I had intended….more simply simple in the end….but I love it nonetheless.
–
  I also made this set of greeting blocks, which were so fun to make!  And…..there is much more than meets the eyes with these!  I can’t wait to show you how versatile they are!  I took photos along the way, and will have a whole tutorial for you on this project as well.

I did not grow the pumpkin, because, well, if you follow me on our Facebook Page (please come ‘LIKE’ us if you’re on Facebook!) you may know that our pumpkin patch bit the dust hard and early this year!
(Vine borers…..I despise them oh so much!)
BUT, I did indeed make the candle a bit behind the pumpkin, with real leaves embedded. I made two, and gave one to my sister.
You can find the post with directions about how I made them HERE.

This rustic Autumn wreath is the fourth homemade item I made last year, as of the date of this post  Simple, simple, simple. It’s more….assembled, than homemade.
You can see just how I did that, what I used, and from where, in this post on this wreath HERE.

And that concludes the details of the first mantel.
–

On to the second mantel….

 for which I made nothing for, with my own hands. But I can share some ‘where to get’ info, for this year anyway.

The overview, of mantel #2.

I spotted this pumpkin, adored it, and purchased it at the Home Goods dept of TJ Maxx.
I think it has a really high cute-factor, and I love the rustic qualities of it.
–

Now, you all may know custom lettering is at the snap of my finger!  As my husband, Michael is a professional truck letterer / sign maker. But, I saw this wall adhesive at Michael’s Arts and Crafts, and fell right for it!  It not only expresses one of the many things I love about Fall, but I really loved the leaves accents.  So while I could have asked Michael to whip this up for me, why, when this was $1.99! And ready to go!

Here’s what’s even greater about it:  I had imagined I would stick it on one of our painted walls.  But when I got it home, I just though the best placement for it, was within the theme of our mantels. I wasn’t sure how well it would work on the bead board though, with all of the grooves.  So I was very pleased to discover it worked beautifully! And I was really impressed with how discreet the fact that it’s a one-piece adhesive, is. People come into our home and when they see it, they get right up close to try and figure out…how did we do that? LOL. It’s a cool thing, and a very nice accent for the walls behind mantels!  I always try to have some accents on the walls, behind the mantels, somewhere. Such as the wreath as well. It really just extend all of the beauty, and adds dimension with the various levels. It’s more pleasing to the eye.

Lastly, I simply placed a pot of warm orange colored mums in an old cranberry crate Michael brought me home one day. (Actually, he brought me home two.)  I love these crates, and I love that he found them in shed he was hired to clean out at the parish he was working for, and thought of me.

And that’s the end of our Fall mantels tour.

I may mix things up just a little for Thanksgiving, but I haven’t decided yet. I do know that I am enjoying my mantels as much as I dreamed, from putting them together through these various seasons, to the holidays we celebrate. I hope you’ve enjoyed seeing them as well, and have found any bits of inspiration in them, for any areas or even shelves in your own home. PIN away!

I plan to share the tutorials or details of some of the projects on mantel one, soon. So please share your thoughts, hopes, or questions of what you would like to know in those posts coming up, in our comments below!  You are automatically notified by email if I reply to you, or if more fitting, I will address those questions in the posts coming up.

 Hope you are relishing in all of the gifts of Fall, as much as we are!


Save

Save

Filed Under: FALL Home Decor, Home Decor, Mantel Decorating (Ideas), Photography, Seasonal Home decor, The Homestead Tagged With: autumn decor, decorating-with-theme, fall-decor, fall-decorated-mantels, fall-decorating, fall-mantel-decorating-ideas, home-decorating-mantels, mantel-decorating-ideas, mantel-decorating-tips, mantels

  • « Previous Page
  • 1
  • …
  • 7
  • 8
  • 9
  • 10
  • 11
  • …
  • 30
  • Next Page »

We are wicked happy to have you here! We hope you find much inspiration, help, humor and enjoyment here.


Archives


POPULAR POSTS

* * * * * *

SUBSCRIBE to House of Joyful Noise blog! Every new post, delivered right to your email box!


Privacy Policy

Amazon Affiliates

Never at any additional cost to you, we may earn a small commission for our endorsement, recommendation, testimonial, and/or link to any products from our website. Your purchase through our links helps support our family, while sharing with you the products we authentically use and recommend, for various ideas, and letting you know where you can purchase them. Thank you for your support!

[footer_backtotop]

Copyright © 2025 HouseOfJoyfulNoise.com ยท Genesis Framework by StudioPress