• HOME
  • {A}’s Chipmunk Training Archives

 Homepage

  • The Homestead
    • Home Projects
    • Home Improvement
    • Home Decor
      • Seasonal Home decor
        • FALL Home Decor
        • WINTER Home Decor
        • SPRING Crafts and Creations
        • SUMMER Crafts and Creations
    • Our Chickens
    • Gardening
    • Organization
    • Re-Purposing
    • Furniture Refinishing
    • Budget
  • Crafts & Creations
    • Seasonal Home decor
      • FALL Crafts and Creations
      • WINTER Crafts and Creations
      • SPRING Crafts and Creations
      • SUMMER Crafts and Creations
    • DIY (Do-It-Yourself) Project
    • Kids Arts and Crafts
    • Homemade/Handmade Gift Ideas
    • Holiday Crafts
    • Fan Pulls
    • Free Printable/Downloadable
    • Sewing Projects
    • Giveaways
    • Business Features
  • Recipes/FoodFun
    • Breakfast
    • Lunch
    • Main Dish
    • Sandwiches
    • Appetizers
    • Slow Cooker
    • On The Grill
    • Side Dishes
      • Soups
      • Salads
    • Baking
      • Breads, Rolls and Muffins
    • Snacks
    • Treats
    • Desserts
    • Drinks
  • Homeschooling
    • Elementary Homeschooling
      • Elementary Homeschooling READING
      • Elementary Homeschooling MATH
      • Elementary Homeschooling LANGUAGE ARTS
      • Elementary Homeschooling SCIENCE
      • Elementary Homeschooling HOME ECONOMICS
      • Kids Arts and Crafts
    • Middle School Homeschooling
      • Middle School Homeschooling SCIENCE
      • Middle School Homeschooling HOME ECONOMICS
    • Language Arts
    • Math
    • History / Social Studies
    • Geography
    • Foreign Language
    • Field Trips
    • Games
    • Nature Study
  • The Big Picture
    • Life In General
    • Celebrations
    • Faith
      • Into the Light; The Series
    • Giveaways
    • Reviews & Sponsors
  • Photography & Lettering
    • Photography
    • truck lettering
    • vehicle graphics
    • Newborns
    • Kids
    • Engagement
    • High School Senior Pictures
    • High School Senior Pictures Sneak Peeks

How to Blow Out Egg Yolks and String for Hanging | Decorative Eggs for Keeps.

March 6, 2013 By Laura 10 Comments


A couple of pre-Easter seasons back, we blew out and decorated eggs, and prepped some for hanging. I took lots of photos of the process of the way we did it, but never blogged it for you all.  It’s not all that hard. And the best part is, you don’t have to figure out what you’re having for dinner that night! You’ll have a bowl full of egg yolks, ready to scramble. : )  Breakfast for dinner! We do that sometimes around here.

Scroll down to read and see just how simple it is to blow out eggs, and string them for hanging after decorating them.
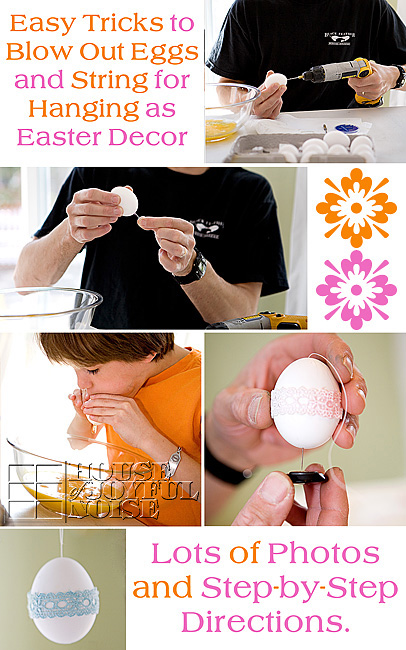
When you’re done reading through, the above collage is the perfect Pin It image for these tutorials.
(Hint, hint. ; )

So let’s pierce some eggs.
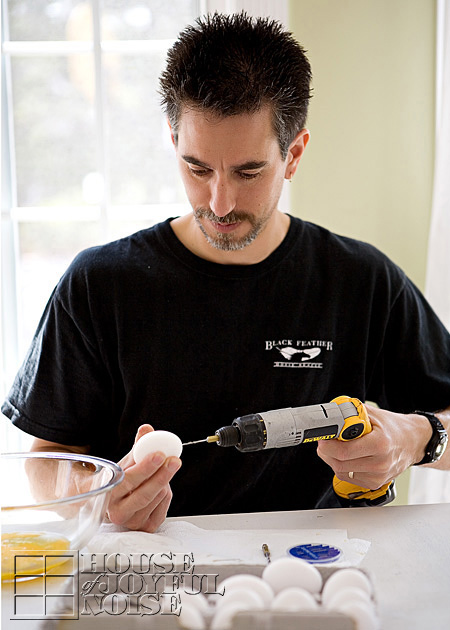

Using a drill makes putting the holes in the egg very easy.  Use a 1/16 drill bit for the top of the egg. This is the smaller hole.
On the bottom of the egg, make a slightly bigger hole, using the 1/8 drill bit.
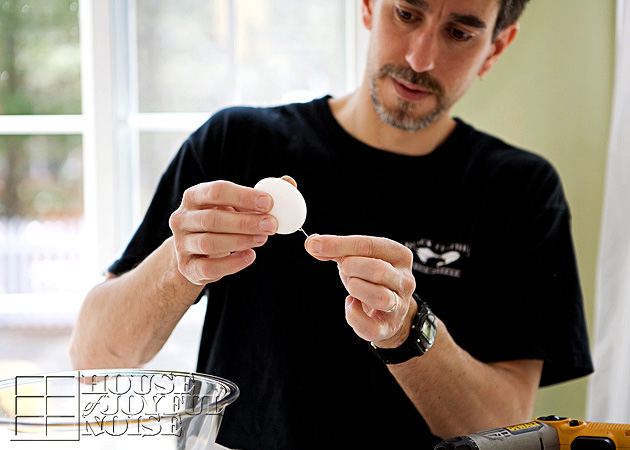
Next, use a long pin in the bottom/big hole, and move it around and jab in and out, to break up the yolk sac some.
Now it’s time to blow that yolk out.
We let the kids take turns blowing them out. They thought it would be so fun.  But I was worried their head would explode, seeing how red their faces were getting! I was like, “Oh my gosh! Breathe!” Ha ha ha.
It took them a little bit to learn how to direct the air from their blow, into the hole. You need to do that best you can.  You can also try a syringe, to push air through. Once the yolk starts coming out, it comes out pretty fluidly.


Plenty for our family of 6.

So after you have blown all of the eggs you want hallowed out, you’ll want to wash them off and out a bit. Run them under warm water, getting water inside the egg too, and shake them some, to wash the inside of the egg. Drain them as well as possible. You can then put them all on a plate in the microwave for microwave them for 10-15 seconds

Now you can decorate them.  It is a little tricky to dip-dye the hallowed eggs, because they tend to float now. So if you are dyeing them, you’ll need to keep it submerged with a spoon or whatever.  Of course, there is a host of other ways you can decorate eggs. And remember, since these are blown eggs, you’ll be able to keep them! So consider drawing on them, doing a little decoupage with dried flowers, using Washi tape, or embellishing them in a number of ways. Just use your imagining and have fun.

If you’d like to hang your hallowed eggs, here is how you can string them:
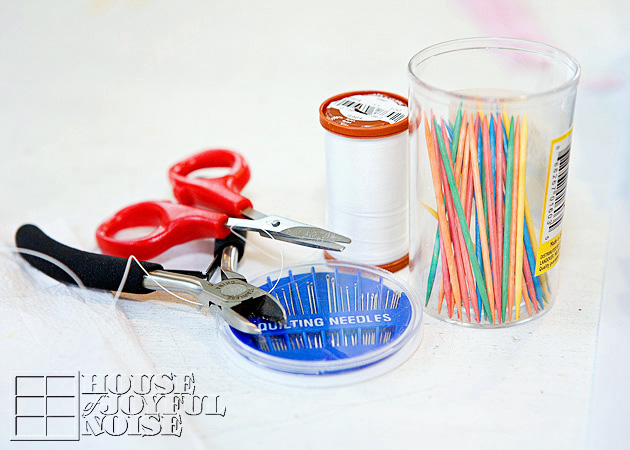
These are helpful supplies to string your eggs:

  • strong thread
  • eye needles
  • little scissors
  • toothpicks
  • small (wire) cutters. As you have probably caught on by now, my husband was the executor of this project this day, while I was the photographer.
    (Please excuse my husband’s hard-working hands in these detail shots. Love this man so much, for all he does for our family. And then he does fun things like this with us, too.)
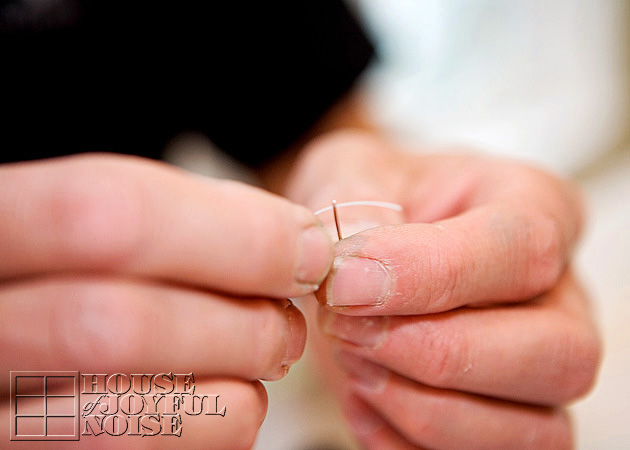
    Thread one of the larger sized needles, and tie it off as a single thread.
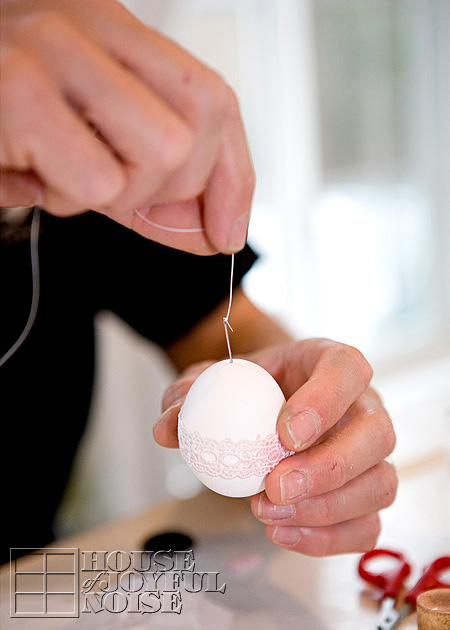
    Insert the threaded needle in through the top of the egg, all the way, but leave plenty excess out of the top for hanging later.
    Now it needs to come out the bottom, and as you can imagine, it would be challenging to make the needle do that.
    So here’s the trick . . . . .
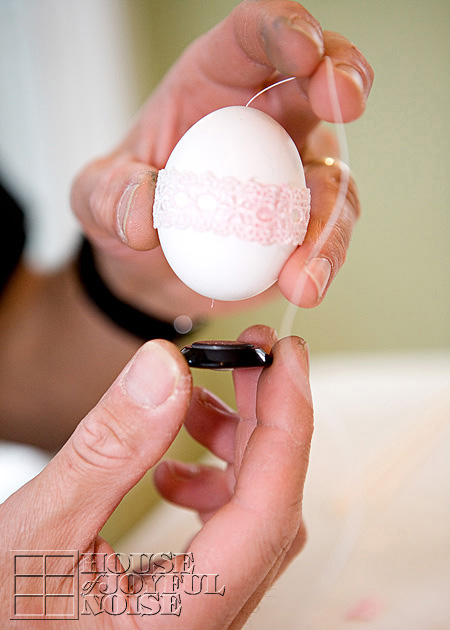
    Hover a magnet underneath the egg at the hole. 
    You can gently shake the egg as you do this, to try and get the tip of the pin to the hole as well.
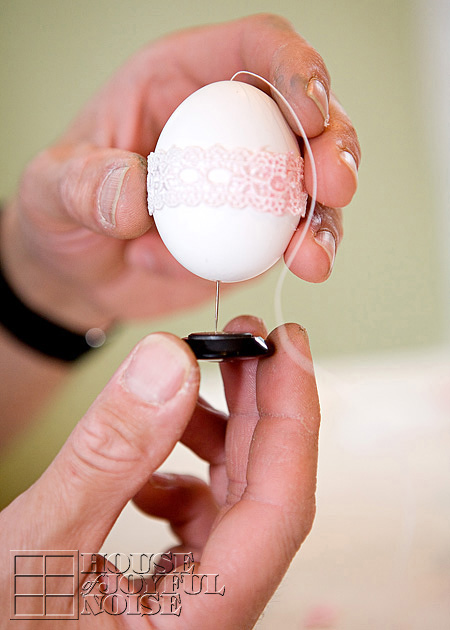
    The magnet will draw the the threaded needle down out of the hole.
    Cut the pin off the thread now. You won’t need it anymore for this egg.
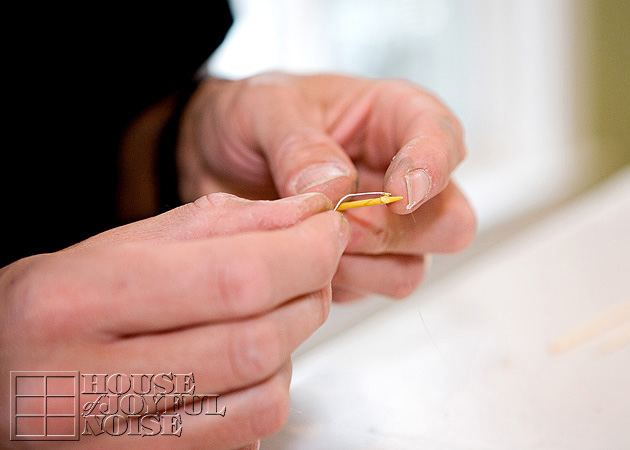
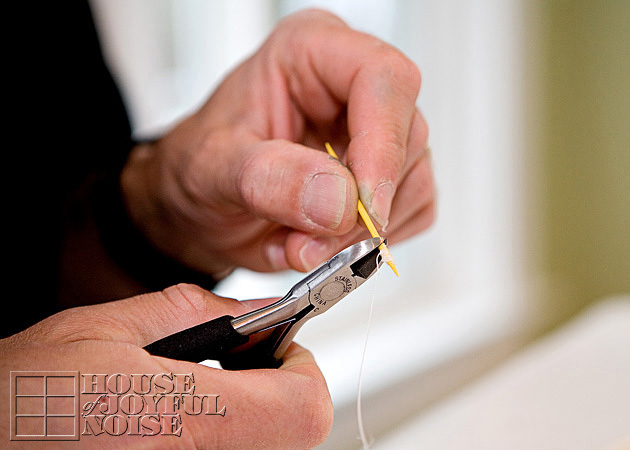
    On the same end of the thread that you cut the pin off, tie on a toothpick, and wrap the thread around it, as shown above.  You only need that little piece of toothpick where the thread is wrapped, (maybe 1/2″ or a little more) so you can cut the rest off using your cutters. So now you have this little piece of toothpick, tied onto the thread, that is coming out of the bottom of your egg.
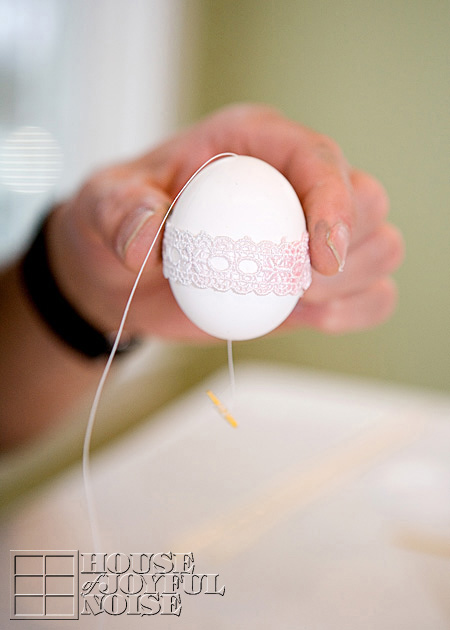
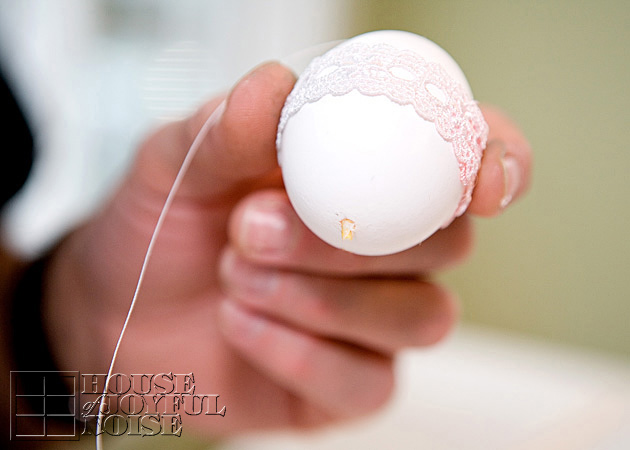
    Now carefully push the whole thing back up into the hole of the bottom of the egg.  Let it fall in all of the way.
    This will act like an anchor inside the egg, for the string coming out of the top of the egg, to hang it.
    So with the single thread coming out of the top, tie it in a loop, to hang your egg.

    That is the process you do with all of your eggs.  If you don’t wish to hang some or any of your eggs, of course you won’t need to string them.
    All of it is fairly quick, and you’ll have your beautiful decorated eggs for years to come.
    Here’s how we have used some of ours:
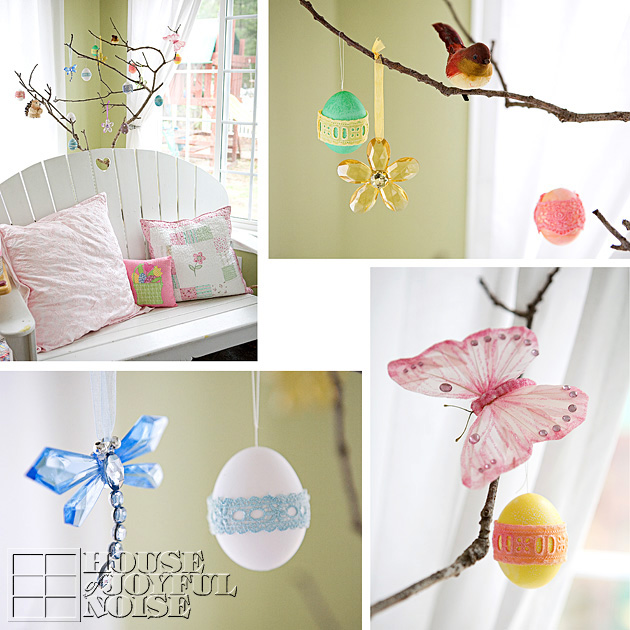

Hung on an Easter Tree.
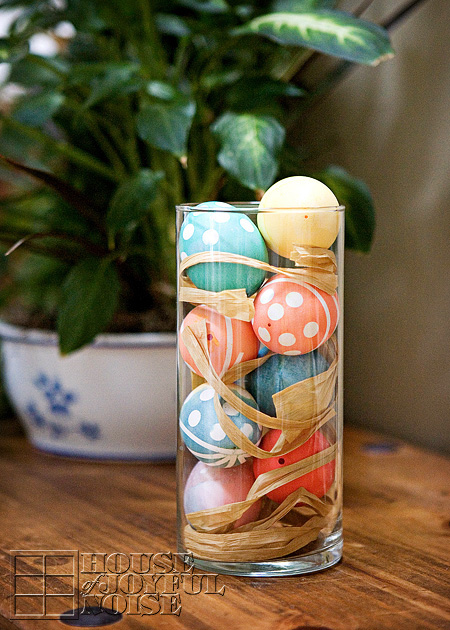

In a glass cylinder vase, with some pieces of Raffia paper.
What ways will you use yours?

I am considering making some more this year, decorating them in a new beautiful way, possibly personalizing some, and giving some of them as gifts!
We hope you found this tutorial helpful and learned some tricks that will help you blow some eggs of your own, and maybe string a few as well.
Thanks for coming by! May your Easter celebrations with those you love, be beautiful!

* * * * * *

Please come follow me here and there:

This tutorial was shared at Joyful Homemaking’s Think Tank Thursday Link Party #230!

Filed Under: Crafts & Creations, Holiday Crafts, Home Decor, Seasonal Crafts and Creations, Seasonal Home decor, SPRING Crafts and Creations, SPRING Home Decor, The Homestead, Tutorial Tagged With: crafts, decorating-with-blown-eggs, Easter decor, easter-crafts, Easter-home-decor, easter-tree, egg-blowing, hanging-blown-easter-eggs, how-to-blow-out-egg-yolks, how-to-string-blown-eggs

Thanksgiving Place Card Holder Turkey / Free Personalizable Place Cards Printable

November 17, 2012 By Laura 9 Comments

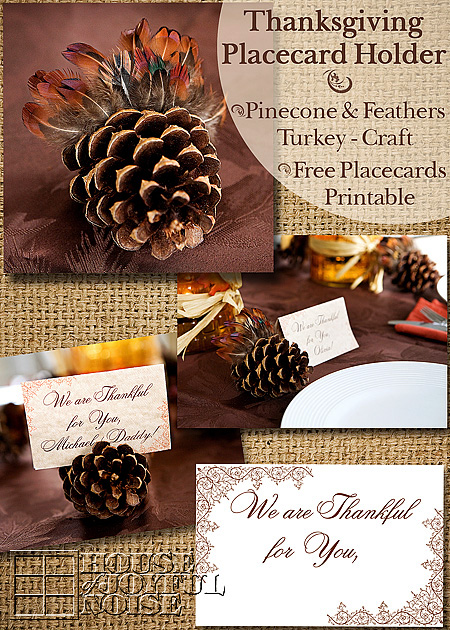
I’m so happy to offer you some free printable designs I created just for you:
Thanksgiving Place Cards

 as well as an adorable turkey craft to hold the cards, or as beautiful added detail to your table, if you’d like.

Thanksgiving is only days away.  If you are still scrambling to add a little ‘fancy’ detail to your Thanksgiving table setting, here’s an idea for you.  This idea is one I came up with for my own Thanksgiving table setting from last year that I never got a chance to share with you all.  Our guests loved them, and hopefully you will too.

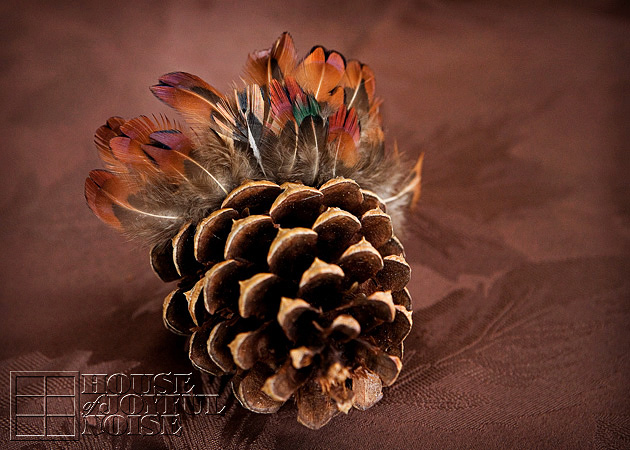
Turkey Place Card Holders

I think they are just simple, yet classy and beautiful looking.  They are easy to make, and require minimal supplies.  It’s so easy, there is no point in even showing you how to make them, when I can simply tell you in a few words:

I got a net bag of plain, natural pine cones at Michael’s Arts & Crafts.  They are for crafting and decor. I recommend not using the pinecones from any kind of potpourri, because they can be so strongly scented, and really clash with the otherwise enjoyable aromas of your Thanksgiving dinner.

The feathers were also bought at the same craft store, and come loose in a clear, flat cellophane bag.

The kids and I simply put some glue right between the last two rows of blades, on the backside of the second to last row. Then we simply stuck the feathers onto the backside there, starting in the middle and working our way outwards to the sides,being sure they were facing forward, and fanning nicely as we worked across. That was it!  These particular feathers are very fine, so it took just a little patience.  But I chose them because I loved the colors in them. We used toothpicks to be able to maneuver the feather into the position we wanted on the still wet glue, without using our fingers and getting glue all over them.

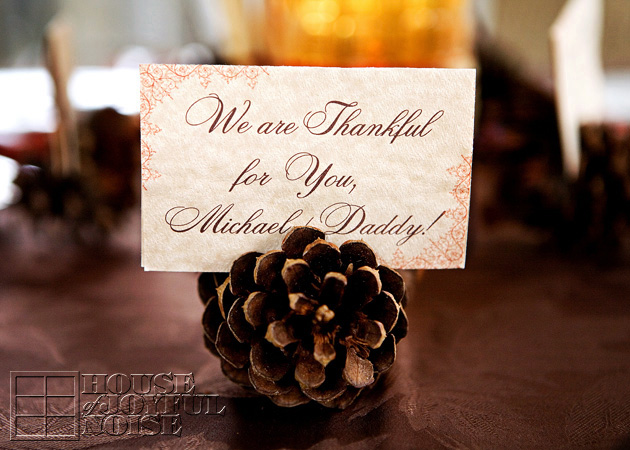
I made them to be place card holders, so I needed to make some of those too . . . . . .
. . . . . . and I’m going to share that customize-able printable with you too, so you can have your own personalized settings like this.
I printed them out on sheets of card stock that a variegated warm beige color to it, rather than bright white.

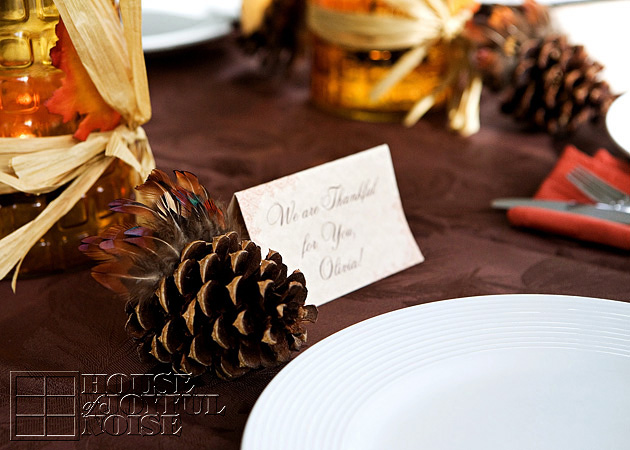
  Of course you also have the option of putting the place card on the table, beside the turkey, as seen in the photo above.

We also did something special on the inside of these place cards
; and so this is another idea or suggestion for you:
In light of Thanksgiving, and being most thankful for the blessing of those we love, the 6 of us in our family wrote a little something on the idea of each person’s card, expressing something about that person that we love or are thankful for.  It was an unexpected surprise for those joining us around the table this holiday; my father, brother, and a family friend. And I’ll tell you what; they all cried, finding more inside, and reading it!  The kids wrote the sweetest things.

If you would like to add a more whimsical flair to your turkeys like these, for just the kids or for everyone, you could add some googley eyes on white cardstock, and an orange waddle with felt, foam or construction paper.  I just happened to love the more subtle indication of a little turkey.
–

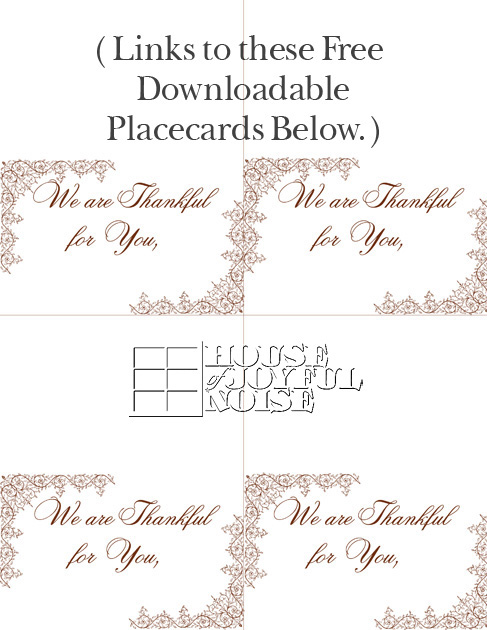
Free Thanksgiving Place Cards Printable

O.k., here is the customizable/personalizable place cards printable I promised you, but you must get it using one of the links to the downloadable file (you choose) below . . . . . .

PSD FILE:  This version is still in layers.  If you use Adobe Photoshop or any other program that works with PSD files, you can add in each persons name, to personalize each card. The color for the font is hexcode #6f3014, and the font style I used is Cecily.  I forget the font size, but if all I just mentioned didn’t go over your head. I’m sure you’ll figure it out. Ha ha.
-or-
JPG FILE:  This version is flattened, and ready to print as is. You can simply write in each person’s name with a marker.
Specs:  8.5 x 11 printable – Use same size card stock; I’m suggesting a light and warm or compatible color, perhaps that goes with your table setting.

And now for a little Giddy-Diddy:

If you love this idea . . . . .
Just SHARE it however you do!
But most of all please know this year . . . .
We’ll be giving THANKS for YOU!

* * * * * *

Please come follow me here and there:


Filed Under: Crafts & Creations, FALL Crafts and Creations, FALL Home Decor, Free Printable/Downloadable, Holiday Crafts, Home Decor, Kids Arts and Crafts, Seasonal Crafts and Creations, Seasonal Home decor, The Homestead Tagged With: crafts, free-printables, holiday-crafts, November-crafts, pinecone-crafts, place-card-holder-idea, printable-Thanksgiving-place-card-holders, Thanksgiving, Thanksgiving-crafts, Thanksgiving-free-printable, Thanksgiving-place-card-holders, Thanksgiving-table-decor, Thanksgiving-table-setting-details, turkey-craft

Decorating with Autumn Leaves; Door Garland and Candle Jars

November 10, 2012 By Laura 26 Comments

I think you’d be hard-pressed to find anyone on God’s green earth, who appreciates the foliage that Autumn brings, more than I do.  I am mesmerized by the leaves, from beginning to end.  Ask my kids.  They are often amused at how taken I am, with the beauty of this season.  And they’ve certainly come to understand that I don’t want them to miss one bit of it, any more than I do. I get especially excited when we are driving here and there, which with 4 kids I can tell you, we do a whole lot of.  “Oh!! There’s a tree starting to change right there! Do you see it guys?” And as fall progresses., each week is more full of awe than the last. As we go along, I’ll burst out “LOOK!….at that GORGEOUS tree guys!! LOOK AT THE COLORS ON THAT THING!!”  I’ve startled them. And they’ll be like, “We know Mama! Watch where you’re going!”  It’s true. I probably shouldn’t be driving at all in the Fall. Certainly not during peak foliage week.  There is just a span of weeks in this season, where the trees are all I can talk about, everywhere we go. Sometimes, I feel God made Autumn, just for me. Perhaps not. But gosh, it sure feels like such a gift of love.

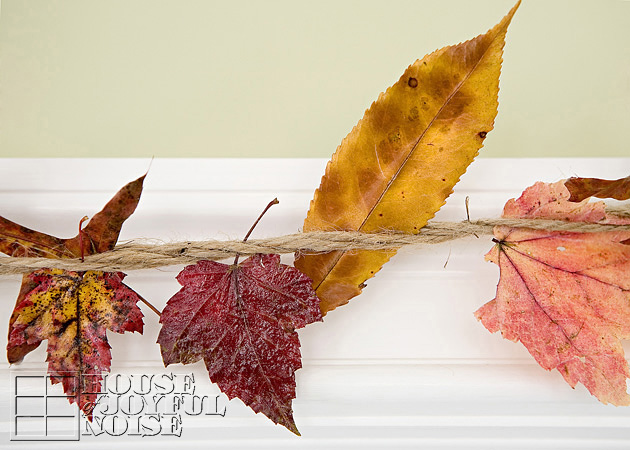
The peak beauty of the season, is really all too fleeting for me.  I want it to stay just as it is in those weeks, forever.  At least, I want to save as many beautiful leaves as I can.  But I’ve never found a great way to preserve them for a while, until this year. Oh yes, there was the waxed paper trick but, I heard that never worked all that well.  And besides…..Confession of Domestic Shame:  I really hate ironing.  So when I learned that using Glossy Modge Podge really worked well, I was so excited to try it.  And I immediately started dreaming up a very simple, very rustic leaf garland for my home.

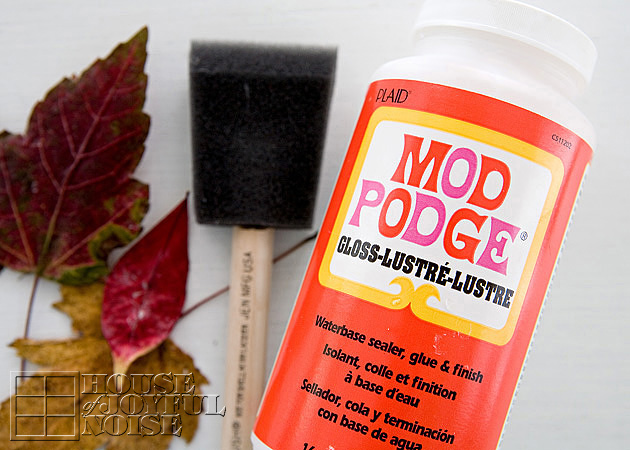
 The kids helped me Modge Podge countless leaves they had collected for me, over the weeks.  We had them drying and being pressed between the pages of newspapers and magazines all over the house. I’m willing to bet we’ll be finding several we missed finding again, well into spring.  But I found you can actually Modge Podge a fresh leaf right away, anyway.  I do recommend the Glossy medium. I tried the Matte finish just as a test, and it seemed to strip the color, and not look very impressive once it was dry either. Something about the Glossy really does enhance the color of the leaf, and add lustre.  To Modge Podge (MP) the leaves, we just poured some MP in a non-pourous bowl, and used foam brushes to apply it to our leaves, doing the back of the leaves first.  Then you can lay them on newspaper or whatever, until they dry. They don’t really stick anywhere as drying, because they are not flat or heavy.  MP is so easy to clean up anyway.


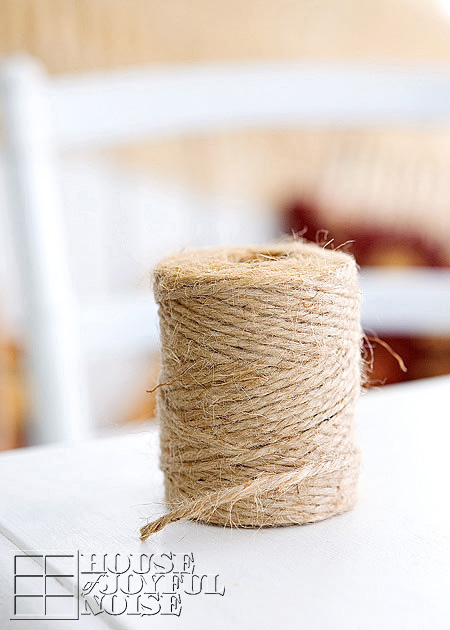
I wanted my garland extremely simple and rustic.  Jute was just the kind of string for the job. I love this stuff.

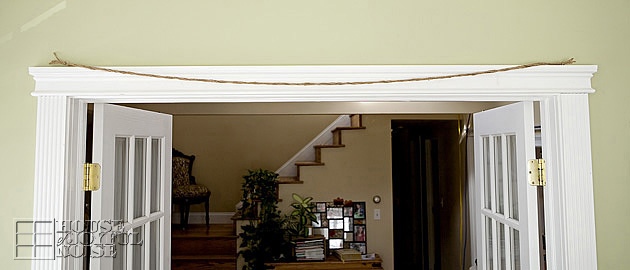
 I took 4 pieces of equal lengths of the jute, knotted the ends, and twisted the quadruple strand quite a bit before push-pinning it over the frame of our sun room french doors.

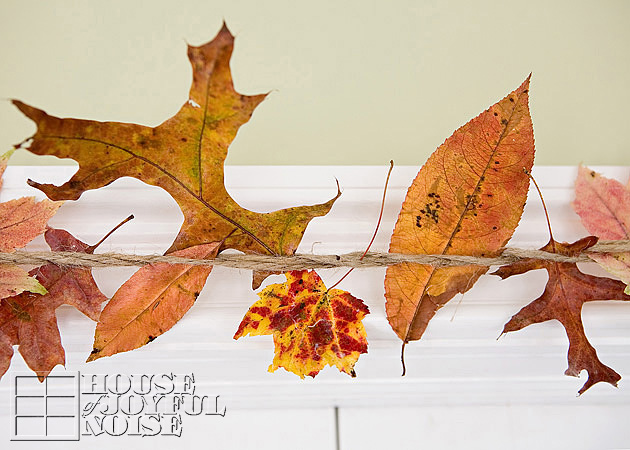
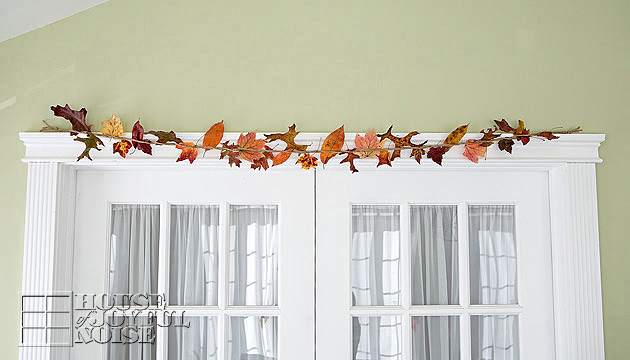
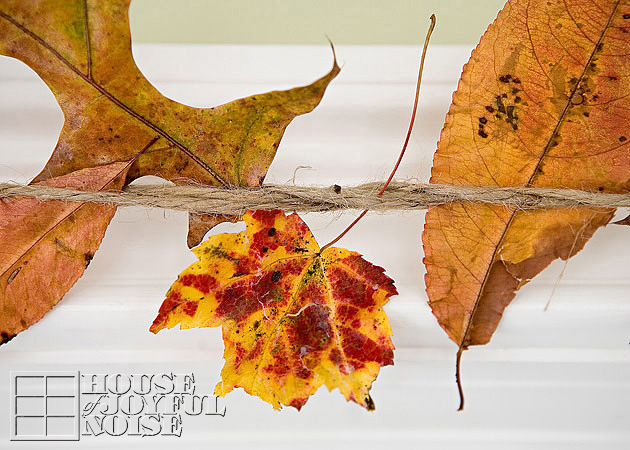
 Then, I just stuck my leaves in between the twisted jute string, arranging as I wanted to, all the way across.

 There it is. Done in like, . . .a couple of minutes.
And I didn’t fall off while standing on the chair I had to keep moving, even once.
(Although I think I had my husband and kids nervous, because they kept reminding me to be careful. That might have to do with the many happenstances I have had. But not this time!)

 Look how pretty!  Honesty….my heart is racing a little bit right now, just looking at them.
No two alike….such beautiful shapes and colors.

 Do you see that long pointy leaf? After being out and about collecting leaves, the kids came running in, so excited to give me that one. They call it my giraffe leaf.  I love giraffes, and they saw a giraffe skin pattern in it. I do too now.  I felt the love, and that leaf makes me smile even more than all the rest now.

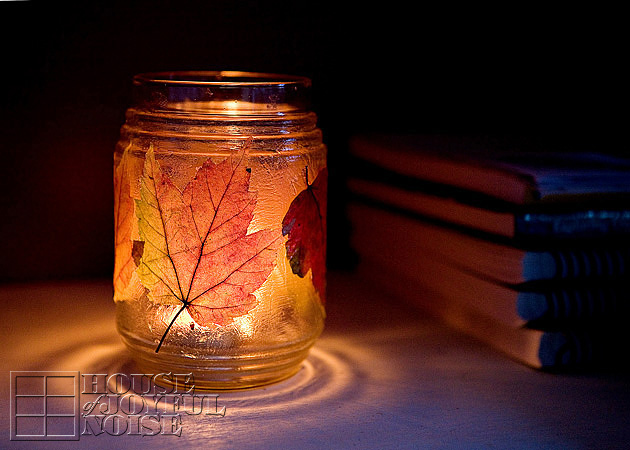
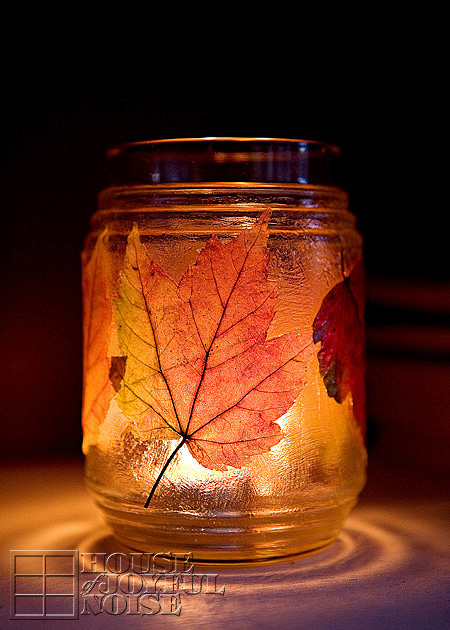
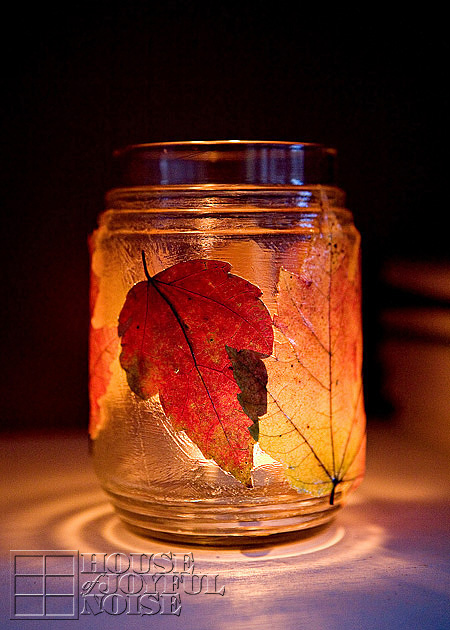
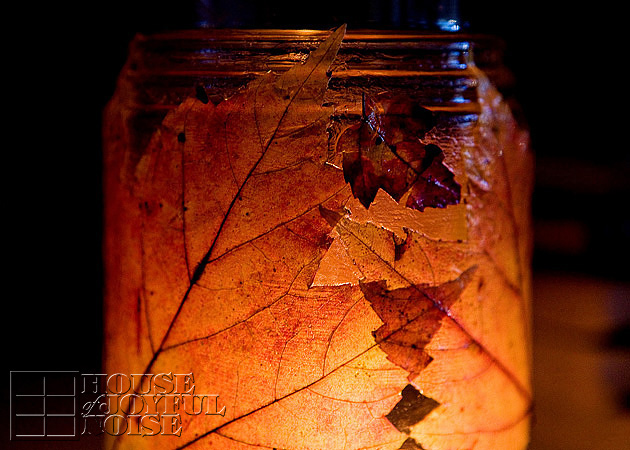
I also used the glossy Modge Podge to apply more leaves to jars.  I love that you can just slap that MP all over the jar with a foam (or flat bristle) brush, and everywhere it dries where there is not a leaf, it looks like frosted glass.

Isn’t it beautful?
I’ll warn you that this project took a little more patience than I had anticipated. Certainly not as easy as my garland! It’s worth the little bit of trouble I think though! It’s just that the leaves, which I had MP’d the back of, as well as the jar, don’t want to lay down flat right away. It’s all kind of slippery. It’s only once the MP glue starts setting a little, that is starts sticking as you need it to.  You need to MP over the leaves too anyway, so I kept kind of poking the leaves down where they were sticking up. Once the whole jar was dry, I did one more final coat.  Oh and I just let stems hang free off the glued down leaf. I liked them that way anyway, if they didn’t want to stick.

 They give such a warm glow of radiance.

 I can see myself doing these same projects with leaves every year, from now on. And other preserved leaf projects I’ll think of I’m sure now too.
I so enjoyed every minute of working with the leaves, and I am so very happy I found a way to preserve them, and let the beauty live on in my home, as the world around us outdoors drains colorless.

Thanks for coming by, and listening to me go on and on about my love for the colors of Autumn.
It sure was an amazing Fall season this year, and I thanked God for it every day.
Do you get a colorful foliage season where you live, in the Fall? And if so, have you done anything with the leaves?

Come follow me here and there:

Save

Save

Save

Save

Filed Under: Crafts & Creations, FALL Home Decor, Home Decor, Seasonal Home decor, The Homestead, Tutorial Tagged With: autumn decor, autumn-crafts, decorating-with-leaves, door-garlands, fall-craft, fall-decor, leaves-candle-jar, leaves-garland, Modge-Podge-crafts, modge-podge-projects, seasonal-decorating, simple-rustic-decorating

Rustic Autumn Wreath | A Simple Craft

September 24, 2012 By Laura 20 Comments

000_autumn-decor-150x150

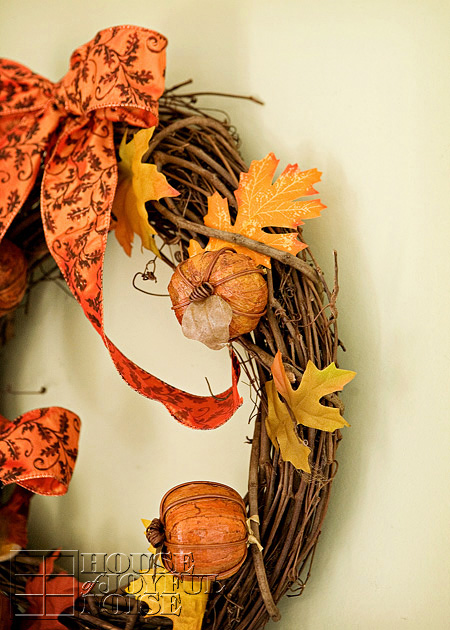
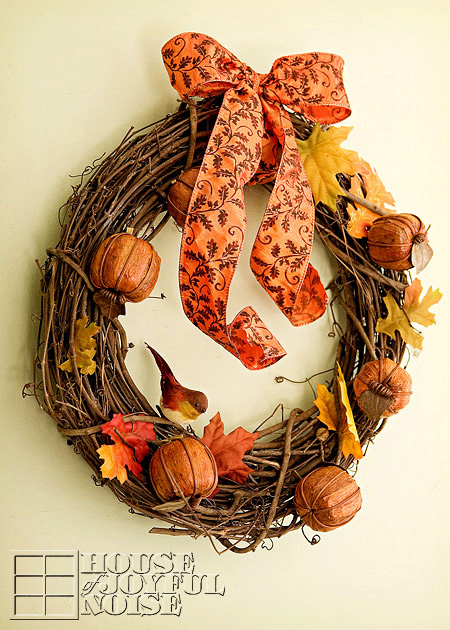
 If you’d like to add a touch of crafted Autumn decor to your home, but don’t have a lot of time or energy right now, this wreath is for you! It is so very simple and quick to make.  I think it’s beautiful, and has a real rustic flair that fits right in here at our homestead.

002_autumn-decor-crafts
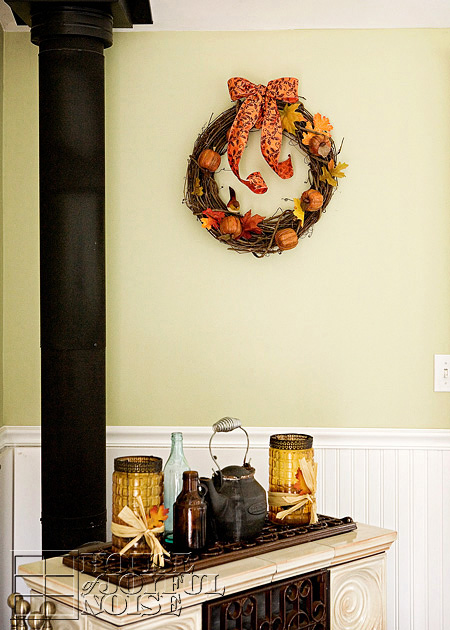
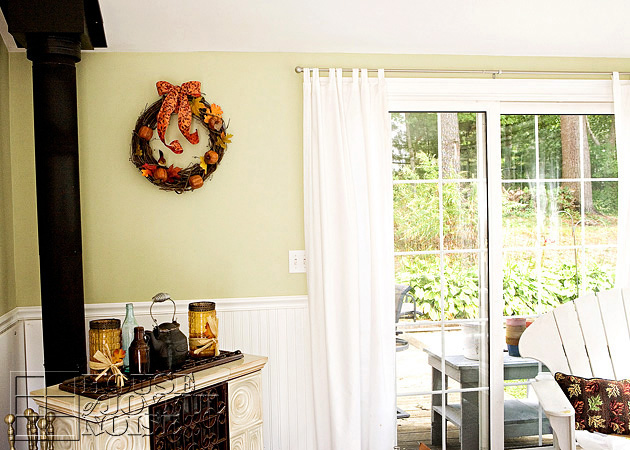
I hung our wreath in the sun room, on the wall directly in front of anyone coming in through our front door.

It’s so very simple to make, you really don’t even need to be shown how.
But I will tell to you how, and give you a couple of tips as well.

003_fall-wreath
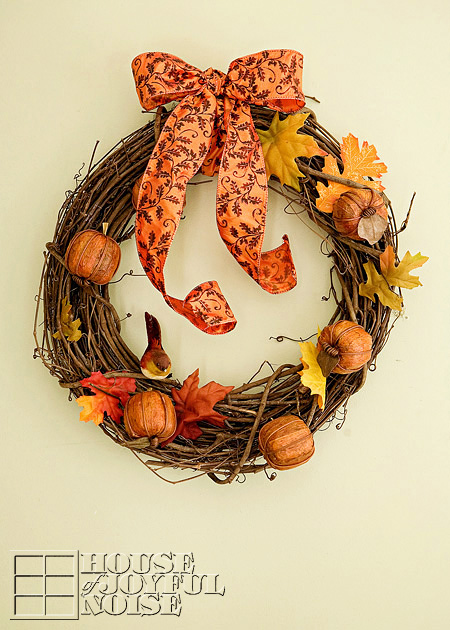
Start with a stick/branch wreath, which can be found ready-made at your local craft store.

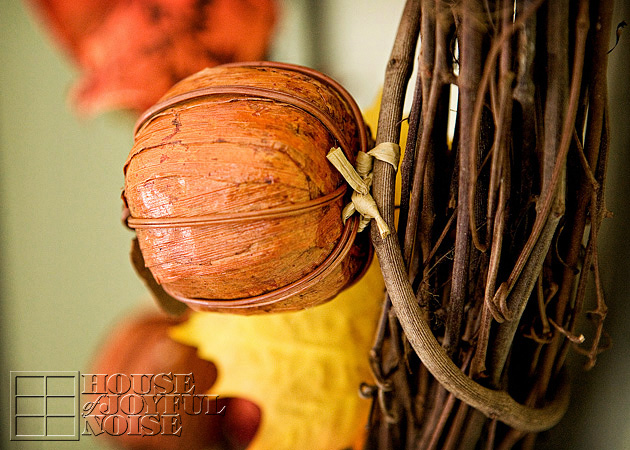
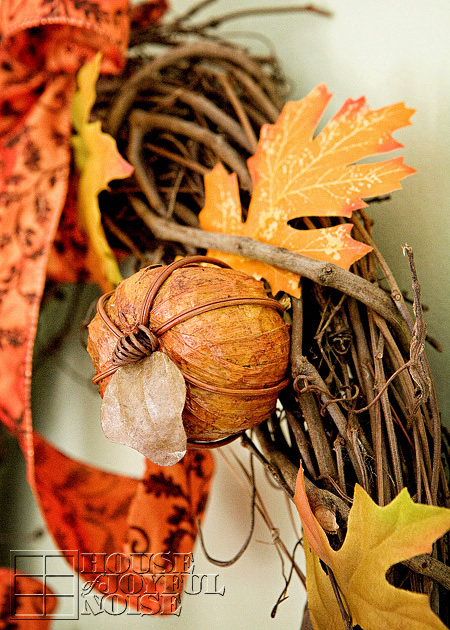
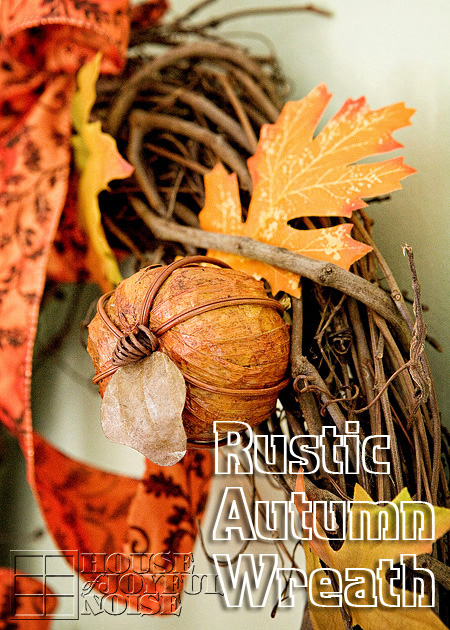
The pumpkins I also found at the craft store. They are very light in weight, made of a paper medium, and some kind of painted wire.  They are finished with a shellac, and they came as a bunch in a net bag, much like potpourri comes. So you may want to look in that area.

005_fall-home-decor-crafts To attach them to the wreath, I used a small piece of raffia! I simply slipped it under the wire on the bottom/underside of the pumpkin, and tied it onto a branch where I wanted the pumpkin placed. How easy is that? I cut any excess tails of raffia I didn’t need, but I don’t even care if it is seen, because it just adds to the simple rustic charm of  the wreath, in my opinion.

004_autumn-decor-accents
Then I added some nice looking faux fall leaves.  You can simply just tuck them under the intertwining sticks of the wreath. But if you want to be sure they stay, and/or plan to save the wreath to use year after year, I recommend using a dab of glue from a glue gun at the base of the leaf or stem area, and stick in between branches in an inconspicuous place.  The leaves don’t need to be any more attached than that, and keeping the leaves loose gives it a more natural look.

006_autumn-wreath-decor-crafts
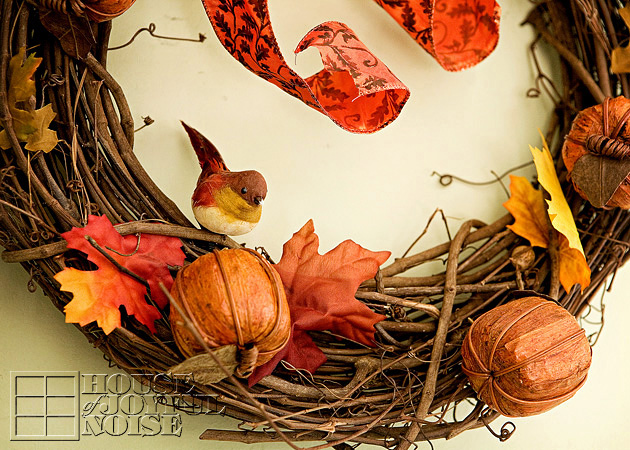
Just follow that technique with leaves and pumpkins, all the way around.

007_autumn-crafts-decor The little birdie is just a clip on, and was also picked up at the craft store at some point. It was one we had, and it not only went perfectly with this wreath, with it’s warm tones, but added new interest.

008_fall-wreath
The wide ribbon is wired, which can be a little difficult to work with, when tying bows or making nice curls. But I found a trick I’ll share with you.
TIP:   When working with wired ribbon, use an aluminum can, cup, or any cylinder object to make nice curls for the tail of your ribbon, or uniform loops in your bows.  Simply choose an appropriately sized cylinder object, relevant to the size you’d like your curls or loops, and use it to shape your ribbon.  You can place the cylinder into the loops to make them nice and round where they curve around, and/or wrap the ribbon around the tails to make nice curls.

009_autumn-home-decor It’s really as easy as that! It can literally be done in 10 minutes.

010_rustic-autumn-wreath
It’s not only a simple and beautiful wreath for this awesome season, but you can say you made it yourself.

Save


Save

Filed Under: Crafts & Creations, DIY (Do-It-Yourself) Project, FALL Crafts and Creations, FALL Home Decor, Home Decor, Seasonal Crafts and Creations, Seasonal Home decor, The Homestead Tagged With: autumn home decor, autumn-crafts, Autumn-decor-ideas, autumn-wreath-tutorial, autumn-wreaths, fall-crafts, fall-decor, fall-home-decor, fall-wreath-tutorial, fall-wreaths, rustic-wreaths, seasonal-crafts, seasonal-decor, seasonal-wreaths

4th of July

July 4, 2012 By Laura Leave a Comment

1_painted-american-birdhouse

HaPpY 4th of JULY, Everyone!

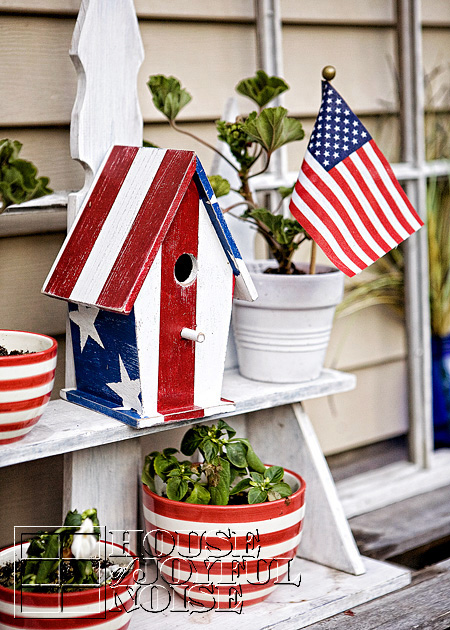
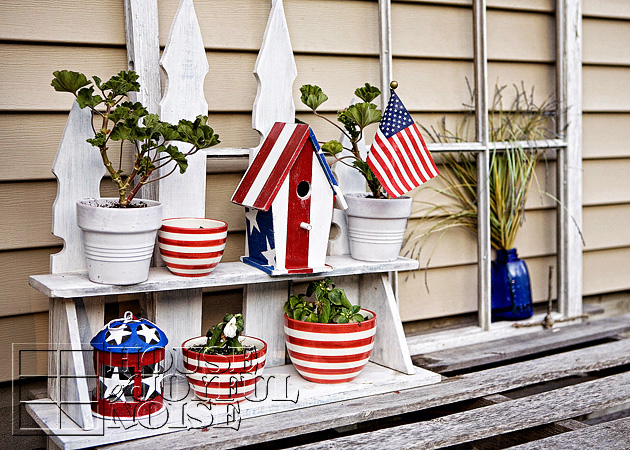
Since I wanted some photos, to go along with our wishes for you,  I thought today would be a good day to show you where I put my painted American Birdhouse.  It’s out on the potting bench near the gardens!  So now you know! I’ve got a whole red-white and blue theme going on out there, and it’ll be there throughout the month of July.  Then I’ll likely change it up, to some other summer theme.

 The birdhouse has held up very well in weather, despite the sun and rain beating on it.  Again, I credit that to the wax finish. It seems to be a great protector for outdoor wood, in my experience.

2_hand-painted-american-birdhouse-on-potting-bench Have a safe and memorable celebration of our country, with your families and friends!

We’ll see you again soon.


Filed Under: Crafts & Creations, Gardening, Home Decor, Refinishing, SUMMER Home Decor, The Homestead Tagged With: 4th-of-july-decor, american-birdhouse, american-home-decor, fourth-of-july-decor, garden-decor, red-white-blue-decor

  • « Previous Page
  • 1
  • 2
  • 3
  • 4
  • 5
  • 6
  • Next Page »

We are wicked happy to have you here! We hope you find much inspiration, help, humor and enjoyment here.


Archives


POPULAR POSTS

* * * * * *

SUBSCRIBE to House of Joyful Noise blog! Every new post, delivered right to your email box!


Privacy Policy

Amazon Affiliates

Never at any additional cost to you, we may earn a small commission for our endorsement, recommendation, testimonial, and/or link to any products from our website. Your purchase through our links helps support our family, while sharing with you the products we authentically use and recommend, for various ideas, and letting you know where you can purchase them. Thank you for your support!

[footer_backtotop]

Copyright © 2025 HouseOfJoyfulNoise.com · Genesis Framework by StudioPress