• HOME
  • {A}’s Chipmunk Training Archives

 Homepage

  • The Homestead
    • Home Projects
    • Home Improvement
    • Home Decor
      • Seasonal Home decor
        • FALL Home Decor
        • WINTER Home Decor
        • SPRING Crafts and Creations
        • SUMMER Crafts and Creations
    • Our Chickens
    • Gardening
    • Organization
    • Re-Purposing
    • Furniture Refinishing
    • Budget
  • Crafts & Creations
    • Seasonal Home decor
      • FALL Crafts and Creations
      • WINTER Crafts and Creations
      • SPRING Crafts and Creations
      • SUMMER Crafts and Creations
    • DIY (Do-It-Yourself) Project
    • Kids Arts and Crafts
    • Homemade/Handmade Gift Ideas
    • Holiday Crafts
    • Fan Pulls
    • Free Printable/Downloadable
    • Sewing Projects
    • Giveaways
    • Business Features
  • Recipes/FoodFun
    • Breakfast
    • Lunch
    • Main Dish
    • Sandwiches
    • Appetizers
    • Slow Cooker
    • On The Grill
    • Side Dishes
      • Soups
      • Salads
    • Baking
      • Breads, Rolls and Muffins
    • Snacks
    • Treats
    • Desserts
    • Drinks
  • Homeschooling
    • Elementary Homeschooling
      • Elementary Homeschooling READING
      • Elementary Homeschooling MATH
      • Elementary Homeschooling LANGUAGE ARTS
      • Elementary Homeschooling SCIENCE
      • Elementary Homeschooling HOME ECONOMICS
      • Kids Arts and Crafts
    • Middle School Homeschooling
      • Middle School Homeschooling SCIENCE
      • Middle School Homeschooling HOME ECONOMICS
    • Language Arts
    • Math
    • History / Social Studies
    • Geography
    • Foreign Language
    • Field Trips
    • Games
    • Nature Study
  • The Big Picture
    • Life In General
    • Celebrations
    • Faith
      • Into the Light; The Series
    • Giveaways
    • Reviews & Sponsors
  • Photography & Lettering
    • Photography
    • truck lettering
    • vehicle graphics
    • Newborns
    • Kids
    • Engagement
    • High School Senior Pictures
    • High School Senior Pictures Sneak Peeks

Boston Museum of Science | Field Trip | Homeschooling

October 12, 2010 By Laura 3 Comments

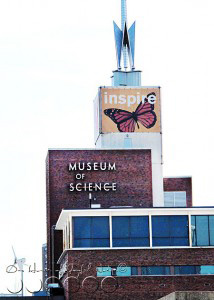
One of our first field trips of this new homeschool year, was to the Boston Museum of Science!

001_boston_museum_of_science-214x300
{JM, O & S} are at that age now, where I knew they would really benefit from going, on an educational level.
{A}, of course, has been an appropriate age for some time, and she found many areas of interest that she enjoyed learning more about.

We left home early in the morning.  I have to add, that I had decided I was not going to lug my big camera equipment around…because that was one of the reasons why we got {A} the Canon point and shoot for her birthday, right? But I have to tell you…it was hard!  I felt like I was leaving one of my children behind! I was walking to the car in the drive-way as we left, asking myself…can I really do this?  I made myself leave it home, and I worked on learning how to work this little thing better.  And I’m still working on it. I’m an all manual girl for sure.

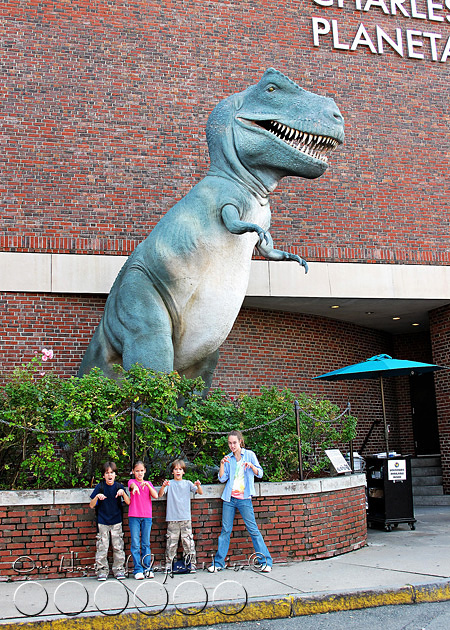
Anyway, we were there until late afternoon.  This museum really is a place where you could spend at least2, maybe even 3 days at, to really enjoy it to the fullest, and not miss anything. Thankfully, we live close enough that we’ll be going again soon.  The planetarium here at the Boston Science Museum, is currently under construction until early 2011.  So we’ll be returning to see that when it re-opens. Especially because the little ones are studying Astronomy this year.  But we certainly filled our day taking in all we could, enjoyed every moment expanding our knowledge on a variety of subjects, and having fun while we learned!

boston-museum-of-science-field-trip boston-museum-of-science-field-trip-1

This very large scale grasshopper model displayed the internal parts of the insect, and their function.  It was interesting to see the muscles of their legs, which are quite powerful in relation to their size.  They can jump up to 20 times the length of their own body.

boston-museum-of-science-field-trip-2

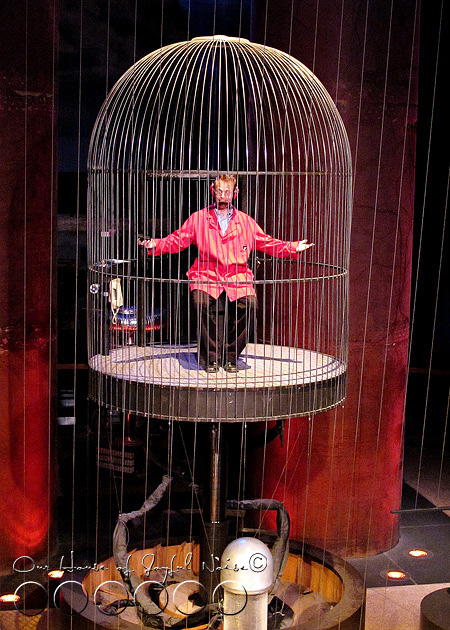
A real highlight of our trip, was this educational exhibit on electricity.  The scientist was extremely knowledgeable and held our attention for sure.  His ‘science lab’ was intriguing, as he explained a variety of facts.

boston-museum-of-science-field-trip-3

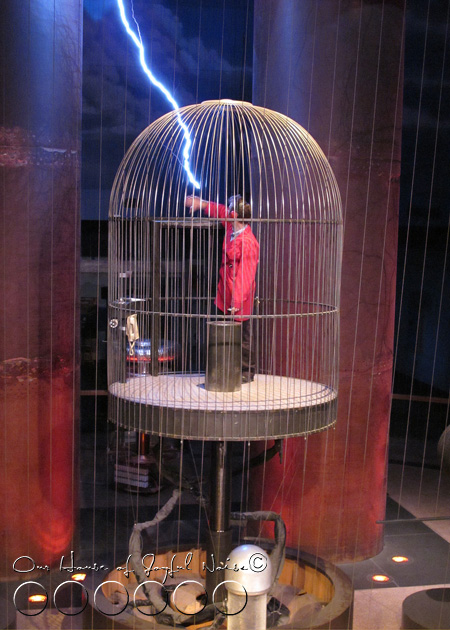
We were often advised to protect our ears for certain demonstrations where the electrical currents were very loud.  The kids were getting a little upset with me, because I kept uncovering my ears in order to take photos. But I got a shot with an electrical current like I wanted! Cool, huh?

boston-museum-of-science-field-trip-4

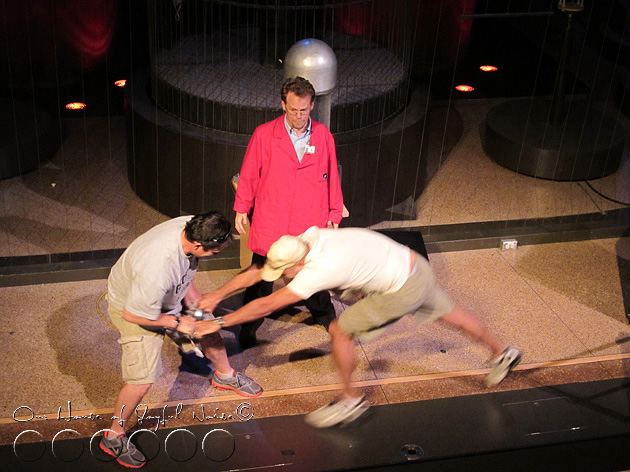
These 2 guys were sure they were stronger than a AA batteries.  But this demonstration proved them wrong. They were sorry they volunteered their manhood strengths, because the magnetic force that was created here, won in the end.

I was talking to my cousin’s middle school boy this past weekend (smart little fella), who took a field trip here when he was in 5th grade.  He mentioned one of the highlights for his class was the electricity demonstration here too.  They saw a couple different demos than we did this day.

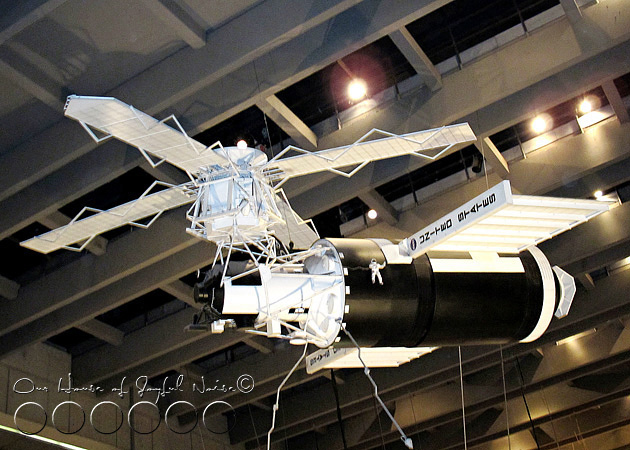
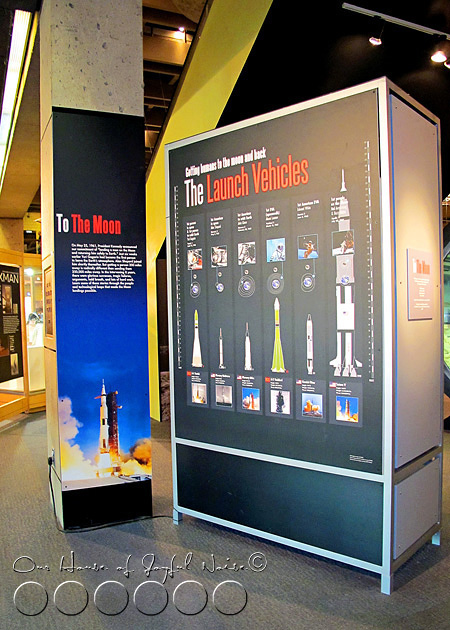
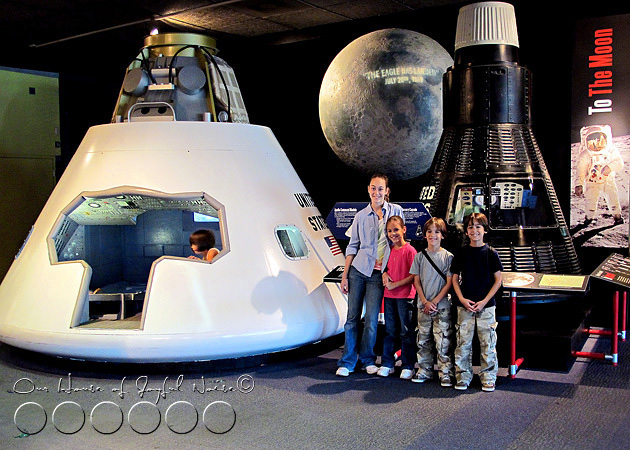
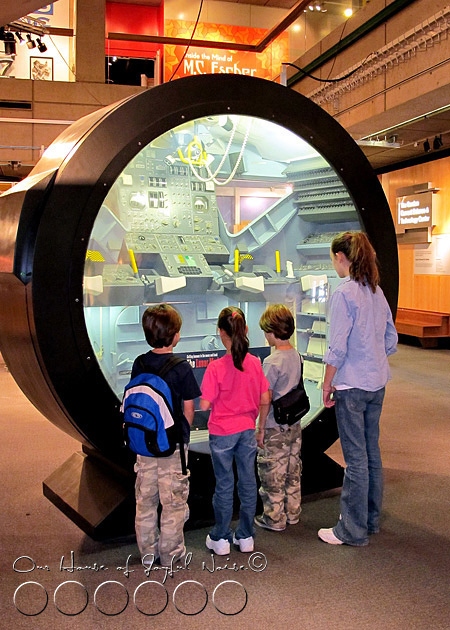
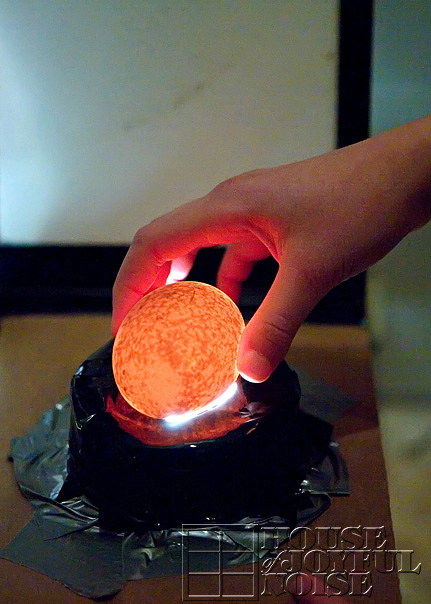
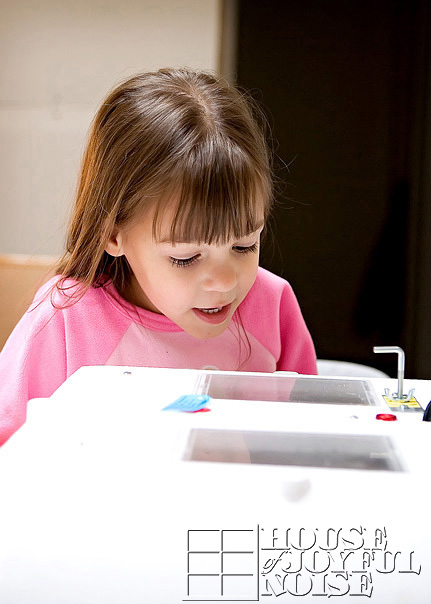
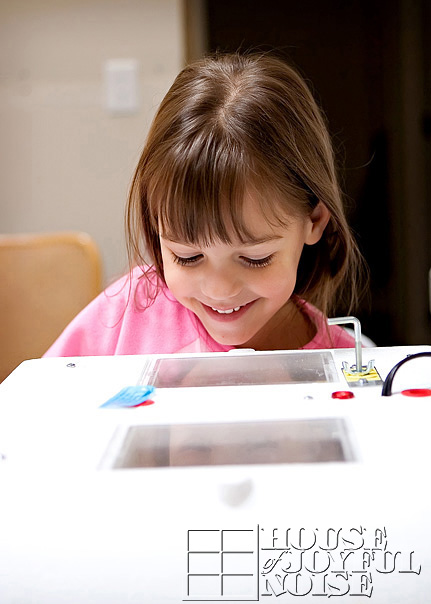
The kids very all excited for this space exhibit, since they are currently learning all about astronomy.   So this area in the following photos was very educational for them, and really brought to life so much of what they have been studying.

boston-museum-of-science-field-trip-5

boston-museum-of-science-field-trip-6

boston-museum-of-science-field-trip-7

boston-museum-of-science-field-trip-8

boston-museum-of-science-field-trip-9

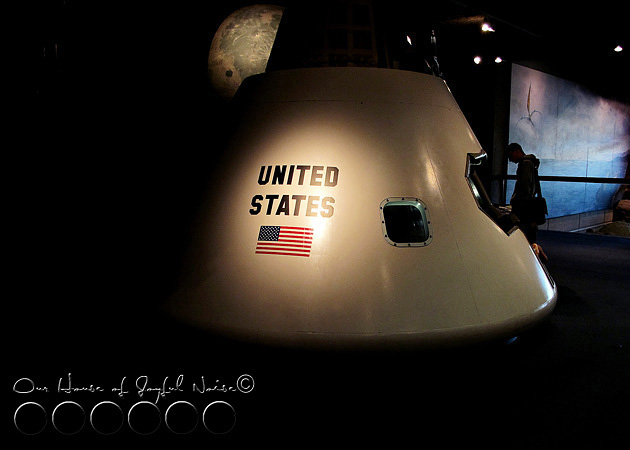
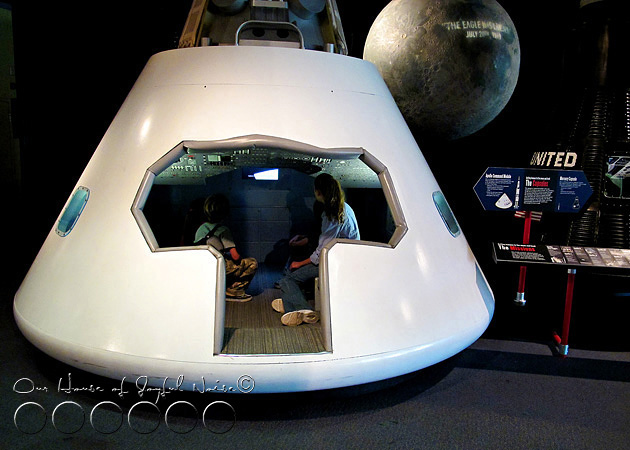
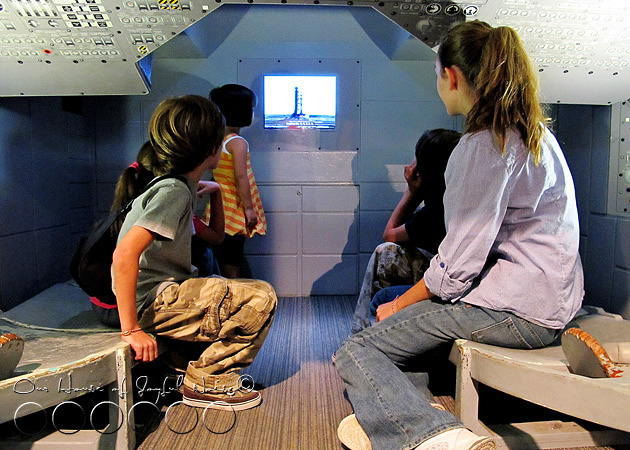
Inside the spaceship capsule, watching an educational video about the space shuttle.

boston-museum-of-science-field-trip-10

boston-museum-of-science-field-trip-11

boston-museum-of-science-field-trip-12

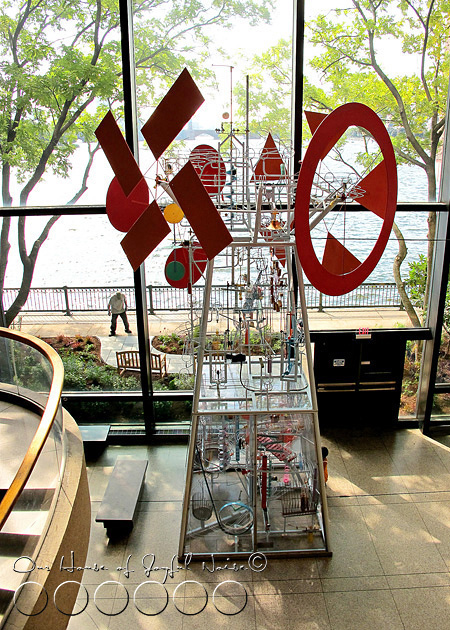
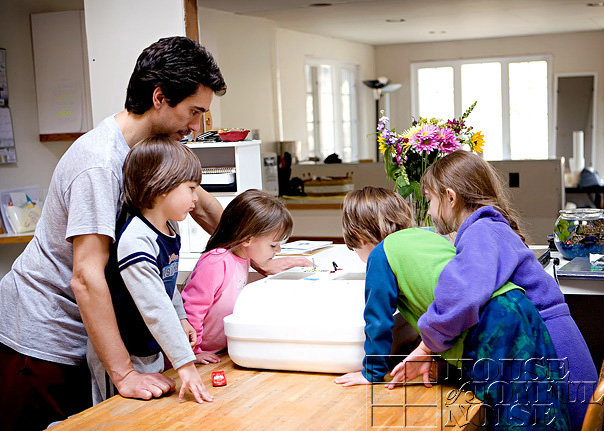
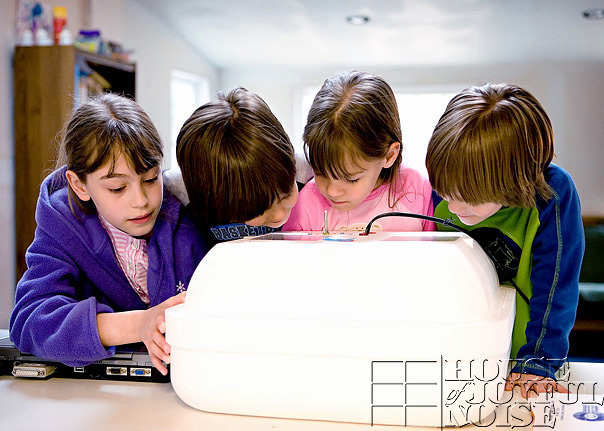
This contraption was something else.  There was so much it did.  Engineering at it’s best.  It was so much fun to watch it work.

boston-museum-of-science-field-trip-13

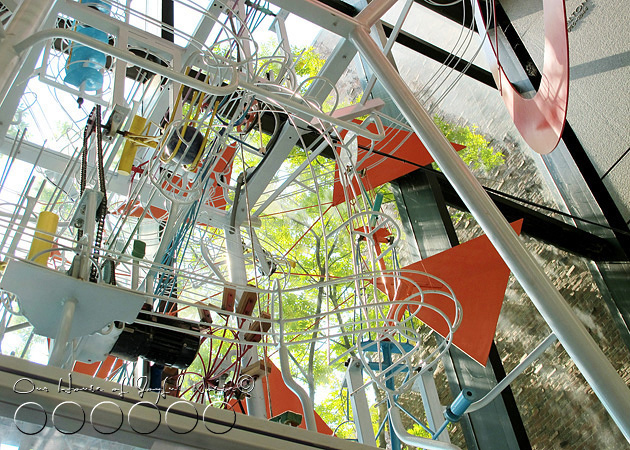
As we looked at it, and watched the intricate and clever functions of it all, I thought to myself, “I can see {JM} building something like this, someday.”

boston-museum-of-science-field-trip-14

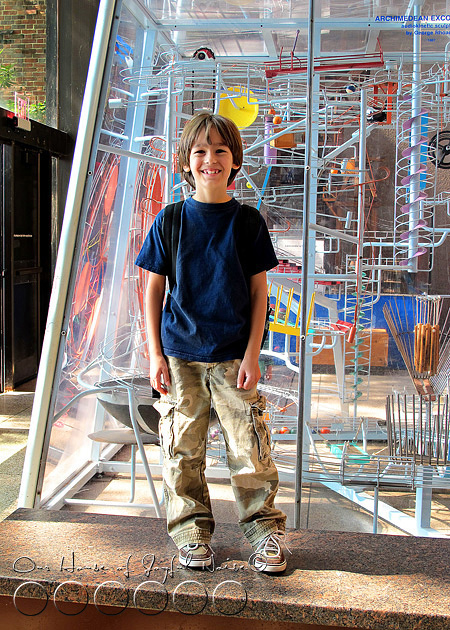
No sooner did I think that, did he ask me to take his photo in front of it.  He was grinning from ear to ear, and I could see his wheels turning.  I think he was inspired.
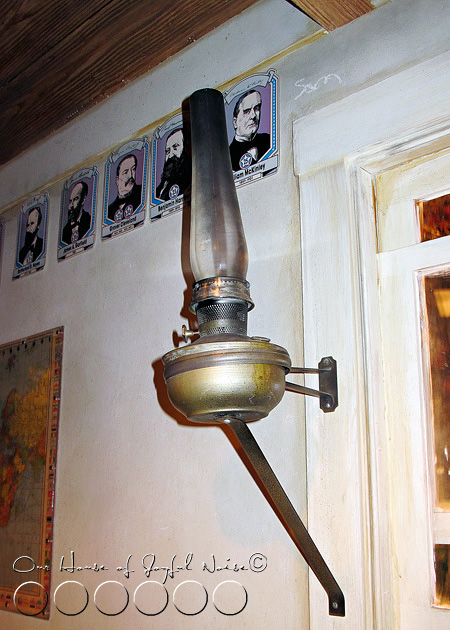
boston-museum-of-science-field-trip-15

boston-museum-of-science-field-trip-16

I loved this wall.
–

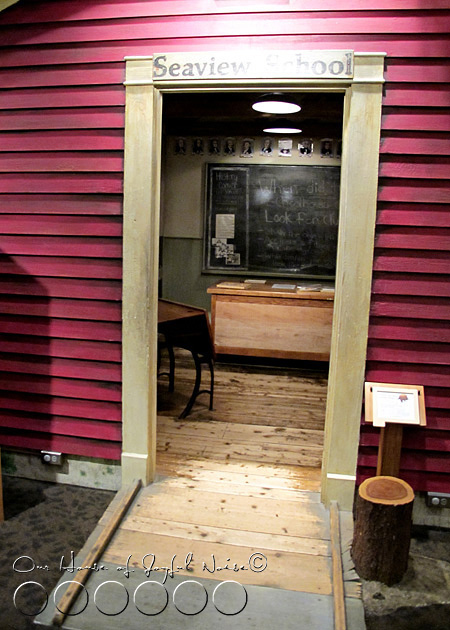
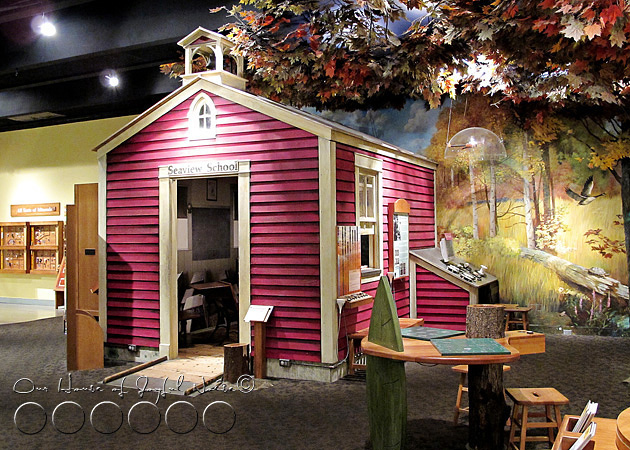
But this was the highlight of the trip, for ME, at the Boston Museum of Science!  When I ever came around the corner, and saw this…..my heart was all a-flutter!….


boston-museum-of-science-field-trip-17 
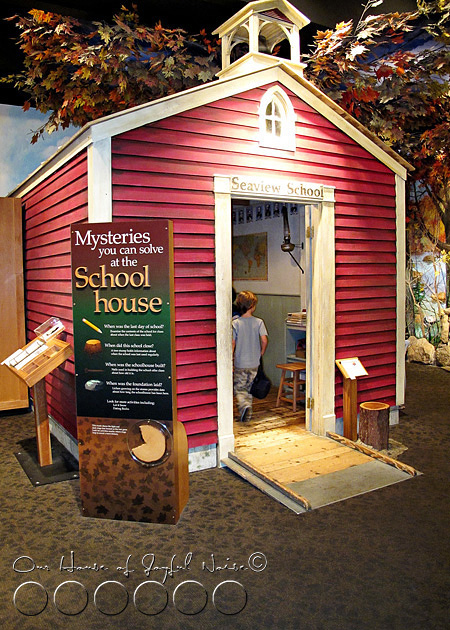
An old school house!  I know they around here and there..like at Sturbridge Village, my cousin reminded me.  I haven’t been there since I was very little, and I don’t remember anything there. (That’s another planned trip for us!).  But I was very excited to be able to see this one, and GO IN!!

boston-museum-of-science-field-trip-18

boston-museum-of-science-field-trip-19

boston-museum-of-science-field-trip-20

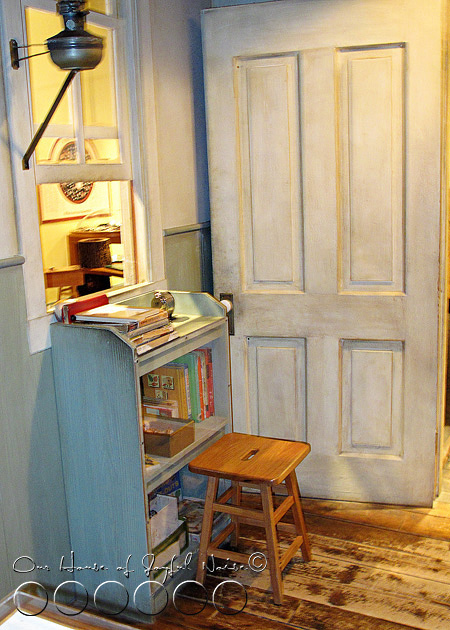
I was smitten, with every nook, cranny, and detail.

boston-museum-of-science-field-trip-21

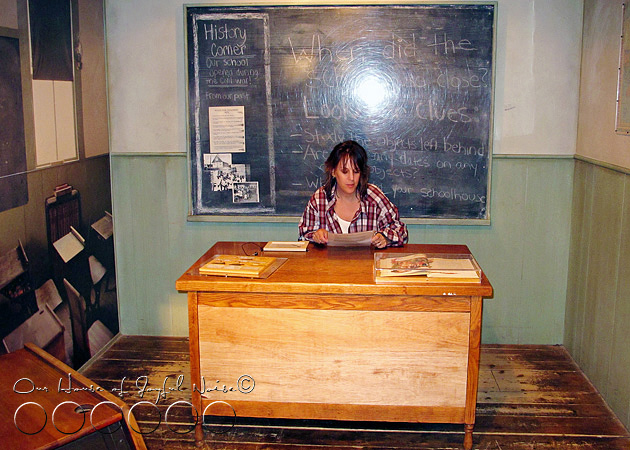
And I couldn’t resist playing teacher!

boston-museum-of-science-field-trip-22

Thankfully I even had willing students, to play along and amuse me!!  Their clothing was all wrong, but I didn’t care.

boston-museum-of-science-field-trip-23

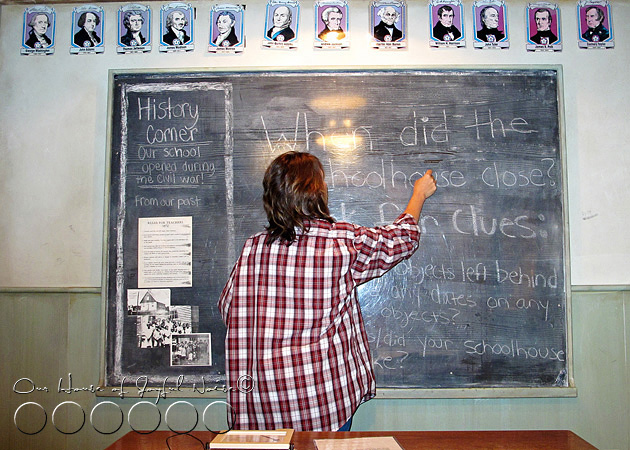
So was mine.  But I was having fun.  Michael was taking photos of my antics, left and right.  I was glad I had on one on his shirt for this shot….so no one could see my mom jeans.  ; )

Just kidding.


boston-museum-of-science-field-trip-24 {O}, pretending to write.
–


boston-museum-of-science-field-trip-25 
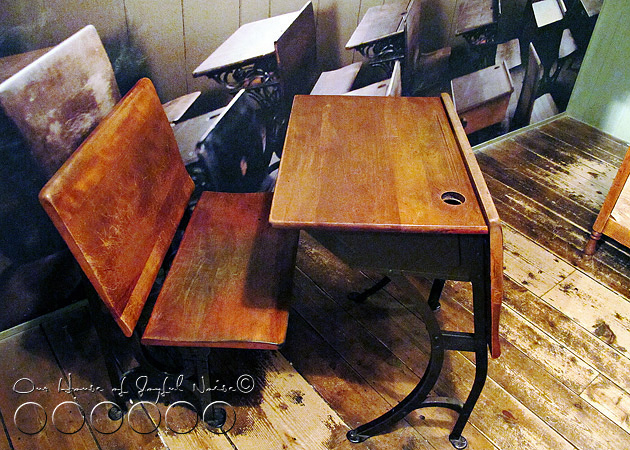
Check out the desk.  Michael reminded me that we have an old school desk his parents gave him, when they moved from this area some years ago.  I forgot about that!!  I’m going to find it, and maybe bring it upstairs and put it in our school room. : )
–


boston-museum-of-science-field-trip-26 
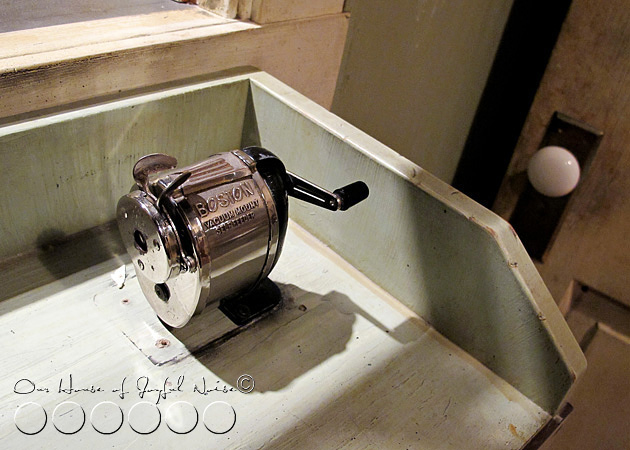
THERE’S the pencil sharpener I remember.
–

boston-museum-of-science-field-trip-27


boston-museum-of-science-field-trip-28 
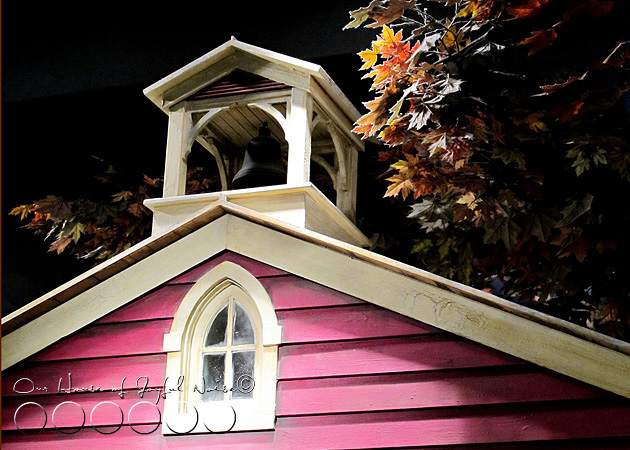
I didn’t easily leave the school house area!  As we stepped out and I looked at it from a little ways, I started to have crazy thoughts.  Out loud.  Like…”You know Michael, I bet you could build me one of these fairly easily.”  And to my surprise, he didn’t even chuckle.  He asked me where we would put it.  Huh.  Oh…..I guess I’ll find a spot then!
–


boston-museum-of-science-field-trip-29 I loved this display.  It slowly turned.

Behind it was a whole room of taxidermied animals!  As we explained to {JM, O & S} about what taxidermy is, the process, and when and why it is done, they were wide-eyed!!  We couldn’t help but laugh.  I remember being about their age, and trying to wrap my brain around it all, when I learned this little fact of life, too.  They were so cute.

{A} knew about taxidermy, but she said she found seeing the stuffed animals here very interesting anyway, because it gave her an accurate scale of the size of the animals.  For example, we saw a Grizzly Bear and a Black Bear side-by-side, and she was surprised to see how much larger the Black Bear was.  She always assumed Grizzly Bears were the larger.

boston-museum-of-science-field-trip33

It was a great trip, to a really great museum, for all of us.  We look forward to returning there within this school year again, to see the planetarium, and have another day studying the world of science (all of God’s Creation), history, mathematics and social studies.

Have you ever visited the Boston Museum of Science?  If so, what part of your visit did you like best?

Thanks for reading along and following some of our home schooling adventures we chronicle here.  We’re glad you stopped by.

Save

Save

Save

Save

Save

Filed Under: Elementary Homeschooling, Elementary Homeschooling SCIENCE, Field Trips, Homeschooling, Middle School Homeschooling, Middle School Homeschooling SCIENCE, Science Tagged With: Boston Museum of Science, Boston-area-places-to-visit, Boston-museums, homeschooling, homeschooling-field-trips, museums, Science, science-field-trips

The Math and Science of OOBLECK! | Elementary Homeschooling

June 9, 2010 By Laura 14 Comments

oobleck goop

It wouldn’t be surprising, if many of you have already heard of and made some ‘Oobleck’, with your kids.  Some may know this crazy-fun concoction by another name.  My sister says they call it ‘Goop’.

My kids have indeed made and played with Oobleck before.  I first heard about it at least a few years ago, from my friend Maria, over at Very Blessed Mommy. It’s a downright fun little activity, that will keep your little ones  happy and busy for quite awhile!  It’s appropriate for ages 4-42 (at least ; )

We’ve made it several times since that first, but this time, we looked closer at the educational aspects of math and science, that come with this very intriguing activity!  If we were going to keep playing with the stuff, it just seemed like a good idea to get a little more intellectual about it.    So here we share the recipe for Oobleck, what we learned or reviewed, and as always, too many photos.   (Thanks for understanding.)

Necessary ingredients:  corn starch, water, food coloring, bowl(s), wooden spoon(s), and measuring cups.

The Recipe for one batch:   2 cups of corn starch, mixed with 1 cup of water.  Then a few drops of food coloring.

Now, the recipe calls for 2 parts corn starch to 1 part water.    So the recipe is adequate for two little kids to play with.  But you could make 2 separate batches so they have their own bowl, whether you half the recipe for them or not.

This day, we literally quartered the recipe for each kid that day, because we were running low on corn starch!  But it still worked out alright.    What’s great is, it was an opportunity for the kids to practice their measurement math.

Since the recipe calls for 2 cups, what is 1/4 of that?   How about 1/4 of 1 cup?

Not only is measuring ingredients a great exercise for their math skills, but it’s great for them to follow directions, and do it all themselves!

This is such a perfect summer time activity for kids of all ages.  Mom can make a batch for little ones, just to play in. There is no need to worry about a mess outside! Everything washes very easily away, with water!  I take the hose and just spray off the table and deck.  Once the food coloring is mixed in, there is no worry about color staining either.

My kids had their play clothes on, so I let them put their own color drops in too.


{JM} made his Oobleck blue.

  05_yellow_oobleck
{S} wanted his yellow.

But {O} wanted hers orange.  But there is no orange food coloring, right?  Here was more opportunity to learn; reviewing color mixing of primary colors, to create secondary colors.

So I asked {O}……if the only colors we have, are red, green, blue and yellow, how can we make orange?

She knew, that red + yellow = orange.

Of course……using just a few drops, in relation to the amount of corn starch and water, we got a very light orange.  Similar to peach or orange sherbet.

{JM} decided he wanted to try making his blue Oobleck,  purple.  So I asked him what color he would need to add to his blue, to make purple?

blue + red =  purple

Again….in relation to the amounts of ingredients, we had lavender.

{S} wanted to change turn his yellow Oobleck, green.  Well, he knew that yellow was already a primary color, but so was green. So what would happen if he put green in his yellow?

yellow + green = lime green.

But the most interesting thing about Oobleck, is the constant change in consistency, depending on it’s state. This is where we get into the scientific study.

On appearance, it seems to be a liquid form.  If you run your fingers through it, it is still a liquidy form.  But any act of compression, suddenly turns the liquidy state of substance, more solid.    If you look at the photos below, in frame 1, {S} is just holding a puddle of it in his hands.  But as soon as he starts to squeeze it, in frames 2-4 it turns to a more solid mass.

But left when the compression is relieved, it begins to return to it’s liquid state again.

It’s amazing, isn’t it?

Here is a more specific explanation, taken from this link, which also has different Oobleck activities, for different ages, if you’d like to check it out after.

Water and starch do something unusual when mixed together. The substance they form pours like a liquid, but when squeezed with your hands, becomes solid. When a substance acts like both a liquid and a solid, scientists call it a discrepant substance.     Two things commonly cause this type of change—temperature and pressure.  We will see that temperature has no effect on Oobleck and that its solid or liquid state is influenced only by pressure (or lack of pressure). Squeezing it in our hands turns Oobleck into a solid. But if we hold it without squeezing, it drips through like a liquid. You can roll Oobleck into a ball, but when the rolling stops, it will become a liquidy mess!

It really is a great deal of fun to play with!  And I promise you it is not as impossibly messy as it looks.  And trust me…it looks it! But it washes away with such ease, it’s enough to make any mother smile. A REALLY BIG GRIN!!

The thrill of it it does not wear off, any time soon.

Oh, we never tried shaking hands before!!  How do you do??  <giggles> <giggles>

And the fun goes on and on and…..

…..on.   AND on.

We hope you enjoyed this post.  Have YOU made Oobleck before?  Do you call it something else?  Will you let your kids make some (again) soon?   Oh and, can YOU play with them?

Yes you can.  I sure do.

Save

Save

Filed Under: Elementary Homeschooling, Elementary Homeschooling HOME ECONOMICS, Elementary Homeschooling MATH, Elementary Homeschooling SCIENCE, Homeschooling, Math, Science Tagged With: color-mixing-lessons-for-kids, goop, goop-recipe, homeschooling-elementary-science, measuring-fun-for-kids, oobleck, oobleck-recipe

Your Kids Might Dig This, Too! | Archeology Digging Fun for Kids | Homeschooling

May 22, 2010 By Laura 2 Comments

If your kids love archeology, digging in the dirt, or finding treasured, they are really going to dig this!
(This post contains an affiliate link.)

archeology for kids

My cousin and her daughter (my God daughter) came down a couple of months ago, for a girl’s overnight with myself and my own 2 girls, and so thoughtfully, she had brought some great gifts for the kids! It was so sweet.  It was unexpected and unnecessary, but I do love gifts that are both project-like, fun and educational.

archeology for kids

This is one of those gifts,…. which was for {JM}:  Dig & Play Treasure Island.

Some may not think of it as educational, initially, but many of us homeschoolers, tend to quickly identify the learning aspects that are truly in just about anything, and everything.

Dig and Play Treasure Island brings out the excavator in your child.  The kit contains a plaster block, which contains buried treasures and coins. Using the specially designed digging tool, they must dig at the plaster little by little, to find the treasures.

It takes hard work, determination and ambition, but is ultimately rewarding.  To me, this helps instill the life lessons, that nothing worth having, comes easy.  What’s more, {JM} spent hours having fun, was excited about what he had found, and inspired to keep going to see what else was still yet to be discovered.

By reading and following the directions (such a necessary skill in life), {JM} learned that wetting the plaster, would make the digging easier, because the plaster would soften. (Science).

Soon he could see the edge of something!  He dug more ambitiously around the treasure, so that he could get it out.

Gold and silver coin treasures were being exhumed all over the place.  Because the plaster digging was a dusty job, {JM} wore a face mask that Daddy had on hand.  But a bandana would do as well.

{JM} also learned that the more water he sprayed on the plaster, the easier the job got!

What’s this?  It looks like a treasure chest!  He wondered what was inside.

Wow!!  Look at the beautiful gems!  And a die?

Dig and Play Treasure Island, also comes with a game board. and game directions.   Game pieces are also exhumed while digging in the plaster block.

So once the digging is all done, the fun doesn’t end!
What a great gift idea, for your kids, or other kids in your life.

Save

Save

Filed Under: Elementary Homeschooling SCIENCE, Games, Homeschooling, Science Tagged With: archeology-for-kids, archeology-projects-for-kids, dig-and-play-treasure-island, educational-games, educational-gifts, elementary-homeschooling-science, homeschooling, homeschooling-archeology

Incubation and Embryology of the Chick | Chick Coloring

March 31, 2010 By Laura 7 Comments

Incubation and Embryology of the Chick | Chick Coloring

chick-coloring-incubation-embryology-10

Although we have a small line-up of homeschooling posts about recent happenings coming your way, I’ve been inspired recently to take a little trip down our homeschooling memory lane, back to early 2007, when we did a study on chick embryology,  incubated eggs and hatched chicks!   At the time, the kids ages were 9, 4, 4, and4.  So not only will you notice how young our kids look compared to today (now 12 and 7, respectively), but you’ll see how very unfinished our home was back then!  Remember, Michael has been finishing all of the inside of our home himself.   (With a little help and direction from me too.)  As far as we have to go on this house, we can look at these photos and think, “We’ve come a long way, Baby!”

My brother, his wife, and their 2 kids, have a chicken coop, which began with an order of live chicks last year, I believe.   But soon they will be receiving a batch of eggs, and will be incubating and hatching them themselves, for the first time. I am SO excited for them, and especially for my niece and nephew, to have this exciting experience!  So much so, that we are itching to do it again ourselves all over again, since the our youngest kids are 3 years older now. The little ones would be able to get so much more out of the study and be a lot more hands-on, as {A} was for our first experience 3 years ago. It would be fun for the kids to compare notes with their cousins too.  Nonetheless, with Easter coming in a few days as well, we thought it would be cute and fun to blog about our chicks.  This experience in 2007, was ‘pre-blog’, so we never did get to share it with you all.

chick-coloring-incubation-embryology

We picked up our order of 24 eggs from the Plymouth County 4-H on March 13 of that year.  They have a wonderful Embryology Program, and supplied us with the eggs, an incubator (rented), a very informative book, a poster, and some feed.
–

chick-coloring-incubation-embryology-11

We got our eggs incubating right away.  This process of incubation, to expected hatching would be about 21 days.  The temperature of the inside of the developing eggs needed to be regulated at 100-101 degrees.  So the goal of environmental temperature within the incubator, needed to stay within the 97-103 degree range.  The humidity level was also a very important factor, and that was the hardest part for us!

{A}, being the oldest and the most appropriate age for this project at the time, was the most involved in the hands-on activities .  She did most of the rotating duties, temperature checks, egg observations, and kept records on everything on a daily basis.

The eggs needed to be rotated 3 times a day.  Therefore, we marked them with an X on one side of each egg, and an O on the other.  (We had XO eggs! lol).  They were each also numbered, 1-24.  These markings helped us be assured that every egg was rotated every time.

chick-coloring-incubation-embryology-12 –

Candling was a very interesting activity that was part of this project.  This allowed the kids to observe the development of the chicks, without damaging them.  This can be done on days 3,4,6,7,and 13.   Michael created a make-shift ‘candle’ using a light projector we had.

chick-coloring-incubation-embryology-13

By holding the egg to the light, we were able to look for developments and progress inside of the eggs.

In the period of time in days 11-14, we had the option of giving our chicks some COLOR.  This is a completely safe and harmless procedure for the chicks!!  If it was not, we wouldn’t have done it!  To understand this process more thoroughly or to get directions, please see (and save)  this link:  Chickscope. Another great link is here.  In brief, this is done by injecting harmless vegetable dyes, into the albumen area of the egg.  This is a pinhole break through just the very surface of the egg shell, at a specific area of the egg. In the following days, as the chicks continue to develop and grow, the sac that contains the color is naturally broken, and the chick is surrounded by the fluid coloring.  This results in temporarily colored chicks.  Michael performed this procedure, while {A} observed and recorded data.  Unfortunately, I was away these few days at a professional photographer’s conference.  So there are no photos of this part of the study.   But the results are coming up!

Throughout the day on March 1, we could hear faint peeps from within the eggs!   Talk about excitement!  The next day, the peeps were a little stronger.  We knew the time was drawing near, as we were just about at day 21!

Sure enough, very late at night on March 3, as I was exhausted and headed to bed, I took a last peek into the incubator, and lo and behold, an egg was hatching!   I was like, “Are you kidding me?  They are going to start hatching NOW?!  As I’m ready to go to sleep?”.  It was like both of my own labors, that kicked in high gear, right as I was most exhausted and badly needing a good night of sleep.  So of COURSE eggs would start hatching at this time.

Still, the anticipation and excitement perked me up a little.  I got {A} up and, the little ones, one by one, to take a peek.  I put them back to bed after a few minutes, but I kept watch for awhile longer.  It looked like it was going to be a slow process, and so thankfully, unlike my own labors, I was able to go get some sleep.

Early the next morning, we had 2 hatched!

chick-coloring-incubation-embryology-14

We could see that there was another, who had tried to break free of it’s shell, but never quite made it.  We lost that one.  But the 2 that successfully hatched seemed to be doing fine.  One was a very dark color.  He almost looked purple?  Which was not a color we had used, so we were confused for a bit there.  The other was green.

chick-coloring-incubation-embryology-15

I was not able to take photos of the chicks very well, through the little cheap (no pun intended, lol) plexi-glass viewing windows, but they were sure fun to watch! They were flopping all over the place, and all over each other.

The kids were so tickled, watching for more activity with the other eggs, and watching the chicks that had been born.

  chick-coloring-incubation-embryology-16

chick-coloring-incubation-embryology-17

chick-coloring-incubation-embryology-18

chick-coloring-incubation-embryology-1

chick-coloring-incubation-embryology-2

In the end, we had only hatched 4 eggs.    To truly learn from the study, and understand the developments of the embryos/chicks, it was necessary for someone to break open and study the eggs that had not hatched.  I could not do it myself.  Michael took that task on.    He and {A} took those eggs up on the hill out back, and dug a big hole in the ground.  Then {A} sat on a stump, with her back to her Daddy, while he dictated the number on each egg, and the stage of development, while she recorded the data in her notebook.  Then Michael buried them.

What they found, was some eggs were never fertilized at all. Some barely started developing, and for some reason didn’t continue.  Others were pretty much fully developed, but had never hatched. It was all natural outcomes.  That was probably the only unpleasant and sad part of this experiment.

Soon, the chicks were able to be transferred to a big sanctuary (Michael built), where we could really observe and enjoy them.

chick-coloring-incubation-embryology-3

Once our baby chicks dried off and got fuzzy, we realized our dark chick was not a colored chick, but a rooster!
–

chick-coloring-incubation-embryology-4

We also had a green one, a natural yellow one, and a pink one.    One for each of the kids!!  We did expect a higher hatching success rate, but we were glad to get some!

The funniest, and most entertaining thing about these chicks in their first few days, was just watching them gain their strength.  They were so active one moment, and would suddenly just doze right off and plop where ever they were.

chick-coloring-incubation-embryology-5

It was an absolute riot, to watch happen, over and over.   Just look at these photos of them!  A moment before, they were very energetic, then they would just wither into a nap, and the next moment be up and about again.  We know some older folks, who do the same thing these days.  ; )

  chick-coloring-incubation-embryology-6

chick-coloring-incubation-embryology-7

chick-coloring-incubation-embryology-8 –

Soon, {A} was able to gently hold them one by one, although it was important to keep it fairly brief and keep them warm, and to always wash hands after wards!  (The same was done handling the eggs.)

chick-coloring-incubation-embryology-9

With each of the kids having their ‘own chick’, and knowing we wouldn’t be able to keep them much longer, I just knew a fun photo shoot, with the kids and the chicks  in the studio, was in order!!    So click on over to the Photography & Lettering section of this blog, to check out the portraits from that shoot, and find out the names of our chicks!!  Not much to read in that post!  I promise!  Just photos to enjoy.  See you there!!

Save

Save

Filed Under: Homeschooling, Science Tagged With: 4H-club, baby-chickens, chick-candling, chick-development-candling, chick-embryology, chick-incubation, coloring chicks, egg hatching, homeschooling, homeschooling-science, homeschooling-science-experiments

How Doing Puzzles Benefits Our Brain

March 21, 2010 By Laura 2 Comments

Puzzles are not only a great deal of fun, challenging, and an enjoyable way to pass time, but putting together puzzles benefits our brains in numerous ways! For people of all ages. The brain can be so fascinating, as we all know, and learning the many ways in which doing puzzles help our brain health, is really cool.  I’m going to tell you the many ways as to how, in just a moment.
(And by the way,  I should also let you know that this post has a couple of affiliate links.)

puzzles-benefit-brain-3

Real quick first though, I wanted to show you a very different kind of puzzle, than we had ever done before.

1_esphera-sphere-puzzle

My father had this 540 piece sphere puzzle, and he couldn’t figure it out how to piece it together. So he brought it along when came to visit one weekend, to see if the kids might want to give it a try. It’s a very unique puzzle, in it’s spherical shape, which as you can probably imagine creates new challenges to assemble, as opposed to the more traditional flat table puzzles.

It is a puzzle that is a bit more complicated.  At first glance, the pieces look typical of any other puzzle.
However, they are actually plastic pieces, and have a slight curve to them.

puzzles-benefit-brain-4
puzzles-benefit-brain__5 But the backsides are where they really differ.   They all have a little number on them, from 1-540, which is of course, how many pieces are part of this puzzle.   This is where our 7 year old triplets were able to help the most.  They grouped the numbered puzzle pieces into their proper hundreds:  100’s, 200’s, 300’s, 400’s and 500’s.  And then got them more so in order from there.  Great educational help, from the triplets.
–

puzzles-benefit-brain__007  But {A}(12), our oldest, really did most of the puzzle assembly.  You would think the numbers on the back of the pieces, really give away quite a bit, as to what pieces go where.  But if you think about it, each piece connects to at least 4 others.  So number sequence is hardly at play at all times.
–

puzzles-benefit-brain-8
It really is a bit a tricky thing, to connect them just right too, as there is no table or hard surface, to press down on.  Out girl found her technique though, and you would, too. In addition to the typical challenges of a puzzle, you don’t have a photo of the puzzle on all sides for this spherical one.  Of course, you do have the numbers to help guide you somewhat.  Still, it does take some focus and attention.
–

It’s a proven fact, that puzzles are good for one’s brain.  EHow offers these facts about why puzzles are so good for your brain:

• The brain is a highly complex machine that constantly forms and reinforces connections between its 100 billion cells. Performing mental exercises, such as puzzles, can help form new connections and boost long-term mental performance.
–

Making Connections

• Connections between brain cells, and in turn the ability of each neuron to chemically signal the 10,000 or so other cells it connects with, are what form memories.

puzzles-benefit-brain-2

Strengthening Connections

• Memory retrieval and the ability to process new information is associated with brain health.
Puzzles can help with both of these important brain functions by strengthening the connections between brain cells.

–

Giving Your Brain a Work Out

• Just as you exercise to build and maintain muscle mass, you can also strengthen your brain by exercising it.
Engaging in problem solving exercises creates new connections in the brain while strengthening old ones.

–

puzzles-benefit-brain_006

Use It or Lose It, Baby!

• If you don’t give your brain a solid work out, your mental strength starts to deteriorate.
As you age, it is important to keep your brain fit through routine exercises.

–

puzzles-benefit-brain-9

Continued Importance Throughout Life

 • According to one study in the Journal of the America Medical Association, elderly people who strengthened their synapses through ten sessions of brain-boosting exercises showed improvement in memory, reasoning skills and mental processing, “well beyond the specific skills the volunteers learned.”

–

puzzles-benefit-brain_010

So we can only assume, that puzzles are a great mental exercise, for our kids!  Or anyone, at any age.

I’m thinking with all of benefits for our brain, I could really stand to join my kids doing a few puzzles, or 1,000, myself.  Perhaps the younger kids start enjoying puzzles, the more their brains can benefit from them.    I think I’ll be encouraging doing more puzzles for my own kids, as an activity for those rainy days, or an after-dinner wind down before they settle into bed for the night.  I already know that they love to do crossword puzzles, and the more structural type.  But we need more old fashioned puzzles to put together around here! What a great idea for Christmas present, come to think of it. And putting together puzzles can be a great family-time activity, as well!

Here are some more ways in which kids doing puzzles benefits their brains:

• Hand-Eye Coordination     • Fine Motor Skills      • Gross Motor Skills      • Problem Solving
• Shape Recognition    • Memory    • Setting Small Goals

I haven’t been able to find this fairies design sphere puzzle online yet. But some of you homeschoolers may also love this other Esphera spherical puzzle (540 pieces) that is a world globe, which of course would not only be fun, but a great geography learning as well.

puzzles benefit brain
But if you and your family prefer traditional puzzles, they are just as fun, and of course give you all the benefits, too!

puzzles-benefit-brain-1

All in all, I think the likely perks of doing puzzles now and then, can be great for anyone.  If nothing else, it’s a leisure and relaxing activity, that exercises patience and persistence as well.   But as we all know now, there is so much more in it for all of us, than that!

Save

Save

Save

Save

Save

Save

Save

Save

Save

Save

Filed Under: Elementary Homeschooling, Games, Homeschooling, Middle School Homeschooling, Science, The Big Picture Tagged With: brain-development-activities, educational-games-for-kids, homeschooling, how-puzzles-benefit-our-brain, puzzles, puzzles-develop-brain, puzzles-increase-memory, puzzles-make-you-smarter

  • « Previous Page
  • 1
  • 2
  • 3
  • 4
  • 5
  • Next Page »

We are wicked happy to have you here! We hope you find much inspiration, help, humor and enjoyment here.


Archives


POPULAR POSTS

* * * * * *

SUBSCRIBE to House of Joyful Noise blog! Every new post, delivered right to your email box!


Privacy Policy

Amazon Affiliates

Never at any additional cost to you, we may earn a small commission for our endorsement, recommendation, testimonial, and/or link to any products from our website. Your purchase through our links helps support our family, while sharing with you the products we authentically use and recommend, for various ideas, and letting you know where you can purchase them. Thank you for your support!

[footer_backtotop]

Copyright © 2025 HouseOfJoyfulNoise.com · Genesis Framework by StudioPress