• HOME
  • {A}’s Chipmunk Training Archives

 Homepage

  • The Homestead
    • Home Projects
    • Home Improvement
    • Home Decor
      • Seasonal Home decor
        • FALL Home Decor
        • WINTER Home Decor
        • SPRING Crafts and Creations
        • SUMMER Crafts and Creations
    • Our Chickens
    • Gardening
    • Organization
    • Re-Purposing
    • Furniture Refinishing
    • Budget
  • Crafts & Creations
    • Seasonal Home decor
      • FALL Crafts and Creations
      • WINTER Crafts and Creations
      • SPRING Crafts and Creations
      • SUMMER Crafts and Creations
    • DIY (Do-It-Yourself) Project
    • Kids Arts and Crafts
    • Homemade/Handmade Gift Ideas
    • Holiday Crafts
    • Fan Pulls
    • Free Printable/Downloadable
    • Sewing Projects
    • Giveaways
    • Business Features
  • Recipes/FoodFun
    • Breakfast
    • Lunch
    • Main Dish
    • Sandwiches
    • Appetizers
    • Slow Cooker
    • On The Grill
    • Side Dishes
      • Soups
      • Salads
    • Baking
      • Breads, Rolls and Muffins
    • Snacks
    • Treats
    • Desserts
    • Drinks
  • Homeschooling
    • Elementary Homeschooling
      • Elementary Homeschooling READING
      • Elementary Homeschooling MATH
      • Elementary Homeschooling LANGUAGE ARTS
      • Elementary Homeschooling SCIENCE
      • Elementary Homeschooling HOME ECONOMICS
      • Kids Arts and Crafts
    • Middle School Homeschooling
      • Middle School Homeschooling SCIENCE
      • Middle School Homeschooling HOME ECONOMICS
    • Language Arts
    • Math
    • History / Social Studies
    • Geography
    • Foreign Language
    • Field Trips
    • Games
    • Nature Study
  • The Big Picture
    • Life In General
    • Celebrations
    • Faith
      • Into the Light; The Series
    • Giveaways
    • Reviews & Sponsors
  • Photography & Lettering
    • Photography
    • truck lettering
    • vehicle graphics
    • Newborns
    • Kids
    • Engagement
    • High School Senior Pictures
    • High School Senior Pictures Sneak Peeks

Sewing Easy Pillow Shams – Tutorial

November 8, 2017 By Laura 4 Comments

“Someday, I’m going to learn how to do that.”
I’ve got a list of things I’ve said that about. Doesn’t everybody? Do you? As for me, some of those things I’m actually working on now and then, and some are still sitting on the mental ‘someday list’, completely untouched. But learning how to sew, and run a sewing machine, is something I’ve actually gotten to! Oh, there is always more to learn, and I will. But my main motivation was simple:  Pillow shams.
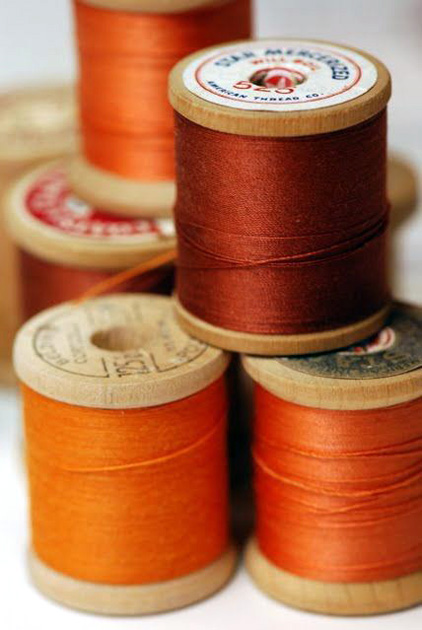
This girl loves throw pillows, as part of our home decor accents, as well as comfort. That include seasonal and holiday throw pillows. But seriously, I’m sure you could agree that there is only so much storage room available, for gads of interchangeable throw pillows. And the perfect solution to that, as far as I could figure, is pillow shams. I could just change up the shams on the pillows with the seasons and holidays!  They would take up virtually no space at all, just folded nicely in a pile somewhere.

But first, of course, I needed to learn how to sew.
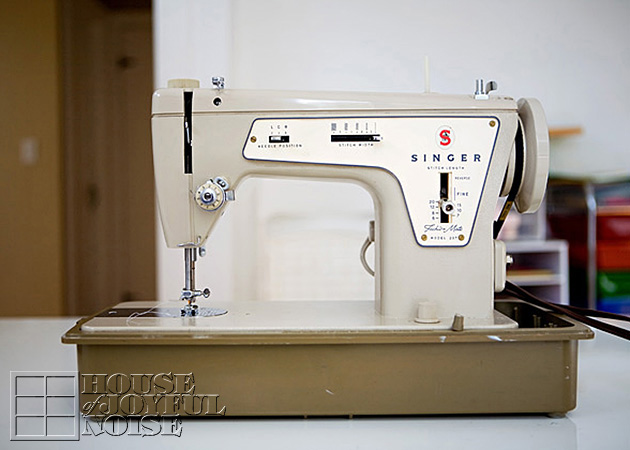
Old Simger sewing machine
And I really wanted to learn how, using my mother’s Singer Fashion Mate (Model 237).  It’s old, it’s ugly, and I’m pretty sure [Read more…]

Filed Under: Crafts & Creations, Holiday Crafts, Home Decor, Homemade/Handmade Gift Ideas, Seasonal Crafts and Creations, Seasonal Home decor, Sewing, The Homestead, Tutorial Tagged With: easy-pillow-shams, home decor, home-accents, homemade-gift-ideas, how-to-sew-pillow-shams, pillow-shams-easy-tutorial, sewing, sewing-pillow-shams, sewing-pillows, sewing-projects, sewing-tutorials

A Wind Chime from the Seashore

December 8, 2013 By Laura 2 Comments


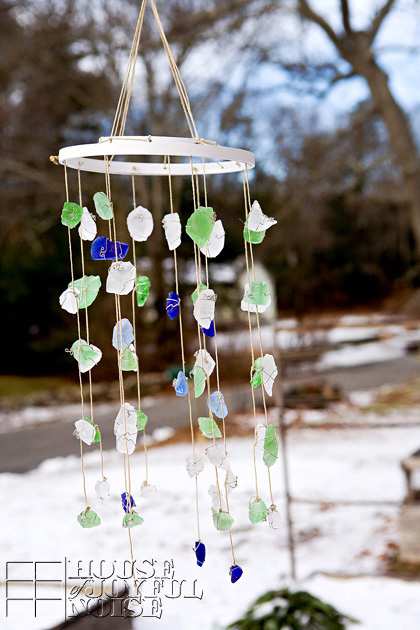
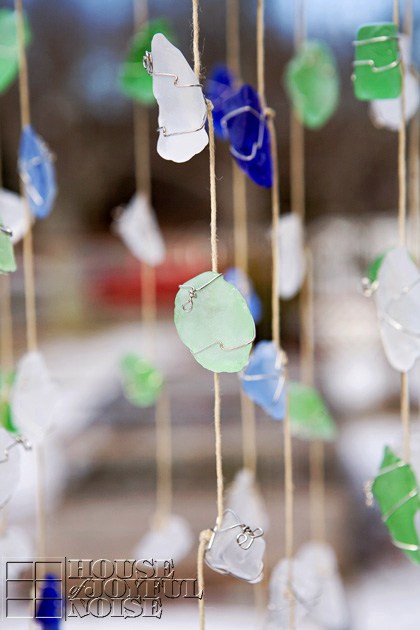
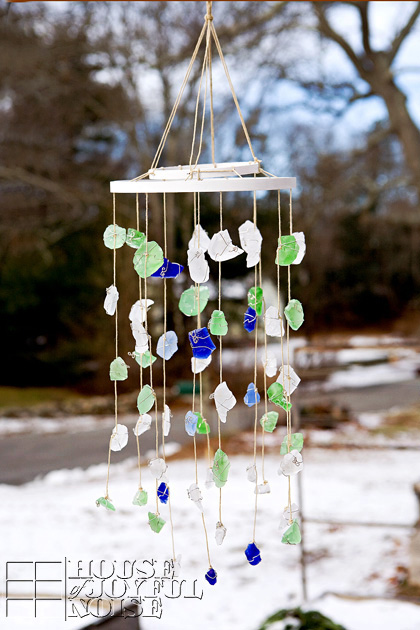
Today I am sharing with you a craft project that was a true labor of love. Or….I should rephrase that: It was labor, in the name of love.  This wind chime made with sea glass was a Christmas gift we all wanted to make for Michael’s mother/Grandma last year. I was so excited about it. It was only once we got going and invested time we didn’t want to write off, that we realized it was not going to be a quick gift-making project, by any means! But, it was a gift of love and so, it would be worth it.


Here it is all done. Photographed last winter, before packaging it up and shipping it off.
It’s an idea I actually borrowed from my always clever and creative fellow bloggin’ friend Angie of The country Chic Cottage.  When I saw hers, I just loved it, and thought it would make a nice gift for my mother-in-law who lives in Florida part of the year. In the end, I am sure Angie’s took a lot less time to make, because she managed to find some nice, big flattish pieces of sea glass to work with. And frankly, I just like hers better.

All we could find were glass sea glass rocks; just bulkier and impossible to work with as her tutorial went. So we had to improvise. Big time. And thus put a lot more time into it. BIG TIME. 

The supplies needed were two embroidery hoops; a bigger and smaller one, lots of sea glass in various colors, jute string, E600 or some string glue, and in our case some silver-plated copper *wire and a set of needle-nose pliers. (I forget if the wire was 18 or 22 gauge; but it needs to be pliable enough to really reshape and work with well.)

My post here is not a tutorial by any means. I didn’t take photos along the way for that, as my hands were busy doing tedious work in late hours of the night. And I sure cannot tell you all about how we made it exactly because, for gosh sakes, it was last year!  My memory skills leave much to be desired. Such as, remembering things. And I struggle with recalling yesterday morning. 

Anyway, no one in their right mind would take the time to make this lovely wind chime our way, with this bulky sea glass. So if you’d like to make one, I’d recommend finding big sea glass with big flat surfaces, and make it the way Angie did. Unless you just like the fine art wire-work on ours. 😉   I do think it adds some fancy.


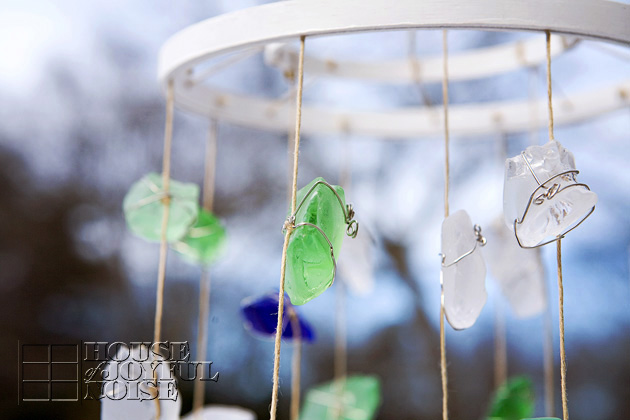
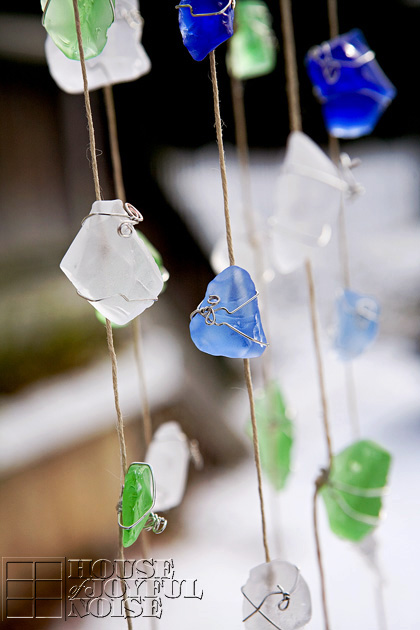
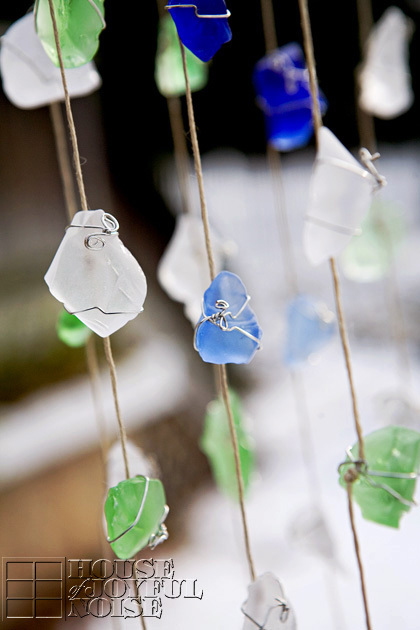
We tied a knot everywhere we planned to put a piece of sea glass. But since tying on and gluing the rocks to the jute was not going to keep them secure enough, we used wire as well.  We took a long pieces of cut wire, laid each over the front of the sea glass (with the back being glued to the jute where the knot was), wrapped it around to the back, twisted it a couple of times over the knot placement, and brought both ends to the front again. Then using the needle nose pliers to create nice designer curls with the ends.
–


Now do you see those kinks in the wire, here and there?  That’s from tightening everything up to make the glass nice and secured, once it’s all wrapped and curly-cued. By taking the tips of the needle nose pliers, grabbing the wire in a suitable place, and giving it a little twist, we’d get this kink that gave it even more of an artistic element, and also made everything tighter.
–


We did actually really like the look of the wire work, since we turned it into art. But it was truly hours of work, for such a simple gift, that really did look homemade in the end. (Not saying that with any kind of pride.)   😉

As I said earlier, it was from all of us for Michael’s mother/my mother-in-law/the kids’ grandmother. (I wanted it to be really nice!) And it was a collaborative effort among us all. The kids went shopping with me and got everything we needed. They also picked out all of the pieces to use out of our batch of sea glass, and helped with other little tasks.  But Michael and I did all of the gluing, and especially the wire work, for 2-3 hours every night, until it was finished. 

When all was done, it took so long, this Christmas gift for our loved one was belated!  When Michael happened to be talking to his mother on the phone, he told her that her gift was going to be late, because we were still working on it! 
–

She did receive it shortly thereafter Christmas, and called us with many expressions of gratitude.
I think she realized how much work we really put into it, and she even convinced us that she loved it. 😉  I’m not sure it really chimes per say.  It takes a mighty wind for those rocks to hit each other. But when they do, it does make a pleasant and interesting sound. I just wouldn’t describe it as, you know, chime-y.  Of course, it’s also decorative for her deck or yard.

We realize that some crafts are just going to come out better than others. We were going for something more like……well, like Angie’s!  But hey…..it was made with love, and received with love. And that’s always nice, no matter which way the wind blows.

Thanks Angie, for the inspiration!
And thank you all, for coming to see our wind chime.

Save

Save

Filed Under: Crafts & Creations, DIY (Do-It-Yourself) Project, Homemade/Handmade Gift Ideas Tagged With: nautical-gifts, sea-glass-wind-chime, seashore-gift-ideas, seashore-themed-wind-chime, wind-chime

Glass Tile Pendants and Magnet Sets | Tutorial | Handmade Gifts

March 25, 2012 By Laura 27 Comments

Glass Pendants and Magnet Sets Craft Tutorial

   
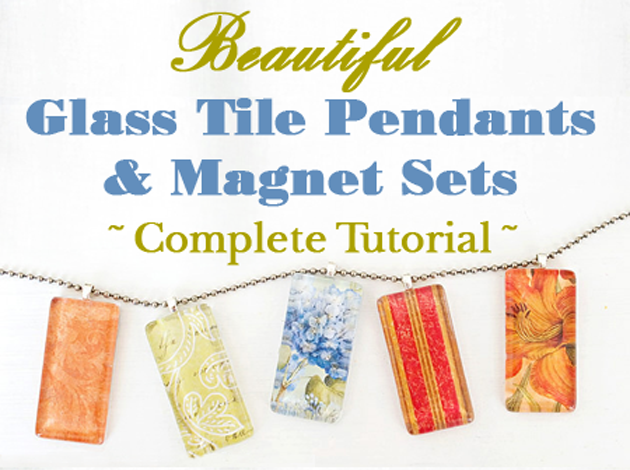
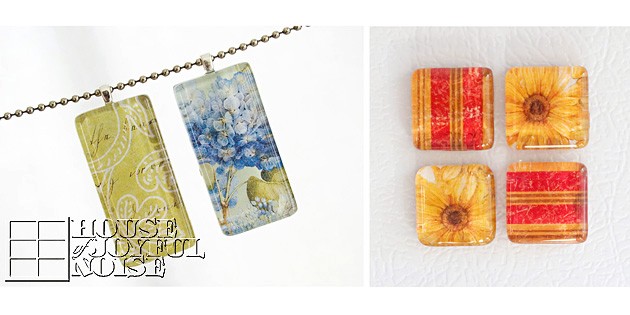
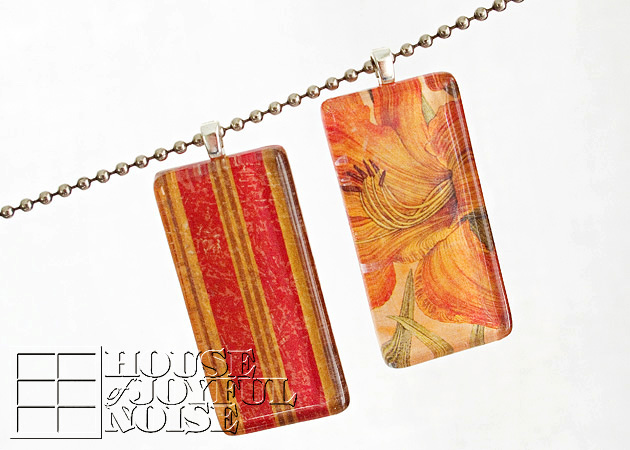
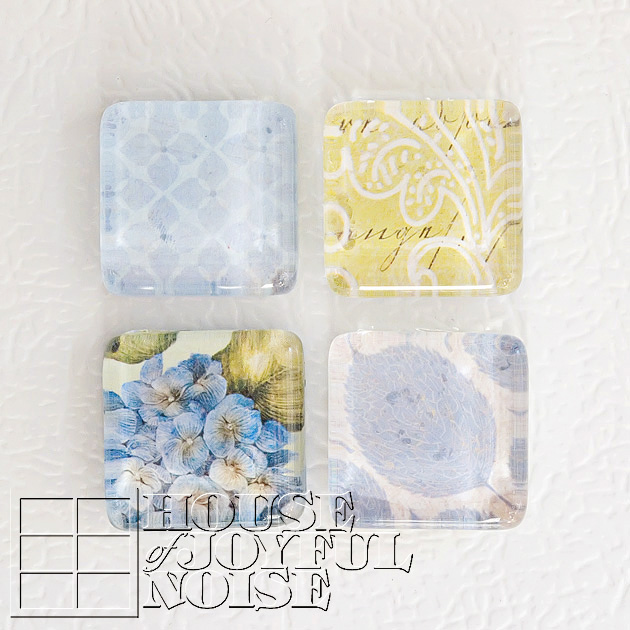
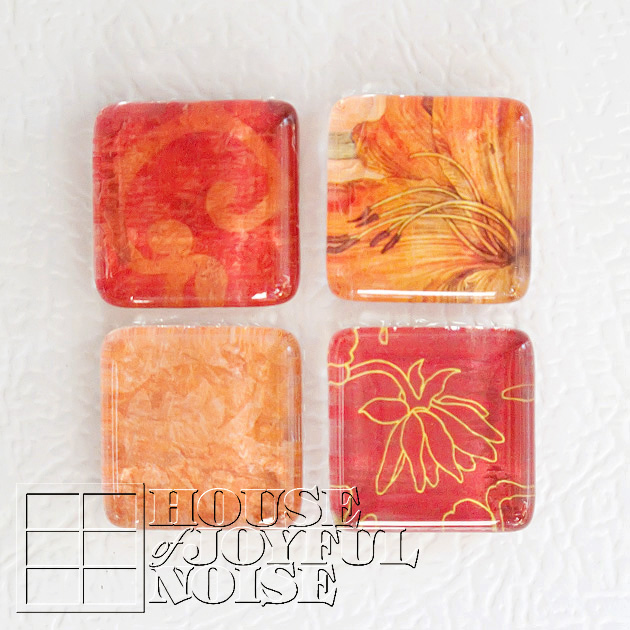
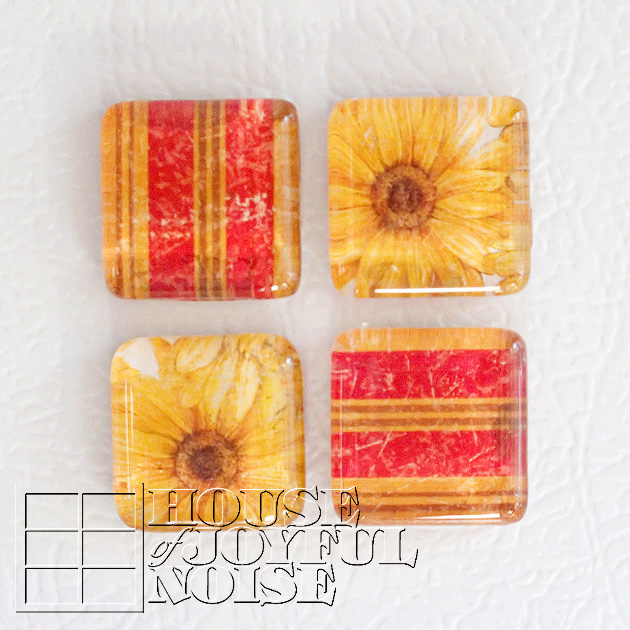
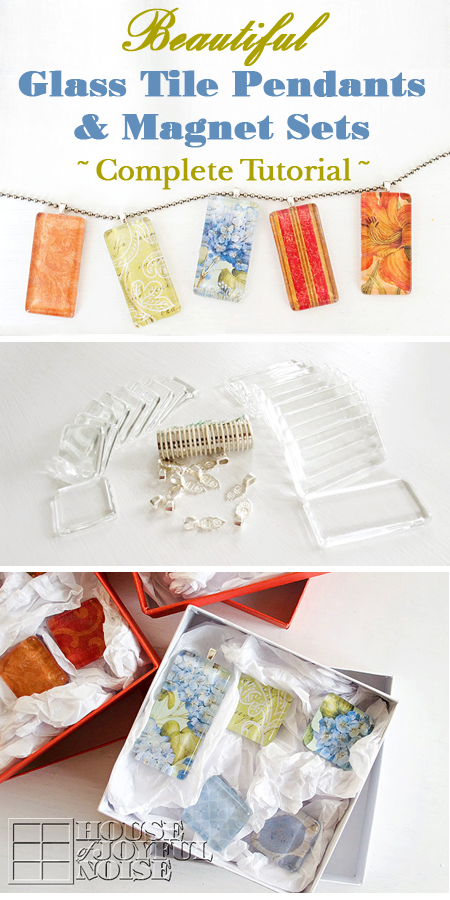
Today we’re going to show you how we made these beautiful glass pendants and magnets. They make such beautiful gifts, for women, as necklaces or magnet sets. I’m sure you could use the same technique to make other jewelry as well, such as cuff bracelets or rings.
You can choose any cardstock print you love, and the necklace pendants can be worn on any necklace chain, ribbon or cord.  So they can be very versatile in style, for you or your gift recipient’s liking.

duo-magnets-pendants    
This was the my first time doing this particular project. But in doing, so I learned lots of tips and tricks along the way, that I’ll be sharing with you throughout this tutorial.  Also, at the end I will share with you the specifications of the supplies, and the resource where you can get them, as I did.  So let’s get started:

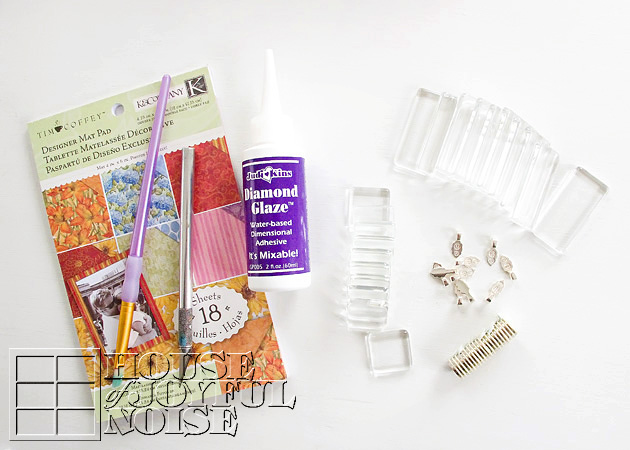
001_glass-tile-craft  Here are all of the supplies I used, but I’ll give more details and sources at the end, so you know exactly what to get, and where:

  • 2-sided designer card stock
  • glass tile rectangles
  • glass tile squares
  •  magnets, with adhesive
  • sterling silver plated bails
  • Diamond Glaze Dimensional Adhesive
  • an x-acto blade
  • a synthetic hair paint brush

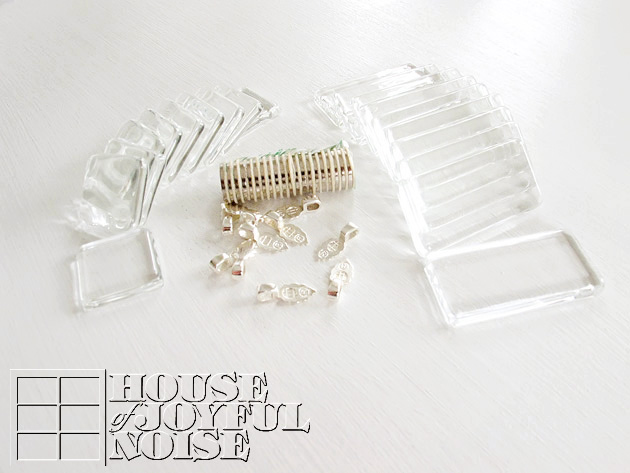
002_glass-tiles-bails-magnets Here is a closer look, at the beautiful tiles, bails and magnets I started with. 

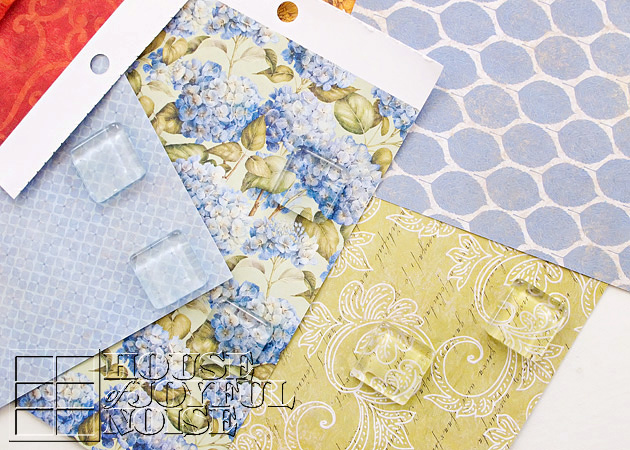
005_making-glass-magnets All of the tiles, both pendants and magnets, are made by adhering beautiful card stock paper behind the tile, which is then magnified through the glass in such a pretty way. 

So here’s a TIP to start:  Before applying any adhesive, I put each tile on the paper I’d be using, and moved it around and looked at the design coming through, so I could decide ahead of time, exactly where I wanted to place each tile. 

003 Once I decide that, I put a little Diamond Glaze on the center back (flat side) of a tile, and then spread it out with a little brush to the edges, pressing out any bubbles with my brush.  I’d give it a moment to get a little tacky and less wet, and then I’d place and press down onto the paper where I wanted it.

TIP:  Eventually I got tired of squeezing it out of the bottle, so I’d put a small puddle on a coated paper-plate, to work from with the brush. You can do that too, if you want to.

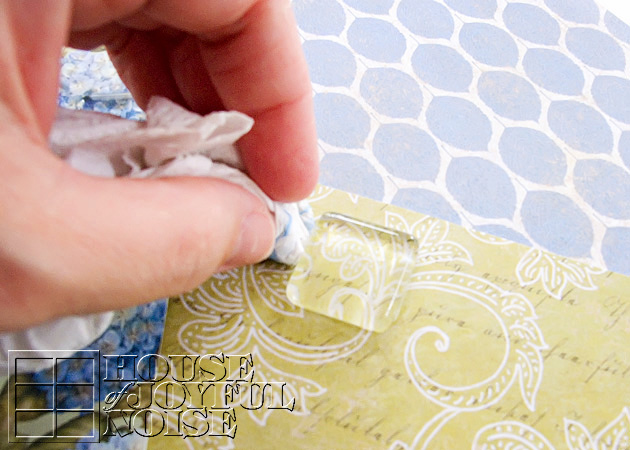
004_making-magnets TIP:  In pressing it down hard enough, to be sure there is no air bubbles, the adhesive smooshes out from underneath the sides of the tile little. You don’t want to leave it, because it hardens like glass!  And you’ll be trimming the excess paper off. So, I used little pieces of twisted paper towels, to clean/wipe the sides, every time.  If you leave it, you will not be able to trim the paper neatly.

Also, I often carefully picked up the paper with the tile on it, and rubbed the back down too, just to be sure it was smoothed out.  Any of the tiles may need to be pressed down repeatedly, as air bubbles tend to sneak in. So just keep checking them until they are drier.

One by one, get all of your tiles adhered to the paper.


006_glass-tile-crafting Once they are all adhered and dried, it’s time to trim.

TIP:  To know if they are dry enough, simply touch the back-side of the tiles where the paper is, and if it is at all cool to the touch or damp feeling, leave them longer to dry.  I honestly do not have any time frames for you on drying time, because I made a LOT of tiles in a craft period spread over 2 days.

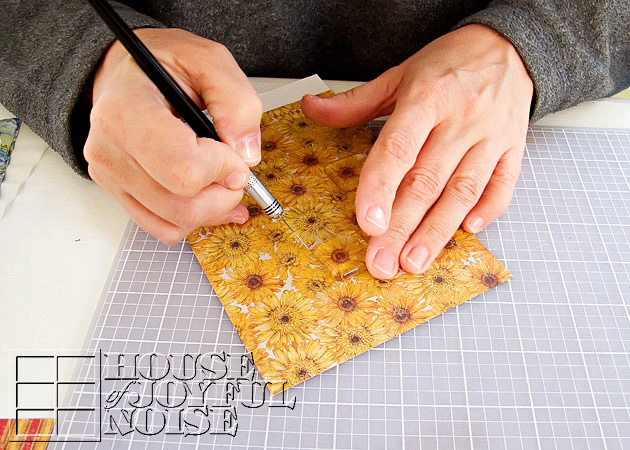
But once you know they are dry, trim the tiles out of the paper, very closely to the edge of the tiles. I always cut on my self-healing cutting mat. But you can use dense cardboard (not corrugated), if you need to.

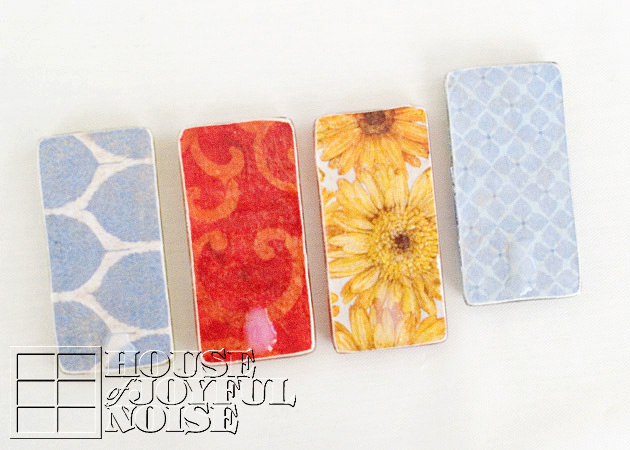
Once all of the tiles are trimmed out, they look pretty done from the front!  You’ll see how beautiful they are already, and you’ll be inspired to make them wearable, or be able to place on a refrigerator.  So they need bails or magnets!

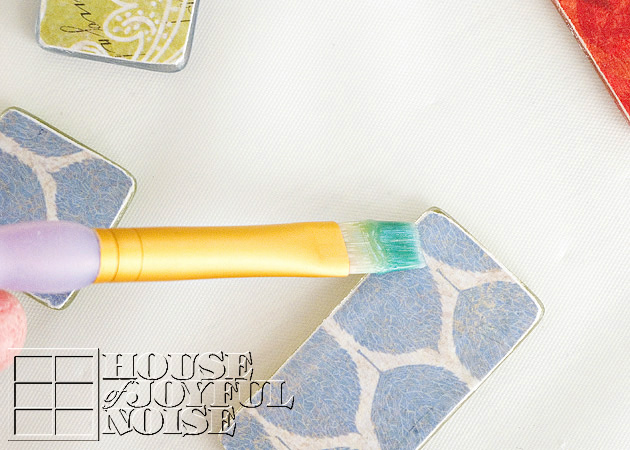
007_making-glass-pendant-necklaces Now I wanted to give the whole back-side of the tiles a coat of Diamond Glaze, as well, brushing just over the edges of the paper as well. The purpose of this is to protect the paper, seal the edges, and make the backs glass-like as well. 

TIP:  Whenever and where-ever you brush on this glaze, you want to use an adequate amount to let it settle to a glass-like surface. If you brush too thinly, just know it will leave a brush marks in those areas. Allow them to dry completely.

If you want to be sure they are thoroughly dry, leave them overnight before the next step.

 From there, I lightly sanded any rough edges of paper I felt, with fine sand paper,  just to make it feel smooth. I wiped off any fine dust from that.

008_making_designer-pendants Once all of the backs were dry, it was time to add the bails to the backs of the pendants.  Basically, I just added a dab of glaze straight from the bottle, onto the center back top of the pendants.

TIP: Be sure to look at the front design, to check that you won’t be adding your bail to the wrong end, leaving you with an upside down pendant! ; )   (I was proud of me for remembering to check that, before I made that mistake.)

009making-glass-tile-pendants Once it has tacked up just a bit, I pressed my bails on just like shown, and then cleaned up what smooshed out, with my brush.

TIP:  As you work throughout this whole process, you may want to clean your brush. The Diamond Glaze is washable, and so so is your brush!  Just wash with warm water (maybe a bit of dish soap if need be), rinse well, and dry.

010_making-magnets
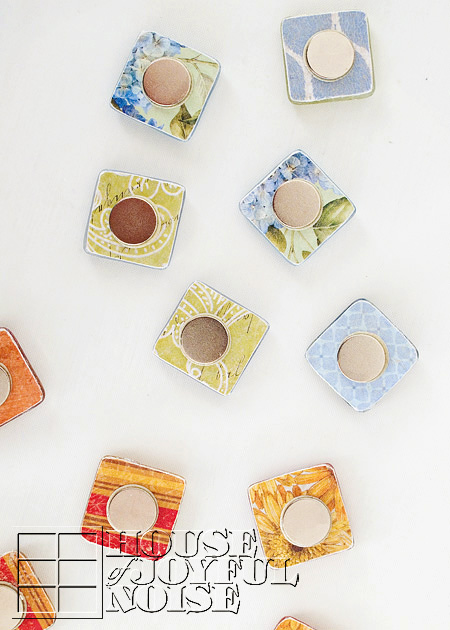
For the magnets, add a small dollop of glaze to the center of the back of the magnets.   It will tack up a bit while you try to pry the magnets apart, and peel the adhesive backing off of one.  Then just press the sticky part down onto the center of the magnet.  Again, clean up any glaze that squished out, for a cleaner looking finished piece.

TIP: If you use too much glaze, the magnet will just slide off center. Just move it back in place. As the glaze tacks up, it’ll stay.  I can see a couple of mine above slid a little, and I missed it.

Another Tip: After all of the pieces were dried, I went back one more time, and added a bit of glaze around the magnets, and around the bails (and underneath the loop), then smoothing with the brush, just for a little more re-enforcement. Whether they really needed that or not, I don’t know.  But I just wanted to be sure the bail would not lift the paper if pressed on, or the magnets would not stay on the fridge and the tile be left in anyone’s hand without the magnet, when moving them!  So I took the time for that extra step.

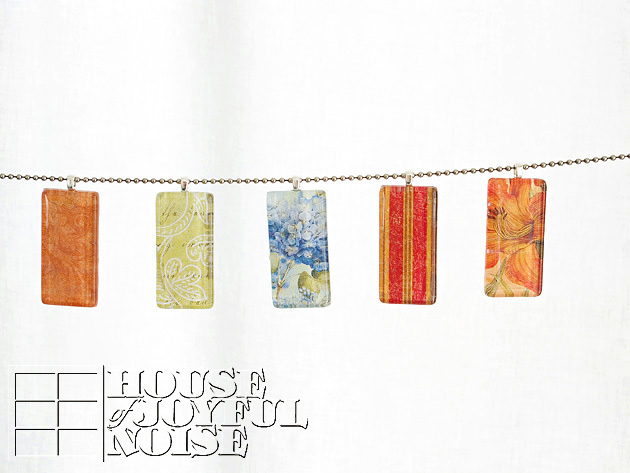
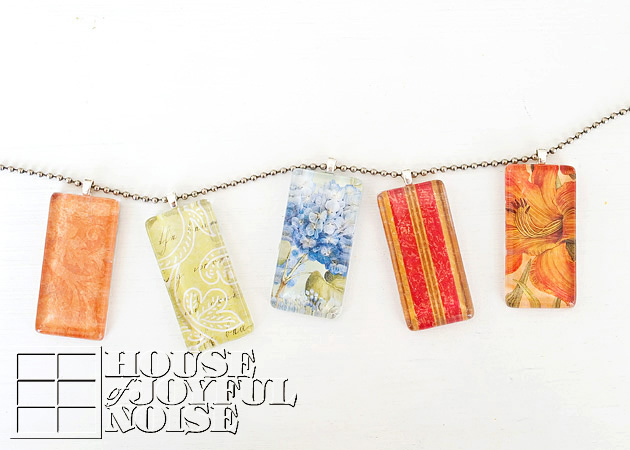
011_making-pendant-necklaces As I said before, they can be worn on a ball chain as a necklace. But they are so versatile for various outfit styles! Consider wearing them on box chains, suede string, leather cords, or a matching sheer or satin ribbon!

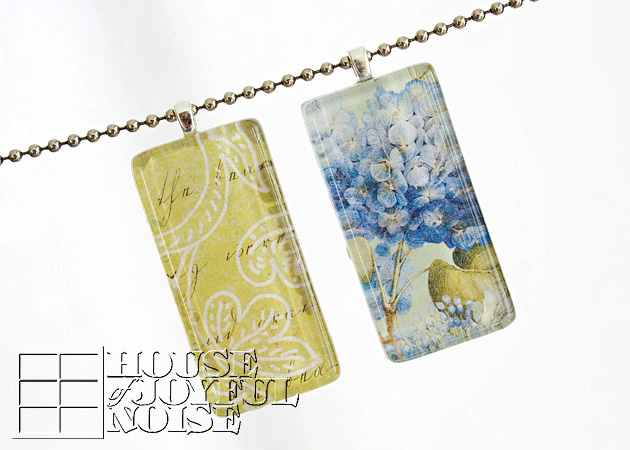
Closer peeks of pendants….

012_glass-tile-pendants

013_glass-tile-pendants

….and the magnets sets….

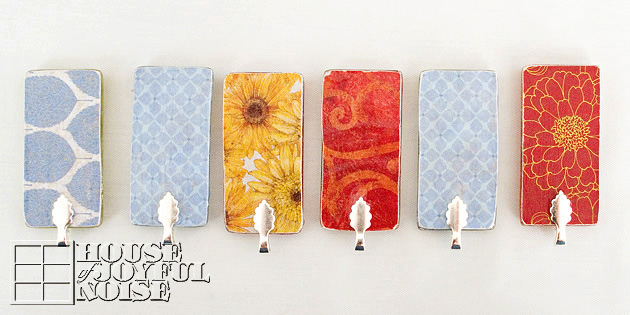
  014_glass-tile-magnets

015_glass-tile-magnets

016_glass-tile-magnets

017_glass-tile-pendant-necklaces-craft The chained pendants, lying on the table.

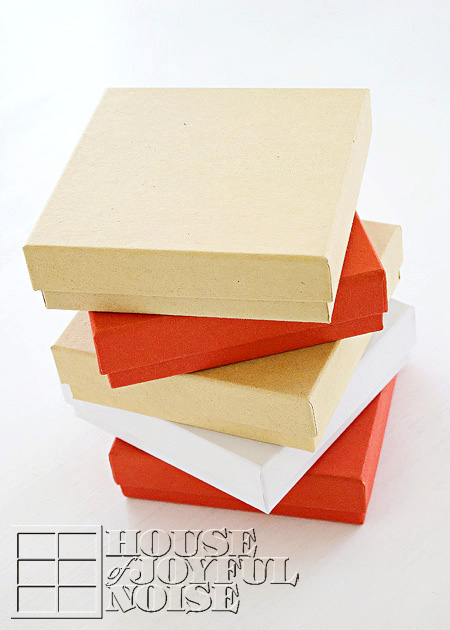
018_jewelry-boxes

I found the perfect boxes, to package these gifts in.


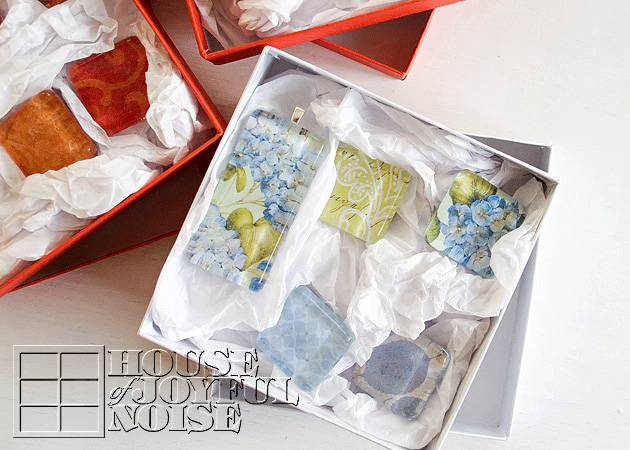
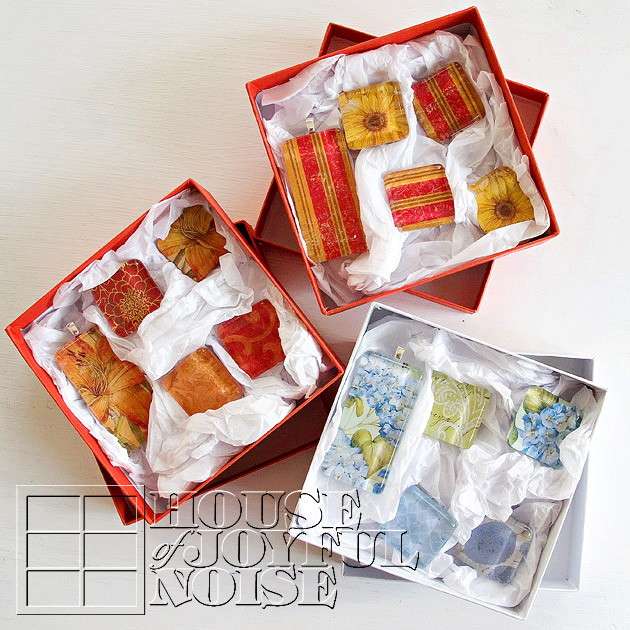
019_glass-tile-pendants-magnets I started, trying to fold the tissue paper.  But ummm….honestly, there needs to be a youtube filmage someday, on me and tissue paper, trying to work together.  I have NO = NONE = ZERO patience for it! It took me….seconds, to just crumble it up, and start stuffing it in the boxes!  But you know, in the end, the look kind of worked, with the slick glass pieces!

I was SO excited to finish packaging them up, and get them to the post office! 

020_glass-tile-magnets-pendants I was just thrilled, with how nice they all came out!  Granted, every piece was not absolutely perfect, but they were made with absolute love! That’s what anything homemade, is all about!

In closing, I’d like to give the the specifications and resources, if you’d like to try making these yourself. Because really, it’s quite easy, quite fun, and you’ll be amazed at what beautiful pieces you made all-by-yourself!  What a perfect gift for a special friend’s birthday, or as Mother’s Day or Christmas gifts! Someone, could be impressed with you. ; )

EXTRA TIPS:

CARD STOCK CHAT:  You do really need to use heavy designer card stock for these, as opposed to regular scrap booking paper. The layer of glaze would make regular weight paper very soggy and ripply, very fast. You’d have a hot mess on your hands, quickly.  The heavier stock holds up to the glaze much better. Also, I really loved using the 2 sided designer card stock, because the coordinating papers made really nice coordinating mixed sets of magnets! I had fun putting them together. The brand I used of the card stock were pads by K&Company.

MAGNETS: I got the 1/2″, ‘3 pounds of force’ Neodymium magnets for strength. Of course, I had no idea what that meant. I can tell you, they have some crazy force!!  I had a few comical happenings!  At times, they just kept pushing away from each other. Or, they would just pulling each other and piling up, with no sense of control! Chaos, I tell you! So maybe I got too strong? But it’s better than the frustration of weak magnets!

GLASS TILES:  I got/used 7/8″ Square Pure White Glass Hand-Cut Tiles, and 1-7/8″ x  7/8″ Rectangle Pure White Glass Handcut Tiles

BAILS: Sterling Silver, Standard Small. (There are various styles.)

DIAMOND GLAZE: 2 Oz. Bottle.  – This stuff can be used as a glaze, and also as an adhesive. As you know, I used it for both in this project!  It dries beautifully clear, and glass-hard! So it can also be used dimensionally!  For example, as raised glass dots on a piece, or to add pop to any design!  I can’t wait to work with it some more.

SUPPLY SOURCE:  Well, the card stock pad I got at Michael’s Arts & Crafts.  But everything else….the tiles, bails, magnets and Diamond Glaze, I got on Etsy!  I would start by searching look for a vendor who sells glass tiles, and in particular, search for ‘pure white glass’ tiles. They seem to be superior in quality, in my experience. I did have a specific vendor I could recommend, from whom I bought my supplies from, but she seems to be out of business now.

* That’s a wrap to this project!  I hope you loved what you saw, and find yourself inspired! You can do this!  Please feel free to ask any questions you may have in the comments and I’ll do my best to answer them for you, or just leave some love, if you’d like.  Thanks for coming by!

 Love it?  PIN IT!!

Save

Save

Save

Save

Save

Save

Save

Save

Save

Save

Filed Under: Crafts & Creations, DIY (Do-It-Yourself) Project, Holiday Crafts, Homemade/Handmade Gift Ideas, Tutorial Tagged With: craft-tutorials, crafts, Diamond-Glaze, glass-pendant-tutorial, glass-tile-crafts, glass-tile-magnets, glass-tile-pendants, handmade-necklaces, homemade-gifts, homemade-jewelry, jewelry-how-to, jewelry-tutorials

Valentine Chocolate Covered Spoons

February 8, 2012 By Laura 5 Comments

003_valentine-chocolate-covered-spoon-150x150
Chocolate covered spoons are something we have been intending to try making, for awhile now. There really needs to be no upcoming holiday to make them. But when there is a holiday coming up, it’s another good reason to go ahead and make them!
If you have never heard of chocolate covered spoons, they are just what they sound like they are:  spoons covered in chocolate!  And then prettied up.  They can be used to to stir your coffee, hot chocolate, warm milk, etc – to add some chocolatey flavor to your drink, or make licking your spoon that much more enjoyable!  Meanwhile, if you’ve made a whole batch, they just look pretty sitting in any container in your kitchen.
Chocolate covered spoons can be made as simply or fancifully as you’d like. You’re the designer, with each and every spoon, and that’s the fun of it!  I already had an idea of how we wanted to make some chocolate covered spoons for Valentine’s Day, so that’s what we’re sharing with you in this post.

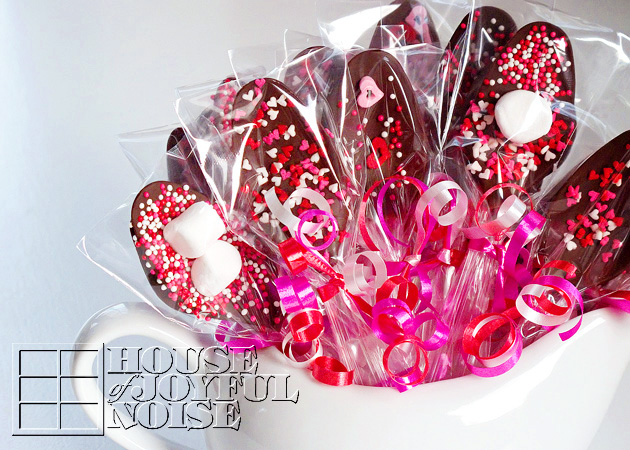
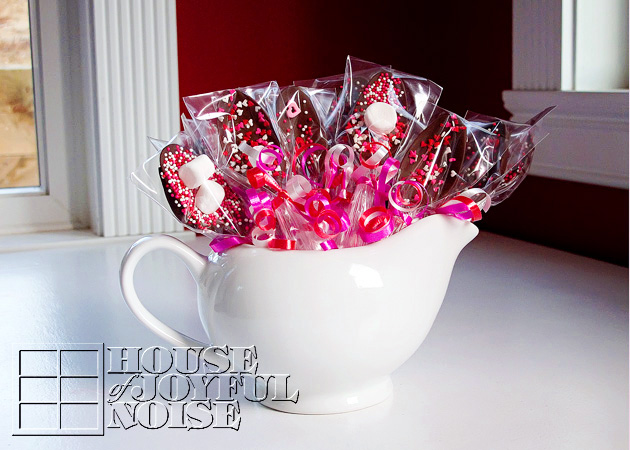
005_valentine-chocolate-covered-spoons1 Here are a bunch of our spoons, already finished. I thought they looked nice in this simple white gravy boat. We made even more than this though.  We’ll be using some ourselves, but we really made them for the kids to give to their friends. And our oldest made some for her whole basketball team. lol.  I made a simple Valentine card printable, to go with each spoon, and you can get that for yourself HERE, if making these spoons is an idea you’d like to use for your kid’s friends or classmates, too.  It’ll make a unique Valentine, don’t you think?

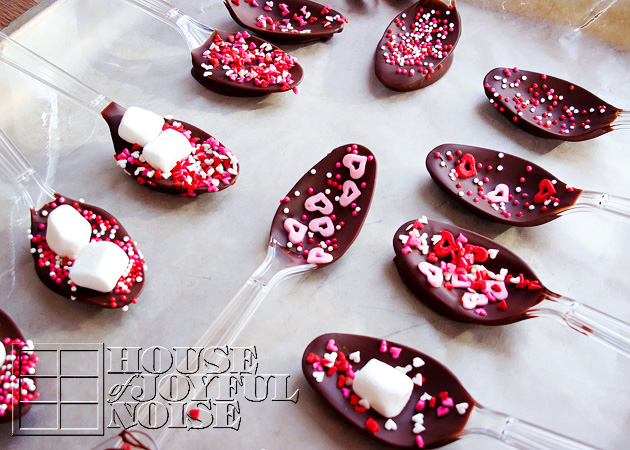
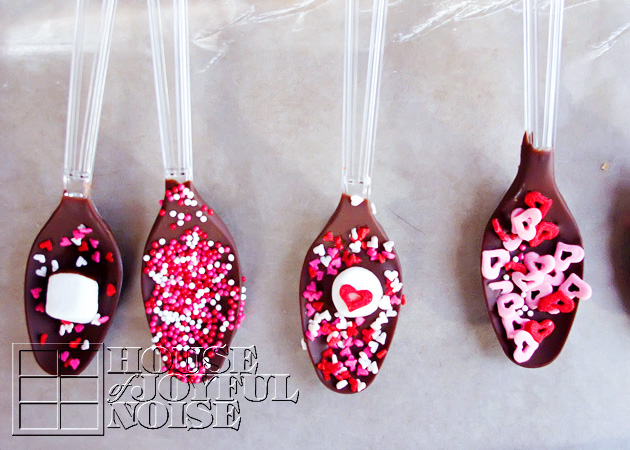
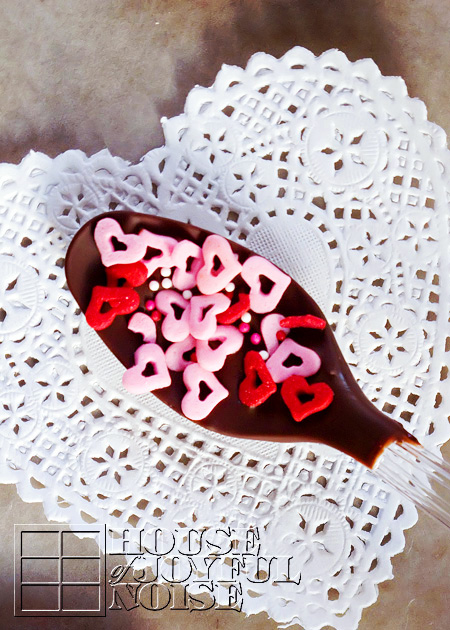
I did not photograph the step-by-step process, but I think it is simple enough directions to explain.   All you need is some hard plastic spoons, *chocolate to melt, a tad bit of shortening (optional, I guess), and whatever you’d like to decorate the chocolate covered spoons with!   We used Valentine sprinkles and marshmallows for this batch.  But you can drizzle with white melted chocolate after, use sprinkles on other (holiday) colors, cover in nuts…whatever you’d like!

*Because we have a boy with a severe peanut allergy, we cannot use the chocolate melts (like Wilton’s) that are sold in stores in the baking / candy supplies aisles, because they are not guaranteed peanut-safe.  They are convenient though, and melt very nicely, if you can use them!  Since we cannot, we use Hershey’s Milk Chocolate Chips, and so the best we can with those. I believe we can find peanut-safe melts online though, if we planned ahead.

001_chocolate-covered-spoons We got everything out that we needed:  spoons, chocolate (chips), sprinkles and marshmallows, and shortening.  You can melt the chocolate in a mug or a glass measuring cup – just choose something deep. We got a few cookie sheets out, and covered them with some wax paper.  

We began melting about 1/2 cup of chocolate chips at a time, in a mug, in the microwave, with just a 1/2 teaspoon of shortening. (I normally avoid shortening for anything, but a tad bit does help the chocolate melt and stir up smoothly.)   We started at a minute, and then did 10-1secomd intervals, stirring completely in between, until all of the chocolate is melted and smooth. 

Two important tips:   1) You do not want to overheat the chocolate, or it will be ruined. Little by little is the way to go, and add a dab more shortening if you feel it needs it.  2)  I use the handle end of a wooden spoon, for stirring chocolate.  I saw that tip somewhere a long time ago, as it doesn’t heat and cool like metal does.  Stir rapidly, for smooth and shiny chocolate.

002_chocolate-covered-spoons When your chocolate is melted, dip a spoon!  It does take a little patience to wait for each spoon to stop dripping off excess, unless you want to make a big mess.  Then, over an extra the cookie sheet or wherever, sprinkle on your decorations!  For the ones we were adding marshmallows to, we pressed those in first, and then added the sprinkles.  We had fun with our little Valentine variety. Simply rest the handle of the spoon on the edge of a cookie sheet, and the wet chocolate end of the spoon on the wax paper to harden.  As soon as the sheet was full of spoons, we put the sheet in the refrigerator, to further harden.


003_valentine-chocolate-covered-spoon
A couple of other things we have learned:   The spoons really need to be kept in a cool place. Cold, is best. SOME of our spoons, developed white specs on the chocolate the next day.  We know that tends to happen sometimes when the chocolate is overheated any amount.   It could very well have something to do with our needing to use chocolate chips too.  (You know how milk chocolate chips have that white-ish coating sometimes?)  But we did notice, that they spoons we left int he coldest place, are still looking perfect!! Those are the ones we’re giving away! lol.  Regardless……the little change from the smooth chocolate you see will not hurt you or any different.  It’s just prettier to prevent it, if you can.


004_chocolate-covered-spoons To package nicely, we got some skinny clear bags sold in the baking/candy making aisles. They have some for chocolate covered pretzels, and that what we used!  We just cut them down to about 8 inches, and they were perfect!  Then we tied on curling ribbon, and curled!  As I said, I designed a Valentine for each spoon, for these.  But this is a fun project for you (maybe with our kids too!),  and it’s certainly a pleasant treat that will bring a smile to anyone’s face, when given away, or served with a hot drink!

ENJOY!

Save


Filed Under: Crafts & Creations, Drinks, Fun Food, Holiday Crafts, Homemade/Handmade Gift Ideas, Recipes, Seasonal Crafts and Creations, Treats, Tutorial, WINTER Crafts and Creations Tagged With: chocolate-covered-spoons, chocolate-covered-spoons-how-to, chocolate-spoons, edible-crafts, February-crafts, February-treats, kids-recipes, recipes, serve-with-coffee, treats-to-serve-with-hot-drinks, unique-valentines, valentine-ideas, valentines

Gift Idea for the Coaches!

November 14, 2011 By Laura 10 Comments

03_coach-gift-handmade-300x214

We’ve got a great gift idea for coaches, today!  We need to show our kids’ coaches, and especially volunteer coaches, our appreciation for their sacrificed time and generous efforts in coaching and teaching our kids.  This post does contain an affiliate link, in case you don’t have the equipment to do projects like these.

Even though I haven’t even blogged about our kid’s sports fall season(s) yet, I thought I would share with you all a nice personalized gift idea that is great as a ‘thank you’ to your kids’ sport coaches.  Although keep in mind, the specifics/design of this idea can be changed for many other gift needs, and fitting for teacher’s (on a pedestal mug), Dads, teens, etc., Christmas or thank you gifts as well, as long as you have some kind of cutter machine, such as a Silhouette.  (The number of projects and crafts you can do with this machine, are only limited by your imagination!)  You may consider some simple graphics, or the special occasion of the recipient.  The gift idea is completely customizable and suitable for so many, which is why we thought it would be great to share with you.

We’ve done this gift before for other coaches too, but this time it was for our boy’s awesome flag football coaches. We put this gift together very quickly, literally right before their Superbowl Game!(<< Whoo Hooo!)

01_
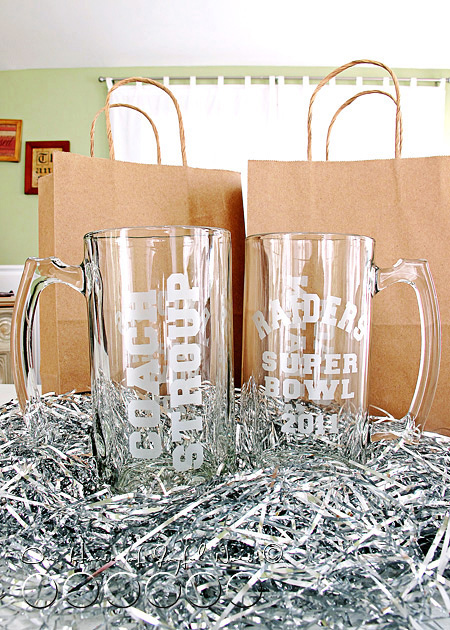
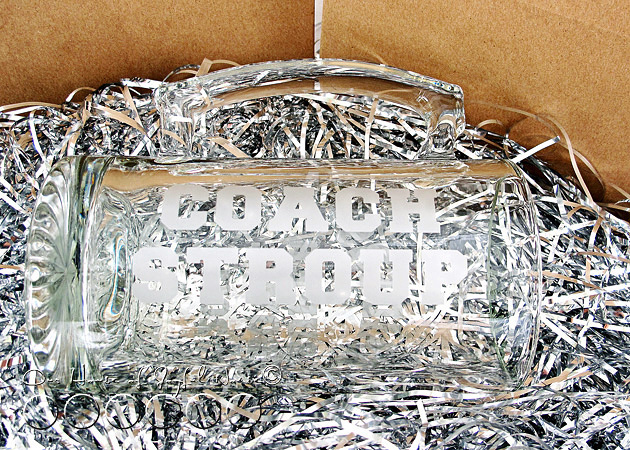
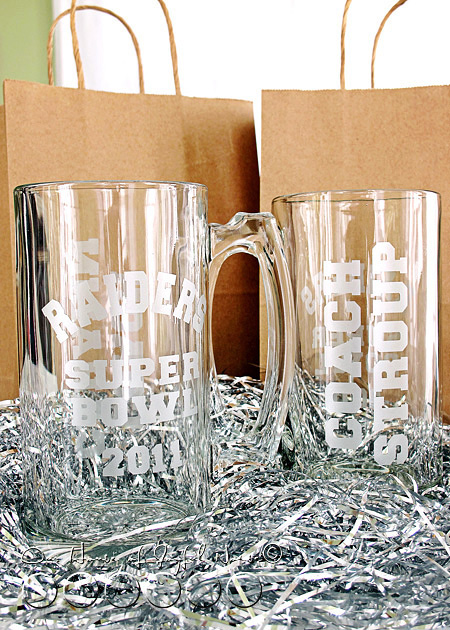
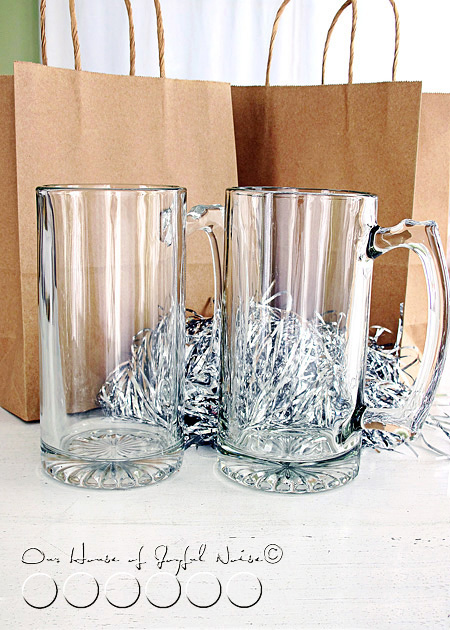
We picked up these ‘guy mugs’ (beer mugs….or Root Beer Float Mugs! ; ), at the Dollar Store!  As well as the brown paper gift bags, and the silver bag filler.  2 gifts, for less than $6.00!


02_lettering-mugs
After taking measurements of our mugs, we put together a quick layout on the computer, and cut out 2 sets. (One for each coach, and personalized with their own name.)  Our boy’s team was the Raiders, whose colors are silver and black (on white). We chose to just use ‘frost’ vinyl material, for something quick.  But silver letters outlined in black, would have been nice for this gift too, as their team colors.


03_coach-gift-handmade I didn’t take step-by-step photos.  But the general procedure is:  layout what you are wanting cut in the computer, cut it out on your cutter, weed the vinyl material, cover the weeded vinyl with transfer tape, peel off the back, apply your lettering/design, and then peel off the transfer tape.


04_viny-lettering-mugs
I did wrap and stuff the mugs in white tissue, and put them in the bags with the silver filler.

We think it’s a great gift!  It’s sharp looking, personalized, so affordable, and most of all…..thoughtful!  (And I keep hearing, that’s what counts. ; )

The boys had a blast this season, and we were so happy as it was, that their team made it to play in the Superbowl game, just as their big sister did last year playing flag football.  Did they win? Well, we’ll let you know how that game went, in an upcoming post.

Meanwhile, CHEERS! <clink!>. We hope you enjoyed this quick gift idea.

* * * * * *


Filed Under: Crafts & Creations, DIY (Do-It-Yourself) Project, Homemade/Handmade Gift Ideas Tagged With: gift-ideas-for-coaches, gifts-for-coaches, homemade-gifts, Silhouette, Silhouette-cutters, thank-you-gift-ideas

  • 1
  • 2
  • 3
  • …
  • 5
  • Next Page »

We are wicked happy to have you here! We hope you find much inspiration, help, humor and enjoyment here.


Archives


POPULAR POSTS

* * * * * *

SUBSCRIBE to House of Joyful Noise blog! Every new post, delivered right to your email box!


Privacy Policy

Amazon Affiliates

Never at any additional cost to you, we may earn a small commission for our endorsement, recommendation, testimonial, and/or link to any products from our website. Your purchase through our links helps support our family, while sharing with you the products we authentically use and recommend, for various ideas, and letting you know where you can purchase them. Thank you for your support!

[footer_backtotop]
Copyright © 2025 HouseOfJoyfulNoise.com · Genesis Framework by StudioPress