• HOME
  • {A}’s Chipmunk Training Archives

 Homepage

  • The Homestead
    • Home Projects
    • Home Improvement
    • Home Decor
      • Seasonal Home decor
        • FALL Home Decor
        • WINTER Home Decor
        • SPRING Crafts and Creations
        • SUMMER Crafts and Creations
    • Our Chickens
    • Gardening
    • Organization
    • Re-Purposing
    • Furniture Refinishing
    • Budget
  • Crafts & Creations
    • Seasonal Home decor
      • FALL Crafts and Creations
      • WINTER Crafts and Creations
      • SPRING Crafts and Creations
      • SUMMER Crafts and Creations
    • DIY (Do-It-Yourself) Project
    • Kids Arts and Crafts
    • Homemade/Handmade Gift Ideas
    • Holiday Crafts
    • Fan Pulls
    • Free Printable/Downloadable
    • Sewing Projects
    • Giveaways
    • Business Features
  • Recipes/FoodFun
    • Breakfast
    • Lunch
    • Main Dish
    • Sandwiches
    • Appetizers
    • Slow Cooker
    • On The Grill
    • Side Dishes
      • Soups
      • Salads
    • Baking
      • Breads, Rolls and Muffins
    • Snacks
    • Treats
    • Desserts
    • Drinks
  • Homeschooling
    • Elementary Homeschooling
      • Elementary Homeschooling READING
      • Elementary Homeschooling MATH
      • Elementary Homeschooling LANGUAGE ARTS
      • Elementary Homeschooling SCIENCE
      • Elementary Homeschooling HOME ECONOMICS
      • Kids Arts and Crafts
    • Middle School Homeschooling
      • Middle School Homeschooling SCIENCE
      • Middle School Homeschooling HOME ECONOMICS
    • Language Arts
    • Math
    • History / Social Studies
    • Geography
    • Foreign Language
    • Field Trips
    • Games
    • Nature Study
  • The Big Picture
    • Life In General
    • Celebrations
    • Faith
      • Into the Light; The Series
    • Giveaways
    • Reviews & Sponsors
  • Photography & Lettering
    • Photography
    • truck lettering
    • vehicle graphics
    • Newborns
    • Kids
    • Engagement
    • High School Senior Pictures
    • High School Senior Pictures Sneak Peeks

A Simple Lunch Spread, for a Celebration Gathering | Recipes

May 15, 2010 By Laura 5 Comments

light-lunch-spread

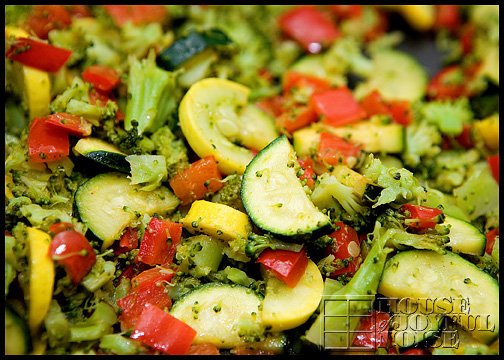
If I had one goal, for the entire day of  our triplets’, {JM, O & S}’s, First Holy Communion, it was to ‘keep it simple‘.  I wanted it ALL simple, so that we could all focus as much as possible on the purpose of the celebration, and enjoy it. That certainly included any food prepping I had to do, to feed our guests, who came back to our home following Mass.  I didn’t want anything that needed to be re-heated or kept warm, and certainly not anything messy. I was going for a light, spring lunch.  I was pretty happy with what I came up with!

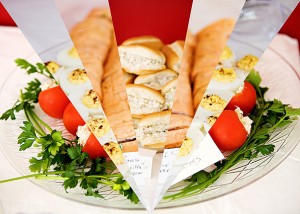
For a few of the platters, I made a wrote a little food description card, so no one needed to ask what was in this or that, nor would they be surprised when they took a bite. ; )


light-lunch-spread-5

To start, we put out very Fresh Fruit Cups, we assembled the night before.  So very simple, but everyone was commenting how much they were loving the fruit cups.  You can’t miss, with fresh fruit!   We included:  clementine slices, pineapple, strawberries, black berries, and green grapes.

light-lunch-spread-4 
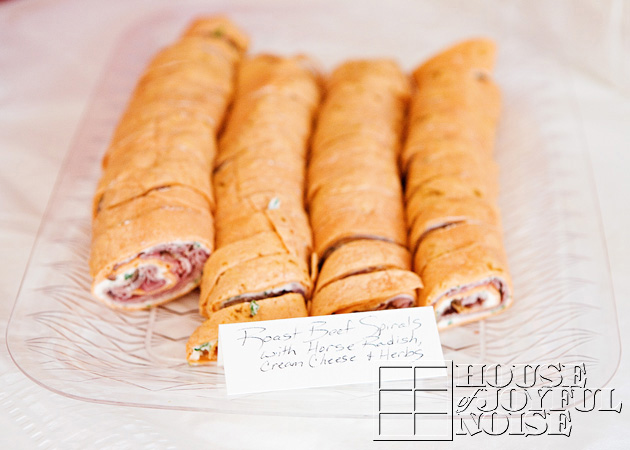
Roast Beef Horseradish Spirals:  This was one of the items I wanted people to know ahead of time, what it was made with – since it would possibly be an iffy preference for some.  So easy to make, so fancy to display, and as it turns out, a real hit for all! (Even the kids, here!)
Combine these 6 ingredients:   1 8oz. of packaged cream cheese, 1/2 cup or 2 green onions chopped, 1/4 fresh parsley, 2 TBS prepared horseradish, drained, 1/4 tsp salt, & 1/4 tsp garlic powder. 
Spread evenly over 2 10″ tortillas (we used tomato tortillas), leaving 1/2 inch border around edge.   Divide 8 oz sliced deli roast beef  over 2 tortillas. Roll up tightly, wrap tightly in plastic wrap, and refrigerate to firm > 30 minutes to a day ahead of time.  When ready, remove from fridge, and cut diagonally into 1/2 slices, and serve.

light-lunch-spread-3

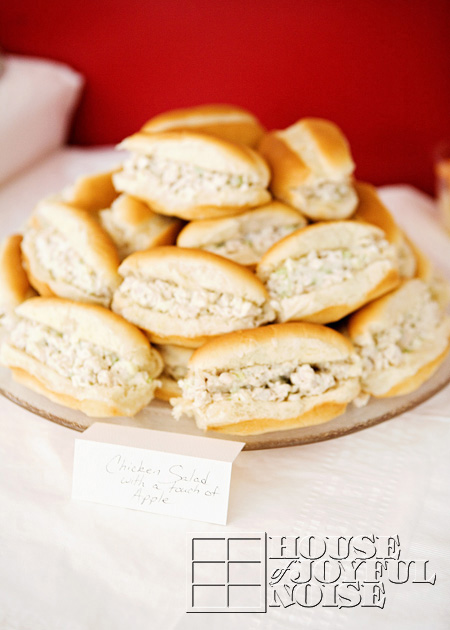
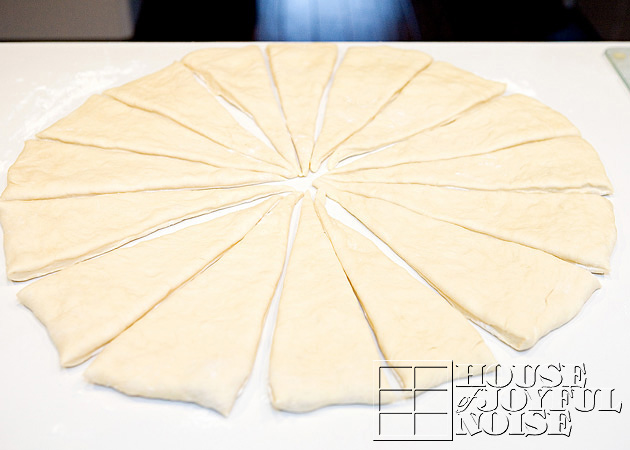
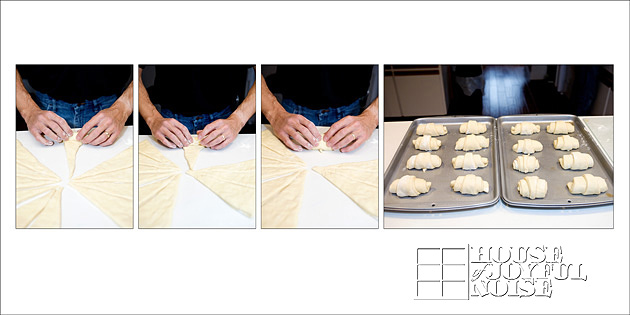
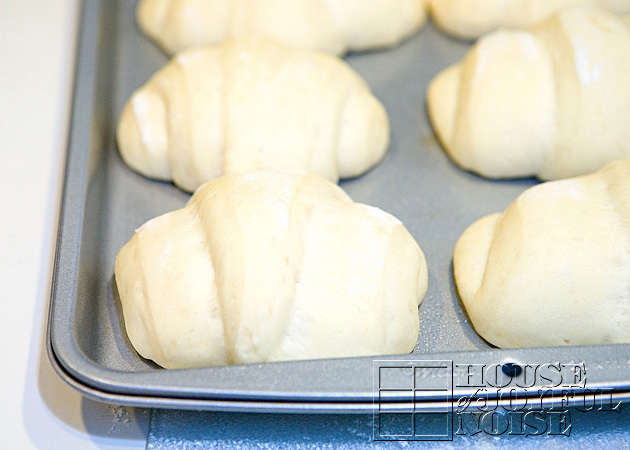
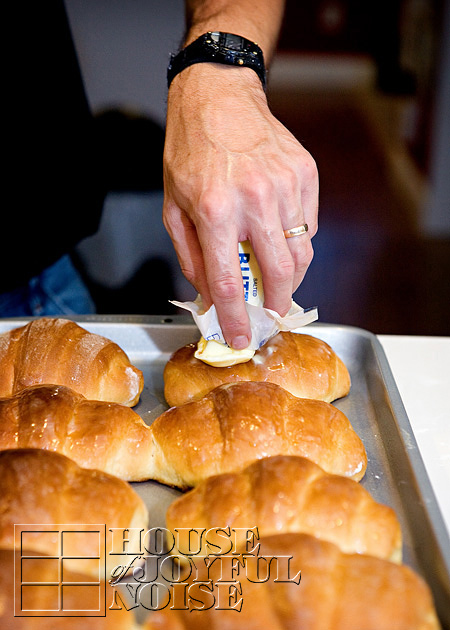
Chicken Salad (w/ a touch of Apple):  4 chicken breasts, cooked and chopped, 2 apples chopped small, 3 stalks of celery, chopped, and mixed with mayonnaise until desired consistency. (We use Real Hellman’s).  Stuff fresh finger rolls, and serve.


light-lunch-spread-1

Deviled Eggs: We used 18 hard boiled eggs.     Cut eggs in half the long way using sharp knife, gently  remove egg yolks and place in small bowl.  Mash yolks well w/ fork, add 3 tsp of dijon mustard, 3 Tbs minced onion, 1/2 – 3/4 tsp tobasco (preference), salt & pepper, and 1 cup of mayonnaise. Mix well together.  Fill pastry bags with mixture, fill egg whites, and sprinkle with Paprika.


light-lunch-spread-2

Tuna Stuffed Tomatoes: Prepare tuna salad as usual.  We add chopped celery and onion.  Hollow out grape tomatoes, using a apple corer first to cut in, and then scoop out all of the inside with a melon ball scoop!  Fill with tuna salad, and arrange on platter.  I garnished the platter with fresh parsley.

Cucumber Sandwiches: I forgot to take photos of these, and darn, because they were so cute!  Very easy, very tasty.  Mix 1 package of cream cheese (8 oz.) with 1 packet of Italian Seasoning.  Peel and slice cucumber.  Spread mixture on slices of minim pumpernickel loaf (usually found near deli), place a slice of cucumber on each, and sprinkle w/ a little dill seed.


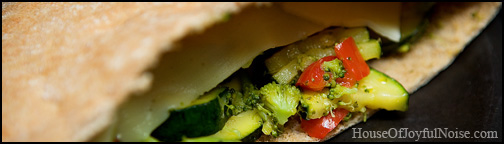
We also served pita chips with red pepper humus.

For drinks, we offered water, Raspberry Crystal Light, and we also had a punch bowl made, of which I should share the recipe.  It’s my Dad’s recipe and we have it on many special occasions w/ the kids.

One might wonder where the First Holy Communion Cake is. Well….that was one thing I wanted to be so special.  I knew we would not have time to bake anything and decorate it nicely, with all else we had to prepare, and because of {S}’s peanut allergy, we can’t just order a cake from a bakery. SO…..I hired a ‘professional’ to custom bake for us.  What I wanted instead of a cake, was very special cupcakes. (You all know how much I adore cupcakes!)  After several, (several) very specific e-mails, and an in person meeting at which I also included drawings and reviewed again exactly what I wanted, with a professional local custom baker I found online (who has a convincing web site),  ……. they were a disaster. < Insert eye roll here, with perhaps a tear escaping, here.. > Not what I asked for, not cute or pretty (or photo worthy), and they were not even enjoyable to eat, as they were HUGE, and so dense.  SO……they were the talk of the party, but not in a good way. It is almost comical, that the one area we hired a PRO to take care, and the one area we spent the most $ on, was the worst part of our whole food spread.  I can’t tell you how disappointed I was, with such a special piece of this special occasion.  That’s why I hired a pro!  Michael said all along “We can do that ourselves Honey, I don’t want to spend the money.“…. and I always said, “But this is the one thing I really want to be special!“.  In the end, we could have done much more of a professional job, ourselves. I have not even contacted the baker with my complaints yet, because I am quite sure if I begin to speak, I will spew venom.  And we all know that’s not like me. ; )

And since I don’t want to leave this post on a tense note (doing head/shoulder rolls as I type…)…..please remember the light, spring, cheery lunch items above!  I hope you find some of these ideas useful, for an occasion or gathering of your own sometime!

Save

Filed Under: Appetizers, Lunch, Recipes, Sandwiches Tagged With: Chicken-Salad-Sandwiches, deviled eggs, fruit-cups, light lunch, light-lunch-spread, lunch-party-ideas, recipes, roast beef horseradish spirals, tuna stuffed tomatoes

Paula’s Rolls | Recipe

November 25, 2009 By Laura 1 Comment

This wonderful (and I mean wonderful!) dinner roll recipe was sent in by our friend Paula, from A Catholic Harvest. She’s a great gal.  I adore her for so many reasons, but to sum it up, she’s a mixed bag.  I love people who are full of wonderful qualities, but also full of surprises.  For instance, recently I learned that she’s a ‘closet head-banger’.  Inside this sweet, funny, supportive and faithful girl, is an inner rock-n-roll chick!!  It’s true!  Who knew?!

So speaking of rolls…lol….I love this recipe she sent us.  I have a few recipes sent in that I’ll be making, now that I have more time to cook and bake.  But here is one for now.  She sent it, we made it, we photo’d it, and now we’re bloggin’ it!!   I wanted to be sure I posted it at least by today, because really, these are perfect Thanksgiving Day rolls to have on your table! And chances are, you already have all of the ingredients you need, to make some last minute.  (But please don’t hold us to that. lol)  Regardless, these are truly wonderful ANYTIME rolls.   So here we go.

dinner-rolls-recipe-tutorial

Participating Ingredients:

  • ***1/2 c shortening (or unsalted butter)
  • 1/2 c sugar
  • 1 tsp salt
  • 4-1/2 tsp yeast
  • 5+ c flour
  • 2 eggs
  • stick of butter (not shown)

    *** Since the sharing of this post, we have revised our family’s diet, for a healthier lifestyle.
    Therefore, we substitute the shortening now for unsalted butter. We believe it’s a better choice.

dinner rolls recipe
NOTE: If you have a kitchen mixer, you are welcome to do this part using that. But did not have one at this time, so we mixed the dough by hand.
–

In a large bowl, combine flour, yeast, sugar, salt, and shortening, mixing up and cutting up with pastry cutter.

Now, the next step in the directions is to beat 2 eggs in a measuring cup , and then fill the cup to the 2 cup mark with hot water. However, we did not have a 2 cup measuring cup, we only had a 1 cup Pyrex measuring cup.  So, we measured out the eggs, dumped them in a small bowl, and added the remaining needed hot water, to collectively make 2 cups of eggs and hot water.  I sure hope you followed that.

dinner-rolls-recipe-tutorial-2

dinner-rolls-recipe-tutorial-3

So here are our two measured, beaten eggs.

dinner-rolls-recipe-tutorial-4

Adding the remaining measurement of how water.

dinner-rolls-recipe-tutorial-5

Beat together.

https://www.youtube.com/watch?v=sF0JNwud9K0

Pour hot water, over dry ingredients in big bowl, and mix together.  Slowly add 3 more cups of flour.  Once all of the flour is in, and as you mix, you may realize that the mixture is really very wet, and is not really going to form a dough mixture at any point.  This means you need to add even more flour, little by little, until it becomes more dough-like.

dinner-rolls-recipe-tutorial-6

Once all combined well, cover the dough bowl, and let rise in a warm oven until doubled. (Paula uses 170 because it’s the lowest setting on her oven.  Ours is 150, and that worked too.)

https://www.youtube.com/watch?v=sF0JNwud9K0

https://www.youtube.com/watch?v=sF0JNwud9K0

On a floured surface that you can cut on, knead the dough.

https://www.youtube.com/watch?v=sF0JNwud9K0

Flatten the dough out with your hands, or with a rolling pin, into a large pizza shape.  Then cut with a pizza cutter into 16 triangle shaped slices, like seen above.

https://www.youtube.com/watch?v=sF0JNwud9K0

Roll each piece from the wide end of a slice, to the point.   They’ll look like crescent rolls.

https://www.youtube.com/watch?v=sF0JNwud9K0

Place in greased pan (Paula uses Pam spray), allowing enough space for rolls to double in size again.  Paula says you can use 2 9×13 pans and put 8 on each as we did, or she also has a large pan she thinks is about 11×20.

Cover and let rise in a warm oven again, about 20-30 minutes. When doubled, remove from oven, and heat oven to 375.  Bake in 375 oven for 20-30 minutes, depending on how dark you want them.

https://www.youtube.com/watch?v=sF0JNwud9K0

Immediately rub on, or brush, with 1 stick of melted butter.  ( Paula says, “Yes, 1 whole stick!”).

https://www.youtube.com/watch?v=sF0JNwud9K0

Do these look savory, or what?!!

Paula states at the end of the recipe, “YOU WILL NOT BE DISAPPOINTED!”  And indeed, we were not!!

dinner-rolls-recipe-tutorial_2-13

We loved them so much, that we’ll be making them again and again.  In fact, I am making more today.  However, since we don’t normally eat all white bread, I am going to try this time making them with about 1/3 wheat flour, and see how those come out. I can keep you posted!

We hope you’ll find this recipe a new favorite in your home. Paula also sent a recipe for Indian Fry Bread, which we have plans to make in the next few days.  I’ve got a list of recipes we’ll be sharing, actually.   Meanwhile, if YOU have a recipe you’d like to see featured on our blog, please use the e-mail button in the sidebar on the right, and send it along!  If it remotely appeals to us, we may just Make it-Photo it-Eat it & Blog it!  And we’ll link to your blog too, if you’d like!

Now if you’ll excuse me, I have rolls to make.  And Taco Soup!

Save

Filed Under: Breads, Rolls and Muffins, Recipes Tagged With: dinner-rolls-recipe, recipes, roll-recipes, rolls

St. Michael’s Bannock – Recipe

September 30, 2009 By Laura 12 Comments

If you’re looking for the perfect, traditional St. Michael’s Bannock recipe, you just found it!
We enjoy this recipe so much, and we are sure you and your family will as well.

st-michaels-bannock-recipe

St. Michael’s Bannock

Preheat oven to 375 degrees

Mix together:

  • 2 cups of flour
  • 2 tablespoons sugar
  • 1/2 teaspoon baking powder
  • 1/2 teaspoon baking soda
  • 1/4 teaspoon salt
  • Cut in 2 tablespoons butter (not margarine)
  • 1 cup buttermilk or yogurt
  • handful of raisins or currants

On a floured surface, knead the dough until smooth, then pat into an 8 inch round loaf, and bake on a greased cookie sheet for 40 minutes.

For a more festive look, score the dough with crosses.

Cool on a cookie rack.

May be served with butter or jam.  But honestly….we ate it plain, and it was so delicious!

st-michaels-bannock-bread-recipe

It also makes awesome toast in the morning.  I had some this morning, with my very necessary cup of coffee, in my House of Joyful Noise mug, that I still love so much!

Now, just because it is called St. Michael’s Bannock, doesn’t mean you have to wait until next Michaelmas to make and eat it. Because if you think we’ll be doing that, you’re crazy!!  We’ll just re-name it if we have to! Thanksgiving Bannock, Christmas Bannock, St. Patrick’s Day….., Easter…….

Save

Filed Under: Baking, Breads, Rolls and Muffins, Celebrations, Faith/ Catholic, Recipes, The Big Picture, Traditions Tagged With: bannock, Catholic-family, Catholic-family-blogs, Catholic-recipes, Catholic-saints-day-recipes, recipes, st-michaels-bannock-recipe

Cookie Love – Italian Cookies Recipe

March 26, 2009 By A 13 Comments

Italian cookies recipe

Have you ever seen cookies like these?  They are called Italian Cookies, and maybe they are ordinary to you. But the very thought or sight of them, has always made my heart simply swell.  The recipe will be below.

My Godmother has made these cookies for me, all of my life.  I think she makes them a lot. She may even be known for them in the lives of many people who are in her life. But it doesn’t matter.  Whenever she made them for ME, it always felt like such a  gift of her love for me.

Italian cookies recipe

My Godparents are AMAZING people. Not just to me, but to anyone who knows them.  They are the essence of unshakable faith,  completely selfless sacrifice, sincere compassion, and always a lot of very unconditional love.  As Godparents, they always gave all of those gifts to me. They also truly had a BIG part in forming the foundation of my faith. They were ALWAYS there for me. ALWAYS with some wise words, without judgement. ALWAYS lived an example of inspiration.  I have always felt so blessed to be their Godchild. Even though I have always known, I am one of umpteen of Godchildren that they have.   Again…a testament of the kind of people they are to everyone. But they have always made me feel like their only one.  Now as a grown adult with children of my own, they give that same kind of love to my husband and my children. And my they all  feel it, powerfully, just as I always did.

My Godmother is a retired teacher. I have spoken about her in this blog before, I am sure. In the years of her teaching, she reached the hearts of 100’s and 100’s of children.  If you were in her student, you knew you were very sincerely loved.  And she taught each one with all she had. She instilled in me the love for books, which thank God, my children have been able to embrace as well.  When she retired from teaching, her grown former students from all over the world, came to give her their thanks, or sent notes of the beautiful impact she had had on their lives.

When I was a teenager with troubles on my mind, my Godmother was there to talk with me, and she made me these cookies. As an art student, when I came home for the weekend, she wanted me to come visit, and she made me these cookies. When my family and I go visit them, she has these cookies made for us.  And when my mother died, she was there for me, and she made me LOTS and lots of these cookies.

So I don’t know if you have ever seen or tasted cookies like these. But whenever I think of them, see them, or taste them…..I am filled with the comforting feeling of her love.

{A} bakes A LOT. And lately, more than ever. I think baking posts like this will become quite regular from her, here on our blog, because it is a big part of her. I will share more about that another time. But suffice it to say, she got the recipe for these cookies from my Godmother, having grown up with her own sense of how special they were.  So this is {A}’s post, sharing this Italian Cookies recipe, and how to make them. They are indeed delicious. But it’s the memories of love that the familiar taste of them bring, that we love even more.

~ Laura

~~~~~

Hi Everyone!   {A} here now. I am going to share with you how to make these cookies that are very special to us. You will find a printable version of this recipe at the end of the post.

Here is what you’ll need:

Participating Ingredients

Italian cookies recipe

  • 4  C All Purpose Flour
  • 1  C Sugar
  • 2 Tbs. Baking Powder
  • 4 Eggs
  • 1/2C Land-O-Lakes Margarine
  • 4 Tsp. Vanilla Extract
  • 1/4 C Milk
  • Confectioners Sugar
  • A Little Extra Milk for Glaze* This cookie dough was formed by hand. But you can use a Kitchen Aid or other mixer, and it will be much faster.COOKIE DOUGH
  1. In a large bowl, put in flour, sugar, baking powder, eggs, margarine, vanilla, and milk. (Add your own special love.)

Italian cookies recipe

2.  Mix it all together with fork at first. Once it starts to form, you can use your clean hands.

3.  Flour a counter or big board.

4.  Remove dough from bowl, and knead for 8-10 minutes, sprinkling the surface more if the dough starts sticking.

Italian cookies recipe

Italian cookies recipe

Italian cookies recipe

6.   Grease baking sheets with vegetable oil. (You probably can use Pam Spray…if you’re a fan of that.)

7.   Preheat oven to 375 degrees.

8.   Grab a piece of dough, and begin to roll into a ball between the palms of your hands.  You want it to be about the size of a chestnut.
(I decided the ones in the photo below are too big. I made them all smaller after Mama took a photo. But see how I am rolling them in my hands into balls.)

Italian cookies recipe

9.    Place the dough balls on the cookie sheets, about an inch 1/2 apart, staggered.   You will likely have more dough balls waiting for their turn in the oven.

Italian cookies recipe

10.   Bake full sheets for 8-10 minutes.  You want them to be pale, but if you are wondering if they are cooked enough, open one with knife and see if it is baked through well. If not, put back in for 1-2 minutes more, depending on how doughy they still were.

11.  Remove from oven………and then place them each on a cooling rack.

Italian cookies recipe

GLAZE and SPRINKLES

12.  In a small bowl, pour some confectioner’s sugar, and add a little milk.  I don’t really measure the sugar or milk here.  I recommend adding one tablespoon of milk at a time, and stir well. You want the glaze thick-ish. You will be surprised at how much powdered sugar you need!

13.  Pour sprinkles into shallow bowl. Watch out, because these things are ridiculously bouncy!!!

Italian cookies recipe

14.  Once the cookies are COMPLETELY COOLED, you can start glazing them.  We just dunk the top of the cookie into the glaze, lift out, and really let it drip off as best as you can.

Italian cookies recipe

Italian cookies recipe

15.     Place dunked cookies back on rack.  The glaze needs to set a little.

16.    Continue dunking cookies, but when keep checking the first ones you dunked, and once you see that the glaze on those is starting to become clear, they are ready for sprinkles!  (If you sprinkle them when the glaze is too wet, the colors of the sprinkles will run, and your cookies will be a multi-colored mess. Kind of pretty anyway, but not what we are going for here!)

17.    Now to get the sprinkles on the cookies, we think Mama’s Godmother shakes them on out of the container.  She has patience like that. But this is how we do it:

15_Italian-cookies-recipe

Pretty easy, huh?

18.  Keep glazing and sprinkling, putting them on the rack as you go.

16_Italian-cookies-recipe

19.   Any air tight container is great storage for these. They are so pretty all together!

*  This recipe makes 6 dozen cookies.  But trust me, they go fast. (Especially if Mama is around these cookies.)   Below is what was left after filling two larger containers.

17_bowl-of-Italian-cookies

ENJOY!!!

18_bite
ENJOY!

 I hope you enjoyed this recipe post! You can print it out below.

~ {A}

Cookie Love - Italian Cookies Recipe
 
Print
Prep time
30 mins
Cook time
10 mins
Total time
40 mins
 
Italian Cookies Recipe Recipe Type : Baking Cuisine: Italian Author: House of Joyful Noise blog / houseofjoyfulnoise.com Prep time: 20 mins Cook time: 10 mins Total time: 30 mins Serves: 6 Dozen
: House of Joyful Noise blog / houseofjoyfulnoise.com
: Cookies
Cuisine: Italian
Serves: 6 Dozen
Ingredients
  • Italian cookies recipe
  • 4 C All Purpose Flour
  • 1 C Sugar
  • 2 Tbs. Baking Powder
  • 4 Eggs
  • ½C Land-O-Lakes Margarine
  • 4 Tsp. Vanilla Extract
  • ¼ C Milk
  • Confectioners Sugar
  • A Little Extra Milk for Glaze
Instructions
  1. * This dough for this cookie recipe is formed by hand. You can also use a Kitchen Aid or other large mixer.
  2. COOKIE DOUGH
  3. In a large bowl, put in flour, sugar, baking powder, eggs, margarine, vanilla, and milk. (Add your own special love.)
  4. Mix it all together with fork at first. Once it starts to form, you can use your clean hands.
  5. Flour a counter or big board.
  6. Remove dough from bowl, and knead for 8-10 minutes, sprinkling the surface more if the dough starts sticking.
  7. Grease baking sheets with vegetable or olive oil oil. (You probably can use Pam Spray...if you're a fan of that.)
  8. Preheat oven to 375 degrees.
  9. Grab a piece of dough, and begin to roll into a ball between the palms of your hands. You want it to be about the size of a chestnut.
  10. Place the dough balls on the cookie sheets, about an inch ½ apart, staggered. You will likely have more dough balls waiting for their turn in the oven.
  11. Bake full sheets for 8-10 minutes. You want them to be pale, but if you are wondering if they are cooked enough, open one with knife and see if it is baked through well. If not, put back in for 1-2 minutes more, depending on how doughy they still were.
  12. Remove from oven.........and then place them each on a cooling rack.
  13. GLAZE and SPRINKLES
  14. In a small bowl, pour some confectioner's sugar, and add a little milk. I don't really measure the sugar or milk here. I recommend adding one tablespoon of milk at a time, and stir well. You want the glaze thick-ish. You will be surprised at how much powdered sugar you need!
  15. Pour sprinkles into shallow bowl. Watch out, because these things are ridiculously bouncy!!!
  16. Once the cookies are COMPLETELY COOLED, you can start glazing them. We just dunk the top of the cookie into the glaze, lift out, and really let it drip off as best as you can.
  17. Place dunked cookies back on rack. The glaze needs to set a little.
  18. Continue dunking cookies, but when keep checking the first ones you dunked, and once you see that the glaze on those is starting to become clear, they are ready for sprinkles!
  19. - (If you sprinkle them when the glaze is too wet, the colors of the sprinkles will run, and your cookies will be a multi-colored mess. Kind of pretty anyway, but not what we are going for here!)
  20. Now to get the sprinkles on the cookies, we think Mama's Godmother shakes them on out of the container. She has patience like that. But we dip them in a bowl of the sprinkles.
  21. Keep glazing and sprinkling, putting them on the rack as you go.
  22. Any air tight container is great storage for these. They are so pretty all together!
  23. ENJOY!
3.4.3177

~~~~~

Save

Save

Save

Save

Filed Under: Baking, Recipes Tagged With: Baking, cookie-recipes, cookies, italian cookies, Italian-cookies-recipe, party-cookies, recipes

Veggie Pockets – Lent Meatless Meal – Recipe

February 27, 2009 By Laura 5 Comments

meatless Lent meal ideas

Here’s a delicious meatless meal for the Fridays of Lent, or for any day, for either lunch or dinner! My kids love most vegetables, so these pocket sandwiches are always a real hit with them! They always cheer when they ask what we are having, and they always ask for 2nd one!

I didn’t take any photos in the early stages, as I usually do just for fun. But I think you’ll be able to follow along just fine without them.

Ingredients:

  • red peppers
  • zucchini
  • summer squash
  • broccoli
  • vegetable oil
  • American cheese
  • whole wheat pockets

~ Naturally, you can use any stir-fry type vegetables your family likes best.

1.)   Wash *all vegetables well, of course.  : )

*How many of each vegetable you use depends on your family size. Use your best judgement. Once it’s all in the pan you’ll get a better idea.

2.)  Clean out red peppers, and dice.

3.)  Zucchini and summer squash:

>>>   a.) Cut off ends.

>>>   b.)  Cut length-wise in half

>>>   c.)  Cut again lengthwise,  cutting halves into half.  Now you have 4 quarters of lengthwise slices. (Aren’t I great at explaining these things?  Maybe I should have taken photos of this part too. lol)

>>>   d.)  Now slice the quartered lengths the short way, about 1/4″ thick.  You will have nice quarter-0f-a-slice pieces.

4.)    Cut up broccoli into medium sized pieces, chopping off ends first. (You will chop it all up later.)

5.)    Get broccoli going in a steamer. (We have a Black & Decker Handy Steamer. But you can steam however you do.)

6.)   Heat a large stir-fry pan at medium-heat, and add 1-2 tablespoons of vegetable oil.

7.)   Add red peppers, zucchini and summer squash to pan, and stir up.

8.)  Cook all vegetables in steamer and pan, to desired tenderness.  (We call it done when fork inserts nicely.   Be careful not to overcook.)

9.)  Remove steamed broccoli from steamer, and put on cutting board.

With a large chopping knife, chop up into smaller pieces, and then add to the pan on stove-top, with other vegetables.

Stir all vegetables together.

meatless Lent meal ideas

So happy to-ge-THERRRRRRRR! (Name that tune!)

meatless Lent meal ideas

For pockets, we use this brand:

meatless Lent meal ideas

10.)  Take a bread disc out, and cut in half.

11.)  Lay some slices of American cheese in the pocket half.  Break slices up to fit nicely.  (Us grown-ups sometimes put some Pepper-Jack in too, for some kick! But it’s delicious just with American.).

12.)    *Fill pocket up with vegetables.

* For the little ones, we don’t overload it, because it’s a wide/big pocket, and a little bit difficult to for little hands to handle. Reminders to eat over plate are a good idea, with these babies!   But what falls to the plate can be eaten up with a fork, after.

**  Us grown-ups really fill it up.  : )

meatless Lent meal ideas

Filled just right for a kiddo.

13.)  When they eat it all up, and ask for another, SAY YES!!  A kid can never eat too many vegetables!   : )

ENJOY!!

Save

Save

Filed Under: Faith/ Catholic, Lunch, Main Dish, Recipes, Sandwiches Tagged With: Catholic, Catholic-blogs, Catholic-families, Catholic-family, Lent, meatless meals, Meatless-meal-ideas-for-Lent, recipes, veggie-pocket-recipe

  • « Previous Page
  • 1
  • …
  • 3
  • 4
  • 5
  • 6
  • Next Page »

We are wicked happy to have you here! We hope you find much inspiration, help, humor and enjoyment here.


Archives


POPULAR POSTS

* * * * * *

SUBSCRIBE to House of Joyful Noise blog! Every new post, delivered right to your email box!


Privacy Policy

Amazon Affiliates

Never at any additional cost to you, we may earn a small commission for our endorsement, recommendation, testimonial, and/or link to any products from our website. Your purchase through our links helps support our family, while sharing with you the products we authentically use and recommend, for various ideas, and letting you know where you can purchase them. Thank you for your support!

[footer_backtotop]

Copyright © 2025 HouseOfJoyfulNoise.com · Genesis Framework by StudioPress