• HOME
  • {A}’s Chipmunk Training Archives

 Homepage

  • The Homestead
    • Home Projects
    • Home Improvement
    • Home Decor
      • Seasonal Home decor
        • FALL Home Decor
        • WINTER Home Decor
        • SPRING Crafts and Creations
        • SUMMER Crafts and Creations
    • Our Chickens
    • Gardening
    • Organization
    • Re-Purposing
    • Furniture Refinishing
    • Budget
  • Crafts & Creations
    • Seasonal Home decor
      • FALL Crafts and Creations
      • WINTER Crafts and Creations
      • SPRING Crafts and Creations
      • SUMMER Crafts and Creations
    • DIY (Do-It-Yourself) Project
    • Kids Arts and Crafts
    • Homemade/Handmade Gift Ideas
    • Holiday Crafts
    • Fan Pulls
    • Free Printable/Downloadable
    • Sewing Projects
    • Giveaways
    • Business Features
  • Recipes/FoodFun
    • Breakfast
    • Lunch
    • Main Dish
    • Sandwiches
    • Appetizers
    • Slow Cooker
    • On The Grill
    • Side Dishes
      • Soups
      • Salads
    • Baking
      • Breads, Rolls and Muffins
    • Snacks
    • Treats
    • Desserts
    • Drinks
  • Homeschooling
    • Elementary Homeschooling
      • Elementary Homeschooling READING
      • Elementary Homeschooling MATH
      • Elementary Homeschooling LANGUAGE ARTS
      • Elementary Homeschooling SCIENCE
      • Elementary Homeschooling HOME ECONOMICS
      • Kids Arts and Crafts
    • Middle School Homeschooling
      • Middle School Homeschooling SCIENCE
      • Middle School Homeschooling HOME ECONOMICS
    • Language Arts
    • Math
    • History / Social Studies
    • Geography
    • Foreign Language
    • Field Trips
    • Games
    • Nature Study
  • The Big Picture
    • Life In General
    • Celebrations
    • Faith
      • Into the Light; The Series
    • Giveaways
    • Reviews & Sponsors
  • Photography & Lettering
    • Photography
    • truck lettering
    • vehicle graphics
    • Newborns
    • Kids
    • Engagement
    • High School Senior Pictures
    • High School Senior Pictures Sneak Peeks

The Way to Easter in the Heart & Home

April 8, 2017 By Laura 1 Comment

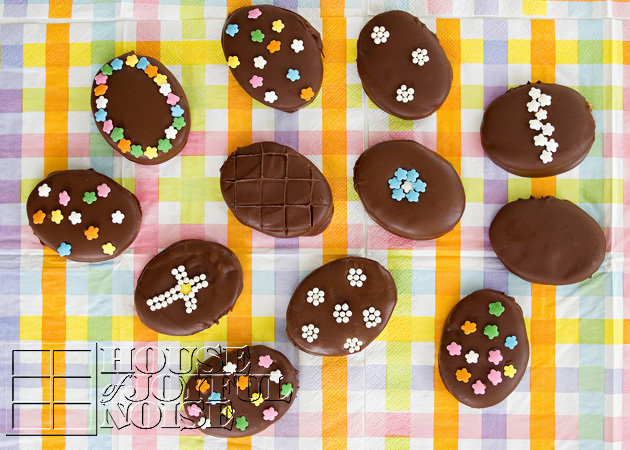
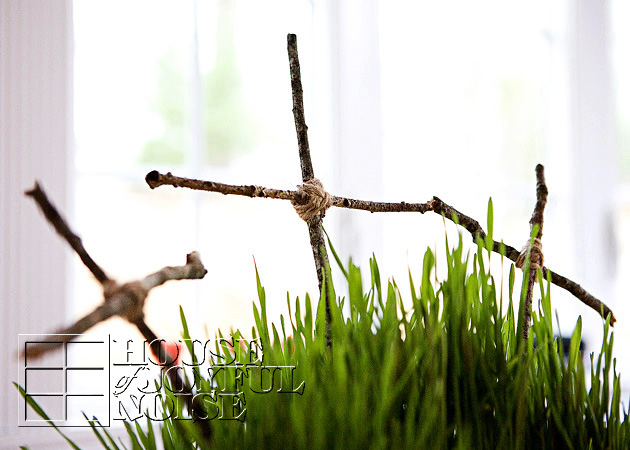
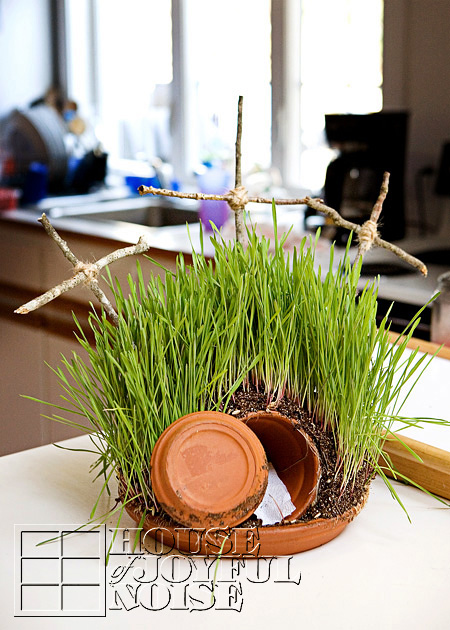
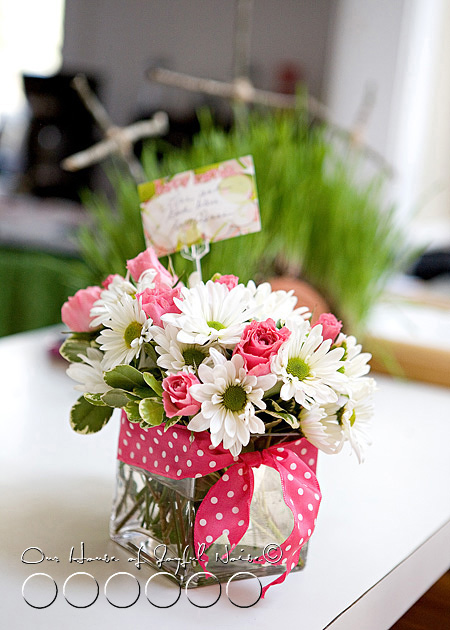
Whatever seasons or holidays we are in the midst of, they are most always reflected in a little bit of decor details around our home. I’ve just always enjoyed the changing of seasons, the anticipations of family holiday celebrations around the bend, and weaving that inspiration into the fabric of my homemaking.

But increasingly over the years I have found, that the way to Easter in the heart and home, doesn’t come so easily.
I don’t want to bring out the Easter specific elements of our decor in the weeks before Easter.  I don’t feel drawn to embracing that beautiful spirit of Easter joy just yet, that I know is on it’s way, come Easter Sunday morning. I don’t jump on the anticipation of excitement, as I do with any other approaching season or holiday.
But I do know why.
[Read more…]

Filed Under: Celebrations, Faith, Faith/ Catholic, Holidays, Home Decor, Into the Light; The Series, Seasonal Home decor, SPRING Home Decor, The Big Picture, The Homestead Tagged With: Catholic-blogs, Catholic-families, Catholics, Christians, Communion, Easter, Easter-Sunday, Good-Friday, Holy Week, Holy-Saturday, Holy-Thursday, Jesus-resurrection, Lent, the-Eucharist

Spiritual Easter Printable for You.

March 14, 2013 By Laura 5 Comments

I felt like designing a spiritually-themed Easter printable for us, and to share with you.

So I did!

It’s designed to fit an 8×10 frame. I recommend printing it on white card stock.

Please be sure to DOWNLOAD and SAVE the full resolution version, as opposed to the image you see in this post, which is web sized.

Clicking on the colorful printable below, should bring you to the full sized version at my DropBox. You need to click the ‘Download’ button there.

*Warning Note: Do not right-click and ‘Save Image As’, or you will not get the sharp printable image.

Download. Save. Print. Enjoy!

I’ll share with you mine on display in my home decor, soon.

Hope you like it. : )

~Laura |  House of Joyful Noise blog

 * * * * * *

Please come follow me here and there:

Save

Save

Filed Under: Crafts & Creations, Free Printable/Downloadable, Holiday Crafts, Home Decor, Seasonal Home decor, SPRING Home Decor, The Homestead Tagged With: Easter, Easter decor, Easter-decorating, Easter-printable, free-Easter-printables, holiday-printables, spiritual-Easter-printable

Chocolate Covered Sunbutter Eggs Recipe| Peanut-Safe Alternative to Reese’s

April 2, 2012 By Laura 9 Comments

sunbutter-eggs-alternative-to-reeses-peanut-safe-alternative
Last week I was visiting one of my favorite blogs, TidyMom. (It truly is a place for everything! ; )  Cheryl over there was sharing a recipe for her Homemade Peanut Butter Eggs.  Ohhhh, how I wanted one!  In fact, I have been missing Reese’s Peanut Butter Cups, and the Reese’s PB Eggs that come out every Easter, for years now!  But peanut and peanut butter anything has been removed from our life, since we discovered our son has a severe, life threatening allergy to it.  It was a hard pill to swallow, for this life-long-die-hard-peanut-butter-lover.  But Sunbutter has helped me survive. And anyway, I love my son way more, and keeping him has been worth the sacrifice!   Sunbutter can be found in the organic section of most grocery stores.  We love it so much, we order it online by the case, and also because it is cheaper that way.

     Now, as anyone with a peanut-allergy child knows, Easter and Halloween especially, can be quite the challenge, when it comes to finding a few treats and candy for our kids!  This is because so much of anything with chocolate, has a real risky potential to be contaminated with peanuts, within the factory manufacturing. And most packaging even says so. 

     That being said, I have wondered right along, how well any recipe that calls for peanut butter, could be substituted with Sunbutter!  When I saw TidyMom’s Homemade Peanut Butter Eggs, I knew it was time to find out!  And guess what?  It was a delectable success!  Sunbutter tastes very similar to peanut butter, to us, and these eggs bring all of the joy to our mouths, that Reese’s Peanut Butter Cups/Eggs ever did.   This is how they came out lookin’!…..


sunbutter-eggs-alternative-to-reeses-peanut-safe-alternative-13      So, I thought I’d share how we did it with you all.  Now, if peanut allergies are not an issue for your family, and you’d like  to make your own peanut butter eggs, you are welcome to follow (Cheryl’s) TidyMom’s Recipe.  If you’d like to try the Sunbutter version, you can follow ours right here.  Our recipe using Sunbutter here, was experimental, but we were just switching out the peanut butter from Cheryl’s recipe.  (I  did make one little tweak I’ll mention.)  I got a little help from my husband, because I needed to take photos too.  But we might have done some things a tad differently, just trying to find to make it work for us. It did get messy as Cheryl said it does, but like any project, once we get going and figure things out, we find our groove.


sunbutter-eggs-alternative-to-reeses-peanut-safe-alternative-1 Participating Ingredients:

  • 1 1/4 cup of Sunbutter
  • 5 Tablespoons unsalted butter, softened
  • *1 Cup graham cracker crumbs

     (*-Cheryl’s recipe calls for 3/4 cups, but the Sunbutter seemed so sticky, we added a little more.)

  • 1 Cup powdered sugar
  • 1/2 Teaspoon Sea Salt
    **14 ounces of chocolate (milk, semi-sweet or chocolate)

   (**-We used the flat Hershey bars with the squares to break, and they worked perfectly!  The ones with the squares are peanut-safe!)

  • 1 Tablespoon shortening
  • an appropriately sized egg-shaped cookie cutter–

sunbutter-eggs-alternative-to-reeses-peanut-safe-alternative-2    
In a large bowl mix together peanut butter, butter, graham cracker crumbs, powdered sugar and salt until well combined. We used our Kitchen Aid, stopping it once and using a spatula scraper to get it all to the middle and off of the attachment.  It was while mixing that we decided to add that extra 1/4 cup of graham cracker crumbs, for a total of 1 cup, to make it a little less sticky.

      Next, put the whole (Kitchen Aid) bowl into the freezer for a few minutes, to get it easier to work with. Then we plopped the whole mix on a big piece of wax paper, covered it with another piece, and rolled it out.  Then we placed the whole rolled out dough between the wax sheets, on a cookie sheet.


sunbutter-eggs-alternative-to-reeses-peanut-safe-alternative-3 We then placed the whole cookie sheet back into the freezer, to help really firm it up. We left it in for maybe 15 minutes.

sunbutter-eggs-alternative-to-reeses-peanut-safe-alternative-4   After removing the tray from the freezer, we put the wax papered dough onto the counter, peeled off the top sheet, and got cutting with our little egg cutter, right away.  It’s important to work quickly, because the dough softens quickly, depending on how warm it is where you are working. We rubbed just a dab of shortening all over the cutter, and because the dough was really firm from the cold, and the eggs cut out really nicely.  We placed them on another cookie sheet lined with a fresh sheet of wax paper.

   Again (not shown), we put the cut eggs back into the freezer to firm up once again.

     Meanwhile, we broke up all of the Hershey chocolate bars into a bowl with a tablespoon of shortening, and melted it.  Using the microwave, put the bowl in on high for 20 seconds to start.  Remove, and stir with the handle of a wooden spoon. It’ll still be chunky at this point.  Put in for another 10 seconds, and another 10, always stirring in between intervals, until the chocolate is all smooth.


sunbutter-eggs-alternative-to-reeses-peanut-safe-alternative-5    By the time the chocolate is melted nicely, the eggs should be nice and cold.  So remove the tray, have another freshly lined tray ready, and get dipping!  Now remember, the chocolate is pretty warm, and you want your eggs to stay as firm as possible, so you need to get that egg in and out of the bowl quickly! We just let them belly-flop in one at a time, flipped it over and lifted it out with a fork, as seen in the next photo as well.


sunbutter-eggs-alternative-to-reeses-peanut-safe-alternative-6    Just tap the fork on the side of the bowl to remove the excess dripping chocolate off as best as you can, and then gently let the chocolate covered egg onto the cookie sheet.


sunbutter-eggs-alternative-to-reeses-peanut-safe-alternative-7 This photo is just to show you what happens if you don’t get the egg out of the bowl fast enough.  It goes soft very quickly.  If at any point you think your un-dunked eggs are getting too soft work with, it never hurts to pop them back in the freezer, again and again.


sunbutter-eggs-alternative-to-reeses-peanut-safe-alternative-8 As you can see here, putting them down without making them a mess, is not easy!  We felt like we were really making a mess of things, and wondered if we would even have something to be proud of or be worth sharing when finished, but we did! Just like craft projects and the like, when you keep going, you get better at it and quickly find what works better.   And we did get much better at it as we went along……


sunbutter-eggs-alternative-to-reeses-peanut-safe-alternative-9 Some we placed on wax paper directly on the counter for the time being…

sunbutter-eggs-alternative-to-reeses-peanut-safe-alternative-10  

...and other went on a lined cookie sheet. 

     Once they were all dipped, the first one’s chocolate was firming up enough, that we could decorate them a little.  We just used various sprinkles for some.  My oldest daughter is great at decorating. Such patience!  So she was in on the helping there.

     After we were done decorating them,  once again, we wanted to chill them again.  There was one more thing we wanted to do to ours, before taking some photos of them…..

sunbutter-eggs-alternative-to-reeses-peanut-safe-alternative-11   If you like to try and perfect anything you can, when you can (raising my hand..), we figured out a way to clean our egg’s edges up a little bit….

sunbutter-eggs-alternative-to-reeses-peanut-safe-alternative-12 Using a clean x-acto blade, just trim off the excess chocolate that dripped down and spread when placing the eggs down. 

     We didn’t do it to every single one.  Just the ones that really needed it.

sunbutter-eggs-alternative-to-reeses-peanut-safe-alternative-13    These are just some.  Some of the eggs we left as plain chocolate, and others we kind of drew in with a toothpick when the chocolate was just firming up.  Do you see the criss-cross one?  That one I used a french-fry cutter plate.  Just placed it down, and lifted!  Look around your utensil and kitchen tools drawers, and see what you can find to use, to make some neat designs!

 We were really happy with how well they came out.   Cute!

sunbutter-eggs-alternative-to-reeses-peanut-safe-alternative-16
…and OH-SO-GOOD! 

     The salty-sweet melty party in your mouth is just divine!  What I really love about them too, is the little crispy-crunch surprises, from the graham cracker!

sunbutter-eggs-alternative-to-reeses-peanut-safe-alternative-17  

      We have all already had some of these of course, and we’ll be enjoying and sharing the rest, right through Easter Day!  We’re also encouraged and inspired, to try more peanut butter recipes that we can substitute Sunbutter with!  One thing is for sure; we’ll be making these again with other holiday shapes and decorations! They are SO worth the mess. (Especially when your husband cleans it up for you. ; )

     Special thanks to TidyMom/Cheryl, for the inspiration, and allowing us to adapt your recipe!

—–

Love it? PIN it, or share it! And come join us on FACEBOOK! We’d love to have you.

  If you’d like to print this recipe, just cut & paste the whole thing to a document, and delete any photos or paragraphs you don’t need before printing.


Save

Save

Filed Under: Desserts, Fun Food, Recipes, Treats Tagged With: Easter, Easter-candy, Easter-desserts, Easter-menu, Easter-treats, homemade-candy, no-bake, peanut allergies, peanut-safe-candy, peanut-safe-Easter-candy, Reeses-peanut-butter-cups, Reeses-peanut-butter-eggs, Sunbutter, sunbutter-recipes, TidyMom

Calvary Hill Planting | A Kids’ Lent Project

February 26, 2012 By Laura 29 Comments

020_easter-empty-tomb-calvary-hill-plant-kids-project-150x150

When Lent comes around, it’s difficult enough for us as adult Christians, to decide in which ways we’d like to embrace the 40 days leading to Easter. We are led by 3 things: Sacrifice, Prayer, and Alms-giving.  But as parents, we also want our children to take part in some way, and fully realize the significance of this period of time, too!  Attending Mass (especially through Holy Week), hearing the Scripture relating to Jesus’ death and resurrection, and witnessing (or participating in, depending on the ages of the children) their parent’s participation throughout Lent, certainly helps build their understanding of the importance of this season in our faith. 

However, I was thrilled last year, to come across this great project for the kids, that really invited them to be involved in some significant way even more, throughout the Lenten Season!:


020_easter-empty-tomb-calvary-hill-plant-kids-project
Calvary Hill

As parents instruct the kids how to build this project, and plant and water the grass seeds, they have the opportunity to teach, or further discuss, the reality of the death and resurrection of Jesus, why and how He died, and what that means for all of us!

 This Calvary Hill plant needs to be nurtured and tended to by the kids, throughout Lent. By Easter, it is beautiful plant, symbolic why we celebrate. It makes for a wonderful Easter table centerpiece, and can also be put outdoors to keep for many months!  We put ours out near our gardens, on our potting bench.  It can also simply be placed right into a garden bed, or on a deck. We trimmed the grass down when necessary, and kept it watered, enjoying it for long past Easter.

001_calvary-hill-plant-supplies Pictured here are some of the supplies you will need.

Here is a more complete list: 

  • Organic Seed Starting Mix (we used Jiffy brand)
  • Organic Hard Winter Wheat Berries, OR, Winter Rye (we used Winter Rye),
  • a large (12″) flower pot dish (w/ no drain hole),
  • a small (4″) flower pot and it’s dish,
  • small rocks (for drainage),
  • a pail
  • pail and shovel, with some water, for mixing soil.
  • some straightish-sticks of any kind, for the crucifixes
  • brown twine to tie together crucifixes
  • probably a glue gun

002_easter-kids-lent-project First will be creating Jesus’ tomb: Lie the small pot on it’s side, in the center of the large pot dish, with the opening of the pot a couple of inches or so from the inside edge of the big dish. The small pot is representative of Jesus’ tomb. You just want to be sure you leave room for the dish to that pot, to be in front of the pot opening, and room to roll to the side, which will serve as the stone in front of Jesus’ tomb.
–

003_kids-lent-project Fill the whole bottom of the large potting dish with small rocks on the 3 sides of the small pot (Jesus’ tomb), supporting it to keep it from rolling. Smaller rocks than we used are acceptable and may even be more suitable and manageable. We just grabbed some from our driveway! 
–

004_mixing-soil Next, in a pail, add water to some Organic Seed Starter Mix . . . . . .

005_ . . . . . .and mix to make some nice wet dirt!

006_ Time to get dirty!

Scoop handfuls of dirt out of the pail, and place it all around the sides of and behind the tomb, as well as right over the top of it.  Create a nice round hill. 

*Note that in these photos, you see some dirt in front of the lid and somewhat in the way here. We learned that was not a good idea, as dirt was always falling out when we moved the lid. It is best to keep it clear of any soil.

007_soil  Again, keep the dirt away from the front of the tomb, so the ‘stone’ can roll away.  But be sure the tomb is covered in the soil mixture.

009_calvary-hill-seeding Next, is planting the seed. As mentioned earlier, we used Winter Rye, but Organic Hard Winter Wheat Berries can also be used.  Either grow quickly!  Simply cover the soil with the seed, pressing down into it if possible, and perhaps cover it with some more where you can, if there is room.

010_stick-crosses Now 3 crucifixes need to be made.  We wanted to keep it simple and rustic, so we simply found some straight sticks up in our wooded area, and created crossed wrapping the twine in a criss-cross effect around the intersection of the 2 sticks.  We tied off and then cut the twine ends, but then also used a dab of glue with a glue gun to secure it.

011_building-calvary-hill-plant-easter The crucifixes can be placed into the soil of your Calvary Hill now, as we did right away.  But as a tip, they would stay in place better, if you waited a bit for the seed to sprout and begin to grow, so there is a bit of a root system established to support the sticks.


012_kids-calvary-hill-plant-project
Here is what ours looked like, all done and ready to grow!

We brought it indoors, and placed it on a plastic covered table where sunlight would be on it a good part of the day. Throughout the first week or so, the kids need to simply mist spray the soil with water, in a spray bottle, 3 times a day, to keep the soil moist, and encourage the seed to sprout.  Perhaps you can come up with a simple 1 or 2 line poem to say, while they do this, as a form of meditation.
–

013_kids-lent-project
It’s growing!  The kids will be so excited to see this.

As sprouts push upward from beneath, some dirt will tumble down. This is why it is important to really try to keep the soil quite moist, until it is all held in place by the grass that grows. We thought the plastic table covering was wise, because all of the water spraying.
–

014-seeds-sprouting You will also notice some seeds and seed casings being pushed up to the surface. It’s fine.


015_calvary-hill-plant-easter
Before you know it, you’ll have lush green grass, on your Calvary Hill!

More photos of Jesus’ empty tomb….

016_calvary-hill-plant

017_calvary-hill-plant-jesus-tomb

018_rustic-stick-crucifixes I just love this photo.


019_calvary-hill-kids-project
On Good Friday, you can wrap a clothespin with a white piece of cloth or paper towel, or simply cover it.  The clothespin and wrap is representative of Jesus’ body.
  Then roll the stone to close the opening of His tomb.  : (
–

020_easter-empty-tomb-calvary-hill-plant-kids-project
On Easter morning
, JESUS IS RISEN!  When the kids get up in the morning, let them find the stone rolled away from Jesus’ tomb, and his garments folded or rolled neatly inside. 

It is our hope and prayer as adults, that our Lenten Season practices, help draw us closer to Jesus, deepening our relationship with Him.  May your kids not only enjoy this project, but like the seeds in the fertile soil, may it help sprout a faith in their hearts, that is bound to grow within them, and help guide them all throughout their lives.

ALLELUIA!!

(We’re happy to discuss this project, or answer any questions for you, in the comments below.)

* * * * * *

Follow us on FACEBOOK!


Filed Under: Crafts & Creations, Faith, Homeschooling, Kids Arts and Crafts, Kids Arts and Crafts, The Big Picture, Tutorial Tagged With: calvary-hill-plant, calvary-hill-plant-how-to, calvary-hill-plant-tutorial, Catholic-blogs, Catholic-families, Catholic-kids, christian-kids-project, Easter, easter-kids-projects, Easter-plant, Easter-table-centerpiece, kids-easter-crafts, kids-easter-lent-projects, kids-lent-projects, lenten-arts-and-crafts, lenten-projects, triplets

Personal Photos of Our Easter Day

May 4, 2011 By Laura 1 Comment

00_

Just sharing some personal photos of our kids with you, from our most

beautiful, joyful, memorable, perfect Easter Day.

  001

These lovely flowers were sent from a family friend.  She’s always so thoughtful on holidays.

The daisies are still very much alive, in a wine glass of water. Had to keep the polka dot ribbon too.

002
The Lord is Risen!!
This Calvary plant the kids made, is now out in my gardens.


easter-pails_003 We don’t do the E.B. (or S.C.), but I always love having surprises for the kids.  Especially because they ask for nothing, expect nothing, and do easily remain so focused on our faith. They couldn’t wait to go to Mass, and neither could I!  It had been an intense but beautiful Holy Week, but we were ready for the celebration!
–

004 I’ll share my puzzle with you.  Unscramble it, if you can! ; )  lol

–

005

006

007

008
009

010

011

The greatest gifts of our earthly life. . . .

012

–

triplets_013

A Package Deal kind of Blessing!

–

014
I can’t tell you, how happy these piggy-braids made me.

{A} asked for me to do them, and she loved them too.

The shock of it all almost stopped my heart,

on Easter morning.  ; )

Our beautiful doll, is now way taller than me.

015

Our girls….

016

017

–

Our boys….

018

–

easter-apple-tini_19 I did not photograph our delicious Easter dinner.

But I did photograph my pretty Apple-Tini!

******

Hope your Easter Day was joyful too, and picture-perfect in every way!


Save

Save

Filed Under: Celebrations, Faith, Faith/ Catholic, Holidays, The Big Picture Tagged With: Catholic-blogs, Catholic-families, Easter, Easter photos

  • 1
  • 2
  • 3
  • Next Page »

We are wicked happy to have you here! We hope you find much inspiration, help, humor and enjoyment here.


Archives


POPULAR POSTS

* * * * * *

SUBSCRIBE to House of Joyful Noise blog! Every new post, delivered right to your email box!


Privacy Policy

Amazon Affiliates

Never at any additional cost to you, we may earn a small commission for our endorsement, recommendation, testimonial, and/or link to any products from our website. Your purchase through our links helps support our family, while sharing with you the products we authentically use and recommend, for various ideas, and letting you know where you can purchase them. Thank you for your support!

[footer_backtotop]

Copyright © 2025 HouseOfJoyfulNoise.com · Genesis Framework by StudioPress