• HOME
  • {A}’s Chipmunk Training Archives

 Homepage

  • The Homestead
    • Home Projects
    • Home Improvement
    • Home Decor
      • Seasonal Home decor
        • FALL Home Decor
        • WINTER Home Decor
        • SPRING Crafts and Creations
        • SUMMER Crafts and Creations
    • Our Chickens
    • Gardening
    • Organization
    • Re-Purposing
    • Furniture Refinishing
    • Budget
  • Crafts & Creations
    • Seasonal Home decor
      • FALL Crafts and Creations
      • WINTER Crafts and Creations
      • SPRING Crafts and Creations
      • SUMMER Crafts and Creations
    • DIY (Do-It-Yourself) Project
    • Kids Arts and Crafts
    • Homemade/Handmade Gift Ideas
    • Holiday Crafts
    • Fan Pulls
    • Free Printable/Downloadable
    • Sewing Projects
    • Giveaways
    • Business Features
  • Recipes/FoodFun
    • Breakfast
    • Lunch
    • Main Dish
    • Sandwiches
    • Appetizers
    • Slow Cooker
    • On The Grill
    • Side Dishes
      • Soups
      • Salads
    • Baking
      • Breads, Rolls and Muffins
    • Snacks
    • Treats
    • Desserts
    • Drinks
  • Homeschooling
    • Elementary Homeschooling
      • Elementary Homeschooling READING
      • Elementary Homeschooling MATH
      • Elementary Homeschooling LANGUAGE ARTS
      • Elementary Homeschooling SCIENCE
      • Elementary Homeschooling HOME ECONOMICS
      • Kids Arts and Crafts
    • Middle School Homeschooling
      • Middle School Homeschooling SCIENCE
      • Middle School Homeschooling HOME ECONOMICS
    • Language Arts
    • Math
    • History / Social Studies
    • Geography
    • Foreign Language
    • Field Trips
    • Games
    • Nature Study
  • The Big Picture
    • Life In General
    • Celebrations
    • Faith
      • Into the Light; The Series
    • Giveaways
    • Reviews & Sponsors
  • Photography & Lettering
    • Photography
    • truck lettering
    • vehicle graphics
    • Newborns
    • Kids
    • Engagement
    • High School Senior Pictures
    • High School Senior Pictures Sneak Peeks

The Making of Mantels / Appeasing my Mantel Envy!

April 1, 2013 By Laura 8 Comments


A couple of weeks ago, I hinted on our Facebook Page about the weekend project we had in the works. I mentioned that I was all done dealing with the ‘mantel envy’ I have had going on, for years now. You know, mantels, the shelving surface that many homes have over their fireplace?  Many creative homemakers have great fun decorating their mantels for various seasons and holidays, switching it up all of the time. I wanted that, too!
We don’t have a fireplace, anymore. Years ago, before the little-house to big-house renovation, we had a built in coal and wood fireplace insert, with a brick mantel. But that was ripped out when our sun room was added on.
I wanted a mantel of my own to work with. And when I really want something, I usually figure out how to get it.
And you know how good I am at that?

I got me TWO mantels! HA!

I reckon some will have some envy for me, now. ; )  See, the good Lord blessed me, like Mary, with a carpenter of my own.  A very skilled carpenter, I might add, who can build just about anything I want. And because I am not only blessed, but possibly (possibly . . . ) spoiled, he does build me anything I want.
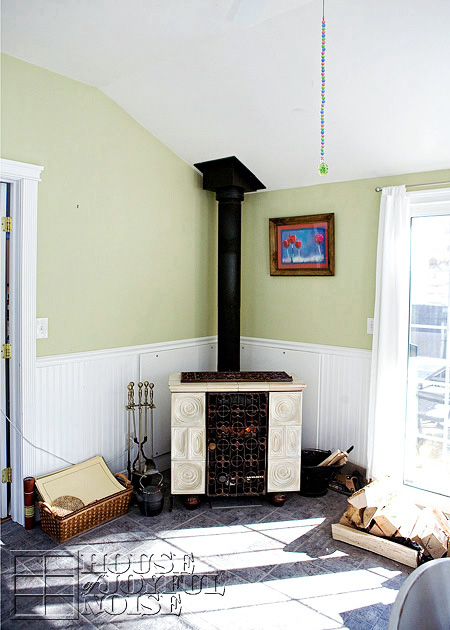
 
I had been telling my-personal-Joseph, how I thought it was a fine idea, for him to build me a great pair of corner mantels, over our beloved, ceramic wood burning, family-heirloom. I explained it to him in great deal, trying to paint the picture for him. I don’t think he was really getting my vision for awhile, because he kept looking puzzled, while assessing the area, and saying, “Really?”, every time I brought it up.  But then on the Thursday before said-prior weekend, I told him I just had to have it. And I’d love for him to get sketchin’, and bring home any materials he;d need for the weekend, home after work on Friday. And he said, “So let me get this straight. This is our new urgent project, that you’d like done right away, before I have even finished the last urgent project, that you’d like done right away? I’m supposed to stop that one, and do this one first, after stopping the one I was doing 2 projects ago, to do the last, new urgent project?”  And I said,
“Right. Honey.”

And so he got sketchin’,
and buildin’, and
yes, I helped quite a bit too.
Because I’m not that spoiled.

And by the next weekend, my mantel dreams had come true, x2.
And I was and am still, thankful.

WANNA SEE?!
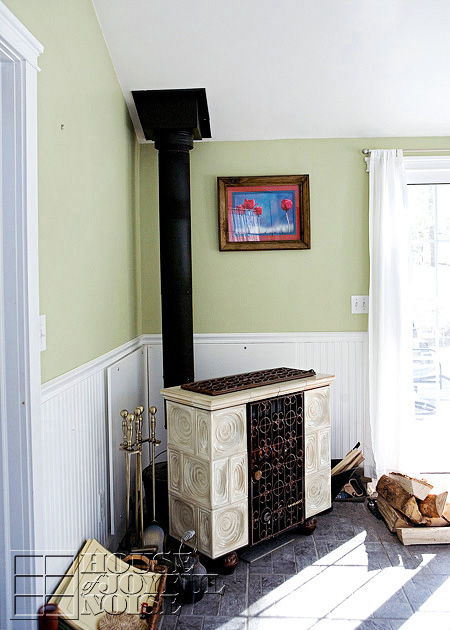

Ok so this is the corner as it has been (before), when anyone is looking at, when they walk into our front door. On the left hand side there, is where our Prayer List Chalkboard has been hanging for years. (And we still use it, regularly.) For now, it’s moved to the wall beside the front door. But take not of the wall straight ahead.  It’s shorter . . . . .
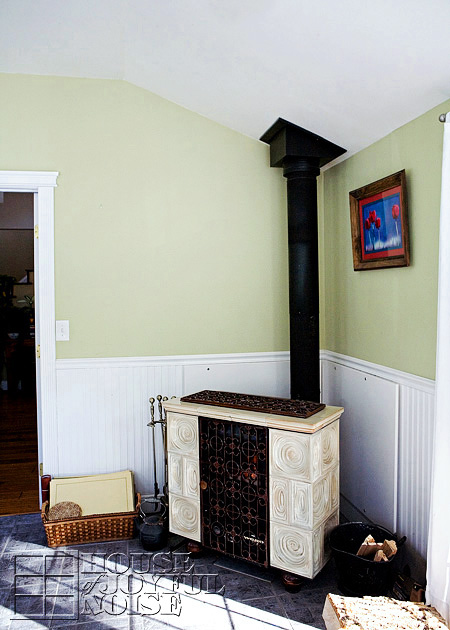
. . . . than the corner wall perpendicular to it. This one is a bit longer.  So I’ll have two different lengths of mantels.
I also got thinkin’ about how much I’ll be photographing the mantels as it changes for our home decor. And it hit me that the backdrop will always be the same, and green. And the simple (right?…) mantels project instantly grew. I wanted a wider bead board like wall as a backdrop.
See? Spoiled. Possibly.
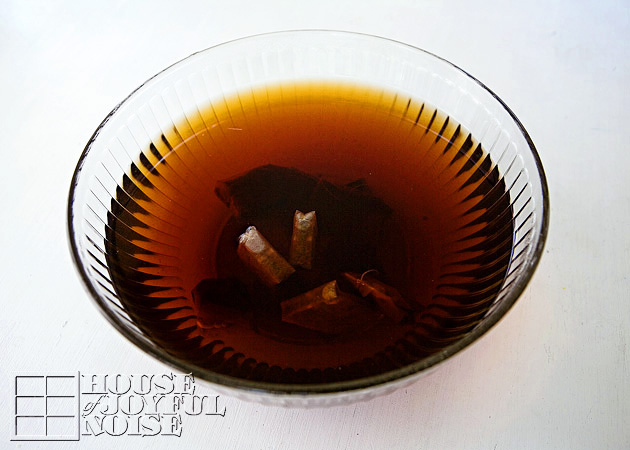
I knew if my Joseph built me these, I would be so grateful. I’d be happy to finish them myself. Of course, I wanted them to not look new. Or fresh. And for my vision, distressing on fresh wood was not going to work. So I researched how to weather/age the wood, before painting and distressing, and was pleasantly surprised to find a way to do it. That worked!
It’s fairly simple too.  You ‘paint’ the wood with tea, first. I made a big strong batch, soaking my tea bags over night.
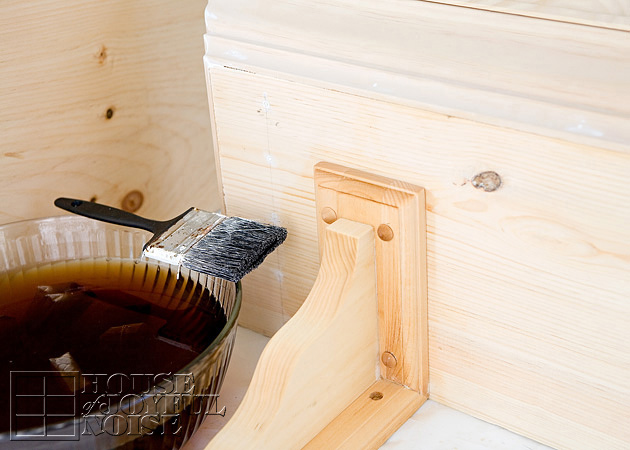
So I brushed the tea on all over my two built mantels, and let them dry. There was no difference to see. 
But the tea is only applied to react with the next strange solution brushed on.
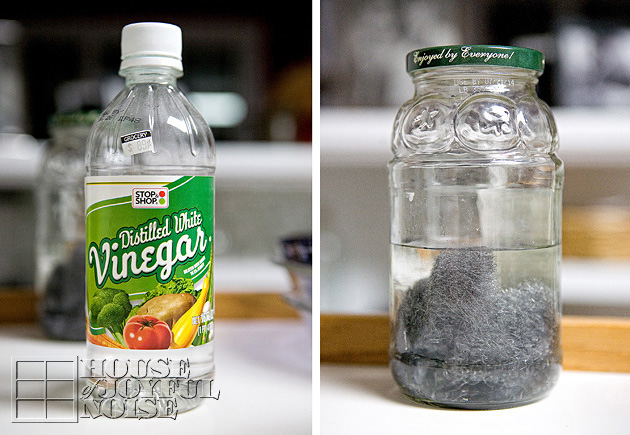

I had to cover very fine steel wool (#0000) with straight distilled white vinegar.  And just let it soak, at least for overnight. 
The next day, it didn’t look much different in the jar. I know in time, that wool would rust. (It has since…). But anyway, while applying it to the mantels (already treated with the tea), I could see the instant reaction happening. Very cool. Almost magical!

To see the dried wood after the vinegar/steel wool solution treatment, click on any image in the gallery below, use arrows to see each next, and then your ESC button to close.

[Show as slideshow]
07_weathering-wood-technique
08_weathering-wood-technique
09_weathering-wood-technique
10_weathering-wood-technique

Interestingly, even after the wood had been dry and I took the above photos, the wood seemed to turn even a bit greyer. which I was happy about. For a darker finish, I could have brushed on a second treatment, but I was quite happy with the results after just one, for this project.

So then it was time to paint both mantels, white.  I used about 3-4 parts paint to 1-part water.
And then a whole lot of sanding and distressing.
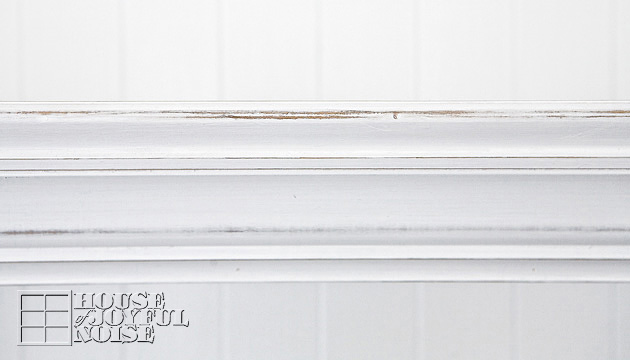
Meanwhile, Michael, a.k.a my Joseph in this post, was taking care of the walls to my every wishes.


And I’m pretty much done talking, and ready to show you lots of photos of this exciting home improvement project!
Here we go!
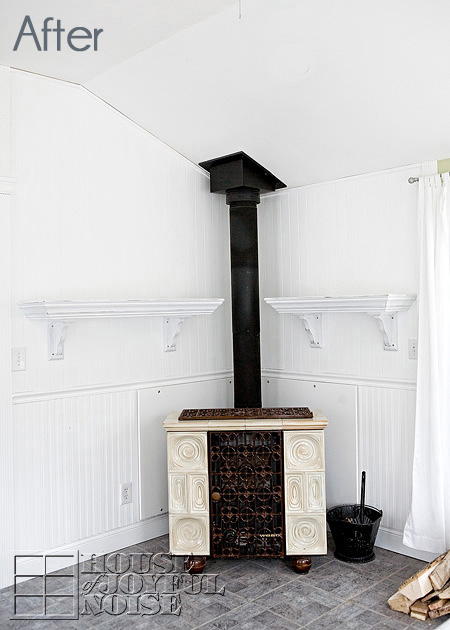

Now for anyone concerned, we were sure to make certain these mantels met fire code.  They needed to be at least 6 inches from the stove-pipe, and they are. It’s hard to tell in these photos, but trust us. We have the most to lose! That is why they don’t wrap around behind the pipe.  The mantel shelves are very thick, and keep in mind too, that the stove is only in use maybe 1-1/2 seasons a year.
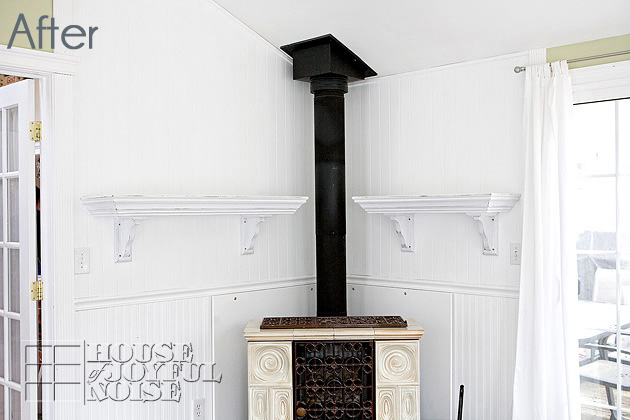
So yes, while narrow bead-board goes all the way around the lower half of our green sun room (as of this post), the wider bead board (v-groove) type paneling is just in this corner.  I think because of where we let it end, and because of the molding we used, it works nicely! 
And how about those mantels?
I love that I have two to work with! Because sometimes you get going on a theme, but you really have another idea that kind of ties in too.
So that is going to be way fun.  One is 48″ and the other is 35″.
Let’s take a closer look at the beauty of the craftmanship of my husband, shall we?
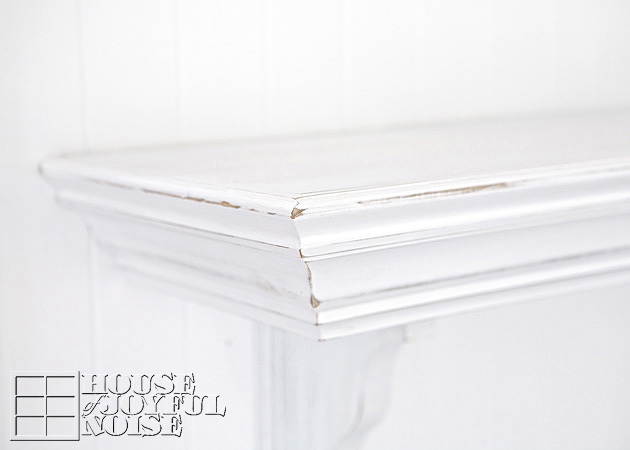
He used  1×12″ and 1×10″ pine boards, crown molding, and base cap.
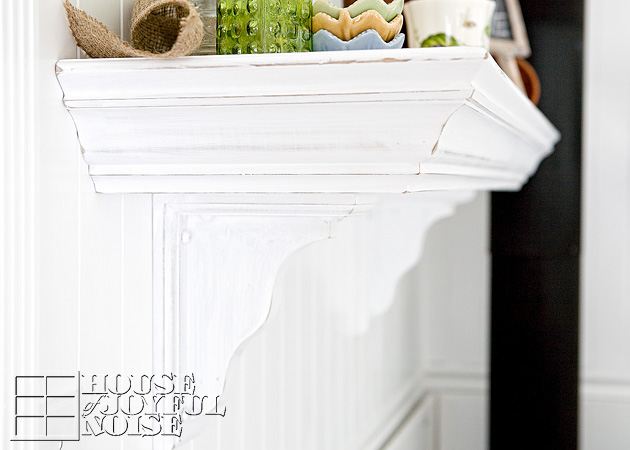
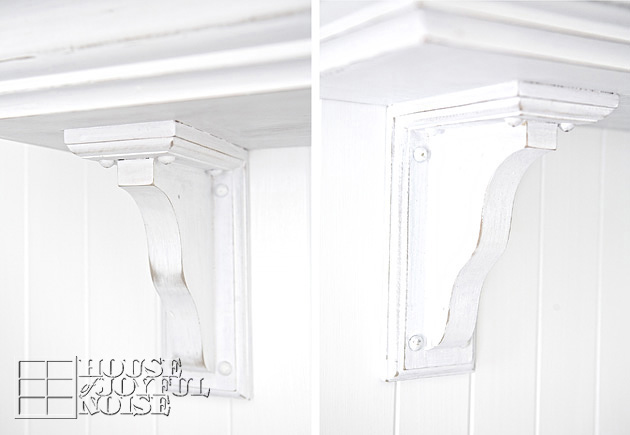
And these awesome pre-assembled 9×7″ shelf brackets. Which, I love.
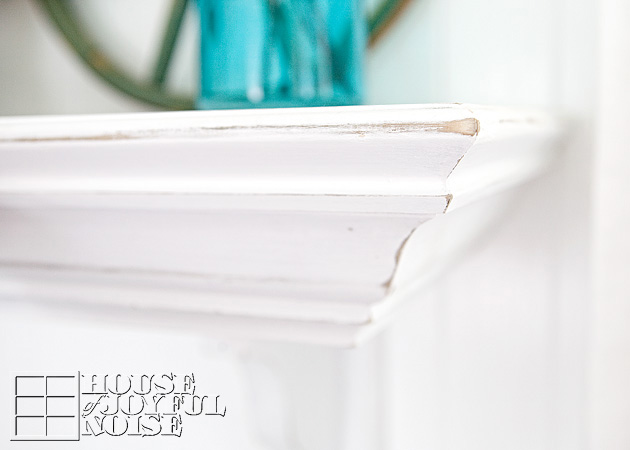
Do you see how the wood looks older, peeking out from underneath the (supposed) worn paint?
Love it!
A few more photos . . . .
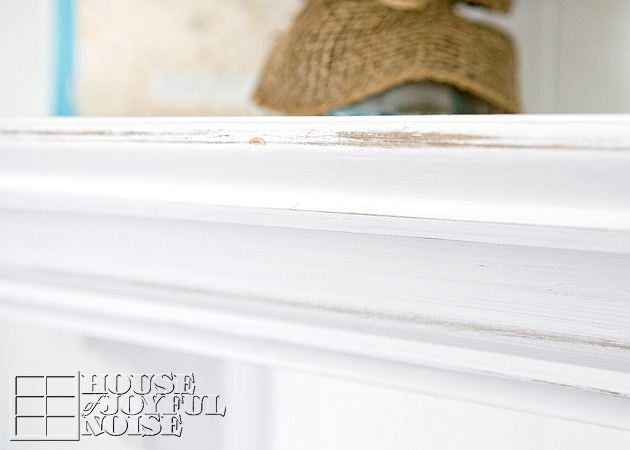

Beautiful, no?

 I am SO happy with them. Of course, the whole point of having them, was to decorate. They are looking kind of NAKED in these photos.
But as you can see peaks of in a few photos above, I have indeed gotten my Spring mantels together!
So my Spring Mantels…..that is a next post coming up!
Detail photos of what I adorned these mantels with, for this season, are on their way. Which I believe will really help you pull the whole vision together.
They are gorgeous, and so homey, all decorated. I can’t wait for you to see!
But this post is about the craftmanship of Michael’s work, and his ability and willingness to build my little dreams.
Please leave him your thoughts!
And then look for the Spring Mantels post real soon.! ; )

* * * * * *

Please come follow me here and there:


Filed Under: Furniture Refinishing, Furniture Refinishing, Home Decor, Home Improvement, Home Projects, Mantel Decorating (Ideas), The Homestead Tagged With: carpentry, corner-mantels, custom-mantels, home improvements, making-mantels, mantel-decorating, mantels, shelving, weathering-new-wood, wood-stove-mantels

Re-Purpose Old Calendars | DIY Wall Art

March 26, 2013 By Laura 17 Comments

Have you ever found yourself sad to turn the page on your 12 month wall calendar, because you liked the image for the ending month better? Or hesitant to throw out a calendar with so many great visuals at the end of the year? After all, when we buy a wall calendar, we usually pick out the one we did, because we liked the pictures or designs that went with each month. 

So isn’t it a great recycling idea, to re-purpose old calendars into DIY wall art, using some of those favorite months, for home decor?

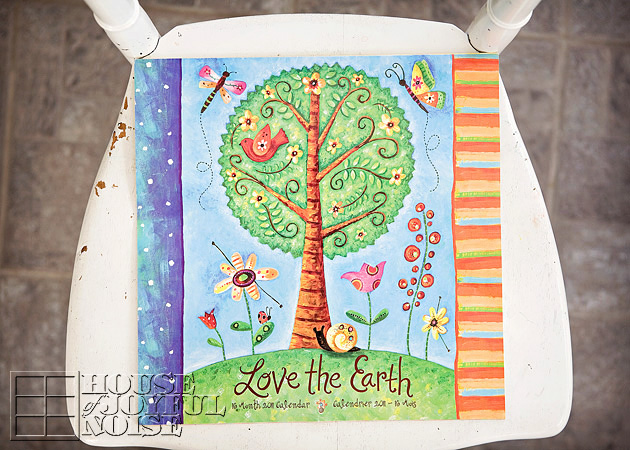
I had chosen this 2011 calendar for my youngest daughter to use in her room, because I just loved the artwork in it, so much. 
And can you believe I got it for $1.00, at Michael’s Arts and Crafts?! A buck!
Our girl enjoyed it hanging in her room the whole way through. And she used it to remember things on certain days, as well.
When the year came to an end, she was sad to take it down, and I just couldn’t throw it out, either.


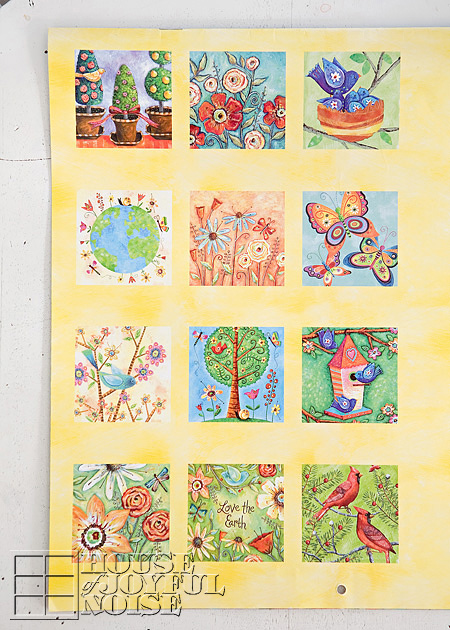
I loved so many of the months artwork pictures, that I was hoping I might figure out something creative to be able to do with them. 
I had it for the whole following year; busy with other projects most times, forgetting I even had this calendar other times, and then finding it again and remembering I wanted to do something with it. I just wasn’t sure what.
And then it hit me: Why not keep it simple, and just frame some of the pages as artwork?!

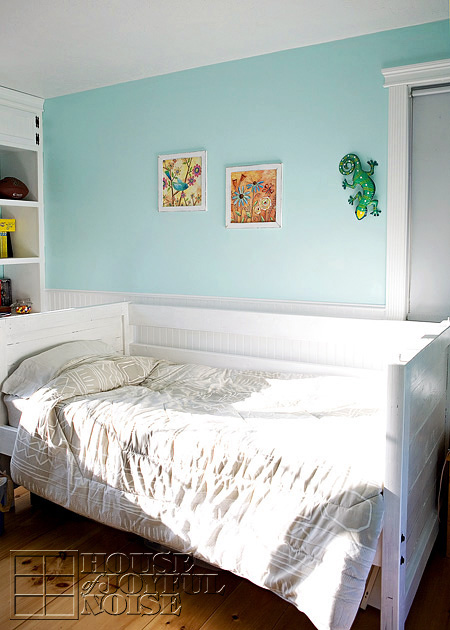
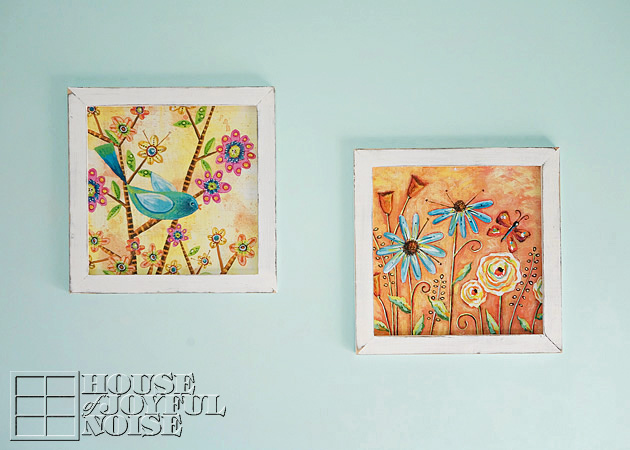
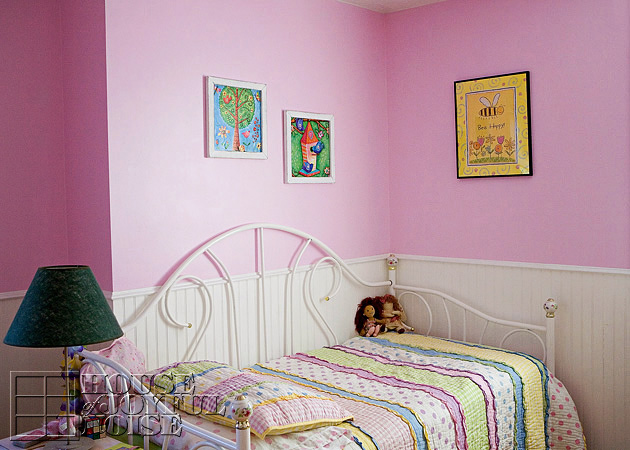
So we chose 2 picture-pages for each of our girls’ rooms. Ones that they loved, but that also went well with each of their room colors.
After taking those 4 pages out, I DID throw the rest of the calendar away, because it had already been hanging around for a year after it’s expiration.

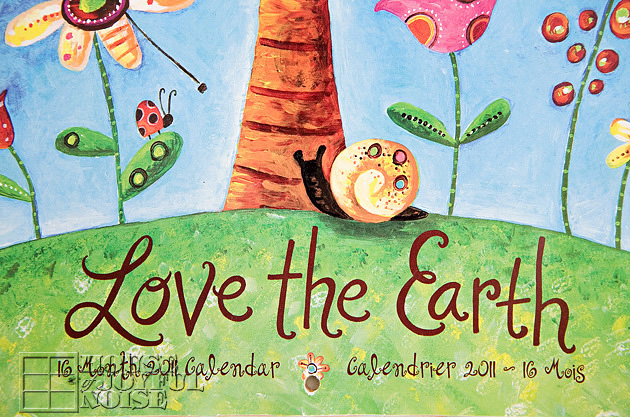
But in looking at all of the photos I took of the calendar for this blog post, I wish I kept the cover! 
Because I’ve realized the cover was the artwork I loved most. Dag nabbit!
I could have trimmed it right over the bottom copy there, and had say a 12″ x 1o or 11″ piece of artwork too.
Oh well. Trying to let go of the regret, since there is nothing I can do about it now.

So let me tell you the simple way in which I turned this old calendar into 4 awesome, colorful and artistic looking pieces of wall art.

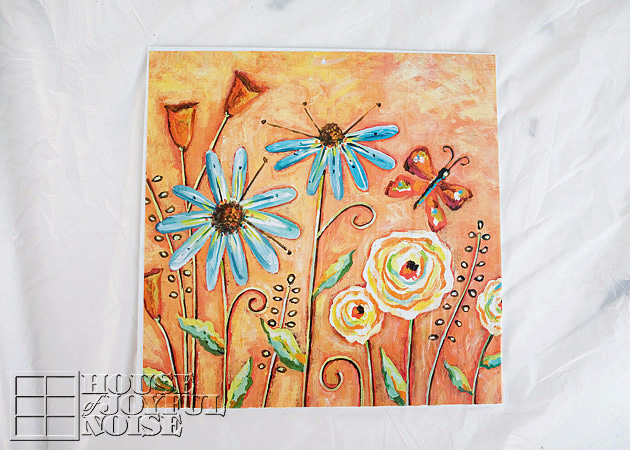
The calendar measured 12″ x 12″, so that was the size to work with.
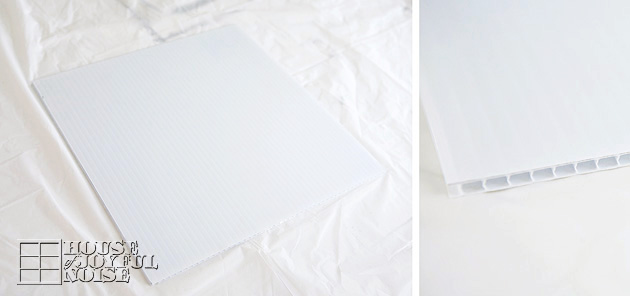
To give the floppy calendar page some stability, it needed to be mounted on something. You can also just use some sturdy pieces of cardboard. 
But my husband had some corrugated plastic around, that he uses to make yard stake signs for different companies.  Real estate agents use them a lot, as does various home contractors, etc.
So I used that stuff. I cut four 12″ square pieces.

Then I simply adhered each artwork page onto each corrugated backing, using Modge Podge as the glue.

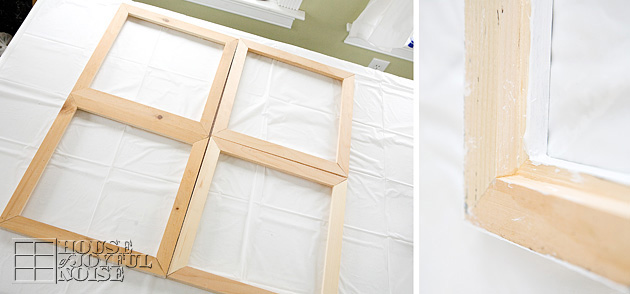
Next we needed 4 12×12″ frames.  I am quite sure square frames are available in stores. One could certainly get them custom made, if necessary. But my husband is pretty good at just banging out any frames when I need them, and it’s a lot more cost efficient to make them ourselves, than buying them at retail stores. I also really prefer to finish them myself, so they have the look and style I am envisioning. 
So he builds the frames, and I paint them.

I have various ways of finishing frames or any woodwork pieces.
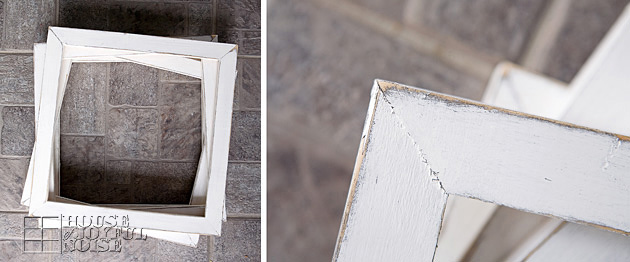
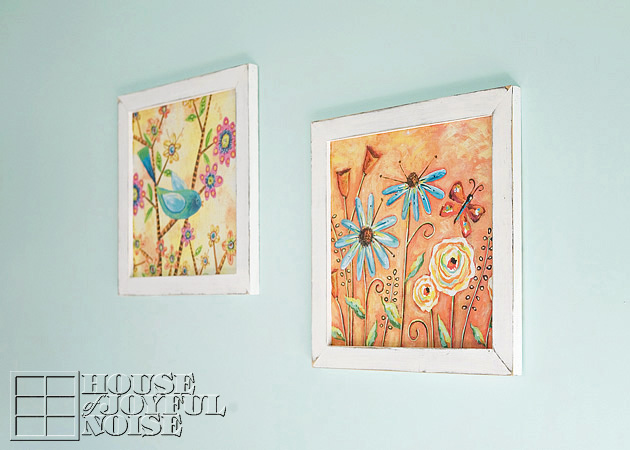
For these, I painted them dark grey first, then white, and then distressed the edges well with sandpaper.
This resulted in some grey paint as well as bare wood showing through the distressed areas of the white finish. That mix of shades and depth was just what I was aiming for.

The mounted artwork just popped into the back of the frames, and I used a few tiny nails to ensure they were held in.
Done!

Here’s a look at several photos of the finished art pieces, adding pretty and cheerful decor to each of the girls’ rooms:

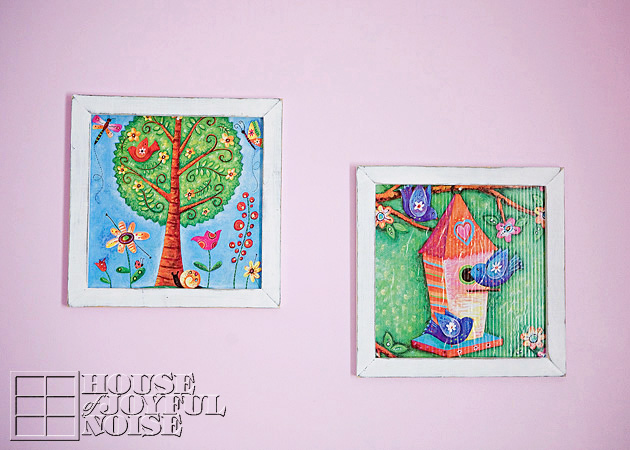
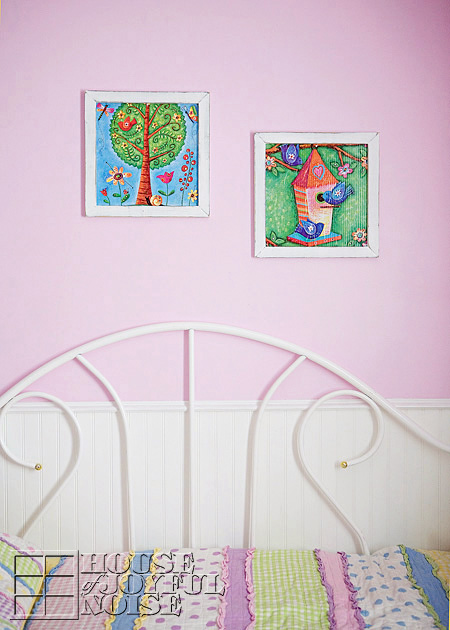
(Our oldest daughter, Alexis’ room.)


–
(Next, our youngest daughter, Olivia’s room.)

There you have it. Inexpensive and beautiful accent wall decor.

As anther tip, stores often sell expiring soon calendars at a steep discount, when it’s already half way through a year, etc. So if you keep an eye out for them, making framed pictures such as these is another way to create more awesome budget friendly decor for your home, or to give as gifts.

The more I think about it, the more creative ideas I can think of, to recycle and make the most of out-of-date calendars.
So before you throw out your next expired calendar, think about what else you can use it for.
Hope you enjoyed this idea, and seeing the results of it.

* * * * * *

Please come follow us here and there:


Filed Under: Crafts & Creations, Home Decor, Re-Purposing, The Homestead Tagged With: budget-home-decorating, DIY-wall-art, handmade-frames, home-decor-ideas, inexpensive-wall-art, Modge Podge, recycling, repurposing, repurposing-ideas, repurposing-old-calendars, wall-decor-ideas

Spiritual Easter Printable for You.

March 14, 2013 By Laura 5 Comments

I felt like designing a spiritually-themed Easter printable for us, and to share with you.

So I did!

It’s designed to fit an 8×10 frame. I recommend printing it on white card stock.

Please be sure to DOWNLOAD and SAVE the full resolution version, as opposed to the image you see in this post, which is web sized.

Clicking on the colorful printable below, should bring you to the full sized version at my DropBox. You need to click the ‘Download’ button there.

*Warning Note: Do not right-click and ‘Save Image As’, or you will not get the sharp printable image.

Download. Save. Print. Enjoy!

I’ll share with you mine on display in my home decor, soon.

Hope you like it. : )

~Laura |  House of Joyful Noise blog

 * * * * * *

Please come follow me here and there:

Save

Save

Filed Under: Crafts & Creations, Free Printable/Downloadable, Holiday Crafts, Home Decor, Seasonal Home decor, SPRING Home Decor, The Homestead Tagged With: Easter, Easter decor, Easter-decorating, Easter-printable, free-Easter-printables, holiday-printables, spiritual-Easter-printable

How to Blow Out Egg Yolks and String for Hanging | Decorative Eggs for Keeps.

March 6, 2013 By Laura 10 Comments


A couple of pre-Easter seasons back, we blew out and decorated eggs, and prepped some for hanging. I took lots of photos of the process of the way we did it, but never blogged it for you all.  It’s not all that hard. And the best part is, you don’t have to figure out what you’re having for dinner that night! You’ll have a bowl full of egg yolks, ready to scramble. : )  Breakfast for dinner! We do that sometimes around here.

Scroll down to read and see just how simple it is to blow out eggs, and string them for hanging after decorating them.

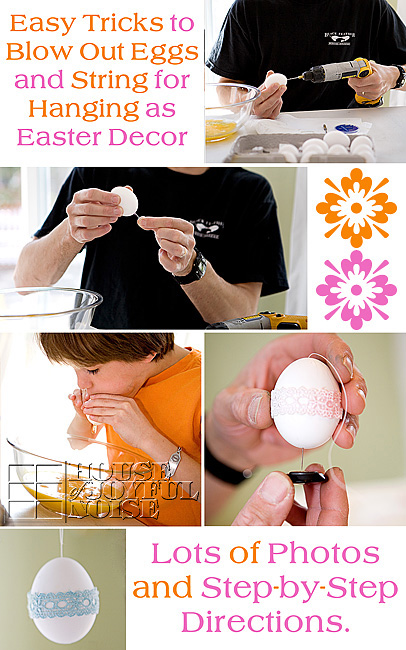
When you’re done reading through, the above collage is the perfect Pin It image for these tutorials.
(Hint, hint. ; )

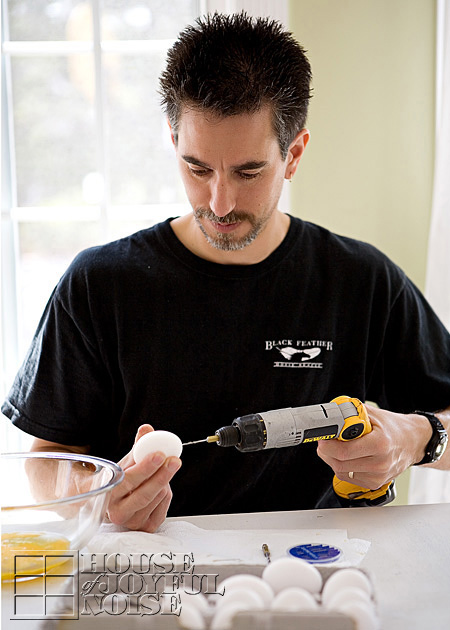
So let’s pierce some eggs.


Using a drill makes putting the holes in the egg very easy.  Use a 1/16 drill bit for the top of the egg. This is the smaller hole.
On the bottom of the egg, make a slightly bigger hole, using the 1/8 drill bit.

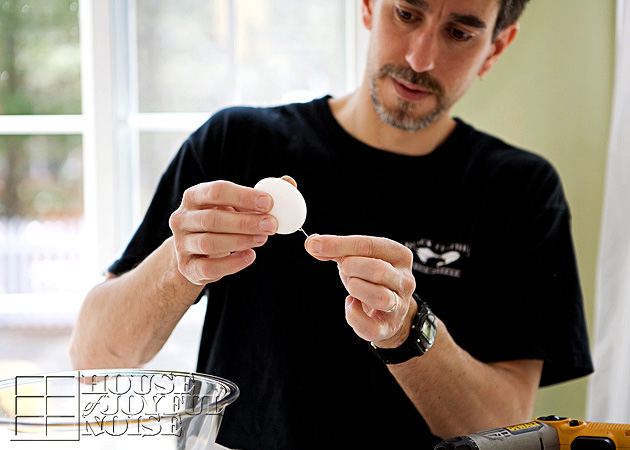
Next, use a long pin in the bottom/big hole, and move it around and jab in and out, to break up the yolk sac some.
Now it’s time to blow that yolk out.
We let the kids take turns blowing them out. They thought it would be so fun.  But I was worried their head would explode, seeing how red their faces were getting! I was like, “Oh my gosh! Breathe!” Ha ha ha.
It took them a little bit to learn how to direct the air from their blow, into the hole. You need to do that best you can.  You can also try a syringe, to push air through. Once the yolk starts coming out, it comes out pretty fluidly.


Plenty for our family of 6.

So after you have blown all of the eggs you want hallowed out, you’ll want to wash them off and out a bit. Run them under warm water, getting water inside the egg too, and shake them some, to wash the inside of the egg. Drain them as well as possible. You can then put them all on a plate in the microwave for microwave them for 10-15 seconds

Now you can decorate them.  It is a little tricky to dip-dye the hallowed eggs, because they tend to float now. So if you are dyeing them, you’ll need to keep it submerged with a spoon or whatever.  Of course, there is a host of other ways you can decorate eggs. And remember, since these are blown eggs, you’ll be able to keep them! So consider drawing on them, doing a little decoupage with dried flowers, using Washi tape, or embellishing them in a number of ways. Just use your imagining and have fun.

If you’d like to hang your hallowed eggs, here is how you can string them:
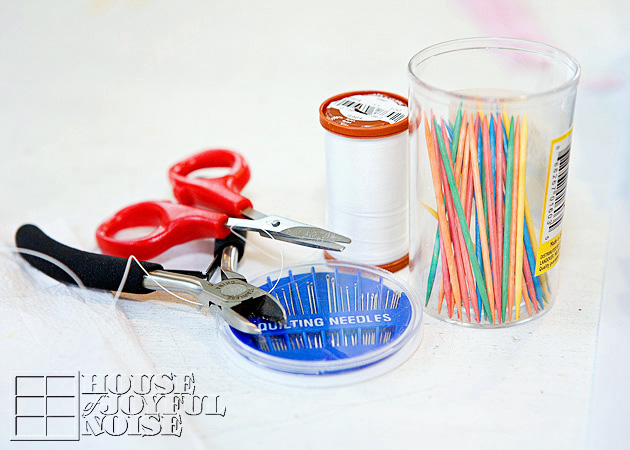
These are helpful supplies to string your eggs:

  • strong thread
  • eye needles
  • little scissors
  • toothpicks
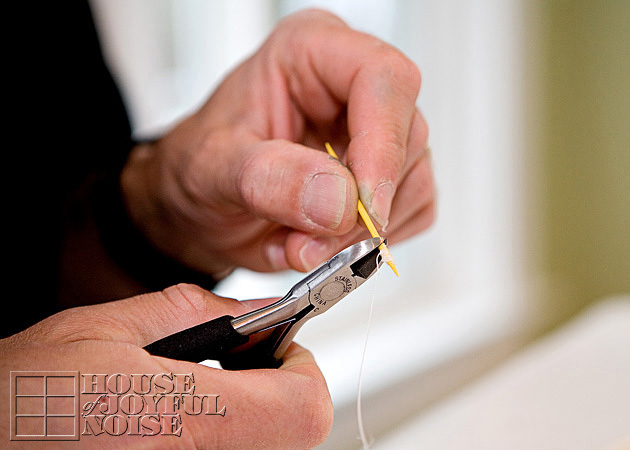
  • small (wire) cutters. As you have probably caught on by now, my husband was the executor of this project this day, while I was the photographer.
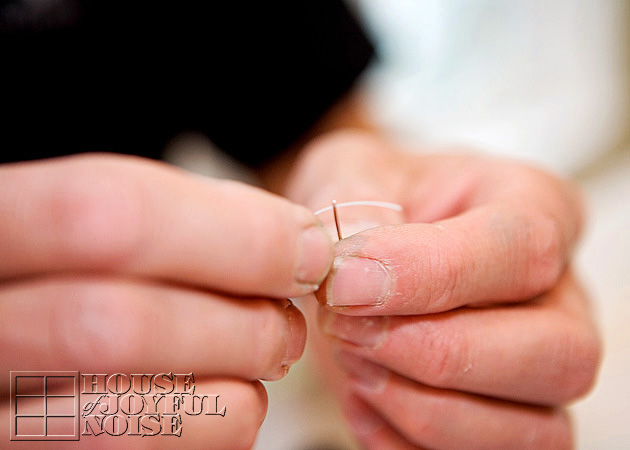
    (Please excuse my husband’s hard-working hands in these detail shots. Love this man so much, for all he does for our family. And then he does fun things like this with us, too.)
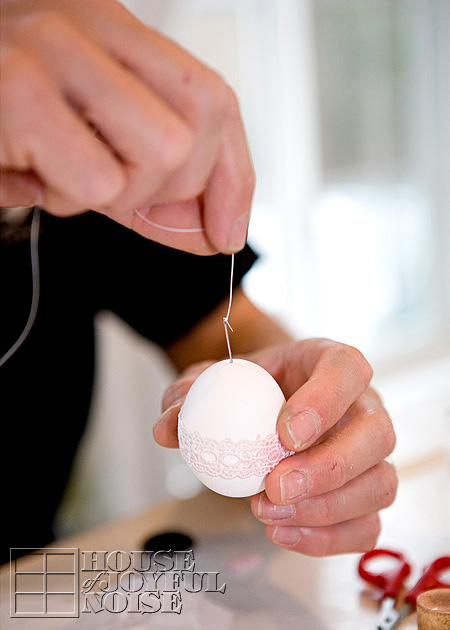
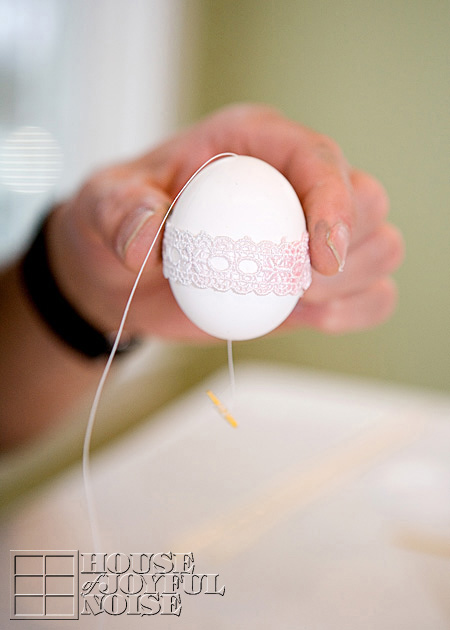
    Thread one of the larger sized needles, and tie it off as a single thread.
    Insert the threaded needle in through the top of the egg, all the way, but leave plenty excess out of the top for hanging later.
    Now it needs to come out the bottom, and as you can imagine, it would be challenging to make the needle do that.
    So here’s the trick . . . . .
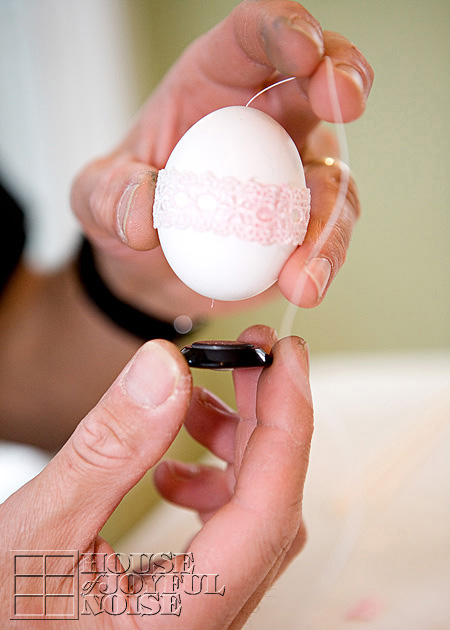
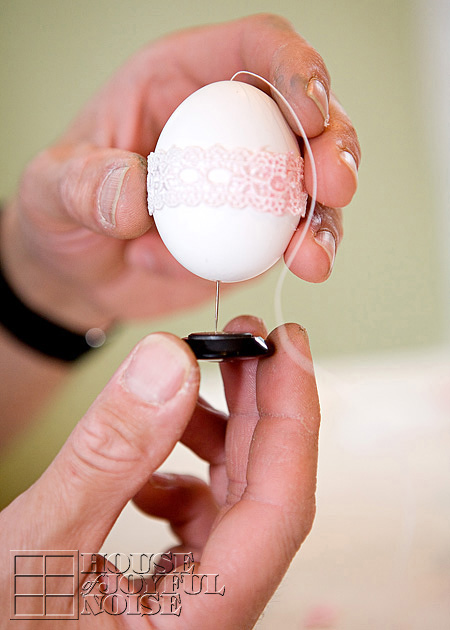
    Hover a magnet underneath the egg at the hole. 
    You can gently shake the egg as you do this, to try and get the tip of the pin to the hole as well.
    The magnet will draw the the threaded needle down out of the hole.
    Cut the pin off the thread now. You won’t need it anymore for this egg.
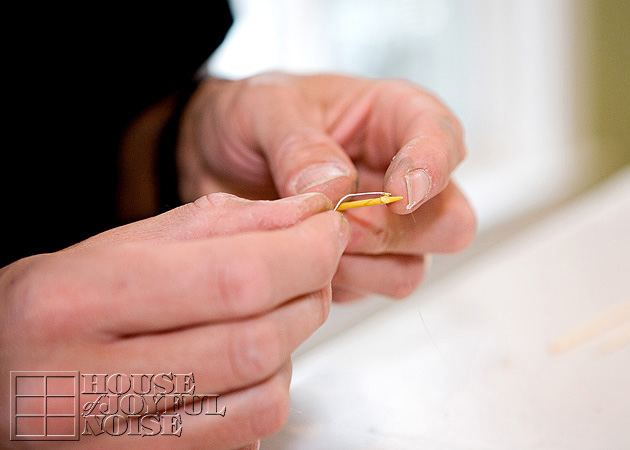
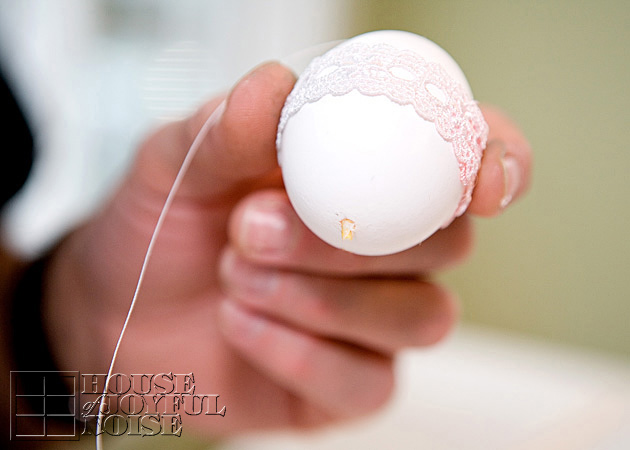
    On the same end of the thread that you cut the pin off, tie on a toothpick, and wrap the thread around it, as shown above.  You only need that little piece of toothpick where the thread is wrapped, (maybe 1/2″ or a little more) so you can cut the rest off using your cutters. So now you have this little piece of toothpick, tied onto the thread, that is coming out of the bottom of your egg.

    Now carefully push the whole thing back up into the hole of the bottom of the egg.  Let it fall in all of the way.
    This will act like an anchor inside the egg, for the string coming out of the top of the egg, to hang it.
    So with the single thread coming out of the top, tie it in a loop, to hang your egg.

    That is the process you do with all of your eggs.  If you don’t wish to hang some or any of your eggs, of course you won’t need to string them.
    All of it is fairly quick, and you’ll have your beautiful decorated eggs for years to come.
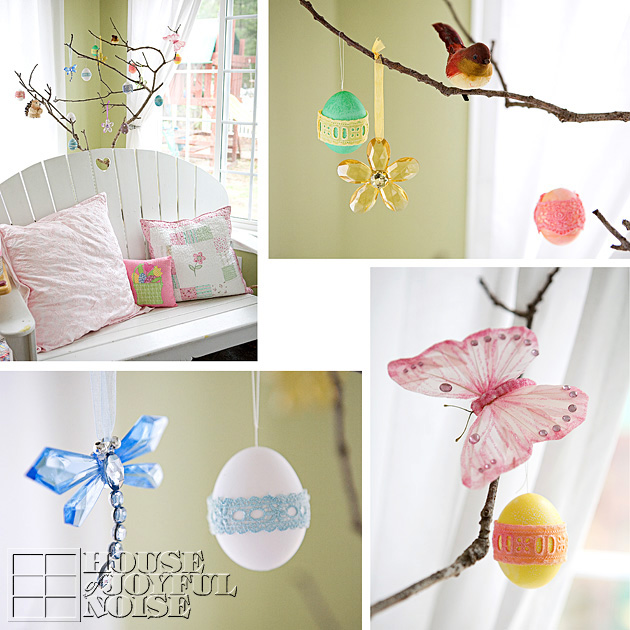
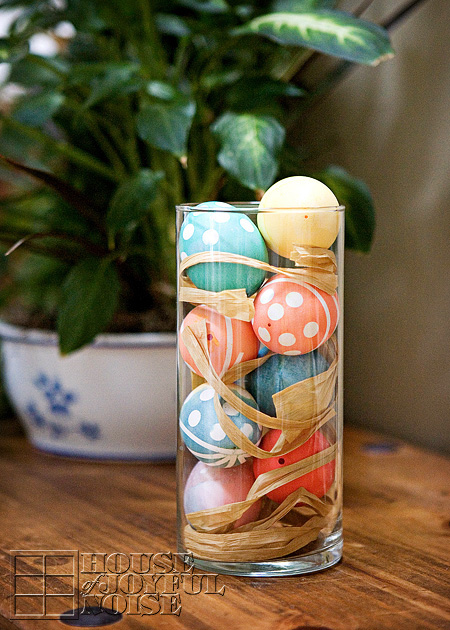
    Here’s how we have used some of ours:


Hung on an Easter Tree.


In a glass cylinder vase, with some pieces of Raffia paper.
What ways will you use yours?

I am considering making some more this year, decorating them in a new beautiful way, possibly personalizing some, and giving some of them as gifts!
We hope you found this tutorial helpful and learned some tricks that will help you blow some eggs of your own, and maybe string a few as well.
Thanks for coming by! May your Easter celebrations with those you love, be beautiful!

* * * * * *

Please come follow me here and there:

This tutorial was shared at Joyful Homemaking’s Think Tank Thursday Link Party #230!

Filed Under: Crafts & Creations, Holiday Crafts, Home Decor, Seasonal Crafts and Creations, Seasonal Home decor, SPRING Crafts and Creations, SPRING Home Decor, The Homestead, Tutorial Tagged With: crafts, decorating-with-blown-eggs, Easter decor, easter-crafts, Easter-home-decor, easter-tree, egg-blowing, hanging-blown-easter-eggs, how-to-blow-out-egg-yolks, how-to-string-blown-eggs

Banner of Love | A Valentine Decor Craft

February 4, 2013 By Laura Leave a Comment

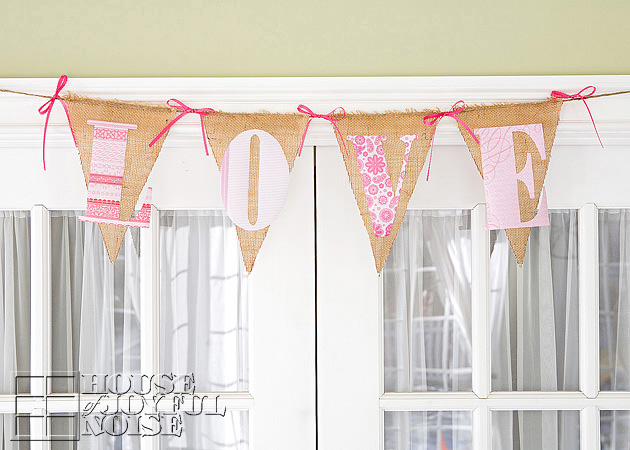
While February, the ‘month of love’, was approaching throughout January, I had had this image in my head of a burlap pennant banner that spelled out LOVE, with little pink ribbons, over our french doors in the sun room, to the living room.  Of course, I didn’t actually have one, so it was something I’d need to create. After pondering how I might go about doing that, I decided I wanted to keep it as simple as possible, even if it doesn’t hold up for subsequent Valentine holidays.

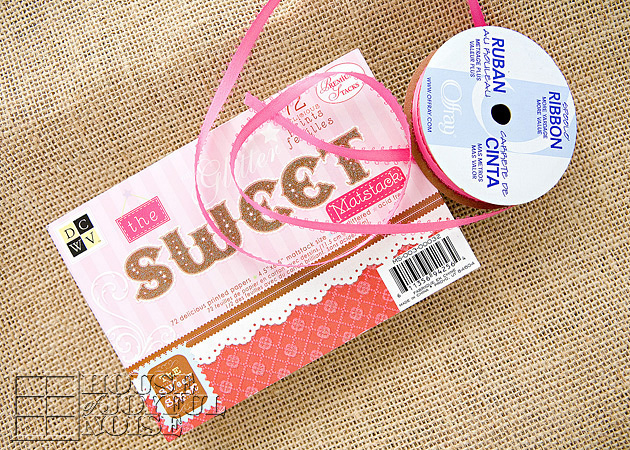
As planned, I got some burlap, for the pennants themselves. I’ve never worked with burlap before.  Good-gosh does it stink!  I don’t understand why. ???  I need to get educated on burlap I guess.  I’m adding it to my list of things I intend to Google.  But in the meantime, I hung the burlap outside for a bit, and even went so far as to FeBreeze it, so I could work with it. I could have used another material, but my vision, was the burlap. So for this project I used it, as well as jute string, a 4.5″ x 6.5″  pad of designer cardstock that contained a variety of pink patterns (for the letters), and pink satin ribbon.

 I also used a few other supplies to make it as well, and I’ll explain in these easy steps as I go along here.
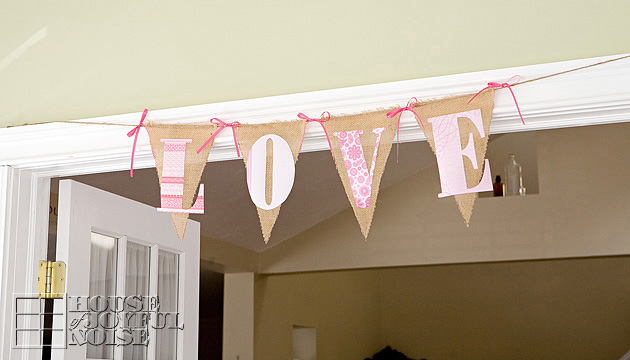
But before I do, let me show you how sweet it came out.

Kind of shabby-chic looking, don’t you think?
Of course this would be sweet with fabric letters, and would probably hold up for many more ‘months of Love’ and Valentine decor to come, but it would probably require some sewing, and I still don’t sew yet. I’m going to learn someday. But it wasn’t happening before this craft. So I used paper cardstock letters. Which does kind of have it’s own charm, I think.

This is how I made this rustic, simple, sweet little banner:

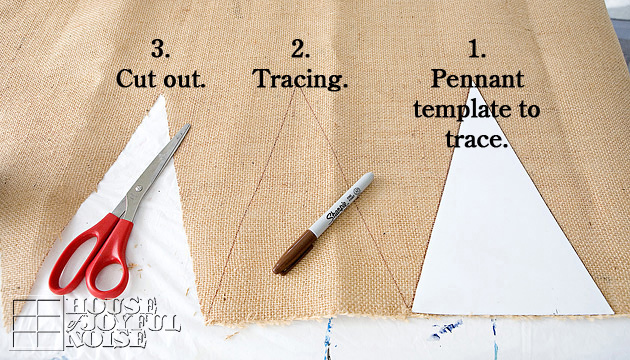
I made a template for the pennant, that measured 7″ wide by 10″ to the point. You can use cardboard as a template. My husband cut me a piece of sheet metal he had, but that’s not really necessary.
So using the template, I traced the pennants with a brown marker. I used the finished edge of the burlap itself, as the top of the pennant, to help hold it together as well as reduce my cutting.
1. Place pennant template at edge of material.  2. Trace template.  3. Cut out pennant.

4. To keep the sides of the pennants (the sides that form the V) from falling apart, because burlap is a weave, I applied a bit of matte Modge Podge just on the edges.
Modge Podge dries clear, and it worked like a charm.


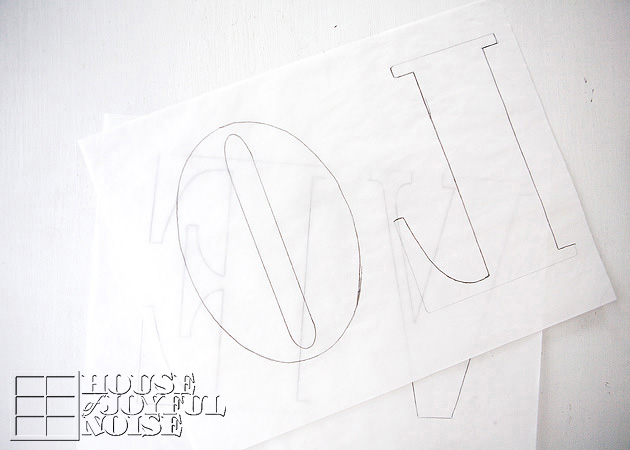
Using the small 4.5″ x 6.5″ pad of designer cardstock that I bought, I wanted each letter as large as possible. So I made each letter to fit a full cardstock sheet edge to edge. I just created the outline of each letter (4.5″ x 6.5″) in photoshop, and arranged two of the letters side by side on an 8.5 x 11″ standard space, and printed them out. LO on one, and VE on another. Then, I traced those printed letters onto tracing paper. Then, I arranged each letter tracing upside down on the backside of my little cardstock sheet (for each letter).  Having done that, I had a backwards letter on the back/white sides of my cardstocks to cut out, so that when I did cut them out, they were facing the right way on the front.  Some of the patterned paper is embellished and bumpy, so it was easier to transfer the pencil lines on the backside, and keep the patterned side clean as well.

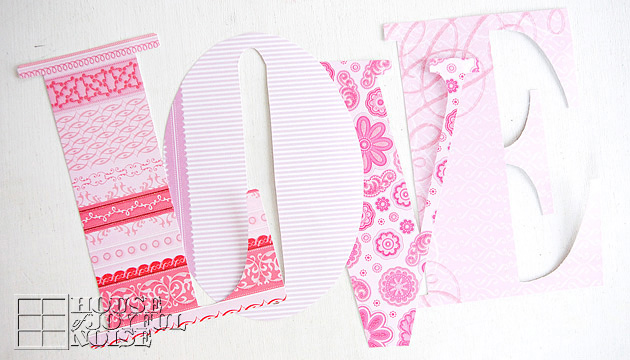
Here are my letters all cut out.
Again, the letters I designed filled a mini-cardstock sheet, so it reduced some of the cutting I needed to do, minimized paper waste, and gave me as large letters as possible.

Next, I wanted to string the pennants.

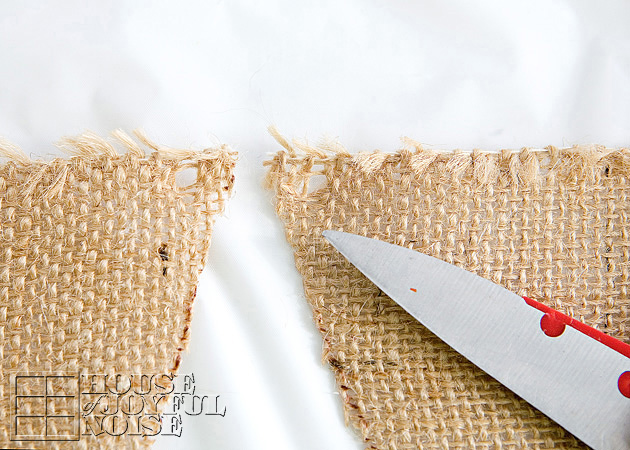
I planned to use jute string for this; another stinky material! I did not want to cut holes in the burlap at all, because it would simply fall apart, being a weave. So using the tip one side of the scissors, open, I just poked it into an existing hole of the burlap where I wanted a hole for the string, and gave the scissors a little twist.  No cutting, but just pushing the fiber-string over.


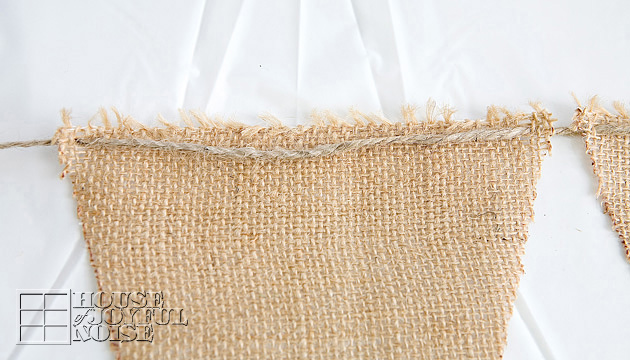
Then I strung a sufficiently long enough piece of jute through each pennant piece, as seen above.  

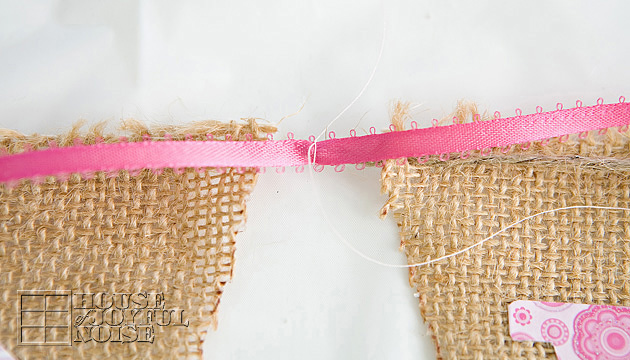
To add some touches of pink and pretty, I wanted to add some little simple bows. To do this, I first tied a little piece of satin ribbon onto the jute string in between each pennant, with a little piece of thread, and then cut off the excess thread ends to just leave the little knot.  Then I tied a bow with the ribbon. The reason I tied the ribbon onto the jute string with the thread first, rather than just tying the ribbon directly onto the jute string, was so that my bows would not be sideways.

  I did not take photos of this part, but to attach the cardstock letters to the burlap pennants, I used Modge Podge as a sort of glue.
I simply covered the back of each letter, and pressed it down onto each pennant.  Although the letters created to extend beyond the pennants, I still Modge Podged the entire back of the letters, because I figured it would help give each paper letter that extra stability.
I let it all dry, lying flat.

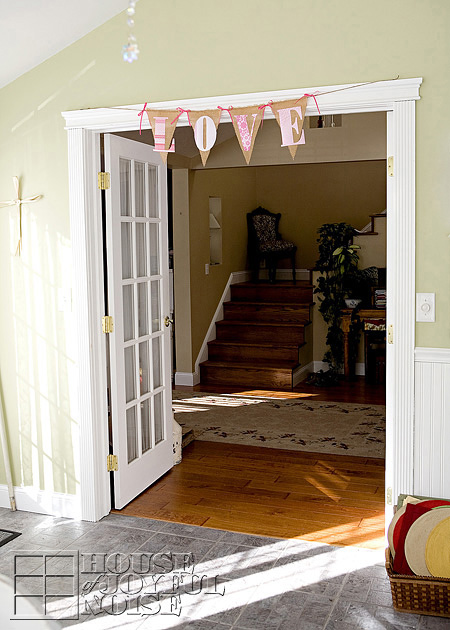
Then we hung it up, right where I envisioned it to be.

I think it makes for very cute Valentine decor.
It’s also made me start humming a few times,
♫ The Lord is mine, and I am His
His banner over me is LOVE . . . ♫


Sorry if that sticks in your head all day long, now! ; )
Hope you enjoyed this project, and it inspires you to make one like it, or one of your own design.

We’d LOVE your thoughts or a hello, if have another moment.
But know we’re always glad when you visit.

* * * * * *

Please come follow me here and there:


Save

Filed Under: Crafts & Creations, Holiday Crafts, Home Decor, The Homestead, Tutorial, WINTER Crafts and Creations Tagged With: February-crafts, holiday-decor, how-to-make-a-burlap-pennant-banner, love-banner, love-themed-decor, pennant-banner, valentine-craft-decor, Valentines-Day-decor-craft, valentines-home-decor
  • « Previous Page
  • 1
  • …
  • 4
  • 5
  • 6
  • 7
  • 8
  • …
  • 16
  • Next Page »

We are wicked happy to have you here! We hope you find much inspiration, help, humor and enjoyment here.


Archives


POPULAR POSTS

* * * * * *

SUBSCRIBE to House of Joyful Noise blog! Every new post, delivered right to your email box!


Privacy Policy

Amazon Affiliates

Never at any additional cost to you, we may earn a small commission for our endorsement, recommendation, testimonial, and/or link to any products from our website. Your purchase through our links helps support our family, while sharing with you the products we authentically use and recommend, for various ideas, and letting you know where you can purchase them. Thank you for your support!

[footer_backtotop]

Copyright © 2025 HouseOfJoyfulNoise.com · Genesis Framework by StudioPress