• HOME
  • {A}’s Chipmunk Training Archives

 Homepage

  • The Homestead
    • Home Projects
    • Home Improvement
    • Home Decor
      • Seasonal Home decor
        • FALL Home Decor
        • WINTER Home Decor
        • SPRING Crafts and Creations
        • SUMMER Crafts and Creations
    • Our Chickens
    • Gardening
    • Organization
    • Re-Purposing
    • Furniture Refinishing
    • Budget
  • Crafts & Creations
    • Seasonal Home decor
      • FALL Crafts and Creations
      • WINTER Crafts and Creations
      • SPRING Crafts and Creations
      • SUMMER Crafts and Creations
    • DIY (Do-It-Yourself) Project
    • Kids Arts and Crafts
    • Homemade/Handmade Gift Ideas
    • Holiday Crafts
    • Fan Pulls
    • Free Printable/Downloadable
    • Sewing Projects
    • Giveaways
    • Business Features
  • Recipes/FoodFun
    • Breakfast
    • Lunch
    • Main Dish
    • Sandwiches
    • Appetizers
    • Slow Cooker
    • On The Grill
    • Side Dishes
      • Soups
      • Salads
    • Baking
      • Breads, Rolls and Muffins
    • Snacks
    • Treats
    • Desserts
    • Drinks
  • Homeschooling
    • Elementary Homeschooling
      • Elementary Homeschooling READING
      • Elementary Homeschooling MATH
      • Elementary Homeschooling LANGUAGE ARTS
      • Elementary Homeschooling SCIENCE
      • Elementary Homeschooling HOME ECONOMICS
      • Kids Arts and Crafts
    • Middle School Homeschooling
      • Middle School Homeschooling SCIENCE
      • Middle School Homeschooling HOME ECONOMICS
    • Language Arts
    • Math
    • History / Social Studies
    • Geography
    • Foreign Language
    • Field Trips
    • Games
    • Nature Study
  • The Big Picture
    • Life In General
    • Celebrations
    • Faith
      • Into the Light; The Series
    • Giveaways
    • Reviews & Sponsors
  • Photography & Lettering
    • Photography
    • truck lettering
    • vehicle graphics
    • Newborns
    • Kids
    • Engagement
    • High School Senior Pictures
    • High School Senior Pictures Sneak Peeks

Frozen Banana Bites – Such a treat! | Recipe

August 22, 2011 By Laura 2 Comments

frozen-banana-bites-recipe-4

I don’t remember exactly the last time I had a frozen chocolate covered banana, but I do know that I had one or 2 when I was a kid, and I loved them.  I thought of making them many times since I’ve had kids of my own, but never quite got to that.  So when a reader linked us up with this simple recipe for ‘Frozen Banana Bites’, I knew we had to try them.  Not exactly the same as frozen chocolate covered bananas, but close enough.  They were absolutely delectable!

*The actual recipe called for peanut butter, but with one of our kids having a severe peanut allergy, we substitute everything that calls for peanut butter, with Sunbutter.

frozen-banana-bites-recipe 
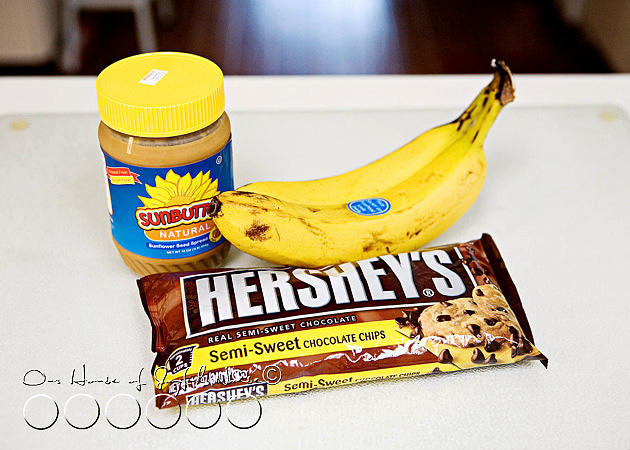
Participating Ingredients: Bananas, Hershey’s Semi-Sweet Chocolate Chips, & Peanut Butter or *Sunbutter

Naturally, you can make as many Frozen Banana Bites as you would like. But for the sake of giving you a recipe to follow, just use the following measurements per 2 bananas, and then make as many batches as you would like. We made 2 batches, 1 at a time, considering not wanting the slices bananas to brown, or the sauce to cool too much as we worked.

  • 2 bananas
  • 1/4 Hershey’s Chocolate Chips
  • 1/4 Peanut Butter or Sunbutter

frozen-banana-bites-recipe-1 Cover a cookie sheet with some waxed or parchment paper.

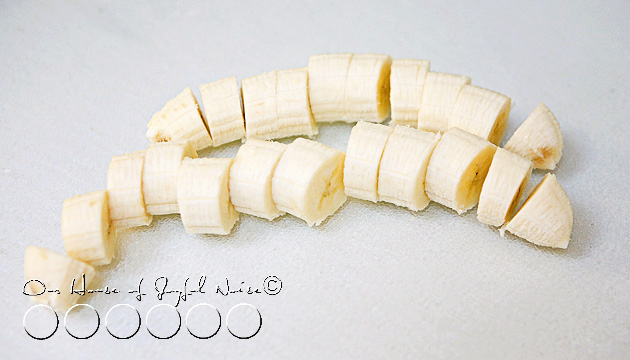
Slice the bananas into bite sized pieces.

We have big mouths.   😀

Put the measured chocolate chips and Sunbutter in a microwave safe bowl, and microwave for 20 seconds or so, mix, and keep putting back in for 10-15 second interval until it’s all melted, combined & smooth.

Tip:  I stir with a wooden spoon handle, and I stir rapidly, just as you would tempering chocolate.

frozen-banana-bites-recipe-2
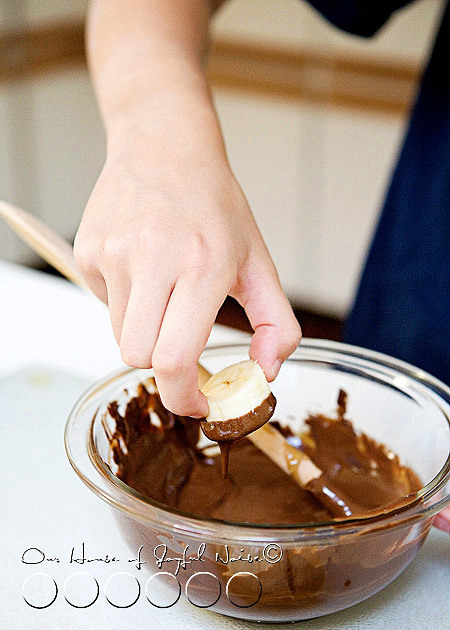
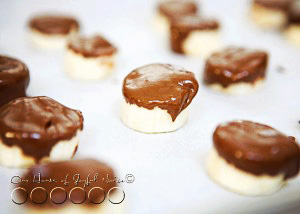
With your sauce all warmed and ready, take each chunk of banana, and dip the top of it into the sauce.  Let it drip off as much as possible.


frozen-banana-bites-recipe-3 
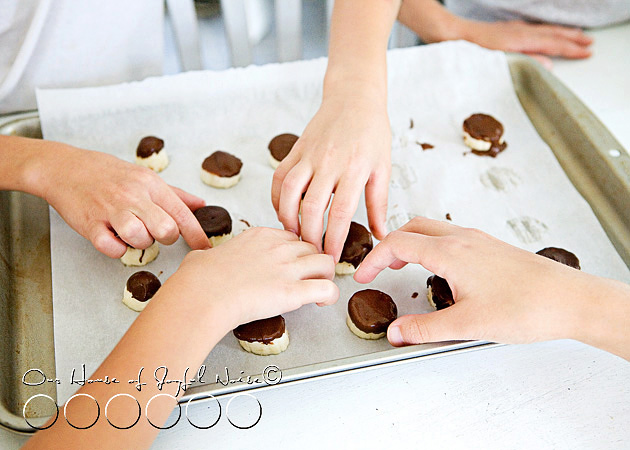
Place on the cookie sheet, sauce side up.

Optional: If desired, you also can roll the chocolatey side in chopped nuts as well, and then place on sheet.

Repeat until they are all done.

~ It’s a bit of a messy process, and there isn’t much way around it. ~

Place the sheet of Banana Bites into the freezer, and let freeze completely.

Note:  Freezing time varies, depending on how many times you your kids open the freezer door, to see if they are frozen enough to eat, yet. : )

frozen-banana-bites-recipe-5 Once our first sheet was frozen, the kids and I just took them out, and had at them right away. 😛

  frozen-banana-bites-recipe-6

frozen-banana-bites-recipe-7

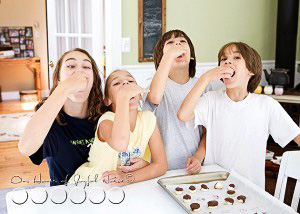
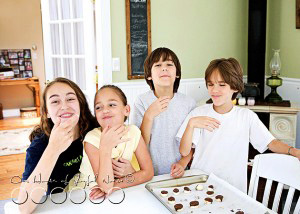
These guys’ expressions and sound effects are always so animated, when it comes to food.

Especially treats.

Any frozen leftovers, can be thrown in a ziplock-style freezer bag, for later enjoyment.

Hope you find them worth the small mess. ; )  We did!

***


Save

Save

Filed Under: Fun Food, Recipes, Treats Tagged With: banana-recipes, banana-treats, frozen treats, frozen-banana-bites, recipes

Camp Site Eclair | Getting Creative with Fondant

June 12, 2011 By Laura 22 Comments

fondant-art-fathers-day-dessert-14

I was brainstorming about a good dessert to have for Father’s Day coming up,

when I came up with this idea:  A Camp Site Eclair Dessert.

fondant-art-fathers-day-dessert I know the Daddy in our family, loves camping, fishing, and marshmallows! So this whole dessert was going to make him very happy, because there is a whole lot of marshmallow fondant involved! And as a bonus, there are other surprise treats everywhere!

I decided to make it ahead of time (with a little help from the Daddy in celebration, and our kiddos.)  Thankfully, we can save all of the decorations on top, make the dessert again next week, and redecorate.  Because I wanted to be able to share the idea with you all, our blog readers, in case you’d like to replicate the idea, or let it spark an idea of your own in some way.

So this decorated dessert is the pan variation of No Bake Eclair. You may remember we shared this recipe before, as individual cup servings, that looked like this:

fondant-art-fathers-day-dessert-2 You can find that recipe and directions for the cups version here.

fondant-art-fathers-day-dessert-1 This is what our No Bake Eclair Dessert originally looked like, before covering with crushed

graham cracker, for a nice dirt ground effect, to set the scene for our camp site.  Here is the easy, no-bake

recipe for it. You can whip this part up ridiculously quickly!

::::::

No Bake Eclair

Participating Ingredients:

  • graham crackers
  • 2 boxes instant vanilla pudding
  • 8 oz. cool whip
  • 1 can of chocolate frosting and 2 tbsp. milk
  • 3   1/2  cups of milk

Directions:

Mix the pudding and milk with the blender- let it get a little thick. Add the cool whip in.

Butter a 9X13 in. cake pan. Place WHOLE graham crackers in the bottom of pan. You will need to break some though.

On top of graham crackers add 1/2 of the pudding/cool whip mixture.

Put on another layer of crackers and then the other half of the pudding mixture.

Place last layer of graham crackers on top.

In a separate bowl empty the frosting and add 2 tbsp. of milk. Mix so the frosting is creamy and easy to spread.

Frost the crackers and enjoy!

 ::::::

Now to share as much as I can, about how we decorated the pan of No-Bake Eclair:

fondant-art-fathers-day-dessert-5 The ground as I said, is the top frosting layer, covered in lots of very crushed graham cracker.  On top of that, everything is made out of marshmallow fondant, various kinds of candy, and little pretzel sticks.

Now please keep in mind, we are no fondant artists, yet! This is our very first time working with the stuff.  This is actually marshmallow fondant, which is made so easily with mini marshmallows, confectionery sugar, and water.   Then of course, we used some food dye. (Not food coloring, but food dye, used for coloring icing.)  I very easily found 2 videos on making marshmallow fondant, and coloring it, just by Googling. I will put them at the end of this post, for your convenience.

fondant-art-fathers-day-dessert-4 Don’t mind the father’s face, lol.  We really didn’t expect it to show much. It was just quickly smushed together. lol
But we’re not sure we could have done much better, if we tried. LOL

He is completely made of white/uncolored marshmallow fondant, and then painted with food dye and a brush.

fondant-art-fathers-day-dessert-5 The camp fire is made of colored fondant for the flames, pretzel sticks, and chocolate rocks that we found in the cake aisle of Michael’s Arts & crafts.

fondant-art-fathers-day-dessert-6  The tent and family feet are also all fondant, and pretzel sticks to hold the tent up.

fondant-art-fathers-day-dessert-7 Here’s a helicopter view.

The trees and bushes are green dyed fondant, molded around Hershey Kisses, and then more green dye painted on the trees & bushes, for texture.  The pine tree uses a pretzel for the trunk.

fondant-art-fathers-day-dessert-8  This is a set picnic table.  The table top probably could have been another layer higher.  But the table and bench seats are made of Andes Candies, the plates are Smarties Candies, and the little triangle napkins is plain marshmallow fondant.

fondant-art-fathers-day-dessert-9 All of the logs you see here and there, are Tooties Rolls, with a little edible black writing pen to show some grooves and bark.

fondant-art-fathers-day-dessert-10 The 2 fish on the scene are Swedish Fish.

The marshmallow on a stick is actually fondant, but we could have just used a mini marshmallow, since we had plenty left from  making the fondant.

fondant-art-fathers-day-dessert-11

fondant-art-fathers-day-dessert-12 The water is plain fondant, painted with blue and green dye.

The sign face is fondant, with a pretzel stick, and more chocolate rocks. (Love those!)

fondant-art-fathers-day-dessert-13  The tent, and the family dirty feet, is my favorite part!

It was so fun to make, and we thought it came out pretty good!!

Between shopping for the goods, and making it all, it was almost a day project, but a fun family one!

We wanted to note too that, while fondant and the colors are all edible, we don’t really eat artificial colors. But it is all SUPER fun to get creative with, as decorations.

Please tell us you are a at least little impressed with our work, even if you aren’t. 😉   Either way, hope you find yourself inspired to play with some fondant, and get creative with food, too!!

::::::

*(Love this post? How about subscribing to our blog in the sidebar, ‘Liking’ our Page on Facebook, or following me (Laura) on Twitter? Or all 3? 😀

Making Marshmallow Fondant

Coloring Fondant


Save

Save

Filed Under: Desserts, Fun Food, Holidays, Recipes, Treats Tagged With: cake decorating, coloring fondant, fathers-day-dessert, fishing-camping-scene-dessert, fondant ideas, fondant-art, getting-creative-with-fondant, marshmallow fondant, no-bake, no-bake-eclair

Josh’s Double-Chocolate Biscottis Recipe

May 15, 2011 By Laura 1 Comment

A friend of ours baked our family thesedouble-chocolate biscottis, and we enjoyed them so much, we asked him for the recipe. (So we could have some more!).  He very kindly sent the recipe to us, and he also suggested it as a blog post.  We thought it was a great idea!  It’s just not nice not to share, Italian cookies this good

bis·cot·ti

Definition of BISCOTTI :  small rectangular twice-baked cookies, typically containing *nuts, made originally in Italy.

*We omitted nuts, as one in our family has a serious allergy to nuts.


Josh’s Double Chocolate Biscotti Recipe
Recipe


Participating Ingredients

  • 1 cup of butter, softened
  • 1 1/3 cups of sugar
  • ½ of a cup of unsweetened cocoa powder
  • 4 teaspoons of baking powder
  • 4 eggs
  • 3 ½ cups all-purpose flour
  • ½ cup of white chocolate pieces
  • ¼ cup milk, semisweet, or dark chocolate pieces

Preheat oven to 400 degrees. Lightly grease 2 or more cookie sheets. Beat the softened butter with an electric mixer on medium/high speed for 45 seconds to a minute. Add sugar, cocoa powder, and baking powder. Beat until combined. Beat in the eggs until combined. Beat in flour, “If you can’t beat in all the flour, just stir it in.” Stir in the chocolate pieces.

Divide the dough in fourths: shape into four loaves and put them on the cookie sheets, adjusting the thickness and length of them to fit in the cookie sheet but not bake into each other.

Bake for 23 to 28 minutes or until wood toothpicks inserted near the centers comes out clean. Cool the loaves on cutting boards for 1 to 4 hours. (They slice easier if you let them cool longer and become more firm.)

Preheat oven to 350 degrees. Use a serrated bread knife to cut each loaf into slices, you may cut them as thick or thin as you like. Bake them for 12 to 15 minutes, turn them over on their side, and bake them for another 12 to 15 minutes.

Cool, and enjoy!

Origin of BISCOTTO

Italian, biscuit, cookie, from (pane) biscotto, literally, bread baked twice

First Known Use: 1946


Josh's Double Chocolate Biscotti Recipe
 
Print
Prep time
30 mins
Cook time
35 mins
Total time
1 hour 5 mins
 
A delightful double-chocolate biscotti cookie recipe, with a dash of facts about biscotti cookies, to further enjoy.
: House of Joyful Noise blog
: Baking
Cuisine: Italian
Serves: ~48 cookies
Ingredients
  • 1 cup of butter, softened
  • 1⅓ cups of sugar
  • ½ of a cup of unsweetened cocoa powder
  • 4 teaspoons of baking powder
  • 4 eggs
  • 3 ½ cups all-purpose flour
  • ½ cup of white chocolate pieces
  • ¼ cup milk, semisweet, or dark chocolate pieces
Instructions
  1. Preheat oven to 400 degrees. Lightly grease 2 or more cookie sheets. Beat the softened butter with an electric mixer on medium/high speed for 45 seconds to a minute. Add sugar, cocoa powder, and baking powder. Beat until combined. Beat in the eggs until combined. Beat in flour, “If you can’t beat in all the flour, just stir it in.” Stir in the chocolate pieces.
  2. Divide the dough in fourths: shape into four loaves and put them on the cookie sheets, adjusting the thickness and length of them to fit in the cookie sheet but not bake into each other.
  3. Bake for 25 to 28 minutes or until wood toothpicks inserted near the centers comes out clean. Cool the loaves on cutting boards for 1 to 4 hours. (They slice easier if you let them cool longer and become more firm.)
  4. Preheat oven to 350 degrees. Use a serrated bread knife to cut each loaf into slices, you may cut them as thick or thin as you like. Bake them for 12 to 15 minutes, turn them over on their side, and bake them for another 12 to 15 minutes.
  5. Cool, and enjoy!
3.4.3177

Be sure to grab the printable recipe, before you go! Hope you enjoy, too!


Save

Filed Under: Baking, Desserts, Recipes, Snacks, Treats Tagged With: biscotti-recipe, chocolate-biscotti-recipe, chocolate-cookies-recipes, double-chocolate-biscotti, Italian-cookies-recipe, recipes

Earth Day Cupcakes

April 15, 2011 By Laura 2 Comments

We are so smitten with how our Earth Day cupcakes came out, we like to keep on sharing them with you all.

Earth Day ideas

There are times that the things we creatively do as a family, or the ideas we have, happen ON a holiday or special calendar day. So naturally they do not get blogged until after the fact.  Since we like our readers to have the opportunity to take our ideas and find creative inspiration from them, or flat out borrow the ideas, I like to try and share (or re-share) those ideas the following year, so that you all can have time to use them if you’d like, while that day is upcoming once again.

Here in the Recipes section, I thought it would be nice to (re-) share just the photos of the Earth Day Cupcakes that we had so much fun making with the kids last year, on Earth Day following our neighborhood and beach clean-up we did.   For any new readers, if you’d like to visit our family’s Earth Day 2010 blog post, you can do so HERE. It was a great day, and I took lots of photos of the kids and our activities that day, so I think you would really enjoy it.

These are simple boxed chocolate cake mix cupcakes.  Using canned white canned frosting, we split it up into separate little batches, making various colors with drops of food coloring.  The blue ocean base of the earths we just spread on, but most of the rest of the designs were piped on.  We are no cake decorating pros, but we sure had fun, and we think they came out cute!

Earth Day ideas

Earth Day ideas

Earth Day ideas

Earth Day ideas

Earth Day ideas

Hope you find yourself inspired!!  If not to decorate some cupcakes for Earth Day, at least to eat some!
And to give love and care to our Earth, all year round.


Save

Filed Under: Baking, Desserts, Recipes, Treats Tagged With: creative-cupcakes, earth-day-cupcakes, Earth-Day-ideas, Earth-Day-recipes, homeschooling, inspiration-for-Earth-Day

Midnight Snaps (Festive Cookies for New Years Eve)

December 30, 2010 By Laura 20 Comments

New Year's Eve clock cookies

My kids and I were trying to come up with some themed food for New Year’s Eve, and {JM} came up with this great idea, right off the bat:  Cookies that are designed like clocks! (Oh, to have his quick, 8 year old brain!)

Right away I started trying to figure the details, and decided to start with homemade Gingersnap Cookies.  To design them, we went with a white icing that hardens, and a bit of chocolate art.  The design process does involve some intricate detail work, but if you enjoy the creative process and have a little patience to work with, they are worth the effort!  Your party-goers will be impressed with these festive cookies, you made!

First, I’m going to start by giving you this basic Gingersnap Cookie Recipe.  This post is not featuring how to make the cookies, with step by step photos, etc.,  but how to turn them into clocks.  So, using the recipe below, bake some cookies and let them cool before getting to designing.

Participating Ingredients for Gingersnap Cookies:

  • 3/4 shortening
  • 1 cup white sugar
  • 1 egg
  • 1/4 cup molasses
  • 2 cup all-purpose flour
  • 2 teaspoons baking soda
  • 1/2 teaspoon salt
  • 1 teaspoon ground cinnamon
  • 1 tablespoon ground ginger

Preheat oven to 350 degrees F.  Grease cookie sheets.

In a large bowl, cream the shortening and sugar. Add the egg and beat until light and fluffy, then stir in the molasses.  In a separate bowl, mix together the flour, baking soda, salt, ginger and cinnamon.  Add to the egg mixture, and stir until well blended. * (See foot note below). Roll bits of dough into 1 inch balls.  Dip each ball into sugar and place on cookie sheet, sugar side up, about 2 inches apart.

*Now, being the first time we made these, we did indeed use 1 inch balls of dough.  However, we found that the cookies were pretty small to work with, and it was difficult making such tiny chocolate numbers!  So……we advise that you make cookies twice the size, using 2 inch dough balls, and putting a little further apart on the cookie sheets.  That way, your chocolate numbers can be made larger, and it will all be easier to do.

Bake for 10-12 minutes, until cookies have spread, and cookies have cracked.  Let cool on wire rack.

New Year's Eve clock cookies They are delicious straight and plain, for sure! Crispy on the outside, a little softer on the inside, and amazingly good!  Surely no one would notice, if just one, was missing. ;  )

New Year's Eve clock cookies

Again, these are small cookies, and we recommend having bigger ones to work with.

Now, once they are cool, you’ll need to whip up some icing.   I am going to guess some of you already have a recipe, and I am sure there many variations out there.  This one below is the one I started with. BUT, I really needed to add a lot more liquid than it calls for, being careful to keep it a very pretty thick consistency.  Really, this is one of those recipes where you need to tweak as needed, depending on how yours is looking.

Note:  You’ll probably want to at least make a double batch of this icing.

Participating Ingredients for Cookie Icing

  • 1 cup confectioner’s sugar
  • 2 teaspoons milk *
  • 2 teaspoons light corn syrup
  • 1/4 teaspoon of preferred extract (called for almond, I used vanilla, frankly, because I hate almond. )

* I probably had to add at least 2 tablespoons of milk!  But gauge for yourself.

New Year's Eve clock cookies Using a piping bag, we outlined a circle around the edge of each cookie, and filled it in, using the tip to push the icing around some, to help get it all covered.
–

New Year's Eve clock cookies

The icing is bound to drip a little sometimes, but if you try not to be close to the edge where the fall-off is, you should do o.k.

At the back of the photo above, you can see where we experimented with seeing if covering the whole cookie would be easier.  It was just too much icing.  So we stuck with our original icing plan.

Allow the iced cookies to set, so that the icing can harden.

*****

Now you’ll need to melt some chocolate to work with, otherwise known as tempering.   I should do a post just on this process at some point, but you’ll need to know it for this recipe! So I’m going to share with you a quick tutorial. Now, you may have used the double-boiler method of melting chocolate before, but we’ve never had much good luck with that.  Then, we learned a quick and easy trick to tempering chocolate, from Barefoot Contessa – and I am going to share it with you right now:

You’ll need: some milk chocolate -shaved or chips (we used  Hershey chocolate chips, which as chips are easier to melt), a glass measuring cup, a wooden spoon, and a microwave.

In the glass measuring cup, add about half of the amount of chocolate that you’ll need.  Microwave it for about 15-20 seconds. Take out, and with the handle/ butt end of the wooden spoon, mix the chips rapidly.  It will likely need more melting, so put it in for 10 second increments, and stir with the end of the wooden spoon very rapidly after each time, until the chocolate is all melted smooth and glossy.  Now, just as the remaining half of your chocolate, and stir rapidly some more.  You really want to mix it hard and fast – the more you do, the shinier your chocolate will be.

Now that’s a tip we can all use for life!!  Thanks Contessa!

***

Now below is some writing with chocolate tips.  Since I didn’t photograph making the teeny-tiny numbers, here below I am using the photos of when we made the words for Jesus’ Birthday cake on Christmas.

We printed out the words on a piece of paper, having laid out the size we wanted, in the font we wanted.   Then we slipped that ‘stencil’ to trace, under a piece of parchment paper.  Using a fine tip on a piping bag filled with the melted chocolate, do your writing or designs!

New Year's Eve clock cookies

New Year's Eve clock cookies

As the chocolate cools, it will harden.

Our words came out nice, and when they were hardened, we just placed them on our cake!

New Year's Eve clock cookies

Michael and the kids had chocolate left in the bag, and they just couldn’t stop themselves from playing with chocolate some more.

New Year's Eve clock cookies
See how you can just pick it up?

So this is the method we used, to make tiny little number and click hands. They were probably only 3/8ths of an inch, so you can imagine it was a tad difficult.  Bigger would be easier.  This way, doing the chocolate work on parchment paper first, if something comes out awful, you didn’t ruin a cookie or a cake.  You just start a new one on the parchment paper, and use the ones that came out best.

If the icing on the cookies is hardened, then use a bit more icing to apply the numbers and dots to the cookie.
Otherwise they won’t stick and stay put.

New Year's Eve clock cookies

So here is how our Midnight Snaps came out!!  Not perfect by any means.  But we think they are imperfectly cute!

New Year's Eve clock cookies

Now I realize I am giving you this grand idea, pretty last minute.  (lol….lol….).  So I wouldn’t blame you, if you went out and tried to find some large, store bought gingersnap cookies, or maybe even molasses cookies, to just bring home and decorate.  That would be a time saver for sure.  ; )

May you all rock around the clock on New Year’s Eve, (or at least until  midnight) and may we all have a Happy New year!

Filed Under: Baking, Fun Food, Holidays, Recipes, Treats Tagged With: chocolate-art, clock-cookies, cookies-for-New-Years-Eve, how-to-write-with-chocolate, midnight-cookies, new-years-eve-menu-ideas, new-years-eve-treats, tempering chocolate

  • « Previous Page
  • 1
  • 2
  • 3
  • 4
  • 5
  • …
  • 7
  • Next Page »

We are wicked happy to have you here! We hope you find much inspiration, help, humor and enjoyment here.


Archives


POPULAR POSTS

* * * * * *

SUBSCRIBE to House of Joyful Noise blog! Every new post, delivered right to your email box!


Privacy Policy

Amazon Affiliates

Never at any additional cost to you, we may earn a small commission for our endorsement, recommendation, testimonial, and/or link to any products from our website. Your purchase through our links helps support our family, while sharing with you the products we authentically use and recommend, for various ideas, and letting you know where you can purchase them. Thank you for your support!

[footer_backtotop]

Copyright © 2025 HouseOfJoyfulNoise.com · Genesis Framework by StudioPress