• HOME
  • {A}’s Chipmunk Training Archives

 Homepage

  • The Homestead
    • Home Projects
    • Home Improvement
    • Home Decor
      • Seasonal Home decor
        • FALL Home Decor
        • WINTER Home Decor
        • SPRING Crafts and Creations
        • SUMMER Crafts and Creations
    • Our Chickens
    • Gardening
    • Organization
    • Re-Purposing
    • Furniture Refinishing
    • Budget
  • Crafts & Creations
    • Seasonal Home decor
      • FALL Crafts and Creations
      • WINTER Crafts and Creations
      • SPRING Crafts and Creations
      • SUMMER Crafts and Creations
    • DIY (Do-It-Yourself) Project
    • Kids Arts and Crafts
    • Homemade/Handmade Gift Ideas
    • Holiday Crafts
    • Fan Pulls
    • Free Printable/Downloadable
    • Sewing Projects
    • Giveaways
    • Business Features
  • Recipes/FoodFun
    • Breakfast
    • Lunch
    • Main Dish
    • Sandwiches
    • Appetizers
    • Slow Cooker
    • On The Grill
    • Side Dishes
      • Soups
      • Salads
    • Baking
      • Breads, Rolls and Muffins
    • Snacks
    • Treats
    • Desserts
    • Drinks
  • Homeschooling
    • Elementary Homeschooling
      • Elementary Homeschooling READING
      • Elementary Homeschooling MATH
      • Elementary Homeschooling LANGUAGE ARTS
      • Elementary Homeschooling SCIENCE
      • Elementary Homeschooling HOME ECONOMICS
      • Kids Arts and Crafts
    • Middle School Homeschooling
      • Middle School Homeschooling SCIENCE
      • Middle School Homeschooling HOME ECONOMICS
    • Language Arts
    • Math
    • History / Social Studies
    • Geography
    • Foreign Language
    • Field Trips
    • Games
    • Nature Study
  • The Big Picture
    • Life In General
    • Celebrations
    • Faith
      • Into the Light; The Series
    • Giveaways
    • Reviews & Sponsors
  • Photography & Lettering
    • Photography
    • truck lettering
    • vehicle graphics
    • Newborns
    • Kids
    • Engagement
    • High School Senior Pictures
    • High School Senior Pictures Sneak Peeks

Shabby-Chic Fan Pull & Pillow | Craft and Home Decor

July 19, 2011 By Laura 4 Comments

shabby-chic-fan-pull-craft-3

I know!  It’s been awhile since I’ve made a ceiling fan pull, huh?  Hey, a girl only has so much time to craft! But once I got this new one in my head, I couldn’t go out & get the supplies to make it, fast enough.  I made it, and then I was so excited to see it up, that I took down my summer fan pull, to put it up.

shabby-chic-fan-pull-craft

I’m all about farmhouse style, to the core. But I definitely dig a little Shabby Chic. It’s just a wonder to me, because when I was a little girl, I hardly had a feminine bone, and I was sure I never would.  I even recall a mylar motorcycle poster on my bedroom wall at one point. But here I am!

I really dig pink, lace, and Shabby-Chic-ness.

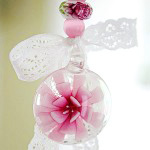
This fan pull has that kind of feel to me.  You?  That’s what I was going for, anyway.

shabby-chic-fan-pull-craft-1

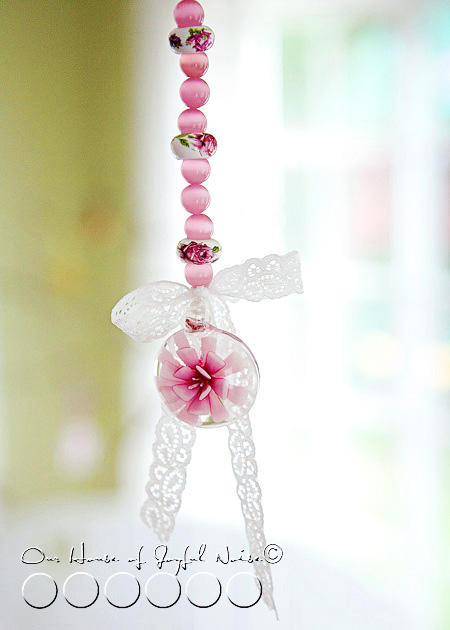
I found THE perfect beads at Michael’s Arts & Crafts.  I used the style of the round soft pink ones (in various colors) so many times.  But how about those rose ones, huh? I swear my heart skipped a beat, when I saw those.

shabby-chic-fan-pull-craft-2

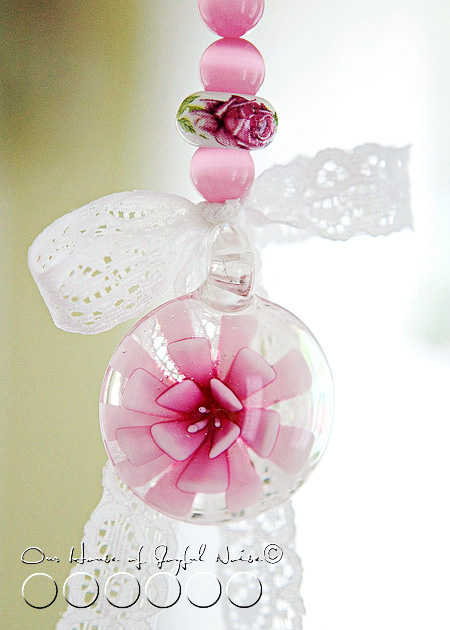
And despite the fact that I used a large glass pendant just like this one in green, for a spring fan pull, this pink one went way too perfectly, for this pull too.

Besides, I couldn’t find a big pretty rose to use. Not at that store anyway. And this worked nicely.

shabby-chic-fan-pull-craft-4
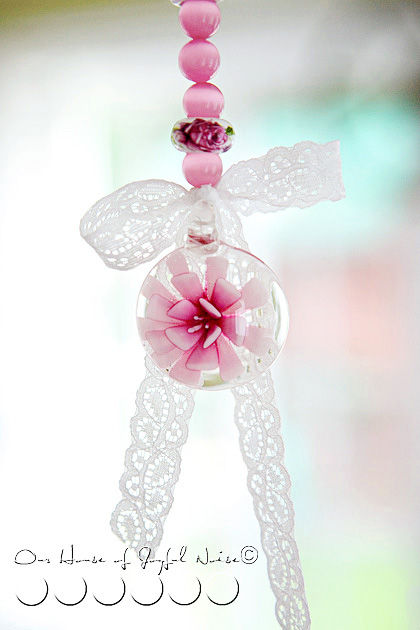
I was so excited to add my last little touch: a lace ribbon bow.


shabby-chic-fan-pull-craft-5

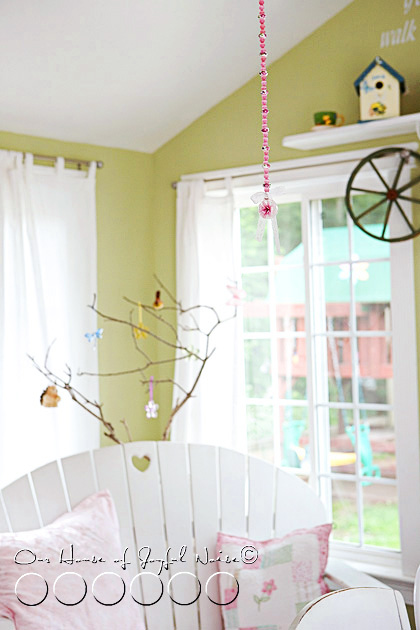
It looks so pretty, hanging in the middle of the room, that the summer fan pull may not make it back up, this year.

(If you’d like to check out all of my other fan pulls I’ve made so far, you can search ‘fan pulls’ in the category box later, in the sidebar.)


shabby-chic-fan-pull-craft-6
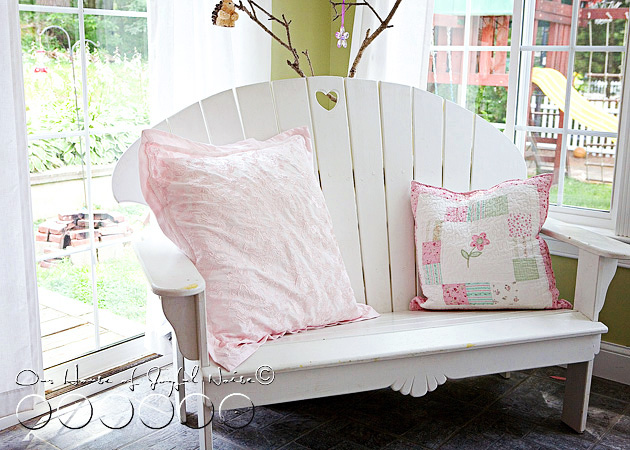
I’ve been meaning to share something else with you all, since um….February?!  The big Shabby Chic Pillow, that Michael got me for Valentine’s Day.
<3


shabby-chic-pillow-home-decor 
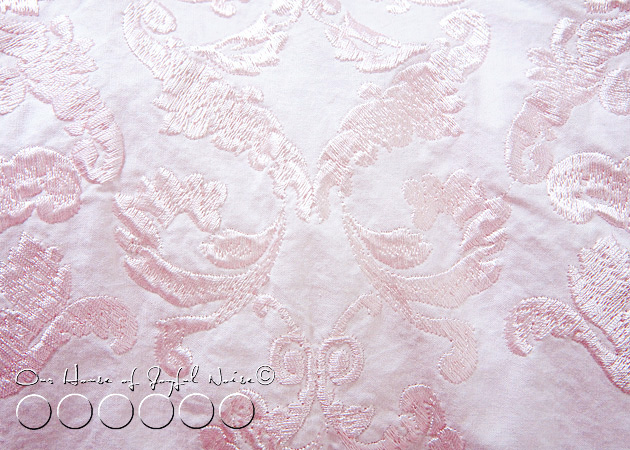
How pretty is this embroidered pattern?

It’s a satin like thread, on a light polyester, I guess.

shabby-chic-pillow-home-decor-1 
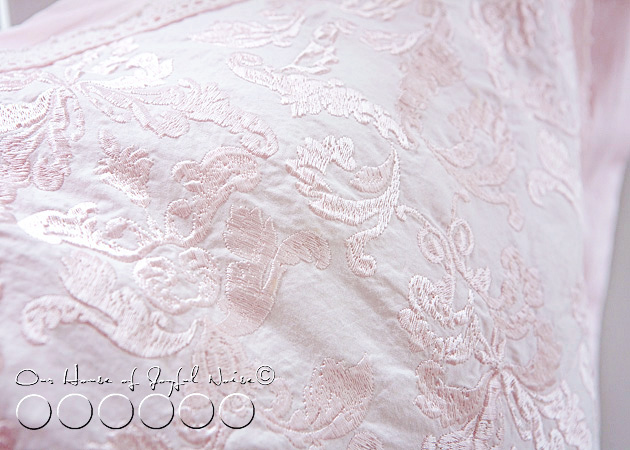
The texture of the thread-work plays so awesome in the light.

shabby-chic-pillow-home-decor-4

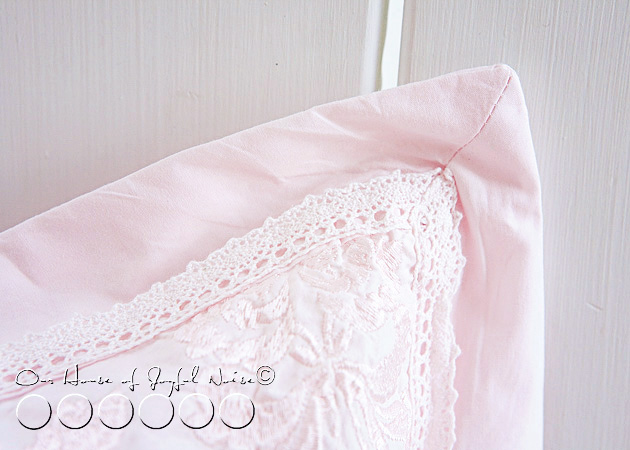
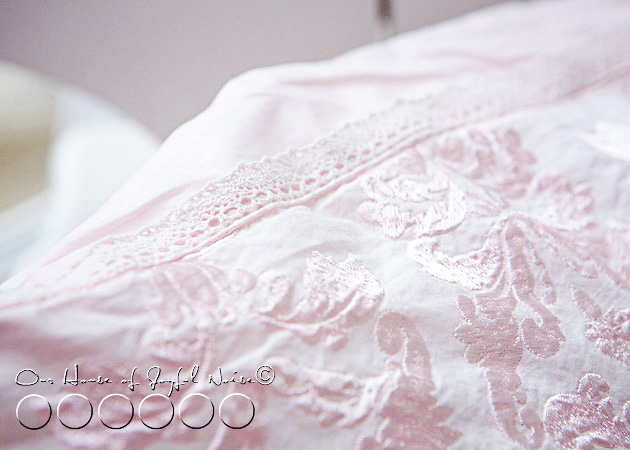
So does the crocheted lace trim.


shabby-chic-pillow-home-decor-3 Lovely, isn’t it?


shabby-chic-fan-pull-craft-6 Yes, when the kids come in from playing, all covered in dirt, I preach! “Oh boy!  You better be SURE not to touch-my-PILLOW!”.  (And between you and me, I may have a few heart palpitations with that preachin’.)

Yes, I COULD just wash it.  But then I’d have to iron it again too! And I really despise ironing.

Oh, which reminds me, that yes, this pillow cover IS removable.  Check out the back….


shabby-chic-pillow-home-decor-5
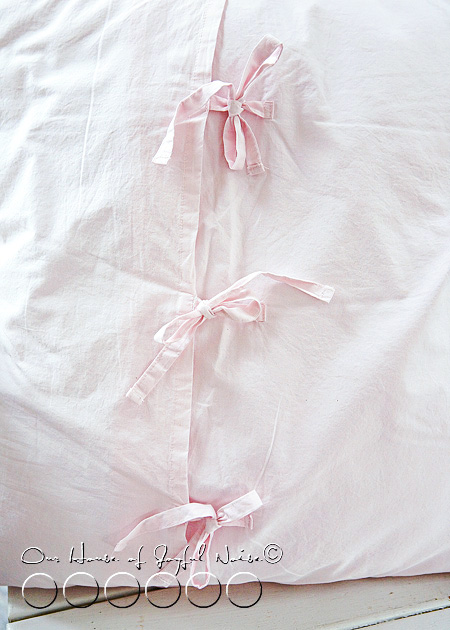
It’s the details.  You know?

I don’t know why I get so crazy over this stuff.  But I do.  Like….butterflies. Over so many little things in life.  Not kidding.

Well, I hope you enjoyed seeing my Shabby Chic fan pull & pillow.
Thanks for stopping by.

*


Save

Filed Under: Crafts & Creations, DIY (Do-It-Yourself) Project, Fan Pulls Tagged With: ceiling-fan-pull, crafts, fan-pulls, shabby-chic, shabby-chic-crafts

Setting Eyelet Embellishments – A Tutorial

July 5, 2011 By Laura 4 Comments

setting-eyelet-embellishments-crafts-tutorial-4

Several blog posts back, I shared a simple craft I did making decorative paper pennants. Part of that project was putting eyelets in the top corners of the pennants, to string ribbon through, and hang like paper bunting. I asked in that post if there was anyone interested in a tutorial on the procedure of using eyelets, and one of our readers, Lindy over at Veni Vidi Scrappy, said she would.  She is a passionate scrapbooker, as evidenced by her great site, so this would make for a very useful technique for her. But there are many creative ways you can use eyeletting for.

I’m happy to share how I set eyelets! But what I didn’t know at the time I offered is, there are new tools that supposedly make this process even easier, and quieter, that have become available in the scrapbooking industry in recent years.  I have had my eyelet/brad set, from Making Memories, for a good many years. Apparently, longer than I knew!  So for the sake of reference, the newest tools now available, and the methods in which they are used, can be seen here at this site.

However, I have rather enjoyed using my cute little hammer, and the method I have used all of these years, as noisy as it is. So regardless of the fact that this is now the ‘old fashion’ way’, I’m going to share it as promised anyway.  And most likely continue to do things the old fashioned way, for a good many years to come.  And show you now just how I do this.


setting-eyelet-embellishments-crafts-tutorial As I mentioned, the old tool set I have is from the company Making Memories (MM). The small container you see are some MM eyelets, used in this tutorial, and are brushed aluminum.  But they come in bronze as well, and a large selection of colors.  Eyelets come in 2 sizes, and the tool tips for both sizes come with this set. Also seen is my cute little hammer, and a self-healing mat I use to set eyelets on. I also use it for cutting things with an x-acto knife. You should be able to find these tools at Michael’s Arts and Crafts, and other craft supply stores.

setting-eyelet-embellishments-crafts-tutorial-1 On the right you see the tip of the small hole puncher, and on the left is the eyelet setter. Yes, kind of
backwards, and not in order of use. Sorry, but I did not think of that at the time I took the photo.


setting-eyelet-embellishments-crafts-tutorial-5 Here is a better look at the eyelets, before they are hammered. Cute little things.


setting-eyelet-embellishments-crafts-tutorial-6 The first tool you’ll need is the hole puncher. Screw the hole punching tip into your handle, and position it straight up and down, on the material you want to put an eyelet through. In this case, I am just putting one in the point of a spare paper pennant I had, for the sake of demonstration.  Also, you’ll want to work on a mat like this, a piece of cardboard, or something to protect the surface you are working on. So, holding the hole punching tip firmly where you want the eyelet, gently hit the top of the instrument with your hammer once.  It taps a clean hole through the paper very easily.


setting-eyelet-embellishments-crafts-tutorial-2 Next, place an eyelet in the hole you made, going in through the front of the material, and place it down on your protected surface.

Now it’s time to use the setter tool, to set the eyelet in the paper, by hammering & ultimately splaying out the aluminum tube.


setting-eyelet-embellishments-crafts-tutorial-3 This is the fun part, I think.  Take your setter tool, and put the point of it into the hole of the eyelet tube. Holding the setter firmly straight up & down, and being sure to keep it in in place, you are going to hammer the top of the tool several times.  This time you’ll be hitting harder than you did before, while just tapping a hole through paper. Hammering the eyelet to set it, is something you’ll get a feel for quickly, as to how hard you need to hit the hammer, and how many times you’ll need to, to get the job done. Basically, your goal is to the splay the tube open flat, making it look flower-like.

I can tell you, the process of my eyeletting has a real rhythm to it. I hit the top of the tool four times, and then I remove the tool off of the eyelet, and hit the back of the eyelet on my paper a 5th time, to make sure it is good and flat.  So the sound pattern is 4 loud hammer to tool noises, and 1 thud when I hit the eyelet on the mat. : )

((1))-((2))-((3))-((4))–(5)

setting-eyelet-embellishments-crafts-tutorial-7 That’s it! Here is what the eyelet looks like on the front of your material! It may seem like a lengthy procedure to you, explained so thoroughly here. But I assure you, it’s very quick. You’ll find yourself doing many in rapid succession.  I would just tap all of your holes first, and then set your eyelets.


Eyeletting is popular embellishment technique in scrap booking and card making, but can also be used through fabrics as well.
I believe snaps are put on clothing much the same way.

I hope you found this tutorial helpful & inspiring!

Imagine the unique ways in which you can incorporate some eyeletting into
your creative projects!


Save

Save

Save

Filed Under: Crafts & Creations, DIY (Do-It-Yourself) Project, Tutorial Tagged With: embellishments, eyelet-setting-tool-kit, eyelet-tutorial, how-to-set-eyelets, setting eyelets

4th of July Celebration Table Printables – Free!

July 1, 2011 By Laura Leave a Comment

Happy long 4th of July Weekend, Everyone!

I designed these two 4th of July folded, 2-sided card printables this morning,
for our tables this weekend, and I am happy to share them with you!

free July printables

Above is just a web-sized sample for you to see, only.

(Printed version will be sharp looking. ; )

To download the full resolution 8.5″ x 11″, click here! >> You will also find others there you may like.
** But read and follow directions below first!**

Do not make the mistake of just printing out the image that comes up at that link > It is a low resolution image and will print fuzzy.
To print the full resolution image:
1) Click the GEAR WHEEL in the upper right hand corner
2) Select ‘Download Zip File’ from the drop down menu, and download it.
3) Find the folder under your downloads, and open it.
4) Print what you want.

Select the LANDSCAPE orientation, when *printing out.

*For sturdier cards, consider printing on heavier card-stock, rather than ordinary
printing paper, and/or laminating the cards if possible, after cutting.

Fold on the dotted line. – – – – – – – – – – –

Cut on the solid line. ____________

ENJOY your printables, AND your long holiday weekend!
Feel free to share or PIN this!

Keep it safe, Peeps!!


Save

Save

Filed Under: Celebrations, Crafts & Creations, Free Printable/Downloadable, Free Printables, Giveaways, Seasonal Crafts and Creations, SUMMER Crafts and Creations, The Big Picture Tagged With: 4th of july free printables, 4th-of-july-decor, free-printables

COOL AMERICANA | Red, White and Blue Detail Ideas for 4th of July Cookout

June 26, 2011 By Laura 8 Comments

We’re talking about red, white and blue detail ideas for your 4th of July cookout bash, today.

americana-red-white-blue-ideas-cookout-5

When the 4th of July falls on a day of the week, that makes for a long weekend, Americans all over the country often either host or attend a good ole’ fashioned all-American cookout! It’s the summer bash of the season, when families and friends get together, have good summertime eats, and make fond memories together that they remember for many years.

If you’re planning on throwing an All-American bash this summer, here’s just a couple of detail ideas, that will color your party Red, White & Blue, and remind everyone how happy they are to be an American, and have loved ones to celebrate with!

americana-red-white-blue-ideas-cookout
If you’ve got a patio table with an umbrella, you may or may not be able to relate to the annoyance, of that pole sticking out of the middle of the table. Ours is black, which is not the most festive of colors in my book. It’s also a hindrance to the photos I’m trying to take, of the spread, or the loves ones gathered around the table.  If you need the umbrella to block the sun, there is no getting rid of that pole!  But I did think of a way to dress it up, and make it an asset to the party decor! I picked up cheap red, white and blue bandanas, and wrapped them tightly around the pole, making the most of the remaining corners to make a nice bow, and pulling the bottom corner to overlap the bandana below it.


americana-red-white-blue-ideas-cookout-1
An AmericanFlag bandana can be wrapped around the handle of pitchers, adding a little more festivity, and added grip to that handle.

And what about red, white & blue striped ice, thrown in some refreshing ice water! I picked up some star shaped ice molds at Michael’s Arts and Crafts, and using red and blue Gatorade, and plain water, the kids filled the molds *1 colored layer at a time, freezing each layer in between.  *TIP: To get even layers, do this pre-test: Fill one a single star in the mold with water, and then suck it up with a medicine dispenser.  Check out the measurement of the liquid that filled the star, and divide it by 3!  That’s how much of each color you’ll need to fill the stars evenly.

You’re welcome. : )


americana-red-white-blue-ideas-cookout-2
Try tying 3 colored straws together, to make another American-style detail. You could use pretty ribbon, but I loved the rustic touch of gardening twine.


americana-red-white-blue-ideas-cookout-3 This was the coolest surprise.  Eventually, as the star-striped colored ice melted, it tinted the water light blue! I loved it!  But to slow the process of your colored Gatorade stars melting right away, be sure you fill a COLD pitcher, with ice-cold water, and then throw in a tray or 2 of plain ice cubes. On top of the plain ice cubes, add your star-striped ice.


americana-red-white-blue-ideas-cookout-4 We also experimented making solid-colored stars with just a little food-colored water.  Consider making plenty, and throwing them in with your cooler of cold drinks, for your guests.

If you ask us, nothing makes a good time better, than hanging out & having fun with people you care about, really great food & drinks, and great all-American music, chatter, & hardly laughter in the air.

Make your 4th of July celebration memorable, with a few simple details.


Save

Filed Under: Celebrations, Crafts & Creations, Holidays, Seasonal Crafts and Creations, SUMMER Crafts and Creations, The Big Picture Tagged With: 4th-of-July-cookout-details, American decor, red-white-blue-cookout-decorating-ideas

Eyeletted Paper Pennants | Room Decor | Craft Tutorial

June 13, 2011 By Laura 9 Comments

eyeletted-paper-pennants-room-decor-tutorial_0001

Sometimes, my crafts come about in all-backwards-sorts-of-ways. This craft, these pretty eyeletted paper pennants, is one of those.
I love how they came out. And lucky for you, I took photos of the whole process.

eyeletted-paper-pennants-room-decor-tutorial-12

See, I happened to be in one of my favorite crafts stores, Michael’s Arts & Crafts, and saw this pad of 12×12 scrapbooking paper, that was nothing short of stunning to me.

I had to have it.

The hesitation was, that I don’t much scrapbook these days.  I will again, one day, begin scrapping like mad very regularly, and catch up on the many years I am behind on.  But in the moment, it seemed foolish to buy the pad of paper to save, for years.   So I bought it with the promise to me, that I would find something to do with the beautiful papers, right away.

eyeletted-paper-pennants-room-decor-tutorial Are they not ever so lovely?  Please take a real moment, to look at that photo. Because on this particular day, it took a little more patience than I had, to arrange them in that perfect fan, you see.


eyeletted-paper-pennants-room-decor-tutorial-1 It’s The Sasha Paper Collection.

What I decided to do with some of the paper, was make paper pennants, with metal eyelets.  My original and only intention, was just to string them in my daughter(‘)s (plural & possessive, lol) rooms, like bunting. No big project, by any means, in the end. But the project will be expanded, as you’ll soon learn.

Now, I did get the pad of designer paper on sale. But still, I as always, I wanted to get the most ‘bang for my buck’.  So this is how I utilized the space of my paper:

eyeletted-paper-pennants-room-decor-tutorial-13

Remember asking yourself back in school, when in your life, you would ever need to use that math?  There it is, People. I figured it out rather quickly, and rather felt genius-like.  Of course, I’m practicing a lot with my 8 years olds triplets, these days.  ; )

I have good craft plans for the pale yellow scrap pieces, by the way.  So all you tree-huggers can be at ease.
(Nothing wrong with a tree-hugger. I’m just sayin’.)


eyeletted-paper-pennants-room-decor-tutorial-2 Oh how I *love* my Fiskar Trimmer, in times like these!!  Zip, zip!!

eyeletted-paper-pennants-room-decor-tutorial-3

Now because I was going to be putting eyelets through these paper pennants, I thought it wise to perhaps, re-enforce them, to prevent them ripping when pulled for any reason. So I just used some photo mounting stickers, and didn’t remove the the backing.

THEN, I added all of the metal eyelets. Which, you may or may not know, can be all kinds of fun!

Do you all know what metal eyelets are?  This is what they look like….see the corners of the pennants:

eyeletted-paper-pennants-room-decor-tutorial-4

Perfect to attach or strong ribbon.  This ferris wheel of patterns, are the ones my oldest daughter chose, for her room, which is a color I like to call ‘Spring Rain’.  (Because I forget the real name of the paint. lol).

eyeletted-paper-pennants-room-decor-tutorial-5

This wheel of designs my youngest daughter (the middle & only girl triplet) chose for her room, which is a soft pretty pink.


eyeletted-paper-pennants-room-decor-tutorial-6
Here are the tools needed for doing metal eyelets, in case you do not know anything about this technique. (I don’t know why I feel like there will be people who have never heard of this?  So perhaps I am over-explaining to a very crafty-wise crowd….)

eyeletted-paper-pennants-room-decor-tutorial-7 But just in case, I’m going to give you a little more info here.  Above, are the 2 main tools needed: the hole tapper, and the eyelet smasher.  A hammer is involved. <Eyebrows bouncing up and down.> Sounds like fun, huh?

I think it is.  : )


eyeletted-paper-pennants-room-decor-tutorial-8 This is what the eyelets look like, post-smashing.


eyeletted-paper-pennants-room-decor-tutorial-9 I was thinking I might do a little eyelet technique tutorial, step by step with photos, if there is anyone who would like to learn?  Eyelets can be used for a wide variety of crafts, including fabric!  It offers an awesome element to scrap booking and card making as well. Your imagination is the only limit. Let me know in the comments, if a tutorial would tickle your fancy.

I’ll do it for even 1 person.  I’m full of love like that.

I’ll even dedicate the tutorial to you, like a song.  ; )

eyeletted-paper-pennants-room-decor-tutorial-10 I used the same sheer ribbon I always have on hand, to string this paper bunting, and I just hung it across {O}’s Mirror for now.


eyeletted-paper-pennants-room-decor-tutorial-11 {A} chose the pale yellow ribbon.  Pay NO mind to the horrid curtain and window with no trim (in these photos).  She has an amazing room, hand-crafted by hubby, and I can’t wait to show you all sometime soon.

  eyeleted-paper-pennants-room-decor-tutorial_012

So, in closing, I have to tell you….with getting 6 pennants, out of multiple designs chosen out of this pad of paper, and the way I got carried away with my happy-hammer, I ended up with WAY more eye-letted pennants than I ever needed, for my original plan!  I have a horrible guesstimation gauge!  Ask my hubby – I can never figure out the appropriate sized container to store dinner left-overs in!  Either way too big, or way too small….never just right.Ever.

Anyway….the question is:

“WHAT TO DO WITH ALL OF THESE EXTRA EYE-LETTED PENNANTS?”

I have a few brainstorms brewing, but I would LOVE *YOUR* ideas!  It’s quite possible there are many of you who will have amazing ideas, I would never have thought of.  So give them to me!  What would YOU do with them?

*(Love this post? How about subscribing to our blog in the sidebar, ‘Liking’ our Page on Facebook, or following me (Laura) on Twitter? Or all 3? 😀 )


Save

Save

Save

Filed Under: Crafts & Creations, DIY (Do-It-Yourself) Project, Tutorial Tagged With: crafts, eyeletted-paper-pennants, eyeletting-tutorial, paper-pennants-tutorial, pennants, pennants-craft, pretty-pennants, room-decor-pennants

  • « Previous Page
  • 1
  • …
  • 13
  • 14
  • 15
  • 16
  • 17
  • …
  • 28
  • Next Page »

We are wicked happy to have you here! We hope you find much inspiration, help, humor and enjoyment here.


Archives


POPULAR POSTS

* * * * * *

SUBSCRIBE to House of Joyful Noise blog! Every new post, delivered right to your email box!


Privacy Policy

Amazon Affiliates

Never at any additional cost to you, we may earn a small commission for our endorsement, recommendation, testimonial, and/or link to any products from our website. Your purchase through our links helps support our family, while sharing with you the products we authentically use and recommend, for various ideas, and letting you know where you can purchase them. Thank you for your support!

[footer_backtotop]

Copyright © 2026 HouseOfJoyfulNoise.com · Genesis Framework by StudioPress