• HOME
  • {A}’s Chipmunk Training Archives

 Homepage

  • The Homestead
    • Home Projects
    • Home Improvement
    • Home Decor
      • Seasonal Home decor
        • FALL Home Decor
        • WINTER Home Decor
        • SPRING Crafts and Creations
        • SUMMER Crafts and Creations
    • Our Chickens
    • Gardening
    • Organization
    • Re-Purposing
    • Furniture Refinishing
    • Budget
  • Crafts & Creations
    • Seasonal Home decor
      • FALL Crafts and Creations
      • WINTER Crafts and Creations
      • SPRING Crafts and Creations
      • SUMMER Crafts and Creations
    • DIY (Do-It-Yourself) Project
    • Kids Arts and Crafts
    • Homemade/Handmade Gift Ideas
    • Holiday Crafts
    • Fan Pulls
    • Free Printable/Downloadable
    • Sewing Projects
    • Giveaways
    • Business Features
  • Recipes/FoodFun
    • Breakfast
    • Lunch
    • Main Dish
    • Sandwiches
    • Appetizers
    • Slow Cooker
    • On The Grill
    • Side Dishes
      • Soups
      • Salads
    • Baking
      • Breads, Rolls and Muffins
    • Snacks
    • Treats
    • Desserts
    • Drinks
  • Homeschooling
    • Elementary Homeschooling
      • Elementary Homeschooling READING
      • Elementary Homeschooling MATH
      • Elementary Homeschooling LANGUAGE ARTS
      • Elementary Homeschooling SCIENCE
      • Elementary Homeschooling HOME ECONOMICS
      • Kids Arts and Crafts
    • Middle School Homeschooling
      • Middle School Homeschooling SCIENCE
      • Middle School Homeschooling HOME ECONOMICS
    • Language Arts
    • Math
    • History / Social Studies
    • Geography
    • Foreign Language
    • Field Trips
    • Games
    • Nature Study
  • The Big Picture
    • Life In General
    • Celebrations
    • Faith
      • Into the Light; The Series
    • Giveaways
    • Reviews & Sponsors
  • Photography & Lettering
    • Photography
    • truck lettering
    • vehicle graphics
    • Newborns
    • Kids
    • Engagement
    • High School Senior Pictures
    • High School Senior Pictures Sneak Peeks

One Fine Bread Maker! – A Homemade Bread Recipe

February 9, 2009 By Laura 10 Comments

bread-maker-1

That’s MY bread maker!

He’s a fine bread maker.

And a fine bread maker, too. lol

9_photos-of-making-homemade-bread

The bread we go through is crazy, and it’s seemed one of those things you can’t buy enough of, and it’ll go just as quick.  We’re not ‘white bread’ people either, so what we spend on bread can get….tiresome.  So a few weeks back, my hubby decided he’d try making some. After all, he makes a mean pizza dough.  And he had a good book that his parents let us have. (I think.  I’m afraid we borrowed it, and never returned it, but he says no.)  Anyway, they’re experienced…everything makers.

13_Beard-on-Bread-book

Anyway….I can’t tell you how many loaves he has made now, in the past few weeks. He loves doing stuff like that anyway. (What a blessing. lol)  The rest of us love eating it up!!

The recipe we use is a version of a James Beard bread recipe. However, we like to replace 1 cup of the flour called for, with some whole wheat flour, for a bit of a healthier and heavier bread.
We’re sharing our version of the recipe with you today, at the end of this post.

If you happen to have the old book Beard on Bread (shown above), you can find the original recipe Basic Home-Style Bread, on Page 30.

I took photos one Saturday or Sunday not long ago, along the way, from flour and yeast, to our home smelling like something possibly from Heaven.  Is there ANYTHING that smells as good as baking bread??  Few things, I reckon.

1_photos-of-making-homemade-bread

Working together the flour, proofed yeast (with milk and sugar), and salt.

~~~~~~

2_photos-of-making-homemade-bread

Rising.

~~~~~~

3_photos-of-making-homemade-bread

Doubled and ready for round 2!

~~~~~~

4_photos-of-making-homemade-bread

{JM} is the lucky kid who was around to punch it down!  These little things make them SO happy, you know.

~~~~~~

5_photos-of-making-homemade-bread

Kneading some more.

~~~~~~

6_photos-of-making-homemade-bread

Dividing for 2 loaves.

~~~~~~

7_photos-of-making-homemade-bread

8_photos-of-making-homemade-bread

Rising for a second time.

~~~~~~

breadmaker-2

Hanging around, just looking good, while the bread bakes in the oven. He was so tired, I could tell, having chopped a lot of wood that day too.

Beep!  Beep!  Beep! (Timer goes off.)

~~~~~~

10_photos-of-making-homemade-bread

Knock-knock-knock! It sounds done.

11_photos-of-making-homemade-bread

But when the kids hear the timer go off , and the knocking….they come calling, to check for themselves.  Everyone has to get into the knocking, you know. These little things make them SO happy, you know.  : )

Sounds ready!!

9_photos-of-making-homemade-bread

Not quite perfectly formed, but that’s what happens when kids help. The family love that went into them is perfect! And oh….if you could smell our home right about now.   For those of you who bake bread daily (I know you’re out there..) you know what I’m talking about. For those of you who buy fresh baked bread, you know what I’m talking about too.  It’s the smell of a bakery. lol

~~~~~~

14_slicing-homemade-bread


Basic Home-Style Bread
 
Print
Prep time
4 hours
Cook time
45 mins
Total time
4 hours 45 mins
 
A basic simple homemade bread, based on a James Beard recipe, adding some more wholesomeness with a bit of whole wheat flour, and lot of homemade love.
: House of Joyful Noise (.com) blog / Based on James Beard Recipe
: Baking
Serves: 2 loaves
Ingredients
  • 1 package of active dry yeast
  • 2 cups of warm milk (100 to 115 degrees, approximately)
  • 2 tablespoons granulated sugar
  • ¼ cup melted butter
  • 1 tablespoon salt
  • 1 cup whole wheat flour
  • ~ 4 cups all-purpose flour
  • *additional flour as needed when kneading
Instructions
  1. *NOTE: The directions below are all done by hand. However, if you have a Kitchen Aid or other large mixer, as we do now, it is much faster to make this dough!
  2. Warm 2 cups of milk.
  3. Add the yeast to ½ cup of warm milk, along with 2 tablespoons of sugar, and stir well until the yeast is completely dissolved. Allow yeast to proof.
  4. Place the remaining milk, the melted butter, and the salt in a large bowl.
  5. Stir in the flour, *1 cup at a time, with a wooden spoon.
  6. *Start with first cup of whole wheat flour, and then for rest of recipe use all-purpose.
  7. After the third cup of flour, add the yeast mixture.
  8. Continue stirring in flour until the mixture is rather firm, which should take ~ 4 cups.
  9. Remove the dough to a floured board or smooth surface, and knead, adding more flour as necessary if it gets sticky, until it is satiny and no longer sticky.
  10. Butter a bowl and place the dough in it, turning and using your hands to coat all sides with the butter. Cover with a with a kitchen towel or other suitable covering.
  11. Options for Rising:
  12. Place covered dough bowl in a warm, draft-free spot until doubled in size (approx. 1.5 - hours)
  13. -OR-
  14. Heat oven to 170 degrees, and when it reaches temperature, turn the oven OFF, and place the covered dough bowl in the oven. ( ~ 1 hour)
  15. Once dough is doubled in size, punch it down firmly 2 or 3 times, and return to floured surface.
  16. Knead 4 or 5 minutes more.
  17. Divide dough into 2 equal parts, and shape into loaves.
  18. Place each in well-buttered 9 x 5 x 3-inch loaf pans.
  19. Cover and allow to rise again, in a warm, draft-free spot (or warmed/off oven again) until doubled in size.
  20. When loaves are risen, preheat oven to 400 degrees.
  21. Slash the loaves with a sharp knife.
  22. Bake in 400 degree oven for 40 - 45 minutes, or until bread sounds hollow when taped on with knuckles on the bottom.
  23. Optional: Remove from pans and put them in oven a few more minutes longer to become crisped.
  24. ENJOY!
3.4.3177

15_homemade-bread-toast

 What a delicious bread! Great for sandwiches. Toasted, is how I like mine.

Save

Save

Save

Save

Save

Save

Save

Filed Under: Baking, Breads, Rolls and Muffins, Recipes Tagged With: Baking, baking-recipes, homemade-bread-recipes, James-Beard-bread-recipes, recipes

Handprint and Footprint Aprons – Homemade Gifts from Kids

February 5, 2009 By Laura 8 Comments

handprint-footprint-aprons-homemade-gifts-from-kids_00

One of the gifts the kids did for their paternal grandparents for Christmas, was this apron set.   We found the denim aprons right at our favorite place….Michael’s Arts & Crafts.   Then, we just picked up acrylic paints in the colors we wanted.  Their grandparents are both FANTASTIC cooks (they even make their own pastas), and take turns in the kitchen cooking, or cook together.  So we thought this idea of an apron set, with the kids hands and feet prints, would be cute for them. I only took photos the night we did feet, which was first.  The kids had a good time, and never stopped smiling and giggling.

how-to-make-footprint-aprons-homemade-gifts

First, we coated the bottom of a foot really well with paint.  You need to work quickly though, because it starts drying pretty fast.

how-to-make-homemade-aprons-homemade-gifts-from-kids_1

They stepped on the apron with their painted foot, putting their weight on it. Then they lifted their foot off the apron, going straight up!

afoot

ahop2

Then they went hopping off to the tub, to wash their foot.

ahop

Our kids are color coded (from the triplets birth), so their grandparents would know anyway, whose prints were whose.

how-to-make-footprint-aprons-homemade-gifts-from-kids

They all giggled from the tickles,  while their feet were having paint put on – you might notice the firm grip on this ankle, because for some…

stickle

…it was practically torture!!!

But didn’t they come out so cute??

footprint-apron-homemade-gifts-from-kids

handprint-apron-homemade-gifts-from-kids

I wanted to keep them for myself. lol

But, I knew the kids would be HAPPY to do it again sometime.

Now, on to a related topic:   I’m not sure if anyone happened to notice the yellow on our boy’s cheek in this photo we showed above? :

stickle

That’s from a couple of days before.  I was out on a job, and when I came home and walked in, they all came running in to meet me with excitement.  That’s not unusual. But they wanted to show me what their big sister spent quite awhile doing for them….

spuppy

She did face painting for them. I was impressed with her work!!   {S and O} got something on each side of their face.  {S}, above, got that puppy on one side….

sbee

…and a bumble bee on the other.

ounicorn

{O} chose a unicorn, and…..

oflower

…a flower.

jdolphin

{J} just wanted a dolphin.

rainbow-paint-arm

And then {A} did her own arm!

She always has such creative ideas to spend time with them, and they LOVE it!

They are blessed to have her as their big sister.

Well, that’s it for this edition!  Dang….that took me a long time to get together!  lol.  We sure hope you enjoyed it, and perhaps it sparked some inspiration for you, or an idea of your own!

See you soon!!

Save

Save

Save

Filed Under: Crafts & Creations, Homemade/Handmade Gift Ideas, Kids Arts and Crafts, Kids Arts and Crafts Tagged With: denim-apron-crafts, gifts-for-grandma-grandpa, handmade-gifts-from-kids, handprint-footprint-ideas, homemade-Christmas-gift-ideas, homemade-gifts-from-kids, kids-decorating-aprons

Groundhog Day; Shadow Games in the Street, and a Treat! – Homeschooling

February 2, 2009 By Laura 6 Comments

Groundhog Day homeschooling ideas
Happy Groundhog Day!

First of all, we have been meaning to express our appreciation for the commenting that’s been happening here at our blog, FINALLY!!  Who knew a little whining could go such a long way??  I mean, it doesn’t work for our kids, so we’ve been a little surprised. lol.  All we know is that we are having a lot more fun, sharing bits and pieces of our crazy fun life on our blog here, and getting to chat a little bit with all of you who come to ‘visit’ us.  You all have had so much to share with us, with your own  creative ideas, witty humor and kind, encouraging words.  We love it!! So a heartfelt thanks to you all!

Today we thought we would actually share our day, on the same day it all happened. That usually doesn’t happen, because I have too many photos to go through and edit, which takes time, and just blogging it takes another chunk of time.   But it’s nothing a little work-hooky can’t fix. lol.  I was at my computer by late afternoon, as I needed to be. But just not doing what I was supposed to be doing.  But it’s been a fun day we were looking forward to blogging about.

The kids got all of their ‘book and written’ school work done lickity-split today, knowing we had Groundhog Fun on the agenda!  First, we got to searching on the computer,  if Punxsutawney Phil in Pennsylvania there, saw his shadow or not.  As you all know by now, NATURALLY he DID. It’s hard to remember a year when he didn’t, but it seems it has happened twice in the lifetime of our oldest child’s life, in 1999, and 2007. (Does anyone remember if we actually DID get an early spring??)   But it’s been a great winter, so Phil’s shadow wasn’t going to ruin OUR day!  Besides, we have our wood stove!  lol. So we then read a little of the history of Groundhog Day, which like every holiday, has much more to it than people in general realize (or care to know, in some cases, I suppose. lol)  But we can tell you that the groundhog tradition stems from similar beliefs associated with Candlemas Day, and the days of early Christians in Europe.   For centuries the custom was to have the clergy bless candles and distribute them to the people. Even then, it marked a milestone in the winter and the weather that day was important.

As the old English song goes:

If Candlemas be fair and bright,
Come, Winter, have another flight;
If Candlemas brings clouds and rain,
Go Winter, and come not again.

Today, February 2nd, also marks the Feast of the Presentation of Our Lord.

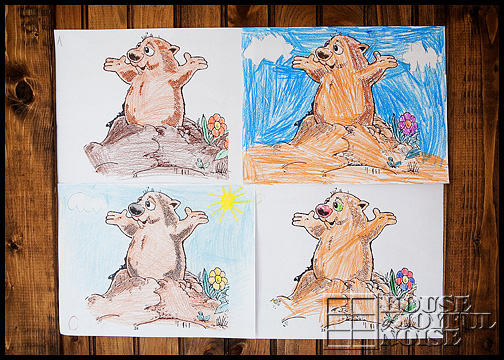
Next the kids colored Groundhog coloring pages, while we got some groundhog puppets started to use outdoors.
 

Groundhog Day homeschooling ideas

And then we got outdoors.  It was SUCH a beautifully warm and sunny day for our antics in the street, that it was easy to accept the whole ‘6 more weeks of winter’ thing.
Groundhog Day homeschooling ideas

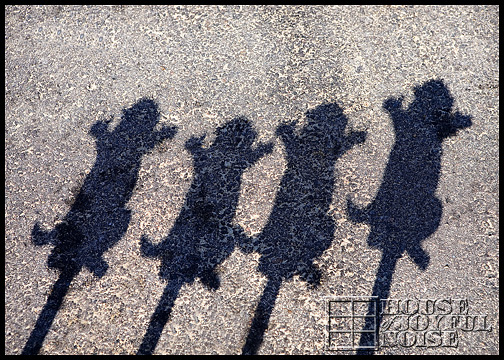
We know how easily we can fool you….So we will fess up;  Those aren’t real groundhog quadruplets. lol
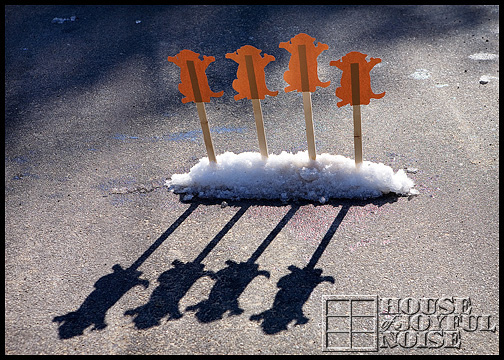
Groundhog Day homeschooling ideas

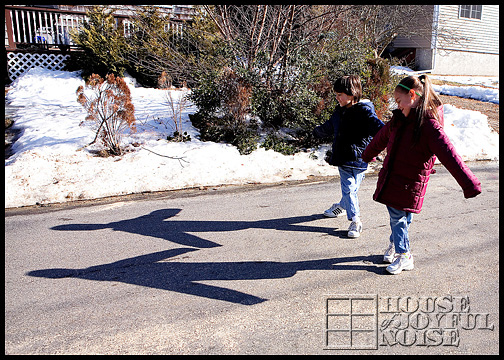
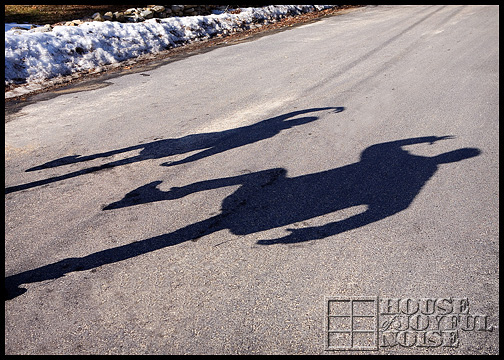
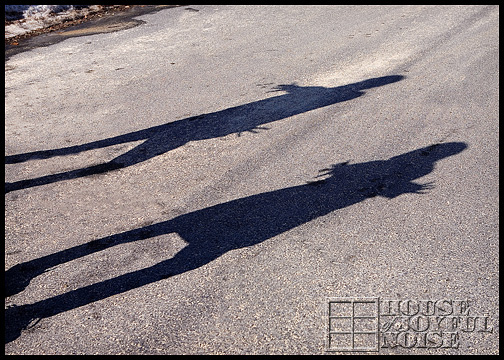
Then the kids (and Kid-Daddy)  paired up, and made shadow poses in the street.  One created a shadow pose on the street,  and their partner had to copy it as exactly as they could.
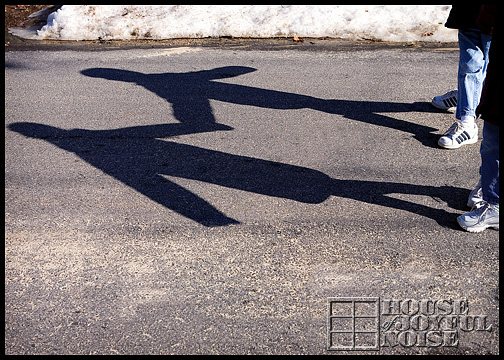
Groundhog Day homeschooling ideas

Groundhog Day homeschooling ideas

Groundhog Day homeschooling ideas

Groundhog Day homeschooling ideas

Groundhog Day homeschooling ideas

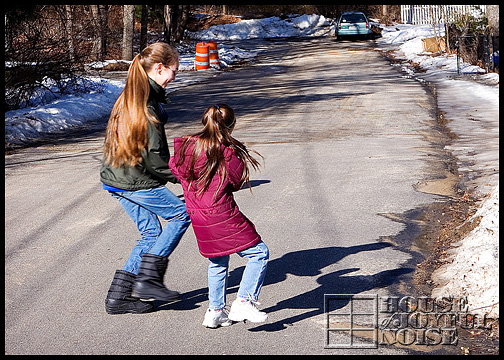
Then they chased each other’s shadows, and tried to step on someone else’s….
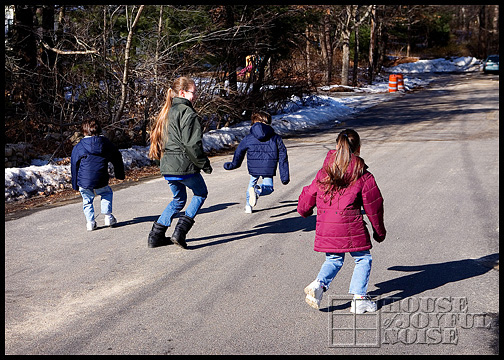
Groundhog Day homeschooling ideas

…and would you believe, NO ONE wiped out on the sand?
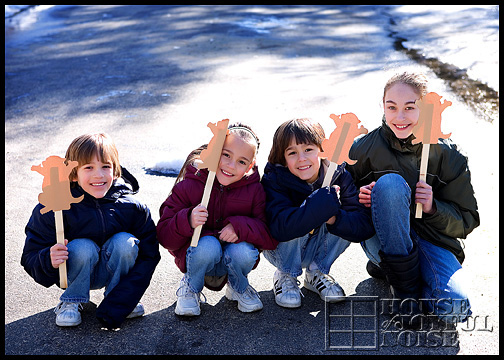
Groundhog Day homeschooling ideas

Our Little Shadow Fools, and their groundhog shadow puppets.

We soon came in, made and ate lunch, and read this poem.

And THEN made and ate…..
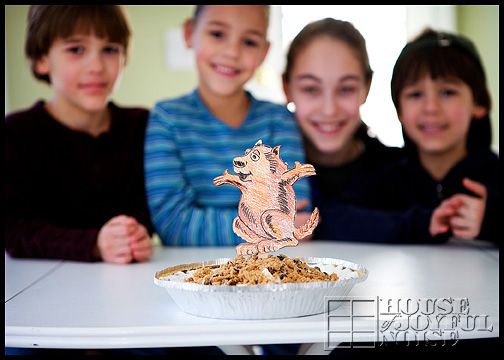
Groundhog Day homeschooling ideas

….Groundhog Pie!!!

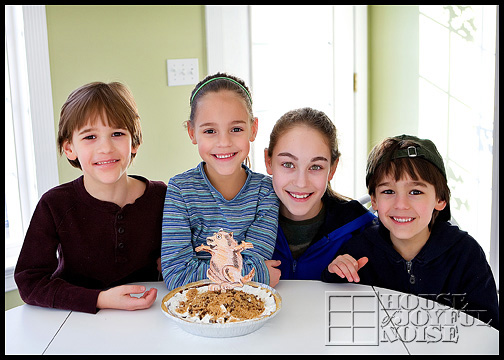
(Made with chocolate pudding in a graham cracker crust shell, pushed up to a little mound, with crumbled Chips Ahoy on top for ‘dirt’, surrounded by some Reddi Whip for snow (melting near our wood stove…lol) and of course…..the Groundhog himself, drawn and colored by Daddy, and taped to a popsicle stick!)
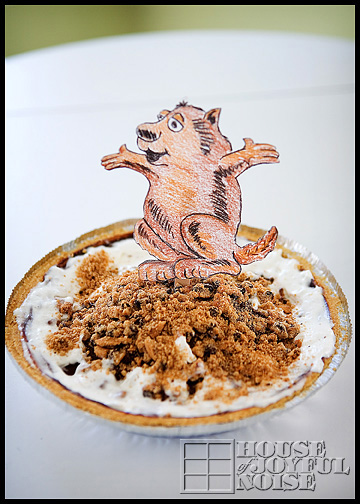
Groundhog Day homeschooling ideas

We hope you had some time to act like fools yourselves today!!  It’s such a silly day, we might as well!
Save

Save

Save

Filed Under: Elementary Homeschooling, Holidays, Homeschooling, Kids Arts and Crafts, The Big Picture Tagged With: fun-ideas-for-Groundhog-Day, Groundhog Day, Groundhog-Day-activities, homeschooling, homeschooling-Groundhog-Day, kids-activities-for-Groundhog-Day, shadow games, snack-recipe-for-Groundhog-day

How to Make Homemade Embossed Glycerin Soap Bars

January 30, 2009 By Laura 8 Comments

homemade-glycerine-soap-gifts_1
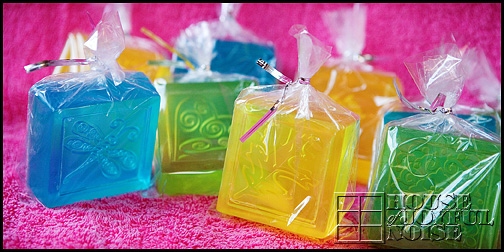
This was one of my personal favorite crafts we made;  Embossed Homemade Glycerin Soap Bars! It was so much fun choosing designs, colors and scents.  Yes, we know most people use soap pump bottles now.  Bars are sometimes considered too messy….but my kids make a pretty good mess with the bottles too, anyway! The thing drips all over the place.  Anyhoo…..if one MUST use the pump bottles, these are pretty enough to just sit in a bathroom and look nice!
So here are the EASY steps to making them.  I tried to combine the photos of steps, in a storyboard format.  So the steps are left to right, or top to bottom. I’ll do my best to explain the steps as well.

You will need:

  • 2lb glycerin soap block
  • soap molds
  • rubber soap embossers
  • soap scent oil
  • soap coloring
  • clear bags
  • bag ties

From Home:

  • a microwave
  • a glass measure cup

Many of these soap supplies can be found all together in the soap supply aisle at your craft store.  We always go to Michael’s Arts and Crafts.

Steps described below photos.

how-to-make-homemade-glycerine-soap_02

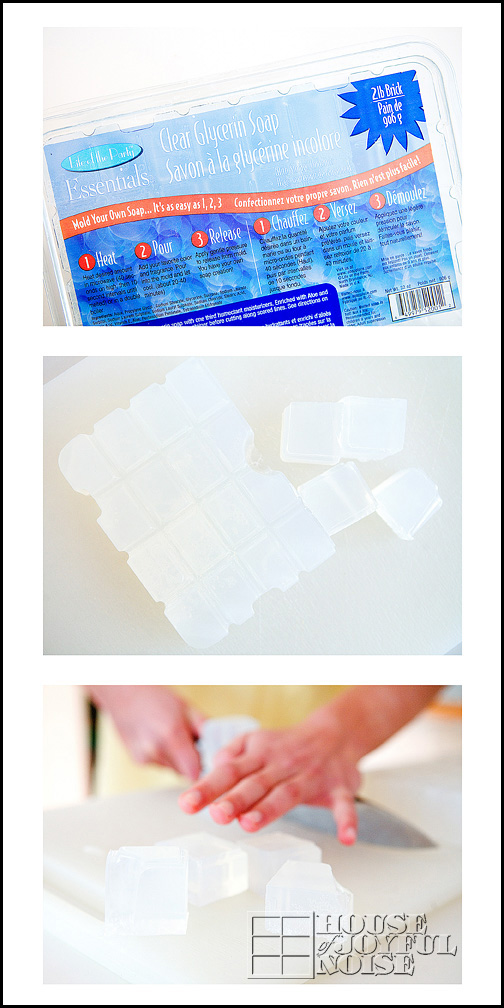
1) This is what a the package of the soap glycerin soap block might look like.

2)  It is scored so you can cut chucks easily, with a large knife.

3) You want to cut the chunky cubes into groups of 4.

Next….

how-to-make-homemade-glycerine-soap_03

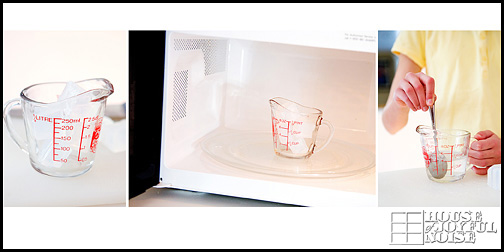
4) Put 4 cubes of soap into a glass microwavable measuring cup.

5) Microwave for 40 seconds, take out carefully, stir, and see if it is all melted. If it needs to go in again, do so in 10 second intervals, until it’s all completely melted.

6) Stir again.

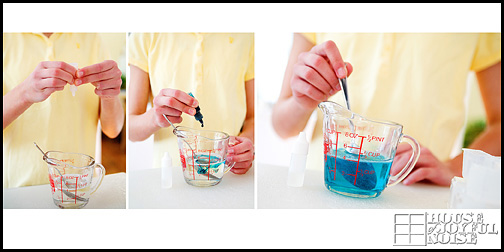
We used scents and coloring put out by Party Lite.  The oils are called Essential Oils.   They all come in little bottles, in hanging packaging. These are found with the soap supplies at the craft store as well.

So then……

how-to-make-homemade-glycerine-soap_04

7) Add 6 drops of your preferred scent. We used Green Apple.

8)  Add 3-5 drops of a chosen color. How much you add depends on how deep you want the coloring to be.

9) Stir again.

~~~

Embossing Your Soap Bars

They sell these rubber embossed designs, to lay into the bottom of your soap molds! Some soap molds come with a design embossed into the plastic mold as well.

Soap molds come in all kinds of shapes as well;  oval, octagon, rectangle, square, etc.  We went with the squares, as they fit these rubber embossers perfectly.

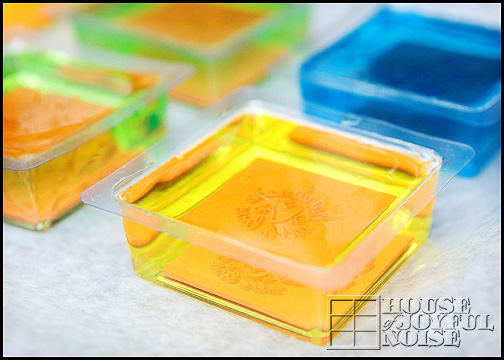
how-to-make-homemade-glycerine-soap_06

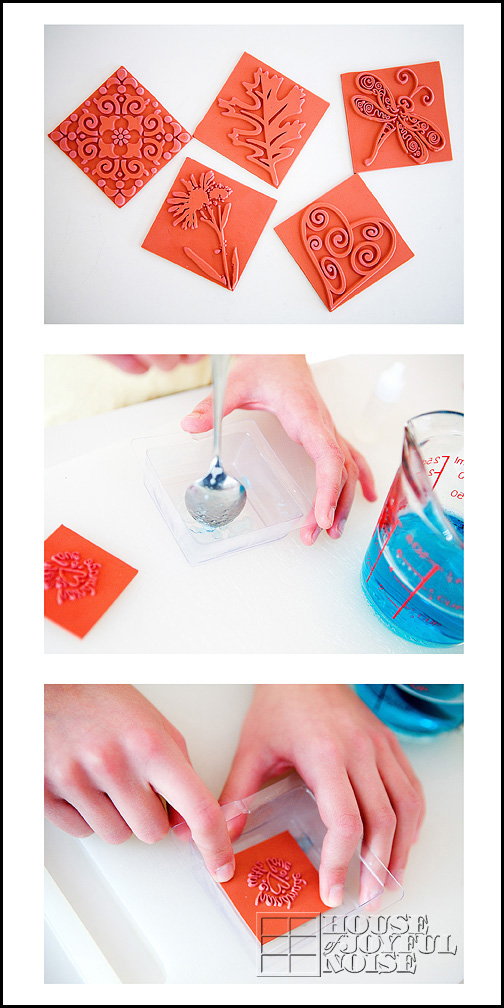
10) Rubber Embossers

11) With a spoon, put some dabs of the hot melted soap in the bottom of the mold.  This helps keep the rubber embosser in place.

12)  Place the embosser on the soap dabs, and gently press down well all over.

Next….

how-to-make-homemade-glycerine-soap_07

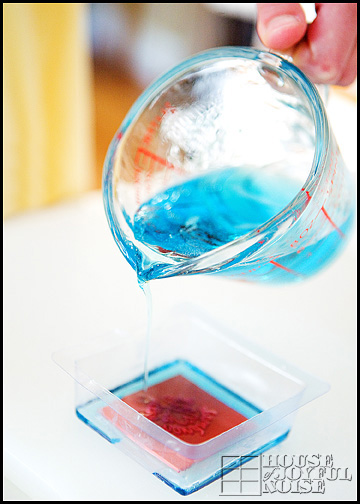
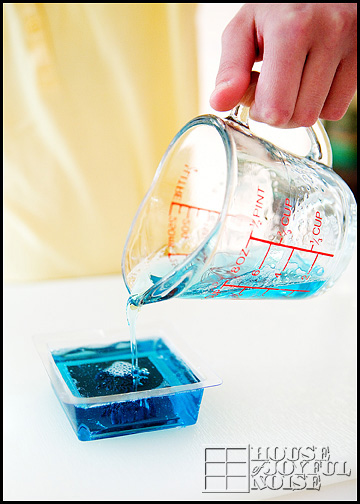
13) Start pouring the scented/colored/melted soap into the mold fairly slowly, but consistently.

how-to-make-homemade-glycerine-soap_08

14) Fill nearly to the top.  We just leave any bubbles. They mostly dissipate on their own.

how-to-make-homemade-glycerine-soap_09

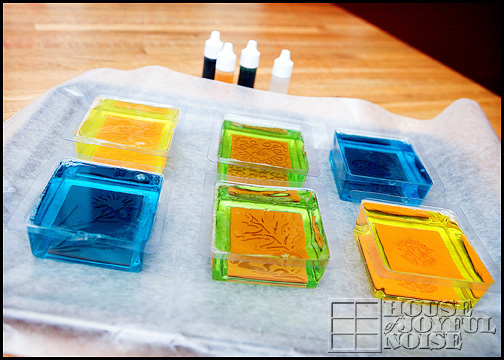
As we filled each mold, we placed them on a cookie sheet lined with wax paper.

They need to set for….awhile?  lol.  We always just let them set for a day or so, or overnight, to be sure they were turned solid.  But we’re not sure how long it really takes.

how-to-make-homemade-glycerine-soap_10

how-to-make-homemade-glycerine-soap_11

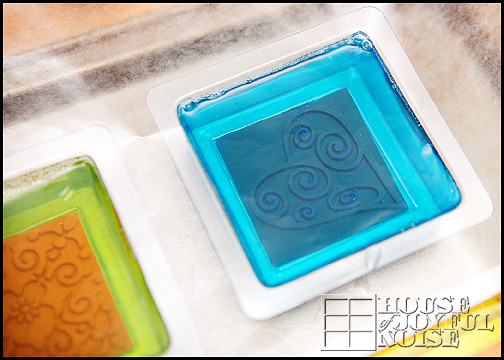
As they do start to set, you will see the soap start to get less crystal clear.

~~~

The next day they’ll be set for sure.

All you need to do is work them out of the mold.  They don’t pop or slip right out, but it’s not that difficult with a little effort.  The goal is just to try and not mark up your beautiful soaps.

Once they are popped out, you just peel off the rubber embosser, and admire your COOL design on the soap! Try not to get finger prints all over them too. Especially the tops.

how-to-make-homemade-glycerine-soap_12

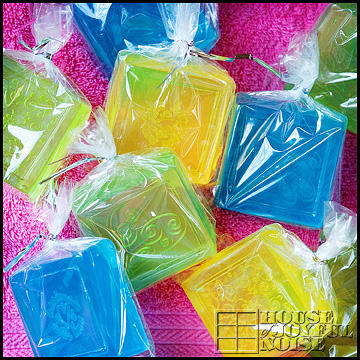
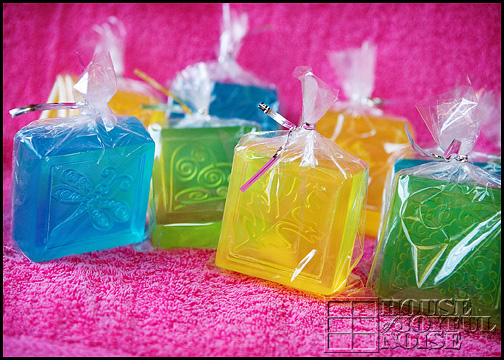
We just packaged the soaps with the proper size of clear bags, found in the candy aisle of the crafts store, and the fancy silver twist ties came with the bags.

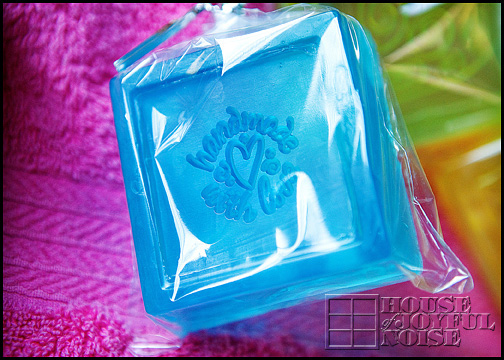
how-to-make-homemade-glycerine-soap_13

“Made With Love”.  My favorite design.  Although the dragon fly and the ornate tile ones were close seconds.

how-to-make-homemade-glycerine-soap_

That’s it for this craft!!  Easy, huh?? And so PRETTY!  We think they made lovely gifts.

Trust me, they come out so nice, and smell so good!!  I love the clarity of glycerin soap, but there are other kinds of soaps you can make too. I am sure the directions are a little different though.  Naturally, with this soap making process we showed you here, there are certain steps you will not want your children to do alone;  such as any of the steps that involve the hot melted soap, or chopping with the big knife! But they can count out 4 soap cubes and load the measuring cup up, choose and add drops of scent and coloring, pop out the soaps and bag and tie them, etc.

We do hope you try making some yourselves sometime!!

STAY CLEAN NOW!  : )

Save

Save

Save

Save

Filed Under: Crafts & Creations, Homemade/Handmade Gift Ideas, Tutorial Tagged With: arts and crafts, crafts, easy-homemade-gift-ideas, embossing-glycerine-soap-bars, homeade-gift-ideas, homemade-glycerine-soap-bars, how-to-make-glycerine-soap-bars, soap-crafts

Squirrel Invasion

January 29, 2009 By Laura 6 Comments

squirrels
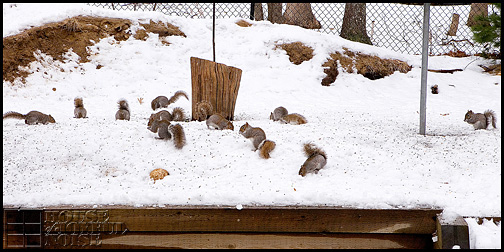
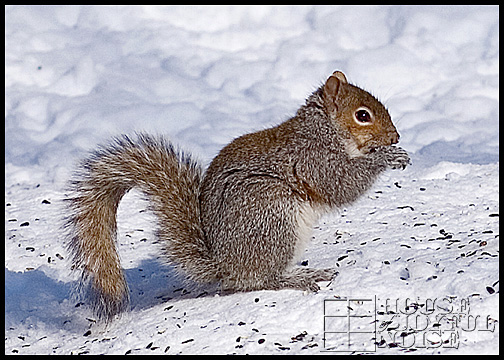
The squirrels love to hang out at our house.  We’ve got many bird feeders, and the squirrels are happy to feast on what falls to the ground.  Sometimes there are twice as many squirrels as this,  out there.  This whole area you see is going to be a beautiful bird sanctuary, when we get that far with our plans at the homestead here.  We get LOTS of birds every day, and all kinds too. We love to watch the birds the most. If they only knew what a paradise we have planned for them.  No doubt, the squirrels will stay too.

squirrels

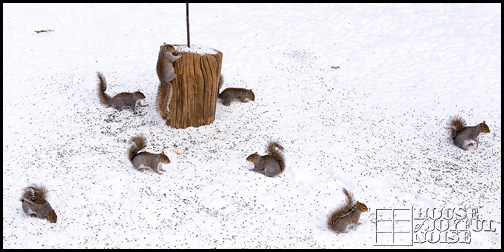
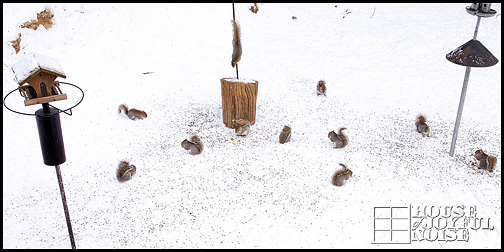
The kids know some of these squirrels from the others. A few even have names.  We have outsmarted all but one, from getting up into our bird feeders.  We don’t mind them around, but THAT is unacceptable behavior. And they know it.  Only one manages to get up into one of the bird feeders, now and then.  But he doesn’t enjoy his victory for long, as one of the kids always spots him, and someone is out there reprimanding.

squirrels

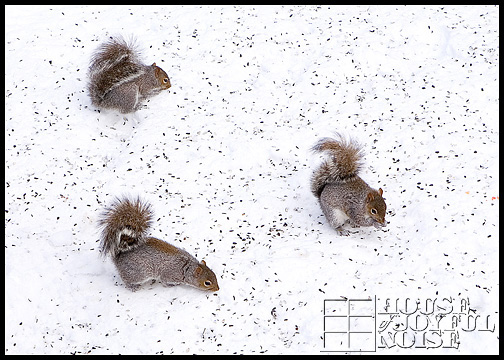
We do love to watch their antics.  They can be pretty funny sometimes.

squirrels

squirrels

That’s all for now. The next Christmas Craft is coming up!  I’ve just been busy today with a little work.  Even had a little quiet time to work today, after school and lunch, while the kids were at the youth center with Daddy ‘shootin’ hoops’.  I accomplished quite a bit!  But now it’s time for a good night’s sleep!

Save

Save

Filed Under: Homeschooling, Life In General, Nature Study, The Big Picture Tagged With: photos-of-squirrels, squirrels, squirrels-in-snowy-yard, squirrels-playing

  • « Previous Page
  • 1
  • …
  • 80
  • 81
  • 82
  • 83
  • 84
  • …
  • 100
  • Next Page »

We are wicked happy to have you here! We hope you find much inspiration, help, humor and enjoyment here.


Archives


POPULAR POSTS

* * * * * *

SUBSCRIBE to House of Joyful Noise blog! Every new post, delivered right to your email box!


Privacy Policy

Amazon Affiliates

Never at any additional cost to you, we may earn a small commission for our endorsement, recommendation, testimonial, and/or link to any products from our website. Your purchase through our links helps support our family, while sharing with you the products we authentically use and recommend, for various ideas, and letting you know where you can purchase them. Thank you for your support!

[footer_backtotop]

Copyright © 2026 HouseOfJoyfulNoise.com · Genesis Framework by StudioPress