• HOME
  • {A}’s Chipmunk Training Archives

 Homepage

  • The Homestead
    • Home Projects
    • Home Improvement
    • Home Decor
      • Seasonal Home decor
        • FALL Home Decor
        • WINTER Home Decor
        • SPRING Crafts and Creations
        • SUMMER Crafts and Creations
    • Our Chickens
    • Gardening
    • Organization
    • Re-Purposing
    • Furniture Refinishing
    • Budget
  • Crafts & Creations
    • Seasonal Home decor
      • FALL Crafts and Creations
      • WINTER Crafts and Creations
      • SPRING Crafts and Creations
      • SUMMER Crafts and Creations
    • DIY (Do-It-Yourself) Project
    • Kids Arts and Crafts
    • Homemade/Handmade Gift Ideas
    • Holiday Crafts
    • Fan Pulls
    • Free Printable/Downloadable
    • Sewing Projects
    • Giveaways
    • Business Features
  • Recipes/FoodFun
    • Breakfast
    • Lunch
    • Main Dish
    • Sandwiches
    • Appetizers
    • Slow Cooker
    • On The Grill
    • Side Dishes
      • Soups
      • Salads
    • Baking
      • Breads, Rolls and Muffins
    • Snacks
    • Treats
    • Desserts
    • Drinks
  • Homeschooling
    • Elementary Homeschooling
      • Elementary Homeschooling READING
      • Elementary Homeschooling MATH
      • Elementary Homeschooling LANGUAGE ARTS
      • Elementary Homeschooling SCIENCE
      • Elementary Homeschooling HOME ECONOMICS
      • Kids Arts and Crafts
    • Middle School Homeschooling
      • Middle School Homeschooling SCIENCE
      • Middle School Homeschooling HOME ECONOMICS
    • Language Arts
    • Math
    • History / Social Studies
    • Geography
    • Foreign Language
    • Field Trips
    • Games
    • Nature Study
  • The Big Picture
    • Life In General
    • Celebrations
    • Faith
      • Into the Light; The Series
    • Giveaways
    • Reviews & Sponsors
  • Photography & Lettering
    • Photography
    • truck lettering
    • vehicle graphics
    • Newborns
    • Kids
    • Engagement
    • High School Senior Pictures
    • High School Senior Pictures Sneak Peeks

Colored Ice Castles – Homeschooling Science Experiment

January 27, 2009 By Laura 14 Comments

colored-ice-castles-homeschooling-science-experiment__

This is how home schooling happens a lot in our family:

Someone gets a cool idea they think would be a fun to try, (in this case, that would be me), and we decide to do it. For fun.  So we discuss our plan, start getting stuff together, and as we get to work on the project……….we start to wonder, or predict out loud.

And suddenly it hits me. “Hey!  This is a science experiment!  Yes….this is going to count for science.”

But ‘the lesson’ was not planned for school.  It was just something fun to do.  Curiosities arose that we wanted to explore and experiment with.  We were just LIVING.  Yes . . . . learning often times just happens.

As you can guess by now, that’s exactly what happened with this project.  The kids are always watching the outdoors thermometer through the window of our school room. If it’s below freezing, they like to put a bowl of water out, and check it all day to see how long it took to freeze.  You know…’just for fun.’   So I thought to myself, “Wouldn’t it be fun to fill up all kinds of containers, all different shapes and sizes, and then build an ice castle? “  (and continuing to talk to myself in my head….because a lot of conversation happens with myself up there, I said…) “Hey!!  We could use food coloring and make them COLORED ICE CASTLES!!!!”  Because I am a color freak, I got REAL excited the other day, to tell the kids what we were going to do.

Creating Colored Ice Castles

So we gathered everything we needed, bundled up as best we could, and went out and got to work.

colored-ice-castles-homeschooling-science-experiment

The kids started filling up all of the containers with hose water.
*

colored-ice-castles-homeschooling-science-experiment_5

And took turns choosing colors, and squeezing drops of food coloring  in.

colored-ice-castles-homeschooling-science-experiment_7

When one of them added yellow to the red, the colors intoxicated me…..and I went CrAzY taking photos from then on.

And I love most all of the photos I took.

colored-ice-castles-homeschooling-science-experiment_8
So now you’re going to have to see them all. : )

colored-ice-castles-homeschooling-science-experiment_9

colored-ice-castles-homeschooling-science-experiment_10
Because I have little control, when it comes to these kinds of things, you know. : )

Just look at the beautiful colors floating and swirling!

colored-ice-castles-homeschooling-science-experiment_11

Oh….it gets better.

colored-ice-castles-homeschooling-science-experiment_12

Look at that!!!  The kids started adding color to different containers at the same time, which resulted in lots of outbursts of excitement at the same time…“Look at this one, Daddy!”  “Mama look at these colors together!!  Hurry!”
We were getting dizzy. But it was all good!

colored-ice-castles-homeschooling-science-experiment_13

I was having so much fun taking photos.  I just knew they were going to be beautiful.

colored-ice-castles-homeschooling-science-experiment_20

colored-ice-castles-homeschooling-science-experiment_25

Here below, {O and J} swap colors.

colored-ice-castles-homeschooling-science-experiment_23

colored-ice-castles-homeschooling-science-experiment_26
THIS ONE, ABOVE, IS MY ABSOLUTE FAVORITE!!

Honestly, I get butterflies.

And by this time, I was (incorrectly) thinking that we were going to have the COOLEST TIE-DYE ICE CASTLES!

colored-ice-castles-homeschooling-science-experiment_27

colored-ice-castles-homeschooling-science-experiment_28

colored-ice-castles-homeschooling-science-experiment_29

colored-ice-castles-homeschooling-science-experiment_31

Oh Dear….Unexpected Science Experiment Happenings

About now we start to notice that the 2 colors are mixing and changing to one color.

BUMMER!!

No tie-dye ice castles?? I, personally, might have sulked for a moment or 2 over that development and reality check.  But, this is all part of science experiments, and the kids were still excited.  They got me excited again, too.

When I saw all of the multi-colors were gone, I thought “Good thing I took photos!!!”  lol

They still looked vivid and beautiful, all together.

colored-ice-castles-homeschooling-science-experiment_35

Now, I did say to the kids at the start, “Let’s try NOT to get food coloring all over our hands. OK?”

colored-ice-castles-homeschooling-science-experiment_30

Reality check number 2.  lol

But you know….I love the colors, even all over my children’s faces and hands. I do!!  Even if we’re going out…..going to Mass…where ever. If it doesn’t come off all of the way….OH WELL!!  I think it’s evidence of their creativity!

DIRT is another story!!

Watching, Waiting, and Wondering….For Days

So the next couple of days were annoying, temperature wise.  It kept being a little warmer than it was supposed to be, and the darn water in the containers would not freeze all of the way!!  We knew it needed to be 32 degrees or colder, to freeze. (We’re like Einsteins, huh?  Ha haha!)  But for how long would it need to be that cold?  And how much longer would the BIG containers take, than the small ones?  These are the scientific questions we had, and the things we observed and studied over the next few days.  We knew…..it was taking a lot longer than we ever wanted it to!!

What’s more….we could see the color really settling to the bottom of the containers.

Why, we wondered??  Which led us to what ‘wondering’ always does.  Research!!

The Scientific Explanation

BECAUSE:  Cold water does not allow the molecules of the food coloring to break down as easily….or dissolve.  So, because it could not really ‘mix’ with the water, being a separate element, it all settled. What’s more, the molecules of the food coloring were so big, that they were not able to freeze all of the way.  So the food coloring ended up being pockets of slush, within the frozen water/ice.   It was interesting that the 2 elements were able to separate that much in the end, from being 2 colors swirling around each other, when first added to the water.

By this morning, we were done waiting.  The big containers STILL did not seem solid all of the way through—-but gosh darn it….WE WERE BUILDING OUR CASTLES TODAY!!

The Results

colored-ice-castles-homeschooling-science-experiment_37

colored-ice-castles-homeschooling-science-experiment_38

colored-ice-castles-homeschooling-science-experiment_39

colored-ice-castles-homeschooling-science-experiment_42
{S}(on the far right) was excited about the pizza slice container one.  He is also very partial to green, because it is ‘his color‘.  (As triplets, we had a lot of color coding going on when they were babies.)

TA-DAAAA!!!!!!!

colored-ice-castles-homeschooling-science-experiment_45

colored-ice-castles-homeschooling-science-experiment_47

colored-ice-castles-homeschooling-science-experiment_48

colored-ice-castles-homeschooling-science-experiment_49

colored-ice-kids-with-castles-homeschooling-science-experiment

I LOVE this shot of my kids, and their ice creations!!

They had SO much fun doing this!!  So did I!!  So did their Daddy!!

We built it in the front yard, for the world to see. (You know…the ones who happen to drive down our dead-end street. Ha haha!).

Another lesson learned:  We don’t always get what we’re expecting to.  But we learn to love what we DO get.

Because it’s ours.  Because we made it.  Because we created memories together, doing it.
And that makes it all beautiful, to us!

Save

Save

Save

Filed Under: Crafts & Creations, Elementary Homeschooling, Elementary Homeschooling SCIENCE, Homeschooling, Middle School Homeschooling, Middle School Homeschooling SCIENCE, Science, Seasonal Crafts and Creations, WINTER Crafts and Creations Tagged With: colored-ice, colored-ice-castles, elementary-homeschooling-science-experiments, homeschooling, homeschooling-science-experiments, how-to-make-colored-ice-castles, kids-winter-creations, kids-winter-fun, middle-school-homeschooling-experiments, outdoor-winter-activities, winter-science-experiments

Homemade Bookmarks – Craft Tutorial

January 26, 2009 By Laura 5 Comments

crafts-copy

Hi People!

This is the first of a handful of installments, that finally show you what we were making as we crafted during the pre-Christmas season.  Now that all of the gifts have been given, we can share, and not be concerned with ruining any surprises.  But we hope that some of you may gather an idea or 2, by us posting these projects, to put on your idea list for crafting and/or gift giving of your own, next Christmas or anytime.

We tried to think of gifts we could craft, that most anyone could use. Universal, sort of gifts.  We think we did pretty well in the end.  These gifts are simple;   Simple to make (as the kids did a lot of it, with instruction and/or assistance), and simple in concept.  We did not invent any of these things, but simply put ‘our touch’ to them.  Should any of these projects appeal to you, we’re sure they’ll come out as your own as well.  So many of you are SO creative, that you will likely make them even better, or put a new twist of your own on them, that makes them unique for you.   Whatever you do, have fun!!  Remember, even if everything doesn’t come out perfect, the fact is that they were made with love!  If your recipients can’t appreciate that, then….well,… I won’t say.  But they should.  lol.  Otherwise, you might consider  ‘indian-giving’.  Ha haha!

So let’s get to it! :

You may or may not recall, that one of the headers to a crafting post was this:

homeamde- bookmarks_00

Showing any more than that would have given the project away.  But we were making…………

BOOKMARKS!


homemade-bookmarks_2

We know we love books, and we love to read.  Many people are the same.  Even if they are not big cover-to-cover kind of readers,  one may find a bookmark handy to keep their place in a recipe book, a how-to book, a magazine, a journal, their Bible…and who knows what.  So we hoped these would come in handy, in some way, for our recipients.  We did know that many do love to read, in our case.

I did not think to take step-by-step photos, since photos would have given it away.  But we think you’ll get the gist by looking at the photos of the finished bookmarks, and reading the following information.

Here’s how we made them:

Directions

First, we needed some card stock.  We found these handy pads of beautiful designed card stock in, in the scrapbooking aisle of Michael’s Arts & Crafts.  They are actually meant for making greeting cards, but they worked out to be just what we were looking for, and a good size too.  They looked like this:

homemade bookmarks

One thing we REALLY loved about these card stock pads, was that each ‘card’ was 2-sided!!  It had a different, but coordinating, design on the backside! So that means we had 2-sided bookmarks!!  Very cool. We were excited about that.

So we cut these cards into bookmark size, and marked the centers of exactly where we wanted a hole for the ribbon.

Some supplies we already had on hand that we used are:  thin satin ribbon, a Fiskar cutter (used by many scrapbookers, that make cutting straight as easy as gliding the blade).   Also, eyelets that look like this:

eyelets-brads

And an eyelet tool setter kit, which I already had on hand too, from scrapbooking with eyelets.  That looks like this:

eyelet-setter-tool-kit

It might look scary, but every piece is pretty self-explanatory as to what it does.  Included are 3 size whole punchers tips (which 2 you can see right over the l and k of tool kit, and the other is already screwed onto the handle piece, 3rd in from the right).  All you do is choose the correct size tip for the size eyelets you are using, stand it up on the card stock right where you want a hole, and tap with the hammer.  Next, put eyelet through the hole, hold it in while turning over the card, and get the ‘splaying’ tool. (I may have made that word up.  Not sure.  But it spreads the backside of the eyelet out to hold into the card.  So roll with it.)  So you put the ‘splayer’ into the eyelet back, and hammer!  This takes some real hammering, so be sure you are careful and use cardboard or something.  I used a self-healing cutting board.

Now take a piece of cut ribbon, doubled over, and  put the 2 ends together through the eyelet, and then through the loop of your ribbon.  To finish the bookmarks off, we used a corner rounder, which is also found in the scrapbooking section.

That’s it! 

No doubt, you’ll want to keep a few for yourselves too.  We did!  So Happy Reading!

All of the supplies used can be found at any Michael’s Arts and Crafts, or most any other good craft store.

If you have any questions, just let us know!!  I am always happy to clarify!

I am also used to needing to.   lol  : )

homemade bookmarks

Save

Save

Save

Save

Filed Under: Crafts & Creations, Homemade/Handmade Gift Ideas Tagged With: bookmarks, bookmarks-craft-tutorial, crafting, crafts, eyelet-setter-tool-kit, gift-ideas-for-readers, homemade-bookmarks, homemade-gift-ideas, how-to-make-bookmarks, paper-crafts

More Time at the Horse Stables

January 24, 2009 By Laura 6 Comments

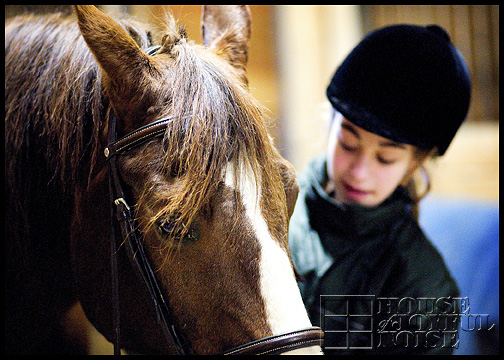
  kids-horse-riding-lessons

{A} has loved every minute at the stables with the horses, and learning every bit she can take in.   The trainer said “She’s a natural.”

I am looking forward to her horse riding outside, come springtime, when she continues some lessons.  When there will LIGHT and COLOR.  And WARMTH.  That will make for prettier photos, I think.  These lessons have been nothing less than frigid.  Even in the arena….just bitter cold.  We leave with numb fingers and toes.  And there’s always a smile frozen on {A}’s face, too.
cleaning-horseshoe-hoof

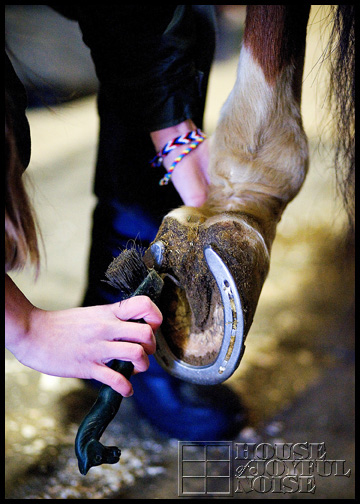
She has to clean her horse’s shoes every time, before she rides him, as well as brush him.  It can be a real task cleaning his shoes well, but thankfully he’s a co-operative horse. So that makes it easier than it could be.
horse-headshot

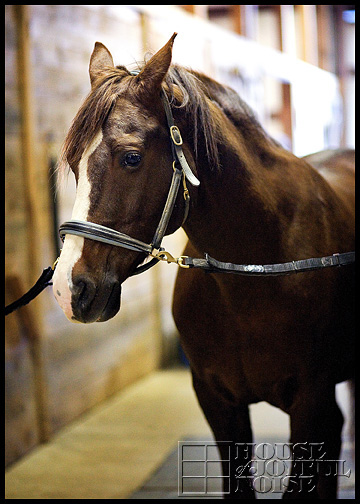
He’s all ready to dress and ride.  Handsome boy, isn’t he?
english-horseriding-lessons-for-kids

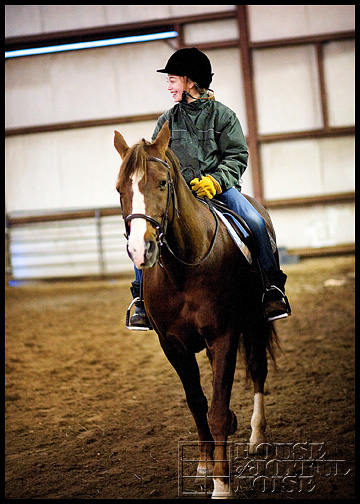
{A} has learned to ‘post’.  Which is that bouncing you see English riders do, when the horse goes into a bit of a gallop.  Once she learned how to stay in the saddle while ‘posting’, she was all set.

She’s been wearing her Daddy’s gloves to try and keep her hands warmer.  Come to think of it, that’s my jacket she has on.
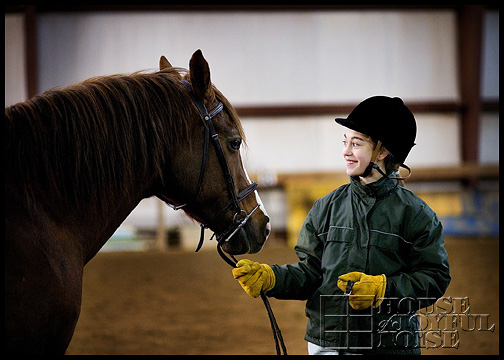
english-horseriding-lessons-for-kids-2

Yes, spring photos will be so much better.

These stables have little birds flying around all over the place inside.  I forget what kind of birds they are. {A} would know, but she’s asleep at the moment.  What a nice shelter for them though.
grey-and-white-bunny

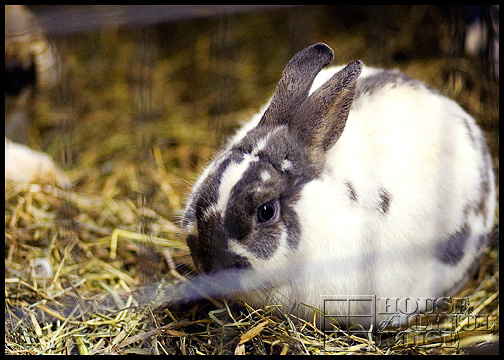
They also have a couple of rabbits.  I approached their cage slowly, but I could tell my camera made this little guy nervous.  He probably wet the hay a little,  when my shutter went off.  So I just took one shot.  I heard rabbits can have heart attacks rather easily, and I sure didn’t want to be responsible for that!

Hey-Guess what??

On Monday I am going to start posting, intermittently over the following days/weeks, our Christmas Crafts reveals.  Anybody been waiting for that?  I posted the kids busy crafting gifts, right along through the pre-Christmas season.  But now will come photos of the finished products, materials, tools and techniques used to make them, and where to get everything you need!   We’ve been waiting to post it all, so we’re excited.  Lots of COLORFUL PHOTOS and FUN!!  So all you who may want to do some lovely crafty-gifts this year, for Christmas or anytime,  get out your notepads!  We’ve got at least a few ideas coming your way that we think you’ll enjoy.  We sure enjoyed making them, and giving them to the people we love.

Until then!!
Save

Filed Under: Homeschooling, Life In General, The Big Picture Tagged With: english-horse-riding, English-horse-riding-lessons, english-horse-riding-lessons-for-kids, homeschooling, homeschooling-learning-experience-ideas, horse-stables

Hot Cider Drink Recipe – Wassail

January 22, 2009 By Laura 6 Comments

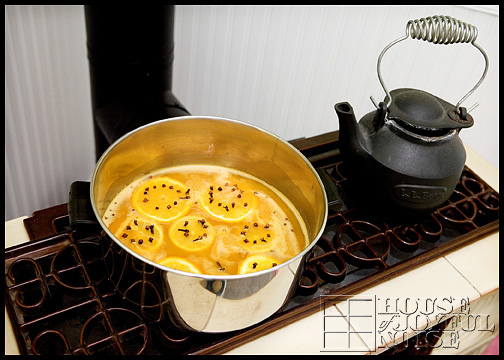
hot cider recipe

Many of you did indeed request the hot cider drink recipe, that was simmering on our stove the other day.  Also known as Wassail. I must say, our kids can’t get enough of it.  We all started a WICKED FUN project out in the bitter cold and snow today. (That’ll be coming up in a few days or so, on the blog here.)  Soon after we came in to warm up, we decided to make another batch of this cider to enjoy.  It smells and tastes SO good.  We hope you enjoy the recipe as much as we do.

Please note:  The ingredient amounts listed below must make one-big-batch!  We’ve been making it by halving the amounts, and it’s been plenty enough for at least 2 cups each, for our family of 6.  But for many more people, it might be best to make the whole batch.  This WOULD be a GREAT treat to serve, if you are entertaining a small party.  I think guests would be impressed with such a delightful warm beverage, and appreciate it coming in from the cold too.  So here it is.  If you make it, let us know what the verdict is at your home!

~~~~~~~~~~~~~~~~~~~~~~~~~~~~~

Spiced Cider Wassail
(Makes about 4 quarts)
2 quarts apple cider
1 quart orange juice
1 quart apricot nectar
1/2 cup fresh lemon juice
6 broken pieces of cinnamon
1 tablespoon whole cloves
one orange, sliced thin
one lemon, sliced thin
whole cloves
 
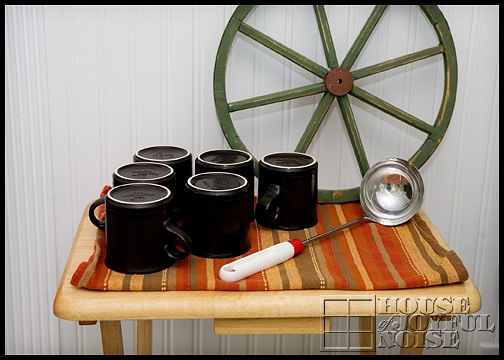
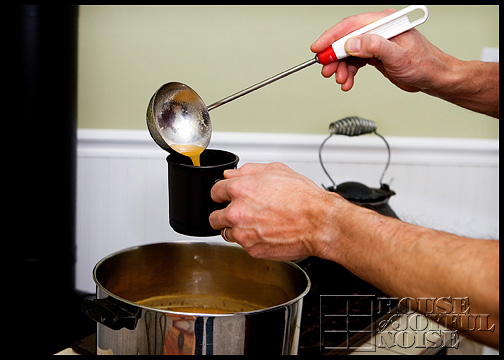
In a stainless steel pan, bring to a boil the cider, juices, cinnamon and cloves. Simmer over low heat for 20 minutes. Transfer to a punch bowl if you’d like.  Stud the orange and lemon slices with whole cloves and float them in the wassail. Serve in punch cups or small mugs.

~~~~~~~~~~~~~~~~~~~~~~~~~~~

I must admit, I haven’t used the word ‘Wassail’ yet.  It’s a bit too fancy for my simple tongue. Not to mention my simple mind, because I had no idea what that word was.  So since I was posting the recipe, I thought it might be wise to look it up first. Here’s the definition, for what it’s worth.  But just feel free to call the drink whatever you want, like I do.  : )

Main Entry:
1was·sail
Pronunciation:
\ˈwä-səl also wä-ˈsāl\
Function:
noun
Etymology:
Middle English wæs hæil, washayl, from Old Norse ves heill be well, from ves (imperative singular of vera to be) + heill healthy — more at was, whole
Date:
12th century
1 : an early English toast to someone’s health 2 : a hot drink that is made with wine, beer, or cider, spices, sugar, and usually baked apples and is traditionally served in a large bowl especially at Christmastime 3 : riotous drinking : revelry

CHEERS!!

Save

Filed Under: Drinks, Recipes Tagged With: cider, drink-recipes, hot-cider-drink-recipe, hot-cider-recipe, recipes, warm drinks, Wassail, winter drinks

How to Make Chocolate Dipped Pretzels

January 21, 2009 By Laura 8 Comments

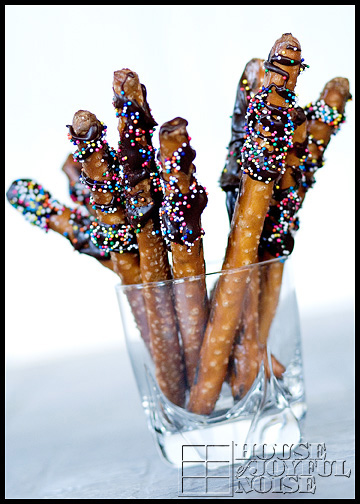
We thought you all deserved some nice treat ideas.  So we’d like to share some steps on how to make chocolate dipped pretzels!
It’s a fun treat to make and eat!

How to make chococlate dipped pretzels

Last year for our Christmas gathering with some family, we made these pretty pretzel rods drizzled with chocolate.  Our visiting family even wanted to get in on the fun, and make their own! We simply melted chocolate, and drizzled it over the rod, slowly turning it as we did so.  Then we sprinkled on some of our favorite decorative sprinkle balls!

This year, we’ve done something similar (a few times!), but with a TWIST!!  : )

How to make chococlate dipped pretzels
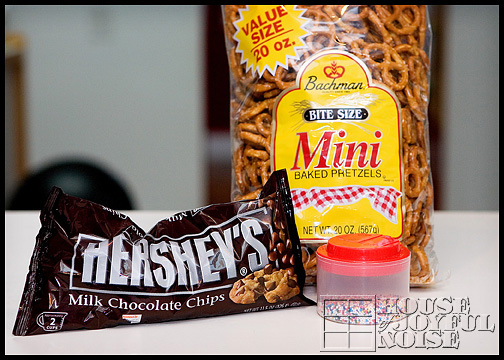
Participating Ingredients.

Get it??  With a TWIST??   (ROFL…..perhaps by myself.  I should probably get up now.)

3 Ingredients!:

  • Mini Pretzel Twists
  • Hershey’s Chocolate Chips
  • Decorative Sprinkle Balls

These are SO easy to make, and your kids will have SO-MUCH-FUN helping!!  Our kids sure do!  Here we go……

How to make chococlate dipped pretzels

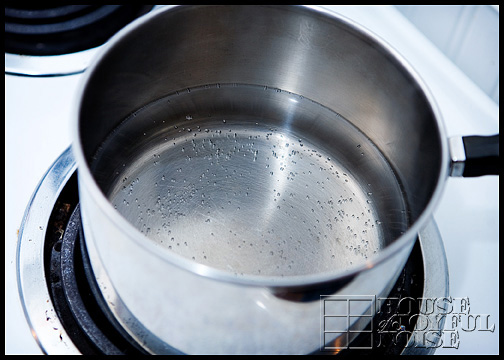
Get some water in the bottom portion of a double boiler pan.  You want to put the burner on MEDIUM, and wait for the water to be ‘just about ready’ to boil.  Once it’s to that point, it’s good enough to turn it down to LOW, and put the top portion of the double boiler pan on.

How to make chococlate dipped pretzels

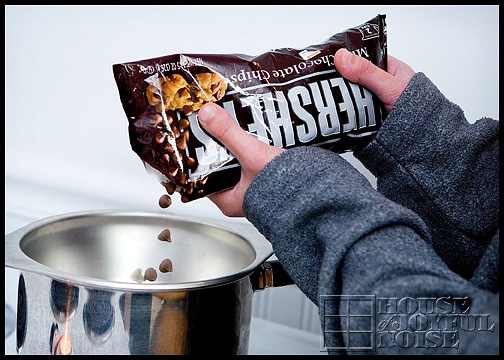
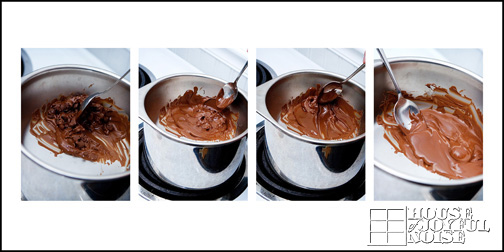
Now pour in the top pan, a small amount (maybe equivalent to a couple of handfuls…but exactness is not that important) of chocolate chips into ONE SIDE of the pan.  You kind of want them in a small pile, so that it makes dipping easier.

How to make chococlate dipped pretzels

Use a spoon, and keep stirring the chips, letting them slowly melt, until the chocolate is really melty and smooth.  Once it is, you’re ready for ……..

How to make chococlate dipped pretzels

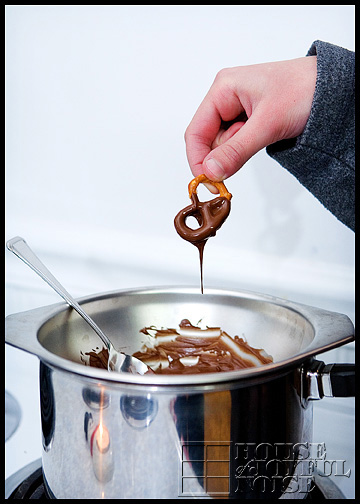
….some dipping!!

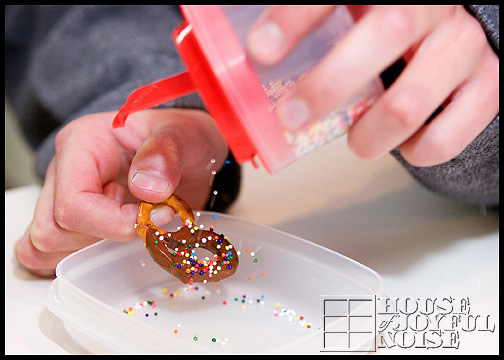
Bring the just dipped pretzel (or 2, if you can do 2 at once) over to a counter space, and sprinkle your sprinkles onto the wet hot chocolate.

How to make chococlate dipped pretzels

We suggest doing this over an empty container.  They are very bouncy……so otherwise you’d be finding them all over the place  until Easter 2012.   You can also re-use what you catch in the container for other pretzels, over another container.

How to make chococlate dipped pretzels

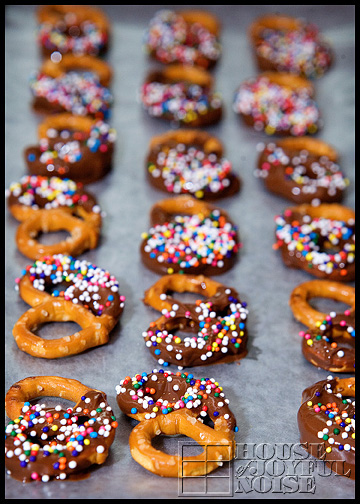
Simply place them on a wax paper lined cookie sheet – spaced nicely so they don’t touch each other.

Just another photo, because I had to take it.

How to make chococlate dipped pretzels

Repeat this process of dipping, sprinkling and laying, adding more chips to your pan as needed, and giving it little stirs to keep it melty and smooth as you go.

Once a tray is full………

How to make chococlate dipped pretzels

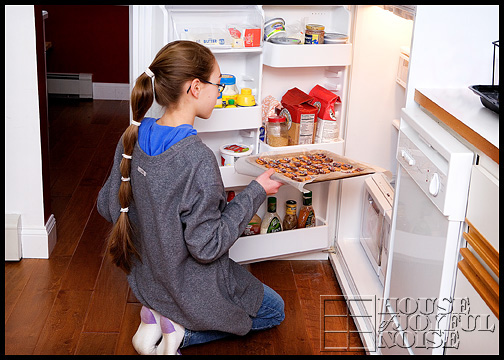
….pop it into the refrigerator. (And begin a new tray, of course!)  Putting them in the fridge will help the chocolate harden.  Generally speaking, they need to be KEPT cool, until they are popped into your mouth, or the chocolate on the pretzels will get melty on your hands. (unlike m&m’s….and we know why.  They do not have that hard candy shell. lol)  (These don’t talk either. Sorry.)

How to make chococlate dipped pretzels

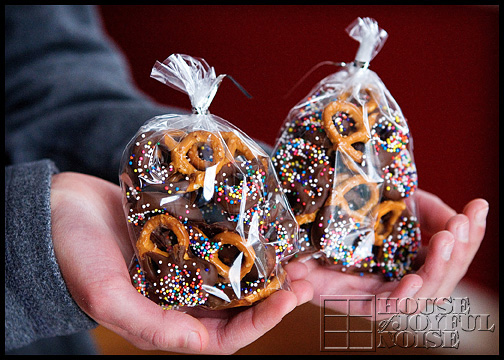
We think they are pretty enough (and tasty enough) to give as little gifts too!  We used these nice little clear bags, found in the stores where they sell chocolate melts, and supplies to make chocolate lollipops, etc. (In our case, our local Michael’s Arts & Crafts) We tied them off with silver twist ties. Who doesn’t love chocolate?  Warning though:  the sweet then salty thing going on, may keep you popping more in your mouth than you meant to!

How to make chococlate dipped pretzels

Sweet, huh??

Save

Save

Save

Save

Save

Filed Under: Homemade/Handmade Gift Ideas, Recipes, Snacks, Treats Tagged With: chocolate-dipped-pretzels, chocolate-treats, food photography, food-gift-ideas, food-gifts, how-to-make-chocolate-dipped-pretzels, party food, Treats

  • « Previous Page
  • 1
  • …
  • 81
  • 82
  • 83
  • 84
  • 85
  • …
  • 100
  • Next Page »

We are wicked happy to have you here! We hope you find much inspiration, help, humor and enjoyment here.


Archives


POPULAR POSTS

* * * * * *

SUBSCRIBE to House of Joyful Noise blog! Every new post, delivered right to your email box!


Privacy Policy

Amazon Affiliates

Never at any additional cost to you, we may earn a small commission for our endorsement, recommendation, testimonial, and/or link to any products from our website. Your purchase through our links helps support our family, while sharing with you the products we authentically use and recommend, for various ideas, and letting you know where you can purchase them. Thank you for your support!

[footer_backtotop]

Copyright © 2026 HouseOfJoyfulNoise.com · Genesis Framework by StudioPress