• HOME
  • {A}’s Chipmunk Training Archives

 Homepage

  • The Homestead
    • Home Projects
    • Home Improvement
    • Home Decor
      • Seasonal Home decor
        • FALL Home Decor
        • WINTER Home Decor
        • SPRING Crafts and Creations
        • SUMMER Crafts and Creations
    • Our Chickens
    • Gardening
    • Organization
    • Re-Purposing
    • Furniture Refinishing
    • Budget
  • Crafts & Creations
    • Seasonal Home decor
      • FALL Crafts and Creations
      • WINTER Crafts and Creations
      • SPRING Crafts and Creations
      • SUMMER Crafts and Creations
    • DIY (Do-It-Yourself) Project
    • Kids Arts and Crafts
    • Homemade/Handmade Gift Ideas
    • Holiday Crafts
    • Fan Pulls
    • Free Printable/Downloadable
    • Sewing Projects
    • Giveaways
    • Business Features
  • Recipes/FoodFun
    • Breakfast
    • Lunch
    • Main Dish
    • Sandwiches
    • Appetizers
    • Slow Cooker
    • On The Grill
    • Side Dishes
      • Soups
      • Salads
    • Baking
      • Breads, Rolls and Muffins
    • Snacks
    • Treats
    • Desserts
    • Drinks
  • Homeschooling
    • Elementary Homeschooling
      • Elementary Homeschooling READING
      • Elementary Homeschooling MATH
      • Elementary Homeschooling LANGUAGE ARTS
      • Elementary Homeschooling SCIENCE
      • Elementary Homeschooling HOME ECONOMICS
      • Kids Arts and Crafts
    • Middle School Homeschooling
      • Middle School Homeschooling SCIENCE
      • Middle School Homeschooling HOME ECONOMICS
    • Language Arts
    • Math
    • History / Social Studies
    • Geography
    • Foreign Language
    • Field Trips
    • Games
    • Nature Study
  • The Big Picture
    • Life In General
    • Celebrations
    • Faith
      • Into the Light; The Series
    • Giveaways
    • Reviews & Sponsors
  • Photography & Lettering
    • Photography
    • truck lettering
    • vehicle graphics
    • Newborns
    • Kids
    • Engagement
    • High School Senior Pictures
    • High School Senior Pictures Sneak Peeks

Spring | Easter Fan Pull | Craft

April 2, 2010 By Laura 3 Comments

Just a quick share of my fan pull for Spring & Easter!

spring-easter-fan-pull-craft-3

These beads are so beautiful. They are heavy, like marbles, but smaller.

And just ….pretty.


spring-easter-fan-pull-craft-1
The beautiful piece on the end is glass as well.

spring-easter-fan-pull-craft

It has definitely put another touch of  ‘spring in the air’, in the sun room.

Just in time for a lovely Easter this weekend, too.

spring-easter-fan-pull-craft-2

Thanks for dropping by, and taking a peek!

***HaPpY SpRinG!!***

Save

Save

Filed Under: Crafts & Creations, Fan Pulls Tagged With: bead-crafts, crafts, Easter decor, Easter-craft, fan-pull-craft, fan-pulls, home decor, home decorating, spring craft, spring-decorating, spring-fan-pulls

Incubation and Embryology of the Chick | Chick Coloring

March 31, 2010 By Laura 7 Comments

Incubation and Embryology of the Chick | Chick Coloring

chick-coloring-incubation-embryology-10

Although we have a small line-up of homeschooling posts about recent happenings coming your way, I’ve been inspired recently to take a little trip down our homeschooling memory lane, back to early 2007, when we did a study on chick embryology,  incubated eggs and hatched chicks!   At the time, the kids ages were 9, 4, 4, and4.  So not only will you notice how young our kids look compared to today (now 12 and 7, respectively), but you’ll see how very unfinished our home was back then!  Remember, Michael has been finishing all of the inside of our home himself.   (With a little help and direction from me too.)  As far as we have to go on this house, we can look at these photos and think, “We’ve come a long way, Baby!”

My brother, his wife, and their 2 kids, have a chicken coop, which began with an order of live chicks last year, I believe.   But soon they will be receiving a batch of eggs, and will be incubating and hatching them themselves, for the first time. I am SO excited for them, and especially for my niece and nephew, to have this exciting experience!  So much so, that we are itching to do it again ourselves all over again, since the our youngest kids are 3 years older now. The little ones would be able to get so much more out of the study and be a lot more hands-on, as {A} was for our first experience 3 years ago. It would be fun for the kids to compare notes with their cousins too.  Nonetheless, with Easter coming in a few days as well, we thought it would be cute and fun to blog about our chicks.  This experience in 2007, was ‘pre-blog’, so we never did get to share it with you all.

chick-coloring-incubation-embryology

We picked up our order of 24 eggs from the Plymouth County 4-H on March 13 of that year.  They have a wonderful Embryology Program, and supplied us with the eggs, an incubator (rented), a very informative book, a poster, and some feed.
–

chick-coloring-incubation-embryology-11

We got our eggs incubating right away.  This process of incubation, to expected hatching would be about 21 days.  The temperature of the inside of the developing eggs needed to be regulated at 100-101 degrees.  So the goal of environmental temperature within the incubator, needed to stay within the 97-103 degree range.  The humidity level was also a very important factor, and that was the hardest part for us!

{A}, being the oldest and the most appropriate age for this project at the time, was the most involved in the hands-on activities .  She did most of the rotating duties, temperature checks, egg observations, and kept records on everything on a daily basis.

The eggs needed to be rotated 3 times a day.  Therefore, we marked them with an X on one side of each egg, and an O on the other.  (We had XO eggs! lol).  They were each also numbered, 1-24.  These markings helped us be assured that every egg was rotated every time.

chick-coloring-incubation-embryology-12 –

Candling was a very interesting activity that was part of this project.  This allowed the kids to observe the development of the chicks, without damaging them.  This can be done on days 3,4,6,7,and 13.   Michael created a make-shift ‘candle’ using a light projector we had.

chick-coloring-incubation-embryology-13

By holding the egg to the light, we were able to look for developments and progress inside of the eggs.

In the period of time in days 11-14, we had the option of giving our chicks some COLOR.  This is a completely safe and harmless procedure for the chicks!!  If it was not, we wouldn’t have done it!  To understand this process more thoroughly or to get directions, please see (and save)  this link:  Chickscope. Another great link is here.  In brief, this is done by injecting harmless vegetable dyes, into the albumen area of the egg.  This is a pinhole break through just the very surface of the egg shell, at a specific area of the egg. In the following days, as the chicks continue to develop and grow, the sac that contains the color is naturally broken, and the chick is surrounded by the fluid coloring.  This results in temporarily colored chicks.  Michael performed this procedure, while {A} observed and recorded data.  Unfortunately, I was away these few days at a professional photographer’s conference.  So there are no photos of this part of the study.   But the results are coming up!

Throughout the day on March 1, we could hear faint peeps from within the eggs!   Talk about excitement!  The next day, the peeps were a little stronger.  We knew the time was drawing near, as we were just about at day 21!

Sure enough, very late at night on March 3, as I was exhausted and headed to bed, I took a last peek into the incubator, and lo and behold, an egg was hatching!   I was like, “Are you kidding me?  They are going to start hatching NOW?!  As I’m ready to go to sleep?”.  It was like both of my own labors, that kicked in high gear, right as I was most exhausted and badly needing a good night of sleep.  So of COURSE eggs would start hatching at this time.

Still, the anticipation and excitement perked me up a little.  I got {A} up and, the little ones, one by one, to take a peek.  I put them back to bed after a few minutes, but I kept watch for awhile longer.  It looked like it was going to be a slow process, and so thankfully, unlike my own labors, I was able to go get some sleep.

Early the next morning, we had 2 hatched!

chick-coloring-incubation-embryology-14

We could see that there was another, who had tried to break free of it’s shell, but never quite made it.  We lost that one.  But the 2 that successfully hatched seemed to be doing fine.  One was a very dark color.  He almost looked purple?  Which was not a color we had used, so we were confused for a bit there.  The other was green.

chick-coloring-incubation-embryology-15

I was not able to take photos of the chicks very well, through the little cheap (no pun intended, lol) plexi-glass viewing windows, but they were sure fun to watch! They were flopping all over the place, and all over each other.

The kids were so tickled, watching for more activity with the other eggs, and watching the chicks that had been born.

  chick-coloring-incubation-embryology-16

chick-coloring-incubation-embryology-17

chick-coloring-incubation-embryology-18

chick-coloring-incubation-embryology-1

chick-coloring-incubation-embryology-2

In the end, we had only hatched 4 eggs.    To truly learn from the study, and understand the developments of the embryos/chicks, it was necessary for someone to break open and study the eggs that had not hatched.  I could not do it myself.  Michael took that task on.    He and {A} took those eggs up on the hill out back, and dug a big hole in the ground.  Then {A} sat on a stump, with her back to her Daddy, while he dictated the number on each egg, and the stage of development, while she recorded the data in her notebook.  Then Michael buried them.

What they found, was some eggs were never fertilized at all. Some barely started developing, and for some reason didn’t continue.  Others were pretty much fully developed, but had never hatched. It was all natural outcomes.  That was probably the only unpleasant and sad part of this experiment.

Soon, the chicks were able to be transferred to a big sanctuary (Michael built), where we could really observe and enjoy them.

chick-coloring-incubation-embryology-3

Once our baby chicks dried off and got fuzzy, we realized our dark chick was not a colored chick, but a rooster!
–

chick-coloring-incubation-embryology-4

We also had a green one, a natural yellow one, and a pink one.    One for each of the kids!!  We did expect a higher hatching success rate, but we were glad to get some!

The funniest, and most entertaining thing about these chicks in their first few days, was just watching them gain their strength.  They were so active one moment, and would suddenly just doze right off and plop where ever they were.

chick-coloring-incubation-embryology-5

It was an absolute riot, to watch happen, over and over.   Just look at these photos of them!  A moment before, they were very energetic, then they would just wither into a nap, and the next moment be up and about again.  We know some older folks, who do the same thing these days.  ; )

  chick-coloring-incubation-embryology-6

chick-coloring-incubation-embryology-7

chick-coloring-incubation-embryology-8 –

Soon, {A} was able to gently hold them one by one, although it was important to keep it fairly brief and keep them warm, and to always wash hands after wards!  (The same was done handling the eggs.)

chick-coloring-incubation-embryology-9

With each of the kids having their ‘own chick’, and knowing we wouldn’t be able to keep them much longer, I just knew a fun photo shoot, with the kids and the chicks  in the studio, was in order!!    So click on over to the Photography & Lettering section of this blog, to check out the portraits from that shoot, and find out the names of our chicks!!  Not much to read in that post!  I promise!  Just photos to enjoy.  See you there!!

Save

Save

Filed Under: Homeschooling, Science Tagged With: 4H-club, baby-chickens, chick-candling, chick-development-candling, chick-embryology, chick-incubation, coloring chicks, egg hatching, homeschooling, homeschooling-science, homeschooling-science-experiments

Baby Colored Chicks and Kids | Studio Photo Shoot

March 31, 2010 By Laura 8 Comments

What a fun shoot this was in my in-home studio, with my own kids and our newly-hatched baby colored chicks!

Laura Lee Richard Photography 
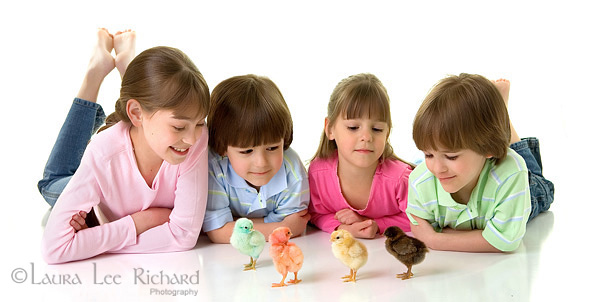
For those of you visiting this section of the blog first, this post is a continuation of a science project we did, which is detailed over in the Home Schooling section of this blog, when we incubated, colored and hatched baby chicks!  Now you can see how nice my kids clean up, from their jammies and morning bed-heads, too! 🙂

Laura Lee Richard Photography 
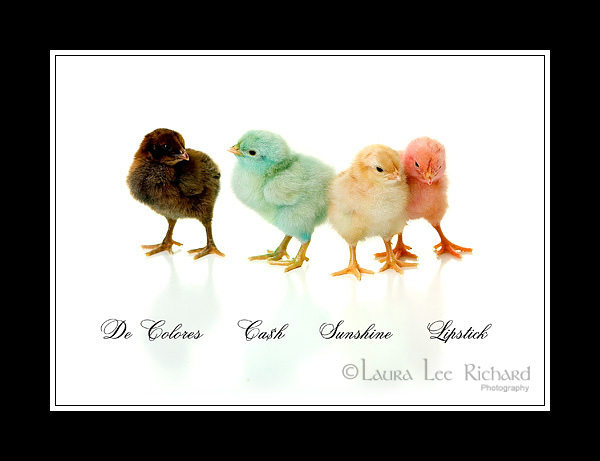
Even though we weren’t keeping them, the kids did name the chicks.

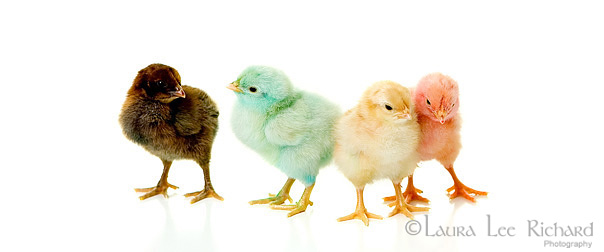
Left to Right:  the brown rooster, “De Colores” (anyone familiar with that term?). The  green chick is “Ca$h”.  (I loved that name.) The Yellow chick is “Sunshine”.  The Pink chick is  “Lipstick”.

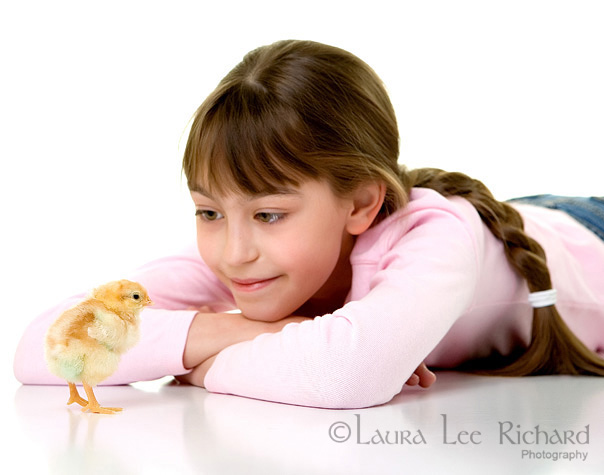
{A} with her chick, Sunshine…..

Laura Lee Richard Photography Laura Lee Richard Photography Laura Lee Richard Photography

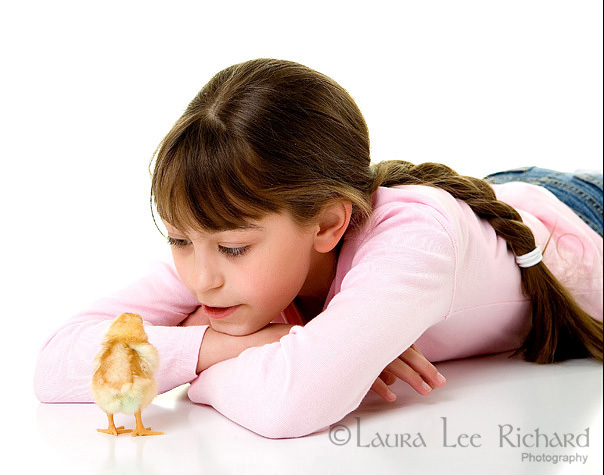
(“Dirty Pants.”  lol)

Laura Lee Richard Photography

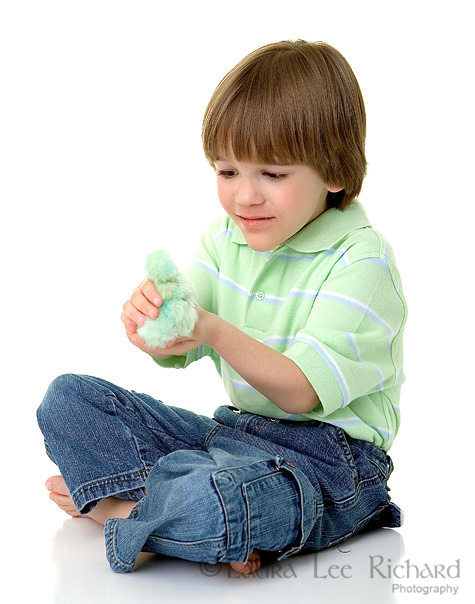
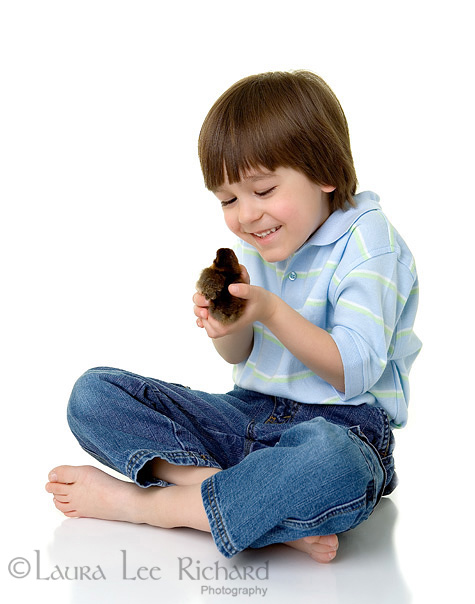
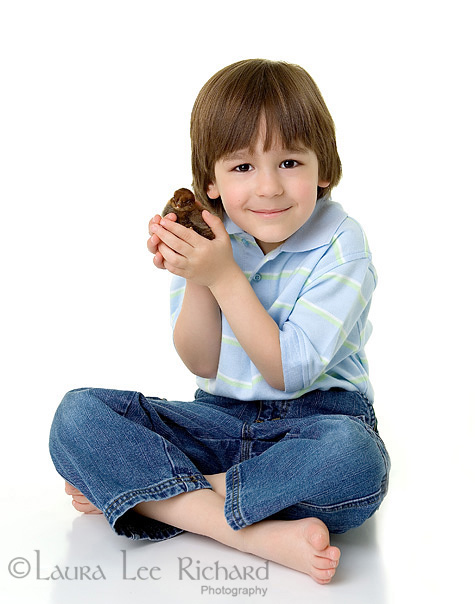
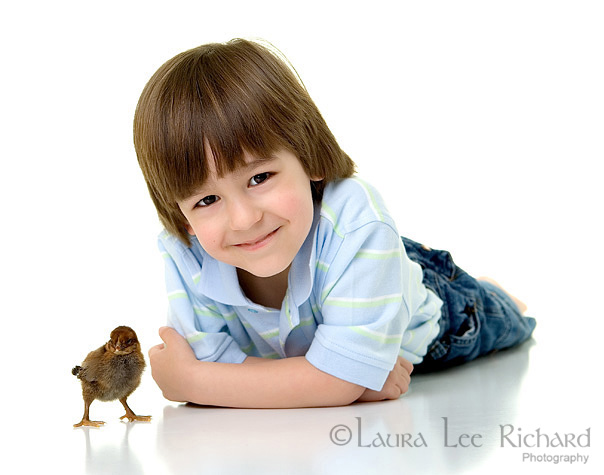
{S} with his chick, Ca$h…..

Laura Lee Richard Photography

Laura Lee Richard Photography Laura Lee Richard Photography

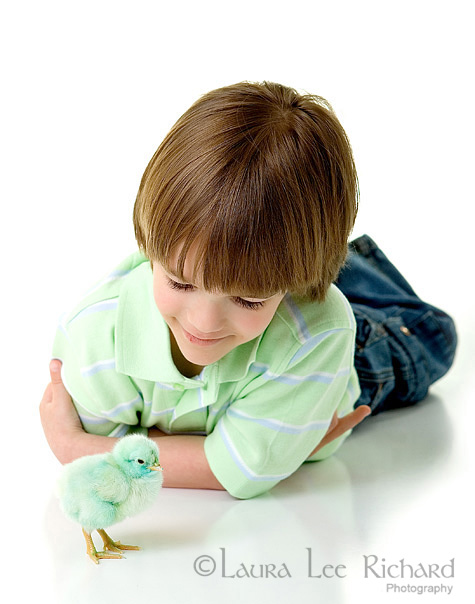
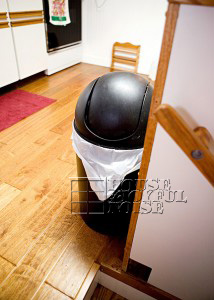
Are you ready for a good laugh??………..

.

.

.

Laura Lee Richard Photography

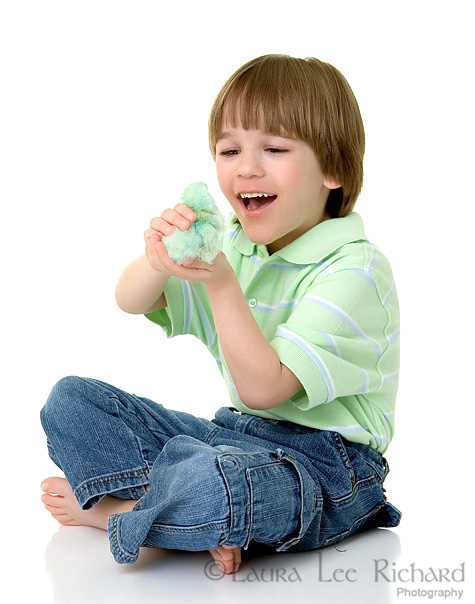
{S} had a sense something just happened in his hand.  The expression on his face…..it makes us laugh hysterically every time I see it.  Even all these years later!!

(Give me a moment.  Recovering here.          O.K.)

{J} with his rooster, De Colores.

Laura Lee Richard Photography

Laura Lee Richard Photography

Laura Lee Richard Photography

Laura Lee Richard Photography

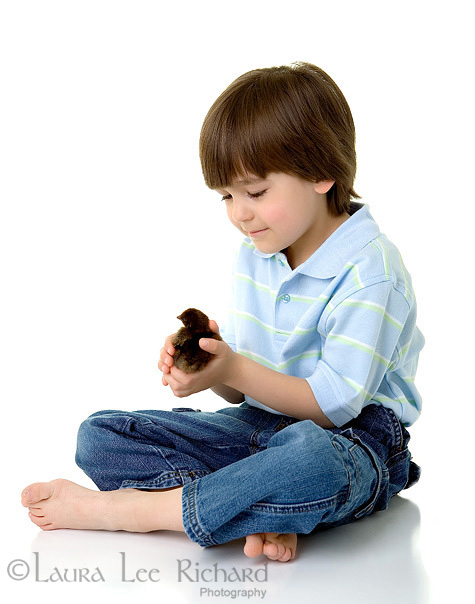
2 cool dudes.  Check out their stance. I loved this one too!

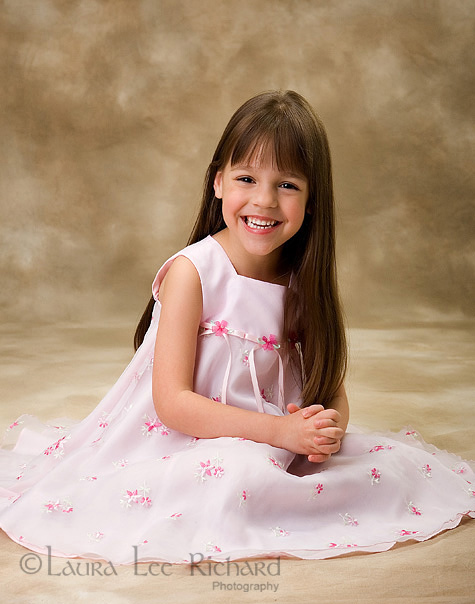
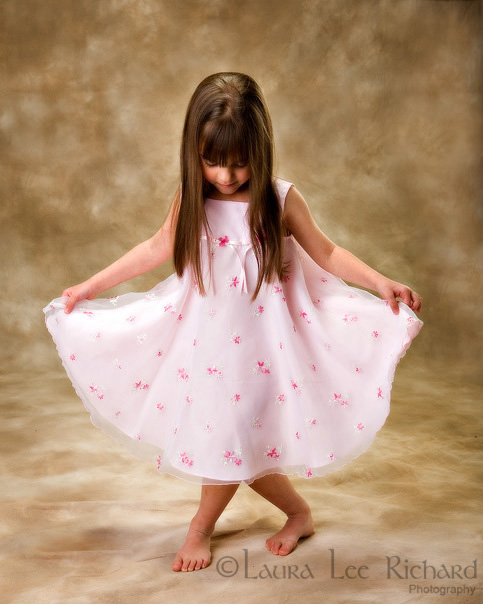
{O} with her chick, Lipstick…..

Laura Lee Richard Photography

Laura Lee Richard Photography

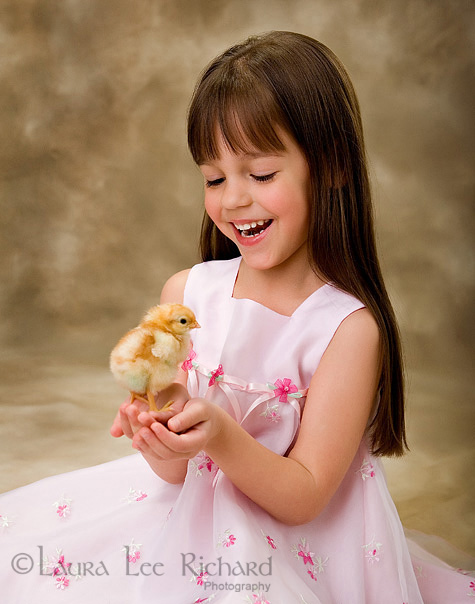
She wanted few more photos, in her beautiful Easter dress….

Laura Lee Richard Photography

Laura Lee Richard Photography

The End.

laura-lee-richard-photography-kids-and-colored-chicks-portraits-18

DISCLAIMER: There were no chicks harmed in this photo shoot with small children!   Nor was there any hard to the chicks in coloring them. The chicks stayed with us for about 1-2 weeks, as we watched them lose their colored fuzz, and grow in their regular feathers.  We  said a long goodbye, and then they went to a farm, to live happily every after.

Save

Save

Filed Under: Kids, Photography, Photography & Lettering Tagged With: baby-colored-chicks-kids-photo-shoot, colored-chicks, Easter portraits, Laura Lee Richard Photography

Let’s Talk Trash | A Solution to Hide Your Kitchen Trash

March 25, 2010 By Laura 12 Comments

In this post I’m going to do a little personal venting, and then I’m going to show you the solution to our kitchen trash problem!

kitchen-trash-solutions-7

Ask anyone who lives with me. I’m a sheer-compulsive-pet-peeved- maniac about certain aspects of our home.  The sudden sight of clutter is one. It sends me over the edge.  Like a sunny 30 mph Sunday drive, to a buck-60 in a clap of thunder.

I’ve analyzed my seemingly over-reactions enough, to figure some of myself out.  The sight of clutter, instantly clutters my mind.  An organized mind of thoughts and agendas is something I work very hard at. So I don’t need some tall and disheveled pile of paper to come along, and mess with me.  See what I’m sayin’?

Another personal demon I’ve been determined to beat, is the trash.  I know where this issue started for me too.  I was living at someone else’s house at the time. I was in the kitchen one day, went to throw something away, and the sight of that cover of that plastic rectangle trash can stopped me in my tracks, and grossed me right out.  Nasty as all get out.  Thank goodness it had one of those levers you could step on to open it, but I found myself holding my breathe even as I did that.  Yuckity-doo-da.

I never forgot that. The haunting of it has followed me right into my own home.  You may understand the thought process for example, that your own bathroom, for instance, as in need of a cleaning as it may be, never seems quite as dirty as say, a public bathroom. Right?  One might apply the same perspective to their trash can covers.  In your own home, it may be like, “Oh, that should be wiped down.”  In someone else’s home, or worse on the sidewalk in front of the storefronts, it’s more like, “OH. GROSS.  I am NOT touching that if I can help it!”  Am I right?  (O.K….if it’s just me, don’t tell me. Sometimes I like to make believe I am one with the world.)

At any rate (….my mother used to say that phrase ALL Of the time.  I don’t get it. But I still say it now.)  At any rate, I see the clutter in my home, and the yuckity-doo-da on the trash covers, through the eyes of make-believe unexpected visitors. I really do not want someone to come into my home, and be repulsed.  Know what I’m saying?  Yes…I COULD go the therapy route.   But why not just fix the problem instead, so we ALL can be comfortable?


kitchen-trash-solutions

So…that brings us to our own kitchen trash container.  I’m going about my happy day.  I go to throw something away, and I see that cover.  So here we have already gone from sunny, leisure Sunday drive, to a buck-60 in a clap of thunder.  Then I try to put something IN, and the trash-a-plenty keeps it from opening properly. Ggrrrr.  Once I do finally get said-trash in, then the cover is stuck open, on some trash.  Now I have to touch it a SECOND time.
I’m ready to throw the whole thing off a cliff at this point.
–

2_stairs

As IF I’m not self-conscious enough, this inevitably also becomes part of that ‘fun and relaxing experience’ I try to give my clients, that I photograph in my studio.   We come up from a good time, after an exciting and fun photo shoot in my studio, and we begin to climb the stairs when we are done, with me leading…..and the sun sneaks behind a cloud….

kitchen-trash-solutions-5

……there it ISSSSSS.  The trash.  Practically in our faces as we come up the stairs.  I notice the sticky spot.  I think I might smell something.  I keep the conversation going with a little more enthusiasm, as my distraction tactic.

kitchen-trash-solutions-6
But really.  WHO is going to miss that thing?
–
Oh.  And then there is my ‘participating ingredients’ shots I do when I am planning a recipe post for the blog . . . .

5

I get it all set up. I set my camera.  I look through the lens.  And it’s not the ingredients I see first.  All I see is the FREAKIN’ TRASH IN THE BACKGROUND!  Oh my gosh!  Somebody move that thing!!  The light seems to have disappeared, and I up my ISO.

So I was heck-bent on a solution, for this trash-matter. (Yes, there is such word as heck-bent.)   I have spent many a moment, just standing in this room or the other, brainstorming on a solution.   And I’ve had a successful brainstorm or two, as a result of my desperation.

6_corner-shelves-repurposed

As you enter our kitchen from the front of the house, we have these corner shelves.  When we first saw this house and bought it, I thought these shelves were as cute as the dickens.   Another little unique feature to our first home, to display cute little things.   Most recently, I have had these storage baskets on the shelves, because I really needed somewhere to put ‘stuff’.  Like extra phone books we might need sometime.  I did get past that one, and just throw them out. But then….the cover would get stuck open. :  (  Or, the umpteen photo lab invoices I get.  Those piles of paper I mentioned before, or questionalbe mail. Etc.  It was a great idea for awhile for another place to stick things, until I saw the clutter in the baskets!  So I got creative and bought matching table place mats to throw on top.  ; )    I was feeling super-clever until one day, my Dad was here, and as he walked by for the 100th time that day he said, “What are these things anyway”.   I told him-storage baskets.  He said, “OK, but why are those things on top?”  So I told him; to cover the clutter of course.   But by his, “Oh. O.k.”, and the moment he took to take that in,  I got the feeling he thought that was tacky.

Now, I am quite sure my father doesn’t really know ‘tacky‘ when he sees it.  So I was concerned.  About my basket covers. Not him.  Hmmm.  We have a problem, Houston.

7_corner-shelves-repurposed

Once upon a time, I kept a few cook books on these triangle shelves.  They were awkward items to keep there.  I had a few decorative kitchen items too.  All of it could have been cute.   If no one (like me) looked closely enough at the dust that collected on the shelves and the things I kept there.

I had better use for that space.   I told Michael I had a good idea for the kitchen.  He’s all ears now-a-days.  He’s come to realize the genius that I am with my ideas.   I knew he’d see the light, in time.     ; )

–

1. So Michael ripped out those shelves and supporters, and took some measurements.

2. Then he built a custom-fitting container.  That was, of course, after he accepted the fact that he would have to buy larger trash bags from now on, and that would mean fewer in a box also.  That took a bit for him to live with in his mind, but he came around again.

3. To finish it, he built a nice door for the cubby.  (And now, what I see is that counter-cabinet above it, that I despise. It’s next on my hit-list. But we won’t go there today.)

kitchen-trash-solutions-1-2-3-8

kitchen-trash-solutions-1

It’s really nice though.  I could look at it all day.You know how you do that, with new things in your home?  I might tomorrow, too.

–

kitchen-trash-solutions-2

It opens perfectly quietly.  And when you throw trash in, you can’t miss, or not be able to close the door again.

–

kitchen-trash-solutions-3

The container itself,  pulls right out, for easy trash bag changing.  There is felt buttons on the bottom, so it just slides in and out softly.   The door closes completely silently.   There is a spring hinge on it.
–

kitchen-trash-solutions-4

The door is built with a wainscot paneling face, framed out, and a brushed nickle knob.   The wainscot bead-boarding flows the lower walls of our home in the sun room, flowing right into the main living space under the breakfast bar, and wraps around right into the wall of the kitchen.

YOU can do this too, in any floor level kitchen cabinet, to hide your own trash container!  You can build a custom fit trash bin, to maximize your trash cabinet size! Just be sure a trash bag will fit your new container.  Or, just stick your current trash container in a cleared out cabinet.

–

15_school-room-cabinets

The trash door now also now matches out school room cabinets Michael did.  They still need kick-board faces on the bottom.

–

17_kitchen_cupboards_lower

 In time, we’ll be replacing these kitchen cabinet faces with the same  doors.  They aren’t TOO bad looking.  And thank goodness, because who knows if it could be years before they get done.   But, they don’t really say ‘farm house’ to me.  And remember…I’m pretending I am living on a farm.   Minus anything gross.
–

18_notrash

The best part?   No UNSIGHTLY trash can to look at anymore!  I can’t tell you how happy this makes me. I ride these joys for weeks on end.  And some days, when I need a little pick-me-up to think about how far we have come, I say out loud to no one in particular……”Remember when we had that ugly, nasty-covered trash can in the kitchen, right by the stairs?  Man, WHAT were we thinking all of those years.  HOW did we even let people come over?“

19_openfloor

There is no longer panic coming up those stairs with my clients. My kitchen floor plan is wide-open, and the eye does not stop in some black sticky-topped container.  It’s a sunny, leisure Sunday drive.  Not a cloud in the sky looking east-ish.

See?  I am my own therapist.  And all it costs me is a little fluttering of the eye-lashes, and asking Honey, nicely, if he”ll make my new little dream come-true.

It’s a beautiful day in the neighborhood.

Who wants to come over and throw somethin’ out with me?!

Save

Save

Save

Save

Save

Save

Filed Under: Home Improvement, Home Projects, Organization, Re-Purposing, The Homestead Tagged With: hiding-your-kitchen-trash, home improvements, kitchen improvement, organization, trash-can-ideas, trash-solutions

How Doing Puzzles Benefits Our Brain

March 21, 2010 By Laura 2 Comments

Puzzles are not only a great deal of fun, challenging, and an enjoyable way to pass time, but putting together puzzles benefits our brains in numerous ways! For people of all ages. The brain can be so fascinating, as we all know, and learning the many ways in which doing puzzles help our brain health, is really cool.  I’m going to tell you the many ways as to how, in just a moment.
(And by the way,  I should also let you know that this post has a couple of affiliate links.)

puzzles-benefit-brain-3

Real quick first though, I wanted to show you a very different kind of puzzle, than we had ever done before.

1_esphera-sphere-puzzle

My father had this 540 piece sphere puzzle, and he couldn’t figure it out how to piece it together. So he brought it along when came to visit one weekend, to see if the kids might want to give it a try. It’s a very unique puzzle, in it’s spherical shape, which as you can probably imagine creates new challenges to assemble, as opposed to the more traditional flat table puzzles.

It is a puzzle that is a bit more complicated.  At first glance, the pieces look typical of any other puzzle.
However, they are actually plastic pieces, and have a slight curve to them.

puzzles-benefit-brain-4
puzzles-benefit-brain__5 But the backsides are where they really differ.   They all have a little number on them, from 1-540, which is of course, how many pieces are part of this puzzle.   This is where our 7 year old triplets were able to help the most.  They grouped the numbered puzzle pieces into their proper hundreds:  100’s, 200’s, 300’s, 400’s and 500’s.  And then got them more so in order from there.  Great educational help, from the triplets.
–

puzzles-benefit-brain__007  But {A}(12), our oldest, really did most of the puzzle assembly.  You would think the numbers on the back of the pieces, really give away quite a bit, as to what pieces go where.  But if you think about it, each piece connects to at least 4 others.  So number sequence is hardly at play at all times.
–

puzzles-benefit-brain-8
It really is a bit a tricky thing, to connect them just right too, as there is no table or hard surface, to press down on.  Out girl found her technique though, and you would, too. In addition to the typical challenges of a puzzle, you don’t have a photo of the puzzle on all sides for this spherical one.  Of course, you do have the numbers to help guide you somewhat.  Still, it does take some focus and attention.
–

It’s a proven fact, that puzzles are good for one’s brain.  EHow offers these facts about why puzzles are so good for your brain:

• The brain is a highly complex machine that constantly forms and reinforces connections between its 100 billion cells. Performing mental exercises, such as puzzles, can help form new connections and boost long-term mental performance.
–

Making Connections

• Connections between brain cells, and in turn the ability of each neuron to chemically signal the 10,000 or so other cells it connects with, are what form memories.

puzzles-benefit-brain-2

Strengthening Connections

• Memory retrieval and the ability to process new information is associated with brain health.
Puzzles can help with both of these important brain functions by strengthening the connections between brain cells.

–

Giving Your Brain a Work Out

• Just as you exercise to build and maintain muscle mass, you can also strengthen your brain by exercising it.
Engaging in problem solving exercises creates new connections in the brain while strengthening old ones.

–

puzzles-benefit-brain_006

Use It or Lose It, Baby!

• If you don’t give your brain a solid work out, your mental strength starts to deteriorate.
As you age, it is important to keep your brain fit through routine exercises.

–

puzzles-benefit-brain-9

Continued Importance Throughout Life

 • According to one study in the Journal of the America Medical Association, elderly people who strengthened their synapses through ten sessions of brain-boosting exercises showed improvement in memory, reasoning skills and mental processing, “well beyond the specific skills the volunteers learned.”

–

puzzles-benefit-brain_010

So we can only assume, that puzzles are a great mental exercise, for our kids!  Or anyone, at any age.

I’m thinking with all of benefits for our brain, I could really stand to join my kids doing a few puzzles, or 1,000, myself.  Perhaps the younger kids start enjoying puzzles, the more their brains can benefit from them.    I think I’ll be encouraging doing more puzzles for my own kids, as an activity for those rainy days, or an after-dinner wind down before they settle into bed for the night.  I already know that they love to do crossword puzzles, and the more structural type.  But we need more old fashioned puzzles to put together around here! What a great idea for Christmas present, come to think of it. And putting together puzzles can be a great family-time activity, as well!

Here are some more ways in which kids doing puzzles benefits their brains:

• Hand-Eye Coordination     • Fine Motor Skills      • Gross Motor Skills      • Problem Solving
• Shape Recognition    • Memory    • Setting Small Goals

I haven’t been able to find this fairies design sphere puzzle online yet. But some of you homeschoolers may also love this other Esphera spherical puzzle (540 pieces) that is a world globe, which of course would not only be fun, but a great geography learning as well.

puzzles benefit brain
But if you and your family prefer traditional puzzles, they are just as fun, and of course give you all the benefits, too!

puzzles-benefit-brain-1

All in all, I think the likely perks of doing puzzles now and then, can be great for anyone.  If nothing else, it’s a leisure and relaxing activity, that exercises patience and persistence as well.   But as we all know now, there is so much more in it for all of us, than that!

Save

Save

Save

Save

Save

Save

Save

Save

Save

Save

Filed Under: Elementary Homeschooling, Games, Homeschooling, Middle School Homeschooling, Science, The Big Picture Tagged With: brain-development-activities, educational-games-for-kids, homeschooling, how-puzzles-benefit-our-brain, puzzles, puzzles-develop-brain, puzzles-increase-memory, puzzles-make-you-smarter

  • « Previous Page
  • 1
  • …
  • 53
  • 54
  • 55
  • 56
  • 57
  • …
  • 100
  • Next Page »

We are wicked happy to have you here! We hope you find much inspiration, help, humor and enjoyment here.


Archives


POPULAR POSTS

* * * * * *

SUBSCRIBE to House of Joyful Noise blog! Every new post, delivered right to your email box!


Privacy Policy

Amazon Affiliates

Never at any additional cost to you, we may earn a small commission for our endorsement, recommendation, testimonial, and/or link to any products from our website. Your purchase through our links helps support our family, while sharing with you the products we authentically use and recommend, for various ideas, and letting you know where you can purchase them. Thank you for your support!

[footer_backtotop]

Copyright © 2026 HouseOfJoyfulNoise.com · Genesis Framework by StudioPress