• HOME
  • {A}’s Chipmunk Training Archives

 Homepage

  • The Homestead
    • Home Projects
    • Home Improvement
    • Home Decor
      • Seasonal Home decor
        • FALL Home Decor
        • WINTER Home Decor
        • SPRING Crafts and Creations
        • SUMMER Crafts and Creations
    • Our Chickens
    • Gardening
    • Organization
    • Re-Purposing
    • Furniture Refinishing
    • Budget
  • Crafts & Creations
    • Seasonal Home decor
      • FALL Crafts and Creations
      • WINTER Crafts and Creations
      • SPRING Crafts and Creations
      • SUMMER Crafts and Creations
    • DIY (Do-It-Yourself) Project
    • Kids Arts and Crafts
    • Homemade/Handmade Gift Ideas
    • Holiday Crafts
    • Fan Pulls
    • Free Printable/Downloadable
    • Sewing Projects
    • Giveaways
    • Business Features
  • Recipes/FoodFun
    • Breakfast
    • Lunch
    • Main Dish
    • Sandwiches
    • Appetizers
    • Slow Cooker
    • On The Grill
    • Side Dishes
      • Soups
      • Salads
    • Baking
      • Breads, Rolls and Muffins
    • Snacks
    • Treats
    • Desserts
    • Drinks
  • Homeschooling
    • Elementary Homeschooling
      • Elementary Homeschooling READING
      • Elementary Homeschooling MATH
      • Elementary Homeschooling LANGUAGE ARTS
      • Elementary Homeschooling SCIENCE
      • Elementary Homeschooling HOME ECONOMICS
      • Kids Arts and Crafts
    • Middle School Homeschooling
      • Middle School Homeschooling SCIENCE
      • Middle School Homeschooling HOME ECONOMICS
    • Language Arts
    • Math
    • History / Social Studies
    • Geography
    • Foreign Language
    • Field Trips
    • Games
    • Nature Study
  • The Big Picture
    • Life In General
    • Celebrations
    • Faith
      • Into the Light; The Series
    • Giveaways
    • Reviews & Sponsors
  • Photography & Lettering
    • Photography
    • truck lettering
    • vehicle graphics
    • Newborns
    • Kids
    • Engagement
    • High School Senior Pictures
    • High School Senior Pictures Sneak Peeks

American Pinwheels

July 1, 2010 By Laura 9 Comments

american-pinwheel-craft-1

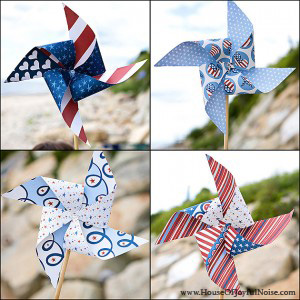
We had some guests down a couple of weekends ago, and while they were here, the kids and I got to making pinwheels.  O.k., in the end, it was mostly me really working on them.  They needed to be fine tuned, to work properly.  Making this quick little craft was on my agenda, so I already had the supplies.   The kids who visited us each took one home.

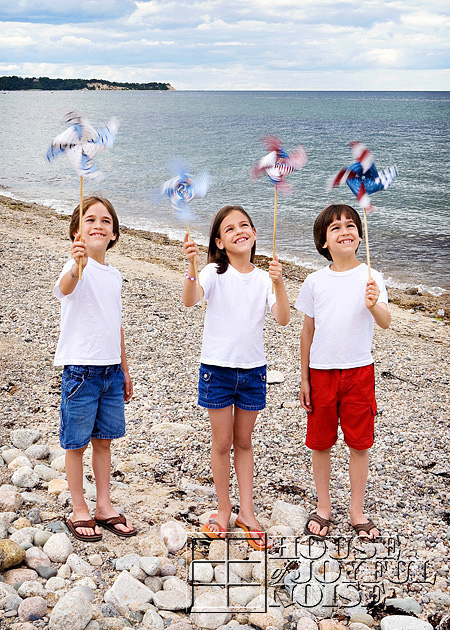
Ours has served mostly as home decor, since then, being the time span between Memorial Day weekend, and the 4th of July.   But today we took them down to the sea shore to really test drive them!
american-pinwheel-craft-2

They worked alright!

american-pinwheel-craft-3
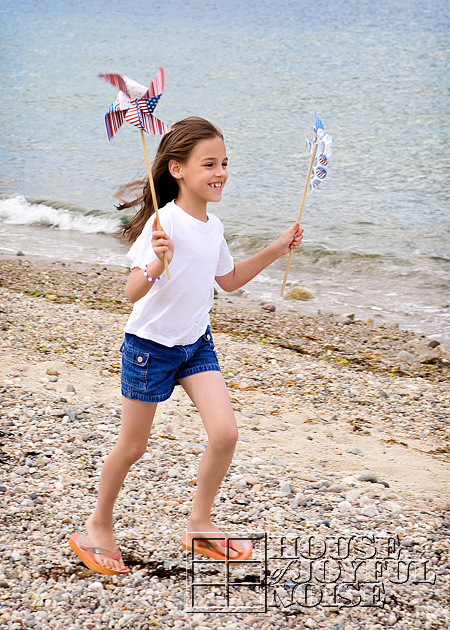
The kids even ran like the dickens with them, to really get those pinwheels spinning.

american-pinwheel-craft-4

I was impressed with how fast the kids could run, with flip flops on, on rocks no less!
american-pinwheel-craft-5

Well, maybe except for {O}.  I’m going to be honest here.  My girl runs like a girl!   Even when she has brand new sneakers on, that are supposed to make you run faster than ever, right?   ; )   She has the daintiest run I have ever seen.  But you know I love her.  Running fast isn’t everything!
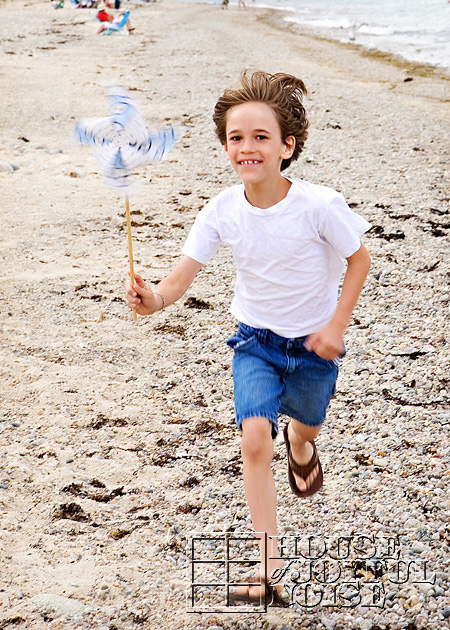
american-pinwheel-craft-6

Well, maybe to this one, it is.  He is another story.  {S} is definitely the runner of the family. He runs, and runs, any chance he gets.   Sometimes, when he shouldn’t.  To see him walk, when he really wants to run, is so comical.  (Well, to me as his mother, who knows him better than anyone else on earth.)   It takes everything he has within himself, to keep himself from running.  He truly needs to concentrate on every single step.  This is my boy who probably shoots an average of 1,000 hoops a day.  He really burns it up.  Look at that pinwheel spin!
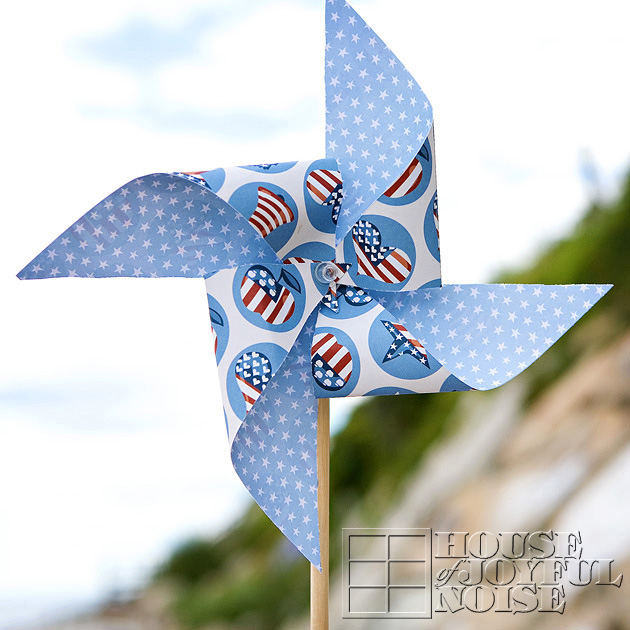
american-pinwheel-craft-7

Making these is really so easy.  You start with square sturdy / heavy weight-ish paper.  I found American-themed 12 x 12 scrapbooking paper at, where else?,  Michael’s Arts and Crafts store.  I was thrilled there were several patterns, with different patterns on the back sides.  Can you say perfect?! I can.  I did.  I bought lots.

If you don’t know or remember the specifics of how to make a pinwheel, (as I did not) you can follow some general directions here.   I had my heart set on making some real Mack-Daddy pinwheels, so we started out using the full 12 x 12 sheet!  But guess what?  They didn’t work.  Hey, I’m no engineer.  12″ was too big, too floppy, too much.  That’s why I ended up crafting by myself in the end, fixing them all!   You think I’m going to let one of my crafts fail?  Heck no!  People talk!  These babies were going to spin like the dickens, and no one was leaving until they all saw it happen!
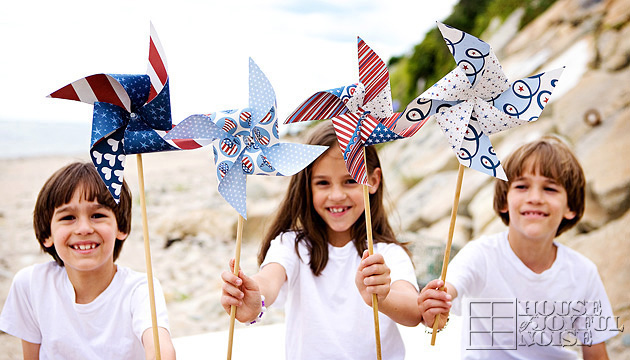
american-pinwheel-craft-8

In the end, we had a few 9″ ones, and a few 7″ ones.   They all worked.  I do have a tip or 2 though.

TIPS

• When you are making them this big, and cut the paper from each corner of the square toward the middle, it’s important to really stop 2 to 2.5 inches from the center, with every cut.   What’s more, I also took about a 2″ inch square of paper from the scraps, and sticky tabbed it good to the center of the back of the pinwheel.  This really gave it some better re-enforcement, and spinning power.

• Also, I used sticky tabs, when bringing every right-side corner to the center of the wheel, between every layer.  That makes it a lot easier to hold it together until you put the pin through anyway, but again, it gives it a flatter surface in the middle to spin better.   We used push pins, and 1/4″ dowels, sticky tabs and square heavy paper.
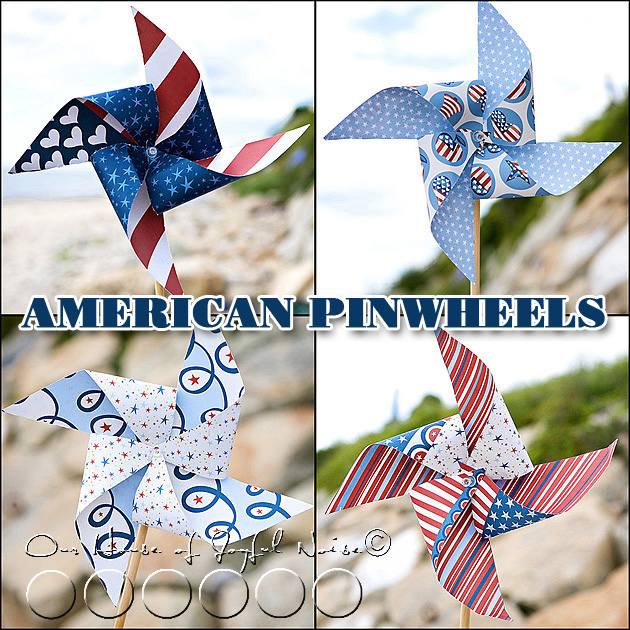
red-white-blue-american-pinwheels-text

The kids will be taking their American Pinwheels, and Liberty Shakers, to the parade and the fireworks this weekend.

We’ve got a full agenda for the long holiday weekend. A good mix of fun, relaxing (lol, we try but we’re not so good at it), celebrating, and of course…working around the homestead.  There will be SO much to share with you, when all is said and done!  What are YOUR family plans this 4th of July weekend?  We’ d love to hear how you plan to spend it!   Be sure to have fun, and stay safe!

Save

Save

Filed Under: Crafts & Creations, Holiday Crafts, Kids Arts and Crafts, Seasonal Crafts and Creations, SUMMER Crafts and Creations Tagged With: american-crafts, how-to-make-a-pinwheel, July-crafts, kids crafts, pinwheel-directions, pinwheels, red-white-blue-crafts, triplets

Mid-May to End of June 2010 | Front Yard Gardens

June 29, 2010 By Laura 12 Comments

03_-300x214

There is so much to catch you up on, where our front yard gardens and transformation goes, that I’m lost in my own thoughts, in trying to figure out where I tell you what we’ve gotten done, and where I tell you about where all of this work in progress is heading.  So, if it all seems a little mixed up at time, that’s pretty much where my head is at.

But to brief you, in case you are new around here;  Our front yard was basically just a big square sandy lot, with no purpose or beauty of it’s own, for all of the years we have owned our home.  We have had a side yard that we have utilized well, but the front yard, parallel to the (dead end) street we live on, was never safe enough for our very-young kids at the time, nor private enough to relax in.

But then early last spring, we decided to start a couple of gardens.  Once we got our feet wet, we fell in love with gardening, and the dream gardens and front yard transformation plans began to unfold, and take on a life of it’s own.  The big progressive goal, is to change our front yard, into a beautiful, charming semi-private garden wonderland of our own. We’ll be sharing the details of those plans as we go along in the posts like these.  We’ve got a long way to go, but we’ve come a long way too!  But for this post, I’m going to show you the kick-off of our gardening work this second spring, and very soon I will be posting how things are looking right now.  The growing in the gardens change so much by the day, it’s hard to blog about!  By the time I take photos, and edit them, and get a post started, the gardens look completely different once again.  But I’m doing my best.

01_winter_rye

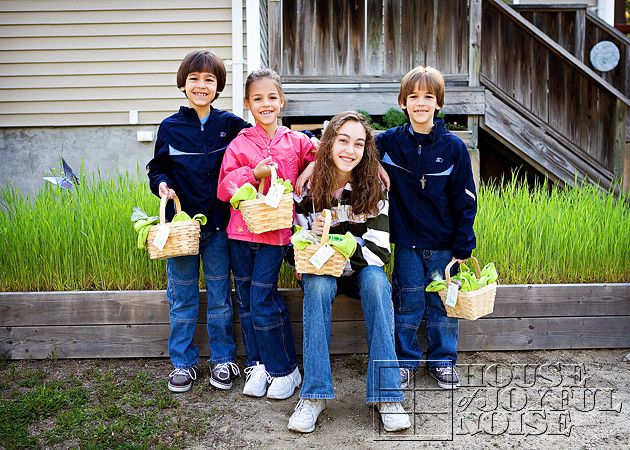
First, I just wanted to share this photo from the first day of May with you, because I never took a photo in the winter as I should have!  What I am showing you, is not the beautiful children I am happy to call my own, but the beautiful green winter rye, in the garden bed behind them.  When we had first built these garden beds, I was concerned about how ugly they would look in front of our house, in the dead of winter with no snow.   Then, it was recommended to us to plant winter rye, which would grow through the winter, and was good for the soil too.  In the spring, we were to till it into the soil to nourish it.  I can’t tell you how beautiful it looked all winter long, with this fresh green rye coming up through the white glistening snow. (We had lots more snow this year, than usual.)
About mid-May, we cut it all down and tilled it into the garden beds.   It was sad and a tad painful!  I couldn’t get planting fast enough, to add oomph to the drab looking place, after that.
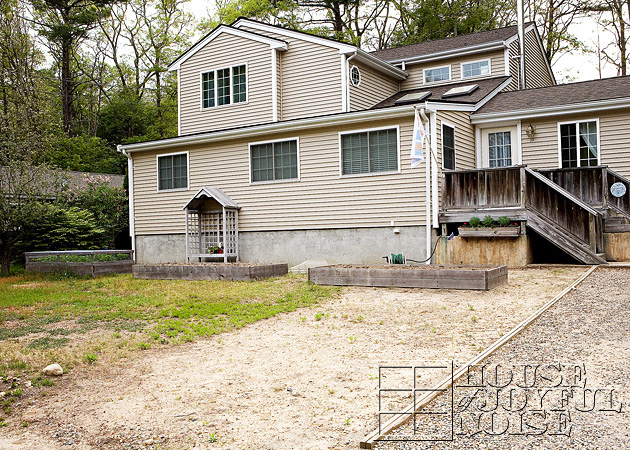
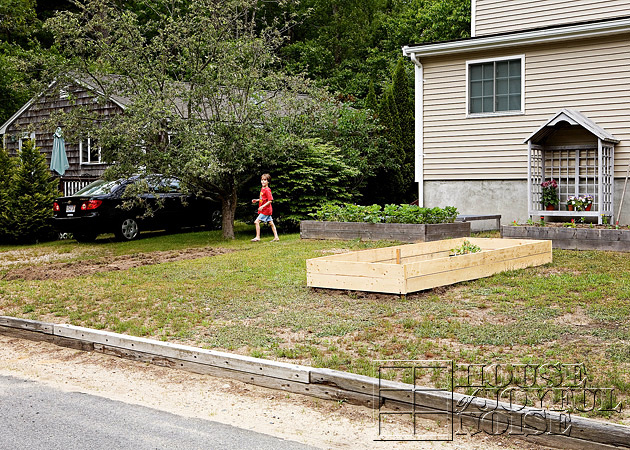
02_ Here is a glimpse of the state of it all, before we got planting for the year.  If you recall , we expanded the front (grass-less) yard last year, by sacrificing some of the extra-wide rock driveway we didn’t really need.   That made more room for a 3rd bed across.

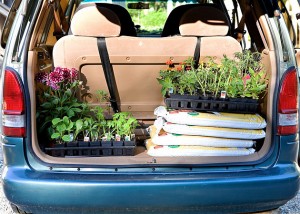
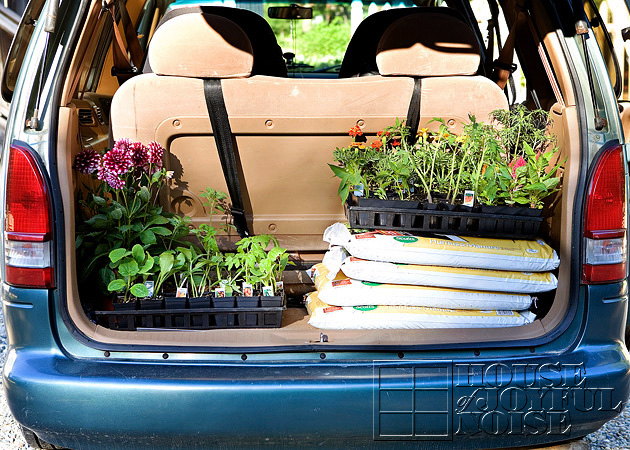
03_ Our trip to the local nursery gave us most all of the starter plants we needed, to get things going.  We got various vegetable plants, some we are growing again, and some new ones too, as well as helpful flowers that make our gardens prettier, keep some pesky things way, and also draw the right insects for much needed pollination.   We’ll have a closer look at all of these plantings very soon.   You also see some bags of compost, which I’ll be getting to in a moment.

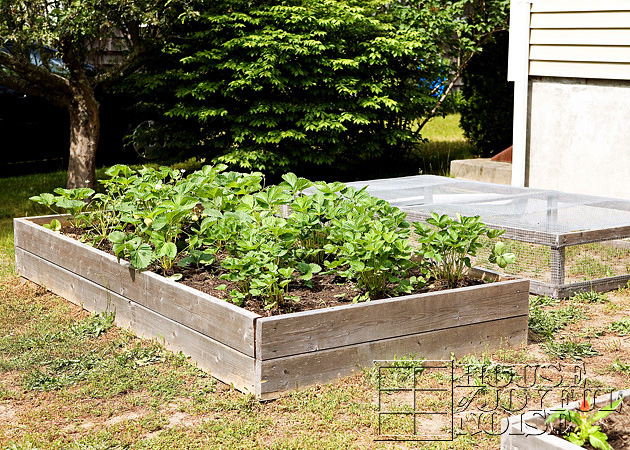
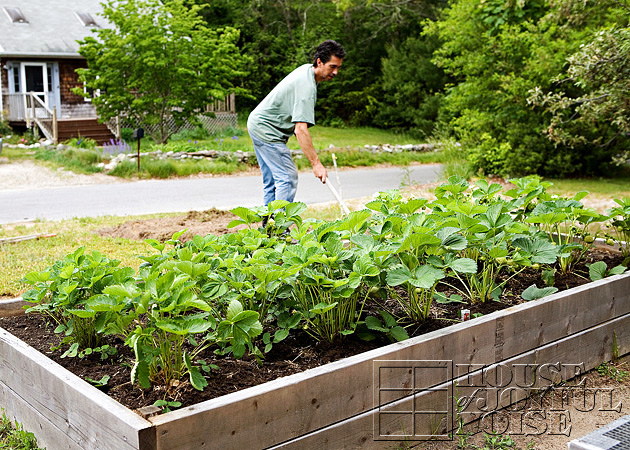
04_ Our strawberry bed, here in mid May, was doing fabulously in it’s second season.  You have seen some strawberry posts since, of the berries it has given us.  It’s grown SO much since this photo, but we have tended it well, having learned much last year.

05_ Michael built a 4th garden bed, once we mulled over the layout that the whole transformation will ultimately be.  He was going to build a 5th too right away, but we never got to it, before early spring had gotten away.  That’s o.k. There is always next year!

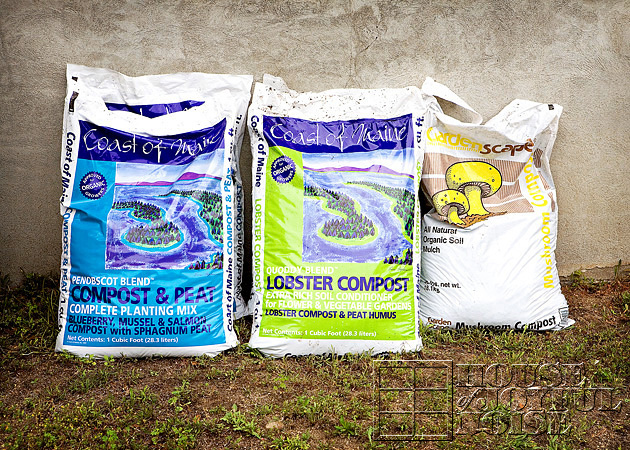
06_ This is new compost we are trying, all recommended by the nursery we frequent.  We have mixed this stuff into all of our beds, and I can tell you, it’s doing some amazing stuff!

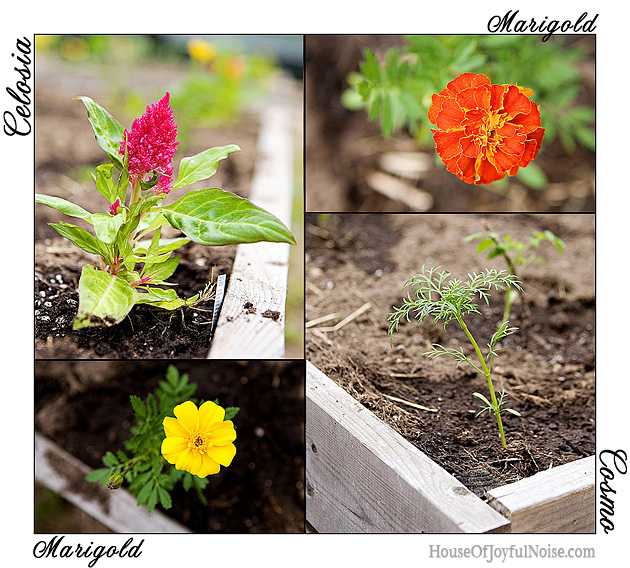
07_flowerscollage These are the flowers that we have planted along the inside edges of the beds.  They are all just baby plants here!  They have grown to ridiculous sizes since.  No doubt due to the new compost we added!

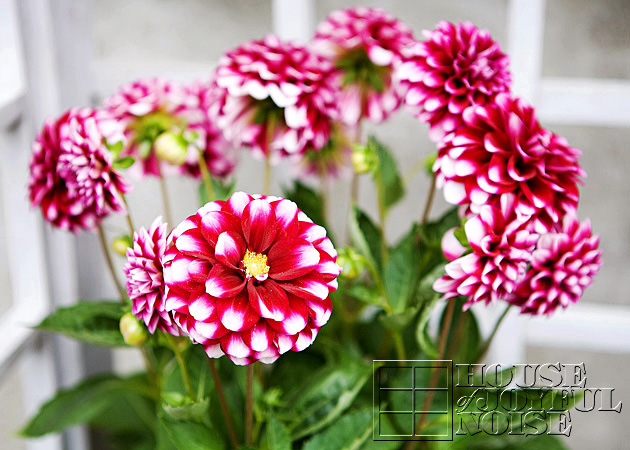
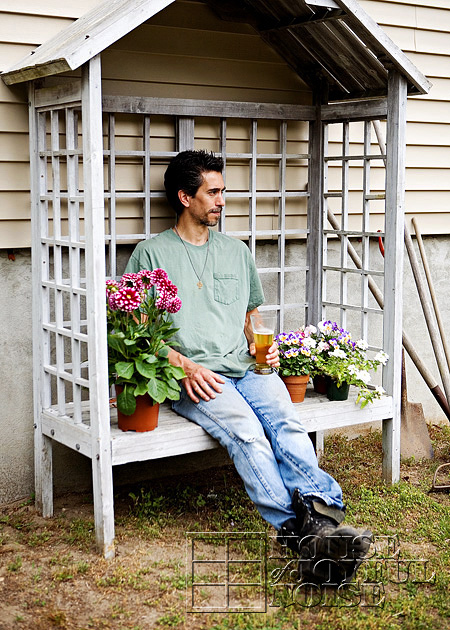
08_dahlias Dahlias.  Oh how I love dahlias.  Big, big, big plans for dahlias of all kinds, in time.  But for now, this pot of them sits on bench.   Michael really did not want to spend the money on them, so I am doing all I can to make sure it keeps growing and thriving and spewing beauty.  Because he loves to remind me, it was $12.99, and if it dies, I can tell you I will never hear the end of it, for as long as I live.

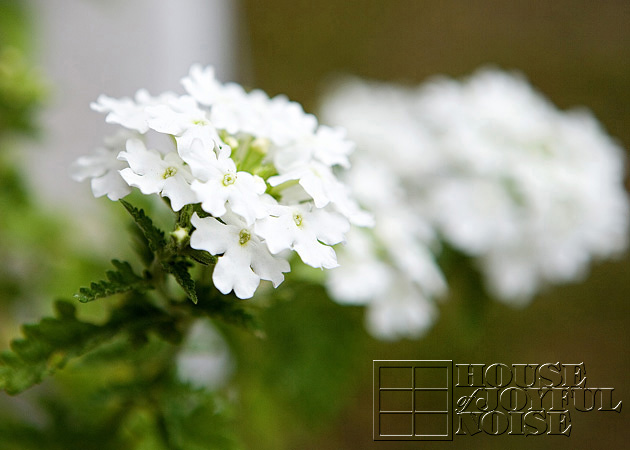
09_verbenas The verbenas have been thriving and growing, in 2 colors.   I love them.

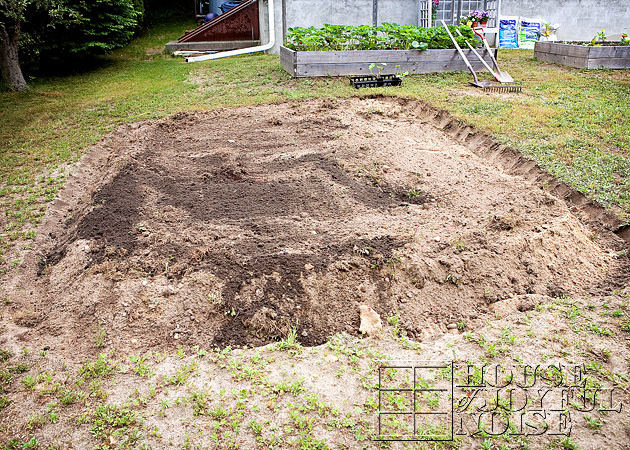
10__digging On the other side of the strawberry bed here, Michael is working very hard, at a new and exciting addition to our gardens….

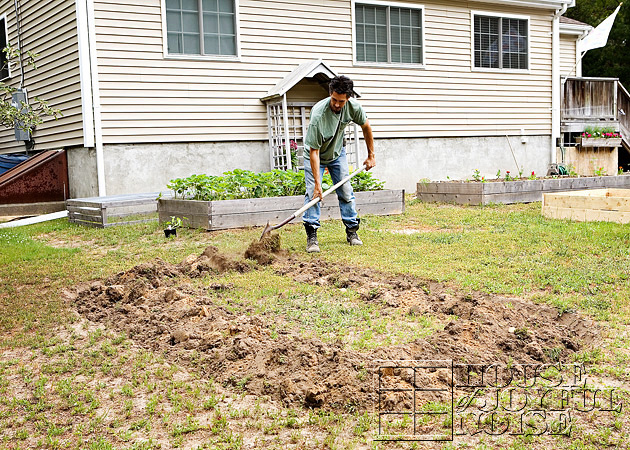
10_ ….our very own little pumpkin patch! <squeal!!>   If you all have been around in the autumn months here at OHOJN, you might know how much we love pumpkins around our home in autumn!  We go pumpkin crazy, and get pretty creative with them too.  It’s an expensive fetish, when you are paying by the pound.  So we decided to try growing our own!!

12_rest After all of the cutting out, digging and turning-over-of-earth for our pumpkin patch, Michael decided to take a little break.

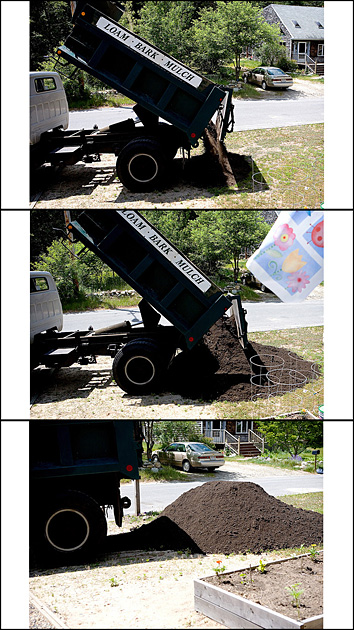
13_dirtcollage About a week later, we had 5 yards of loam delivered.   A bit of it was for the 5th bed we never got to.  The rest was for the 4th bed Michael did build, and to add some healthy loam to our sandy pumpkin patch.

14_ Michael really built it up the patch, and NOW it’s looking real good.  Wait until you see, in our Pumpkin Patch post coming right up soon, too.

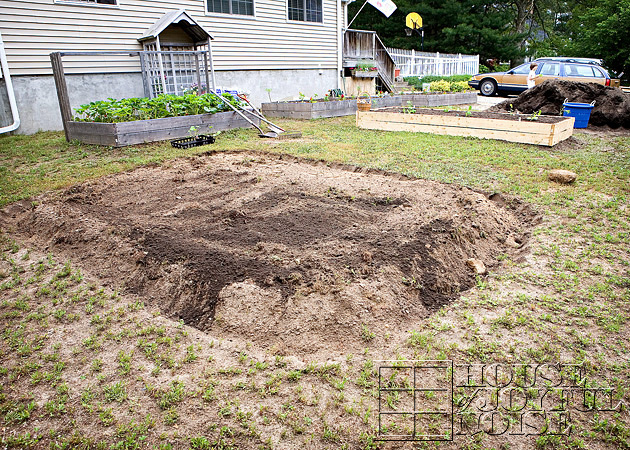
17_yardview So here is a view from the corner of our front lot.   I know…..it’s not looking all that pretty yet.  But you know what I see, when I look at this photo?  All it is GOING to be!   Honest to Pete, (….I’ve always wanted to know who Pete was….anyone know?….), you are not even going to recognize the place at all, when we are done.  Major, major make-over, by the time we are through with the renovations.   You know…years from now.  But won’t it be fun  for you, watching it all happen, little by little?  You don’t even have to work hard with us!  Well…..you could come over and help, if you really wanted.  But really….we’re not minding the hard work involved here.  It’s ever so rewarding!

So, as I said, we’ve got at least 2 posts right on the heels of this one, to show you all that is growing so beautifully, now that we are at the end of June!   We’ll also be sharing more and more of the details of of our garden/front yard transformation plans.  We can tell you, so far we’re pretty excited with where it is all going, and pretty happy with where we are at so far this year….

….which happens to be suddenly SUMMER!  And feeling like it, here in New England, I’ll tell you!  If you haven’t been to the Home Page, you may want to pay it a visit!  ; )

We’re kicking things off with this cheery little Give -Away…..

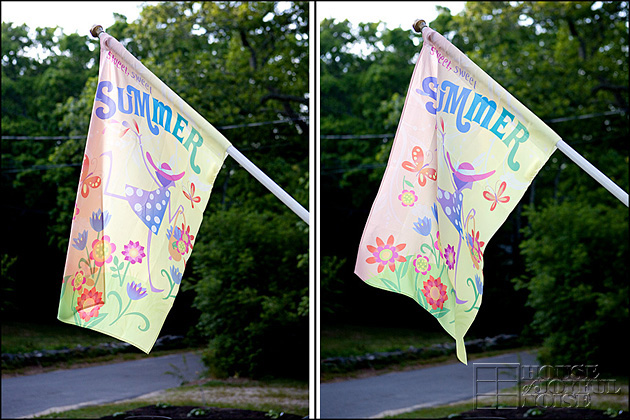
18_flag_giveaway ….Flying and flapping in the breeze, over our growing  gardens, is this happy summertime flag!  It really brings a smile to my face, to see it there, over all that is colorful and thriving.  It’s a bit of color in the air!  It’s a quality-made flag, and to me, it has the happiness of summer, all over it!

If you love it too, we’ve got one for you!

All you need to do, is leave a comment tot his post, and you are in the drawing for a summer flag of your own! If you follow me on Twitter or Facebook, I’ll make an announcement when the comments are closing for the drawing.  Don’t have a pole?  Why not hang it as a banner on the side of your house? Or, you could even give it as a gift, to someone you care about.  Surely, it’ll make someone smile, as much as it does us.

Good luck, and HaPpY SumMeR!!

Save

Filed Under: Gardening, Giveaways, SPRING Home Decor, The Homestead Tagged With: flowers, front-yard-gardening, front-yard-transformation

{O}’s (much discouraged) Haircut | Before & After

June 24, 2010 By Laura 16 Comments

Big haircut in the house!

hair-scissors-150x150
I have been talking for 2 weeks, about getting my hair cut again, because it’s driving me crazy.  This morning I mentioned out loud to Michael, how I’d really like to go get it done today.   But he said, “Me and the boys all need them too, anyway.”  We are rather spoiled, because our hairdresser, Janine, comes right to us, and cuts anyone who needs it.  SO convenient.  Sometimes I go to her, for a highlight, a dye job, or a big-deal-cut for me. But generally, she comes to us. So Michael called her as he always does (her number has always been in his cell phone), and she said she would come tonight!  She most always comes within a day or 2. Got to love that!

1_web_before Well that’s when {O} said she wanted to get hers cut short.  And then, that’s when the household went into a state of tissy, and great debate.

For some reason, her triplet brothers and big sister really, did NOT want her to get her hair cut that much.  Even her Daddy has scowled at the mention of it, many times.  I on the other hand, love it long on her, but feel like if she really wants to get it cut, she should be able to.  My only concern, is to be sure, she is sure.

Well trust me…..she was discouraged,  BEGGED, and someone even attempted to bribe her, all-day-long, not to get it cut, by her siblings.   But she stood strong, and never wavered, right to the end.  She was so excited.  She was sure.   It wasn’t necessarily about donating.   She just wanted it cut.  She’s all about style and fashion anyway.  She’s a girl like that.

2_web

Even Janine made a little disappointed expression, when she came and we told her. Although she is DYING to BUZZ the boys hair!!  She has been waiting to do that.  I do believe she will be waiting, forever, on that one.  I love my long haired boys, and thankfully, they love it long too. {S} always wants it long enough for a ponytail. lol

So Janine first cut {S}, then {JM}, then me, then Michael, and THEN {O}.  Janine asked how how much, and {O} said “to here“, and showed her shoulder level!

3

But Janine started cutting lower, and I could already tell it looked pretty cute at that length.  When Janine did all the way around, {O} went and checked it out to see if she should go shorter, but she came back out squealing, “I LOVE it!”
–

4_b_fcollage BEFORE . . . . . . . . . . . . . . . . . . . . . . . . . . . . . . . . . . . . AFTER

It really did look pretty cute!   I think it was only about 8 inches taken off.  Nowhere near the 17 inches her sister cut off last year!  But for {O}, and her size, it was a lot. More than she had ever gotten cut at once before, anyway.
–

5_wj
She had her photo taken with Janine, just like {A} did last year.
–

6_

Her triplet brothers and sister decided it wasn’t so bad after all, and they would be o.k.   Daddy also loves it.

I think my little girl is a doll, with her long or short hair.  She’s even cuter today though, because of how giddy-happy she is with her new shorter haircut.   But what I really love about her , is that she already has such a strong sense of self-confidence. She knows who she is, and what she wants, (as much as a 7-point-10 year old can) and while she will listen and consider, she is not shaken by the opinions of those around her.

She follows her own heart, and the beat of her own drummer.   I think that’s going to take her somewhere in life.
No matter what her hair looks like.

Save

Filed Under: Life In General, The Big Picture Tagged With: before-after-haircuts, Catholic-blogs, Catholic-families, girl-first-haircut-of-long-hair, little-girl-first-long-hair-haircut, triplets

A Dragonfly Wonder | Homeschooling | Nature Study

June 18, 2010 By Laura 4 Comments

huge-dragonfly-2

It’s Friday afternoon, and a beautiful summer-like day.  I was doing some stuff around the house, with all of the windows open, and the kids were all playing outside, when I hear {JM}, “WOW!  I just found a really BIG dragonfly! Guys, come look!”.  I was chuckling at how loud he was yelling, with such enthusiasm, and wondered if the whole town might come running. I slipped on my flip-flops, sauntered out there, and saw Michael was already at the site of said-dragonfly.  He said to me as I headed over, “You didn’t bring your camera?”  My plan was to judge for myself, if it was camera-worthy. ; )

I took one glance, and…..Yup! It was!!  I went and got the camera, hoping it wouldn’t fly away before I got back.

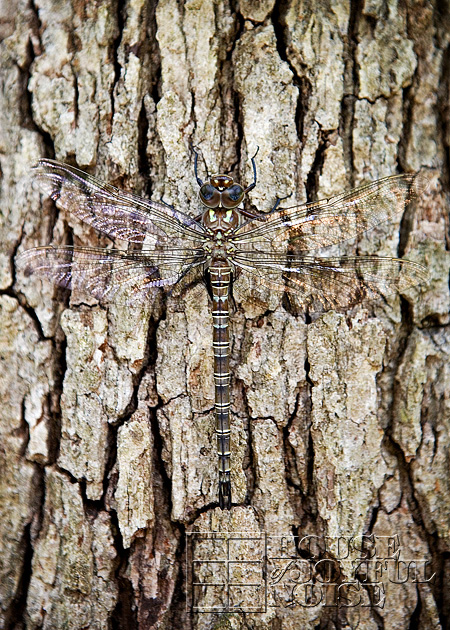
{JM} found it on the tree, just like this…..
huge-dragonfly-5

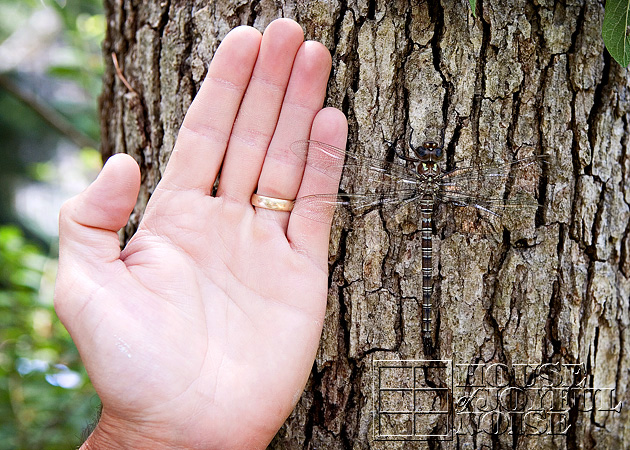
It looked like it had no intention of moving, any time soon.   It was huge.  But I knew you wouldn’t be able to tell the scale of it,  in a photo of it, on a tree.

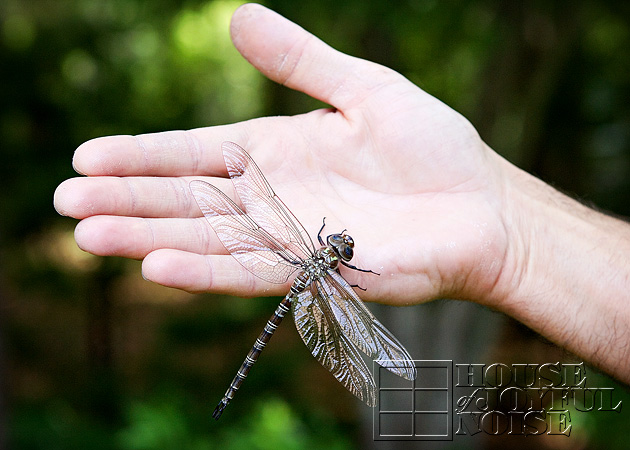
So Michael put his big man-hand beside it….

huge-dragonfly It was 6 inches, easy, head to tail.

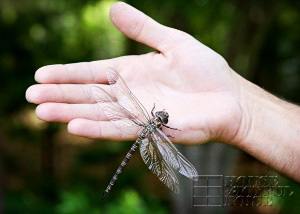
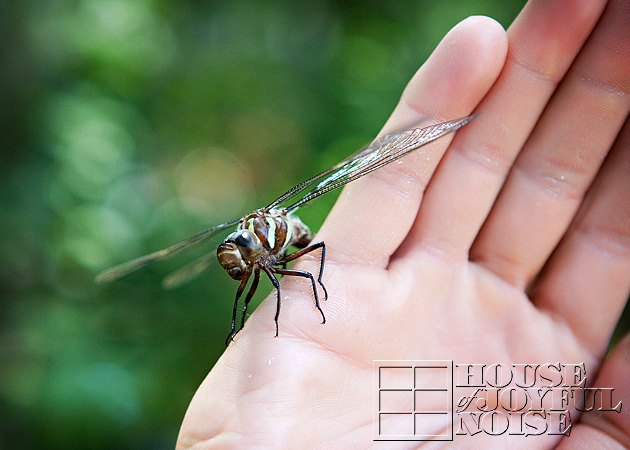
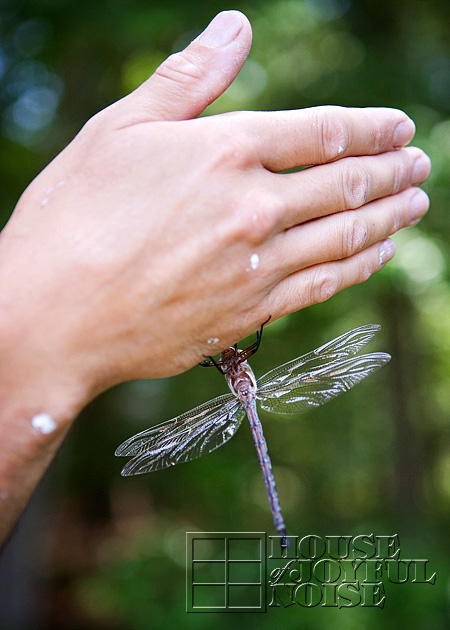
After I got those shots, Michael was dying to get it on his hand.  He managed to very gently….

huge-dragonfly-1 Just LOOK at the size of that thing!!  It did flutter it’s wings momentarily, and it honestly sounded like a bird’s wings flapping.

Maybe it’s common, but we’ve never seen anything like it, in our lives.  Have any of you New England folks ever seen one like this?  Do they grow this big in other states?

If you know what kind it is, or even have a guess, please let us know!

huge-dragonfly-4 We’ve been trying to research it, and figure out what the species is.  But I haven’t yet been able to find a photo that matches it.  We’d love to learn more about it.

Is it possible to have a ‘dragonfly hive’ in your yard, like some have bee hives?

THAT would be so cool, huh?

huge-dragonfly-3 One thing is for sure:  God’s work never ceases to amaze us.

BTW, yes, Michael has been painting, among 100 other projects we’ll be sharing with you soon enough.

Thanks for dropping by, and sharing in our marveling at the wonders of nature!

Save

Save

Filed Under: Homeschooling, Life In General, Nature Study, The Big Picture Tagged With: dragonfly, dragonfly-potos, homeschooling-nature-study, huge-dragonflies, nature-study-photography

The Math and Science of OOBLECK! | Elementary Homeschooling

June 9, 2010 By Laura 14 Comments

oobleck goop

It wouldn’t be surprising, if many of you have already heard of and made some ‘Oobleck’, with your kids.  Some may know this crazy-fun concoction by another name.  My sister says they call it ‘Goop’.

My kids have indeed made and played with Oobleck before.  I first heard about it at least a few years ago, from my friend Maria, over at Very Blessed Mommy. It’s a downright fun little activity, that will keep your little ones  happy and busy for quite awhile!  It’s appropriate for ages 4-42 (at least ; )

We’ve made it several times since that first, but this time, we looked closer at the educational aspects of math and science, that come with this very intriguing activity!  If we were going to keep playing with the stuff, it just seemed like a good idea to get a little more intellectual about it.    So here we share the recipe for Oobleck, what we learned or reviewed, and as always, too many photos.   (Thanks for understanding.)

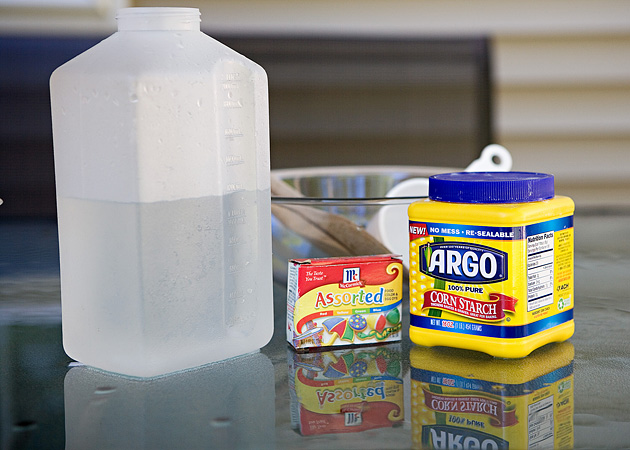
Necessary ingredients:  corn starch, water, food coloring, bowl(s), wooden spoon(s), and measuring cups.

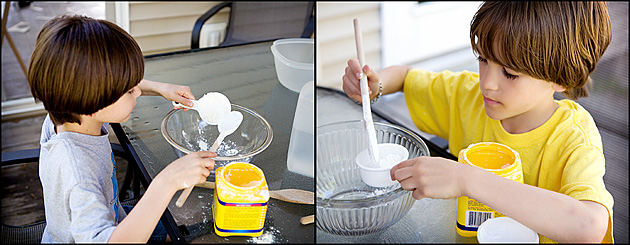
The Recipe for one batch:   2 cups of corn starch, mixed with 1 cup of water.  Then a few drops of food coloring.

Now, the recipe calls for 2 parts corn starch to 1 part water.    So the recipe is adequate for two little kids to play with.  But you could make 2 separate batches so they have their own bowl, whether you half the recipe for them or not.

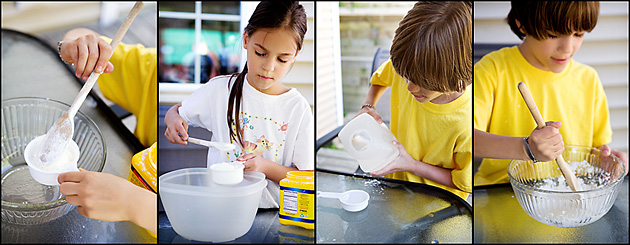
This day, we literally quartered the recipe for each kid that day, because we were running low on corn starch!  But it still worked out alright.    What’s great is, it was an opportunity for the kids to practice their measurement math.

Since the recipe calls for 2 cups, what is 1/4 of that?   How about 1/4 of 1 cup?

Not only is measuring ingredients a great exercise for their math skills, but it’s great for them to follow directions, and do it all themselves!

This is such a perfect summer time activity for kids of all ages.  Mom can make a batch for little ones, just to play in. There is no need to worry about a mess outside! Everything washes very easily away, with water!  I take the hose and just spray off the table and deck.  Once the food coloring is mixed in, there is no worry about color staining either.

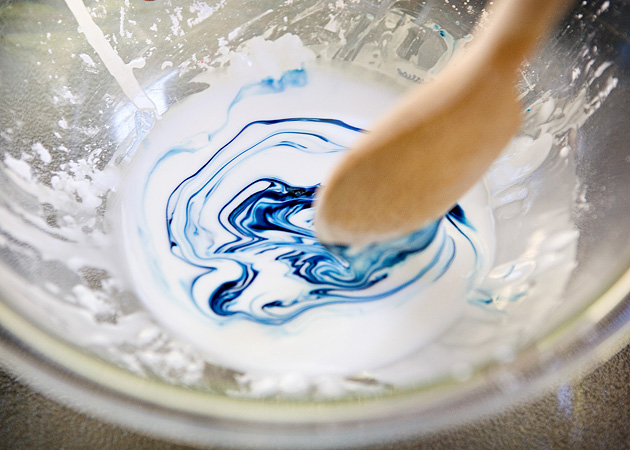
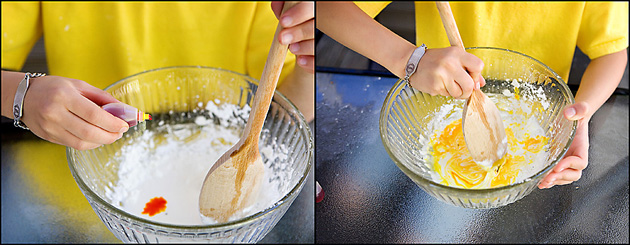
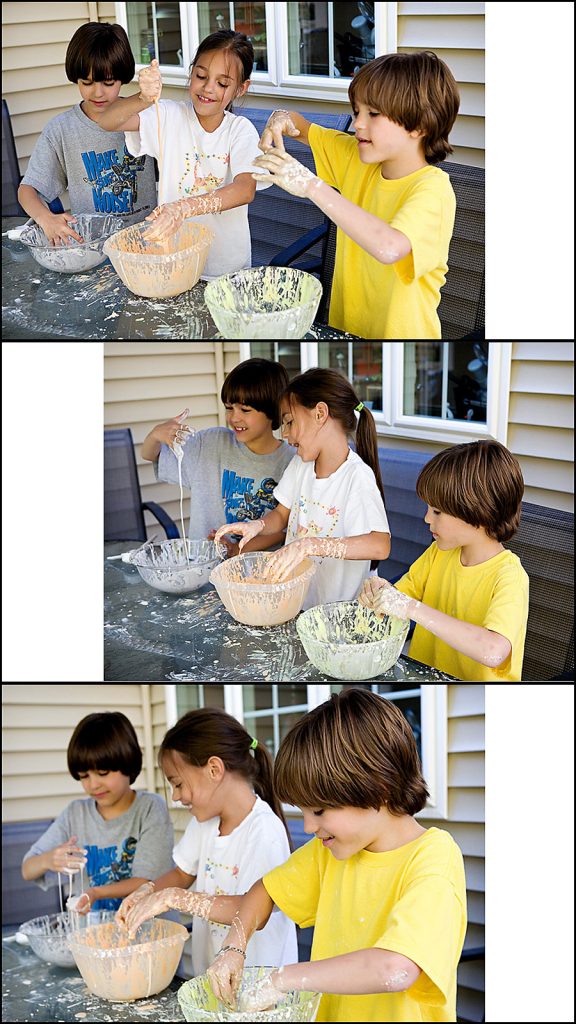
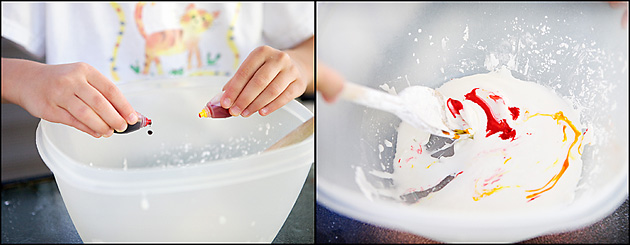
My kids had their play clothes on, so I let them put their own color drops in too.


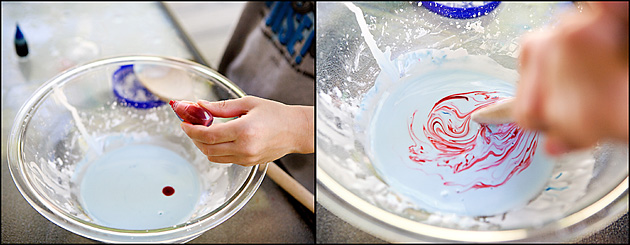
{JM} made his Oobleck blue.

  05_yellow_oobleck
{S} wanted his yellow.

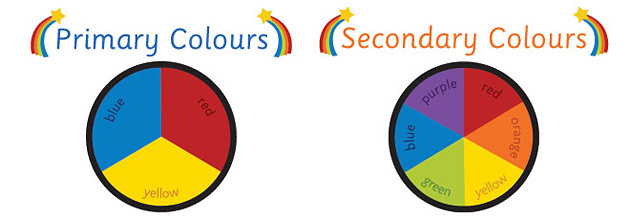
But {O} wanted hers orange.  But there is no orange food coloring, right?  Here was more opportunity to learn; reviewing color mixing of primary colors, to create secondary colors.

So I asked {O}……if the only colors we have, are red, green, blue and yellow, how can we make orange?

She knew, that red + yellow = orange.

Of course……using just a few drops, in relation to the amount of corn starch and water, we got a very light orange.  Similar to peach or orange sherbet.

{JM} decided he wanted to try making his blue Oobleck,  purple.  So I asked him what color he would need to add to his blue, to make purple?

blue + red =  purple

Again….in relation to the amounts of ingredients, we had lavender.

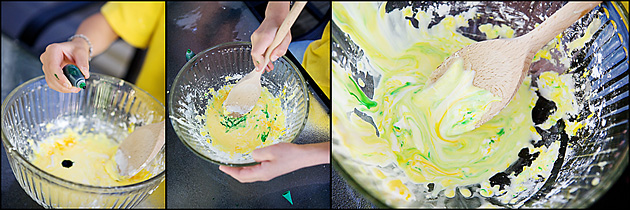
{S} wanted to change turn his yellow Oobleck, green.  Well, he knew that yellow was already a primary color, but so was green. So what would happen if he put green in his yellow?

yellow + green = lime green.

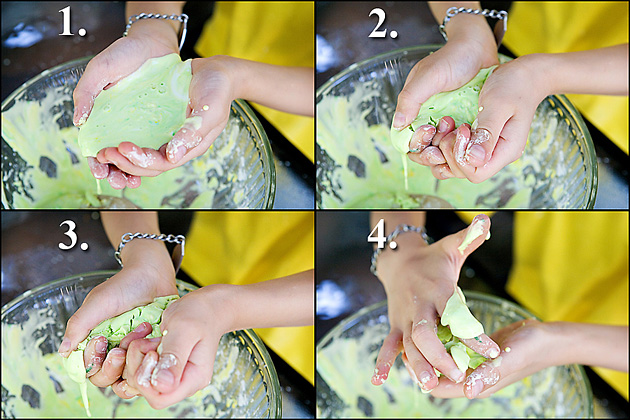
But the most interesting thing about Oobleck, is the constant change in consistency, depending on it’s state. This is where we get into the scientific study.

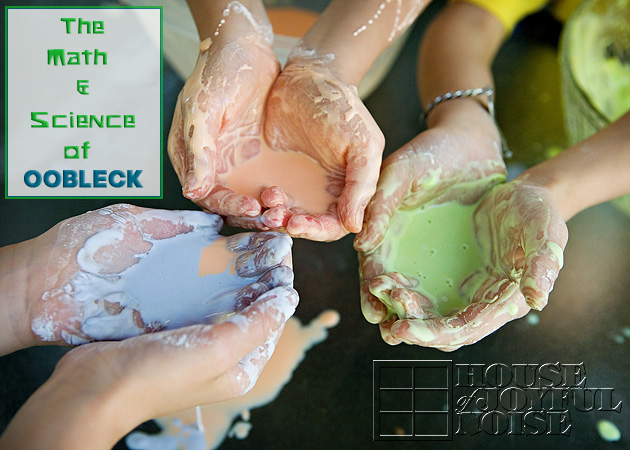
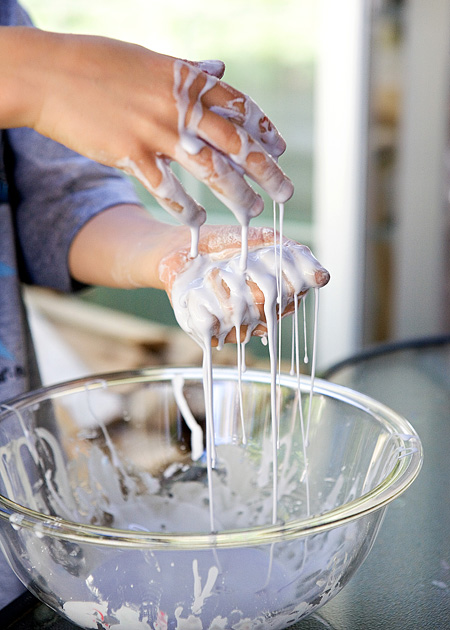
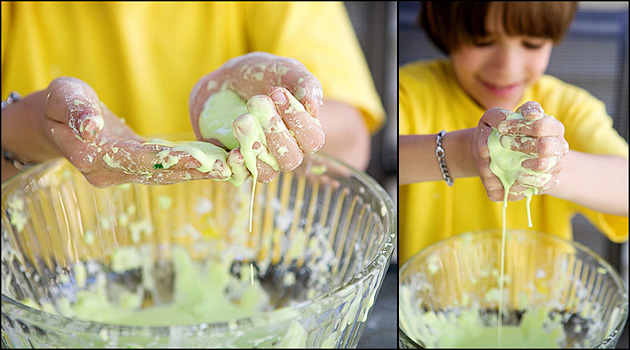
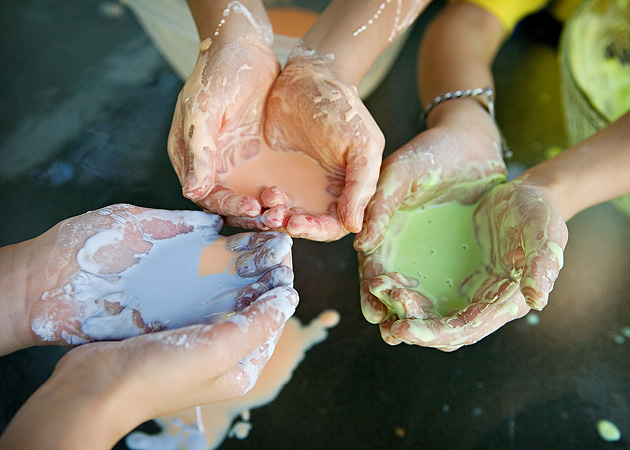
On appearance, it seems to be a liquid form.  If you run your fingers through it, it is still a liquidy form.  But any act of compression, suddenly turns the liquidy state of substance, more solid.    If you look at the photos below, in frame 1, {S} is just holding a puddle of it in his hands.  But as soon as he starts to squeeze it, in frames 2-4 it turns to a more solid mass.

But left when the compression is relieved, it begins to return to it’s liquid state again.

It’s amazing, isn’t it?

Here is a more specific explanation, taken from this link, which also has different Oobleck activities, for different ages, if you’d like to check it out after.

Water and starch do something unusual when mixed together. The substance they form pours like a liquid, but when squeezed with your hands, becomes solid. When a substance acts like both a liquid and a solid, scientists call it a discrepant substance.     Two things commonly cause this type of change—temperature and pressure.  We will see that temperature has no effect on Oobleck and that its solid or liquid state is influenced only by pressure (or lack of pressure). Squeezing it in our hands turns Oobleck into a solid. But if we hold it without squeezing, it drips through like a liquid. You can roll Oobleck into a ball, but when the rolling stops, it will become a liquidy mess!

It really is a great deal of fun to play with!  And I promise you it is not as impossibly messy as it looks.  And trust me…it looks it! But it washes away with such ease, it’s enough to make any mother smile. A REALLY BIG GRIN!!

The thrill of it it does not wear off, any time soon.

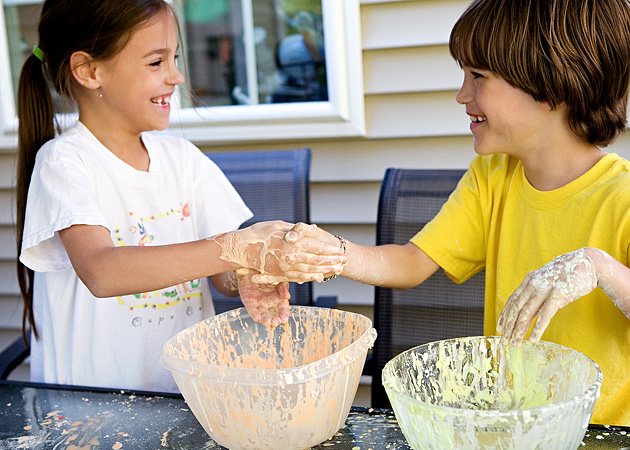
Oh, we never tried shaking hands before!!  How do you do??  <giggles> <giggles>

And the fun goes on and on and…..

…..on.   AND on.

We hope you enjoyed this post.  Have YOU made Oobleck before?  Do you call it something else?  Will you let your kids make some (again) soon?   Oh and, can YOU play with them?

Yes you can.  I sure do.

Save

Save

Filed Under: Elementary Homeschooling, Elementary Homeschooling HOME ECONOMICS, Elementary Homeschooling MATH, Elementary Homeschooling SCIENCE, Homeschooling, Math, Science Tagged With: color-mixing-lessons-for-kids, goop, goop-recipe, homeschooling-elementary-science, measuring-fun-for-kids, oobleck, oobleck-recipe

  • « Previous Page
  • 1
  • …
  • 49
  • 50
  • 51
  • 52
  • 53
  • …
  • 101
  • Next Page »

We are wicked happy to have you here! We hope you find much inspiration, help, humor and enjoyment here.


Archives


POPULAR POSTS

* * * * * *

SUBSCRIBE to House of Joyful Noise blog! Every new post, delivered right to your email box!


Privacy Policy

Amazon Affiliates

Never at any additional cost to you, we may earn a small commission for our endorsement, recommendation, testimonial, and/or link to any products from our website. Your purchase through our links helps support our family, while sharing with you the products we authentically use and recommend, for various ideas, and letting you know where you can purchase them. Thank you for your support!

[footer_backtotop]

Copyright © 2025 HouseOfJoyfulNoise.com · Genesis Framework by StudioPress