• HOME
  • {A}’s Chipmunk Training Archives

 Homepage

  • The Homestead
    • Home Projects
    • Home Improvement
    • Home Decor
      • Seasonal Home decor
        • FALL Home Decor
        • WINTER Home Decor
        • SPRING Crafts and Creations
        • SUMMER Crafts and Creations
    • Our Chickens
    • Gardening
    • Organization
    • Re-Purposing
    • Furniture Refinishing
    • Budget
  • Crafts & Creations
    • Seasonal Home decor
      • FALL Crafts and Creations
      • WINTER Crafts and Creations
      • SPRING Crafts and Creations
      • SUMMER Crafts and Creations
    • DIY (Do-It-Yourself) Project
    • Kids Arts and Crafts
    • Homemade/Handmade Gift Ideas
    • Holiday Crafts
    • Fan Pulls
    • Free Printable/Downloadable
    • Sewing Projects
    • Giveaways
    • Business Features
  • Recipes/FoodFun
    • Breakfast
    • Lunch
    • Main Dish
    • Sandwiches
    • Appetizers
    • Slow Cooker
    • On The Grill
    • Side Dishes
      • Soups
      • Salads
    • Baking
      • Breads, Rolls and Muffins
    • Snacks
    • Treats
    • Desserts
    • Drinks
  • Homeschooling
    • Elementary Homeschooling
      • Elementary Homeschooling READING
      • Elementary Homeschooling MATH
      • Elementary Homeschooling LANGUAGE ARTS
      • Elementary Homeschooling SCIENCE
      • Elementary Homeschooling HOME ECONOMICS
      • Kids Arts and Crafts
    • Middle School Homeschooling
      • Middle School Homeschooling SCIENCE
      • Middle School Homeschooling HOME ECONOMICS
    • Language Arts
    • Math
    • History / Social Studies
    • Geography
    • Foreign Language
    • Field Trips
    • Games
    • Nature Study
  • The Big Picture
    • Life In General
    • Celebrations
    • Faith
      • Into the Light; The Series
    • Giveaways
    • Reviews & Sponsors
  • Photography & Lettering
    • Photography
    • truck lettering
    • vehicle graphics
    • Newborns
    • Kids
    • Engagement
    • High School Senior Pictures
    • High School Senior Pictures Sneak Peeks

Homeschooling in the Kitchen | Food for Thought; Literally!

November 14, 2010 By Laura 7 Comments

homeschooling-kids-in-the-kitchen-6

I’m sure I’ve been forthright about this before, as much as it makes me feel a little bad to say out loud.  (Figuratively speaking.)  But there always moments in time when these things come up, and there is some purpose in being truthful in the matter. Right?

Well, this is one of those times.

So the truth is, <whisper> my mother was just not very domestic in the kitchen. Nor was her mother. <end of whisper> Which says something not good.  Doesn’t it?

I’ll answer that.  Yes it does.

It says that the chances of me being one, was slim to none.

Unless of course, I broke the cycle, and took responsibility for myself.  Made different choices. And God-willing, began a new cycle for my children, and grandchildren, to carry on.

(I’m not really that smart.  I read something like that in a book once.)

I have to say, I did know plenty about cleaning, weeding gardens, and working hard coming into this holy-Sacrament-of-marriage-thing.  I worked for a little old lady from the time I was 11 years old until I was14, every Saturday.  Her name was Mrs. Flahive, (pronounced with long vowels.)  I cleaned her house top to bottom, kept up her gardens, weeded her stone patio, changed the sheets on the beds, did laundry, etc.  I even polished her silver with some grayish-brown, horrid-smelling stuff. I learned a lot from her.  Although I didn’t really appreciate the value in the tasks, at the time.  I never even thought about how they would serve me well someday, in my own home-keeping years.

Some things, she was very particular about how it was done….such as the fine techniques of folding sheets, or making a bed.  It’s funny that I insist on these same techniques in my own home now. lol   She was a nice old lady, made me a fine lunch which we enjoyed together, and later had an afternoon tea as well.  And then she paid me too! She paid me well, I might add. For a kid. Of course, I was also risking my life twice a day, every Saturday, as this 80 year old woman who peered through the hole of her steering wheel, picked me and and brought me home.   I’ll never forget that time we were heading for the side of the bridge…..

But admittedly, I was slow coming around as a new bride-to-be, in the cooking and baking area.  I think becoming a mother sort of kicked me into domestic-gear. Somewhat. Until then, my husband and I did o.k., together. He did have more of a domestic mother, all the way around.  From what I could tell, anyway.  So he had watched, learned, and praise God, was not helpless himself when we married.

Yes, all of this story-telling has everything to do with homeschooling.
In particular today: Homeschooling in the Kitchen

I don’t know if they even have Home Economics in school anymore.  Do they?  But I heard they did, back when I was in school.  Problem is, I went to a private Catholic high school, where the guidance counselor, was also the Geometry teacher sometimes, and the principal was sometimes the Religion teacher. (That was a bad run.). The gym teacher helped in areas he should have never been helping, with the senior girls, if you know what I mean. (But I won’t go there today.)  In other words, we were just a small school, without any extras.  We didn’t even have a football team. Or a field of any sporty-kind.


homeschooling-kids-in-the-kitchen My mom was a wonderful mother in many ways, so don’t get me wrong.  But seeing as though I was not learning much in the kitchen at home, it would have been nice to learn about some of the cooking and baking stuff, especially, somewhere.  In retrospect, I mean. (Because I am quite sure I could have cared less at the time.)   And so seeing as though my kids are not in school, and won’t be going to high school either, where they may or may not have gotten Home Ec classes, I feel it is up to me to be sure they get some!!  Otherwise, they could end up as a floundering bride or groom some day.  And if they marry the same, there is going to be a big problem.  Like. . . . a travesty. Know what I’m saying?

homeschooling-kids-in-the-kitchen-1 So I need to be sure, my kids get a domestic bone from me, some way, some how, some day.   Hopefully before they are married, or are out on their own.  Even if they are single, I don’t want them resorting to fast foods and whatnot!

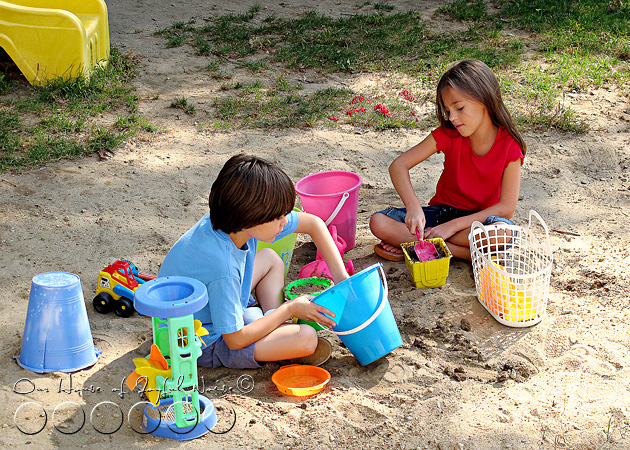
And so it was that mindset that I was in, when I got my kids (happily) helping out in the kitchen, since they were about ohhhh….so tall. (Use your imagination.  It’s pretty short.)

But it was in having them help, that I realized just how much schooling can happen in the kitchen!  And the more we do it, the more I see the lessons happening.

It’s a whole lot more than Home Economics!

Let’s see…….

homeschooling-kids-in-the-kitchen-2

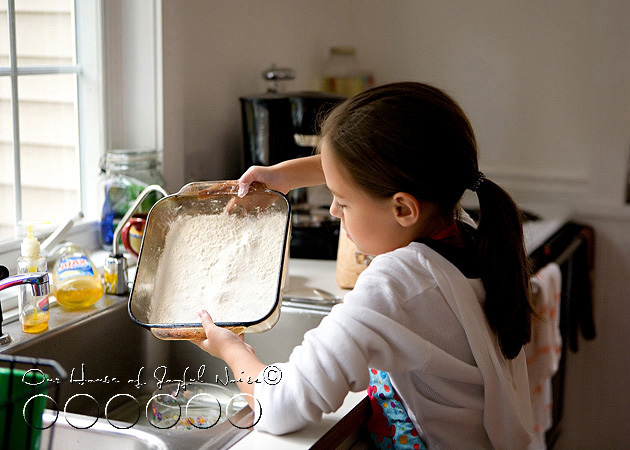
First, there is READING…..the directions.  I have them do it out loud. It’s such an opportunity for new kitchen-related VOCABULARY words, SPELLING words, and PROPER PRONUNCIATION.

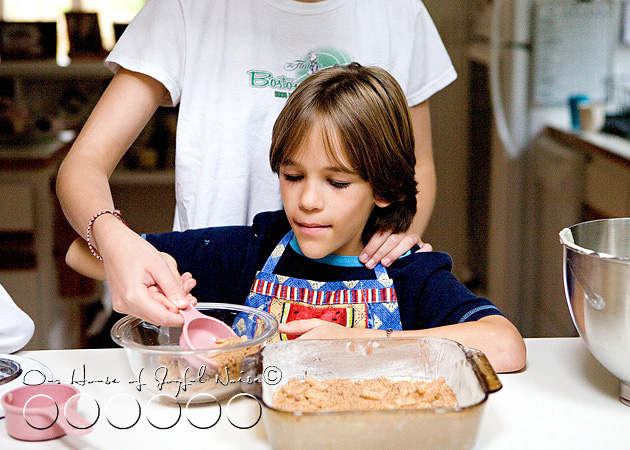
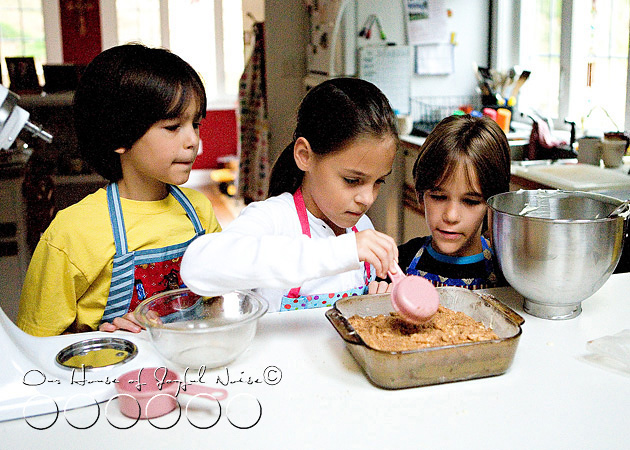
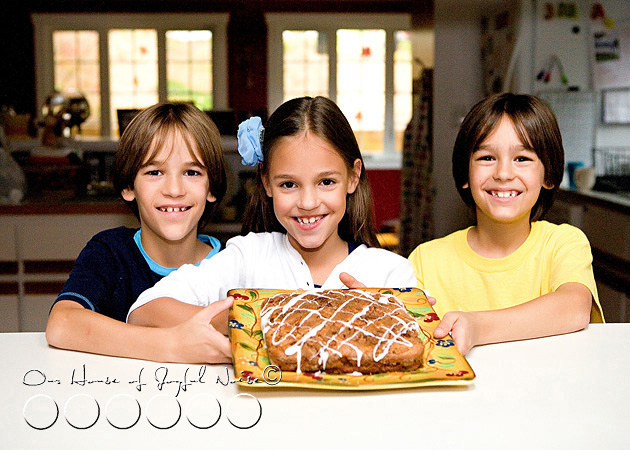
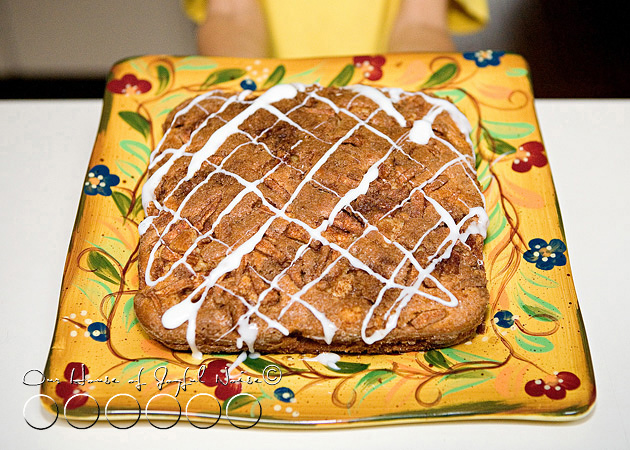
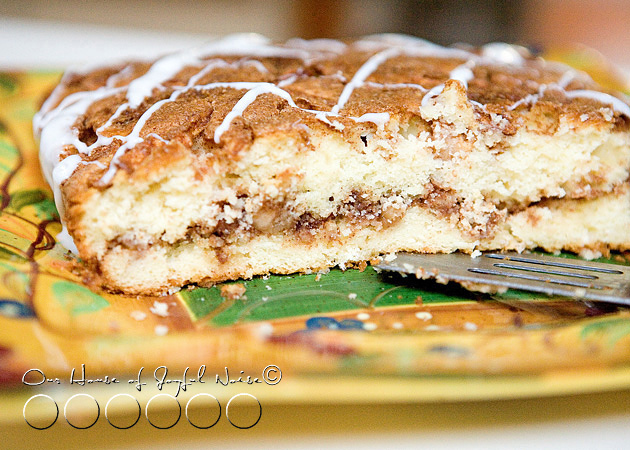
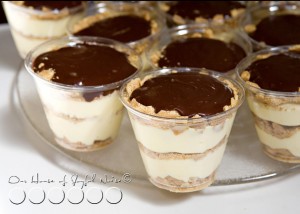
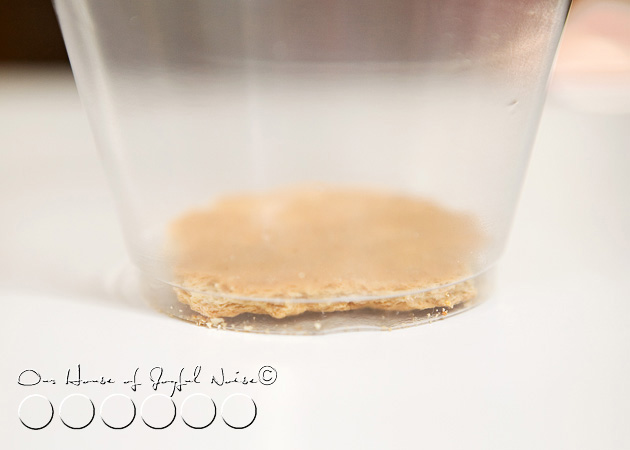
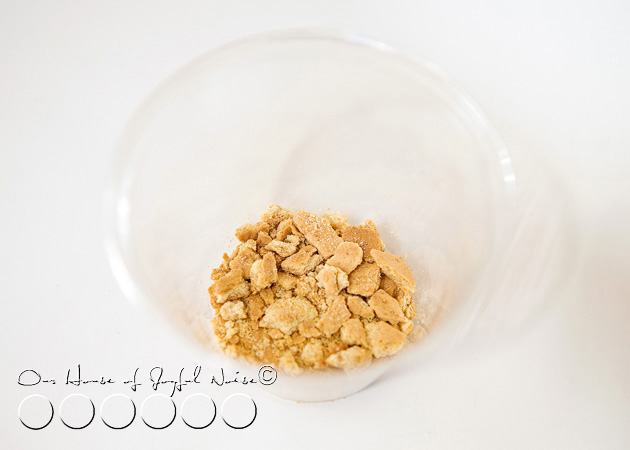
On this particular day in the kitchen, we were making an ordinary box of  cinnamon streusel cake, and making the apple version.

homeschooling-kids-in-the-kitchen-3 Then, comes FOLLOWING DIRECTIONS, of what was just read, very carefully.


homeschooling-kids-in-the-kitchen-4 
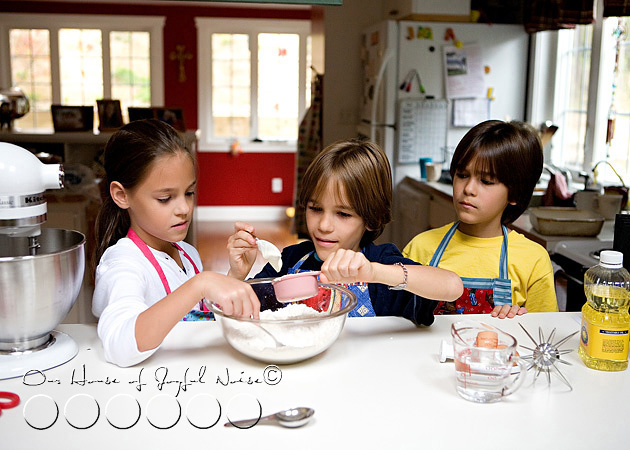
MATH is a biggie!  (age depending.)  There is counting, adding and subtracting, and measuring. (Especially when halving or doubling a recipe.)  Reading numbers, and temperatures!

homeschooling-kids-in-the-kitchen-16

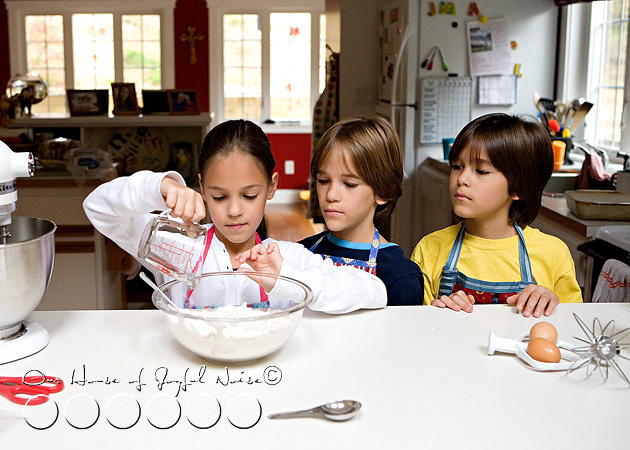
SCIENCE is everywhere, in the operating kitchen.  How does one ingredient react, when another is added to it?  Why must we temper some ingredients first, before adding to the big batch.  (There’s another new word!  So what does it mean, and how do we do it?)

What happens with various temperatures set in the oven, and what is the difference between baking, and broiling?

homeschooling-kids-in-the-kitchen-5

Enjoying our time spent together counts for something too! For some, it truly is a learned behavior!

(Not for my kids, of course.  I’m just sayin’ ; )

homeschooling-kids-in-the-kitchen-7

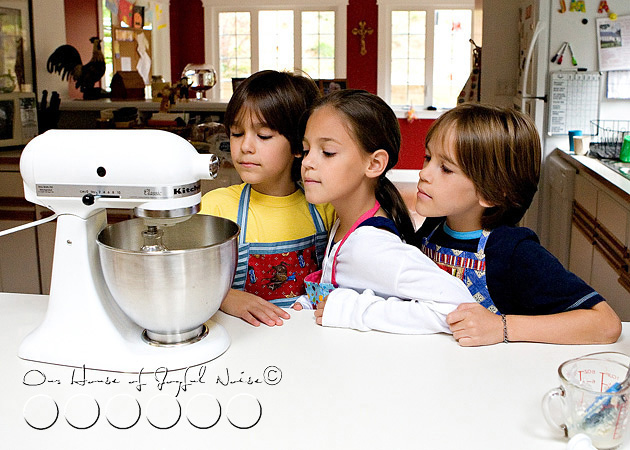
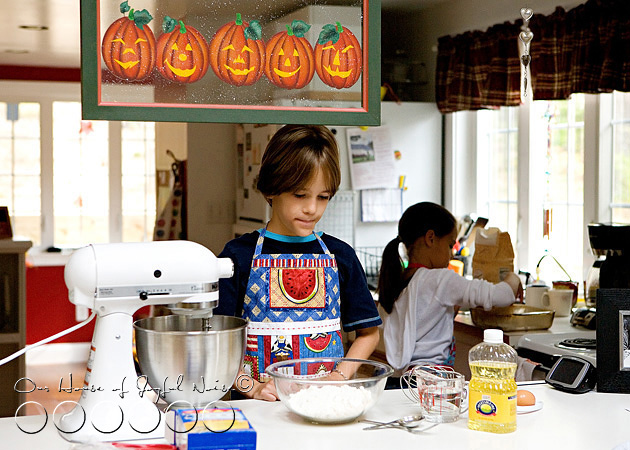
How about the ins and outs of KITCHEN SAFETY?   We are using sharp knives, reaching into hot ovens….

homeschooling-kids-in-the-kitchen-8

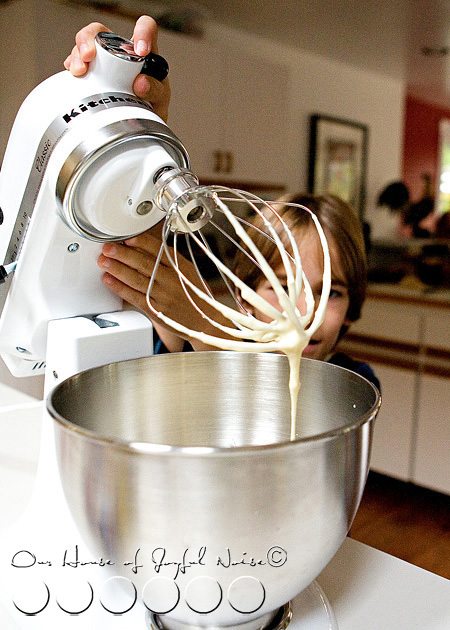
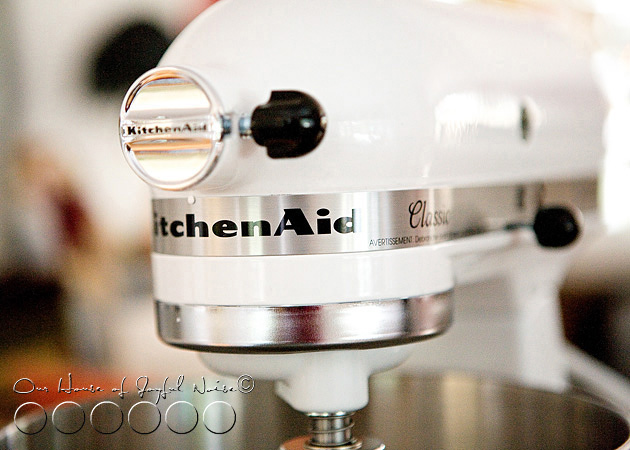
…..and operating heavy machinery!

(After you read this post, you may want to find out how this sweet piece of machinery hummed it’s way into our lives, and MiXeD everything up, HERE. ; )

Uhh, by the way…….Where’s the fire extinguisher, just in case?  And how do you use that?

We don’t want to learn that Science, in an emergency. You want to know how to use that thing if you need to!  And if all else fails,< insert the family fire drill skills here>, and we’ll meet at the telephone pole across the street!

Back to the lessons at hand…

homeschooling-kids-in-the-kitchen-9

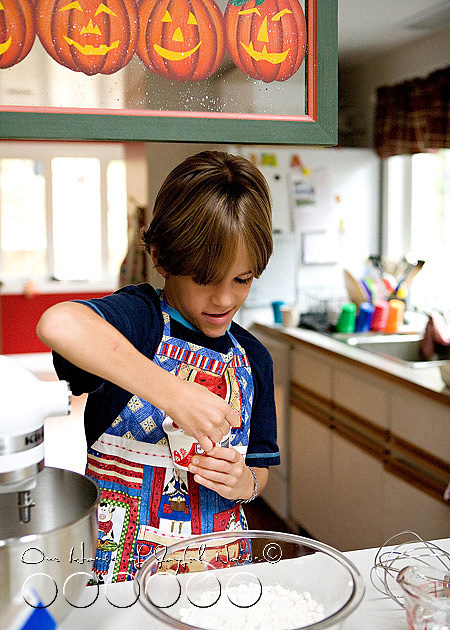
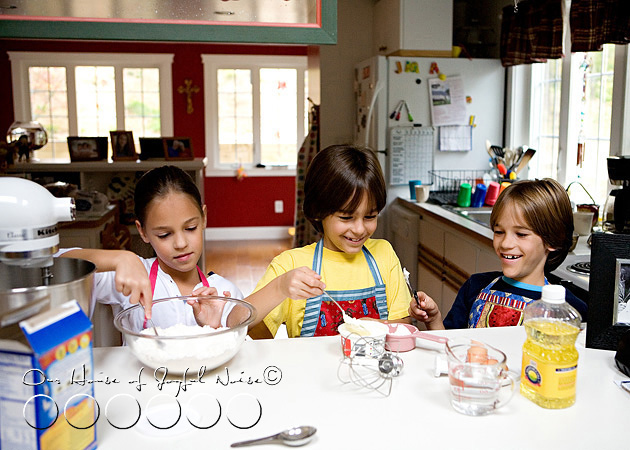
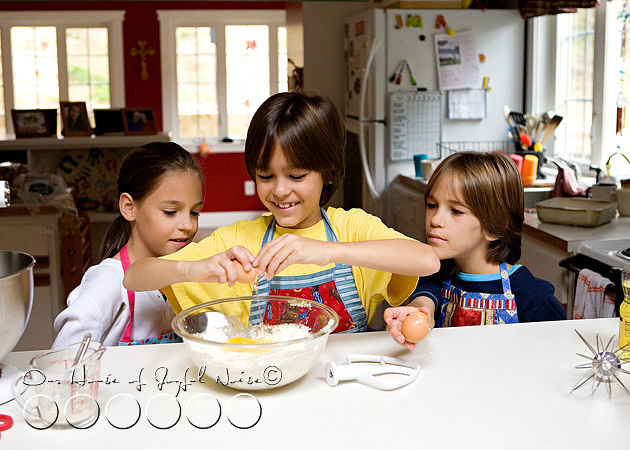
Learning how to WORK AS A TEAM, and also ……..

homeschooling-kids-in-the-kitchen-10 
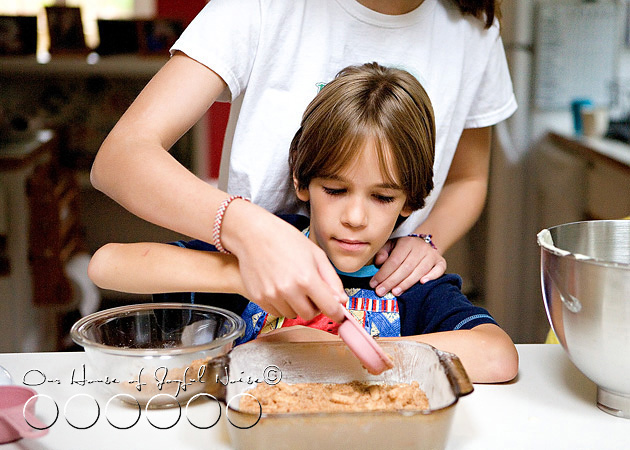
…….admitting when you need help, and allowing others to help you.


homeschooling-kids-in-the-kitchen-11

All of these lessons I mentioned, are just the topping of the cake.

I am sure you could think of plenty more, in addition to mine.

Think on it.

homeschooling-kids-in-the-kitchen-12
OH OH OH!! I just thought of another one!!  The one I think we all like to forget!:

The RESPONSIBILITY of cleaning up the mess!

homeschooling-kids-in-the-kitchen-13

But most times, we can do so, while we enjoy the mouth-watering smell we’ve created in the air.

homeschooling-kids-in-the-kitchen-14
Ahhhhhh……smells…..SO…….good!!!   We can hardly wait to cut into it, indeed!

homeschooling-kids-in-the-kitchen-15

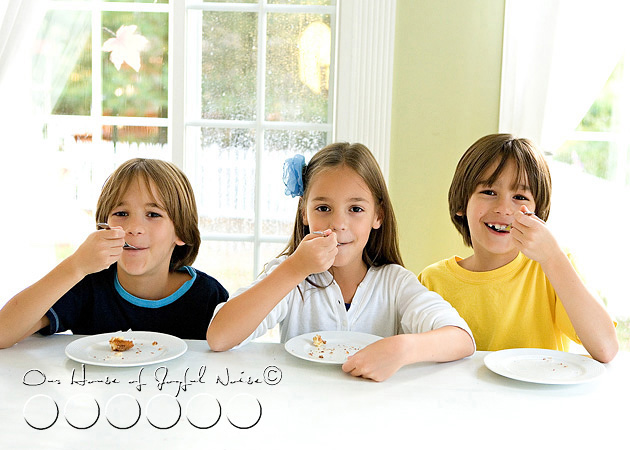
Of course the best lesson of all:, our mouths and our bellies, REAP THE REWARDS OF our HARD WORK.

***

All kids, home schooled or not, can benefit from the lessons to be learned in the kitchen.

What lessons have I missed mentioning?  Help me out here.

I’ll be hoping you can you add to my list, because I know there is a lot more.  And you’re smart cookies.

While I wait, if you’ll excuse me, I need to head down to the laundry room, transfer clothes from the washer to the dryer, sort some piles, and start a new wash load.

And you can bet I’ll be taking a kiddo down with me.  And believe it or not, they’ll be excited to come and help! (And secretly learn.)

Hopefully, I’m cutting my chances here of them coming home on weekends from college, accompanied by several loads of laundry.  If they do, we’ll be repeating those lessons, that weekend.  ; )

Save

Save

Save

Save

Save

Save

Save

Save

Save

Save

Save

Save

Save

Save

Save

Filed Under: Elementary Homeschooling, Elementary Homeschooling HOME ECONOMICS, Elementary Homeschooling SCIENCE, Homeschooling, Math, Middle School Homeschooling, Middle School Homeschooling HOME ECONOMICS, Middle School Homeschooling SCIENCE, Science Tagged With: Catholic-blogs, Catholic-families, elementary-homeschooling, homeschooling, homeschooling-in-the-kitchen, kids-in-the-kitchen, kitchen-lessons-for-kids, middle-school-homeschooling, teaching-following-directions, teaching-kids-home-economics, teaching-kids-measuring, teaching-kids-responsibility, teaching-kids-science-in-the-kitchen, teaching-math-in-the-kitchen, triplets

No-Bake Eclairs | Recipe

November 9, 2010 By Laura 6 Comments

No-Bake Eclairs

No- Bake Eclairs

I’m going to be quite honest with you here:  This dessert of no-bake eclairs is quick, easy, and sooooo good.

I’m going to be even more honest than that:  It’s not quite like real eclairs.   It’s more of a…. fun spin-off, of real eclairs.  But you know, everyone is going to eat them all up, just like that, anyway.  So does it really matter?

I’m thinking, ‘not really’.  So here we go….
–

No-Bake Eclair(s)

002 Participating Ingredients:

  • *Graham Crackers

* The kind we actually prefer is the Nabisco  Grahams Original, in the red box.

  • 2 boxes Instant Vanilla Pudding
  • 8 oz. Cool Whip
  • 1 can Chocolate Frosting (Milk Chocolate of Chocolate Fudge), and 2 Tbs. Milk
  • 3 1/2 cups Milk
  • (tad of Butter, if making in cake pan)


Now there’s 2 ways you can make this no-bake eclairs dessert.  It’s all just layering of pudding mixture and cracker until the topping, either way.

  No- Bake Eclairs

The original recipe I got was made in a 9″ x 13″ cake pan.  This is the easiest and fastest way to make it.  If you make it this way, just coat pan with a rub of butter first.

But we had another idea that we are sharing with you here. It takes a bit more time, but we didn’t mind.

We wanted to make cute little individual servings, in the 4 oz hard plastic clear cups.

First step:  Mix all of the pudding and the milk with the blender in a good sized bowl, let it get thick.  Then add the container of Cool Whip in and mix.


003

Over a little bowl, break graham crackers into roundish pieces, to fit the bottom of about 11 4 oz cups.

004
They don’t have to be perfect.
–

As you do this, save the crumbs and little pieces you are breaking off. They will not go to waste!
(You need ’em….so don’t eat ’em!)

006 ….because you are going to put them on top of that cracker circle, like this.

Next, on top of the crumbled crackers in each cup, add a few plops of pudding/Cool Whip mixture to less than half way up the cup…

007

….and then add a good layer of just crumbled graham crackers.

Then more pudding/Cool Whip mixture.

008

For the top layers, you do want to use another circle of graham cracker fitting for the larger tops, and then just use up the crumbled cracker you have to put on top and fill in the sides, etc.

Now in a separate little bowl, add the chocolate frosting and 2 Tbs. of milk, mixing it all together to make it nice and creamy, and easily spreadable.

No- Bake Eclairs

Using a spoon, carefully put some on the tops of every cup, and spread it around a little.

Now if you wanted to make the cake pan version, it can be a lot easier and faster.  The layering is all the same, but any crumbling is really not necessary, since there is not a lot of custom fitting to do with the crackers!  So you just lay crackers in a single layer, all over to cover the bottom of the pan, and start your layers.

So whether the cups or the pan, the layers go as follows, with the 1st layer being at the bottom:

  • 6th layer – frosting (w/ 2 Tbs milk)  mixture
  • 5th layer – graham cracker
  • 4th layer – pudding / cool whip mixture (the rest of the mixture, for the pan)
  • 3rd layer – graham cracker (flat in pan, crumbles only in cups)
  • 2nd layer – pudding / cool whip mixture (about 1/2 the mixture, for the pan)
  • 1st layer – graham cracker (& crumbles in cups)

No- Bake Eclairs

The layers look really nice in the clear cups. When the cups are all filled, put them in the fridge to chill and set a little, until you are ready to serve them.

No- Bake Eclairs

They are ready to serve and enjoy!!

(Go ahead and lick the cup when you get to the bottom.  We won’t tell. ; )

Save

Save

Save

Save

Filed Under: Desserts, Recipes, Treats Tagged With: cup-desserts, cup-treats, dessert recipes, dessert-ideas, Desserts, eclair-recipes, eclairs, no-bake-desserts, Treats

No-Sew, Double-Sided Fleece Blanket | Tutorial

November 6, 2010 By Laura 4 Comments

The kids and I were recently brainstorming for ideas, to put together a very special package for a certain little boy.  It was very special circumstances, that called us to put something together very special, just for him. I wanted to share with you all this idea our oldest, {A}, came up with:  Making a no-sew, double-sided fleece blanket for him.

no sew double sided fleece blanket
It was the perfect idea for this little boy.

The kids had received fleece blankets like this before, as gifts, and as single layer blankets.  But I wanted to see if we could make a double-sided blanket, so that it would have a different pattern on each side. How FUN, right? And it would be double warm and cozy!

It’s really quite easy, and well worth the effort!   Maybe this is a home-made gift idea you can use sometime, for Christmas gifts, or birthdays.


They are great for anyone, at any age.  From babies to grandparents, and anyone in between.  Just change up the patterns to be more suitable for the recipient, and it’s perfect. Who doesn’t use blankets? It can be a single layer too, and would take even less time. It just wouldn’t have a different pattern on the reverse side.  They are great as throws for beds, getting all wrapped up and cozy to watch a movie, as a lap blanket while you read, or even traveling in the car.  Just choose the appropriate patterns, and a suitable size for whom ever it is for.

Here’s How Easy it is to Make a No-Sew, Double-Sided Fleece Blanket

no-sew-double-sided-fleece-blanket-tutorial We found this set of 2 different patterns, at Joann Fabrics!  I didn’t know there was such thing, and had planned on having to choose 2 patterns separately, and have them cut off the roll to size.   So we were pleased to find these available!  (I also unexpectedly got it at half price!!)  There are a few sizes available in sets. This one was 48″ x 60″.  Perfect width and height for a little boy.  But you can buy any patterns you want off the rolls, and just cut them to matching size.

no-sew-double-sided-fleece-blanket-tutorial-1

I was tickled with this 2-in-1 fleece fabrics of chocolate brown with colored polka dots, and bugs!

Again, perfect for a little boy.

  • The first thing we did was lay it out on a clean table, layering the 2 pieces, one on top of the other, as perfectly lined up as possible.

Then we chose a side to start on, and laid a heavy board several inches away from, but along that edge, to keep the fabric from moving too much.

no-sew-double-sided-fleece-blanket-tutorial-2

We were prepping to cut fringes through both layers.   So using a snapline chalk, we measured up 5 inches from the edge, and snapped a chalk line across from one end to the other, to indicate where to stop cutting, so the fringes would all be the same length. This would create 5 inch long fringes, minus what is taken up when we knot them. Then we measured in from each corner 4 inches,  and cut 1 inch wide fringes, all the way across in between.   In other words, we stopped cutting fringes 4 inches from each end.   This would leave you a squarish block piece on all of the corners, for now.   We’ll get to why we did that, in a bit.

Now, if you don’t have a chalk-line to mark things off, you can use a ruler and chalk per usual.  But this was faster.

no-sew-double-sided-fleece-blanket-tutorial-5 Then, we just started tying each top layer of fringe piece, to the bottom layer fringe piece.

no-sew-double-sided-fleece-blanket-tutorial-6 Now because this blanket is 2 layers, the fringe pieces need to be double tied. Or else it would just un-tie.

But if it was a one-layer blanket, you would just knot the one piece of fringe, and once, would do.

You get me? ; )

no-sew-double-sided-fleece-blanket-tutorial-3
This is how it starts looking.
–

There can be a cool little technique here, where the print of the same side can show most. or the other side.  While tying it (like the beginnings of shoe tying), I found whichever side you stuffed through the whole, is the side that ended up on top. I wanted the opposite side showing, so I made sure to stuff that piece and pull it through to on top.

Now you even get that, or you don’t.  Either way will not ruin your blanket.  This project is virtually fail-proof!

no-sew-double-sided-fleece-blanket-tutorial-4
This is done all the way down, to your 4 inch corner piece.

The same process is done on every side of the blanket.  Again, stopping 4 inches for each corner.

Now what to do with the 4 inch corners:  We just cut 1 inch fringes, on angles, to go around the corner. I think it was 3 cuts, creating 3 more fringes.  Just make then 1″ -ish wide, like the others. This was to create a rounded corner blanket.   It IS an option, to just make fringe cuts one inch apart, all the way to the end, on 2 ends, to make the whole blanket more rectangular.  If you do it that way, I would do one whole side first, and then the opposite side, so they are the same.  Then work on the other 2 sides.

no-sew-double-sided-fleece-blanket-tutorial-7

Cutting 2 layers of fleece at once was a little hard for the kiddos, but they were very helpful for tying!    They took a lot of care with their work.

no-sew-double-sided-fleece-blanket-tutorial-8

Look how cute!   I just loved the colors.  And the bugs.  And the polka dots!

We were really happy with how it came out.

no-sew-double-sided-fleece-blanket-tutorial-10

The kids were really excited to send it out to our special gift, to this special little boy, along with some other gifts. It was a big package.

We hope our home made blanket warms his heart, as much as it warms him, head-to-toe.

It was certainly made with love!

Save

Save

Save

Save

Save

Filed Under: Crafts & Creations, DIY (Do-It-Yourself) Project, Holiday Crafts, Homemade/Handmade Gift Ideas, Kids Arts and Crafts, Tutorial Tagged With: birthday gift ideas, blankets, Christmas-gift-ideas, gift-ideas-for-anyone, gift-ideas-for-kids, handmade-gift-ideas, homemade-Christmas-gift-ideas, how-to-make-a-fleece-blanket, how-to-make-an-easy-blanket, no-sew fleece blanket, no-sew projects

Our Halloween Costume Ideas from the Past

October 30, 2010 By Laura 4 Comments

I don’t plan on having a big post on our Halloween/Hallowtide this year.  But last night I got to thinking about some of our past Halloween costume ideas we’ve come up with, and I went digging through photos. Putting together costumes, is a creative process of sorts, so we thought this section of the blog was a good place for this.

There is SO much I could share with you from our pre-blogging days, because I have always taken lots of photos.  But I haven’t always shot digital.  The scanning of old photos, and cleaning up dust particles, etc, is not a process I enjoy. At all.  But if I’m inspired enough to share with you some old stuff, I guess I will do it.  As I just did!

I thought it would be fun, to share with you some of {A}’s Halloween costume photos from when she was little, as well as the triplet’s second Halloween, but first in costume.  Naturally, we think they are all so cute.  But then, they are all our kids. Maybe we’re bias. But something tells us you might get a chuckle or 2 as well, looking at these.  Or we might at least get a smile out of you, and that’s good enough for us too.

kid-clown-costume
{A} in 1998, as a clown.   She was 1 year old.    I have to laugh at the ‘very best first walking shoes’ she has on.   No, we didn’t do that too, for babies 2, 3 and 4.  Turns out they are all walking and running just fine!
–

kid-genie-costume
In 1999, as a genie, and 2 years old.   Is she not the cutest thing?  My sister-in -aw made the costume for us.  I helped cut fabric and stuff though.  And I also made the bottle.  I have to admit, I’m not into allowing my girls to jaunt around with bare midriffs anymore.  But I wouldn’t give up this photo of her at 2 year old, in this costume, for anything.  What a doll she was.
–

kid-pediatrician
In 2000 at 3 years old, she was her own pediatrician, at the time. lol.  We have had a new pedi now since I was pregnant with the triplets, and the former one is no longer practicing, that I know of.  But she was beyond ecstatic to learn that {A} was her, for Halloween that year.  She (the pedi) showed everyone in the office that day, while {A} waited in her paper gown. lol I think this photo is still hanging in the office there.
–

kid-indian-girl-costume
In 2001, as an Indian, at 4 years old.    I really loved this costume.

kid-indian-girl-costume-2
But this head shot, is one of my all-time favorite photos of her when she was little.
–

baby-farm-animal-costumes-triplets And then we had our little farm animals, in 2003.   lol.  They were 1 year old.  Remember the Tom Armani costumes?  The kids were a riot in them.  We had so much fun this year.  {S}, on the far right, was just on the verge of another hysterical laugh.  He would always, get laughing so hard, he couldn’t compose himself.  He still does that.  He was a happy baby, all of the time, despite all he went through.
–

baby-cow-costume
Our big cow.  He was as heavy as one too.
–

baby-lamb-costume

Our sweet little lamb.
–

baby-goat-costume
Our Billy Goat – always smiling.
–

farmer-girl-costume
{A} (big sister) was their loving farmer, who tended her little farm animals with such care.
–

We just had to show them all off, and trick or treating is always out of the question for us (with {S}’s severe peanut allergy)….so we thought we’d take them to the mall, and just pull them around.  There was Halloween festivities going on there anyway, and it was warm, light, and safe.

And from that idea, our idea grew….

farmer-and-baby-farm-animals-triplets-big-sister We put a little picket fence around our farm animals, in their ‘choo-choo wagon’.   They were the biggest attraction.   People just stopped, and watched us, cracking up.

The funniest thing that night, that still gets us hysterical when we think about it, was that {S}, was the billy goat, and every time we looked back as we pulled him, he was chewing on the fence!!  I was always laughing too hard, to get a photo.

Then we heard there was a costume parade judging contest at the other end of the mall.  So we went down there and pulled them through.  There was a big crowd, and then we had to go by this whole panel of judges at a table. They were all so smitten with our farm.

farmer-and-baby-farm-animals-triplets-big-sister_2 We won 1st Place,  for Most Original Costume!

The judges thought our farm yard was very creative.  The farmer and her little animals had a fun night, and then they went back to the farm and went fast asleep in their barn.

If you have blogged your kids in some of your favorite Halloween /Hallowtide costumes, leave us a link so we can come see them!  If you haven’t, wouldn’t it be a fun post?

Thanks for stopping by.  We hope you enjoyed seeing our kiddo’s costumes from the past, as mush as we enjoy revisiting these wonderful family memories.

Wishing you all a Happy Halloween / Hallowtide!!

Save

Save

Save

Save

Save

Filed Under: Celebrations, Crafts & Creations, Faith, Faith/ Catholic, FALL Crafts and Creations, Holiday Crafts, Holidays, Seasonal Crafts and Creations, The Big Picture Tagged With: clown-costume, costume-contest-winners, farm-animals-costumes, farmer-costume, genie-costume, Halloween, Halloween-costume-ideas, Halloween-costume-ideas-for-triplets, kids-Halloween-costumes, triplets

Just *Some* Things That Make Me Smile….| In Photos

October 24, 2010 By Laura 4 Comments


smiley Me.

I’m always taking random photos, that I love to have because they made me smile. But they wouldn’t necessarily make a whole post.  So I thought I’d try putting them in bunches sometimes, and doing a post now and then, about some of these little things that make me smile. Then I may happen to throw in a couple of others too, that were not random photos, but do indeed make me smile anyway.

Just a photo-happy little post.

So here are just some things, that make me smile……

birthday-pancake This beautiful pancake my husband and kiddos surprised me with on the morning of my birthday, even though they knew I would never eat it in a million years.  They made it anyway, because ‘number breakfasts’ are a tradition in our home on birthdays, and they can’t let the tradition go, even on my day.  I’m not big on eating much in the morning. That is chocolate frosting they worked with there, by the way. (In the morning?).

This pancake masterpiece sat in the fridge for about…well, the million years.

And then Michael ate it.  Really.

I know.
–

0021 ….How happy my kids are, whenever they can spend time with their Papa.

Or maybe it’s, ….how happy my father is, whenever he can spend time with his grandkids.

Basically, it works both ways.

And it all makes me smile, because I love them all, and I love to see them all happy.

Anytime. All of the time.
–

003 When I can just watch them play…..

tea-and-rosary-time …..or focus on our faith, together……

rosary-and-tea
….over apple-cinnamon tea, and banana bread.
–

kitchen-aid-mixer My Kitchen Aid Mixer.  And it’s Sender. <3  You just had to have known that was coming.

And oh yes…..we’ve used it lots already.  You’ll be seeing!
–

0071
How silly my boy gets.  Every day. He’s a clown, for sure.
–

0082 My new/used lens. We fit like a hand in a glove, Baby.

Or is it hand and a glove?

Well, you know what I mean.

We belong together.
–

0092
My God-Daughter. Ohhhh the smiles she has caused on my face.  Her expressions of love for me have made me cry, 100 times over.  Can you even get over the freckles?  When I see her, I try to kiss every one.
She’s so precious to me.
–

homeschooled-siblings Our Autumn family hikes.   The crispness in the air, the crunching of leaves under our feet, appreciating the beauty all around us, that confusing scent in the air (….Old leaves? Or dog poo nearby?….lol)….and just chatting, laughing, and being together, going nowhere in particular.

These are just *some* of the things that make me smile.
I encourage you to ponder the things that make you smile, too. And if you can, take photos of those things! They’ll make you re-smile in later years, when you find them.

Thanks for the visit today, Friends.

Save

Save

Filed Under: Faith, Faith/ Catholic, Life In General, The Big Picture Tagged With: Autumn-family-hike, birthday-pancake, Catholic faith, Catholic-blogs, Catholic-families, homeschooling, Kitchen Aid Mixer, rosary-and-tea, triplets

  • « Previous Page
  • 1
  • …
  • 43
  • 44
  • 45
  • 46
  • 47
  • …
  • 101
  • Next Page »

We are wicked happy to have you here! We hope you find much inspiration, help, humor and enjoyment here.


Archives


POPULAR POSTS

* * * * * *

SUBSCRIBE to House of Joyful Noise blog! Every new post, delivered right to your email box!


Privacy Policy

Amazon Affiliates

Never at any additional cost to you, we may earn a small commission for our endorsement, recommendation, testimonial, and/or link to any products from our website. Your purchase through our links helps support our family, while sharing with you the products we authentically use and recommend, for various ideas, and letting you know where you can purchase them. Thank you for your support!

[footer_backtotop]

Copyright © 2025 HouseOfJoyfulNoise.com · Genesis Framework by StudioPress