• HOME
  • {A}’s Chipmunk Training Archives

 Homepage

  • The Homestead
    • Home Projects
    • Home Improvement
    • Home Decor
      • Seasonal Home decor
        • FALL Home Decor
        • WINTER Home Decor
        • SPRING Crafts and Creations
        • SUMMER Crafts and Creations
    • Our Chickens
    • Gardening
    • Organization
    • Re-Purposing
    • Furniture Refinishing
    • Budget
  • Crafts & Creations
    • Seasonal Home decor
      • FALL Crafts and Creations
      • WINTER Crafts and Creations
      • SPRING Crafts and Creations
      • SUMMER Crafts and Creations
    • DIY (Do-It-Yourself) Project
    • Kids Arts and Crafts
    • Homemade/Handmade Gift Ideas
    • Holiday Crafts
    • Fan Pulls
    • Free Printable/Downloadable
    • Sewing Projects
    • Giveaways
    • Business Features
  • Recipes/FoodFun
    • Breakfast
    • Lunch
    • Main Dish
    • Sandwiches
    • Appetizers
    • Slow Cooker
    • On The Grill
    • Side Dishes
      • Soups
      • Salads
    • Baking
      • Breads, Rolls and Muffins
    • Snacks
    • Treats
    • Desserts
    • Drinks
  • Homeschooling
    • Elementary Homeschooling
      • Elementary Homeschooling READING
      • Elementary Homeschooling MATH
      • Elementary Homeschooling LANGUAGE ARTS
      • Elementary Homeschooling SCIENCE
      • Elementary Homeschooling HOME ECONOMICS
      • Kids Arts and Crafts
    • Middle School Homeschooling
      • Middle School Homeschooling SCIENCE
      • Middle School Homeschooling HOME ECONOMICS
    • Language Arts
    • Math
    • History / Social Studies
    • Geography
    • Foreign Language
    • Field Trips
    • Games
    • Nature Study
  • The Big Picture
    • Life In General
    • Celebrations
    • Faith
      • Into the Light; The Series
    • Giveaways
    • Reviews & Sponsors
  • Photography & Lettering
    • Photography
    • truck lettering
    • vehicle graphics
    • Newborns
    • Kids
    • Engagement
    • High School Senior Pictures
    • High School Senior Pictures Sneak Peeks

Heart Strings / A Valentine’s Craft

January 17, 2011 By Laura 49 Comments

If brilliant colors make you happy, and you love fun projects, then this Valentine’s craft is just for you!  We’re showing you just how to do it, step by step today!
heart-strings-valentines-craft-30

While my home is not completely decorated for the upcoming ‘month of love’ just yet, I knew it was time to get to some Valentine crafting! I happened to see this craft from Martha Stewart Living, and was inspired to try it ourselves, with a spin or 2 of our own on it.  By melting crayons in between wax paper, and cutting out hearts, some very cute Valentine’s decor can be made!  That Martha is a clever one, huh? ( Or, her creative team – whatever. lol.)  You can make this craft as quick and simply. or as involved, as you choose, and I am going to tell you the ways how.

Supplies needed:

  • Crayons, with paper removed (This craft is a great way to use up those old broken crayon pieces!)
  • A sharpener with a fat hole.
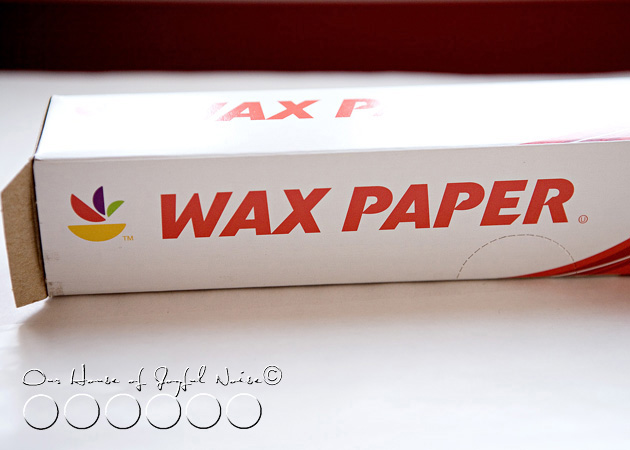
  • *Wax paper
  • Clothing iron
  • Brown craft paper, or brown paper bags (Just a protection layer for ironing.)
  • Hearts stencils or cookie cutters (2-3 sizes is nice.)
  • Pen or pencil
  • Scissors
  • Scotch-like tape

*  DO NOT substitute parchment paper for the wax paper. It is not the same thing, as parchment paper has teflon in it.

Other optional supplies, depending on what you want to do with your crafts decoration:

  • White cotton twine and food coloring. (Simplified option:  thin ribbon in white or any Valentine color.)
  • A clothing hanger, or a long tree branch

I intended to hang our hearts once they were done.  So instead of using some satin ribbon (which is simple and faster, if you want to go that route), I had this vision of hanging our hearts on dyed string, that varied in color.  So, with a roll of white cotton twine, and some food coloring, this is how I did it:
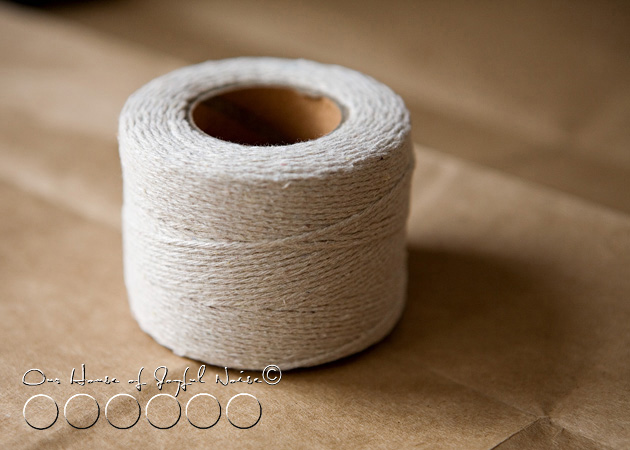
heart-strings-valentines-craft

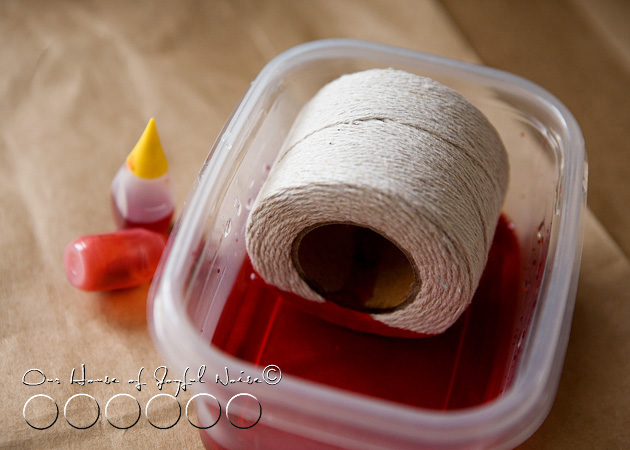
heart-strings-valentines-craft-1 In a plastic container, I added some red food coloring to some water, deep enough to soak the roll on it’s side to the cardboard roll core. I just let it sit for awhile, while I did other things,  until I thought it soaked through all of the layers of twine.  Then, I made orange and yellow soaks as well, letting a different side of the roll sit in each.
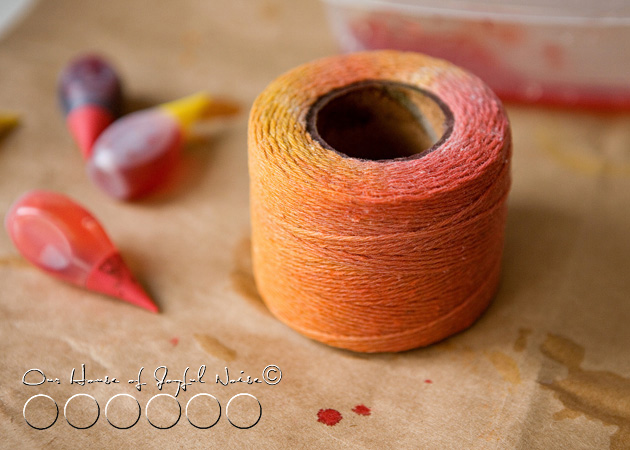
heart-strings-valentines-craft-2 I loved the results!   How pretty is that?
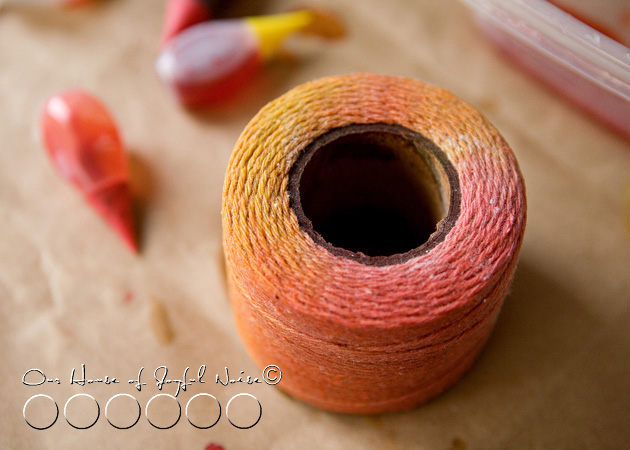
heart-strings-valentines-craft-3

I knew as the twine was pulled off the roll, the layers would get lighter, but that too would only help the variations in the string colors.  Now, all of this string is not going to dry on the roll all the way through, any time this year, but that’s o.k.  You’ll be able to use the string damp just fine, and it’ll dry hanging.
 

heart-strings-valentines-craft-4 But while the string roll was soaking in various colors, the kids and I got to making our hearts.
heart-strings-valentines-craft-6

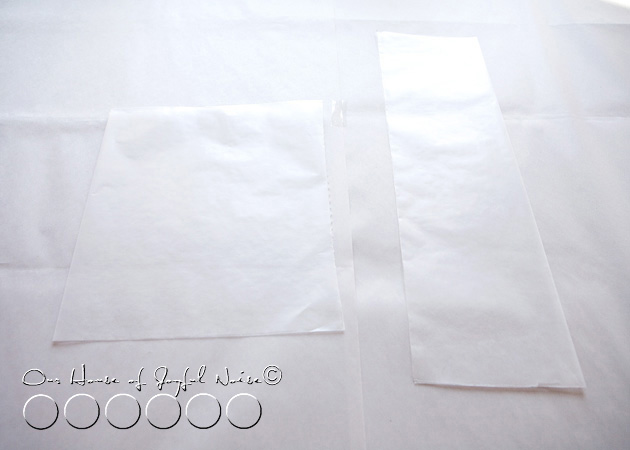
Pull off a piece or 2 of wax paper, fold in half to make a good crease, and then open back up. . . .
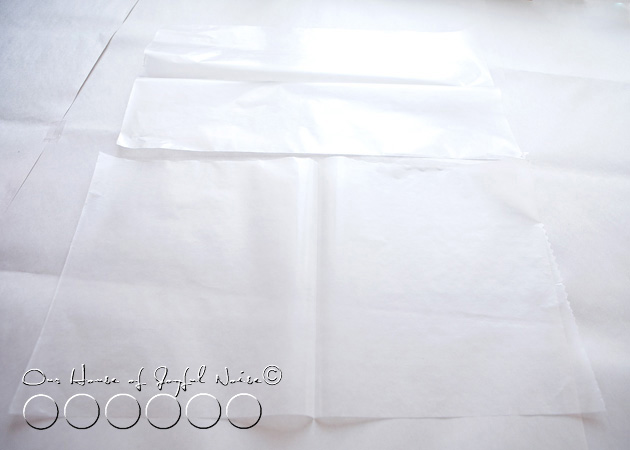
 

heart-strings-valentines-craft-5 What size piece you use depends on how many hearts you’ll want to make.  Remember, you’ll only be able to get hearts out of one half, as it will be ironed together soon, with crayon shavings in between.
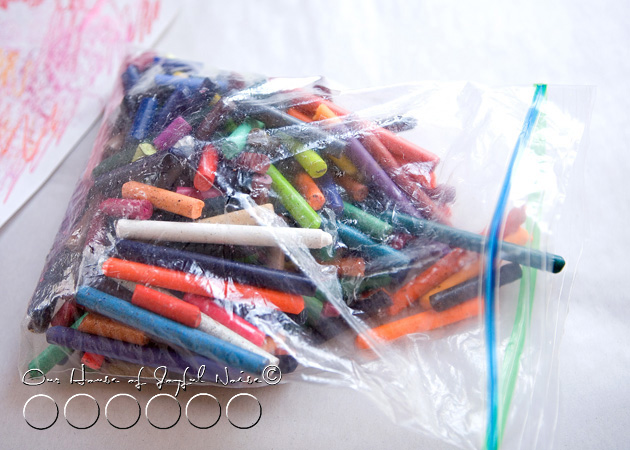
 

heart-strings-valentines-craft-7 Grab your old peeled crayons, and start choosing some great colors for Valentine hearts.  No need to stay with strictly traditional colors, such as red and pink.  Try some purples, raspberries, and even oranges and yellows!
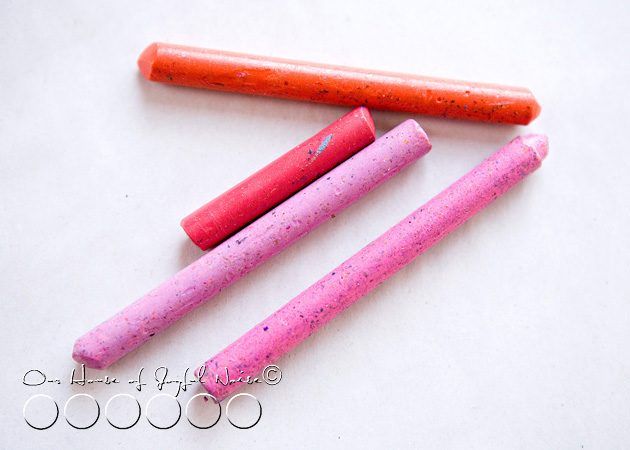
 

heart-strings-valentines-craft-8 Now, if your old crayons have been kicking around together for some time, as ours have, they are going to have yuckity-doo-dahs all over them.  Even as a kid, with me and my sibling’s bottomless bucket of crayons, I hated this.

So because I have had particular issues, long before I was a blogger, I have had a trick for this crayon problem.  And since you came to this blogger with issues blog, I’m going to share it with you.  : )
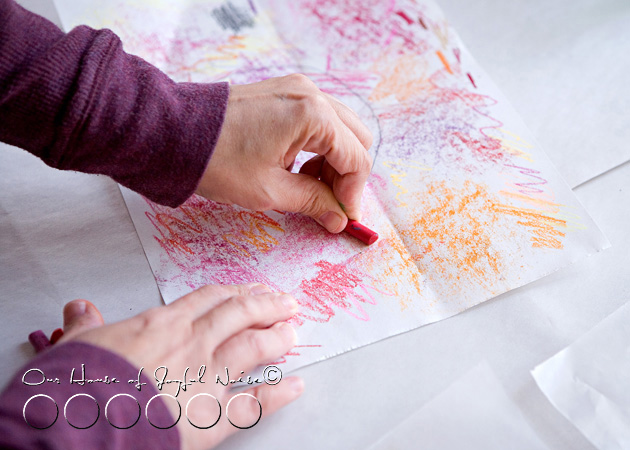
 

heart-strings-valentines-craft-9 Just lay the crayons down, one by one, on some scrap paper, and rub the yuckity-doo-dahs away!  I found this is also a good way to test what the color really looks like!!  Some crayons when used, do not look anything like the shade of the actual crayon!  So deceiving.
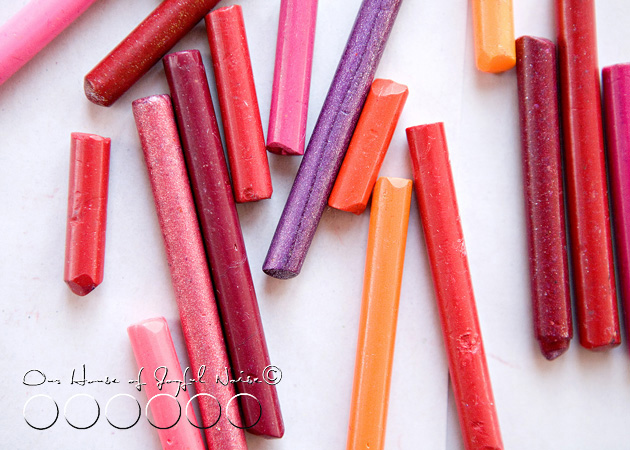
 

heart-strings-valentines-craft-10 Old crayons, like new:  Yuckity-doo-dah free!
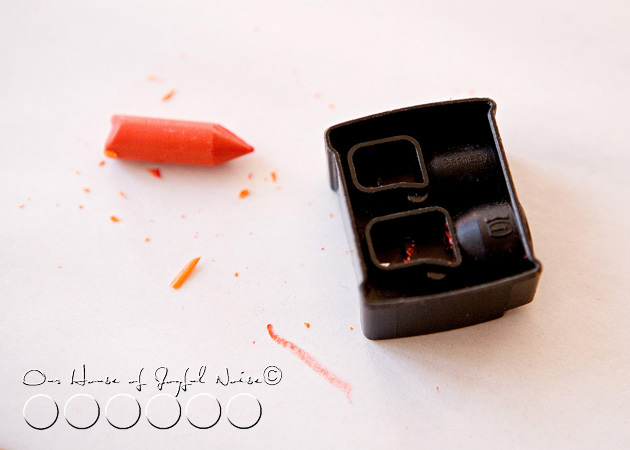
 

heart-strings-valentines-craft-11 To make crayon shavings, you need a sharpener of some kind.  Our little hand pencil sharpener did not have a hole big enough for a crayon, so we used my make-up one!  Thanks Lancome!

Now….you’ll need to iron on your table or other flat surface, so I highly recommend putting down some crafts paper to protect your surface, from both melting crayon, and the heat from the iron.

On top of the protected surface, lay your open wax paper pieces.
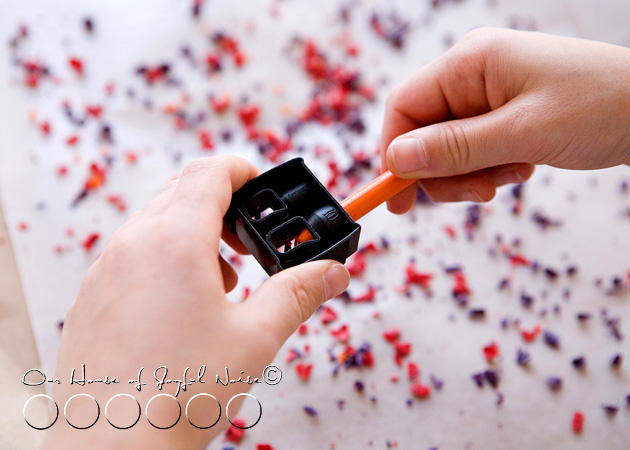
 

heart-strings-valentines-craft-12 Over only one side of your wax paper piece, sharpen your crayons and let the shavings fall onto the paper.  Each of my our kids did their own, and had their own unique colors combinations, which was going to make for a nice variety of colored hearts.
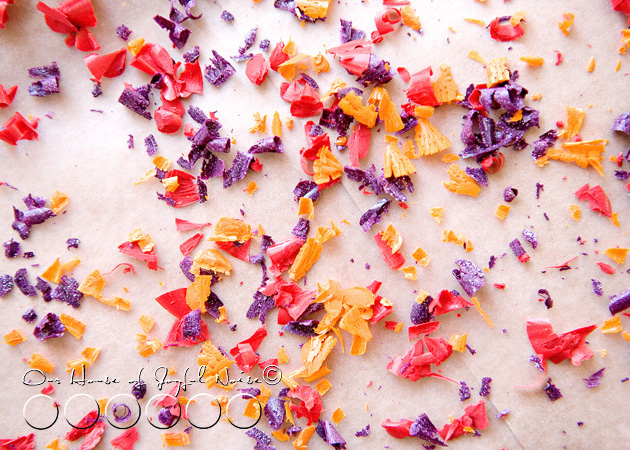
heart-strings-valentines-craft-13 Some of our crayons were metallic ones!!  So that was adding a whole new element of pretty!
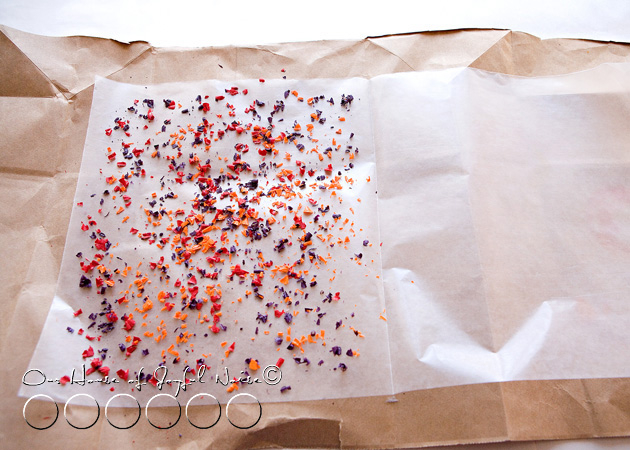
 

heart-strings-valentines-craft-14 Make sure you cover the whole side with shavings pretty well.  Brush any pieces in from the very edge though.
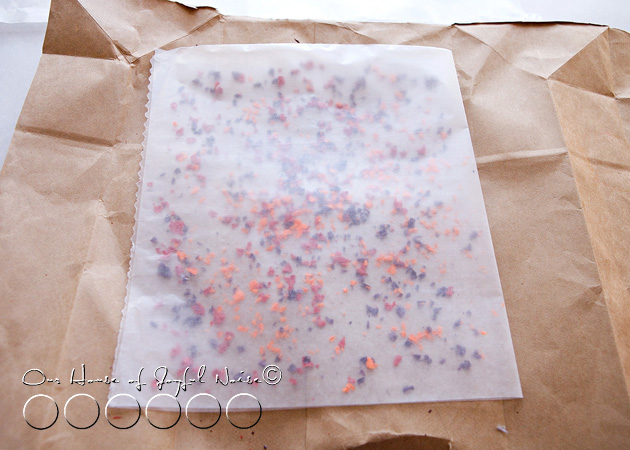
heart-strings-valentines-craft-15 Fold over the empty side of wax paper, onto the side with the shavings.

Now, Martha’s directions say to fold up each open side some, to keep the melting crayon in.  But, I didn’t want to waste any space, as we wanted to make lots of hearts, and some on the bigger side too.  So….I just made sure I was working on my brown paper bag.  (We also had other craft paper taped to cover our surface under that.)
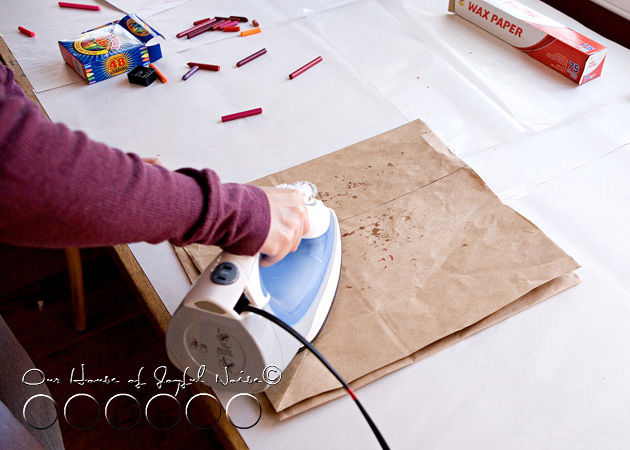
heart-strings-valentines-craft-16 Now, after putting brown paper on top of your waxed paper and shavings, you can start ironing.  What setting?  Good question!!  See, Martha said on a ‘medium setting’.  But guess what?  Our iron doesn’t have a medium setting!  So I set it between silk and wool, ; )  …. and adjusted the heat up or down from there.

As you can see, some oils from the crayons may seep through the wax paper and the brown paper.  It doesn’t cause any problems. Just make sure you clean the surface of your iron off when you are done with this craft, so it doesn’t transfer to your clothes!  What a hot mess that would be!   (Note to self:   Clean surface of iron from crayon craft!!)  (By the time I decide to iron an article of clothing, I’ll have forgotten I ever did this craft with it.)

As you iron, you’ll want to keep peeking,  to see if there are more shavings that still need melting in areas.
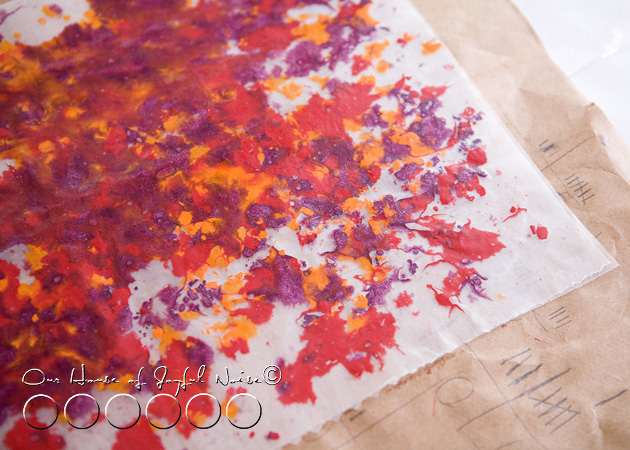
 

heart-strings-valentines-craft-17 Heavy in crayon wax…..but nice!!


heart-strings-valentines-craft-18 The next kiddo went with a lighter layer of shavings, for a new effect.  Or, his hands just got tired from sharpening the crayons.


heart-strings-valentines-craft-17 They were looking good!!  Just holding each of them up to the light, I could tell this was going to look super cool when we were done.
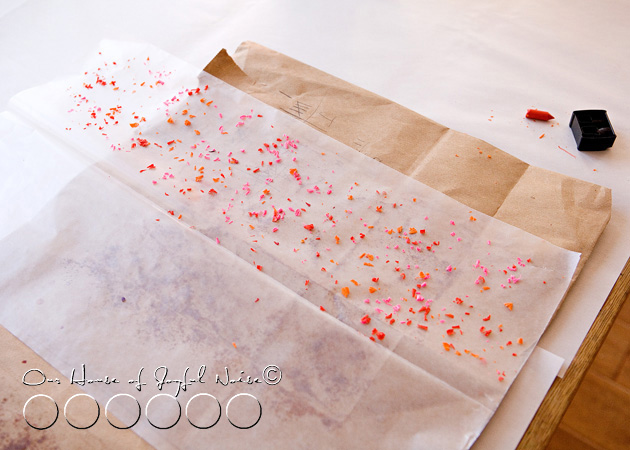
heart-strings-valentines-craft-18

I couldn’t wait to see what this one was going to look like, all melted.
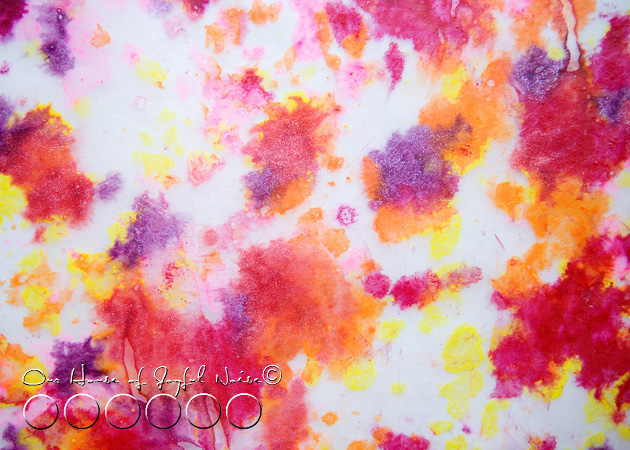
heart-strings-valentines-craft-21 LOVE!!!


heart-strings-valentines-craft-22 Now, you may notice some bubbling or wrinkling in areas.  I’m not sure why this happened sometimes.  I was guessing maybe it was too much heat at times.  But since this was a fun crafts class, and not our Science class, we weren’t going to waste time running tests, to figure it out.  We decided it was a cool effect, and embraced it.

Next, came tracing hearts onto our waxed pieces, and cutting them out with scissors.
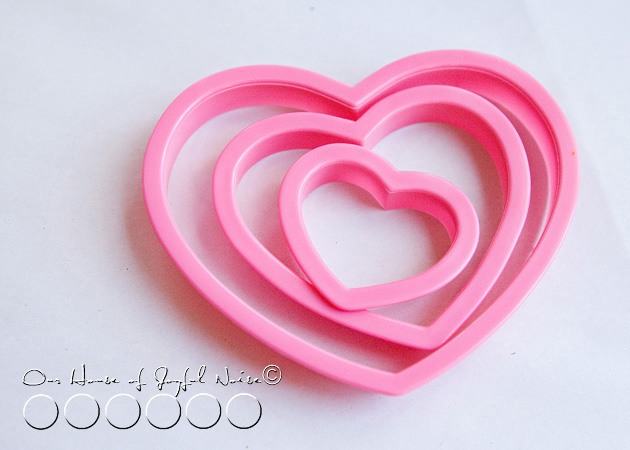
heart-strings-valentines-craft-19 We used simple heart shaped cookie cutters that we had, in 3 different sizes.  Just trace them using a pen or pencil, and then cut out on the heart shaped line.  I used a pen, and because I was using it on wax paper, it wouldn’t really write, which I preferred anyway.  I was able to see the tracing indention well enough to cut, just by tracing it a couple of times.    * I did not take photos of tracing and cutting.  I have faith you get the picture.

Nor did I take photos of exactly how we did the rest of our crafts.   BUT……Once your hearts are all cut out, there several things you can do with them:

1)  The easiest thing you can do, is just put them on your windows much like window clings, using a little transparent tape!  The hearts have a stained-glass look, and they would be beautiful  with the light coming through, and the colors so radiant.

2)  Another option, is using pieces of thin cut ribbon, tape one end to the back of each heart, and tie them to a clothing hanger at different lengths.  Instant Valentine’s themed mobile!!

3)  You can take it to the extreme, like we did…..
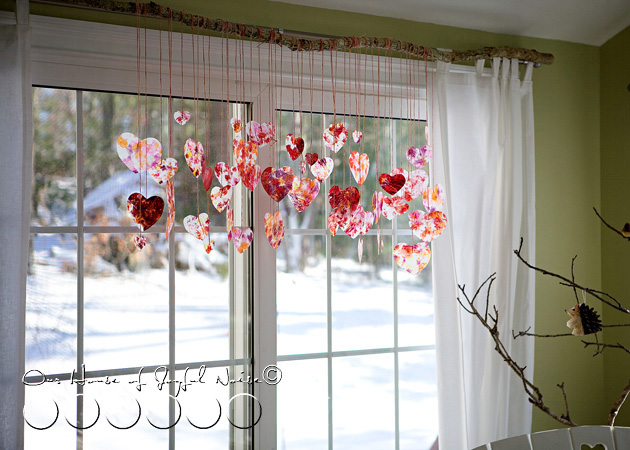
 

heart-strings-valentines-craft-23
Michael went out and found us a really long and fairly straight tree branch, that would meet the length of our sliding glass doors.   Then, to work in a comfortable manner tying our hearts on it, we set 2 chairs very far apart, and rested each end of the stick on the top back of each chair.  Using long pieces of our dyed string, we wound one end around the stick a few times, and taped the dangling end to the back of each heart, at different lengths.
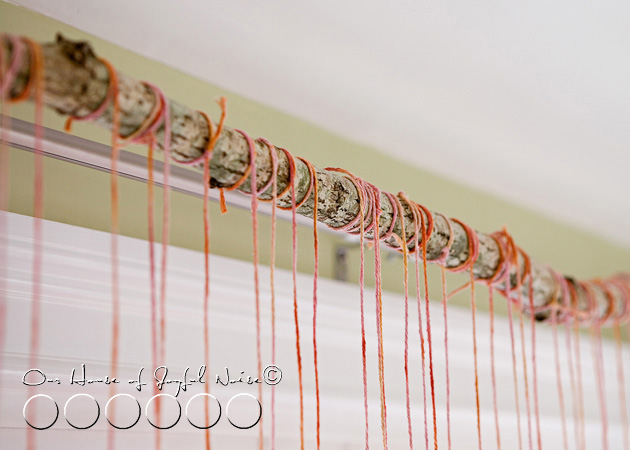
 

heart-strings-valentines-craft-24 Yes, you could just tie it on quickly, but I knew I would love the look of our pretty, hand-dyed string, wound around this rustic tree branch.  And I was right.
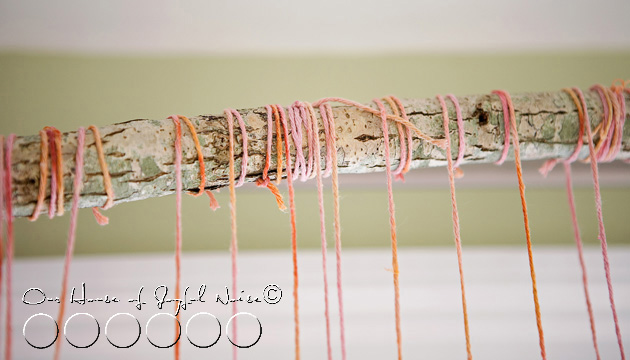
 

heart-strings-valentines-craft-25 It was worth ll of my efforts.  It may not be worth it to you.  Also….my girls helped with this some.
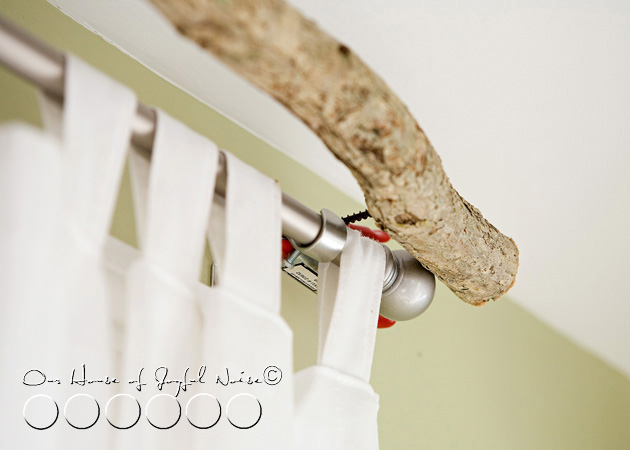
 

heart-strings-valentines-craft-26 If you’re wondering how we hung this long tree branch adorned with colorful Valentine hearts up high and across our slider glass doors, I’ll tell you:   Michael screwed a long screw into the backside of the stick on each end.  Then we simply used those little tight-clamp thingies, and clamped them to the curtain rod bracket.  See?  No permanent damage anywhere.
 

heart-strings-valentines-craft-27

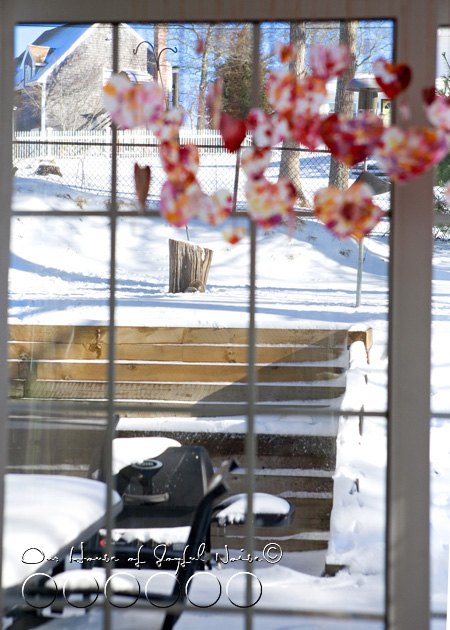
They colors really look beautiful, hanging there, even as I look past them, through our window into the snowy scene behind them.   There are often squirrels out there frolicking in the snow (o.k. …finding the fallen bird seed), and birds at the feeders, eating.

We think the critters rather appreciate our Valentine decorations on display.
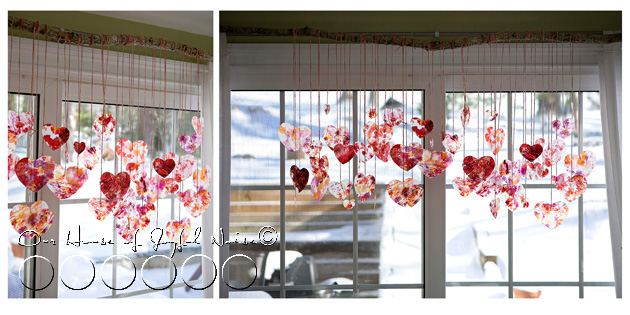
heart-strings-valentines-craft-28
I love coming in our front door, and seeing them swaying in the breeze across the room in front of us.  I can feel the love in the air.  It makes us smile.
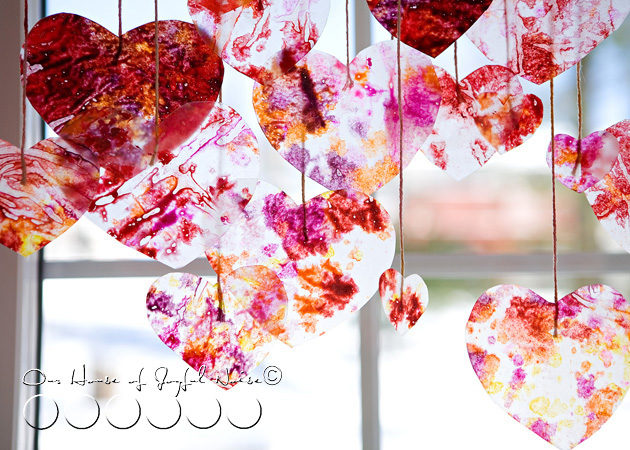
 

heart-strings-valentines-craft-29 The colors of love are a beautiful thing.

Let them shine, shine, shine.

(Love this craft idea?  Share the link on your Facebook!  Your mom-friends will love it too! Or….*pin it* to one of your boards! ; )


Save

Filed Under: Crafts & Creations, Holiday Crafts, Home Decor, Kids Arts and Crafts, Tutorial, WINTER Crafts and Creations, WINTER Home Decor Tagged With: crayon crafts, February-crafts, February-projects, heart shaped crafts, heart-crafts, heart-strings, heart-strings-tutorial, kids crafts, Valentine-crafts, valentine-decorations

Fun Word and Picture Puzzles: Building Important Skills | Elementary Homeschooling

January 10, 2011 By Laura 2 Comments

fun-word-and-drawing-puzzles-for-elementary-age-kids-hoeschooling-2

I know I’ve blogged about puzzles before.  But, that was puzzles of a different kind.  I believe all of the studies, that all puzzles, are just good for our brain – young or old. (People, or puzzles, for that matter.)  They can help keep our brain active, quick, and sharp, and God knows I could use all of that. (Ask Him!)

So when a puzzle sort of exercise came up in my triplet 8 year olds’ Language book, we ran with it.  Puzzles come in many different forms.  Any exercise, of trying to figure something out, can be considered a puzzle, in my book. It’s the search in your head, for a solution – whether it be for a problem in life, a jigsaw, or 17 Across. Regardless, I love puzzles.  (OK, I actually do not love the jigsaw kind.  They are o.k. on occasion. )

As I was saying…..when a puzzle sort of exercise came up in…..uhhhh, my 3rd grade  Language Arts class ( <—solution! ; )… I was thrilled.  Because, puzzles are beneficial for the above stated reasons.  But these particular kind we came up to in our daily lessons, I saw how they had other benefits to offer, after accessing them.  Here’s in what other areas: Comprehension, and following directions, through reading words that direct one’s actions, is pretty important skills for our kids (yours and mine, collectively speaking), to develop.  Right?  Kids especially, need to have opportunities to develop these skills, to continue succeeding in their advancing education, eventually in the workforce of their choosing (if they want to keep their job), and naturally for everyday occurrences in the process of living.  That’s what these exercises, I called puzzles,  would help develop.   But…..it just-so-happens, they are FUN too!  And as I have always said, having fun is always the best way to learn!

So, without too much more chatter, I thought I would share with you first, the two puzzles my three 3rd graders did, show you their results following them, and then welcome you to print them off  for your kids to do, if they are in the appropriate age range, and would like to do them, too.  (But I have to tell you, I’d enjoy doing them myself. So if you are inclined to print them off for yourself, I won’t tell a soul. ; )

Puzzle ONE

1. Draw a circle.
2. Draw an upside down ice cream cone above and on top of the circle. ·
3. Draw a half circle on each side of the big circle.
4. Draw a U in the big circle.
5. Make two dots over the U.
6. Make one dot lower than the two dots, but above the U.
7. Make a circle on the point of the upside down ice cream cone.
8. Make a W under the big circle.
9. Color your picture!

WHAT AM I?

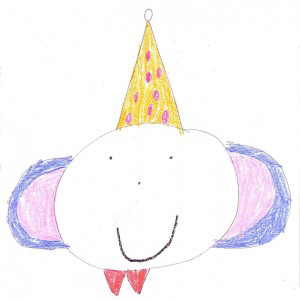
If directions were followed carefully, the drawing should look something like this:


fun-word-and-drawing-puzzles-for-elementary-age-kids-hoeschooling-1

That is just one of my student’s puzzle solution /drawings, after following the directions.  Of course all 3 of them had similar results, with only slight variations.  But all were correct in terms of following the directions correctly.

* If you would like to print off the directions to this puzzle, just click on the link above named ‘Puzzle ONE’, or click here.  It is a downloadable  and printable Word document, if I did it right.

Here’s another:

Puzzle TWO

1. Draw a big circle.
2. On the left top of the circle, draw an upside down V.
3. On the right top of the circle, draw an upside down V.
4. Draw a big W inside the circle, near the bottom.
5. Above the center point of the W, draw an O.
6. Near the left side of the W, draw a V lying on its side with the point of the V toward the W.
7. Near the right side of the W, draw a V lying on it’s side with the point of the V toward the W.
8. Near the middle of the circle, draw two small circles beside each other.
9. Color your picture!

WHAT AM I?

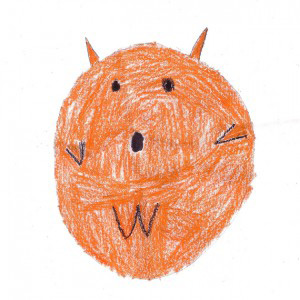
Here’s the results of this puzzle, by one of my student kids:


fun-word-and-drawing-puzzles-for-elementary-age-kids-hoeschooling

*Again, if you would like to print off the directions to this puzzle, just click on the link above named ‘Puzzle TWO’, or click here.  It is a down-loadable  and printable Word document, if I did it right.

The kids had such a good time doing these, that I thought I would  keep working with these puzzles a little more, but put their own writing skills to use.  In fact, I was reversing their role, from puzzle solver, to puzzle creator.   I gave them the assignment, of each writing their own puzzle directions.  Then later, they would have the opportunity, to solve each other’s puzzles the other 2 had written.  They loved the idea, and had a great time doing it!!

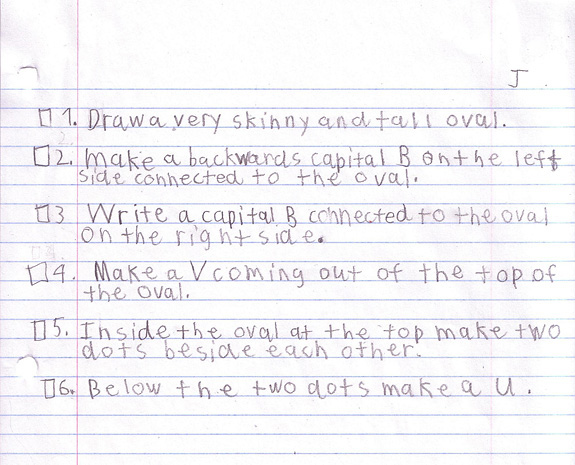
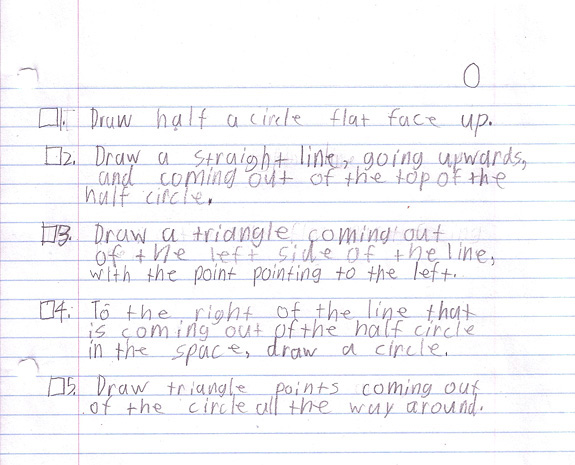
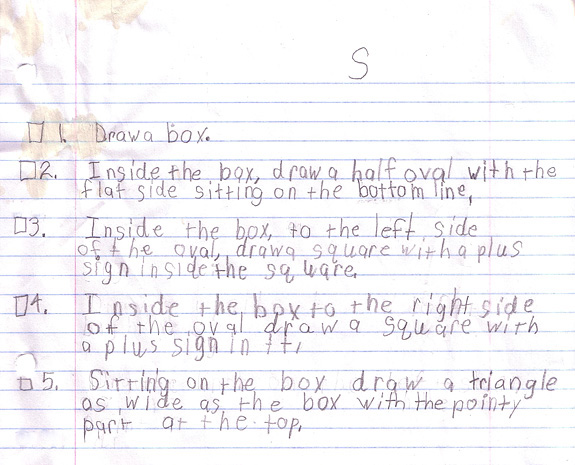
SO……I have their puzzles, that they wrote themselves, to offer you too! I am displaying them in this post, (as their handwritten papers, which I scanned) but their titles are down-loadable links for you too! Now this time the downloadable links are PDF documents, and they are just what you see below – handwritten by the kids.  Why?  Because I totally did not feel like typing them all over.  I think they are readable enough for you to figure out, and they have some endearing homemade character.  Especially, my spilled coffee stain, on {S}’s paper. ; )    Just keepin’ it real!


J’s puzzle

fun-word-and-drawing-puzzles-for-elementary-age-kids-hoeschooling-3

O’s puzzle


fun-word-and-drawing-puzzles-for-elementary-age-kids-hoeschooling-4 –

S’s puzzle

fun-word-and-drawing-puzzles-for-elementary-age-kids-hoeschooling-5


You and/or your kids,  may have more fun than you think you will, doing these puzzles.  If you do, I will take total credit for that. You may also have less fun, than you think.  That will not be my fault.  I am easily amused, and often presume everyone is as easily amused as I am.  : )

If you do download the kid’s puzzles, or follow them from the computer, YOU KNOW WHAT WOULD BE FUN?  (Or, you know, I think it would be…).  Letting us know the solution you came up with, for each kid’s puzzle!!  What does your drawing look like?  Let us know in the comments section below, afterward. Don’t worry.  We’ll tell you if you are wrong! ; )
Hope you enjoyed this post!  And hope you enjoy the puzzles too!!

Don’t sprain your brain, now! ; )


Save

Save

Filed Under: Elementary Homeschooling, Games, Homeschooling, Reading / Writing Tagged With: building-comprehension-skills, building-following-directions-skills, educational-puzzles-for-kids, elementary-homeschooling, fun-activities-for-homeschooling, homeschooling, word-drawing-games, word-drawing-puzzles

Midnight Snaps (Festive Cookies for New Years Eve)

December 30, 2010 By Laura 20 Comments

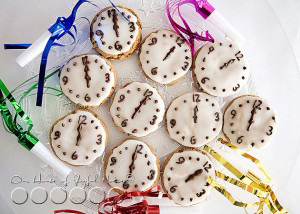
New Year's Eve clock cookies

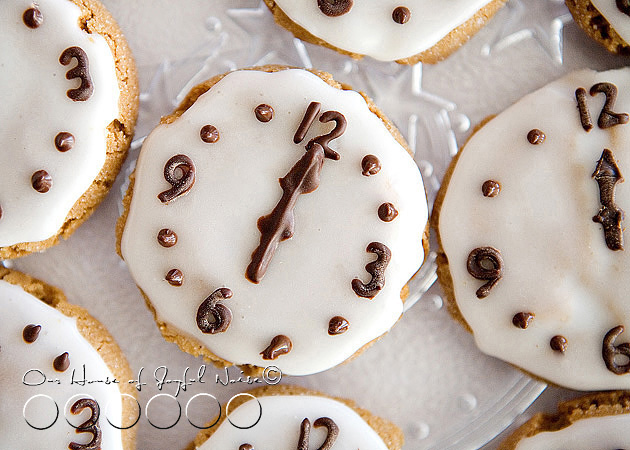
My kids and I were trying to come up with some themed food for New Year’s Eve, and {JM} came up with this great idea, right off the bat:  Cookies that are designed like clocks! (Oh, to have his quick, 8 year old brain!)

Right away I started trying to figure the details, and decided to start with homemade Gingersnap Cookies.  To design them, we went with a white icing that hardens, and a bit of chocolate art.  The design process does involve some intricate detail work, but if you enjoy the creative process and have a little patience to work with, they are worth the effort!  Your party-goers will be impressed with these festive cookies, you made!

First, I’m going to start by giving you this basic Gingersnap Cookie Recipe.  This post is not featuring how to make the cookies, with step by step photos, etc.,  but how to turn them into clocks.  So, using the recipe below, bake some cookies and let them cool before getting to designing.

Participating Ingredients for Gingersnap Cookies:

  • 3/4 shortening
  • 1 cup white sugar
  • 1 egg
  • 1/4 cup molasses
  • 2 cup all-purpose flour
  • 2 teaspoons baking soda
  • 1/2 teaspoon salt
  • 1 teaspoon ground cinnamon
  • 1 tablespoon ground ginger

Preheat oven to 350 degrees F.  Grease cookie sheets.

In a large bowl, cream the shortening and sugar. Add the egg and beat until light and fluffy, then stir in the molasses.  In a separate bowl, mix together the flour, baking soda, salt, ginger and cinnamon.  Add to the egg mixture, and stir until well blended. * (See foot note below). Roll bits of dough into 1 inch balls.  Dip each ball into sugar and place on cookie sheet, sugar side up, about 2 inches apart.

*Now, being the first time we made these, we did indeed use 1 inch balls of dough.  However, we found that the cookies were pretty small to work with, and it was difficult making such tiny chocolate numbers!  So……we advise that you make cookies twice the size, using 2 inch dough balls, and putting a little further apart on the cookie sheets.  That way, your chocolate numbers can be made larger, and it will all be easier to do.

Bake for 10-12 minutes, until cookies have spread, and cookies have cracked.  Let cool on wire rack.

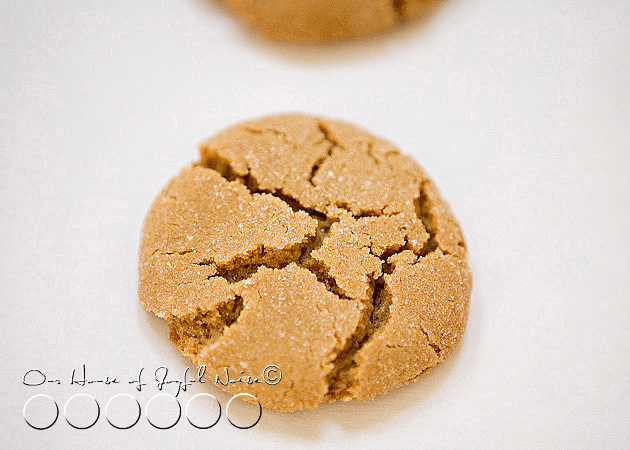
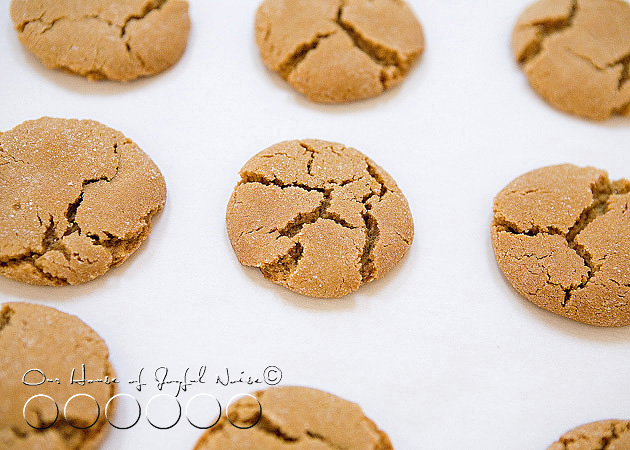
New Year's Eve clock cookies They are delicious straight and plain, for sure! Crispy on the outside, a little softer on the inside, and amazingly good!  Surely no one would notice, if just one, was missing. ;  )
New Year's Eve clock cookies

Again, these are small cookies, and we recommend having bigger ones to work with.

Now, once they are cool, you’ll need to whip up some icing.   I am going to guess some of you already have a recipe, and I am sure there many variations out there.  This one below is the one I started with. BUT, I really needed to add a lot more liquid than it calls for, being careful to keep it a very pretty thick consistency.  Really, this is one of those recipes where you need to tweak as needed, depending on how yours is looking.

Note:  You’ll probably want to at least make a double batch of this icing.

Participating Ingredients for Cookie Icing

  • 1 cup confectioner’s sugar
  • 2 teaspoons milk *
  • 2 teaspoons light corn syrup
  • 1/4 teaspoon of preferred extract (called for almond, I used vanilla, frankly, because I hate almond. )
* I probably had to add at least 2 tablespoons of milk!  But gauge for yourself.

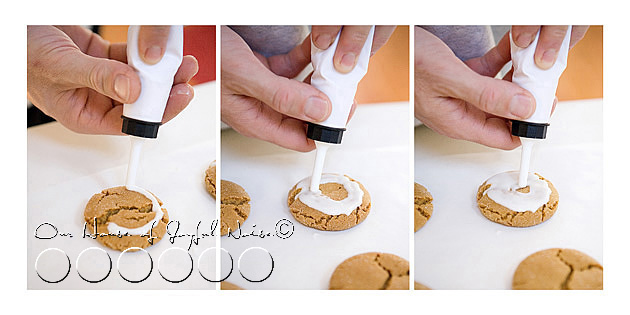
New Year's Eve clock cookies Using a piping bag, we outlined a circle around the edge of each cookie, and filled it in, using the tip to push the icing around some, to help get it all covered.
–

New Year's Eve clock cookies

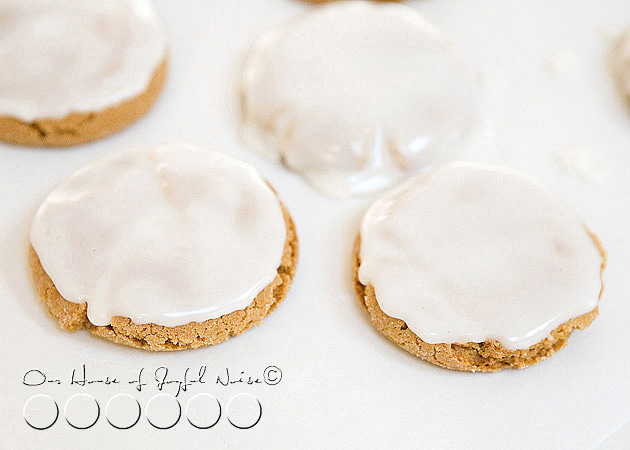
The icing is bound to drip a little sometimes, but if you try not to be close to the edge where the fall-off is, you should do o.k.

At the back of the photo above, you can see where we experimented with seeing if covering the whole cookie would be easier.  It was just too much icing.  So we stuck with our original icing plan.

Allow the iced cookies to set, so that the icing can harden.

*****

Now you’ll need to melt some chocolate to work with, otherwise known as tempering.   I should do a post just on this process at some point, but you’ll need to know it for this recipe! So I’m going to share with you a quick tutorial. Now, you may have used the double-boiler method of melting chocolate before, but we’ve never had much good luck with that.  Then, we learned a quick and easy trick to tempering chocolate, from Barefoot Contessa – and I am going to share it with you right now:

You’ll need: some milk chocolate -shaved or chips (we used  Hershey chocolate chips, which as chips are easier to melt), a glass measuring cup, a wooden spoon, and a microwave.

In the glass measuring cup, add about half of the amount of chocolate that you’ll need.  Microwave it for about 15-20 seconds. Take out, and with the handle/ butt end of the wooden spoon, mix the chips rapidly.  It will likely need more melting, so put it in for 10 second increments, and stir with the end of the wooden spoon very rapidly after each time, until the chocolate is all melted smooth and glossy.  Now, just as the remaining half of your chocolate, and stir rapidly some more.  You really want to mix it hard and fast – the more you do, the shinier your chocolate will be.

Now that’s a tip we can all use for life!!  Thanks Contessa!

***

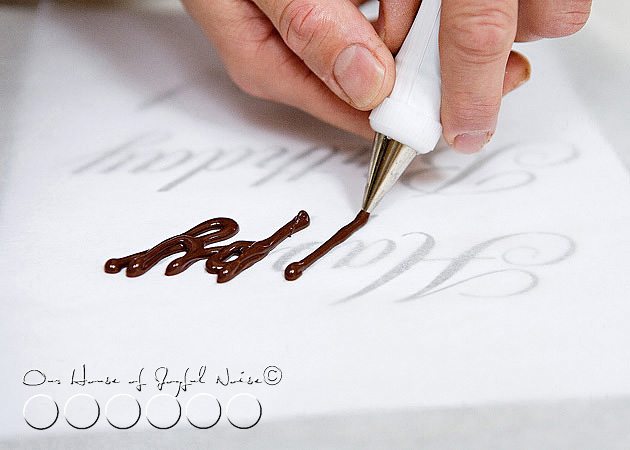
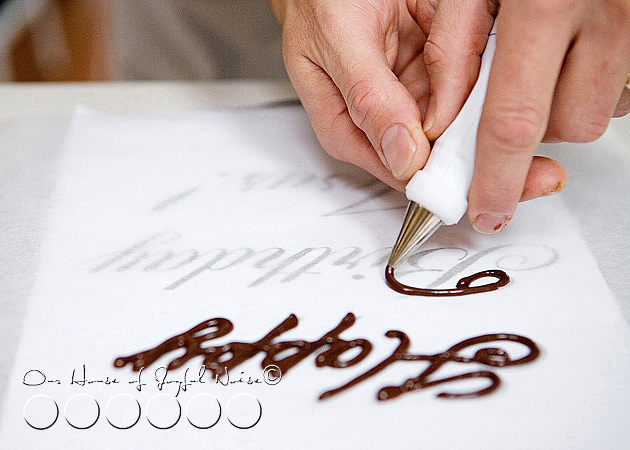
Now below is some writing with chocolate tips.  Since I didn’t photograph making the teeny-tiny numbers, here below I am using the photos of when we made the words for Jesus’ Birthday cake on Christmas.

We printed out the words on a piece of paper, having laid out the size we wanted, in the font we wanted.   Then we slipped that ‘stencil’ to trace, under a piece of parchment paper.  Using a fine tip on a piping bag filled with the melted chocolate, do your writing or designs!

New Year's Eve clock cookies

New Year's Eve clock cookies

As the chocolate cools, it will harden.

Our words came out nice, and when they were hardened, we just placed them on our cake!

New Year's Eve clock cookies

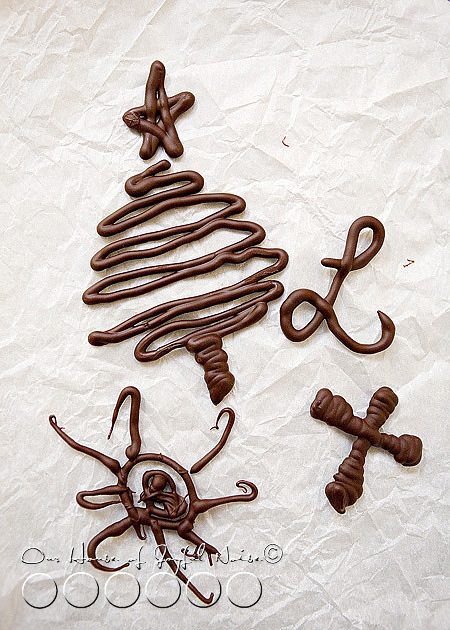
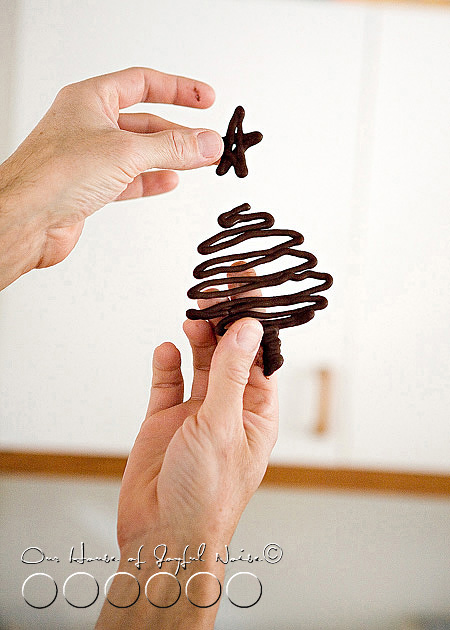
Michael and the kids had chocolate left in the bag, and they just couldn’t stop themselves from playing with chocolate some more.

New Year's Eve clock cookies
See how you can just pick it up?

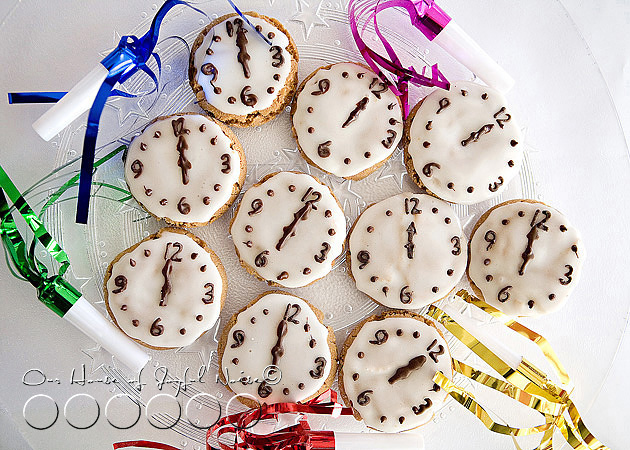
So this is the method we used, to make tiny little number and click hands. They were probably only 3/8ths of an inch, so you can imagine it was a tad difficult.  Bigger would be easier.  This way, doing the chocolate work on parchment paper first, if something comes out awful, you didn’t ruin a cookie or a cake.  You just start a new one on the parchment paper, and use the ones that came out best.

If the icing on the cookies is hardened, then use a bit more icing to apply the numbers and dots to the cookie.
Otherwise they won’t stick and stay put.

New Year's Eve clock cookies

So here is how our Midnight Snaps came out!!  Not perfect by any means.  But we think they are imperfectly cute!

New Year's Eve clock cookies

Now I realize I am giving you this grand idea, pretty last minute.  (lol….lol….).  So I wouldn’t blame you, if you went out and tried to find some large, store bought gingersnap cookies, or maybe even molasses cookies, to just bring home and decorate.  That would be a time saver for sure.  ; )
May you all rock around the clock on New Year’s Eve, (or at least until  midnight) and may we all have a Happy New year!

Filed Under: Baking, Fun Food, Holidays, Recipes, Treats Tagged With: chocolate-art, clock-cookies, cookies-for-New-Years-Eve, how-to-write-with-chocolate, midnight-cookies, new-years-eve-menu-ideas, new-years-eve-treats, tempering chocolate

America’s Hometown Parade & Thanksgiving Day- 2010

December 1, 2010 By Laura 6 Comments

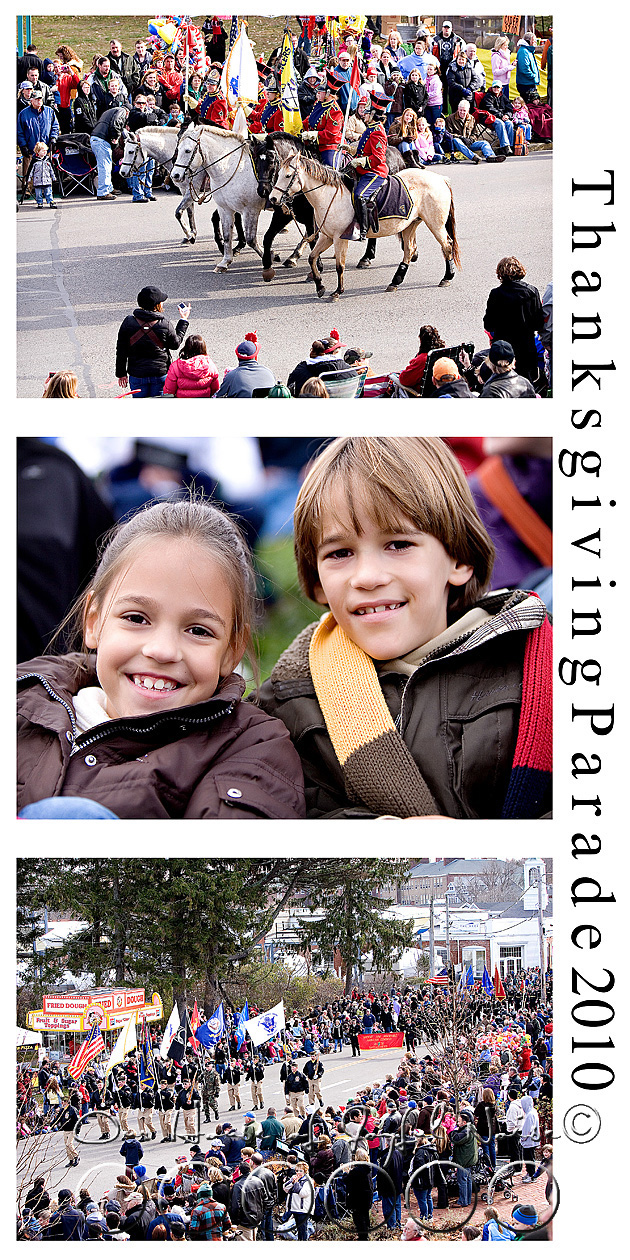
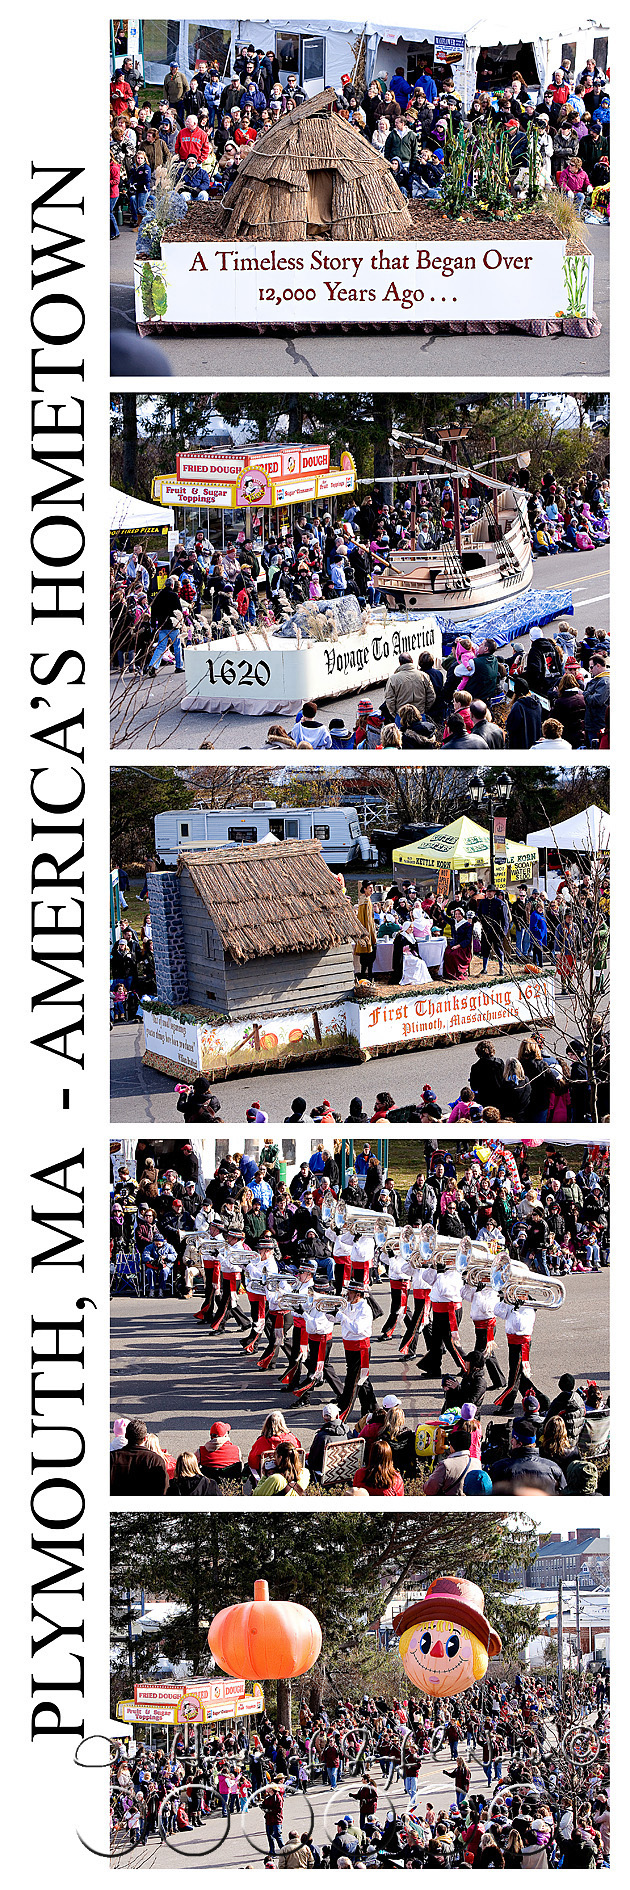
With Plymouth MA being America’s Hometown, and where the pilgrims first settled, we have quite the Thanksgiving Parade every year, not to mention a historical culture to enjoy all year long.

Plymouth MA Thanksgiving parade America's Hometown

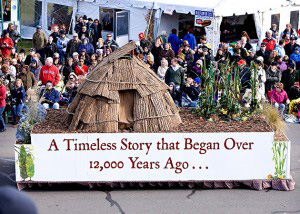
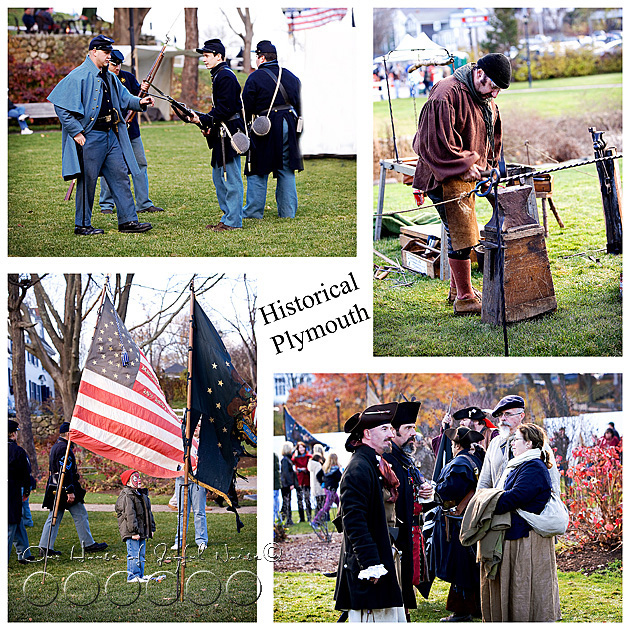
 For 15 years, hundreds of thousands of people have traveled to the historic Plymouth Harbor and Waterfront to experience a bounty of authentic Americana. The celebration of Thanksgiving becomes history-brought-to-life as Pilgrims, Native Americans, Soldiers, Patriots, and Pioneers proudly climb out of the history books and onto the streets of Plymouth. You’ll see some of that in the photos to come!

There is so much to enjoy this weekend.  The festivities include not only the big parade, but a crafter’s pavilion, an educational Wompanoag pavilion, food vendors, kid’s activities, the New England Food Festival, and more.  It’s a very interesting and festive event, so consider coming down in the coming years, if the trip is do-able for you and your family.  And give us a call while you’re here!

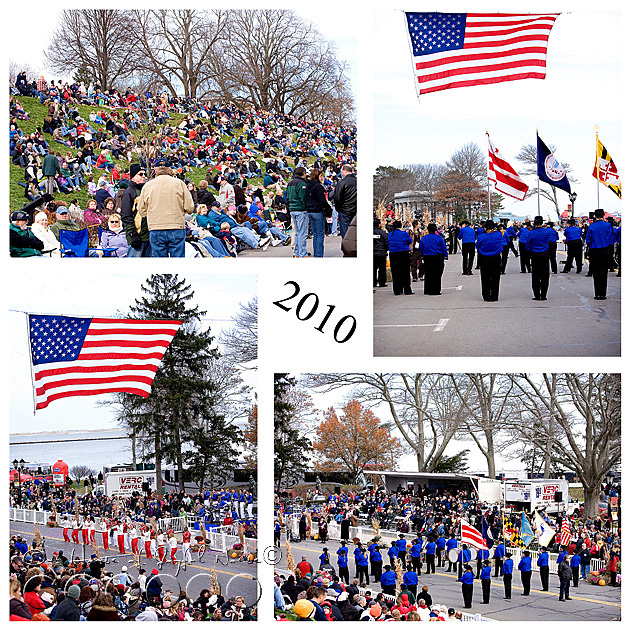
We had a great view of the parade, as we sat on the hill pretty much right across from Plymouth Rock.  That hill can be seen in the photo on the top left below.  Afterward we did a bit of walking around.

I know Thanksgiving is over and everyone is ready to move on, but I thought I would just share with you a bunch of photos I took, so you can enjoy a little of this event with us.  It was a beautiful, and fairly mild day. So use your imagination, sit back and enjoy.

Not much more chatting in this post at all.   Maybe just a little.

Plymouth MA Thanksgiving parade America's Hometown Plymouth MA Thanksgiving parade America's Hometown


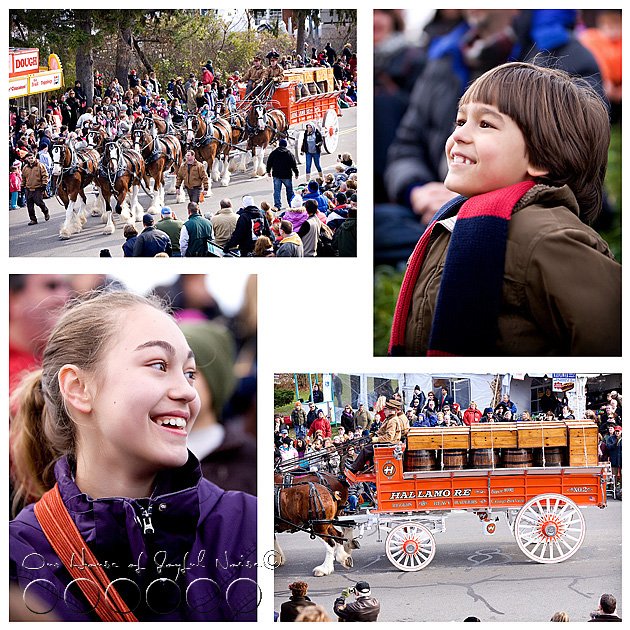
Plymouth MA Thanksgiving parade America's Hometown Many of you know that Michael is a 2nd generation sign maker and letterer.  Well Michael’s father used to hand letter the Hallamore barrel wagons you see in the photos above, pulled by Clydesdale horses. That was an interesting piece of family history to share with the kids.


Plymouth MA Thanksgiving parade America's Hometown Plymouth MA Thanksgiving parade America's Hometown

Plymouth MA Thanksgiving parade America's Hometown Seeing so much live history, right before your eyes, is a thrill.  We are blessed to see some of it all year long, around here.  With the Plimoth Plantation so close, we can step back in time, anytime!  Photographing it all is so fun.  Aside from the modern-dressed people all about, it’s easy to imagine you are back in time.  One thing we DID see a few times, that really cracked us up repeatedly, was the evidence of today’s technology, that not many can be away from for very long!  To see pilgrims and indians, texting, was a hoot!!  I wanted to get a photo of that, but never got one. A funny sight though, as I’m sure you can imagine.   All in all, it was a wonderful and memorable family day together.

As for our Thanksgiving Day……..

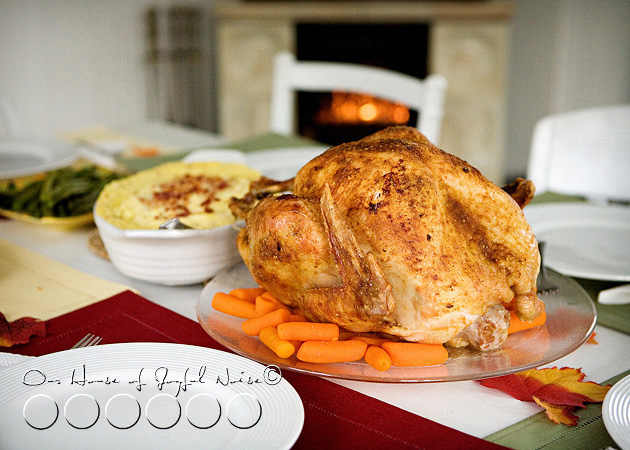
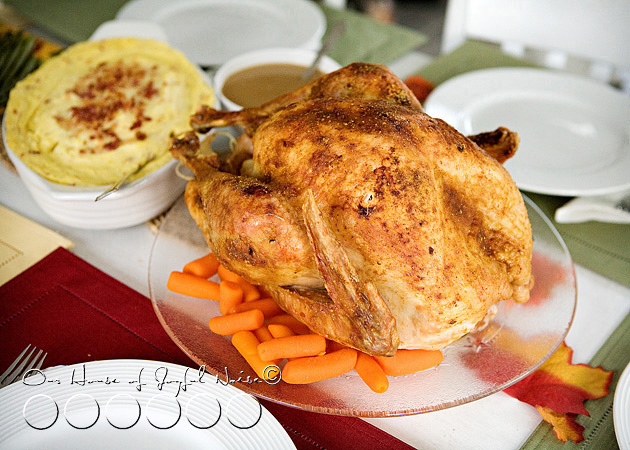
thanksgiving-plymouth-ma-3 ….ours was simply peaceful and lovely.  We do not have a lot of close extended family, so we have often spent this holiday just the 6 of us.  In the past years, we have opted to cook a ham or cornish hens on Thanksgiving.  But this year, we cooked our very first turkey!  It came out….perfect.  As you can see. ; )  Dinner was delicious, as were the pies.  We played games, watched football, and played some football outdoors too.


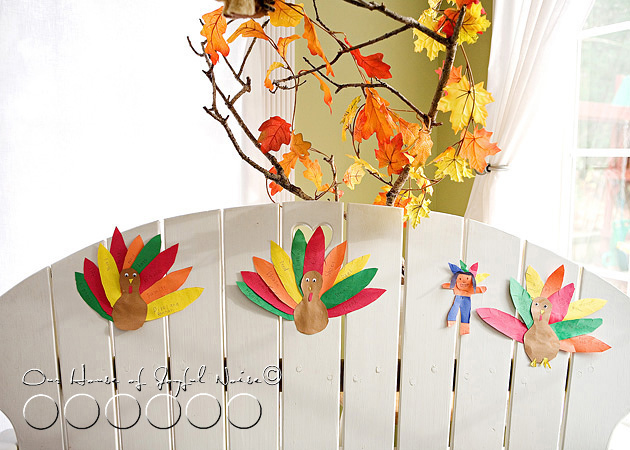
thanksgiving-plymouth-ma The kids set a real festive atmosphere as always, with the creative decorations.


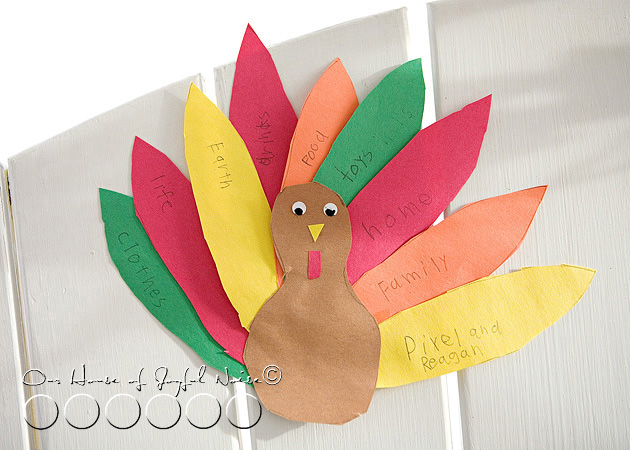
thanksgiving-plymouth-ma-1 Each turkey that the little ones made, displayed feathers that expressed some of the things that they were thankful for. “Reagan”, by the way (on the last feather) is our other pet:  a Republican beta fish. : )  Yep, he’s red.


thanksgiving-plymouth-ma-2
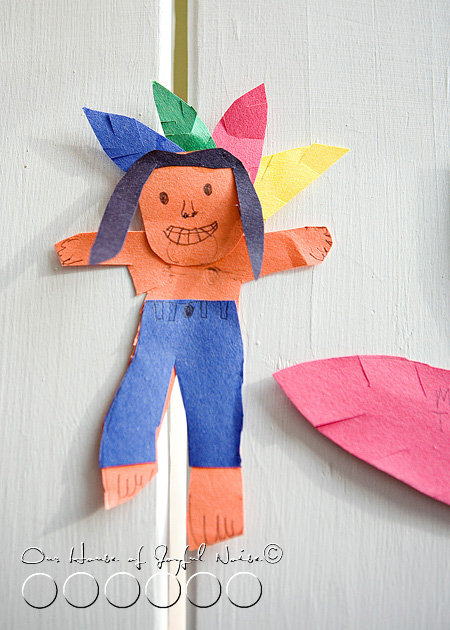
I really loved {S}’s indian.


thanksgiving-plymouth-ma-4 We hope you and your families, had a blessed and memorable Thanksgiving as well!

Save

Save

Save

Filed Under: Celebrations, Holidays, The Big Picture, Traditions Tagged With: America's-Hometown-Thanksgiving-Parade-2010, Plymouth MA

Pixel the Hedgehog Plays Peek-a-Boo!

November 16, 2010 By Laura 9 Comments

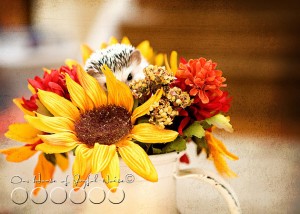
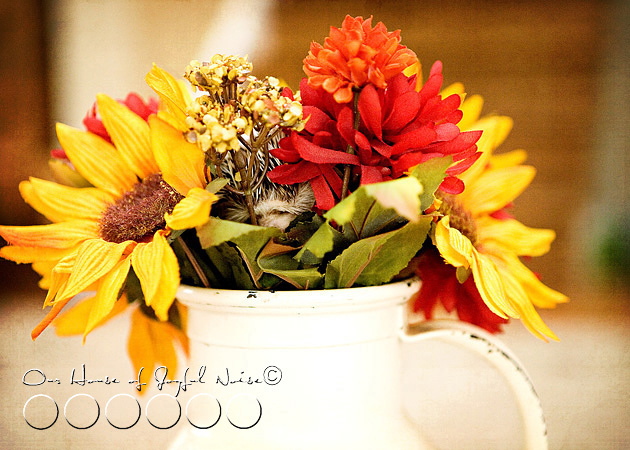
hedgehogs

Have you ever met our sweet hedgehog, Pixel?

We haven’t blogged her much since she first came home as a baby in April.  She is 7 1/2 months old now.

But that doesn’t mean she doesn’t get any attention around here!  She is rarely in her cage all day.  She has got to be the most loved, cuddled, spoiled hedgehog on the face of the earth.   {A} is still her main caretaker, and definitely spends the very most time with her.  But {JM, O and S} have their own play-QT with her every day too.   Pixel is woken up in the morning, played with sporadically throughout the day by someone or other around, and just held and carried around while she takes cat-naps.

Errr….hedgie-naps, I guess.

She’s even settled in for the night at bedtime!

She really is an easy pet, being so quiet, quite clean, and completely potty-trained.  We can even tell when she ‘has to go’, so we just put her in her cage, and she runs to her litter pan.  Pretty cute to see! (If you stop watching right there. lol).

We had so much fun taking these recent photos of her.

hedgehogs


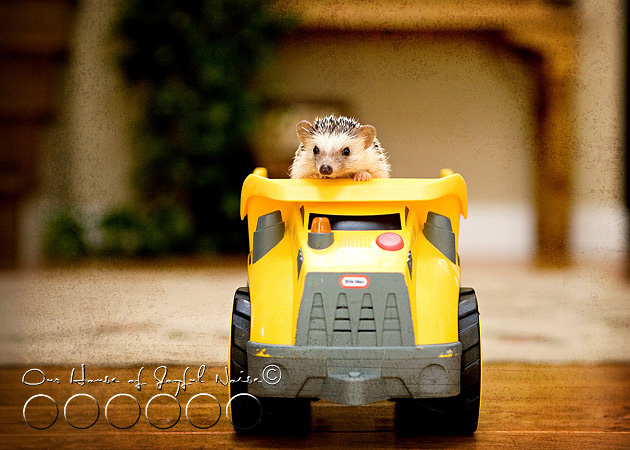
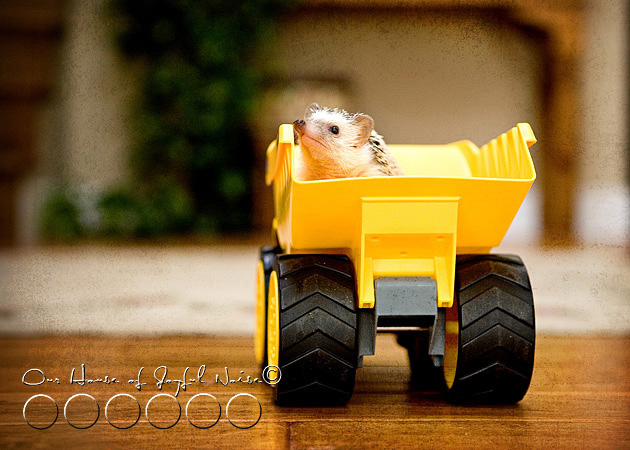
hedgehogs She gets rides now and then.

hedgehogs

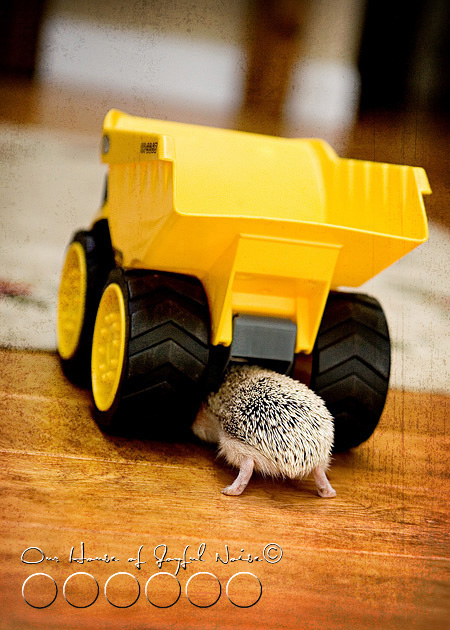
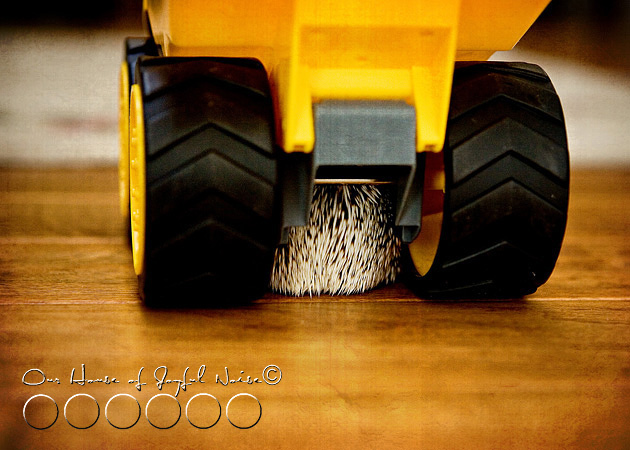
Being a hedgehog, she loves to get underneath things.
–

hedgehogs
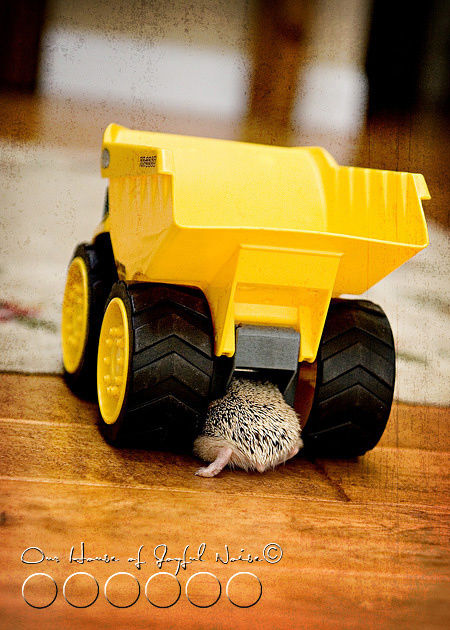
There she goes!!    She was under there for a few minutes.  Then she tried to back out again, but the whole truck was backing up!…..

hedgehogs BEEP!   BEEP!   BEEP!  BEEP!


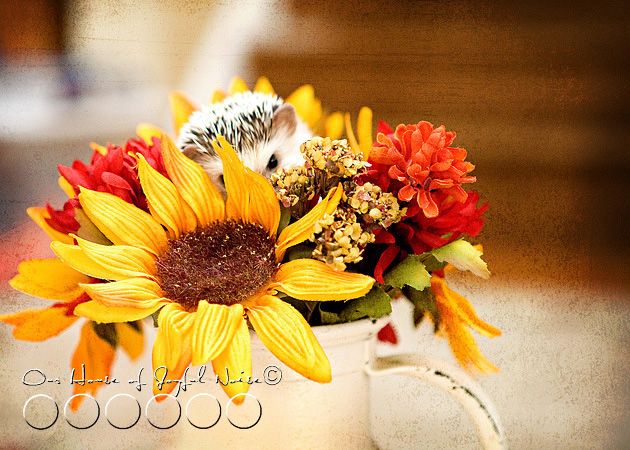
hedgehogs “We see you, Pixel!!”

hedgehogs

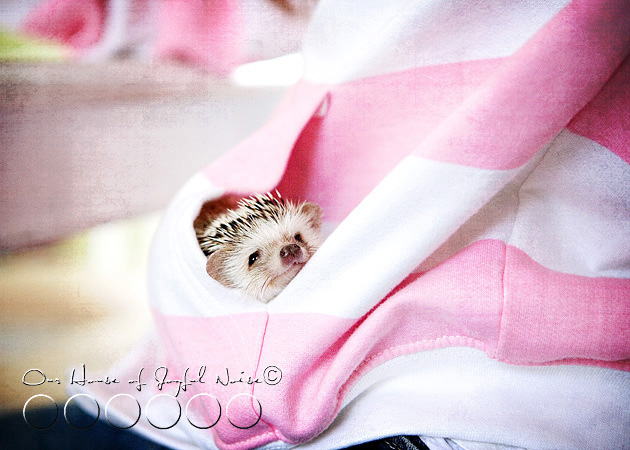
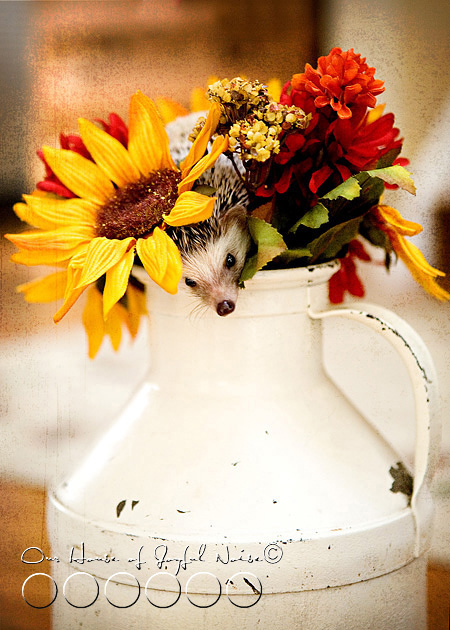
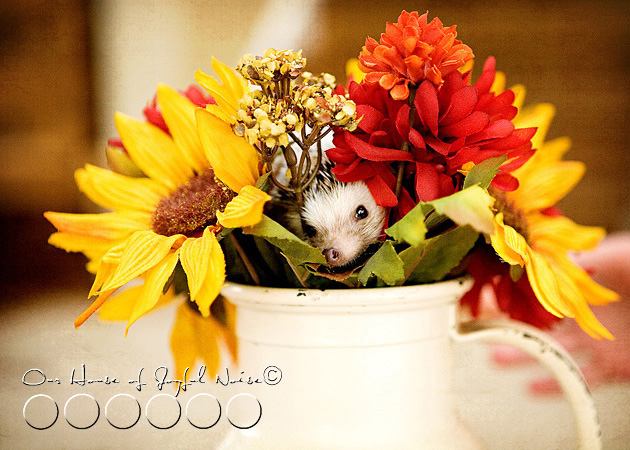
hedgehogs “PEEK-A-BOOO!”

hedgehogs Look closely in there….do you see her scrunched up face?  SO CUTE when she does that!  When she ‘puts her visor down’.  (That’s hedgehog talk.)

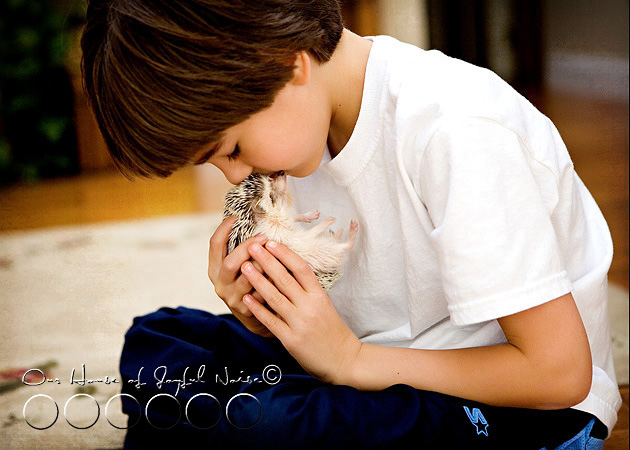
hedgehogs A little time with {JM}.   She gets countless kisses from the kids in a day.  She’s quite used to it.


hedgehogs
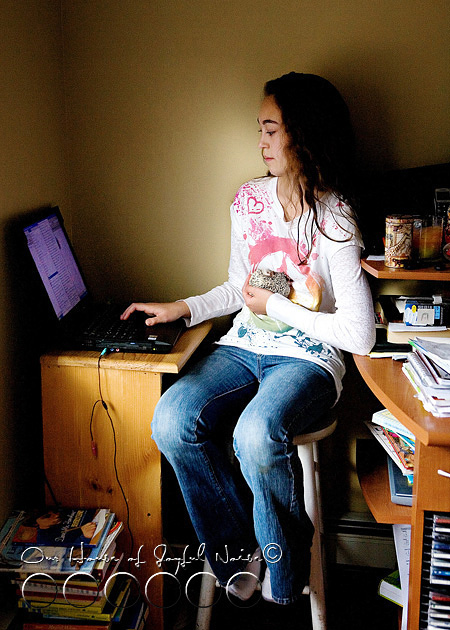
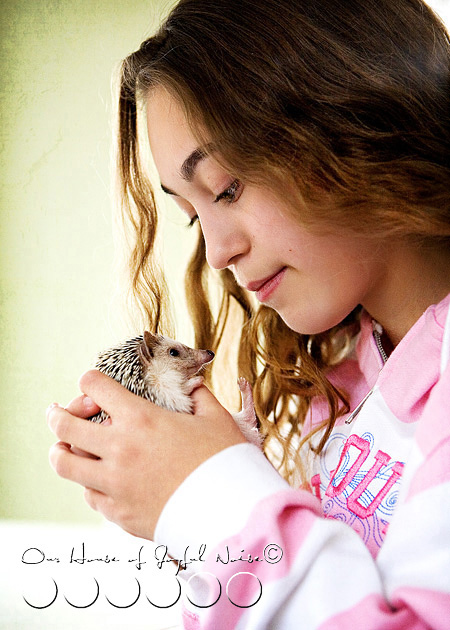
Pixel spends a whole lot of time in {A}’s hand, just like this, when {A} is on the computer, reading a book, or standing around talking.  She is a professional hedgehog handler.  Or of her hedgehog, anyway. I’m in awe, watching them together.

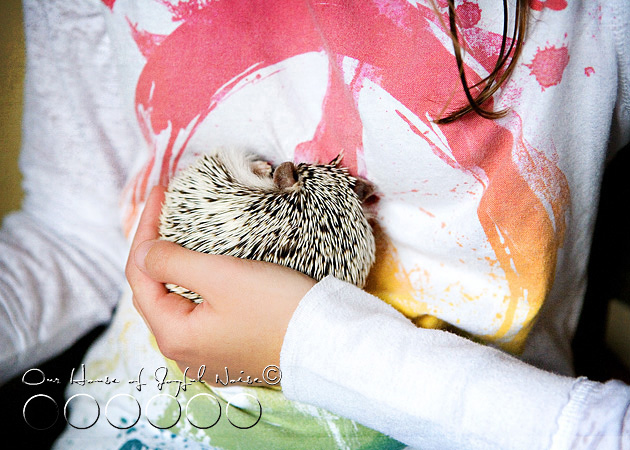
hedgehogs She curls right up and goes to sleep, with the slightest sign of a cuddle.

hedgehogs

hedgehogs
Just look at that face!!  That’s the face I love.  She has other faces.  She’s very facially-expressive.

Hope you enjoyed this recent peek at Pixel.  We’ll try to incorporate her in our blogging more, if you’d like. After all, she is very much a part of our family.

hedgehogs The End!

Save

Filed Under: Life In General, Photography, Photography & Lettering, The Big Picture Tagged With: family pet, good-pets, hedgehogs, pet-ideas, pet-photography, tropical-pets

  • « Previous Page
  • 1
  • …
  • 42
  • 43
  • 44
  • 45
  • 46
  • …
  • 101
  • Next Page »

We are wicked happy to have you here! We hope you find much inspiration, help, humor and enjoyment here.


Archives


POPULAR POSTS

* * * * * *

SUBSCRIBE to House of Joyful Noise blog! Every new post, delivered right to your email box!


Privacy Policy

Amazon Affiliates

Never at any additional cost to you, we may earn a small commission for our endorsement, recommendation, testimonial, and/or link to any products from our website. Your purchase through our links helps support our family, while sharing with you the products we authentically use and recommend, for various ideas, and letting you know where you can purchase them. Thank you for your support!

[footer_backtotop]

Copyright © 2025 HouseOfJoyfulNoise.com · Genesis Framework by StudioPress