• HOME
  • {A}’s Chipmunk Training Archives

 Homepage

  • The Homestead
    • Home Projects
    • Home Improvement
    • Home Decor
      • Seasonal Home decor
        • FALL Home Decor
        • WINTER Home Decor
        • SPRING Crafts and Creations
        • SUMMER Crafts and Creations
    • Our Chickens
    • Gardening
    • Organization
    • Re-Purposing
    • Furniture Refinishing
    • Budget
  • Crafts & Creations
    • Seasonal Home decor
      • FALL Crafts and Creations
      • WINTER Crafts and Creations
      • SPRING Crafts and Creations
      • SUMMER Crafts and Creations
    • DIY (Do-It-Yourself) Project
    • Kids Arts and Crafts
    • Homemade/Handmade Gift Ideas
    • Holiday Crafts
    • Fan Pulls
    • Free Printable/Downloadable
    • Sewing Projects
    • Giveaways
    • Business Features
  • Recipes/FoodFun
    • Breakfast
    • Lunch
    • Main Dish
    • Sandwiches
    • Appetizers
    • Slow Cooker
    • On The Grill
    • Side Dishes
      • Soups
      • Salads
    • Baking
      • Breads, Rolls and Muffins
    • Snacks
    • Treats
    • Desserts
    • Drinks
  • Homeschooling
    • Elementary Homeschooling
      • Elementary Homeschooling READING
      • Elementary Homeschooling MATH
      • Elementary Homeschooling LANGUAGE ARTS
      • Elementary Homeschooling SCIENCE
      • Elementary Homeschooling HOME ECONOMICS
      • Kids Arts and Crafts
    • Middle School Homeschooling
      • Middle School Homeschooling SCIENCE
      • Middle School Homeschooling HOME ECONOMICS
    • Language Arts
    • Math
    • History / Social Studies
    • Geography
    • Foreign Language
    • Field Trips
    • Games
    • Nature Study
  • The Big Picture
    • Life In General
    • Celebrations
    • Faith
      • Into the Light; The Series
    • Giveaways
    • Reviews & Sponsors
  • Photography & Lettering
    • Photography
    • truck lettering
    • vehicle graphics
    • Newborns
    • Kids
    • Engagement
    • High School Senior Pictures
    • High School Senior Pictures Sneak Peeks

A Peek at Our Easter Home Decor, and Finished Eggs

April 20, 2011 By Laura 3 Comments

easter-home-decor-5

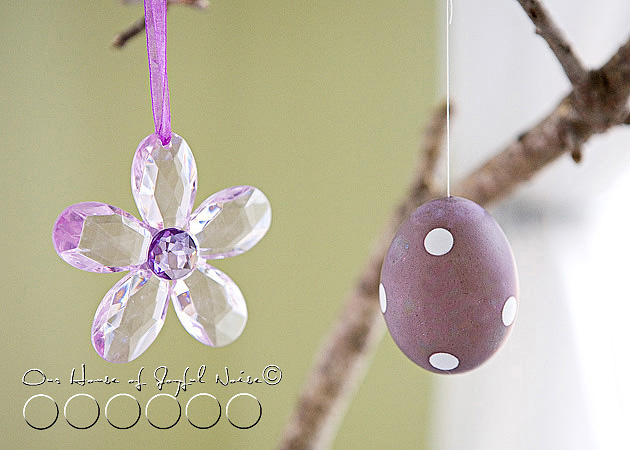
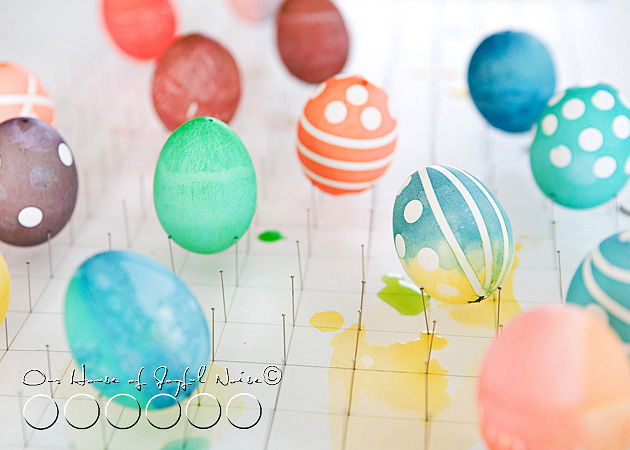
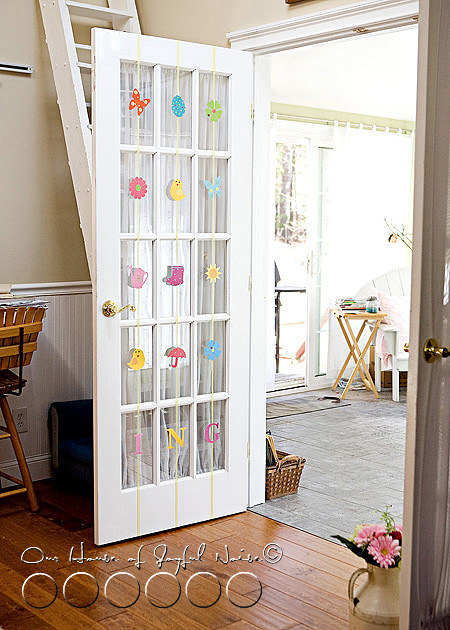
After sharing with you all the egg dying fun we had with the kids, I wanted to show you what we did with the eggs they dyed, and a little bit of the rest of the Easter/Spring decor around our home.  As always, our little holiday tree ( or, branch in a bucket of bricks…lol.) is decorated.  Mostly photos here – less chit-chat.
–

easter-home-decor
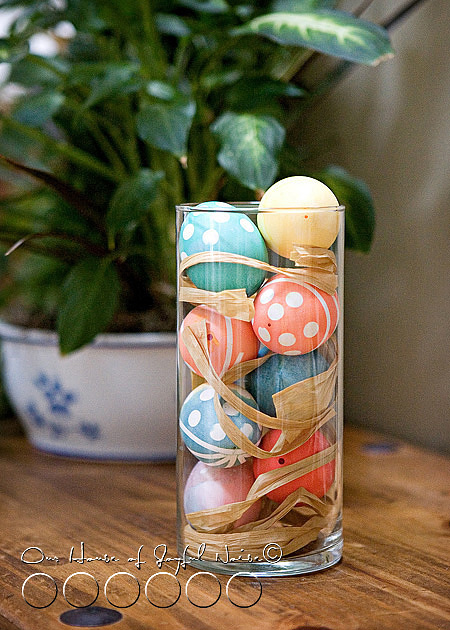
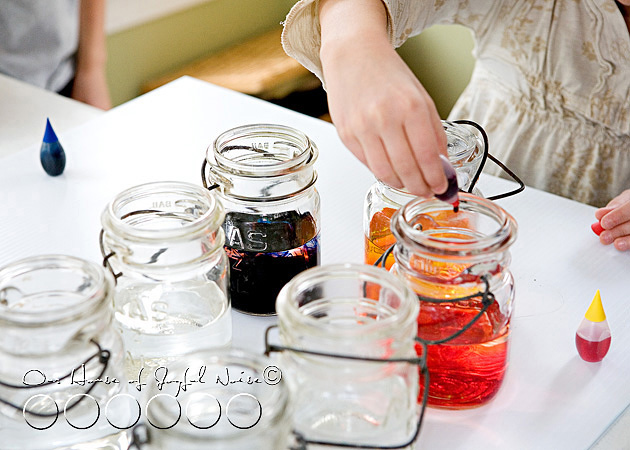
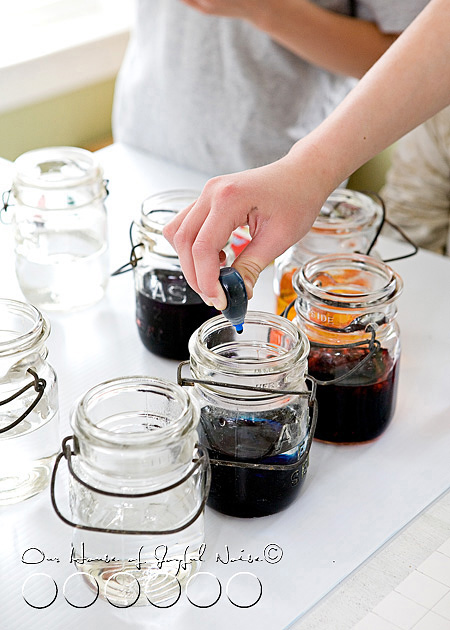
{O} did this arrangement of some of our dyed eggs and raffia in a tall glass jar, all by herself. (She’s 8.) I was so impressed.

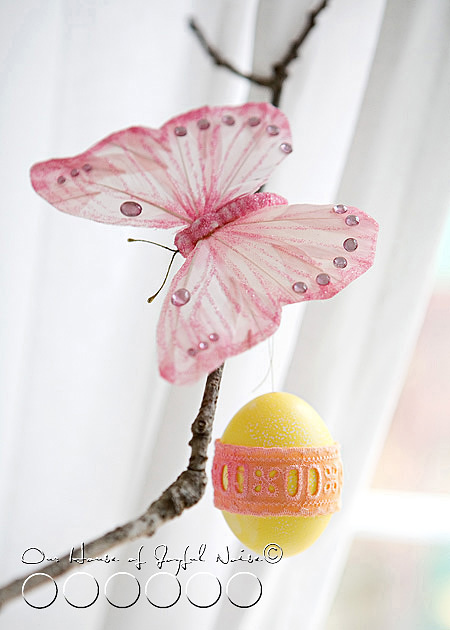
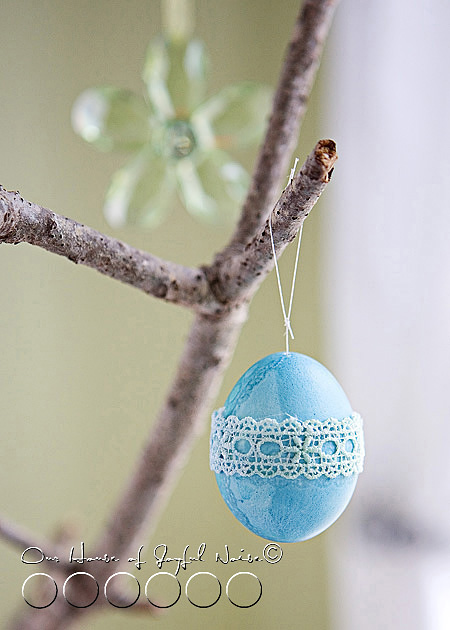
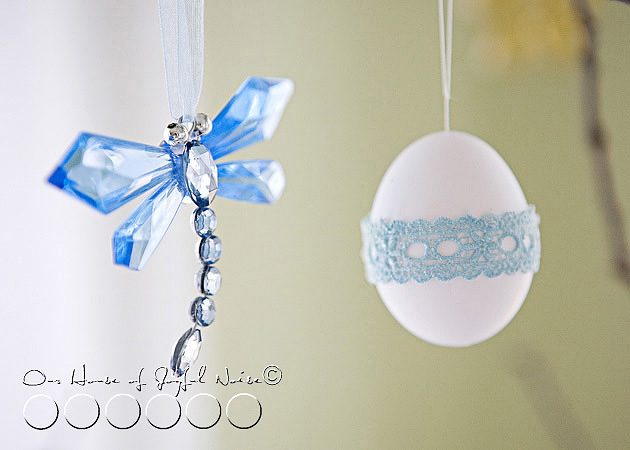
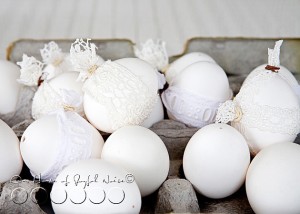
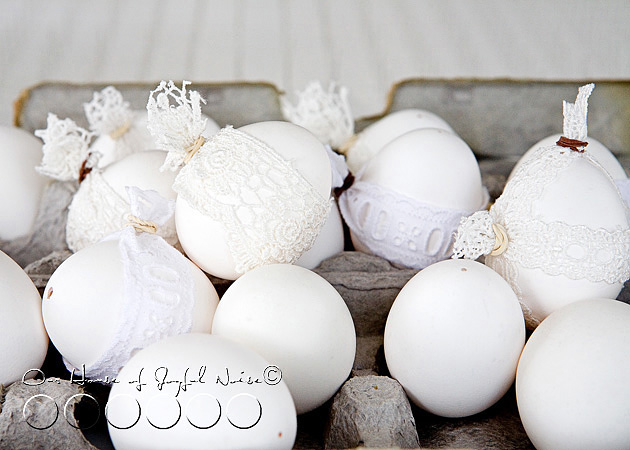
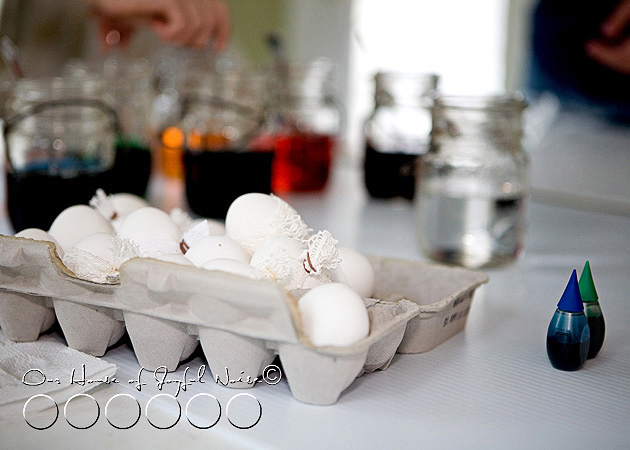
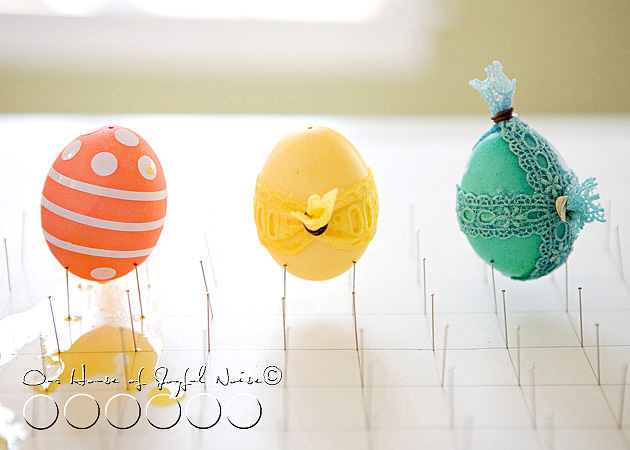
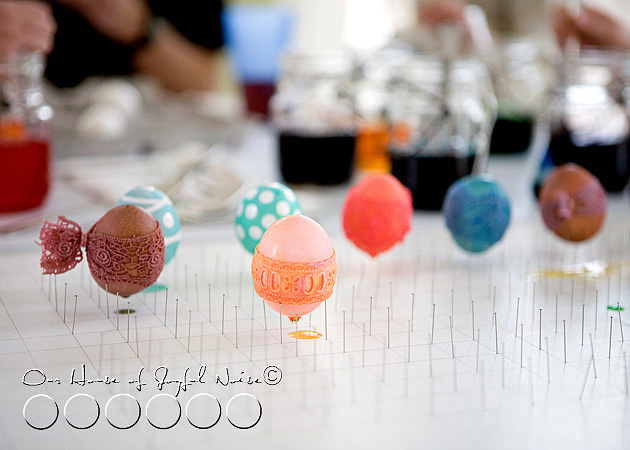
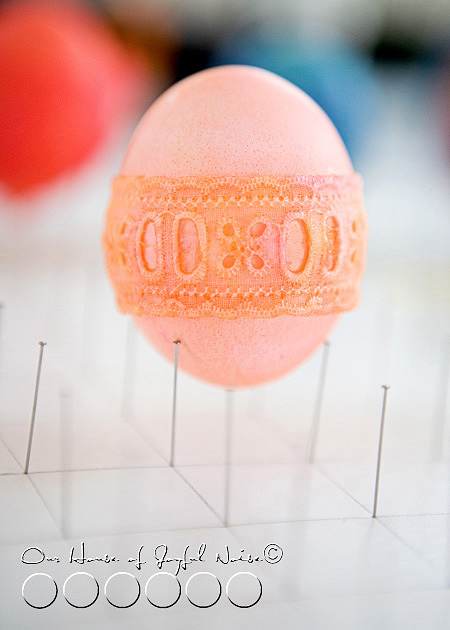
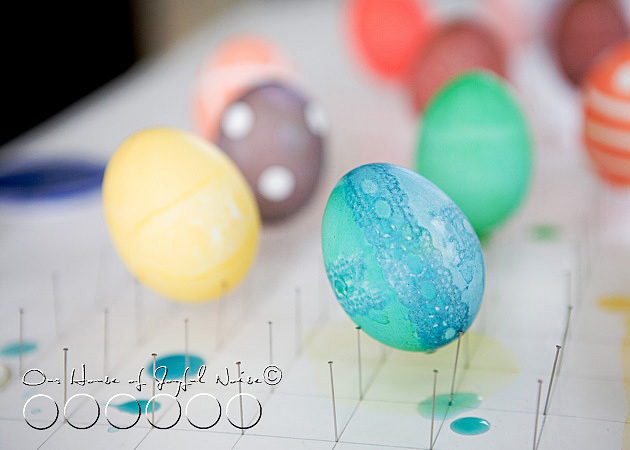
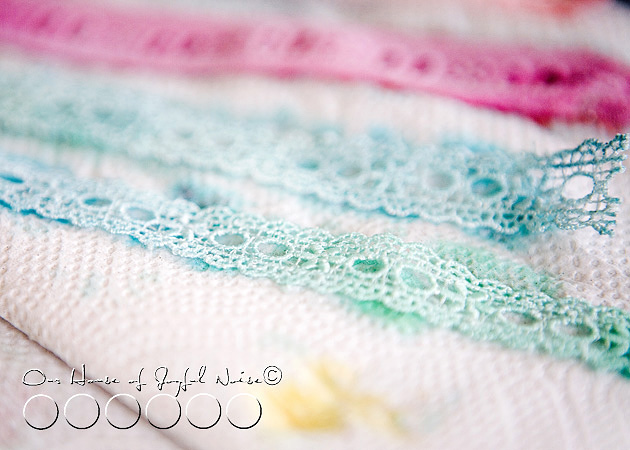
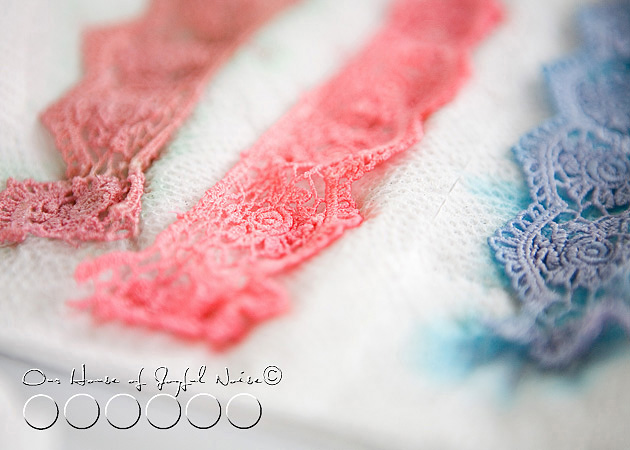
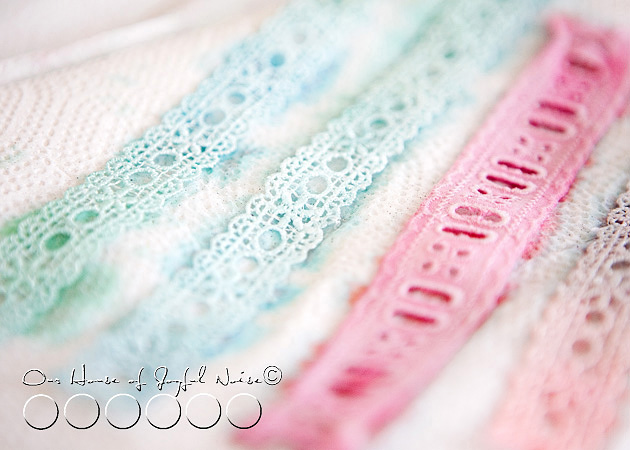
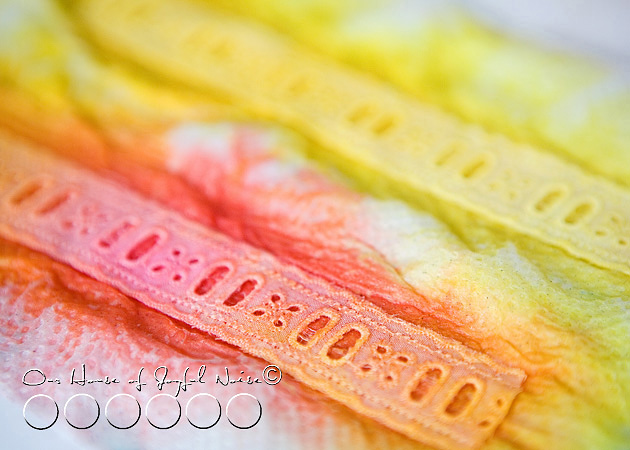
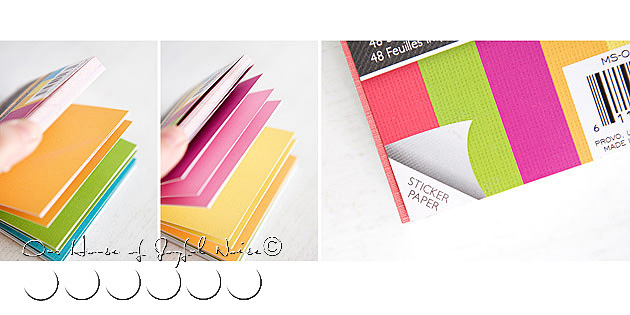
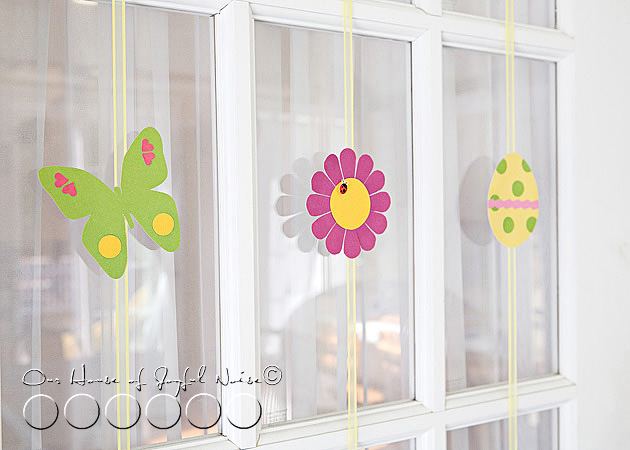
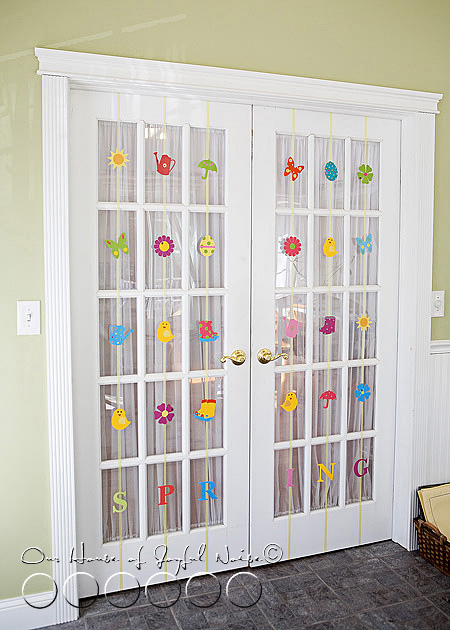
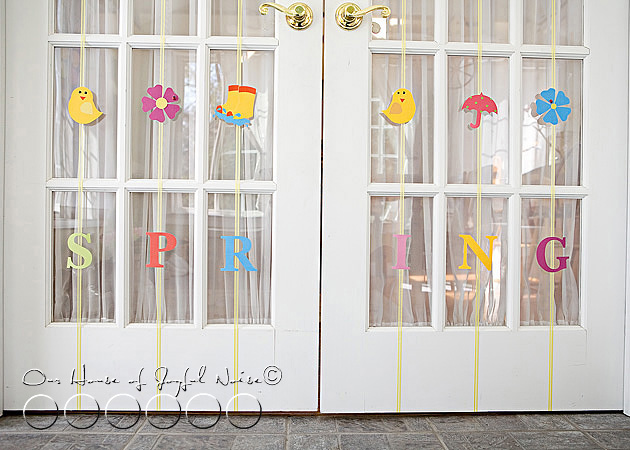
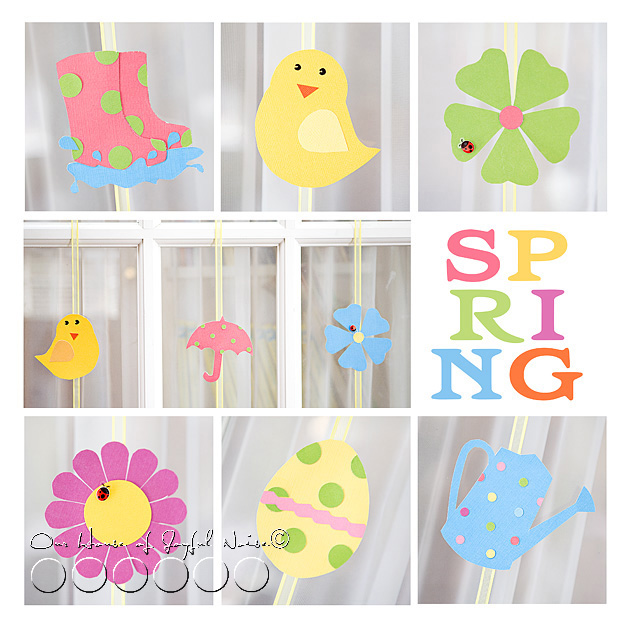
Next, you can see what I decided to do with some of those dyed pieces of lace you saw in the photos of the egg dying post….
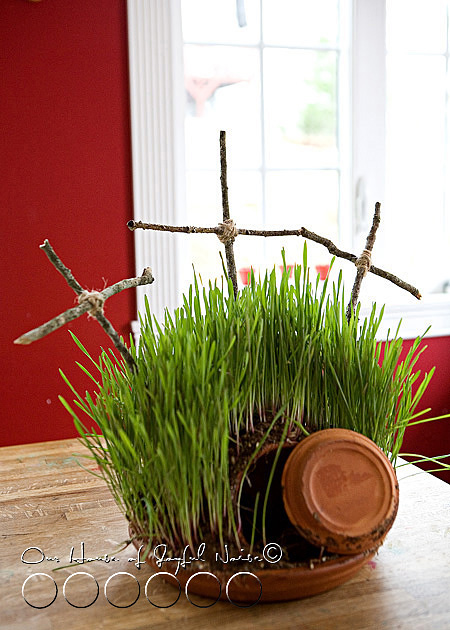
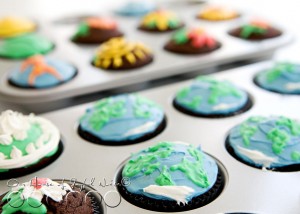
easter-home-decor-1

easter-home-decor-2

easter-home-decor-3

easter-home-decor-4

easter-home-decor-6

easter-home-decor-8

easter-home-decor-9

easter-home-decor-10
easter-home-decor-12

CALVARY.

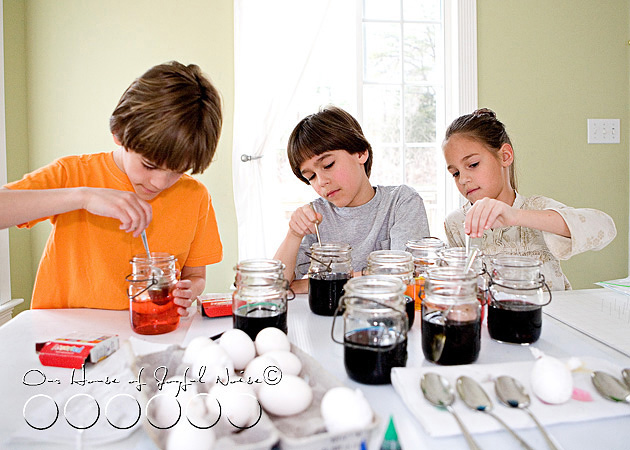
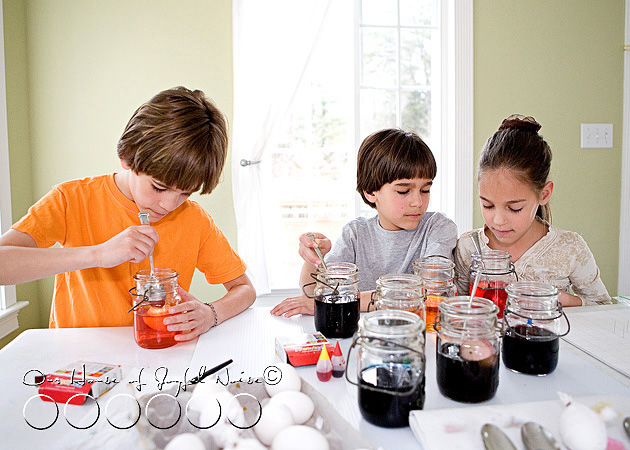
This was a Lenten project & (Scriptural) lesson we did with the kids. Well, Michael really gave the lesson, and he did a really good job with the message, as they all worked, getting their hands really dirty.  It always warms my heart, to listen to the kids talk about their faith, so directly from their heart, and in such sweet ways. I took lots of photos of them making this.  I’ll share in time next year, and show you how it is done.  (If I’m still blogging.)  The whole thing will be going out in my garden.   I love it, for all it represents.  The kids put it together, seeded it, watered it every day, and grew it to this,  and all of that makes me love it even more.

JESUS’ TOMB.

I hope you enjoyed the peek.  : )  We won’t be blogging again until next week. Our family has a busy and focused rest of the week, that I’m really looking forward to, as we prepare ourselves for Easter.  So we just wanted to say to you now…


From our home to yours, wishing all of you, and your families, a blessed Holy Week, and a joyful Easter Sunday celebration.

See you again soon.

Save

Save

Filed Under: Gardening, Home Decor, Photography, Seasonal Home decor, SPRING Home Decor, The Homestead Tagged With: Catholic-blogs, Catholic-families, decorating-with-dyed-Easter-eggs, Easter-home-decor, easter-tree

Creative Easter Egg Dyeing & My Photography Fun

April 19, 2011 By Laura 14 Comments

creative-egg-dyeing-ideas-photos-5

Dyeing Easter eggs is one of our family’s favorite creative Easter activities.  (And photographing the process, is also one of mine.) But every year, dyeing hard-boiled eggs causes us personal dilemmas.  For one, there is the question of how soon, is too soon, to dye eggs. Then we are afraid to put them in the fridge, knowing condensation will likely form on our artwork, when we take them out on Easter day.  Of course, we are always sad to crack and peel our hard work off, and then we’re a little leery of eating them anyway!

So this year we decided…..we’re blowing out the eggs!!  It solves all of those dilemmas of ours, and we can save them until next year, for decorating, and collect more and more with each passing year.   It was to be our first year blowing eggs out, and we were excited.

creative-egg-dyeing-ideas-photos Honestly, the kids were killing themselves, blowing them out.  Michael had made suitable sized holes, and broke up the yolk in there, so it wouldn’t be difficult.  Still….faces were turning red and purple. I could hardly watch. They only did a few.  I didn’t want their head to explode, or anyone to get a headache.
–

creative-egg-dyeing-ideas-photos-4 I had picked up a few tips from Martha Stewart, that I was excited to try.  One was tying lace around some eggs, dyeing them, and hopefully leaving a lace impression on the egg, when the lace was removed.   That was the plan, anyhoo.

Lots of photos coming up here.  Some of how we dyed the eggs, and many are just photos I was having too much fun taking.


creative-egg-dyeing-ideas-photos-1

creative-egg-dyeing-ideas-photos-2

creative-egg-dyeing-ideas-photos-3

All of these mason jars I had just picked up at an estate sale on Sunday!  I knew I’d find lots of uses for them, and I did, the very next day!  They are perfect for dyeing eggs!

  creative-egg-dyeing-ideas-photos-6

creative-egg-dyeing-ideas-photos-7
We had cut some vinyl dots and stripes, to adhere to some of the eggs before dyeing, and to be removed after they were dry.

–

creative-egg-dyeing-ideas-photos-8

creative-egg-dyeing-ideas-photos-9
One of my favorite shots of the day.

The kids always have so much fun choosing colors, and checking their eggs.  I love to watch them work, and listen to them chat.

creative-egg-dyeing-ideas-photos-10

creative-egg-dyeing-ideas-photos-11

creative-egg-dyeing-ideas-photos-12

creative-egg-dyeing-ideas-photos-13

creative-egg-dyeing-ideas-photos-14

creative-egg-dyeing-ideas-photos-15

I was very eager to take the lace off some the eggs.   But it seemed like they should be fairly dry before I did, being concerned the wetness would run onto the lace impression.  I wasn’t sure if that was a good plan or not.

     creative-egg-dyeing-ideas-photos-16
creative-egg-dyeing-ideas-photos-17
Also another new technique we were trying this year:  flat-head pins stuck in foam-core, to dry the eggs on.  Worked like a charm!  I never liked the mark that is left when resting a drying dyed egg on a flat surface.  This leaves no marks!

–

creative-egg-dyeing-ideas-photos-18

I started noticing how much I loved the dyed lace! I wondered, should I leave them on?


creative-egg-dyeing-ideas-photos-19
O.k., I guess leaving this one on, with the little rubber-bands, would just look plain silly.  But I still loved the dyed lace.
–

creative-egg-dyeing-ideas-photos-20 Our {O}.
–

creative-egg-dyeing-ideas-photos-25
I did start removing the lace pieces, and this was the best that came out.  Hmmmm.
It’s not what we were expecting. But the effect is interesting and beautiful, anyway.


I especially loved the dyed lace pieces…..

creative-egg-dyeing-ideas-photos-22

creative-egg-dyeing-ideas-photos-23

creative-egg-dyeing-ideas-photos-24

I’ll have to think of a way in which to use, such beautiful pieces.
–

creative-egg-dyeing-ideas-photos-26

creative-egg-dyeing-ideas-photos-27

Some eggs came out nicer than others.  But they were just beautiful, all together.

–

creative-egg-dyeing-ideas-photos-28 I did end up coming up with a plan, to use the lace pieces.  I couldn’t throw them out. You’ll see…I’ll be showing you all more finished eggs, this week.  How about a peek around our Easter-time home? That’s coming right up.

Also…..would anyone like a step-by-step photo tutorial on how to thread blown eggs for hanging?  I’ve got photos all set to show. We came up with a wicked cool trick, that makes getting the thread through, so easy. We could also share how to blow eggs too, if you are interested in that.  Let us know!

030_beaten-eggs

Have you been creative lately?  Creativity comes in many, many forms. So we’re betting you have.

By the way:  GUESS what we had for dinner this night? ; )


Save

Filed Under: Crafts & Creations, Holiday Crafts, Kids Arts and Crafts, Seasonal Crafts and Creations, SPRING Crafts and Creations Tagged With: creative-egg-dyeing, Easter eggs, egg-coloring-ideas, egg-dyeing

Earth Day Cupcakes

April 15, 2011 By Laura 2 Comments

We are so smitten with how our Earth Day cupcakes came out, we like to keep on sharing them with you all.

Earth Day ideas

There are times that the things we creatively do as a family, or the ideas we have, happen ON a holiday or special calendar day. So naturally they do not get blogged until after the fact.  Since we like our readers to have the opportunity to take our ideas and find creative inspiration from them, or flat out borrow the ideas, I like to try and share (or re-share) those ideas the following year, so that you all can have time to use them if you’d like, while that day is upcoming once again.

Here in the Recipes section, I thought it would be nice to (re-) share just the photos of the Earth Day Cupcakes that we had so much fun making with the kids last year, on Earth Day following our neighborhood and beach clean-up we did.   For any new readers, if you’d like to visit our family’s Earth Day 2010 blog post, you can do so HERE. It was a great day, and I took lots of photos of the kids and our activities that day, so I think you would really enjoy it.

These are simple boxed chocolate cake mix cupcakes.  Using canned white canned frosting, we split it up into separate little batches, making various colors with drops of food coloring.  The blue ocean base of the earths we just spread on, but most of the rest of the designs were piped on.  We are no cake decorating pros, but we sure had fun, and we think they came out cute!

Earth Day ideas

Earth Day ideas

Earth Day ideas

Earth Day ideas

Earth Day ideas

Hope you find yourself inspired!!  If not to decorate some cupcakes for Earth Day, at least to eat some!
And to give love and care to our Earth, all year round.


Save

Filed Under: Baking, Desserts, Recipes, Treats Tagged With: creative-cupcakes, earth-day-cupcakes, Earth-Day-ideas, Earth-Day-recipes, homeschooling, inspiration-for-Earth-Day

Spring Fancy Strands|Door or Window Craft Decor|Giveaway (Closed)

April 11, 2011 By Laura 11 Comments

window-door-craft-decor-12

I find spring-time to be such a craft-inspiring season.  Although winter & spring has been taking turns around here in the past few weeks, I still like to think of it as just spring, as it should be.  Time for garden planning, enjoying the new warmer, sunnier days, and looking for those very exciting signs of spring.  They are popping up all around us, despite the occasional surprise snowfall!  With spring comes all kinds of cheery colors and symbols always associated with this season of new life.  It just makes me feel like crafting!

window-door-craft-decor

This is a craft you can do with ANY kind of doors or windows in your house!

The French doors between our sun room, which is always bursting with sunshine or a soft natural light, and our living room, has been the focus of my craft quite a few times!  All of the rectangular panes of glass  strike me as mini picture frames, calling for some little artwork.  This past Winter, I made beautiful sparkly snowflakes on blue ribbon, which is a craft I am saving to share later this year. There was a functional twist of an idea I used with them, and I think some of you will rather enjoy using the idea for yourselves next year, when I’ll have the opportunity to share it with you in time to use the idea.

My craft idea for Spring is very similar, although strictly and adorably decorative, using very simple Spring shapes, ribbon and colorful card stock.

I designed a small collection of Spring Shapes in Photoshop, to use as stencils again and again.  I will share these with you by the end of this post. But here is a peek at what I came up with.

window-door-craft-decor-1

window-door-craft-decor-2


The supplies needed were few and simple:

  • window-door-craft-decor-3
    Spring Shapes, printed on card-stock to cut out
  • 6 full rolls of thin ribbon
  • Card-stock in cheery bright Spring colors
  • Scissors
  • Hot Glue Gun
  • *Any little embellishments you like.

window-door-craft-decor-4

I found this block-pad of linen card-stock in beautiful colors, at the craft store.  I knew it would be perfect, to use for my Spring shapes, that I wanted all relatively the same size.  It was a pleasant surprise to realize they were sticker paper too! That was going to work out nicely, for adding the centers on flowers, etc. And if there was no need for sticky paper, I just left the backside on.But you can use any colored card-stock, that comes in sheets, as well.

Alright, so I didn’t take photos of every step.  That’s needless really.  But the simple directions are, that I cut my Spring Shapes out of the white card-stock I printed them on, and used them as stencils on the little square card-stock pieces.  There was a whole lot of tracing stencils, and cutting out, going on.  Then it was sticking or gluing pieces together, to make little happy die-cuts of art.


I have to tell you, as crafty as I am, I HATE CUTTING STUFF OUT!! With scissors.  Thankfully, my kids love it! It’s great practice for scissors-skills for them.  I did do a lot of the cutting for this project, but they enjoyed helping when ever and wherever they could.  I was thankful for every bit.

window-door-craft-decor-5 Using almost an entire roll of ribbon for each row of windows top to bottom, attach one end on top of the door, and center of the row.  Run it all the way down, to attach to the bottom of the door, again keeping it center.  Cut off any excess before attaching. We use a tack at the top, and glue on the bottom.

Then just dab a little hot glue onto the center of each die-cut one at a time, and apply it to the ribbon in the center of each window.

window-door-craft-decor-6
Here are my doors, all done!!  CUTE, or WHAT??

Such a simple project, but just a lot of cutting.  This was a craft for the kids and I to do together, from the get-go, so  I knew which part I’d be letting them do some of!  Hopefully you have a few of those happy-cutters, too.

You know, you don’t have to have French doors, to do this project!!  You can do the same thing, in grid picture windows, or make horizontal strands as a Spring-themed decorative garland!


window-door-craft-decor-7  I can tell you, by the time we had made 24 die-cut pieces, trying to make them each a little different, we got to the last 6 and wondered if the doors would look cute enough still, with nothing across the bottom row of window panes.  And then I had the quick and easy idea, to wrap up this craft, in 6 simple letters:

S P R I N G

Seeing my Spring-ish doors makes me smile anyway.  But what really warms my heart, is the words spoken by my little boy the other day: “Mama, every time I see my butterflies that I made, that you put up on the door, I get a really happy feeling inside.”

Dang if that doesn’t make me really happy inside, too.   I love doing projects with my kids.  It’s so rewarding, for all of us, in so many ways.


window-door-craft-decor-8
Just so you know….our French doors are rarely closed like that.  Our 4 season sunroom, is open to the rest of the house most all of the time.  It’s surely a cheery passage-way now.


window-door-craft-decor-9  When spring turns to summer, I’ll be taking these strands down, but keeping them to use again next year, just as I did the winter ones! They are easily re-usable, for at least a few years if not more, if they are stored nicely.


window-door-craft-decor-10 On a side note….I do struggle with displaying fake flowers in my house.  I prefer fresh of course.  But it’s just not budget smart, year round.  Unless I can cut fresh flowers from outdoors now and then, and I do when I can. But in between….fake it is.  I just like to have some especially, in my old milk jug.

So just for fun, I decided to design a little collage, to show you some of the pieces a little closer up.  Naturally, when posting photos on a blog, some detail is lost.  But it’s still a closer look.

And then I thought the collage came out so cute, that maybe it would be a fun idea, to have a Give-Away!  It will printed as a 12 x 12 photo (such as it is), and mounted on a sturdy backing.  It will be sprayed with a protective coating, so it can be popped right into a 12×12 glassless frame. (I never use glass in my frames.  No need when they are mounted and sprayed, and they look so much nicer without the glare.)

The collage of these mini-photos, is of course, of little paper art.  But how cute would it look on display, near your Easter tree, in your kitchen, or in a little girl’s room!  It would look cute anywhere!

window-door-craft-decor-11

If you’d like to try and win this Give-Away, all you need to do is the following:

1.)  Follow our blog, via Subscribing or our Facebook Page, in the sidebar. (If you are not already.)

2.)  Leave a comment below, saying anything you wish, or letting us know you are now following our blog!

3.) Link up a crafty idea of your own, right now, if you can!!  (Not required, but we hope you share something if yours if you’ve gotten creative, and blogged it, lately!)

I’ll do a drawing from the comments by the close of the week!

Want to do this craft yourself?  Here are the pdf links to my Spring Shape Sheets:

Spring Shape Page 1

Spring Shape Page 2

I hope those links work for you anyway If not just email me, and I will send them to you. I did free-hand draw a few on my own, that are not on the sheets, but most are here. You can add idea of your own too.  Just keep the shapes simple.

window-door-craft-decor-text6

ENJOY!

******


Save

Save

Save

Save

Filed Under: Crafts & Creations, Giveaways, Kids Arts and Crafts, Seasonal Crafts and Creations, SPRING Crafts and Creations, The Big Picture Tagged With: crafting, decorations, developing-kids-scissors-cutting-skills, door-and-window-decor, easy-crafts, french-door-decor, home decor, kids-arts-and-crafts, spring-crafts

Some Recent Vehicle Lettering & Graphics | Plymouth, MA

April 11, 2011 By Laura 7 Comments

vehicle-truck-lettering-graphics-plymouth-ma-18

Sharing in this post here, just some of Michael’s vehicle lettering and graphics work for his Michael P. Richard Truck Lettering, Etc., clients from within the past several months.

While most of his work is commercial jobs for small and large businesses require standard and conservative lettering jobs on their vehicles, once in awhile he gets a cool job a client wants just for their personal vehicles, and he has the fun of designing something more out of the box.  This XTERRA below was such a case, and he enjoyed getting a little more free-style with it.  I think it came out rather cool. Take a look-see for yourself:

vehicle-truck-lettering-graphics-plymouth-ma

vehicle-truck-lettering-graphics-plymouth-ma-1

vehicle-truck-lettering-graphics-plymouth-ma-2

vehicle-truck-lettering-graphics-plymouth-ma-3

vehicle-truck-lettering-graphics-plymouth-ma-4
How would you like to drive that bad boy around town?
–

With the 4 door/extended cab trucks being a popular vehicle for tradesman, Michael has been making use of the extra space for their business branding, as seen  in the next couple of trucks, as opposed to keeping it all confined to the front door.

vehicle-truck-lettering-graphics-plymouth-ma-5

vehicle-truck-lettering-graphics-plymouth-ma-6

vehicle-truck-lettering-graphics-plymouth-ma-7
I say, bigger is better, when it comes to company branding.
–

Here below is a more standard can truck lettering job, with front door lettering only.

vehicle-truck-lettering-graphics-plymouth-ma-8

vehicle-truck-lettering-graphics-plymouth-ma-9
Still sharp looking, and eye catching though, with the black & white on red.

Earthshaping.  I like that word!

vehicle-truck-lettering-graphics-plymouth-ma-10 Burkhardt Brothers…….Michael’s Dad lettered this company’s fleet of 40 foot trailers and box trucks for many, many, MANY years.  But guess what?  HE lettered it all IN PAINT, BY HAND!   Michael helped for a few years, with his father.  It’s Michael’s account now, but it is done in all cut vinyl these days.  A whole lot faster for sure.  But more impressive execution, back in the day. Think about it.  Those capital B’s on a trailer are like 30 inches tall!

I miss that man.  <sigh>

 –

vehicle-truck-lettering-graphics-plymouth-ma-11

vehicle-truck-lettering-graphics-plymouth-ma-12
This is Michael’s brother-in-law’s roofing company.  Michael does all of his vehicle and sign work of course.
Michael’s father designed the logo.   I think its super sleek, and extra-so in gold.
– vehicle-truck-lettering-graphics-plymouth-ma-13 This a trailer for a la crosse team, all in vinyl.  Michael did this in our driveway.  The kids love to watch him work, and help sometimes, too.

These next 2 jobs are vehicle wraps.  Have you noticed them around?  It’s basically a very large one piece vinyl print, that is shrink-wrapped onto the vehicle.

vehicle-truck-lettering-graphics-plymouth-ma-14
Here just the bed of the truck is wrapped.

–

vehicle-truck-lettering-graphics-plymouth-ma-15
Here, the entire trailer was done.

vehicle-truck-lettering-graphics-plymouth-ma-16
Wrapping takes some real practice and skill to apply, for sure.

vehicle-truck-lettering-graphics-plymouth-ma-17
But I think it is eye-catching, and effective marketing/branding for one’s business.
–

Hope you enjoyed seeing some of Michael’s latest work.

We just wanted to share some of it with you.  Let him know what you think of this or that, in the comments!  He’ll be glad to read your feedback.


Save

Filed Under: Photography & Lettering, truck lettering, vehicle graphics Tagged With: business-branding, truck-lettering-graphics-Plymouth-MA, vehicle-lettering-graphics-Plymouth-MA

  • « Previous Page
  • 1
  • …
  • 39
  • 40
  • 41
  • 42
  • 43
  • …
  • 101
  • Next Page »

We are wicked happy to have you here! We hope you find much inspiration, help, humor and enjoyment here.


Archives


POPULAR POSTS

* * * * * *

SUBSCRIBE to House of Joyful Noise blog! Every new post, delivered right to your email box!


Privacy Policy

Amazon Affiliates

Never at any additional cost to you, we may earn a small commission for our endorsement, recommendation, testimonial, and/or link to any products from our website. Your purchase through our links helps support our family, while sharing with you the products we authentically use and recommend, for various ideas, and letting you know where you can purchase them. Thank you for your support!

[footer_backtotop]

Copyright © 2025 HouseOfJoyfulNoise.com · Genesis Framework by StudioPress