• HOME
  • {A}’s Chipmunk Training Archives

 Homepage

  • The Homestead
    • Home Projects
    • Home Improvement
    • Home Decor
      • Seasonal Home decor
        • FALL Home Decor
        • WINTER Home Decor
        • SPRING Crafts and Creations
        • SUMMER Crafts and Creations
    • Our Chickens
    • Gardening
    • Organization
    • Re-Purposing
    • Furniture Refinishing
    • Budget
  • Crafts & Creations
    • Seasonal Home decor
      • FALL Crafts and Creations
      • WINTER Crafts and Creations
      • SPRING Crafts and Creations
      • SUMMER Crafts and Creations
    • DIY (Do-It-Yourself) Project
    • Kids Arts and Crafts
    • Homemade/Handmade Gift Ideas
    • Holiday Crafts
    • Fan Pulls
    • Free Printable/Downloadable
    • Sewing Projects
    • Giveaways
    • Business Features
  • Recipes/FoodFun
    • Breakfast
    • Lunch
    • Main Dish
    • Sandwiches
    • Appetizers
    • Slow Cooker
    • On The Grill
    • Side Dishes
      • Soups
      • Salads
    • Baking
      • Breads, Rolls and Muffins
    • Snacks
    • Treats
    • Desserts
    • Drinks
  • Homeschooling
    • Elementary Homeschooling
      • Elementary Homeschooling READING
      • Elementary Homeschooling MATH
      • Elementary Homeschooling LANGUAGE ARTS
      • Elementary Homeschooling SCIENCE
      • Elementary Homeschooling HOME ECONOMICS
      • Kids Arts and Crafts
    • Middle School Homeschooling
      • Middle School Homeschooling SCIENCE
      • Middle School Homeschooling HOME ECONOMICS
    • Language Arts
    • Math
    • History / Social Studies
    • Geography
    • Foreign Language
    • Field Trips
    • Games
    • Nature Study
  • The Big Picture
    • Life In General
    • Celebrations
    • Faith
      • Into the Light; The Series
    • Giveaways
    • Reviews & Sponsors
  • Photography & Lettering
    • Photography
    • truck lettering
    • vehicle graphics
    • Newborns
    • Kids
    • Engagement
    • High School Senior Pictures
    • High School Senior Pictures Sneak Peeks

Our New (Second) Bathroom – Finally!

June 15, 2014 By Laura 4 Comments

 Now, to all of you, this is likely just going to look like an ordinary bathroom. And in many ways, you’d be right.
But to our family of 6, who has lived with one bathroom all of our growing family life, it is . . . . . .
the end of never using the bathroom, without someone waiting just outside the door. 
Or, 2 or 3 people in the bathroom at the same time, getting reading to go somewhere.  At least the one bathroom we’ve had is large, and has a great sharing-layout, with the sink and vanity on one side, and the toilet and shower on the other side of a vertical half wall.  So there’s been privacy on both sides, with proper communication, at least.

This second/new bathroom is far simpler, and smaller at 5×10′. It’s been waiting to be finished for . . . . . . too many years.  It was just a plywood floor, studding walls, and the tub, behind a sheet of plastic, at the top of the stairs. Where paint cans and milk crates of art supplies collected. We either didn’t have the money, or the time, or both, to finish it after the expansion of our home in 2006.  But life has gotten easier, as God has continued to bless us, and we’ve finally been getting our house done room by room.  Who would think a bathroom would be so exciting?
We’ll be sure to appreciate it in the moments of urgency, that are bound to come.
It’s considered the kids’ bathroom, as it is upstairs where 3 (out of 4) of their bedrooms are.


Once Michael got going, it came together quickly.
Here it is in the very beginning stages, sheet-rocked and plastered!

(Ironically, as I type this blog post right now, I just heard, “Are you almost done? I have to go to the bathroom. BADLY!!”
Michael has been building the custom farmhouse door today, for this new bathroom, and it should be up and swinging by tonight.)

So now let’s take a look at the bathroom all done.
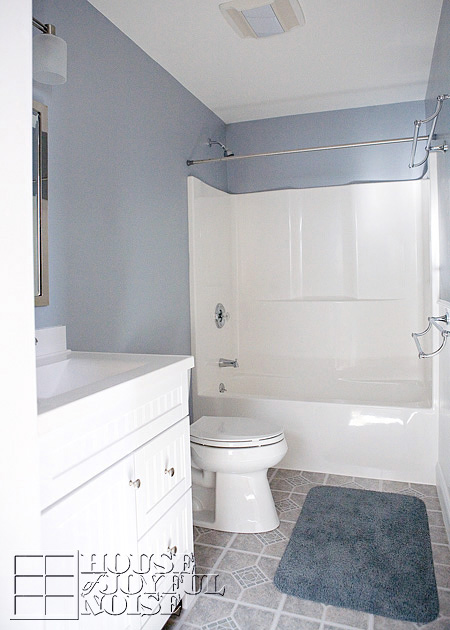

This is the best shot I could get in such a small space, of the bathroom completed, by shooting from just outside of the doorway.
We’ll be stepping inside in just a moment to take a closer look at some details. 
I chose a cool gray paint color for the walls, feeling it was a nice neutral color for boys and girls. 
(Not sure of the name of the color at the moment, but it was a Valspar Signature paint.)
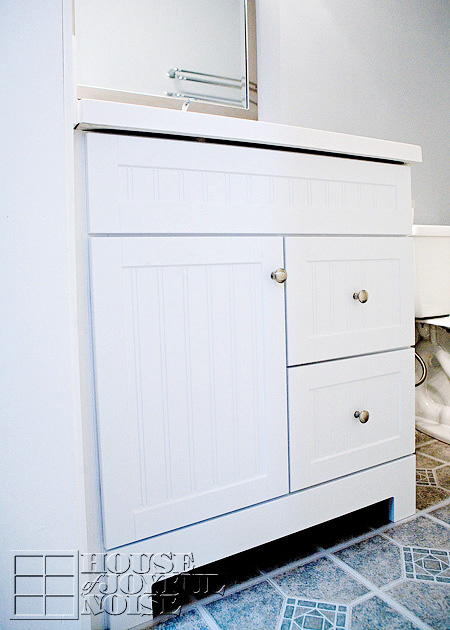

The bead-board style vanity cabinet is in keeping with the style throughout our house.
–
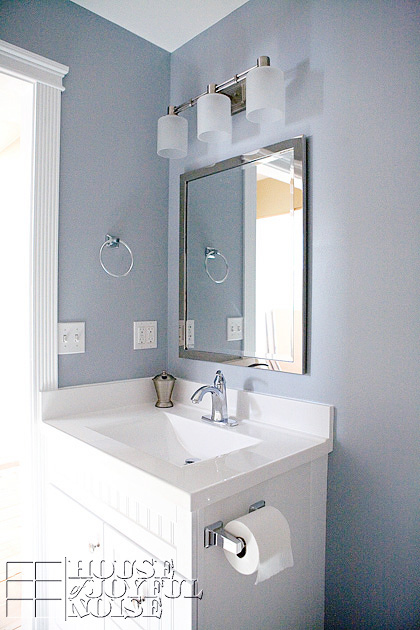

It very much needed modifications, to fit and accommodate the special kind of sink we needed it fitted with.
Thankfully Michael is capable of problem-solving such challenges. It’s been built way out from the wall, and customized with a back splash.
I really dig the style of the lights over the sink.

We had special requirements regarding the sink in this bathroom.  In addition to the regular use as this bathroom’s sink, it’s also the sink right beside the art studio. Because we are often working in the studio, and needing to dump and refill paint water buckets, wash our brushes and pallets, etc., we really needed this sink to be deep and wide enough to be able to do those things, and easy to clean as well!  We’ve been having to go down and use the kitchen sink.
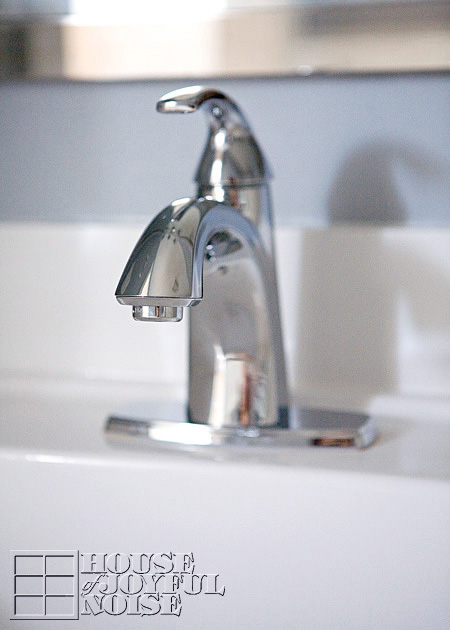

So I not only love the look of this faucet, but it’s height accommodates filling buckets, etc.
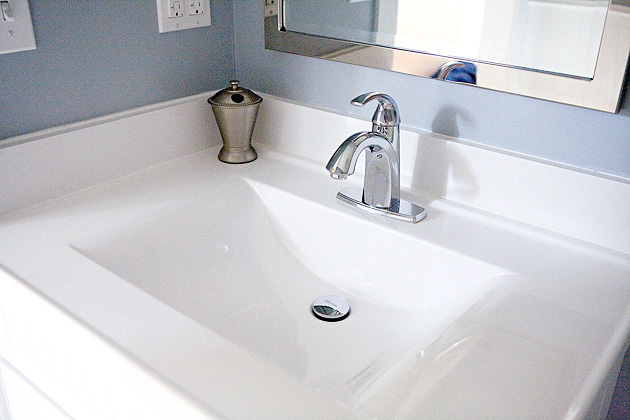
As I hope you can see, the sink is very wide, sloped in, and completely seamless to the vanity.
This will make easily accessible, and easy to clean when paint, and toothpaste, and whatnot, is everywhere.
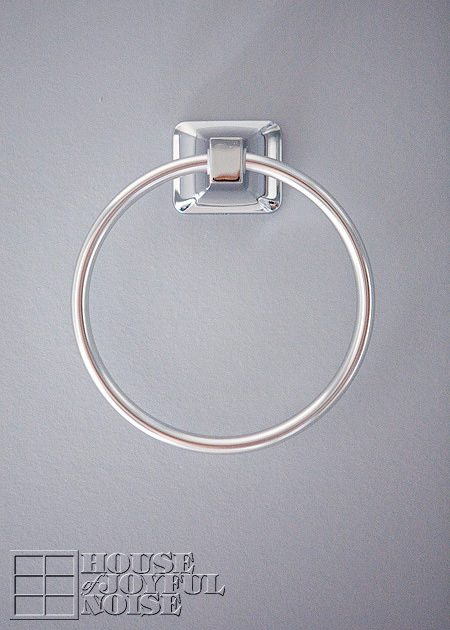

This is just the towel rack on the left wall of the sink area.
For some reason I thought it was a cool photo.
I still do.
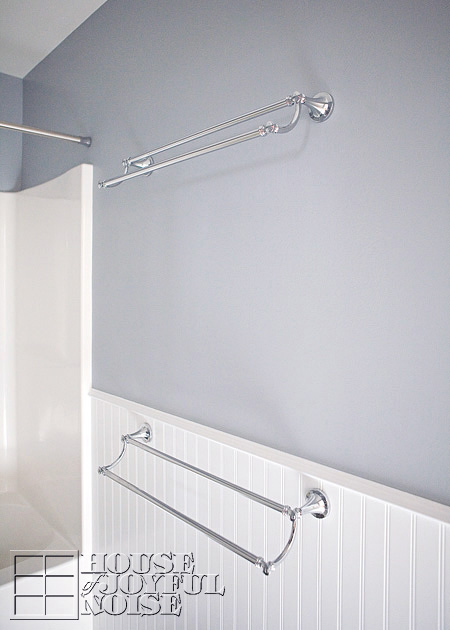

The bath towel double-racks.  There will be 4 towels always drying, so the kids and I were ecstatic when we found these.
We decided we needed to put them well-spaced, over each other, to prevent one from being partially behind the bathroom door, and always getting hit.

So, by now you’ve probably felt like you have the style of this bathroom pegged, right? 
How would you describe it so far?

Well if you ask me, and you think about it, it’s the shower curtain that really sets the mood or style of the whole bathroom. I didn’t know exactly what I wanted, but I knew it needed to either have some gray in it, or look nice with gray. And be gender-neutral, since the kids are 2 boys and 2 girls. Right? 
Interestingly, I wasn’t all excited about going shopping for the little things, much of what you’ve just seen, such as the towel racks, toothbrush holder, toilet paper holder and trashcan, etc.  This bathroom has been a project that has just needed to get done. Not fancy, not creative, just DONE.

But I was excited for finding a great shower curtain. I was looking forward to finding a design that I’d really love, and have it tie everything together beautifully.

The thing is, I took the kids with me, and that changed everything. We had let them have input in everything we had to pick out for this bathroom, but they were pretty non-chalant with their opinions, up until this point. But suddenly, they felt strongly about the shower curtain. Like, as much as I did!  And it was all 4 of them, against me! 

They insisted it’s their bathroom, and they should be able to choose the shower curtain together.
And so I let them . . . . . .
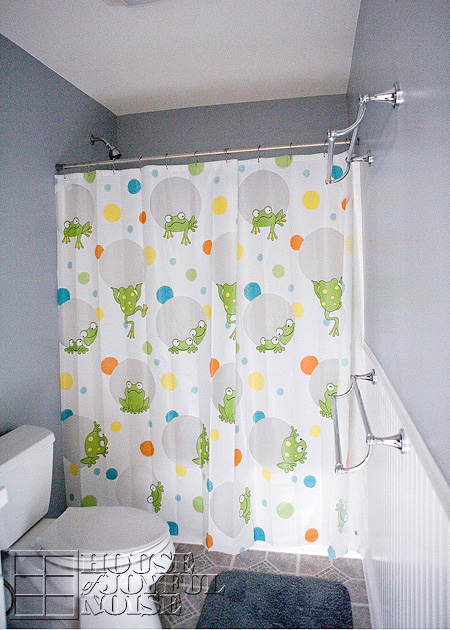

Ohhh…. my crazy kids!
You’d think this is rather…..elementary. A bit childish. Yes?
Especially for the almost 17 year old, right?
But “Oh NO,” they tell me, “it’s just FUN!”
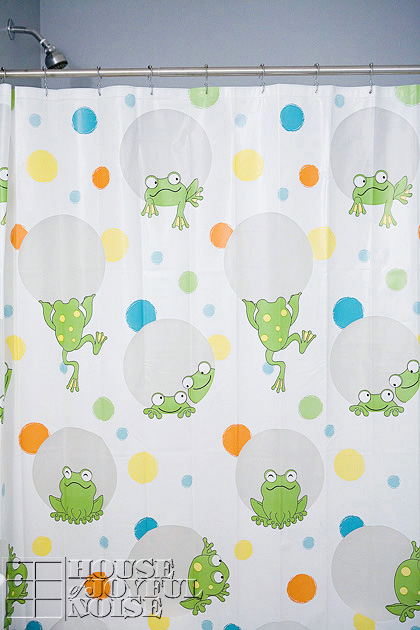

I have to admit, it looks pretty o.k. with the gray walls.
And it does make me smile inside, when I see it. The kids really love it, and that actually makes me smile on the outside, too.
It really speaks of just how silly our kids are. They really get a kick out of this stuff.
And hey…..shower curtains aren’t permanent.

There is just a touch of decor left to do. I haven’t decided what yet, but I think I’ll know it when I see it.
When those touches are added, I’ll be sure to take photos and share on our Facebook Page and InstaGram, so you can see.
(So hope you are following us there!)
But I do believe I’ll be moving this sign from our current bathroom up into theirs, since I made it with them in mind anyway, and it matches……


And there you have it. The bathroom everyone has been waiting for!


Filed Under: Home Decor, Home Improvement, The Homestead Tagged With: bathroom, bathroom-fixtures, Catholic-blogs, Catholic-families, gray-bathroom, home-improvement-project, kids-bathrooms

Wild Orange Lip Balm – Recipe and DIY How-To

June 1, 2014 By Laura 8 Comments

I’m so happy I now know how to make our own awesome lip balm!  It’s all-natural, made right at home, and in our extensive experience and personal opinion, it’s the best lip balm we have ever tried. This one is Wild Orange; made with real wild orange essential oil!  And all kinds of other nourishing stuff that is so good for your lips. It not only feels good, it leaves a nice gloss.

You have no idea how much we are a ‘lip stuff’ kind of family.  4 out of 6 of us anyway. “Where’s the lip stuff?” “Mama, can I have the lip stuff in your purse?” “The lip stuff is almost gone!”  If we are running out, we start to panic a little.
It’s as important to keep in the house, as milk and bread. It’s crazy. We need our lip stuff!

We’ve been through many kinds of ‘lip stuff’ over the years. But our favorite we really got stuck on, was some we could only get at the Farmer’s Market, and only when that vendor was there.  It’s from a local bee/honey farm, and they have many products with their honey in it. Their lip stuff rocks. It was a tangerine balm. But, it’s not really easily accessible. So we’d stock up a little when we saw them at the farm market, at $3.75 each. Yikes! Worth it but, I always thought it would be nice to figure out a way to make our own, for less.

That day has come! And we don’t need to worry about running out.

To figure out what ingredients to use, I went by those listed on our last tube of honey bee lip balm, as a guide, and figured the rest out from there.
My little O helped me make these, and we had great fun making them! It was like science for her, but she always enjoys helping me anyway (as I enjoy her help…ha haha), and she loves anything that involves making something in the kitchen. (What a blessing it will be for her if that lasts her whole life long. Eh??)

In this post I am sharing exactly how we made these lip balms, so you can make your own too, just like we did!

It’s a recipe, DIY how-to, with **FREE PRINTABLE LABELS** I designed for your lip balms as well!

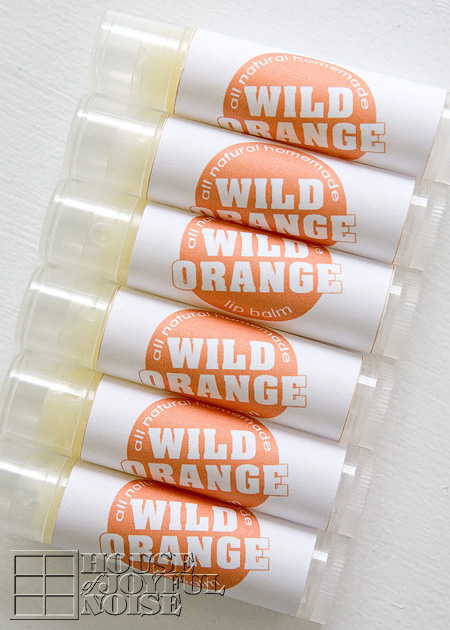
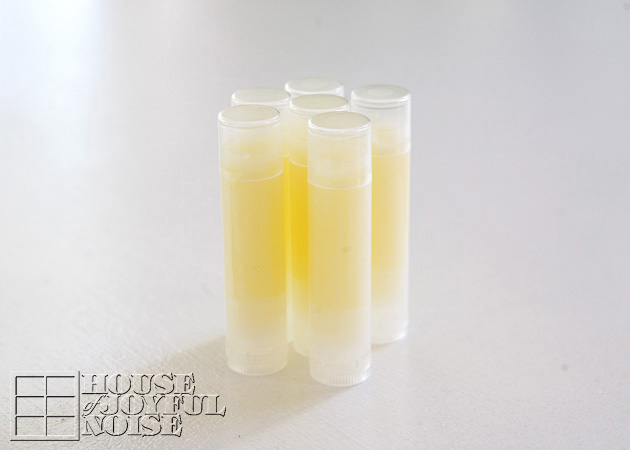
Our recipe makes 6 lip balms, just like this.
Ready to learn how to make your own?

Here’s What You’ll Need


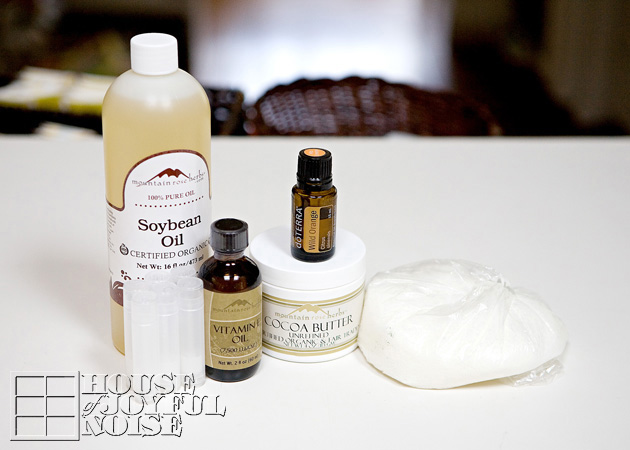
This is the Ingredients list.
You can find the following at Mountain Rose Herbs, using the search tool there:
(5-1/2 tsp) Soybean/Soy Oil
(2 tsp) Bees Wax Pastilles
(1/2 heaping tsp) Cocoa Butter
(1/2+ 1/8 tsp) Vitamin E Oil
6 Clear Lip Balm Tubes
(12 drops) *Wild Orange Essential Oil. (We use doTERRA).
* If you don’t know where to get Wild Orange Essential Oil, you can email us at TheRichardHome@aol.com and I’ll direct you to my shop.

HEY! – If you love these lip balms, you can also use the Wild Orange essential oil in our Wild Orange Sugar Scrub.
—

Equipment:  – A double boiler
– A stove top
– a glass dropper (or disposable pipettes?)

Here’s the How-To

It’s so simple, and so fun to make these lip balms! 
And it’s as easy as measure, melt and mix, and put in the tubes!

I did not take photos of the process with the double boiler because it’s easy enough to explain without unnecessary photos. (Even though I include unnecessary photos most all of the time in my posts, just because I like to take them. So who am I kidding, right? lol)  But my double boiler is just a pan you sit in the top of another pan of boiling water.  Got one of those? It would be a boring photo.

So get your double pans set up on the stove top. As you get the under-pan of water boiling, put your 5-1/2 tsp of Soy Oil in the top pan.
Once warm, add the 2 tsp of Bees Wax
Use a tiny whisk and get it melting.
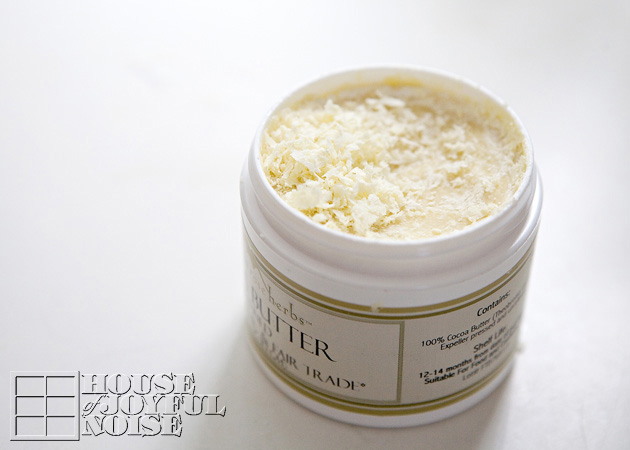
Next add 1/2 heaping tsp of Cocoa Butter.
This Cocoa Butter comes pretty hardened. So just take a spoon and scrape up shavings, until you have enough.
Add that your pan and whisk together.

Once the wax is melted and everything is blended, you can remove from the heat or simply turn off the burner, and add your Vitamin E Oil, which will be 1/2 tsp and then an additional 1/8 of a tsp, and then 12 drops of Wild Orange Essential Oil.

It’s important to keep the mixture in liquid form until you get your tubes filled. You can remove the upper pan as you work, but keep returning it over the pan of hot water if it begins to harden.  The mixture can be reheated to liquefy again at any point, if necessary.
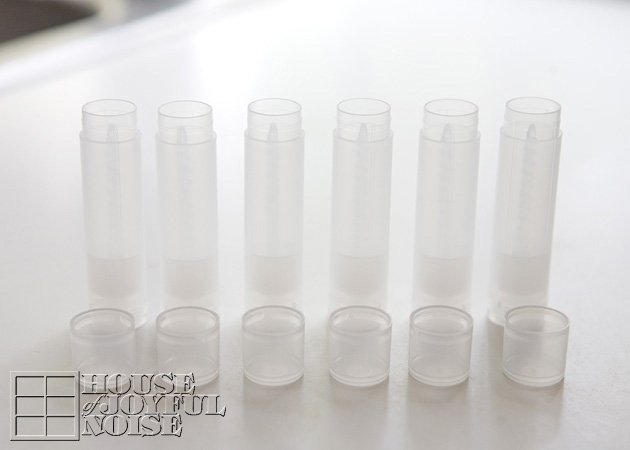
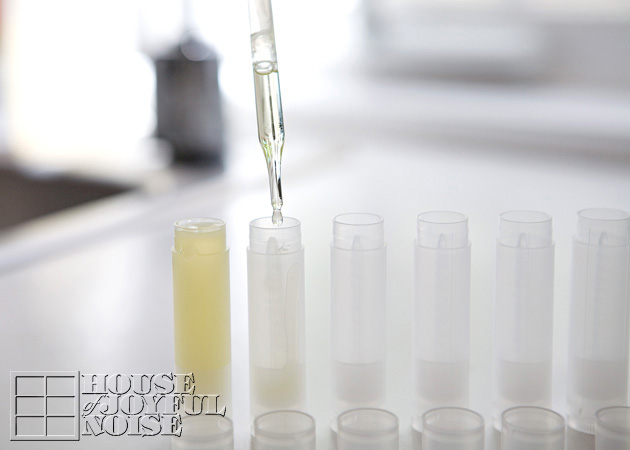
I had my tubes all lined up and ready to go.
I chose clear ones, because I’d like to be able to see how much is left in a tube as we use it.
–

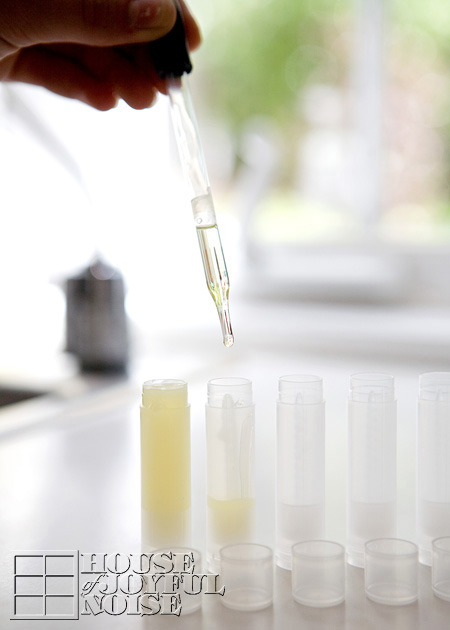
I used a glass dropper from one of our science kits, to extract the mixture from the pan, and fill the lip balm tubes.
–


Work as quickly as you can (safely) and fill each tube to the brim with the liquid.
Then let them sit to cool and firm.

Clean-Up Tips

Meanwhile, you’ve got a pan and a dropper to clean! (Unless you used disposable pipettes – which I did not do. I don’t know if the mixture would be too hot for the plastic pipette? But if anyone tries it, come back and let us know how it works!)

To clean the pan, while it’s still hot, wipe any wax-liquid mixture out as best you can with paper towel. And then wash as normal.
To clean the glass dropper, I used pipe cleaners. That worked very well! But I wasn’t able to get every bit out. That’s ok, I’ll continue to use it for the same thing, as we make more lip balms.

And there you have it!  6 awesome Wild Orange Lip Balms!
You can keep stocked up for yourself, or give them away as gifts.
I know we’ll be doing a whole lot of both!  Because these are so easy to make, literally costs you cents, and they are fun to give away as little tokens of love and care.

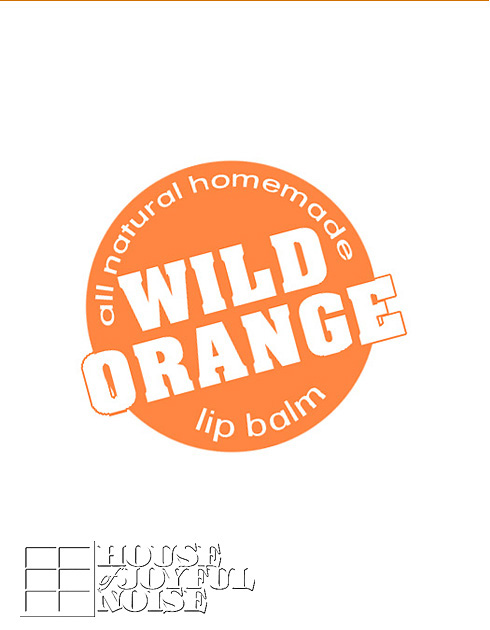
I even designed a label for them!  As seen below.
Just click on the big orange circle, and it’ll take you to a whole sheet of labels you can download and print right out.
It’ll look like this:

The printable sheet also lists the ingredients on it, with has simple directions as to how to put the labels on your tubes. (We secured the labels on with handy 2-sided sticky tabs. Love those things!)


 My oldest has requested Peppermint Lip Balms, so we’ll be making those, as well as more of these, very soon!
We hope you try making these yourself!  Please leave any questions you have below, or come back and let us know you made some and what you think!
ENJOY!


Save

Save

Save

Save

Filed Under: Crafts & Creations, DIY (Do-It-Yourself) Project, Essential Oils Tagged With: all-natural-lip-balm, diy-lip-balm, essential-oil-lip-balm, essential-oil-recipes, free-lip-balm-printable-labels, homemade-lip-balm, how-to-make-lip-balms, toxin-free-personal-care-products, wild-orange-lip-balm

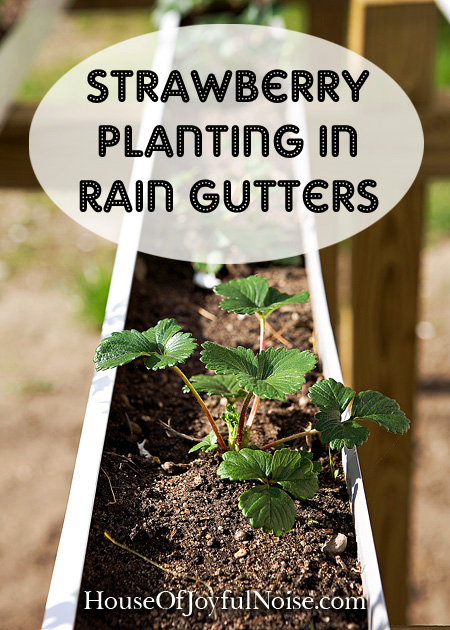
Strawberry Planting in Rain Gutters

May 22, 2014 By Laura 18 Comments

 We’ve have grown strawberries in our gardens going for five seasons now, and we have thoroughly enjoyed it!
While strawberry plants generally comes back and produce for 3-4 years before they are done, we managed to squeeze one more year out of ours. This year however, it was truly time to start over. And so, we decided to really change things up and start anew, by planting and growing our new strawberry plants in rain gutters. We’ll be sharing with you this fun gardening experiment and the progress of it all, with any of it’s failures or successes, as we go along here. We know we can always make improvements if need be, as we learn. Meanwhile, we enjoy the process so much. Isn’t that what it’s all about?
This is the first post on our strawberry plantings in rain gutters, and we’re starting with the construction and set up of it.


But before we dig into our new strawberry growing system, why don’t we briefly review our past strawberry growing years, of which we learned much and had much success with.  We’ve have many blog posts on our strawberries over the past years, but not everyone has been following us for that long. So allow me to mention the highlights, with links to the original posts where there is more info, since could be interesting or helpful information for someone.
If you’re just interested in getting right to the rain gutter method, just skip right down to that sub-headline.


Our Strawberry Growing History and Links to Those Past Posts

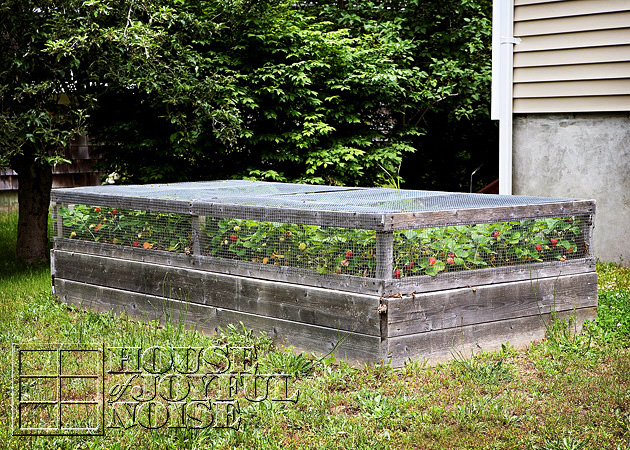
When we built our new strawberry bed in 2009, with new plantings in it, it wasn’t 24 hours before we realized squirrels and birds were going to be a problem!
So that very first morning, Michael whipped us up a solution with his carpentry skills, that has served us quite well, protecting our strawberries from winged and furry creatures, every year since.
There was some real excitement over our first picked strawberry.

We shared many of our lessons learned while growing strawberries.
And we certainly enjoyed our delicious berries, having many-a-strawberry shortcake, learning to make and can jam, and other treats such as Strawberry and Chocolate Nachos, and this beautiful Berry Parfait.

All of those links above open in a new window, so feel free to bookmark or pin them on your interest boards for later.

Anyway, while we got a great crop of berries every year, our 4th year was probably the most abundant, and so we thought maybe we could get one more year out of them. And also, we knew it would be soon time to replace all of our garden beds, but we hoped to get one more year out of them as well. So we went for a fifth year, which was less productive, and confirmed to us that it was time to start over with some new baby starter plants.

Strawberry Planting in Rain Gutters

Which brings us to this season.
As I’ve mentioned, our garden beds were needing replacing.  Last season, we had some wood rot and termite problems insome of them, but we got through one more season with them, and they served their purpose and got us through one more year. But this past brutal winter really gave them the last kick in the pants, and they literally just started falling apart as spring broke.  That’s including our strawberry bed. But since it was time to start again with new strawberry plantings anyway, the timing was perfect to start everything all over from scratch.

So we got planning all of our new garden beds, and already have them built.  We’ll be sharing the rest with you in another upcoming post.
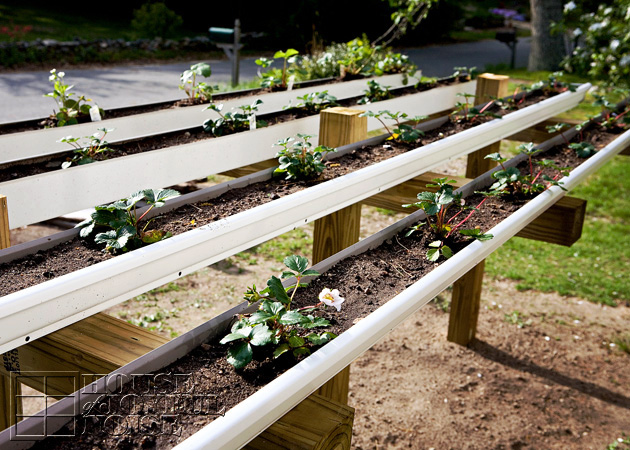
But for the strawberry growing, we decided to try using rain gutters!


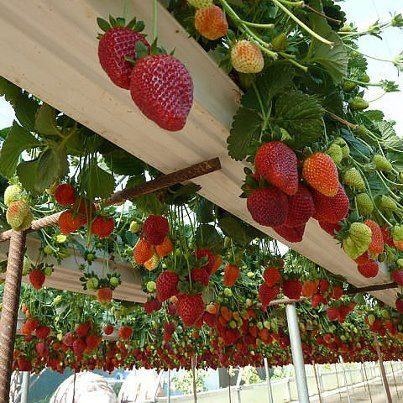
I had seen this photo somewhere, and I was instantly intrigued.  I believe another Facebook Page shared it, and then I shared it to our Facebook Page.  Many of us got talking about it, and we trying to figure out the construction of it, how high they were, and how they were protected from birds and such, if at all.
All I knew was I really wanted to try something like it.

I showed Michael, and he liked the idea too. But he got drawing on paper (as he always does, if you’ve noticed with our projects over the years), and had his own tweeks.  While I always have ideas of my own, and we collaborate a lot, I trust him in the final decisions where the construction goes.

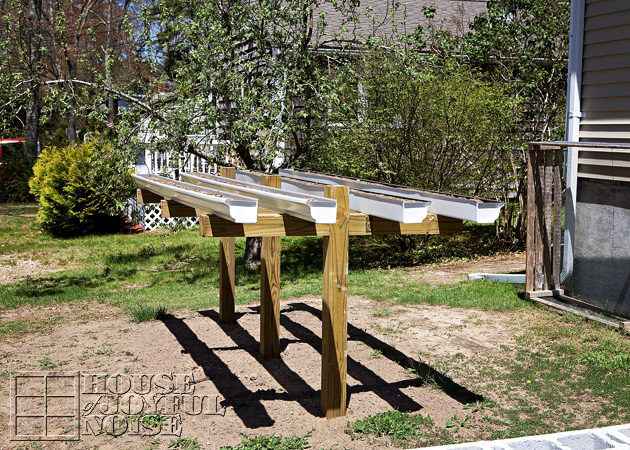
Here’s what he came up with.

Using 4×4′ pressure treated posts, he cut them into 6 ft. and 4 ft. pieces, constructing 3 T structures, all screwed together.
They support four 10 ft. sections of aluminum rain gutters, with end caps, which were bought separately.
They are screwed securely onto the horizontal posts.
I just imagined them higher, even though I knew it would be difficult to tend to the plants. But he thinks more height isn’t necessary. So we’ll see there if it is is better in the long run, to make them higher. But right now, I’m glad I can just stand there at them, and do my gardening thing.

I planted a good many of our new plantings, but the sun was hit this day, and it was getting to me. So a couple of my helpers (also known as our kids) happily agreed to help finish getting them all done.

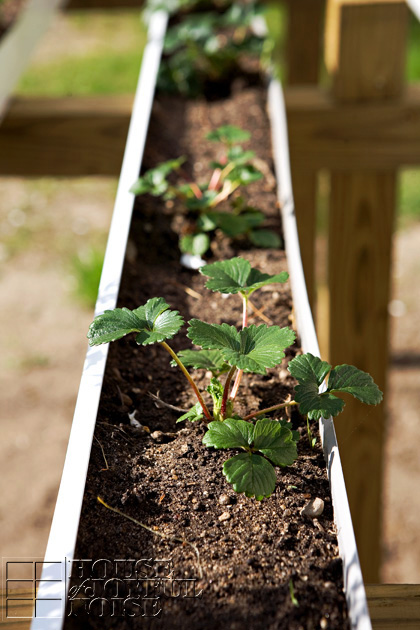
Although as I planted, I was wondering if the gutters were quite deep enough, having to plant right to the bottom, they seem to be doing all right!
As evidenced by home much we have seen them grow day to day, and by that little white bloom you see in the photo above. Which by the way, I cut off. Reason being, I really want to be sure the plants roots are well established, before the plant starts producing berries. So I usually remove the first flowers of every season, before I let them go ahead and produce berries.


You can see they are thriving, and I am really excited to see how they grow, flow over, and produce.
The varieties we chose this year are compact plants. We’ll talk more about that in a minute.
–

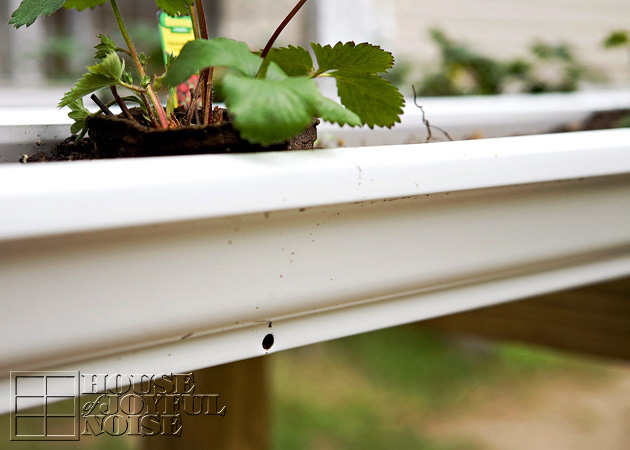
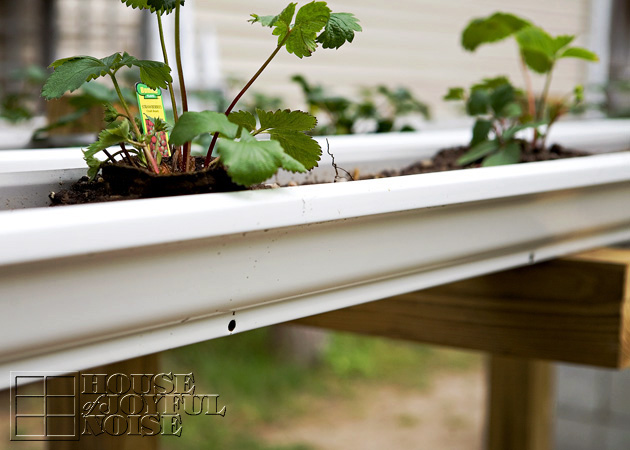
Michael drilled holes in the gutter towards the bottom, every 1-1/2′ or so, for proper drainage.

In the past in our strawberry bed, we grew berries of the June-bearing and Ever-bearing variety. In time we decided we just preferred the June-bearing, so we ripped out all of the Ever-bearing.

This time, considering we are growing them in rain gutters, we decided to try more compact plants.
These will produce few, if any, runners.  So I’m not sure quite what to expect, in terms of spreading or filling in the gutters.  But it’ll be fun to find out!
I did put all of the plants in with the upper part of the biodegradable cup intact, so it may be awhile before we really see them go anywhere.

None the less, I’ve done some research, and I expect we’ll be quite pleased with the varieties we chose.  Both are ever bearing varieties though, which should give us berries throughout the season. But I’m a tad nervous only because it was the ever-bearing we had decided we were less happy with in the beds.  But we’ll see how they do in the rain gutters!

The Lorans produce the typical white bloom, and should give us rounder, plump, juicy berries.
–

The Tristans are a little more unusual. They actually produce dark pink blooms, and the berries are an off shape as well. They are a bit elongated, and kind of pointy. But I’ve heard they too are delicious!
I can’t afford to have any more outlinks in this post, as I’m already afraid it’s going to go to the spam folders of our subscribers. But if you are interested, do Google for more info on these 2 strawberry varieties. BonniePlants(dot)com looked like a great resource. Then use the search tool there.

We had impulsively picked up a couple of herb plants too. Which is new territory for us.
Since we had a little room left in the gutters, and no other plans for the herb plants yet, we stuck them in the gutters too.
I’m not sure how well they will do there, but we can always dig them out and replant them elsewhere.

So we’ve got some Parsley……


……as well as some Oregano. (Which will be delicious, on Michael’s pizza.)
–

So that’s concludes where we are at with our new experiment, of growing strawberry plants in rain gutters.
BUT, it’s not quite done!
As soon as we start letting the plants produce berries, we’ll have the next step to contend with:

UP NEXT on this topic:  Protecting them from birds, squirrels, and the like.
We do have a plan for that of course!  And we’re ready to go!
Be sure you are following us so you don’t miss that, the reveal of our other new garden beds, or the building of our chicken coop!
(SO excited to finally be getting chickens!)
Thanks for your visits!  Share your thoughts  or questions with us, if you’ve got some!  We always try to respond.

UPDATE:
Click HERE to see how these strawberry plants in rain gutters are looking one year later.


Save

Filed Under: Gardening, The Homestead Tagged With: garden-gutters, garden-ideas, Gardening, loran-strawberries, rain-gutter-strawberry-plants, strawberries, strawberry-planting-ideas, strawberry-plating-in-rain-gutters, tristan-strawberries

Ham, Swiss, and Asparagus Rolls on a Bed of Potato | Recipe

April 9, 2014 By Laura Leave a Comment

 Our family really loves to try new recipes.  We love food in general, and certainly love to be gathered around the table together, with lots of it. We have many favorite meals that we have on a regular basis, but it’s always fun and exciting to try something new. And if it’s really good, we’ll have it again, or roll it right in with our regular rotations of meals.
This new one, that I call ‘Ham, Swiss and Asparagus Rolls on a Bed of Potato’, we made for the first time well over a year ago, and it was a big hit.
Just getting to share this recipe with you all now.


 General Ingredients:
potatoes
deli/sliced ham
Swiss cheese
asparagus

I’d call it fairly healthy meal, except maybe for the ham. (With the sodium, nitrates and all of that.)
But swiss cheese is a good choice, potatoes aren’t all that bad, and asparagus is great vegetable.We really love it and eat lots of it – organic and steamed.

This casserole of sorts, couldn’t be easier to make. 
You simply whip up a batch of mashed potatoes, however you normally would. I know I add milk, butter, salt and pepper.
Spread it into the bottom of a buttered 9×13″ glass casserole/cake pan.
Then you do the following next –

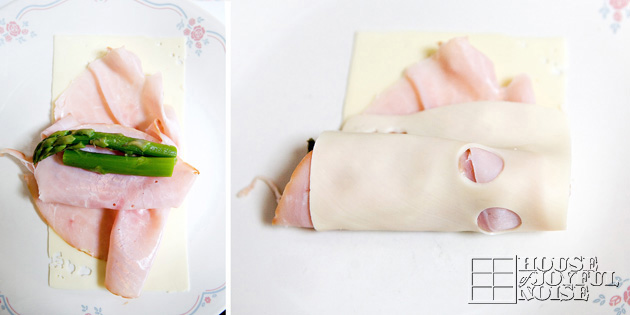
Lay a (not too thin) slice of swiss cheese, topped with sliced ham, and then asparagus.
Then you just roll it up, as seen above.
–

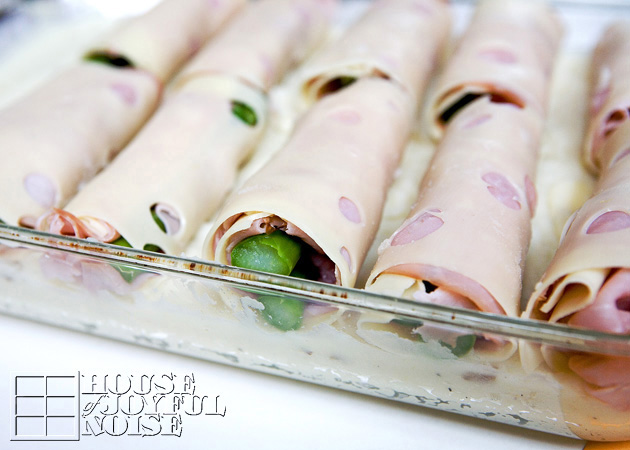
Line them up in your bed of potato!
You can add extra slices of swiss over the top if you wish.
Then bake at 400° for 25 minutes.
–

The house smelled so good!
We knew we’d be loving them.
–

And then . . . . . . we did.
Give them a try!
Hope you all do as well.


Filed Under: Main Dish, Recipes Tagged With: casserole, casserole-dish-recipes, dinner-ideas, ham-swiss-asparagus-potato-recipe, ham-swiss-asparagus-potato-rolls, main-dish-recipes, recipes

My Art Style | Pushing Outside of my Comfort Zone

March 26, 2014 By Laura 8 Comments

For the past several months, about one night a week, a friend of mine comes over to play with me in the art studio.  It started out because she wanted me to give her watercolor lessons. But ultimately, I never could get quite comfortable in that role, and expressed it to her often, because honestly, she has some real skills herself, very different from mine. And I just felt like I had much to learn from her! Still, she continued to call it her lessons, until finally she realized that if we just called it having some creative time together, I’d settle in.  And I did.

One of wonderful things about spending time with her, is that she has a whole new perspective in seeing her art, which I find intriguing. She has a way with expressing what she is trying to accomplish in a piece she is working on, or in retrospect, where she felt she went wrong, and what she could have done better.  She enjoys the process of creating art, seeing where it takes her, and what she may learn along the way.  Furthermore, she is always content enough with how it came out, and grateful for the lessons she took away from it.

I have never been like that!

I tend to expect instant perfection from myself. I want to plan it right, and execute it right, right off the bat. And I want it to come out as perfectly as I see it in my mind. And if it’s not coming out that way, or I’m not happy with how it came out, well….it’s practically useless to me. And more shamefully, I see the whole process almost as a waste of my time and materials. 

Just imagine how that has hindered me over the years. Not only in productivity, but in an open willingness to experiment and learn. I am quite sure, that as a direct result of my demanding perspective, I have limited my productivity, and most certainly hindered myself from true growth as an artist.  Which is just SAD. And years I cannot get back.

The good news is, I have noticed that my friend’s healthy attitude and perspective practices, is rubbing off on me. I am trying to take this time with her, and any other time I can dig up, to just enjoy the process of art. As an artist should. And learn from it all I can, as I go, as well as when the project is complete.

Because of this, I am now growing as an artist, just a little bit so far, in my older years. I think that’s a really good, if unexpected happenstance, for me.

So today I thought I would share with you a bit of what my style has always been, and then how I have actually felt drawn lately, to styles that have never appeared to have been my own before, and am digging up the courage to experiment with them.

First, just a handful of samples of my work from my past.

These are all scanned photos. Some even scanned photos, of photos of photos.  (Did you follow that?) And I wasn’t always a professional photographer, so the exposure and color balance is not great on them. But anyway…. I am talking many years old artwork, here.  Some of it is almost hard for me to look at now, as I see mistakes and things I could have done better. But at the time I apparently was pleased enough with it.  And this awkward and humbling experience is an opportunity for me to grow as well. Right?

But my really intention is sharing these with you, is to show you what my style has always been. In my own words, I would describe my work as very tight, with an effort to make my subjects look as real as possible. That goal has always been what my style has been about.

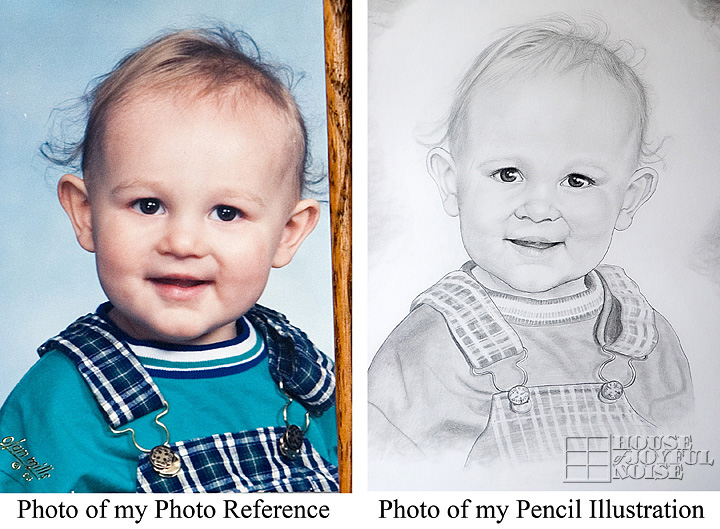
Allow me to gush for a moment. This is a portrait of my nephew and Godson. To give you an idea of just how old this is, he just turned 21! So adorable. Michael and I always thought he resembled the actor Gene Hackman, in this photo. (Right, anyone?).  Anyway…..back in the day, as a freelance artist, I did a whole lot of large pencil and watercolor portraits, as client work. Approximately 22 x 30″, matted and framed.  Mostly pencil.  Possibly 100’s before and after this one.

–
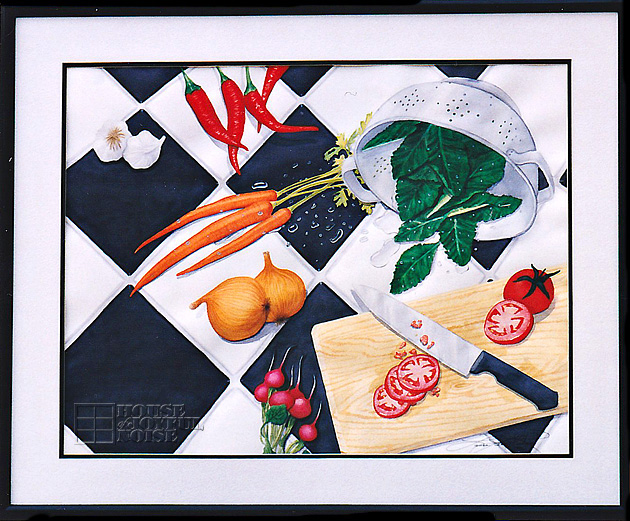
This was a HUGE watercolor painting I did for our own kitchen, before we had any children. (Although I may have been pregnant with our first?) It was a serious painting project, that probably took me months to do.  It did hang it in our kitchen for years, and certainly served as a conversation piece at times, with guests.  I always liked most of the work here, except the very inaccurate perspective of the black and white tiles. I just couldn’t get that right. It was all to me more of an aerial perspective, but the tiles really tended to confuse the viewer I think. Which was usually me.  Painting the water puddles and droplets were my most challenging and favorite part.
–

This was one of my first watercolor portraits.  Working with the medium of watercolor in and of itself, has always been equally a joy and a challenge to me. I have always longed to work more loosely with the paint, and yet create work that, when viewed at a distance, really pulls together in a realistic way.  I would seriously consider myself a very amateur watercolorist, at best.
–

And yet I have sold many watercolor paintings. Including this one, I believe? I forget. This is Nobska Lighthouse in Falmouth, MA.   I did a few lighthouse paintings in my time. This photo of this painting was very underexposed, so the color to the true painting is not accurate.  Though in truth, nor was the painting accurate to the actual scene. Another challenge of mine:  mixing the the color I need, with the paints I have.

Anyway, the shingles on the roof are an excellent example of how tight I always worked, when really, there is a looser form to paint such things, that appear realistic, for which I have not even begun to master yet.  In conclusion, you have no idea how hard I would work, to replicate exactly when I was using as a reference. (Which was often from a photo given tome, or one I took myself.  I never took liberty to change anything from the reality, which I think is a real weakness in an artist.

OK, so back to the present.  Lately I have had an urge to create a more abstract piece of work. Which may quite possibly be because of the freedom it would lend me, when I have felt as of late, as I work in the studio with my friend, that I have lost any art skills I once had.
The style of abstract artwork is an area I have never even remotely been interested in. Not as a an artist, or a viewer. I have always somewhat liked mixed medium kind of artwork, but have never done such a piece of work myself.  But in the past couple of months, an idea/visual of such a piece has begun to take shape in my mind. Something very much layered, and of mixed medium. I have decided that although I have decided on a theme of sorts, and a general palette of colors I’d like to work with, I am not going to try to make the vision in my head so clear in detail before I begin, nor make an effort to create that vision exactly.

I really want to just enjoy the process of creating art.

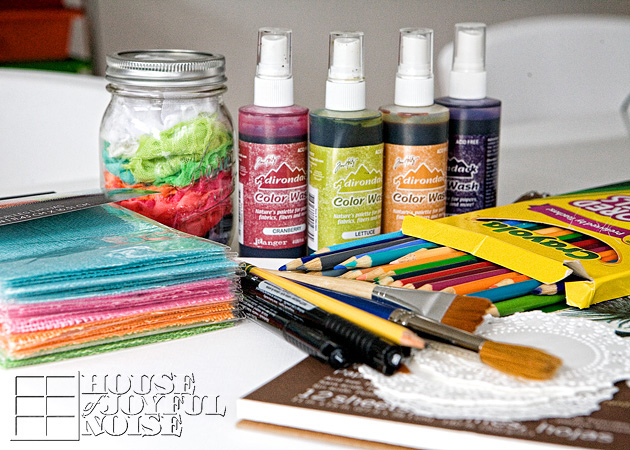
These are just some of the materials I gathered, to work with. I have thought of many other materials since, that I may, or may not, incorporate as I go. I decidedly don’t know entirely, what I’ll use as I go. I’m just going to go with the flow!

I do know, that I will share it with you when the piece is done. Whether or not I like it. And I will not see it as a waste of my time, or materials.  For it’s my intention to just enjoy the process of creating it, and seeing what lessons I can take from it along the way, or in the end.  If nothing else, I will have grown from the experience.
And that alone, can often be the best piece of work, of it all.
– Laura


Save

Filed Under: Crafts & Creations Tagged With: art, art-abstract, art-realism, art-styles, artists, artwork, pencil-illustrations, watercolor, watercolor painting

  • « Previous Page
  • 1
  • …
  • 10
  • 11
  • 12
  • 13
  • 14
  • …
  • 101
  • Next Page »

We are wicked happy to have you here! We hope you find much inspiration, help, humor and enjoyment here.


Archives


POPULAR POSTS

* * * * * *

SUBSCRIBE to House of Joyful Noise blog! Every new post, delivered right to your email box!


Privacy Policy

Amazon Affiliates

Never at any additional cost to you, we may earn a small commission for our endorsement, recommendation, testimonial, and/or link to any products from our website. Your purchase through our links helps support our family, while sharing with you the products we authentically use and recommend, for various ideas, and letting you know where you can purchase them. Thank you for your support!

[footer_backtotop]

Copyright © 2025 HouseOfJoyfulNoise.com · Genesis Framework by StudioPress