• HOME
  • {A}’s Chipmunk Training Archives

 Homepage

  • The Homestead
    • Home Projects
    • Home Improvement
    • Home Decor
      • Seasonal Home decor
        • FALL Home Decor
        • WINTER Home Decor
        • SPRING Crafts and Creations
        • SUMMER Crafts and Creations
    • Our Chickens
    • Gardening
    • Organization
    • Re-Purposing
    • Furniture Refinishing
    • Budget
  • Crafts & Creations
    • Seasonal Home decor
      • FALL Crafts and Creations
      • WINTER Crafts and Creations
      • SPRING Crafts and Creations
      • SUMMER Crafts and Creations
    • DIY (Do-It-Yourself) Project
    • Kids Arts and Crafts
    • Homemade/Handmade Gift Ideas
    • Holiday Crafts
    • Fan Pulls
    • Free Printable/Downloadable
    • Sewing Projects
    • Giveaways
    • Business Features
  • Recipes/FoodFun
    • Breakfast
    • Lunch
    • Main Dish
    • Sandwiches
    • Appetizers
    • Slow Cooker
    • On The Grill
    • Side Dishes
      • Soups
      • Salads
    • Baking
      • Breads, Rolls and Muffins
    • Snacks
    • Treats
    • Desserts
    • Drinks
  • Homeschooling
    • Elementary Homeschooling
      • Elementary Homeschooling READING
      • Elementary Homeschooling MATH
      • Elementary Homeschooling LANGUAGE ARTS
      • Elementary Homeschooling SCIENCE
      • Elementary Homeschooling HOME ECONOMICS
      • Kids Arts and Crafts
    • Middle School Homeschooling
      • Middle School Homeschooling SCIENCE
      • Middle School Homeschooling HOME ECONOMICS
    • Language Arts
    • Math
    • History / Social Studies
    • Geography
    • Foreign Language
    • Field Trips
    • Games
    • Nature Study
  • The Big Picture
    • Life In General
    • Celebrations
    • Faith
      • Into the Light; The Series
    • Giveaways
    • Reviews & Sponsors
  • Photography & Lettering
    • Photography
    • truck lettering
    • vehicle graphics
    • Newborns
    • Kids
    • Engagement
    • High School Senior Pictures
    • High School Senior Pictures Sneak Peeks

Our Halloween Decor! (Indoor-Outdoor-Photos Galore!)

October 9, 2011 By Laura 22 Comments

BOO, People!! So excited here, to show you all around! I had a goal this year (2011), to have our whole homestead Halloween decor done (known as the 3-day Hallowtide, to us) by October 1st! That way, we could enjoy it all the whole month of October.  I also wanted it all blogged no more than a few days later. How long can it really take, to photograph, edit, and blog it? Apparently….9+ days.  With my kids busy schedules, I’m in the driver’s seat, in gyms and on fields, more than in my computer chair these days. (Enjoying it, although behind in work to say the least. But my kiddos come first!)

best Halloweeen decor

Now, I have to explain real quick, that I have been trying to ‘find my place’, with Halloween decor, for years.  From a spiritual/Catholic point of view (always where I am at), I don’t like to stray too far from the true meaning or Christian roots of any holiday, including Halloween. This is why we have always extended our focus to Hallowtide = All Hallows Eve, All Souls’ Day, and All Saints’ Day.  (You can see more about that, and how we roll, HERE.)

On a completely unrelated note, but tying in with the theme, I personally am a big baby, some may say. I do not like scary/gory/terror/evil anything.  My kids laugh at everything they see, and I look away. I freak out inside a little bit, myself. Not to mention (ok, I will….), that I see zero value in all of it. So…. decorating has always been a bit of a reluctance / confusion for me, about what I wanted to do.  But I can say this year, I found my groove, and the game was on!
In that light, I hope you enjoy seeing our homestead, outdoors and indoors, that I have photographed for you all.
LET’S GO!

best Halloweeen decor Off the bat ( <—- <giggle!), I’d like to give huge props and thanks to Emily from Frosting & Ink Social Designery! <—- Click on the link to see her Etsy shop!  I purchased this Halloween Party Collection from Frosting & Ink, and used it for my home decor!  While I can design much of anything myself, I hardly have time these days. And besides, when I saw what Emily created, I was all over it!  So she deserves lots of credit here! I’ll be posting some her beautiful designs, and showing you how I used them throughout these photos. I actually have not used them all yet, but there is always next year!

002

Got to warn you:  I handed the Hubs the cobweb stuff, to be in charge of getting that done, and he went crazy with it!  Even {O} giggled watching him and said, “I can tell you’re having fun with that stuff Daddy! You don’t want to stop!”

One more note:  I had fun editing these photos, with some little grunge effects, etc.  My house is not actually this grimy looking, inside or out!  Not that’s it’s perfectly clean either.  If anything, it gets more of the messy & dust-bunny kind of dirty. LOL  ; )

So here is my very favorite Halloween creation, I made with a design from Frosting & Ink….

best Halloweeen decor

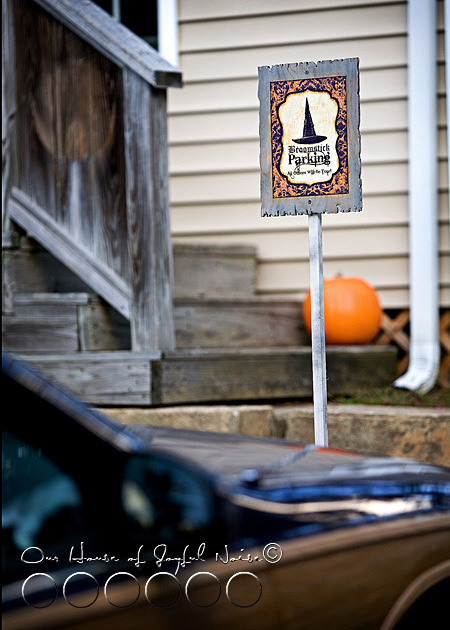
My Halloween Parking Sign! That’s right, I’m the witch around here! Heee hee heeee! Some will agree with that, in a heart beat. ; )  Others will argue, “No000 sir.  She is kidding you.  She is the sweetest thing ever!”  Depends who you talk to. LOL. (Or the day? lol).  Just kidding.

best Halloweeen decor

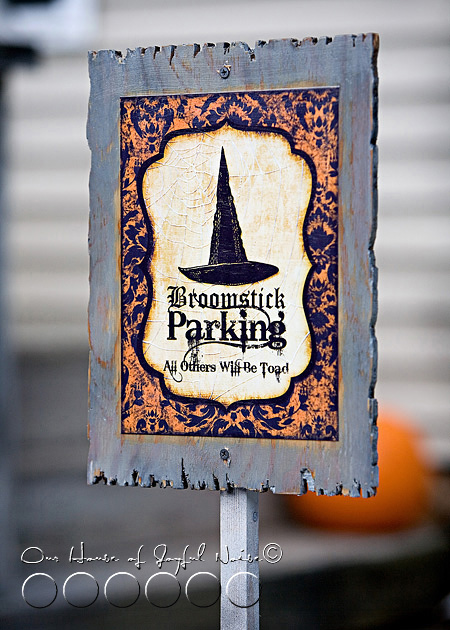
Anyway….I smile every time I pull the car into our driveway, about 20 times a day, and see my sign.  It’s something I made to be able to use every year, for years to come. I saw the whole thing in my head, the second I saw the design.  Michael made the jagged wood board for me, and we painted/distressed it, etc. It is weatherproof.

If you are wondering how, I do plan to do a quick post in the Crafts section, about how I made some of these Halloween decor things, sometime this week.  But this post is just about showing our decorations for now.

best Halloweeen decor 
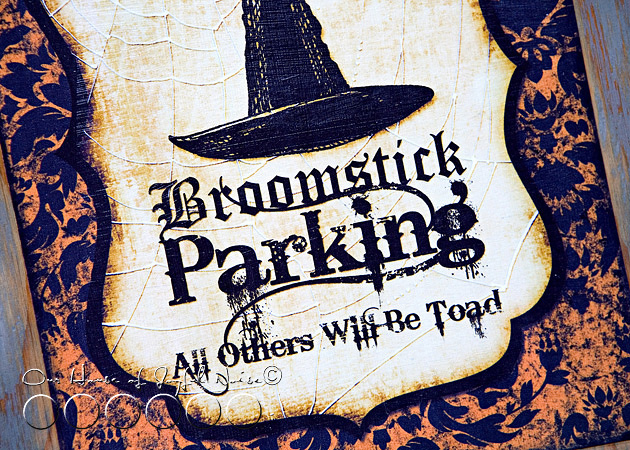
I just have to show you the amazing and beautiful detail in Emily’s work!  I always loved that font used for ‘Parking’.  A band I love, Daughtry, uses that letter-style for their logo. It’s called Bleeding Cowboys, I think. It’s a perfect choice for Halloween designing.  Good call, Emily!

best Halloweeen decor

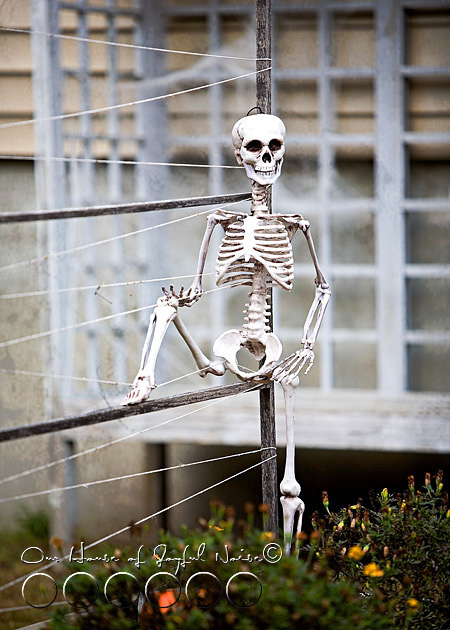
I was soooo on the fence (<—-another pun…giggle!) about getting this skeleton at Michael’s Arts & Crafts!!  I definitely am drawn to skulls and cross-bones and stuff, you know?  I have no idea why. They just ‘look’ cool to me. Yet I don’t really want to like them so much. LOL.  So….this is about my line, as far as decor goes.  See? Call me a wimp.  As long as we placed him humorously, was our/my decision.  I do like seeing him, hanging out there! (As long as it’s not dark out! lol)
–

007_halloween-garden-home-decor 
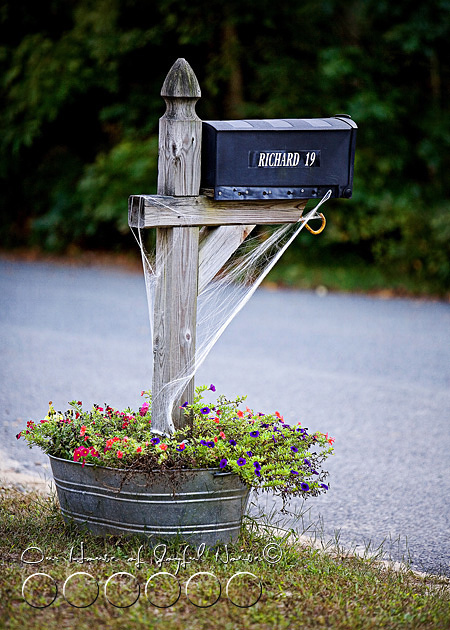
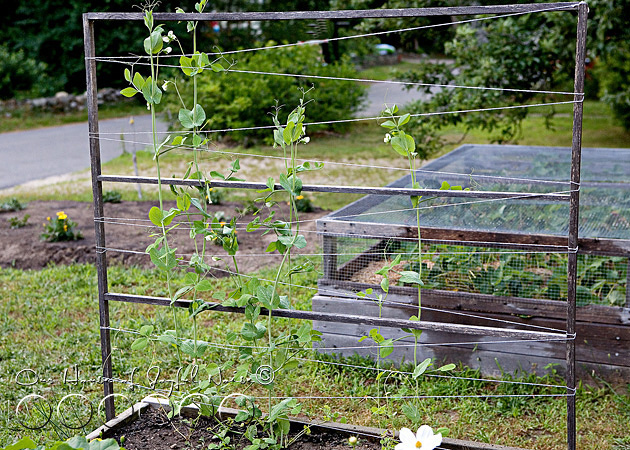
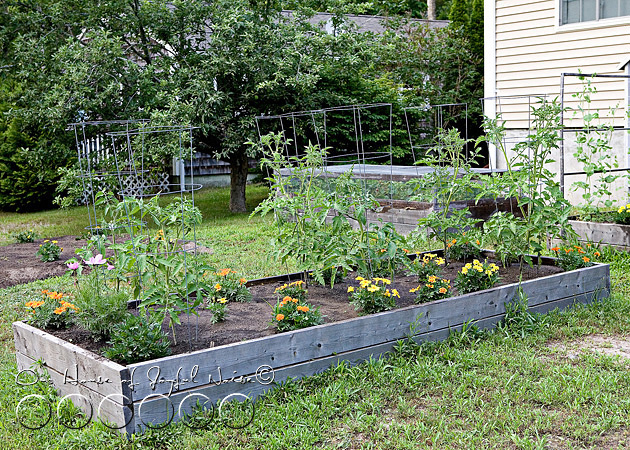
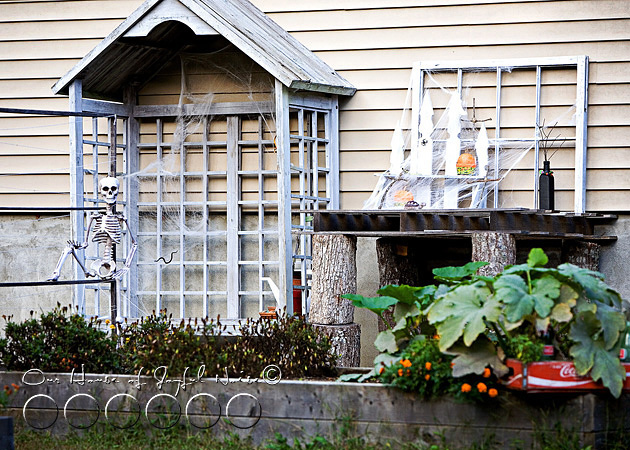
Here is a wider view of our front-yard-gardens.
The flowers are pretty deadish now, which really kind of makes it all work!  Don’tcha think?
–

best Halloweeen decor

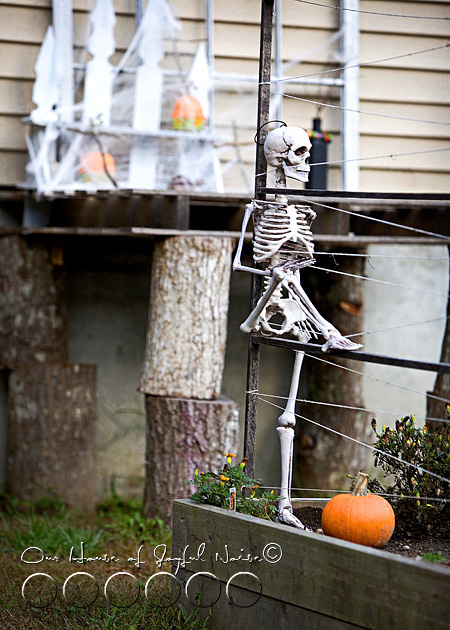
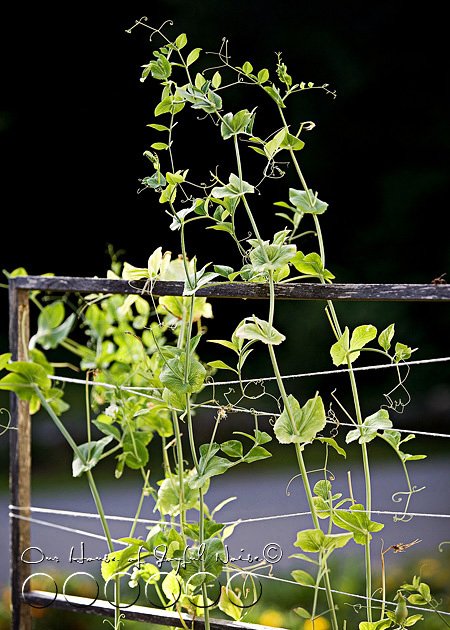
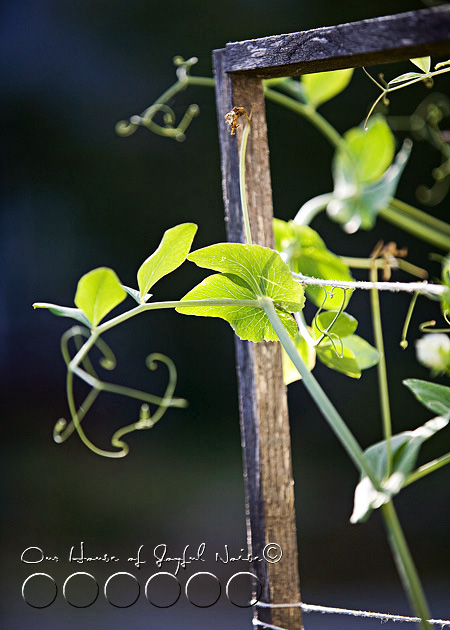
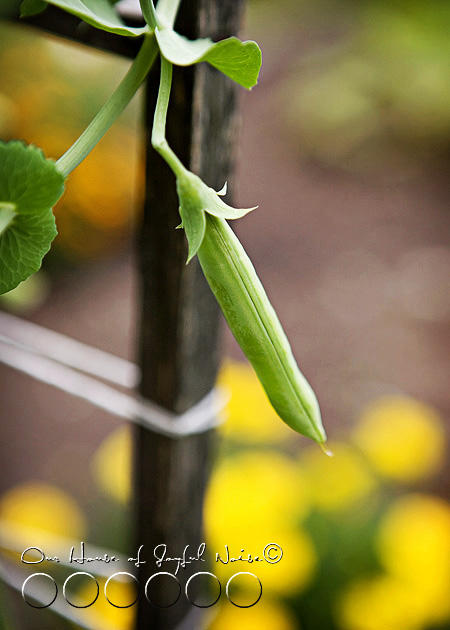
Another perspective of our friend.  From Snap Peas to Skeletons!
–

best Halloweeen decor 
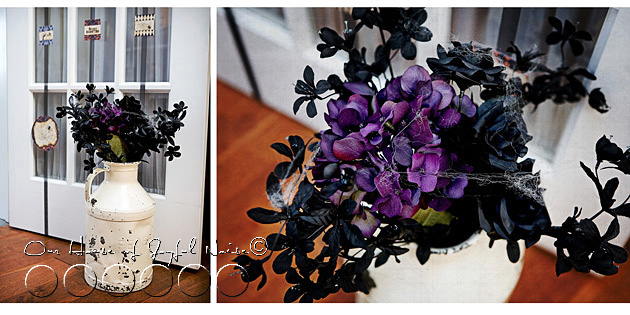
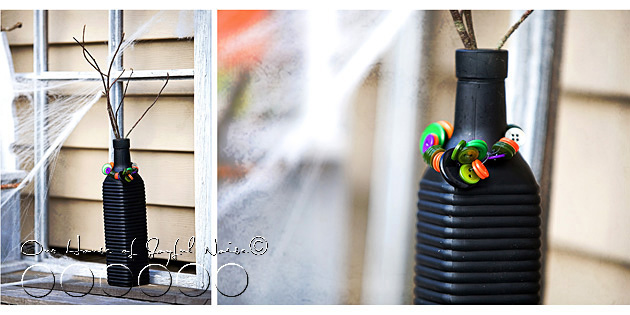
I love my newly painted buttoned bottle.
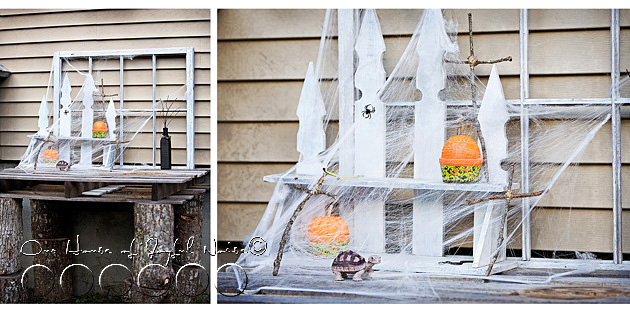
best Halloweeen decor The potting bench.


best Halloweeen decor

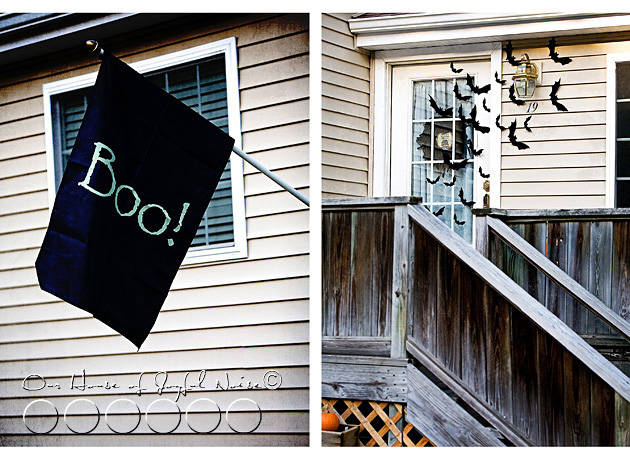
Bats swarming our front door.   It was a popular idea last year, that I loved.  But I’m slow. : )
Details of how I did this will be in the Crafts post too.

best Halloweeen decor This chest Michael picked up free somewhere in front of someone’s house.  It’s super interesting inside!  Really old…meant for shipping clothing and goods, etc., I think.  There are all of these compartments inside.  BUT, when opened, there is a heavy mold/mildew odor (which I am immediately allergic to), that we can’t get rid of.  So, we’ll be tossing it, instead of doing anything more with it.  But I thought it would be cool to keep through Halloween out on the front deck, anyway.
–

best Halloweeen decor

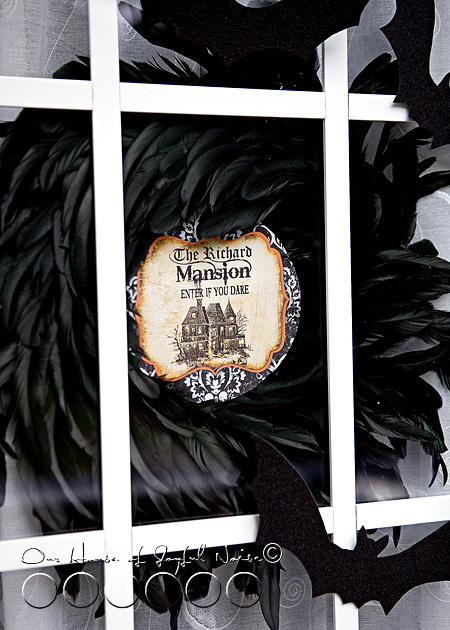
Through the glass of our front door here, you can see our Halloween wreath I made, with another design from my party pack from Frosting & Ink!

SO……that’s about it for our outdoor Halloween decor.

Would you like to come in??…

best Halloweeen decor 
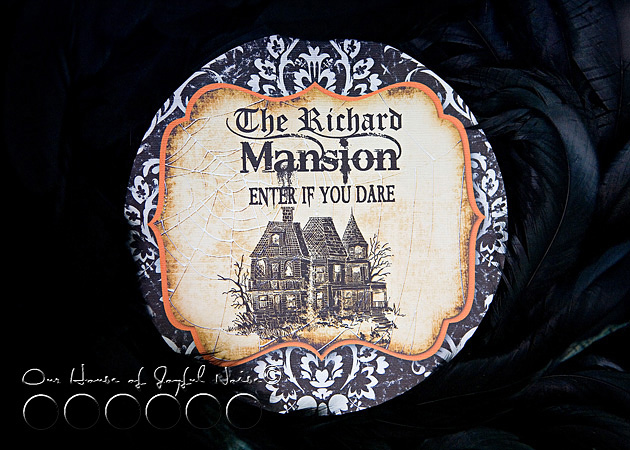
When you order for this particular pack from Frosting & Ink, you are supposed to give her your last name, so she can customize this design.  I incorporated it into a wreath.  I’ll share more about how I made this later, in the craft post, too.

best Halloweeen decor 
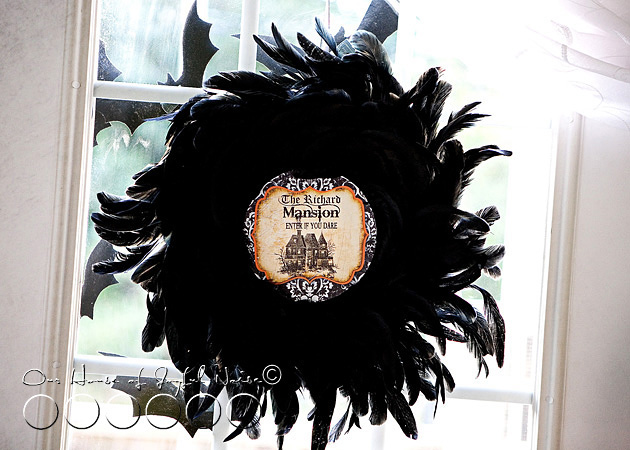
The wreath is technically on the inside, because it is not weatherproof, in any way! Just turning it over here, so you can get a better look of it as a whole.  But faces outdoors.

best Halloweeen decor

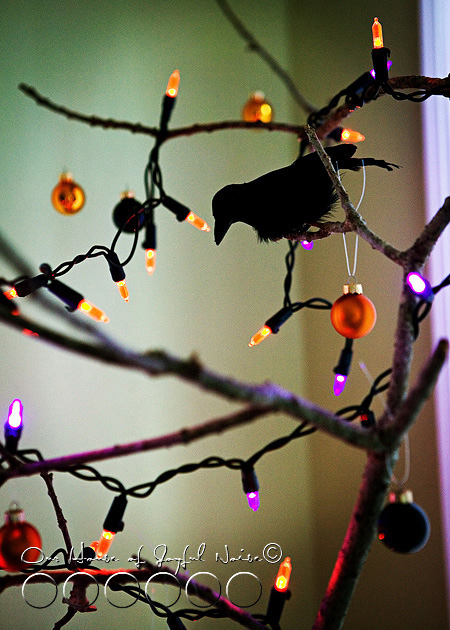
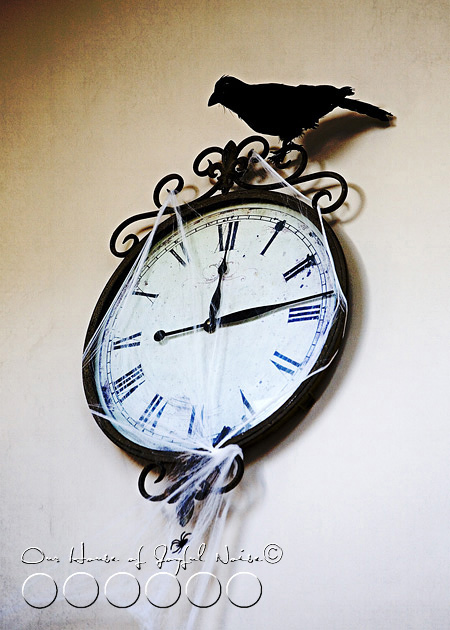
Our Halloween Tree.  Yep….still have that stick tree there! LOL.

The Halloween lights and black crow were bought at Michael’s Arts and Crafts.

best Halloweeen decor

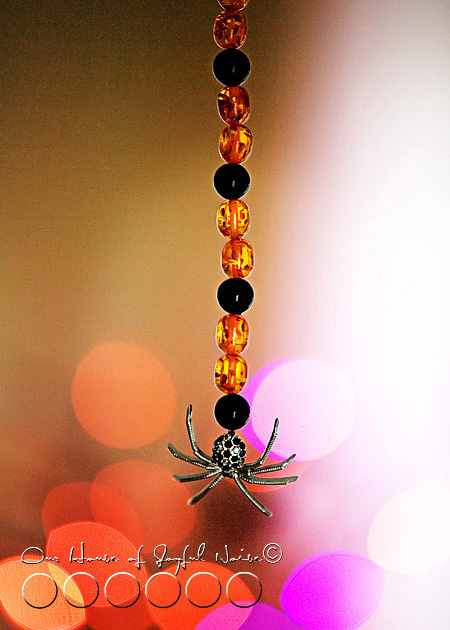
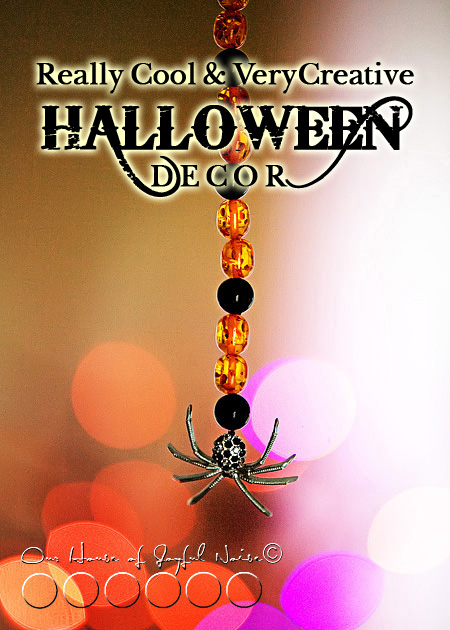
Some of you may know, I love making inter-changable fan pulls, for our all-season room.  (Anyone?)  I haven’t made one in a long time.  BUT, I did make one for Halloween this year!….

best Halloweeen decor 
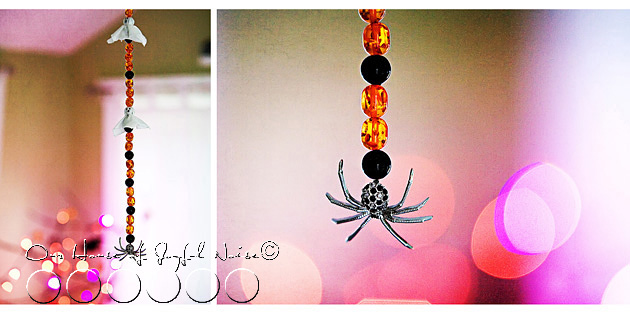
Beads and this spider, from Michael’s Arts and Crafts.

best Halloweeen decor

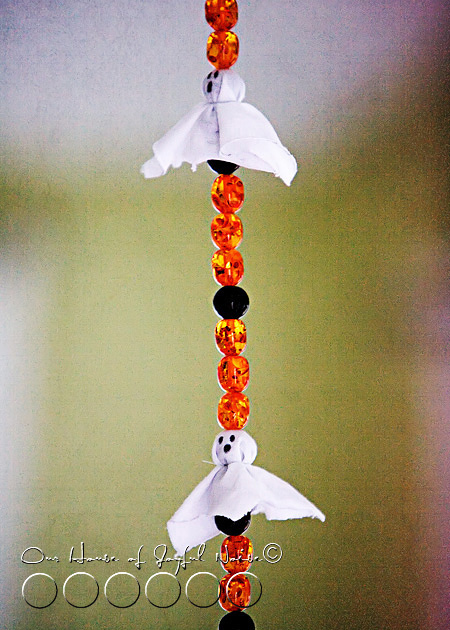
How cute are the little ghosts??

020_halloween-fan-pull-spider

best Halloweeen decor

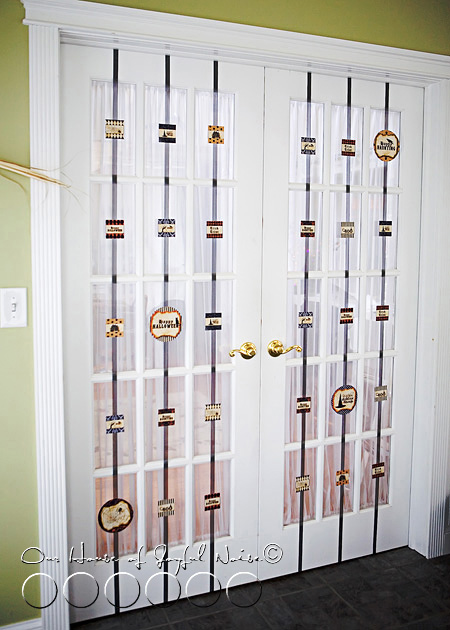
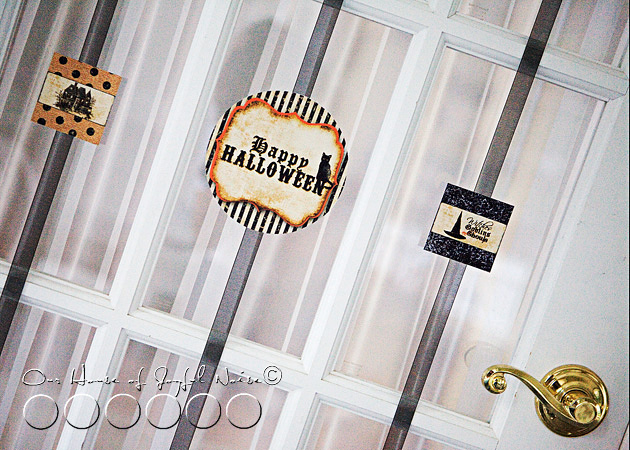
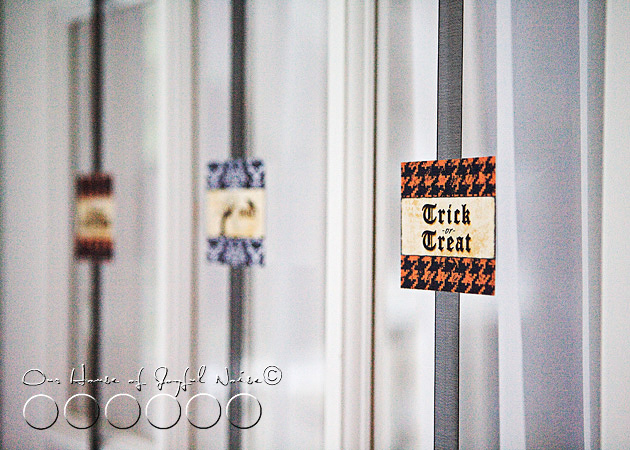
I did this kind of thing on our French doors, for Christmas and spring too.  I used the the little Cupcake Toppers and Party Signs, from the same Frosting & Ink Party Collection,  for what I call ‘Fancy Strands’, down my doors.

best Halloweeen decor

best Halloweeen decor

best Halloweeen decor

025_ 
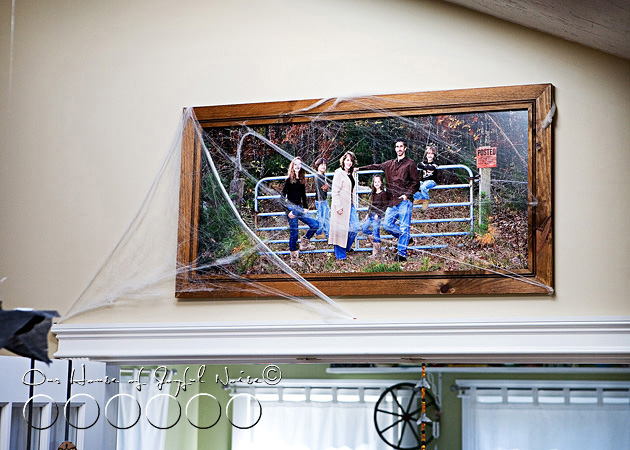
A little over the top with the cobwebs, much?  It is a bit of an old family portrait now. Well, only 2-3 years. Time for a new one, although we’ll keep this one up somewhere in the house, too, anyway. But that’s the fam.

Well would you look at the time!….

best Halloweeen decor

It’s late, and I must get to bed.  I am sure we’ll have something more Halloween-ish to share, in the coming weeks.  We do plan to do something with pumpkins!  And as I said, I’ll be showing how I made everything crafty in this post, in a coming post in the Crafts section. So….we do hope you come again. (If you DARE!!  Because we’re wicked scary….right? ; )

ETA:  Here is the link for:  Tips, Tricks and How-To’s to our Halloween Decor  in this post

Please say  “BOO!”….if you enjoyed this peak of our Halloween Homestead!!?

Feel free to share the post, or PIN any photos you’d like, as well!

Isn’t the Halloween season fun??

* * * * * *
creative Halloween decor


Save

Filed Under: Faith/ Catholic, FALL Home Decor, Holidays, Home Decor, Photography, Seasonal Home decor, The Big Picture, The Homestead Tagged With: Catholic-blogs, Catholic-families, Catholic-Halloween-decorating, Frosting-and-Ink-Social-Designery, Halloween, Halloween-crafts, Halloween-decor, Halloween-fan-pull, Halloween-home-decor, Halloween-tree, Hallowtide, indoor-Halloween-decorating-decor, Michaels-arts-and-crafts, outdoor-Halloween-decor, really-creative-Halloween-decor

Doors to Storage. (Literally.)

September 28, 2011 By Laura 34 Comments

We are so excited to show you a couple of major storage solutions we came up with for our home, that has made a huge help to us!
Not only do we feel much more organized, but these are unique projects where we re-purposed old doors.

005_old-door_300


We’re guessing many of you love to see little home transformations, and creative spaces, as we do, and that’s just what we hope to share with you today.  The photos we share will likely explain what we have done. But if you have just a bit of time, grab a drink of choice, and let us amuse you with a little more about the birth of this project.

We’ve heard some people try to ‘ keep up with the Jones’. But that’s not our style.  I’m sure they’re really nice peeps, and all. But they don’t run in our circles, and even if they did, I doubt we’d want or care what they have, even if we could  afford a thing.  No, our wants and needs are really quite simple. If not a little off-beat sometimes, I suppose.

What we would love to keep up with, is ourselves, and our own plans and ideas.  Michael and I enjoy walking around our home and yard, chat, brainstorm, and hatch a plan, that continues to make the best of our little piece of the world. Our ideas always have a purpose, whether they are to create a sense of decor, efficiency, organization, to save money, or simply to amuse ourselves because we think it’s cool. Many times, it’s all of the above. One thing is for sure; 100’s of plans have been laid out between us, in detail, and never come to fruition, whether it was intended to be done right away or not. Time and/or funds usually hold up the process a bit, until we’ve forgotten we even had the plan!  Sometimes, new plans and ideas have been made over the old ones we forgot, or remember we had.  And we always have more, than we could ever realistically get to, anyway.  It’s craziness, actually. So priority is the key, and some things just need to be dealt with once and for all.


001_shoe-storage-problem

Case in point is this hot mess, known as our shoes issue.  First, you should know, “I” am the kind of person, that really prefers one take off their shoes, before walking around the house.  Not because we have any fancy home, or carpet that mustn’t get dirty for appearances sake.  But, because of the things I notice in the world around me, the things I think of, and the things I know dang well those shoes have walked through.

Take for example, (just to make the most of my point), those teenage/adolescent boys you see walking through parking lots from point A to B, when you suddenly see and hear them do a big collecting sniff of sorts, hack it up, and just let it fly out onto the parking lot ground.  It turns-my-stomach. I’ve seen/heard it hundreds of times, and I have told my boys every time, “Don’t you EVAH, in your life time, do that.  I don’t care if you are 36. That is absolutely dis-gust-ting, rude and UNacceptable.” To which they reply, “We know Mama. You tell us that every time.”  So along with 100 other examples I could give (I’ll spare you), I simply know it’s a small sample of what is on the bottom of anyone’s shoes, and I really do not want to know such disgust is all over the floors of my home.

I’ll take earth-dirty-feet over that kind of what-nots, any day of the week.

So that helps explain all of the shoes, along the walls of our sun room, right inside our front door.  Keep in mind, this is also the room with our wood stove, and one of our family tables where we often eat and school, half the time. We originally imagined it as a cozier room for reading and such, possibly with a chaise lounge chair or 2, and an area rug under the table. Not the feel we had going here. Using the table for eating and schooling the other half of the time, it is the room we enter when we come home, and through which guests come as well. With only our shoes for that season out, with 6 of us, it’s too many. Any, is too many, for me.  It’s actually worse then you see. At the time of this photo, some had just been put away, and 5 other pairs were busy walking around in the world of what-not.  The bottom line is this:  the sight of these shoes always puts me in a bad mood. It looks terrible, and we are always tripping over them.  So, for a couple of years now, our plan was to build a storage bench along the wall you see. We had designed it right down to the details, and frankly, the shoes could never let us forget that plan.  It’s just been on a list of many things we’re been trying to get to.  But we finally did, with a whole new spin, and we’re about to show you.

But completely related, you need to see this…..

002_antique-typewriter This is in (in part) our school room. If I ever took photos of these floor cabinets Michael built for our school room 4-5 years ago, I cannot find them.  So this photo and the one below, will have to give you an idea.  There are 3 of them along the 1/2 wall adjoining the kitchen.

003

If you can possibly look past one of our adorable boy when he was starting 1st grade, you will better see the size of these cabinets.  Michael did an great job, and they served us well in this room for 5 years.  But as of late I decided they are really (way) more specious inside, than we actually need, for our school books and materials. Very roomy.  And we probably did not need so much table-top space either.  As a whole, they take up a lot of space in this room, where there is also another long table and chairs, and where we also tend to gather to eat and school.

Since the sun room was meant to be cozier and lounge-ier than it is, we thought a good first step, is to not let it be the door we come inside the house through, for one.  The back door would probably be better for that.  More like a mud room. But there was still the countless shoes issue! We still needed somewhere to sit down and take our shoes off, and somewhere to store all of those shoes. What we did not need, was quite so much storage space, for all of our schooling materials.   I forget now exactly when, but the 2 matters collided at some point in my head, and ideas started rapidly coming together.  It was likely in the shower, which tends to be my most productive think-tank, but if that is TMI for you, disregard.

The gist of it all was….get rid of the big spacious cabinets in the school room, build some kind of more shallow shelving instead, and move this whole storage bench idea to the school room, where we should really enter the house from now on. A-hA!!  Then we can do better with the sun room! But that would be getting ahead of ourselves here.

004_old-doors

I also had an idea of how/where else we could use the big cabinets, but that too is for another time. In a nutshell, they were moved elsewhere, and it occurred to me that it would probably come out pretty cool, and save us big-time in material costs, to build our storage bench and shelves, out of old doors.

In a matter of days, we had found 4 doors on ebay offered for dirt cheap, just a hop, skip, and maybe 2 jumps, from us. Michael arranged to meet the guy to take a look, and he brought them home. (2 of them from this photo were already moved to the school room.) The doors were dirty, and somewhat mismatched, but that was all workable.

Show and tell will go fast from here I think.All 4 doors were re-purposed in this project(s).

005_old-door I loved the features on these old doors, and I knew I’d probably rough things up some more, from here.

006 First Michael relocated the huge cabinets to other locations. The floor space we gained just doing that, was unreal. Then, put up some leftover bead-board we had, as the back wall.

Then a bit of measuring and taking a moment to think things through, and we started to build.

007_old-door-repurposing-bench
The doors were sawed into half the long ways, as well as proper sized-pieces, for various parts, and we were able to start putting it together.   We wanted it a good height to sit on, and have as much room on the inside, to store/hide the abundance of shoes.


008_shoes-storage-bench As you can see, the bench unit, using the doors, was built 3 sided, simply using the back wall as the back of the unit.   And all of our shoes fit in there perfectly.

009_storage-bench Without all of the shoes inside yet, here is what the bottom looks like.  These removable racks are a feature we came up with, even when the plans was to build traditional storage benches in the front sun room:   The shoes we take off when we come indoors are not only dirty/sandy, but often times wet too.  I know what a mess the elements from the shoes made on the floor, so I had thought of that in terms of the inside of the bench, and what a pain it would be again, to move each pair of shoes, to vacuum up the sand and dirt.

010_storage-bench So we built these shoe racks out out of strapping and chicken wire, so that a whole rack with shoes on it, could be lifted out, and we could vacuum underneath.  They would also keep the shoe off the floor of the bench, so they could dry easier.

011_old-doors-repurposing
At the same time, we were not only building the storage bench with our old doors, but wall shelves beside it, for all of our school books and materials.


012_old-door-shelves
I know it’s quirky, but I really love this part of the door-shelves.  I knew the doorknob would serve purpose, aside from looking cool. The sharpener simply needed to be relocated from elsewhere, as it ended up being located in such a way they we could no longer use it, without moving it, and this was the best place for it.

As you can see, a lot of the doors were beat-up, and the dark wood of the original door showed through. I liked that.  But a few parts of the structures were also necessarily built with new wood.

013
Such as the shelving itself, built with new wood.  So there was still some distressing and aging to do anyway, on new wood and not, which I did with course sand paper, and dark wax, to properly stain and age the new wood, with the old.


016_doorknob-hangers Here is the lid to the storage unit open, pre-distressed. Obviously a door, but this side was painted by the original owner more recently, it appeared.  To add interest, and of course organization and function, we added a collection of old and mismatched doorknobs along the wall above it.

017_storage-doors-bench Here’s a better look as you step back and look at it as a whole. Again, we obviously used doors, and we intended for it to remain obvious, keeping every lock , doorknob and door feature we could.

Coming into the house using the back door, we come in and sit down on the bench to take off our shoes, and put them inside.  I should add, we will be putting down a mud runner, from the backdoor to along the front of this bench.  The little kids can hang their jackets and hats on the doorknobs, which is much easier for them as they cannot reach well in the coat closet that is in the room.  Yes, some coats will be too long to hang completely, leaving the bottom of the coats to sit on the bench, but that’s fine.  Scarves, bags and all kinds of accessories can be hung on the knobs too.

018_old-doorknob-repurposing

019_old-door-shelves The top shelves are for what you can see, as well as some of our music books.  I have many more of my teacher and resource school books that I plan to move from other shelves in the house to these upper ones, for my own use. But the depth we made the door shelves was just right for our needs.

020_old-door-storage The lower shelves are for the kid’s school books, and more of my every day teacher books.  As you can see, we found immediate use for this original doorknob, as well.

020_old-door-storage The kids hang their recorder instruments there. Perfect!

022_old-doors-bench I forgot to take photos of the bench with the lid closed, before we embellished it just a little bit.  But in closing this post, I wanted to give you a better look at the finished bench and shelves.

023_old-doors-bench

In an upcoming post, we will share with you the embellishments details you see, and how exactly we did it, with a surprise inside as well! But that’s pretty much the finished project as a whole.

We have found the entire project to serve us much better. It’s all so much more convenient, functional, and we think, has a cool factor.  I would think it’s the kind of thing that one would either love, or hate.  And I wonder, would features such as these, have a negative 0r positive impact on the ability to sell a house, should the time arise?  What do you think? We personally love the uniqueness and interesting features of people’s homes, and this fits right in with why we love ours. Everyone’s tastes vary, and so our feelings could never be hurt. But we’re curious to know what you think of this idea?  Is it cool, creative, or downright crazy?

* * * * * *

Come follow us here or there:


Save

Save

Save

Save

Filed Under: Budget, Furniture Refinishing, Home Decor, Home Improvement, Home Projects, Organization, Re-Purposing, The Big Picture, The Homestead Tagged With: antique-door-knobs, bench-seats, best-repurposing-ideas, custom-built-storage-benches, home, Home Improvement, home-organization-ideas, old-door-shelfs-shelving, organization, repurposing-old-doorknobs, repurposing-old-doors, shelving, shoes-storage-solutions, storage-benches, unique-shelving

My First Annie Sloan Chalk Paint Project / Before & After

August 31, 2011 By Laura 21 Comments

annie-sloan-chalk-paint-project-7

I have been SO ridiculously excited about this post. And you all know what happens when I get excited! I babble! But I’m going to make great effort in not doing that, this time. (Deep breath. I can do it! I know I can!).  I’ve just had to focus on getting our current $100 Gift Card Give Away together (located in The Big Picture ; ).

So, we’re talking Annie Sloan Chalk Paint.  If you visit many creative-type blogs, surely you have heard of it by now. It’s ‘all the rage’ right now, as they say. And frankly, I was believing it.  So we ordered 5 cans of paint, and both the clear and dark waxes.   Now, I’m not going to get into exactly what colors we ordered right now because, we have a very long list of refinishing projects we plan on doing with this paint, and I feel like each one will be more of an exciting surprise for you all as we blog those ‘Before and After’ projects, if you don’t even know the colors we have to work with.  Am I right? I even went so far, as to digitally cover the paint colors, the day our order came in, and I was so excited I had to share a photo on our Facebook Page.  I know.  The lengths that I will go to.

But anyhoo, that’s the preliminary chat!

annie-sloan-chalk-paint-project-5

I have never worked with chalk paint before, or waxes.  So because I expected this to be a whole new experience than any I’d had before when painting, I wanted to start with a small project.  You know, something fun, but o.k. to experiment with, so I could get a real feel for how this paint worked, and practice waxing, etc.  I know that sounds wise.  ; )  But in other words, I was scared to just jump in with this stuff, and re-do some important family furniture piece for our home when, frankly, I wasn’t sure I’d know exactly what the heck I was doing.

Now, as a little related side-story, there is an elderly couple who are very dear friends of ours, and almost a couple of months ago, {A} helped their daughter move them to a more suitable and helpful place for folks their age. Not a rest home. It’s a lovely community. But in the process of packing up one place to move to the next, they were down-sizing and getting rid of a whole  lot of great stuff.  They were bringing it all to a consignment place, but before they did, they gave us dibs to go through it all, and take whatever we wanted.  We didn’t take a whole lot, but what we did take is pretty cool stuff.

One of those things, was this bird house.

The daughter believed it was really an indoor home-decor piece. But I told her, “That’s o.k. I’m still putting it outside.” Because I new just where I wanted to put it. Under the apple tree, near our gardens.  And I have to tell you, every time I have caught glance of it over there, it has made me smile, and bubbles up joy inside me. I just love to see it standing there. It’s charming, isn’t it?

0011

0021

But I also new, it was the perfect kind of piece, to take the wrath of my experimental Annie Sloan endeavors. I couldn’t imagine I could possibly ruin it, really.  Could I?  My challenge was, what color should I paint it? Because  I actually really liked the color it was, already. And I knew A.S. (Annie Sloan) had a color called Versailles, that is like a tannish-green, of sorts? Pretty similar to this. But if I was going to paint it, I wanted it to be look different enough in the end, to be worth the work!  So as much as I loved the color it was, I was going to veer in another direction.

0031
I can’t tell you how pleased I was to learn, that every little piece of window framework, and even the door, came off!  Gosh, how could I possibly screw this up, right? The way I saw it, I’d hardly even need any brush control, now.  This was going to be a breeze.


0041
Because I had intentions of seriously sanding and distressing the piece when I was done, to make it look somewhat old and weathered,  I felt like I needed to paint a new color, under the top new color. So I painted the entire house Paris Grey first.

0051
As well as the entire stand.

Then it was time, to really get down to the fun parts.  And because of that, I completely got lost in my own world. Completely. If you know me, you know, that once I get into my creative projects, I’m in a zone of my own. Time FA-LIES.  I feel so much joy inside as I work, being creative, and frankly, I’m oblivious to much else going on around me, or what else I should be doing.

Like….taking photos as I go.  I mean, the project was over the course of a few days, because I have lots of responsibilities and priorities, with my family, that need tending to. But I was right back to my project, every-chance-I-got.  Like…”Let me back at it!”.  I was also pretty much a mess while I was doing it too, so touching my camera was really not in the forefront of my mind. Still, I will tell you all about my process to the final piece.

Ready to see a little transformation?

0061

For the body of the house, I went with the Annie Sloan paint color Province, which I think is so beautiful. Even in the can. I was a little concerned that it would clash with the greens of the outdoors. And yet, I wanted it to stand out too. In the the end, I was just dying to paint with this color. So it’s what I went with.  All of the window trims, house trim, and roof, was painted in Annie’s Old White.  As was the stand.  I did use 2 coats, because I knew I’d be sanding like the dickens, and I really wanted some contrast there. So once it was all painted and dry (it dries super fast, which is a good thing for impatient me), I waxed the whole thing with the Clear Wax, doing the little pieces individually, and put it all back together. The wax took some getting used to, to work with. There’s a ‘good time’ to wipe it down, after applying, when it’s no longer wet, and not too dry either. But just touching it, I got a feel for it quickly. After the clear wax coating, I sanded the dickens out of it with 100 grit sandpaper, really attacking the edges of pieces, and even the downward strokes on the roof and house walls.

Then, I applied the dark wax, and when ready, rubbed it in or off where I wanted. The dark wax is messy stuff. But FUN!!

Waxing and sanding, is not a glamorous job. I was a HOT MESS, while working at this point. It was hot and humid out anyway, so I was sweating, putting out such physical labors. The sanding of this piece was a messy job, that I decided needed to be done on the deck, from the paint dust.  The wax has a wicked strong odor too, as some mediums do, but I did that in my sunroom where the whole project was, with all of the (surround) windows open.  So imagine me: trickling sweat, hair stuck to my head, paint dust stuck to me everywhere, hands and nails a wreck with paint and wax, and possibly stinkin’.  But having the freakin’ time of my life!!

0071 This is what I love, about creativity.  It’s contagious!!  Just look at the hot mess on this table, that looked just like this for days. But I’m NOT the only one who made it!!  The ‘other’ kids helped! Once one in our family starts getting creative doing one thing or another, someone else gets a hankering to do something of their own too, and so another does, and so on. We had coloring, painting, and even wood burning going on here in this room! Thank goodness we have other places to eat dinner together in the house. Because this was the sight in this one for a good 3 days.

But the birdhouse was not done. Did you notice the pink paint around in a couple of photos up?  ; )  All along, if I was going to paint my house Province, I envisioned tiny painted pink roses, and little green vines and leaves on it. I’d use acrylic paints for this part. Not Annie Sloan.  The problem was, I had never painted little flowers in this kind of paint before. I’ve been more of a watercolorist.

But….there is always my very best friend to turn to:  GOOGLE!  I was sure I could search up some quick how-to videos and get myself a quick lesson or 2. And so I did.  Then I squirted some pinks, greens and white plops of paint on a coated paper plate, got out some brushes, practiced a few roses on the plate, and then just winged it!!   With a pencil, I lightly traced the door and attic window on the house (for placement) and then removed them (to put back on after painting the roses & vinery), and then….I went ahead and painted the roses and vinery right on the house.  (This is huge for me, People! I don’t spontaneously wing things like this, with no real experience. Because I’m a serious perfectionist! Normally, I would want 100% confidence first because, this wasn’t going to come off the chalk paint!  But, because I am also working on this need-for-perfectionism-part of me, I challenged myself to do it anyway. Fearing….I came so far with loving my birdhouse, only to possible ruin it in a moment. Yikes! But that’s the assignment, you know? Looking fear dead in the eyes, and saying,

“You won’t take me down!! I won’t LET you!”

annie-sloan-chalk-paint-project

And there she was.  All done.
I felt like I won.

Once the acrylic dried, I did rub some clear wax over the flowers and vines, just for protection.

annie-sloan-chalk-paint-project-1

I really, really, really loved the original door. Especially that rusty nail door knob!  So I really did not want to mess with it much. All I did with it, was give it an Old White wash (part water), let it dry, clear waxed it, distressed it good, and then used some dark wax on it too.

In the end, I distessed it so much that in parts, I went right down to the original wood.  So again, the whole process was:

1) Undercoat of paint. 2) Painting of top coat. 3) Clear wax application and rubbing in or off. 4) Distressing. 5) Dark wax.

And for this project, the added steps of the acrylic floral painting and clear waxing.

annie-sloan-chalk-paint-project-2
I could not wait, to put her outside, back under the apple tree.


annie-sloan-chalk-paint-project-3
I love the whole piece. But the door is still my favorite feature.

Do you forget what it used to look like?

With any kind of refinishing projects, I personally just love to see the side-by-side “Before & Afters”, so I’ve got one for you, with this project….

annie-sloan-chalk-paint-project-6

I loved it before. And thankfully, I still love it.

What do YOU think?  Would you have left it alone? Or do you like my refinish?  I’d love to know your preference. You won’t hurt my feelings much. ; )

The important thing is two-fold:

1) I got a really good feel for this paint, and waxes, and a certain new (healthy!) addiction.

annie-sloan-chalk-paint-project-4

And 2) I have to tell you, every time I have caught glance of it over there, it has still made me smile, and bubble up joy inside me.

I just love to see it standing there. It’s charming, isn’t it?

I’m telling you. If some little birds don’t move in to this sweet little pad, I just might!

******

Filed Under: Crafts & Creations, Home Decor, Re-Purposing, Refinishing, The Homestead Tagged With: annie-sloan-chalk-paint, annie-sloan-chalk-paint-projects, before-and-after-refinishes, before-nd-after-Annie-Sloan-projects, bird-house-make-over, bird-houses, home-and-garden, refinishes, refinishing, refinishing-bird-houses

Early August Gardens, at Our House.

August 11, 2011 By Laura 6 Comments

00_

Just a quick update on how our gardens have grown. It’s August now.

The most exciting recent development, is we finally have some watermelons growing!

001_watermelon-patch They are still fairly small. I forget what variety we planted, so maybe they won’t get much bigger.

002_watermelon-patch
I need to find the seed packet, and find out, because we’ve got a (passed due) deadline here!


003_watermelon-patch We need to use the ‘Watermelon Patch’ as our ‘Pumpkin Patch’ soon!  If not yesterday.  If you were with us last year, you may recall we planted our pumpkins way too soon.  We had to harvest them by early October, and so we didn’t have any WE grew, by Halloween.  : ( But apparently, it takes 120 days to grow pumpkins!

That leaves us with…..83 days. Oh dear. This year we’re late!

004 I think we’ll just plant pumpkin seeds tomorrow, right in there with the watermelon vines. There’s room!

005 Are we blessed, with kids who LOVE to weed, or what?

I can answer that.

“Yes we are!”

006_cherry-tomatoes-on-vine Cherry Tomatoes, on the vine.

(The bigger kind.)

007_cherry-tomatoes-on-vine More Cherry Tomatoes.

And some other varieties too….

008_cherry-tomatoes-on-vine

009_tomatoes-on-vine

010_cherry-tomatoes-gardening

011_tomato-gardening
Soon, we’ll have Tomatoes to eat every day.  (LOVE tomato sandwiches.)  Right now, we are eating Cucumber spears every day, and we love it!! The kids eat tons.   The kids dip in Ranch Dressing. I like just Salt & Pepper.


012_green-bell-pepper-plant
We’ve got just a few Green Bell Peppers growing.  My mother-in-law was right. We should had started earlier, when we started with seed in the house.

Always learning as we grow.

Oh my favorite this year….

013_sugar-snap-pea-trellis
Our Sugar Snap Peas.

I just love even the SIGHT of them, growing up our trellis and twine.

  014_sugar-snap-peas

015_fresh-sugar-snap-pea It doesn’t seem we got as many as we should have?

016_sugar-snap-pea
But maybe that is because we can’t stop eating them!  Never enough.

Can you believe we have not gotten as far as to even COOK some yet? They are simply sweet, crunchy, divine, and addicting, raw and right off the vines.

017_sugar-snap-pea-flower
I love the sweet little flowers they put off, too.


018_hornet-on-wood1 There are constantly wasps collecting wood grain, to make nests somewhere.  I’ve come not mind them around.  It’s actually interesting to watch them work.  So far, I still have a trellis so, it’s fine.


019_sunflowers
Lastly, we have some sunflowers, that the kids began to grow inside, and replanted in the gardens.  They make me smile.

And so do your visits here to our blog.  Thank you coming by. How are your gardens/flowers fairing?  Please take a moment to say hi, and invite us over to your place, if you’d like.  Most think we’re pleasant enough folks. : )


Save

Save

Filed Under: Gardening, Photography, The Homestead Tagged With: garden-bed, Gardening, gardens-in-August, gardens-in-early-August, green-bell-peppers, New-England-gardening, pumpkin patch, pumpkins, sugar-snap-peas, sunflowers, tomatoes, triplets, triplets-gardening, wasp, watermelon-patch, watermelons

Garden Peek!> Early Summer 2011

July 20, 2011 By Laura 1 Comment

early-flower-vegetable-garden-photos-12

I believe we’ve been both gardening and blogging, for about 3 years.  Our life is filled with so many various passions, there is more than we are actually able to get to blogging.  I sure try to get it all in though!  But one area that is especially hard to keep you all updated with, is the gardening!  Good gosh. Things grow and change SO fast, by the time I photograph what I want, edit the photos, and start putting a post together (while you know, living my life and doing 1,000 other things in the midst of it all), the post report, explaining the photos I took, don’t seem very current by the time I get to typing it out! But my intent today, is really just to share with you all what we’ve got growing this year.

In that light, after the first photo, the photos in this post were taken in early July. As I type, it is the 20th of July. Still, while reporting with photos is unavoidably a little delayed, we like to try and give you the picture of the process as a whole, even if the photos are a little behind the 8-ball of the gardens in the moment.  I imagine it is all still relate-able for the interested gardeners (or wannabes) reading, and perhaps it opens a door for conversation, as you reflect back on the few weeks prior to your own gardening-status, and the subsequent changes.  So we’re going to roll with this delay-thing we have going on in the gardening blog-shares, and hope you all can too.

early-flower-vegetable-garden-photos

One thing we did differently this year, that we have not done in the past 2 years, is start our vegetable plants from seed!  Our experience with gardening has been that we learn a little more every year.  While we were somewhat successful in growing the plants from seed indoors, to transplant to the garden beds come Memorial Day weekend, I’m not sure our timing was right with everything. (?) For example, our pepper plants started out so tiny in the beds, that I couldn’t imagine them ever producing fruit this season!  But in sharing this with my Mother-in-law when she visited in early June, she mentioned those seeds probably should be planted in February or so.  She and my Father-in-law kept a beautiful yard full of gardens when they lived in this area. In the course of our conversation, I could not even remember the month we actually did start the seeds. But I was sure it was not that early!  The packaging of the seeds did not say, that I could tell, how long prior to replanting, that the seeds should be started. It only seemed to say how many weeks before they should bare their first fruits. So….I was winging it all. All of the seeds did sprout, grow plants, and were transplantable. In fact,  some grew too tall to keep the clear cover on, for the greenhouse effect.  What to do about that? And as I said, maybe different seeds should have started at different times. But when, for each variety, is my question. So, more researching to be done, and more lessons to be learned.  But as I have said all along, the learning as we go is half the fun!  Next year , also, I’ll keep a record of when the seeds were put in the soil. At least write the date on the containers!

Here is just a couple of other small points to note:  1)  As a reference, these photos were taken in early July. Things have grown and changed a lot since then.  So we plan to update you soon, but a little after the facts of course. : )  2) Please pay no mind to the very patchy crabgrass, in our sand-dirt, that needed mowing badly. It was done that evening.  But I am working on not procrastinating photos or a post, due to a likely irrelevant detail, so don’t call me out on that, or I may have a relapse with my self-therapy. ; )  Alrighty?

early-flower-vegetable-garden-photos-1

Here in Bed #1 we have little pepper plants on the far right, behind the Marigolds.There is Green Peppers, and Jalapenos.  Aside from the Marigolds, we also have Cosmos, and a sweet single Sunflower that {O} grew.  I plant the Marigolds and Cosmos in ever bed, to attract bees and butterflies, for assistance in pollination. But also, because I love bees and butterflies.  : )   On the far left, we have Cucumbers growing.


early-flower-vegetable-garden-photos-2

In Bed #2, we are growing Yellow Summer Squash and Zucchini.  We were adamant about the squash varieties growing in another bed this summer, after last year’s devastation!  Some of you may recall the sudden and devastating death of our squash bed last year, and eventual discovery of the culprit!  More on our remedy for this in just a bit.  But also in this garden bed is something new we are trying to grow Sugar Snap Peas! We had no idea what we were doing there at first, but I researched it and learned quickly. They started out ‘thin’, in my Mother-in-law’s word. That was her nice way of saying ‘puny’ I think. Made me giggle. But they are looking GOOD now. A closer look on that in just a minute as well. All else we have here, is the Marigolds, Cosmos, and still sitting there is our now-virtually-famous Coke Bottle Box and Candy-Cane Striped Petunias. There’s also a few Snap Dragon in that box.

early-flower-vegetable-garden-photos-3 Promising buds of  squash.

early-flower-vegetable-garden-photos-4

early-flower-vegetable-garden-photos-5 Squash Flowers.  No, we have not prepared them as a recipe in any way yet. Fried? Stuffed? It just sounds strange to me.  We’ll see who can convince me.

early-flower-vegetable-garden-photos-6 We were pretty excited to see these 2 pods!  I have fond memories of picking & gobbling peas in my aunt’s garden, when I was little.  I want our kids to be able to do the same.

early-flower-vegetable-garden-photos-7

So as I implied earlier, I wasn’t sure starting out, how we would do producing Sugar Snap Peas this first year. But regardless, I have loved watching them climb our wooden frame, and zig-zagging twine.  The hornets are ‘having at’ that wood frame, by the way.  I’ve found myself watching & studying their activity intently, both fascinated & irked at the same time.  I hope the frame holds up through the season anyway. It’s easy enough for Michael to whip another one up next year.  As an update, the peas are doing wonderfully, and I’ll show you more on that next garden post.

early-flower-vegetable-garden-photos-8 Garden #3 is the Strawberry Bed.

You are welcome to check out the post prior to this one, for lots of photos and chat on our Strawberries this year.

early-flower-vegetable-garden-photos-9 Another new learning experiment this year.  Since last year we learned that we planted our Pumpkin Patch too soon, this year we thought we’d try using the bed as a Watermelon Patch first!  The kids planted the seeds into this bed themselves. You can hardly see them well in this early photo, but let me point them out among the Marigold plants.  The Watermelon plants are in the upper far left, the one in the middle-ish, and far center-right.  There were just a couple others that the squirrels pulled out, before we got to spraying a Deer-Off border.  So I planted a row of 6 new Watermelon seeds in the soil vertically on the far right side. Updated photos of the plants will be coming up too.  We’re not sure if we’ll actually get Watermelons this year either, as my Mother-In-Law said those should have been planted earlier too.  But the plants are spreading like mad now, and I did catch a glimpse of a flower. So there’s a small chance we’ll get at least 1 melon. Heyyyy, we can split it!

early-flower-vegetable-garden-photos-10 Lastly, in Bed #4 we have 4 Varieties of Tomatoes:  Cherry, Early Girl, Big Boy & Beefsteak.

This is the bed that was our Squash Bed last year! First, we screened all of the soil, looking for any Vine Borers that were hibernated down into the soil, pupating, after the devastation they do in the year prior, waiting to reak new havoc again this year!  We learned that’s what they tend to do!  We didn’t really seem to find any, but we used a new bed for the squash this year just in case.  Besides, we try to rotate the beds every year or 2, so the soil is not depleted of any nutrients from one particular plant variety.

early-flower-vegetable-garden-photos-11 Some Cherry Tomatoes on the vine.

early-flower-vegetable-garden-photos-13 Marigolds.

early-flower-vegetable-garden-photos-14 Cosmos.

And lastly, a quick look at how our Mailbox Garden Tub has filled in….

early-flower-vegetable-garden-photos-15 I love how the Calibrachoa spill over.

early-flower-vegetable-garden-photos-16 And I have always loved Snap Dragons.

early-flower-vegetable-garden-photos-17 THIS, is not a photo from early July, but a more recent photo after some picking, last weekend. We have been enjoying Yellow Summer Squash, Zucchini, and Cucumbers, so far.

And that my friends, is your Late Garden Report!  Stay tuned for more Late Reporting, right here in the The Homestead ~Home & Gardens section, of Our House Of Joyful Noise.  Meanwhile, I’m open to some sharing and garden chat in the comments!


Save

Save

Save

Save

Filed Under: Gardening, Photography, The Homestead Tagged With: cosmos, cucumbers, early-gardening-season, flower photography, flower photos, garden beds, garden photography, garden photos, Gardening, gardens, green peppers, jalapenos, peppers, snapdragons, squash, strawberries, sugar-snap-peas, vegetable-plants, watermelon-patch, yellow-summer, zucchini

  • « Previous Page
  • 1
  • …
  • 15
  • 16
  • 17
  • 18
  • 19
  • …
  • 30
  • Next Page »

We are wicked happy to have you here! We hope you find much inspiration, help, humor and enjoyment here.


Archives


POPULAR POSTS

* * * * * *

SUBSCRIBE to House of Joyful Noise blog! Every new post, delivered right to your email box!


Privacy Policy

Amazon Affiliates

Never at any additional cost to you, we may earn a small commission for our endorsement, recommendation, testimonial, and/or link to any products from our website. Your purchase through our links helps support our family, while sharing with you the products we authentically use and recommend, for various ideas, and letting you know where you can purchase them. Thank you for your support!

[footer_backtotop]

Copyright © 2025 HouseOfJoyfulNoise.com · Genesis Framework by StudioPress