• HOME
  • {A}’s Chipmunk Training Archives

 Homepage

  • The Homestead
    • Home Projects
    • Home Improvement
    • Home Decor
      • Seasonal Home decor
        • FALL Home Decor
        • WINTER Home Decor
        • SPRING Crafts and Creations
        • SUMMER Crafts and Creations
    • Our Chickens
    • Gardening
    • Organization
    • Re-Purposing
    • Furniture Refinishing
    • Budget
  • Crafts & Creations
    • Seasonal Home decor
      • FALL Crafts and Creations
      • WINTER Crafts and Creations
      • SPRING Crafts and Creations
      • SUMMER Crafts and Creations
    • DIY (Do-It-Yourself) Project
    • Kids Arts and Crafts
    • Homemade/Handmade Gift Ideas
    • Holiday Crafts
    • Fan Pulls
    • Free Printable/Downloadable
    • Sewing Projects
    • Giveaways
    • Business Features
  • Recipes/FoodFun
    • Breakfast
    • Lunch
    • Main Dish
    • Sandwiches
    • Appetizers
    • Slow Cooker
    • On The Grill
    • Side Dishes
      • Soups
      • Salads
    • Baking
      • Breads, Rolls and Muffins
    • Snacks
    • Treats
    • Desserts
    • Drinks
  • Homeschooling
    • Elementary Homeschooling
      • Elementary Homeschooling READING
      • Elementary Homeschooling MATH
      • Elementary Homeschooling LANGUAGE ARTS
      • Elementary Homeschooling SCIENCE
      • Elementary Homeschooling HOME ECONOMICS
      • Kids Arts and Crafts
    • Middle School Homeschooling
      • Middle School Homeschooling SCIENCE
      • Middle School Homeschooling HOME ECONOMICS
    • Language Arts
    • Math
    • History / Social Studies
    • Geography
    • Foreign Language
    • Field Trips
    • Games
    • Nature Study
  • The Big Picture
    • Life In General
    • Celebrations
    • Faith
      • Into the Light; The Series
    • Giveaways
    • Reviews & Sponsors
  • Photography & Lettering
    • Photography
    • truck lettering
    • vehicle graphics
    • Newborns
    • Kids
    • Engagement
    • High School Senior Pictures
    • High School Senior Pictures Sneak Peeks

Tissued Decorative Storage Tins | Craft

June 7, 2011 By Laura 7 Comments

tissued-storage-tins-craft-21

Sometimes, us creative people, have ideas that come out better in our head, than they do in real life!  Agree? But this project of tissued decorative storage tins was the opposite.  On the one hand, it may have been just a tad more difficult than I had imagined.  Only because I should have remembered how tissue paper and I, can go round and round and round.  We just don’t seem to get along. I normally do not have the patience for the stuff, and end up making the tissue a wrinkled mess. So much so, that I refer to my husband, to put the tissue in gift bags if I can, and he also is so kind, as to do all of my packaging for my portrait photography orders for my clients.   But on the other hand, these tissued tins actually came out way nicer than I expected!  I’d have to say the credit for that probably goes to Modge Podge. Love that stuff!

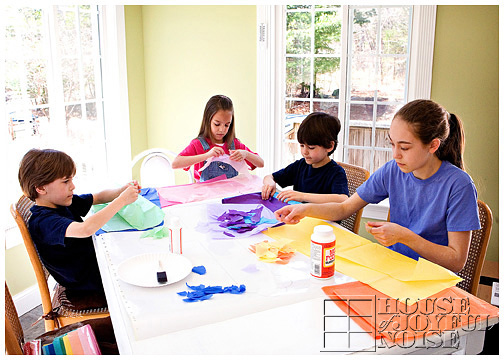
This idea is one I came up with as homemade gifts for our nieces & nephews, for Christmas 2010, as well as for my God-Daughter {Ju}. (You all know her by now, right?)   I thought they would be cool for them to keep little treasures & trinkets in, in their rooms, or even for my oldest nephew/God-Son to keep change or what-not in in his Jeep.

tissued-storage-tins-craft 
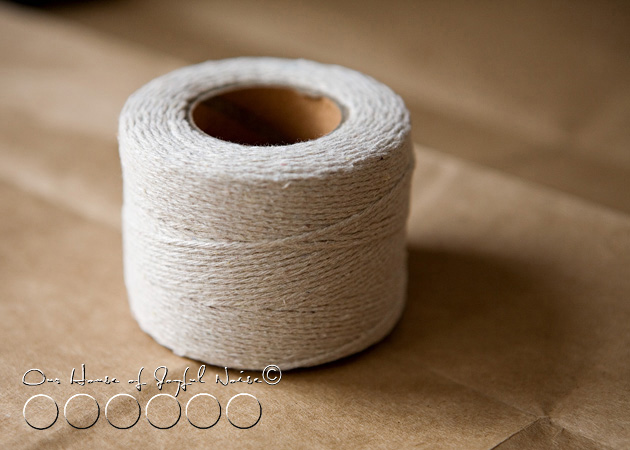
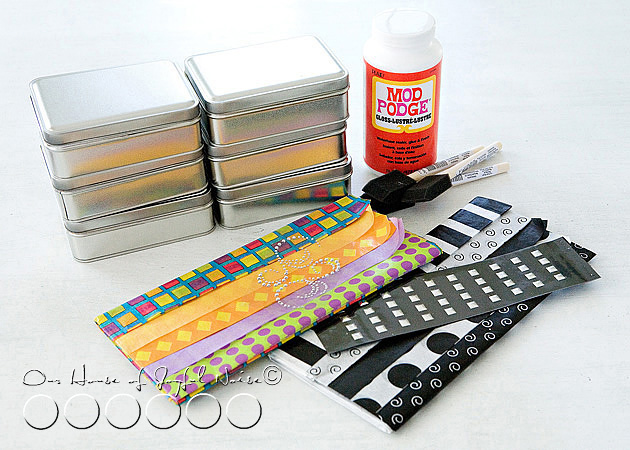
Here’s all you need!

As well as an x-acto knife or razor blade of some sort (not shown), and possibly a little patience, if you are like I am with tissue paper.  If you don’t need the patience…..well I’m happy for you!  : )

tissued-storage-tins-craft-1 
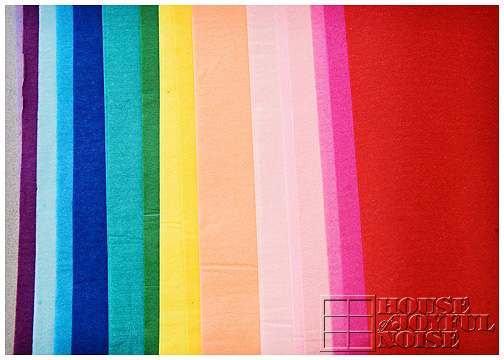
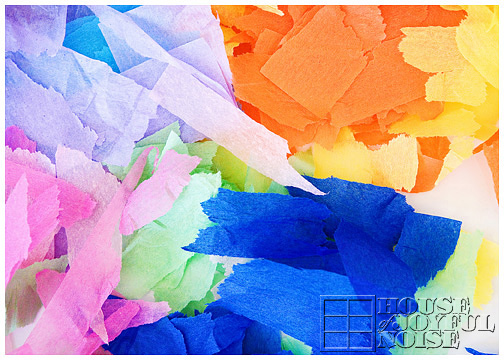
I was so thrilled to find such bold & funky designer tissue paper, at The Dollar Store!…. that I thought was just perfect for the age range of the kids, from elementary school to teens, and for both the boys and the girls as well.  The silver sticky elements I got in the scrapbooking section of Michael’s Arts & Crafts.


tissued-storage-tins-craft-2 I found the tins shown, at Michael’s Arts & Crafts.

They had a variety of shapes and sizes to choose from.

tissued-storage-tins-craft-3

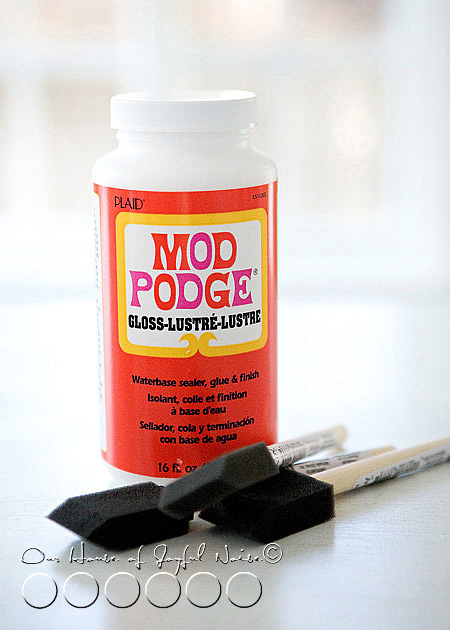
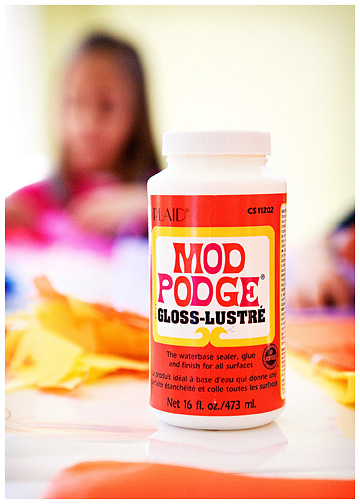
Modge Podge and foam brushes came from the same place.

So this is how this is done:

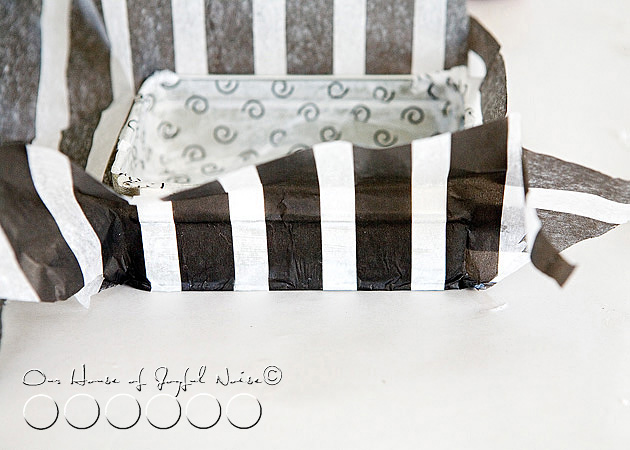
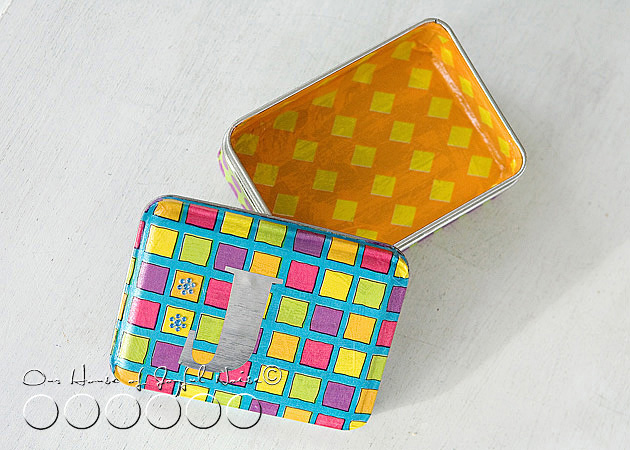
With your foam brush, you begin by Modge Podging the inside of one tin, and then layer it with the tissue design you would like on the inside.


tissued-storage-tins-craft-4 
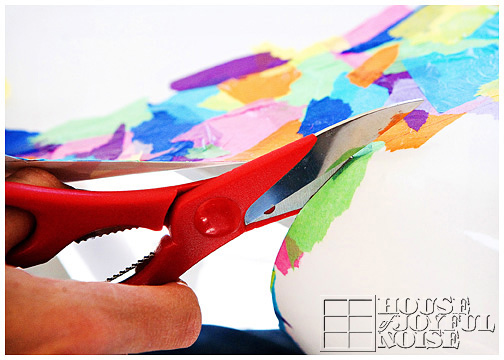
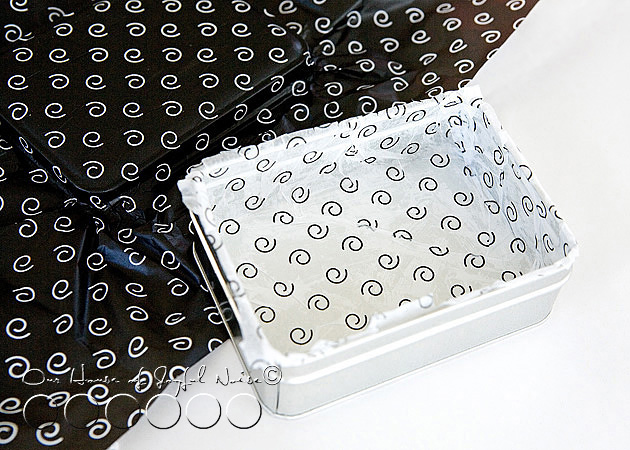
You really only want to Modge Podge up to the lip of the inside of the tin before laying on the tissue, but let the tissue overlap from there, for now.  Just carefully rip off or cut the excess with scissors.  Then leave to dry.  We’ll get to how to finish it off in a minute or 2.

Now I am telling you right now, there is no way for the tissue to come out perfectly smooth. Most especially on the inside, where you virtually have to stuff the tissue in there.  But do be careful not to tear the tissue or poke a hole in it. However, IF you do by accident, (as I did more than once (yes, the patience with tissue issue…..) it’s not that hard to cover it up, or manipulate the tissue to make the hole not show.  Honestly, it’s just the insides of the tins that are the hardest part of the whole project.

tissued-storage-tins-craft-5 
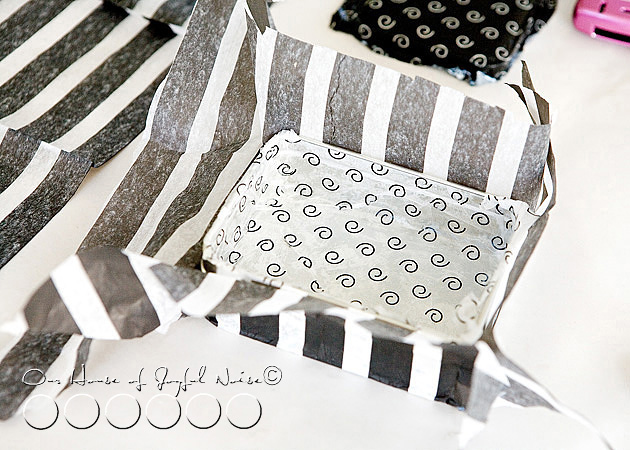
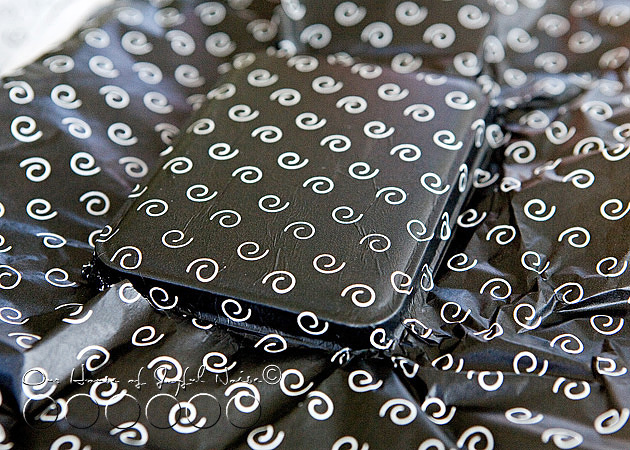
Do the outside of the tin cover, in much the same way.  Again, only Modge Podge to the lip of the lid, then apply the tissue.  Now getting a little (Modge Podge) glue where it shouldn’t be, and the tissue sticking to it, is no big deal. It can be scraped off easily enough once dry.


tissued-storage-tins-craft-6 Just rough trim it with your x-acto blade, and then leave to dry.  If you are trimming first before it really sits to dry, just make sure you don’t drag-rip the tissue.  Your blade will get Modge Podge on it, so you’ll want to try to keep it clean too.

tissued-storage-tins-craft-7 
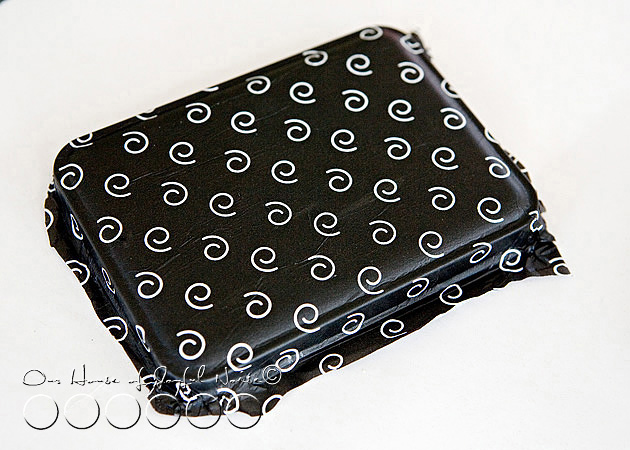
Now you can do the outside of the tin container the same way:  Apply the Modge Podge, and then apply the tissue, smoothing it all as best you can.  Agai…wrinkled are going to happen here and there.


tissued-storage-tins-craft-8 
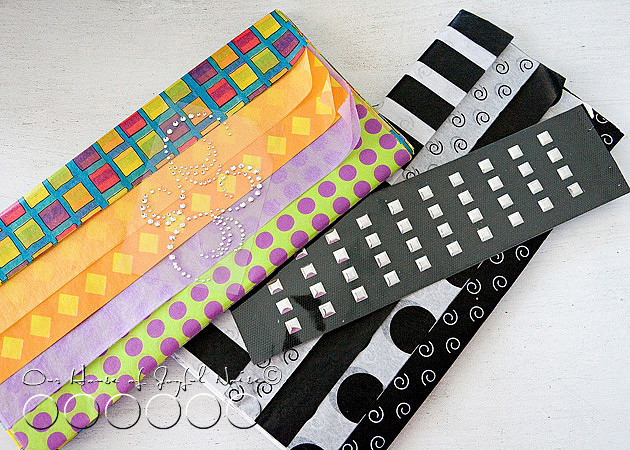
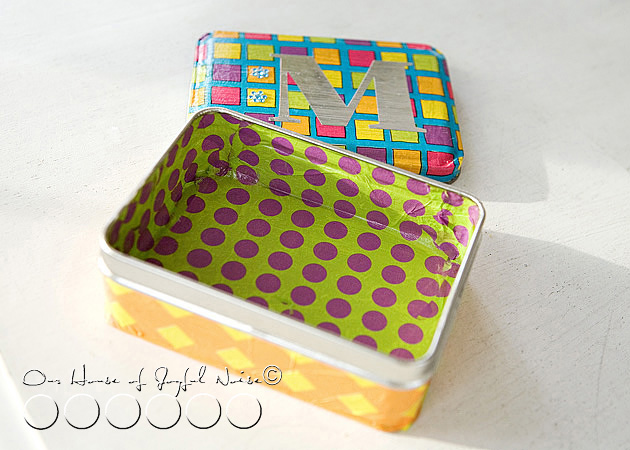
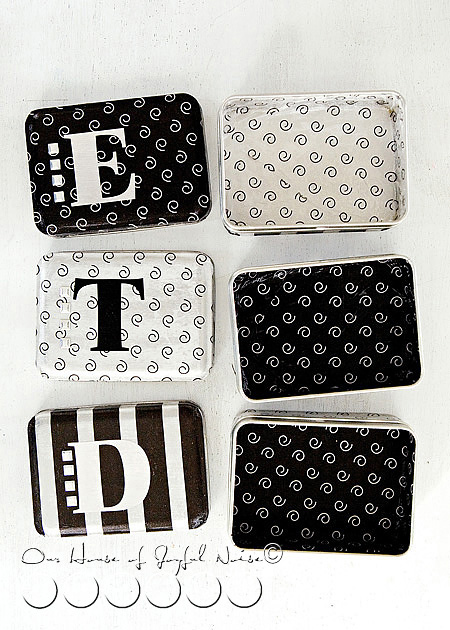
It was really fun to have these co-ordinating designs to work with.  (Pay no mind to my BlackBerry over there.  Always nearby, and forever bLiNkInG!)

Now, in terms of cleaning them up, I found an x-acto knife to be a handy little tool!  I trimmed off the excess tissue, by running the sharp point of the blade, right in the groove of the lips.  If you aren’t sure exactly where or how I mean, just inspect the earlier photo above of the bare tins, and the ones coming up, and think about how the tin is put together.  You can’t have tissue anywhere, where the tin cover and container need to fit together.  Just a little common sense I dug up there. ; )

OK, so after each tissued piece is dry, and you have trimmed the excess tissue off everywhere, you then need to put a coat of Modge Podge over all of the tissue layers, inside and out!  I did second coats of Modge Podge too, letting them dry before coats, and I recommend doing that.  That is what gives the tins a finished look, once they are dried, and keeps the tissue surfaces protected.  Granted, now that the tissue is trimmed and there is tin lips exposed, you want to try and apply the Modge Podge a little more carefully, as to not get glue all over the naked tin parts .  But again, if any gets on the bare tin edges, once it is dry, it scrapes right off like any glue would. Modge Podging the inside of the tissued tins are probably the hardest to do with your foam brushes, only because you’ll see it puddles a little where folds and creases of the tissue are.  It looks a mess at first. But that is ok…..just spread it out best you can, because the Modge Podge really dries hard and clear.  You are using the foam brush to sort of stick down and smooth out any wrinkled tissue as well, as you work.  You’ll be amazed how good it starts to look as the Modge Podge dries clear.

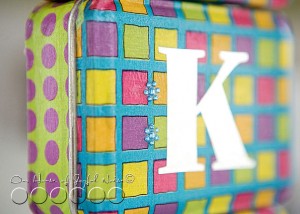
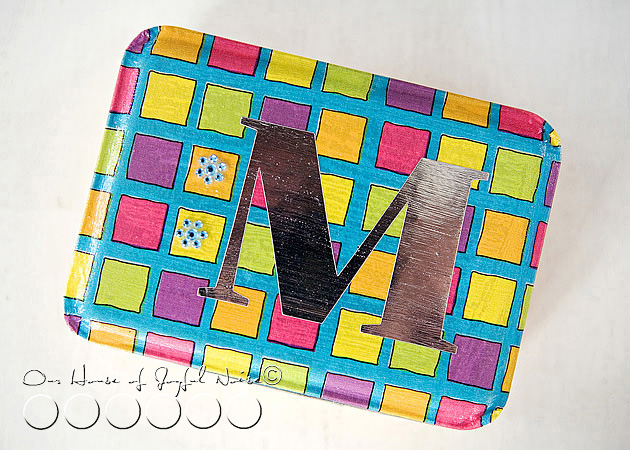
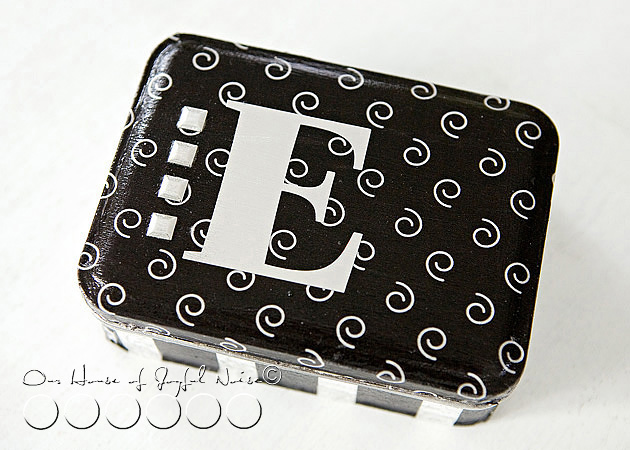
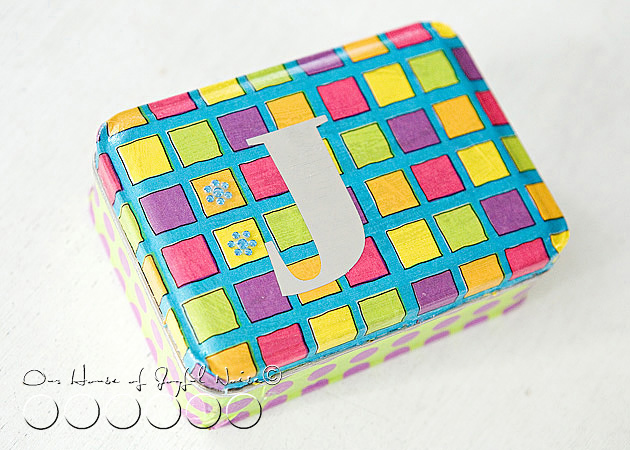
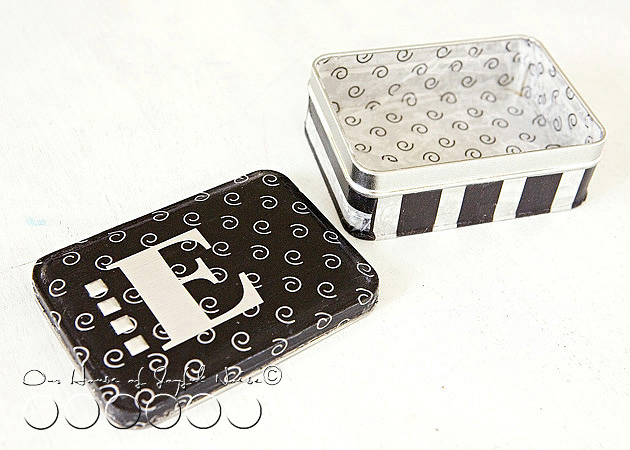
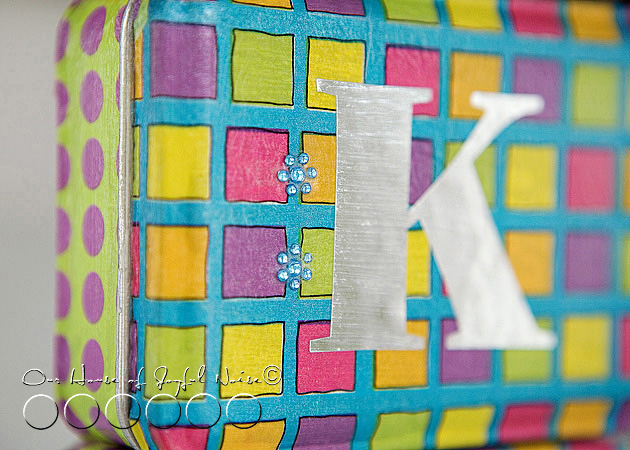
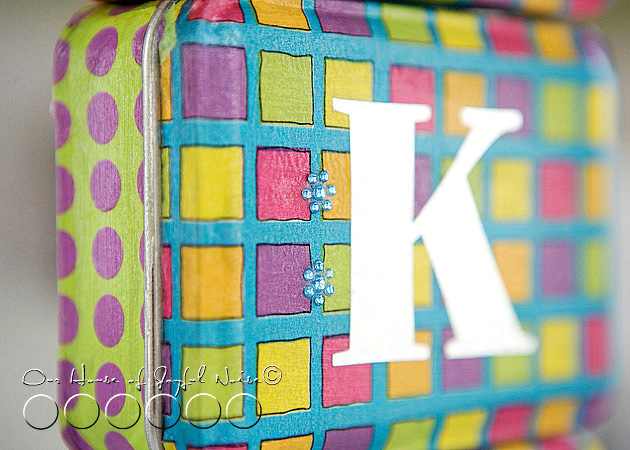
I wanted to personalize them, so I had hubby cut their initials out of sliver mylar vinyl.  Then used the decorative sticky elements, to add a little extra bling.  Finally, I went right over the mylar and the elements on the covers, with another coat of Modge Podge.  Honestly, these came out slick & with a bit of sheen, seeing as though I used the glossy Modge Podge.

I LOVE how they came out, and I am about to show you a whole bunch more of photos, so you really can get the idea. (And, o.k., so I can show them off a little more.)

tissued-storage-tins-craft-9

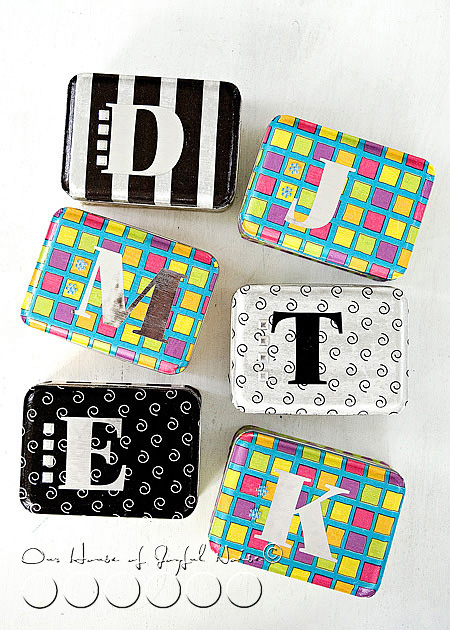
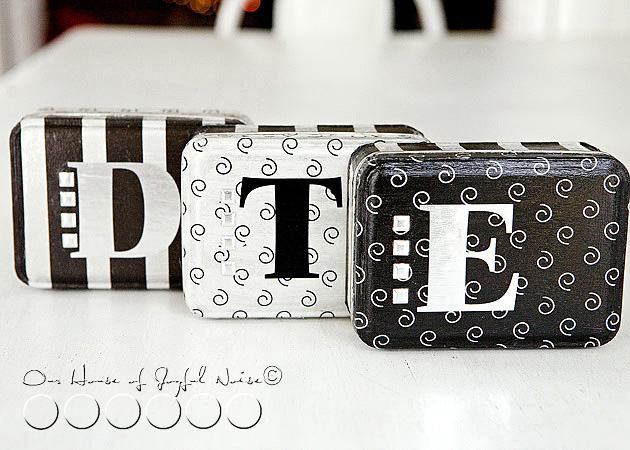
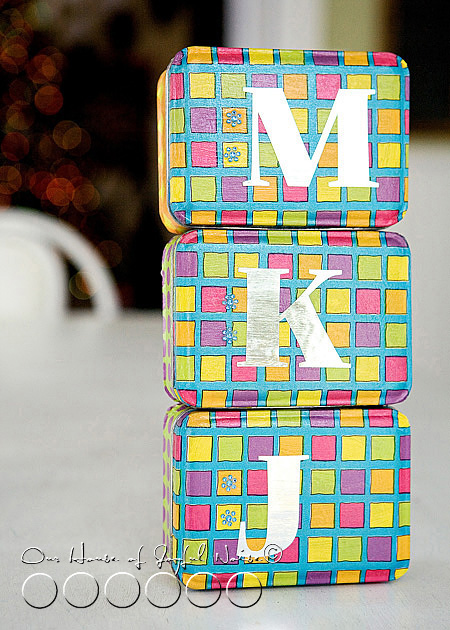
Bold Black & white for the boys……bright happy colors for the girls.


tissued-storage-tins-craft-10

tissued-storage-tins-craft-11

tissued-storage-tins-craft-12

tissued-storage-tins-craft-13

tissued-storage-tins-craft-14

tissued-storage-tins-craft-15

tissued-storage-tins-craft-16

tissued-storage-tins-craft-17

tissued-storage-tins-craft-18

tissued-storage-tins-craft-19

tissued-storage-tins-craft-20

Like? Love? Let me know what you think!

******


Save

Filed Under: Crafts & Creations, DIY (Do-It-Yourself) Project, Homemade/Handmade Gift Ideas, Tutorial Tagged With: crafts, gift tins, handmade gifts, homemade-gifts, Modge-Podge-crafts, modge-podge-projects, storage-tins, tissue paper crafts

Heart Strings / A Valentine’s Craft

January 17, 2011 By Laura 49 Comments

If brilliant colors make you happy, and you love fun projects, then this Valentine’s craft is just for you!  We’re showing you just how to do it, step by step today!

heart-strings-valentines-craft-30

While my home is not completely decorated for the upcoming ‘month of love’ just yet, I knew it was time to get to some Valentine crafting! I happened to see this craft from Martha Stewart Living, and was inspired to try it ourselves, with a spin or 2 of our own on it.  By melting crayons in between wax paper, and cutting out hearts, some very cute Valentine’s decor can be made!  That Martha is a clever one, huh? ( Or, her creative team – whatever. lol.)  You can make this craft as quick and simply. or as involved, as you choose, and I am going to tell you the ways how.

Supplies needed:

  • Crayons, with paper removed (This craft is a great way to use up those old broken crayon pieces!)
  • A sharpener with a fat hole.
  • *Wax paper
  • Clothing iron
  • Brown craft paper, or brown paper bags (Just a protection layer for ironing.)
  • Hearts stencils or cookie cutters (2-3 sizes is nice.)
  • Pen or pencil
  • Scissors
  • Scotch-like tape

*  DO NOT substitute parchment paper for the wax paper. It is not the same thing, as parchment paper has teflon in it.

Other optional supplies, depending on what you want to do with your crafts decoration:

  • White cotton twine and food coloring. (Simplified option:  thin ribbon in white or any Valentine color.)
  • A clothing hanger, or a long tree branch

I intended to hang our hearts once they were done.  So instead of using some satin ribbon (which is simple and faster, if you want to go that route), I had this vision of hanging our hearts on dyed string, that varied in color.  So, with a roll of white cotton twine, and some food coloring, this is how I did it:

heart-strings-valentines-craft

heart-strings-valentines-craft-1 In a plastic container, I added some red food coloring to some water, deep enough to soak the roll on it’s side to the cardboard roll core. I just let it sit for awhile, while I did other things,  until I thought it soaked through all of the layers of twine.  Then, I made orange and yellow soaks as well, letting a different side of the roll sit in each.

heart-strings-valentines-craft-2 I loved the results!   How pretty is that?

heart-strings-valentines-craft-3

I knew as the twine was pulled off the roll, the layers would get lighter, but that too would only help the variations in the string colors.  Now, all of this string is not going to dry on the roll all the way through, any time this year, but that’s o.k.  You’ll be able to use the string damp just fine, and it’ll dry hanging.


heart-strings-valentines-craft-4 But while the string roll was soaking in various colors, the kids and I got to making our hearts.

heart-strings-valentines-craft-6

Pull off a piece or 2 of wax paper, fold in half to make a good crease, and then open back up. . . .


heart-strings-valentines-craft-5 What size piece you use depends on how many hearts you’ll want to make.  Remember, you’ll only be able to get hearts out of one half, as it will be ironed together soon, with crayon shavings in between.


heart-strings-valentines-craft-7 Grab your old peeled crayons, and start choosing some great colors for Valentine hearts.  No need to stay with strictly traditional colors, such as red and pink.  Try some purples, raspberries, and even oranges and yellows!


heart-strings-valentines-craft-8 Now, if your old crayons have been kicking around together for some time, as ours have, they are going to have yuckity-doo-dahs all over them.  Even as a kid, with me and my sibling’s bottomless bucket of crayons, I hated this.

So because I have had particular issues, long before I was a blogger, I have had a trick for this crayon problem.  And since you came to this blogger with issues blog, I’m going to share it with you.  : )


heart-strings-valentines-craft-9 Just lay the crayons down, one by one, on some scrap paper, and rub the yuckity-doo-dahs away!  I found this is also a good way to test what the color really looks like!!  Some crayons when used, do not look anything like the shade of the actual crayon!  So deceiving.


heart-strings-valentines-craft-10 Old crayons, like new:  Yuckity-doo-dah free!


heart-strings-valentines-craft-11 To make crayon shavings, you need a sharpener of some kind.  Our little hand pencil sharpener did not have a hole big enough for a crayon, so we used my make-up one!  Thanks Lancome!

Now….you’ll need to iron on your table or other flat surface, so I highly recommend putting down some crafts paper to protect your surface, from both melting crayon, and the heat from the iron.

On top of the protected surface, lay your open wax paper pieces.


heart-strings-valentines-craft-12 Over only one side of your wax paper piece, sharpen your crayons and let the shavings fall onto the paper.  Each of my our kids did their own, and had their own unique colors combinations, which was going to make for a nice variety of colored hearts.

heart-strings-valentines-craft-13 Some of our crayons were metallic ones!!  So that was adding a whole new element of pretty!


heart-strings-valentines-craft-14 Make sure you cover the whole side with shavings pretty well.  Brush any pieces in from the very edge though.

heart-strings-valentines-craft-15 Fold over the empty side of wax paper, onto the side with the shavings.

Now, Martha’s directions say to fold up each open side some, to keep the melting crayon in.  But, I didn’t want to waste any space, as we wanted to make lots of hearts, and some on the bigger side too.  So….I just made sure I was working on my brown paper bag.  (We also had other craft paper taped to cover our surface under that.)

heart-strings-valentines-craft-16 Now, after putting brown paper on top of your waxed paper and shavings, you can start ironing.  What setting?  Good question!!  See, Martha said on a ‘medium setting’.  But guess what?  Our iron doesn’t have a medium setting!  So I set it between silk and wool, ; )  …. and adjusted the heat up or down from there.

As you can see, some oils from the crayons may seep through the wax paper and the brown paper.  It doesn’t cause any problems. Just make sure you clean the surface of your iron off when you are done with this craft, so it doesn’t transfer to your clothes!  What a hot mess that would be!   (Note to self:   Clean surface of iron from crayon craft!!)  (By the time I decide to iron an article of clothing, I’ll have forgotten I ever did this craft with it.)

As you iron, you’ll want to keep peeking,  to see if there are more shavings that still need melting in areas.


heart-strings-valentines-craft-17 Heavy in crayon wax…..but nice!!


heart-strings-valentines-craft-18 The next kiddo went with a lighter layer of shavings, for a new effect.  Or, his hands just got tired from sharpening the crayons.


heart-strings-valentines-craft-17 They were looking good!!  Just holding each of them up to the light, I could tell this was going to look super cool when we were done.

heart-strings-valentines-craft-18

I couldn’t wait to see what this one was going to look like, all melted.

heart-strings-valentines-craft-21 LOVE!!!


heart-strings-valentines-craft-22 Now, you may notice some bubbling or wrinkling in areas.  I’m not sure why this happened sometimes.  I was guessing maybe it was too much heat at times.  But since this was a fun crafts class, and not our Science class, we weren’t going to waste time running tests, to figure it out.  We decided it was a cool effect, and embraced it.

Next, came tracing hearts onto our waxed pieces, and cutting them out with scissors.

heart-strings-valentines-craft-19 We used simple heart shaped cookie cutters that we had, in 3 different sizes.  Just trace them using a pen or pencil, and then cut out on the heart shaped line.  I used a pen, and because I was using it on wax paper, it wouldn’t really write, which I preferred anyway.  I was able to see the tracing indention well enough to cut, just by tracing it a couple of times.    * I did not take photos of tracing and cutting.  I have faith you get the picture.

Nor did I take photos of exactly how we did the rest of our crafts.   BUT……Once your hearts are all cut out, there several things you can do with them:

1)  The easiest thing you can do, is just put them on your windows much like window clings, using a little transparent tape!  The hearts have a stained-glass look, and they would be beautiful  with the light coming through, and the colors so radiant.

2)  Another option, is using pieces of thin cut ribbon, tape one end to the back of each heart, and tie them to a clothing hanger at different lengths.  Instant Valentine’s themed mobile!!

3)  You can take it to the extreme, like we did…..


heart-strings-valentines-craft-23
Michael went out and found us a really long and fairly straight tree branch, that would meet the length of our sliding glass doors.   Then, to work in a comfortable manner tying our hearts on it, we set 2 chairs very far apart, and rested each end of the stick on the top back of each chair.  Using long pieces of our dyed string, we wound one end around the stick a few times, and taped the dangling end to the back of each heart, at different lengths.


heart-strings-valentines-craft-24 Yes, you could just tie it on quickly, but I knew I would love the look of our pretty, hand-dyed string, wound around this rustic tree branch.  And I was right.


heart-strings-valentines-craft-25 It was worth ll of my efforts.  It may not be worth it to you.  Also….my girls helped with this some.


heart-strings-valentines-craft-26 If you’re wondering how we hung this long tree branch adorned with colorful Valentine hearts up high and across our slider glass doors, I’ll tell you:   Michael screwed a long screw into the backside of the stick on each end.  Then we simply used those little tight-clamp thingies, and clamped them to the curtain rod bracket.  See?  No permanent damage anywhere.


heart-strings-valentines-craft-27

They colors really look beautiful, hanging there, even as I look past them, through our window into the snowy scene behind them.   There are often squirrels out there frolicking in the snow (o.k. …finding the fallen bird seed), and birds at the feeders, eating.

We think the critters rather appreciate our Valentine decorations on display.

heart-strings-valentines-craft-28
I love coming in our front door, and seeing them swaying in the breeze across the room in front of us.  I can feel the love in the air.  It makes us smile.


heart-strings-valentines-craft-29 The colors of love are a beautiful thing.

Let them shine, shine, shine.

(Love this craft idea?  Share the link on your Facebook!  Your mom-friends will love it too! Or….*pin it* to one of your boards! ; )


Save

Filed Under: Crafts & Creations, Holiday Crafts, Home Decor, Kids Arts and Crafts, Tutorial, WINTER Crafts and Creations, WINTER Home Decor Tagged With: crayon crafts, February-crafts, February-projects, heart shaped crafts, heart-crafts, heart-strings, heart-strings-tutorial, kids crafts, Valentine-crafts, valentine-decorations

No-Sew, Double-Sided Fleece Blanket | Tutorial

November 6, 2010 By Laura 4 Comments

The kids and I were recently brainstorming for ideas, to put together a very special package for a certain little boy.  It was very special circumstances, that called us to put something together very special, just for him. I wanted to share with you all this idea our oldest, {A}, came up with:  Making a no-sew, double-sided fleece blanket for him.

no sew double sided fleece blanket
It was the perfect idea for this little boy.

The kids had received fleece blankets like this before, as gifts, and as single layer blankets.  But I wanted to see if we could make a double-sided blanket, so that it would have a different pattern on each side. How FUN, right? And it would be double warm and cozy!

It’s really quite easy, and well worth the effort!   Maybe this is a home-made gift idea you can use sometime, for Christmas gifts, or birthdays.


They are great for anyone, at any age.  From babies to grandparents, and anyone in between.  Just change up the patterns to be more suitable for the recipient, and it’s perfect. Who doesn’t use blankets? It can be a single layer too, and would take even less time. It just wouldn’t have a different pattern on the reverse side.  They are great as throws for beds, getting all wrapped up and cozy to watch a movie, as a lap blanket while you read, or even traveling in the car.  Just choose the appropriate patterns, and a suitable size for whom ever it is for.

Here’s How Easy it is to Make a No-Sew, Double-Sided Fleece Blanket

no-sew-double-sided-fleece-blanket-tutorial We found this set of 2 different patterns, at Joann Fabrics!  I didn’t know there was such thing, and had planned on having to choose 2 patterns separately, and have them cut off the roll to size.   So we were pleased to find these available!  (I also unexpectedly got it at half price!!)  There are a few sizes available in sets. This one was 48″ x 60″.  Perfect width and height for a little boy.  But you can buy any patterns you want off the rolls, and just cut them to matching size.

no-sew-double-sided-fleece-blanket-tutorial-1

I was tickled with this 2-in-1 fleece fabrics of chocolate brown with colored polka dots, and bugs!

Again, perfect for a little boy.

  • The first thing we did was lay it out on a clean table, layering the 2 pieces, one on top of the other, as perfectly lined up as possible.

Then we chose a side to start on, and laid a heavy board several inches away from, but along that edge, to keep the fabric from moving too much.

no-sew-double-sided-fleece-blanket-tutorial-2

We were prepping to cut fringes through both layers.   So using a snapline chalk, we measured up 5 inches from the edge, and snapped a chalk line across from one end to the other, to indicate where to stop cutting, so the fringes would all be the same length. This would create 5 inch long fringes, minus what is taken up when we knot them. Then we measured in from each corner 4 inches,  and cut 1 inch wide fringes, all the way across in between.   In other words, we stopped cutting fringes 4 inches from each end.   This would leave you a squarish block piece on all of the corners, for now.   We’ll get to why we did that, in a bit.

Now, if you don’t have a chalk-line to mark things off, you can use a ruler and chalk per usual.  But this was faster.

no-sew-double-sided-fleece-blanket-tutorial-5 Then, we just started tying each top layer of fringe piece, to the bottom layer fringe piece.

no-sew-double-sided-fleece-blanket-tutorial-6 Now because this blanket is 2 layers, the fringe pieces need to be double tied. Or else it would just un-tie.

But if it was a one-layer blanket, you would just knot the one piece of fringe, and once, would do.

You get me? ; )

no-sew-double-sided-fleece-blanket-tutorial-3
This is how it starts looking.
–

There can be a cool little technique here, where the print of the same side can show most. or the other side.  While tying it (like the beginnings of shoe tying), I found whichever side you stuffed through the whole, is the side that ended up on top. I wanted the opposite side showing, so I made sure to stuff that piece and pull it through to on top.

Now you even get that, or you don’t.  Either way will not ruin your blanket.  This project is virtually fail-proof!

no-sew-double-sided-fleece-blanket-tutorial-4
This is done all the way down, to your 4 inch corner piece.

The same process is done on every side of the blanket.  Again, stopping 4 inches for each corner.

Now what to do with the 4 inch corners:  We just cut 1 inch fringes, on angles, to go around the corner. I think it was 3 cuts, creating 3 more fringes.  Just make then 1″ -ish wide, like the others. This was to create a rounded corner blanket.   It IS an option, to just make fringe cuts one inch apart, all the way to the end, on 2 ends, to make the whole blanket more rectangular.  If you do it that way, I would do one whole side first, and then the opposite side, so they are the same.  Then work on the other 2 sides.

no-sew-double-sided-fleece-blanket-tutorial-7

Cutting 2 layers of fleece at once was a little hard for the kiddos, but they were very helpful for tying!    They took a lot of care with their work.

no-sew-double-sided-fleece-blanket-tutorial-8

Look how cute!   I just loved the colors.  And the bugs.  And the polka dots!

We were really happy with how it came out.

no-sew-double-sided-fleece-blanket-tutorial-10

The kids were really excited to send it out to our special gift, to this special little boy, along with some other gifts. It was a big package.

We hope our home made blanket warms his heart, as much as it warms him, head-to-toe.

It was certainly made with love!

Save

Save

Save

Save

Save

Filed Under: Crafts & Creations, DIY (Do-It-Yourself) Project, Holiday Crafts, Homemade/Handmade Gift Ideas, Kids Arts and Crafts, Tutorial Tagged With: birthday gift ideas, blankets, Christmas-gift-ideas, gift-ideas-for-anyone, gift-ideas-for-kids, handmade-gift-ideas, homemade-Christmas-gift-ideas, how-to-make-a-fleece-blanket, how-to-make-an-easy-blanket, no-sew fleece blanket, no-sew projects

Palm Cross

March 20, 2010 By Laura Leave a Comment

how to make a palm cross

With Palm Sunday almost upon us once again, we thought we would re-post this tutorial which we had in the Big Picture section last year, on how to make a nice cross for your home, with the blessed palms you bring home from mass on Palm Sunday.  We hope you find the instructions and photos helpful, and the craft enjoyable, in making a beautiful palm cross for the walls of your home.

how to make a palm cross

First, take 3 sets of 2 palms each, and at least one good palm wisp.

how to make a palm cross

In the area the intersection of the cross is, put the ends of one set of palms alternately layered in between 2 of the others, going in the opposite direction of course.

how to make a palm cross

Then takes the last set, and layers those for the other side.

how to make a palm cross

Pinching it all together at the intersection, take one side of the palms and makes a loop with them to the back of your cross.

how to make a palm cross

Securing that with your fingers to the middle as well, and then do the same with the other side.

With the formed cross in hand, take the wisp of palm you had set aside, and start wrapping the intersection of the crossed pieces, to secure them tightly.

The below collage, to be viewed left to right in rows top to bottom, is not every single move. It just gives you a general idea of how it is wrapped around, crisscrossing, and going up and down as well.

how to make a palm cross

how to make a palm cross

When you only have about 2 inches left, turn the cross over,  place it on the table, and holding the wrap tightly, take the remaining end and feed it under the wrap a couple of times, and then just pull it tightly. The front of the middle of the cross then looks like the last square in the above collage.That’s it!

how to make a palm cross

We hope you have a happy and peace filled Palm Sunday !


* * * * * *

Please come follow me here and there:

Save

Filed Under: Celebrations, Crafts & Creations, Faith/ Catholic, Holiday Crafts, The Big Picture, Traditions, Tutorial Tagged With: blessed-palms, Catholic, Catholic-holy-week, Catholic-palms, Easter, Holy Week, palm craft, palm cross, palm cross how-to, palm-cross-tutorial, palms, plam sunday

Stained-Glass (looking) Tissue Paper Easter Cross – Kids Craft

April 7, 2009 By Laura 20 Comments

Today we have an Easter themed craft tutorial for you!  It is beautiful, and so fun to make!  It’s a stained-glass (looking) tissue paper Easter cross, for your home or school windows. Or glass door!

stained-glass-tissue-easter-cross-craft_mini

The kids have been working really hard with their school work, and will actually be done with their formal work in just a couple of weeks.  So in preparing our hearts and minds for this Holy week, we decided to do some more lengthy study of the Stations of the Cross, and then get creative today and make a big Stained Glass (looking) Easter cross decoration for our Easter celebration come this Sunday.  It will be fitting in faith and spring spirit, to leave it up as beautiful cheery decor, for several weeks following Easter.

There were really only 5 things we needed:  a very large sheet of window cling, lots of colored tissue paper, a sponge brush, some Modge Podge and a pair of scissors.

colored-tissue-paper-layers modge-podge-gloss-lustre

I didn’t take photos of this part, but, we first drew out a large cross on the back of the window cling material backing-paper, using a board for the straight edges, and a round container for the rounded decor ends of the cross.  Once that was done, the kids all grabbed sheets of the tissue paper, and starting ripping it into pieces 1-2 inches or so. (Might I add, the colors each of them go for are so predictable.  lol)

stained-glass-tissue-easter-cross-craft_6 stained-glass-tissue-easter-cross-craft_5

Once we had plenty of pieces ready to go, I started spreading some Modge Podge, with a sponge brush,  in small sections (on the front) of the cross at a time, going outside of the lines somewhat on purpose.  Then the kids got to work, putting down pieces, overlapping each other, and rubbing them down.

stained-glass-tissue-easter-cross-craft stained-glass-tissue-easter-cross-craft_3

When the entire cross was almost done being covered with pieces of colored tissue, I started on one end, and went over any uplifted corners, or flappy pieces, of tissue, just Modge-Podging them down good with my sponge brush.  I LOVE Modge Podge-that stuff is great for so many projects!

stained-glass-tissue-easter-cross-craft_2 stained-glass-tissue-easter-cross-craft_4

We made the cross 20″x34″.

Once it was all dry, we cut it out!

cuttingout

It was a perfect fit for our front door, because we planned it that way. : )

stained-glass-tissue-easter-cross-craft_1

With the main events of Holy Week still before us, we anticipate the somber and difficult remembrance of the journey Jesus has yet before Him-and we will follow Him all the way to His last breath.

But the radiating colors of this cross, brought to life by the sunlight, reflect the state of our hearts come Sunday, when we will celebrate our risen Jesus Christ, in all of His dazzling and promising glory.

stained-glass-tissue-easter-cross-craft_1 cumosaic-300x214

We appreciate the 100’s of visits our blog has received in the past couple of days.  As we all take part in this holiest week of the year, and end our personal Lenten journeys, may you feel your hearts full of peace, prayer, and the undeniable presence of the Holy Spirit, and find yourself in a deeper, and more meaningful relationship with Christ.

Save

Save

Save

Save

Filed Under: Crafts & Creations, Faith, Faith/ Catholic, Holiday Crafts, Kids Arts and Crafts, Kids Arts and Crafts, The Big Picture, Tutorial Tagged With: beautiful-Easter-crafts, Catholic-blogs, Catholic-crafts, Catholic-family-activities, easter-crafts, Easter-home-decor-idea, faux-stained-glass-craft, faux-stained-glass-window-craft, kids-easter-crafts, kids-religious-Easter-crafts, paper, tissue, tissue paper crafts, tissue-paper-craft

  • « Previous Page
  • 1
  • …
  • 4
  • 5
  • 6
  • 7
  • Next Page »

We are wicked happy to have you here! We hope you find much inspiration, help, humor and enjoyment here.


Archives


POPULAR POSTS

* * * * * *

SUBSCRIBE to House of Joyful Noise blog! Every new post, delivered right to your email box!


Privacy Policy

Amazon Affiliates

Never at any additional cost to you, we may earn a small commission for our endorsement, recommendation, testimonial, and/or link to any products from our website. Your purchase through our links helps support our family, while sharing with you the products we authentically use and recommend, for various ideas, and letting you know where you can purchase them. Thank you for your support!

[footer_backtotop]

Copyright © 2025 HouseOfJoyfulNoise.com · Genesis Framework by StudioPress