• HOME
  • {A}’s Chipmunk Training Archives

 Homepage

  • The Homestead
    • Home Projects
    • Home Improvement
    • Home Decor
      • Seasonal Home decor
        • FALL Home Decor
        • WINTER Home Decor
        • SPRING Crafts and Creations
        • SUMMER Crafts and Creations
    • Our Chickens
    • Gardening
    • Organization
    • Re-Purposing
    • Furniture Refinishing
    • Budget
  • Crafts & Creations
    • Seasonal Home decor
      • FALL Crafts and Creations
      • WINTER Crafts and Creations
      • SPRING Crafts and Creations
      • SUMMER Crafts and Creations
    • DIY (Do-It-Yourself) Project
    • Kids Arts and Crafts
    • Homemade/Handmade Gift Ideas
    • Holiday Crafts
    • Fan Pulls
    • Free Printable/Downloadable
    • Sewing Projects
    • Giveaways
    • Business Features
  • Recipes/FoodFun
    • Breakfast
    • Lunch
    • Main Dish
    • Sandwiches
    • Appetizers
    • Slow Cooker
    • On The Grill
    • Side Dishes
      • Soups
      • Salads
    • Baking
      • Breads, Rolls and Muffins
    • Snacks
    • Treats
    • Desserts
    • Drinks
  • Homeschooling
    • Elementary Homeschooling
      • Elementary Homeschooling READING
      • Elementary Homeschooling MATH
      • Elementary Homeschooling LANGUAGE ARTS
      • Elementary Homeschooling SCIENCE
      • Elementary Homeschooling HOME ECONOMICS
      • Kids Arts and Crafts
    • Middle School Homeschooling
      • Middle School Homeschooling SCIENCE
      • Middle School Homeschooling HOME ECONOMICS
    • Language Arts
    • Math
    • History / Social Studies
    • Geography
    • Foreign Language
    • Field Trips
    • Games
    • Nature Study
  • The Big Picture
    • Life In General
    • Celebrations
    • Faith
      • Into the Light; The Series
    • Giveaways
    • Reviews & Sponsors
  • Photography & Lettering
    • Photography
    • truck lettering
    • vehicle graphics
    • Newborns
    • Kids
    • Engagement
    • High School Senior Pictures
    • High School Senior Pictures Sneak Peeks

Colored Ice Castles – Homeschooling Science Experiment

January 27, 2009 By Laura 14 Comments

colored-ice-castles-homeschooling-science-experiment__

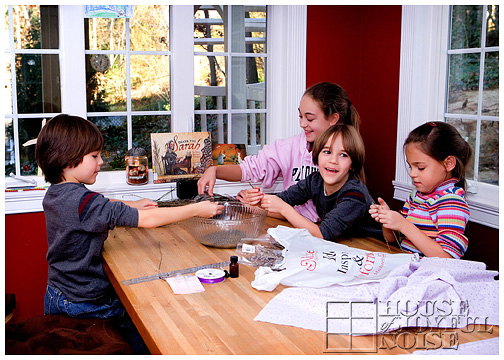
This is how home schooling happens a lot in our family:

Someone gets a cool idea they think would be a fun to try, (in this case, that would be me), and we decide to do it. For fun.  So we discuss our plan, start getting stuff together, and as we get to work on the project……….we start to wonder, or predict out loud.

And suddenly it hits me. “Hey!  This is a science experiment!  Yes….this is going to count for science.”

But ‘the lesson’ was not planned for school.  It was just something fun to do.  Curiosities arose that we wanted to explore and experiment with.  We were just LIVING.  Yes . . . . learning often times just happens.

As you can guess by now, that’s exactly what happened with this project.  The kids are always watching the outdoors thermometer through the window of our school room. If it’s below freezing, they like to put a bowl of water out, and check it all day to see how long it took to freeze.  You know…’just for fun.’   So I thought to myself, “Wouldn’t it be fun to fill up all kinds of containers, all different shapes and sizes, and then build an ice castle? “  (and continuing to talk to myself in my head….because a lot of conversation happens with myself up there, I said…) “Hey!!  We could use food coloring and make them COLORED ICE CASTLES!!!!”  Because I am a color freak, I got REAL excited the other day, to tell the kids what we were going to do.

Creating Colored Ice Castles

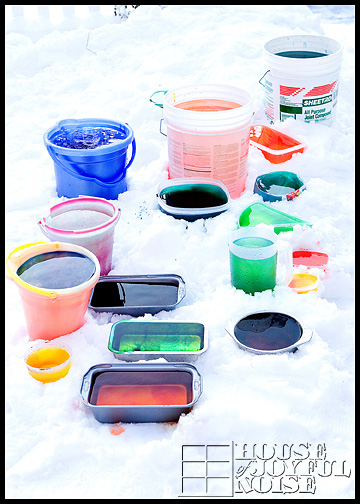
So we gathered everything we needed, bundled up as best we could, and went out and got to work.

colored-ice-castles-homeschooling-science-experiment

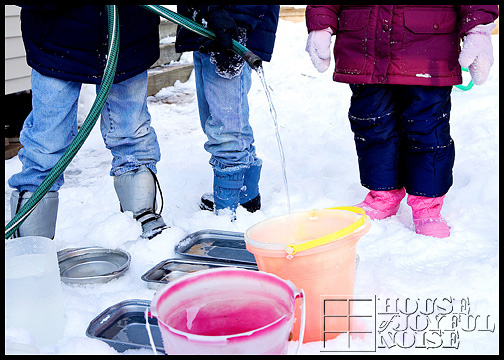
The kids started filling up all of the containers with hose water.
*

colored-ice-castles-homeschooling-science-experiment_5

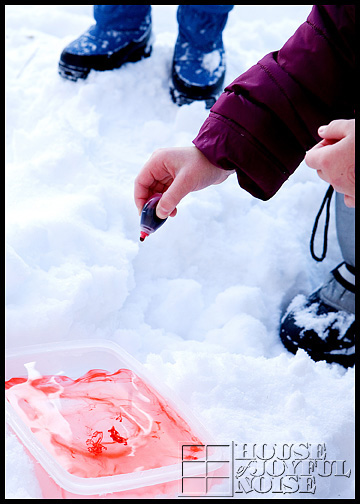
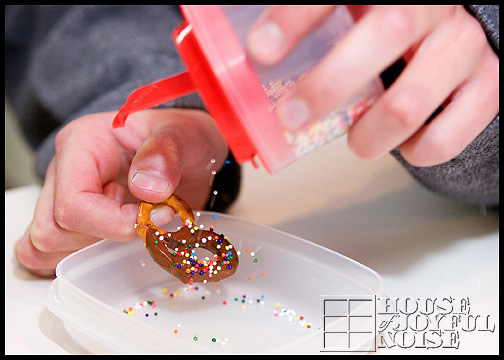
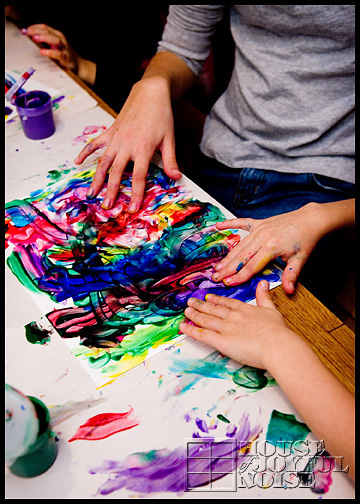
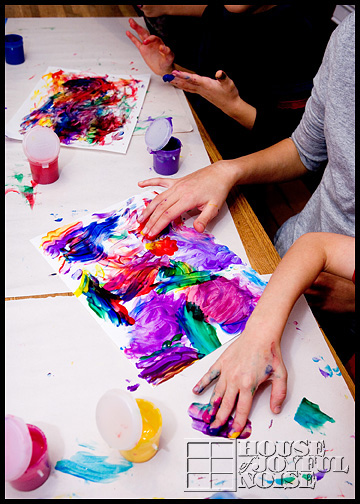
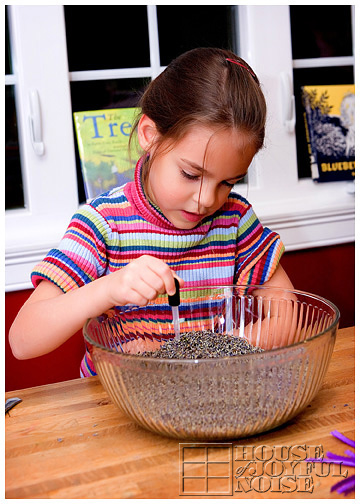
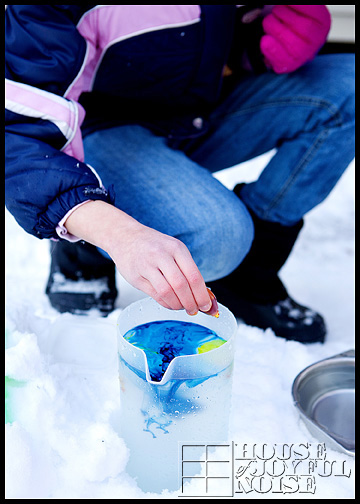
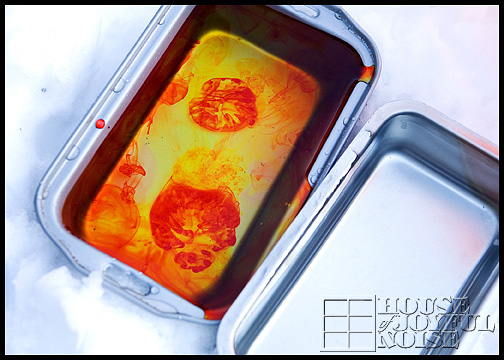
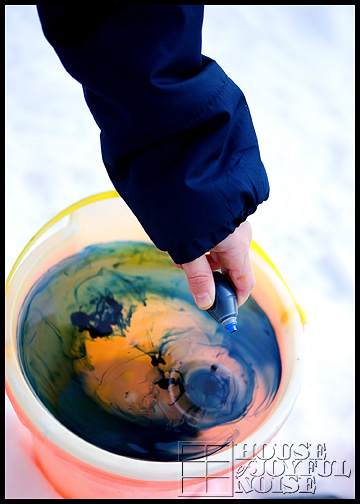
And took turns choosing colors, and squeezing drops of food coloring  in.

colored-ice-castles-homeschooling-science-experiment_7

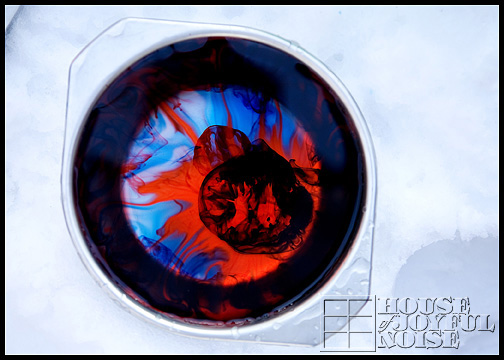
When one of them added yellow to the red, the colors intoxicated me…..and I went CrAzY taking photos from then on.

And I love most all of the photos I took.

colored-ice-castles-homeschooling-science-experiment_8
So now you’re going to have to see them all. : )

colored-ice-castles-homeschooling-science-experiment_9

colored-ice-castles-homeschooling-science-experiment_10
Because I have little control, when it comes to these kinds of things, you know. : )

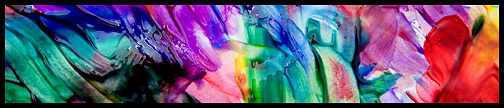
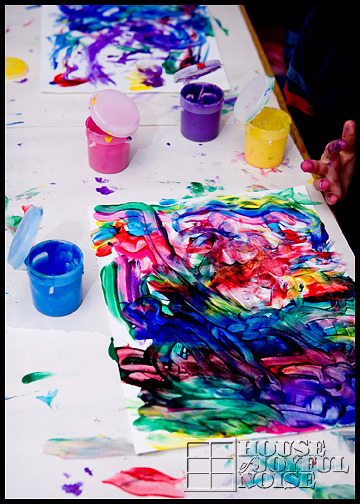
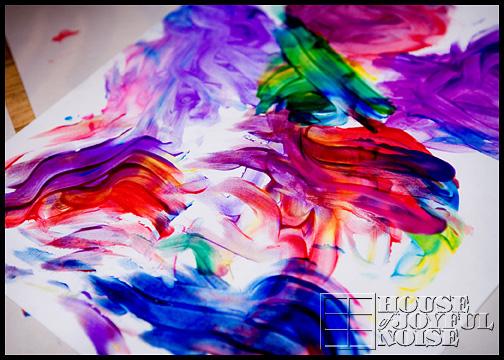
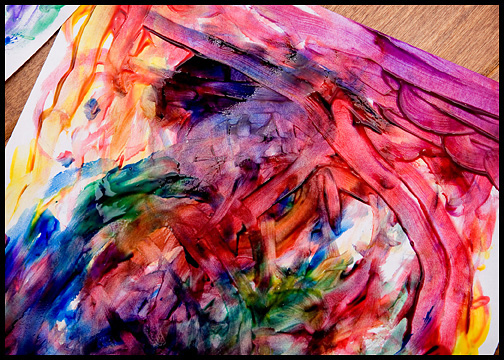
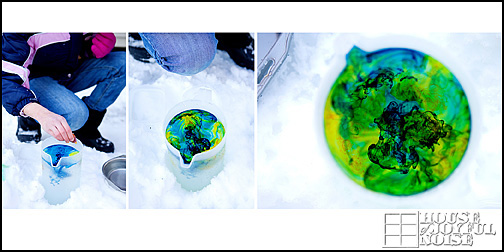
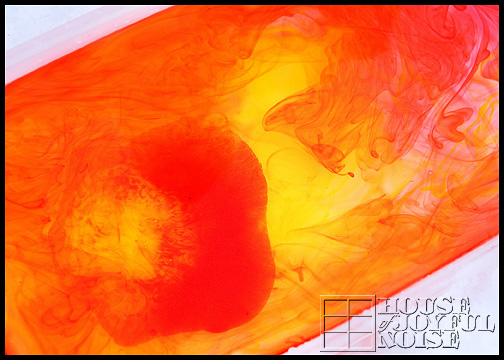
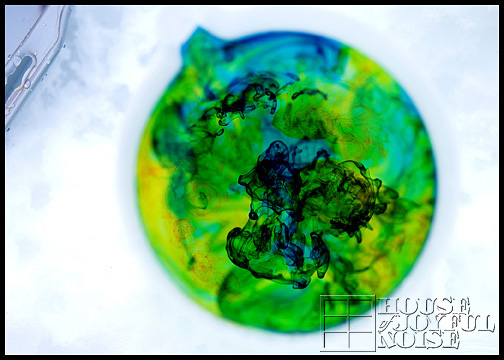
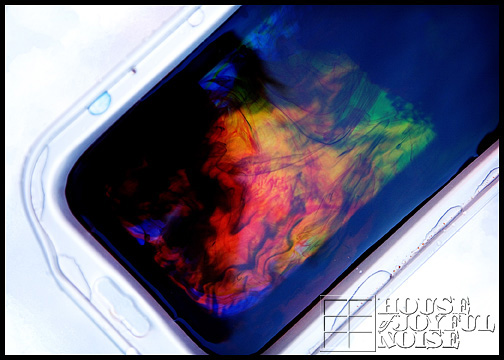
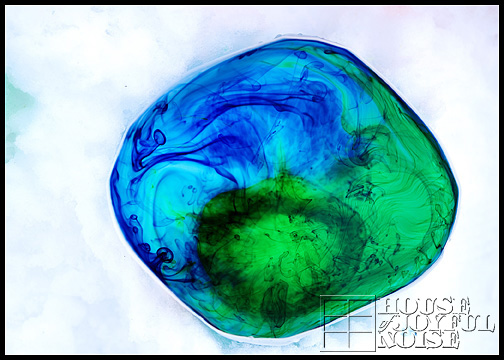
Just look at the beautiful colors floating and swirling!

colored-ice-castles-homeschooling-science-experiment_11

Oh….it gets better.

colored-ice-castles-homeschooling-science-experiment_12

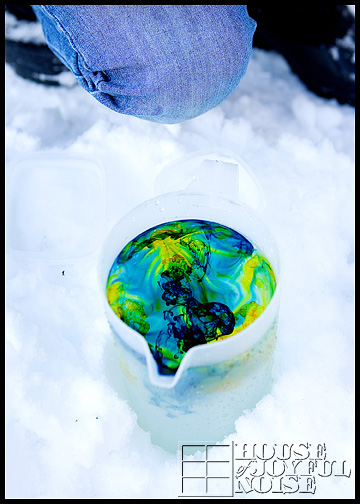
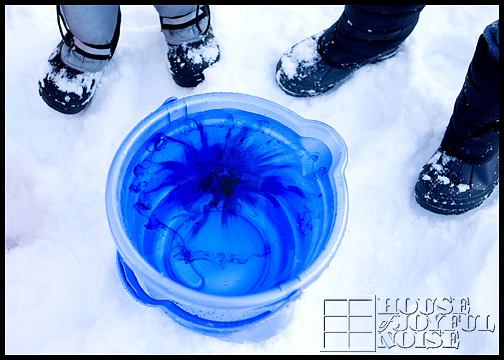
Look at that!!!  The kids started adding color to different containers at the same time, which resulted in lots of outbursts of excitement at the same time…“Look at this one, Daddy!”  “Mama look at these colors together!!  Hurry!”
We were getting dizzy. But it was all good!

colored-ice-castles-homeschooling-science-experiment_13

I was having so much fun taking photos.  I just knew they were going to be beautiful.

colored-ice-castles-homeschooling-science-experiment_20

colored-ice-castles-homeschooling-science-experiment_25

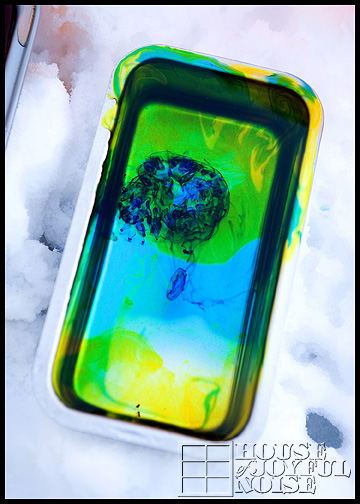
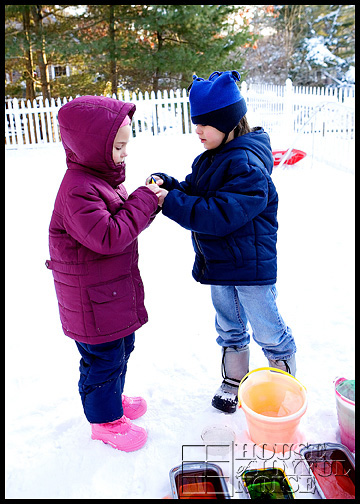
Here below, {O and J} swap colors.

colored-ice-castles-homeschooling-science-experiment_23

colored-ice-castles-homeschooling-science-experiment_26
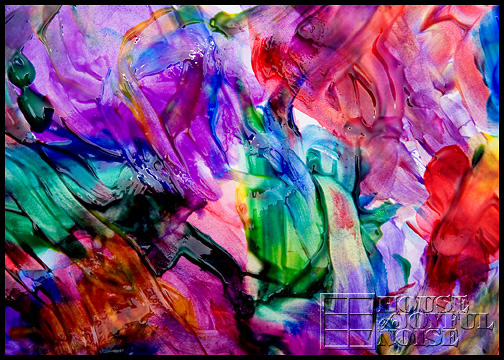
THIS ONE, ABOVE, IS MY ABSOLUTE FAVORITE!!

Honestly, I get butterflies.

And by this time, I was (incorrectly) thinking that we were going to have the COOLEST TIE-DYE ICE CASTLES!

colored-ice-castles-homeschooling-science-experiment_27

colored-ice-castles-homeschooling-science-experiment_28

colored-ice-castles-homeschooling-science-experiment_29

colored-ice-castles-homeschooling-science-experiment_31

Oh Dear….Unexpected Science Experiment Happenings

About now we start to notice that the 2 colors are mixing and changing to one color.

BUMMER!!

No tie-dye ice castles?? I, personally, might have sulked for a moment or 2 over that development and reality check.  But, this is all part of science experiments, and the kids were still excited.  They got me excited again, too.

When I saw all of the multi-colors were gone, I thought “Good thing I took photos!!!”  lol

They still looked vivid and beautiful, all together.

colored-ice-castles-homeschooling-science-experiment_35

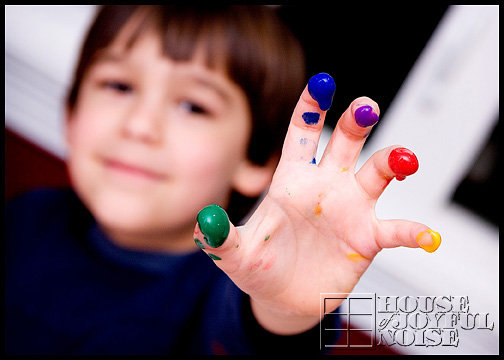
Now, I did say to the kids at the start, “Let’s try NOT to get food coloring all over our hands. OK?”

colored-ice-castles-homeschooling-science-experiment_30

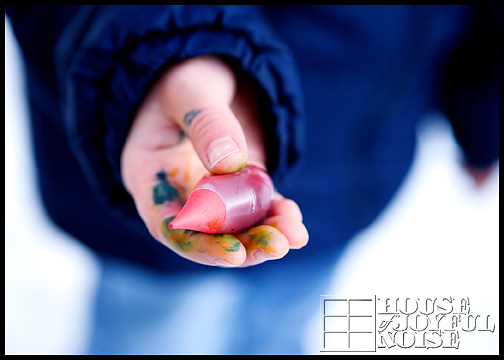
Reality check number 2.  lol

But you know….I love the colors, even all over my children’s faces and hands. I do!!  Even if we’re going out…..going to Mass…where ever. If it doesn’t come off all of the way….OH WELL!!  I think it’s evidence of their creativity!

DIRT is another story!!

Watching, Waiting, and Wondering….For Days

So the next couple of days were annoying, temperature wise.  It kept being a little warmer than it was supposed to be, and the darn water in the containers would not freeze all of the way!!  We knew it needed to be 32 degrees or colder, to freeze. (We’re like Einsteins, huh?  Ha haha!)  But for how long would it need to be that cold?  And how much longer would the BIG containers take, than the small ones?  These are the scientific questions we had, and the things we observed and studied over the next few days.  We knew…..it was taking a lot longer than we ever wanted it to!!

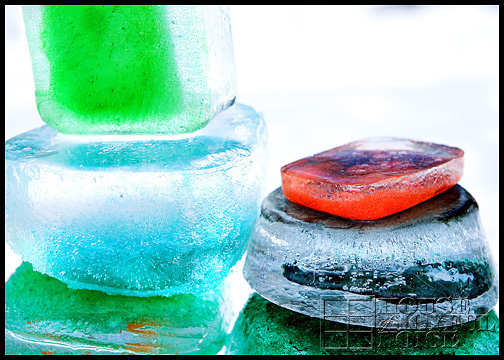
What’s more….we could see the color really settling to the bottom of the containers.

Why, we wondered??  Which led us to what ‘wondering’ always does.  Research!!

The Scientific Explanation

BECAUSE:  Cold water does not allow the molecules of the food coloring to break down as easily….or dissolve.  So, because it could not really ‘mix’ with the water, being a separate element, it all settled. What’s more, the molecules of the food coloring were so big, that they were not able to freeze all of the way.  So the food coloring ended up being pockets of slush, within the frozen water/ice.   It was interesting that the 2 elements were able to separate that much in the end, from being 2 colors swirling around each other, when first added to the water.

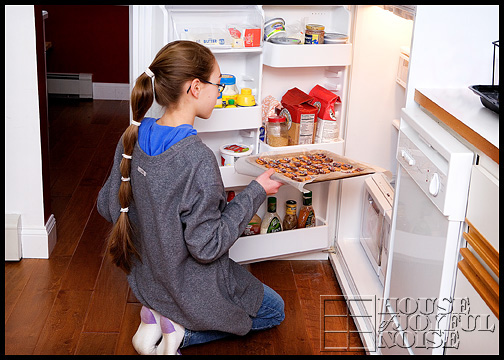
By this morning, we were done waiting.  The big containers STILL did not seem solid all of the way through—-but gosh darn it….WE WERE BUILDING OUR CASTLES TODAY!!
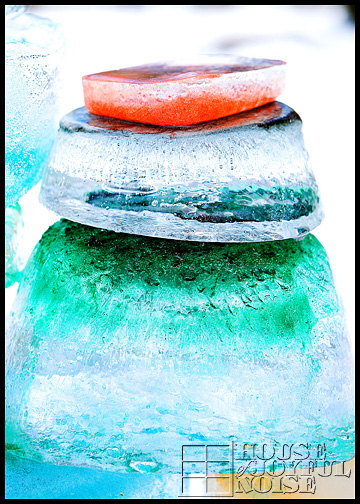
The Results

colored-ice-castles-homeschooling-science-experiment_37

colored-ice-castles-homeschooling-science-experiment_38

colored-ice-castles-homeschooling-science-experiment_39

colored-ice-castles-homeschooling-science-experiment_42
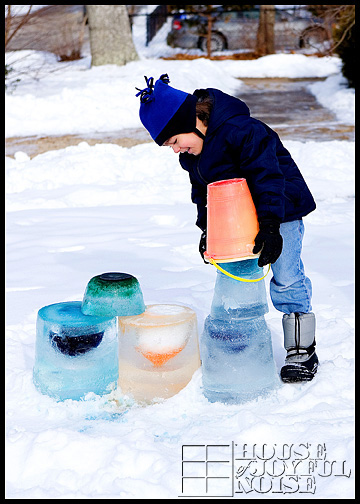
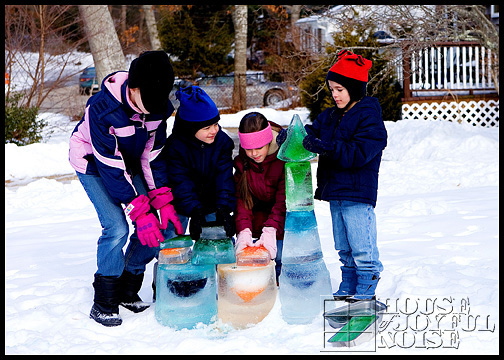
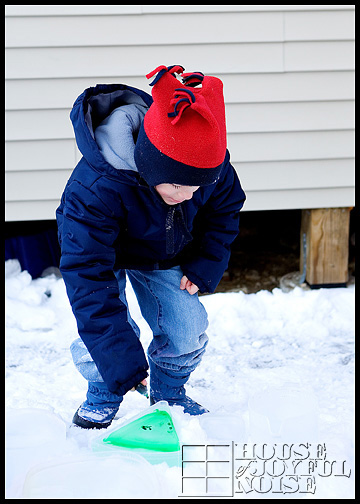
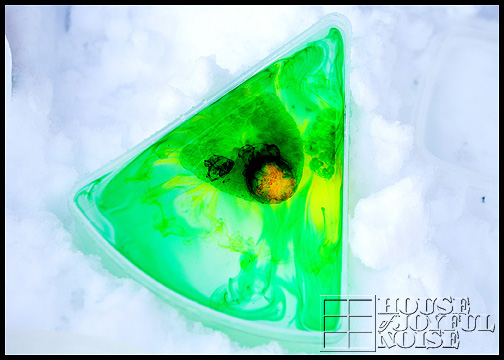
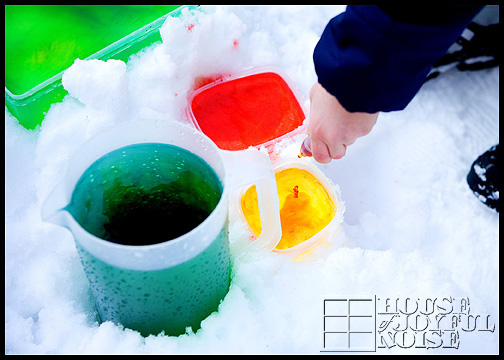
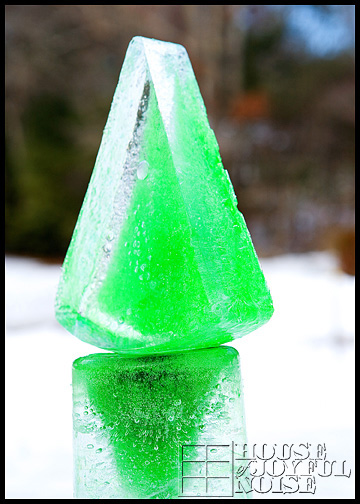
{S}(on the far right) was excited about the pizza slice container one.  He is also very partial to green, because it is ‘his color‘.  (As triplets, we had a lot of color coding going on when they were babies.)
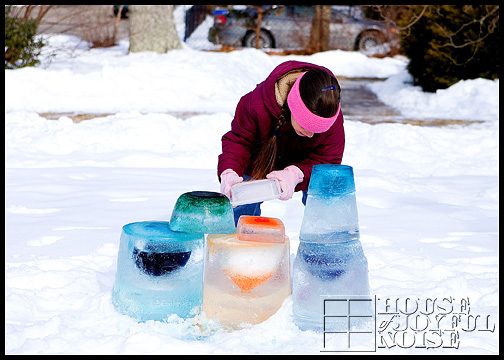
TA-DAAAA!!!!!!!

colored-ice-castles-homeschooling-science-experiment_45

colored-ice-castles-homeschooling-science-experiment_47

colored-ice-castles-homeschooling-science-experiment_48

colored-ice-castles-homeschooling-science-experiment_49

colored-ice-kids-with-castles-homeschooling-science-experiment

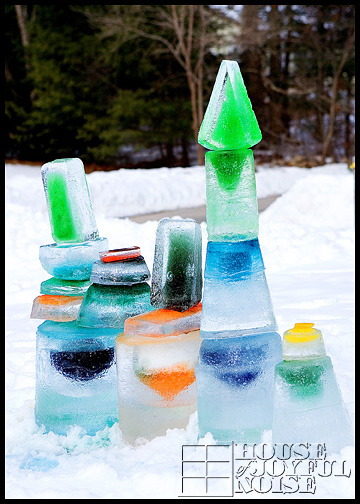
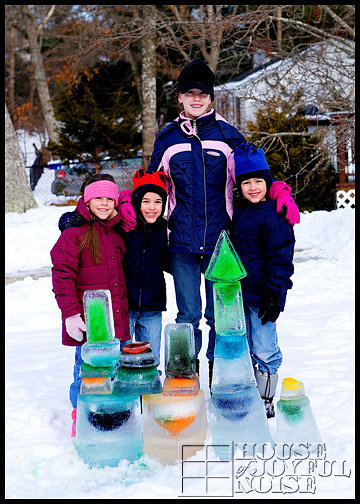
I LOVE this shot of my kids, and their ice creations!!

They had SO much fun doing this!!  So did I!!  So did their Daddy!!

We built it in the front yard, for the world to see. (You know…the ones who happen to drive down our dead-end street. Ha haha!).

Another lesson learned:  We don’t always get what we’re expecting to.  But we learn to love what we DO get.

Because it’s ours.  Because we made it.  Because we created memories together, doing it.
And that makes it all beautiful, to us!

Save

Save

Save

Filed Under: Crafts & Creations, Elementary Homeschooling, Elementary Homeschooling SCIENCE, Homeschooling, Middle School Homeschooling, Middle School Homeschooling SCIENCE, Science, Seasonal Crafts and Creations, WINTER Crafts and Creations Tagged With: colored-ice, colored-ice-castles, elementary-homeschooling-science-experiments, homeschooling, homeschooling-science-experiments, how-to-make-colored-ice-castles, kids-winter-creations, kids-winter-fun, middle-school-homeschooling-experiments, outdoor-winter-activities, winter-science-experiments

Homemade Bookmarks – Craft Tutorial

January 26, 2009 By Laura 5 Comments

crafts-copy

Hi People!

This is the first of a handful of installments, that finally show you what we were making as we crafted during the pre-Christmas season.  Now that all of the gifts have been given, we can share, and not be concerned with ruining any surprises.  But we hope that some of you may gather an idea or 2, by us posting these projects, to put on your idea list for crafting and/or gift giving of your own, next Christmas or anytime.

We tried to think of gifts we could craft, that most anyone could use. Universal, sort of gifts.  We think we did pretty well in the end.  These gifts are simple;   Simple to make (as the kids did a lot of it, with instruction and/or assistance), and simple in concept.  We did not invent any of these things, but simply put ‘our touch’ to them.  Should any of these projects appeal to you, we’re sure they’ll come out as your own as well.  So many of you are SO creative, that you will likely make them even better, or put a new twist of your own on them, that makes them unique for you.   Whatever you do, have fun!!  Remember, even if everything doesn’t come out perfect, the fact is that they were made with love!  If your recipients can’t appreciate that, then….well,… I won’t say.  But they should.  lol.  Otherwise, you might consider  ‘indian-giving’.  Ha haha!

So let’s get to it! :

You may or may not recall, that one of the headers to a crafting post was this:

homeamde- bookmarks_00

Showing any more than that would have given the project away.  But we were making…………

BOOKMARKS!


homemade-bookmarks_2

We know we love books, and we love to read.  Many people are the same.  Even if they are not big cover-to-cover kind of readers,  one may find a bookmark handy to keep their place in a recipe book, a how-to book, a magazine, a journal, their Bible…and who knows what.  So we hoped these would come in handy, in some way, for our recipients.  We did know that many do love to read, in our case.

I did not think to take step-by-step photos, since photos would have given it away.  But we think you’ll get the gist by looking at the photos of the finished bookmarks, and reading the following information.

Here’s how we made them:

Directions

First, we needed some card stock.  We found these handy pads of beautiful designed card stock in, in the scrapbooking aisle of Michael’s Arts & Crafts.  They are actually meant for making greeting cards, but they worked out to be just what we were looking for, and a good size too.  They looked like this:

homemade bookmarks

One thing we REALLY loved about these card stock pads, was that each ‘card’ was 2-sided!!  It had a different, but coordinating, design on the backside! So that means we had 2-sided bookmarks!!  Very cool. We were excited about that.

So we cut these cards into bookmark size, and marked the centers of exactly where we wanted a hole for the ribbon.

Some supplies we already had on hand that we used are:  thin satin ribbon, a Fiskar cutter (used by many scrapbookers, that make cutting straight as easy as gliding the blade).   Also, eyelets that look like this:

eyelets-brads

And an eyelet tool setter kit, which I already had on hand too, from scrapbooking with eyelets.  That looks like this:

eyelet-setter-tool-kit

It might look scary, but every piece is pretty self-explanatory as to what it does.  Included are 3 size whole punchers tips (which 2 you can see right over the l and k of tool kit, and the other is already screwed onto the handle piece, 3rd in from the right).  All you do is choose the correct size tip for the size eyelets you are using, stand it up on the card stock right where you want a hole, and tap with the hammer.  Next, put eyelet through the hole, hold it in while turning over the card, and get the ‘splaying’ tool. (I may have made that word up.  Not sure.  But it spreads the backside of the eyelet out to hold into the card.  So roll with it.)  So you put the ‘splayer’ into the eyelet back, and hammer!  This takes some real hammering, so be sure you are careful and use cardboard or something.  I used a self-healing cutting board.

Now take a piece of cut ribbon, doubled over, and  put the 2 ends together through the eyelet, and then through the loop of your ribbon.  To finish the bookmarks off, we used a corner rounder, which is also found in the scrapbooking section.

That’s it! 

No doubt, you’ll want to keep a few for yourselves too.  We did!  So Happy Reading!

All of the supplies used can be found at any Michael’s Arts and Crafts, or most any other good craft store.

If you have any questions, just let us know!!  I am always happy to clarify!

I am also used to needing to.   lol  : )

homemade bookmarks

Save

Save

Save

Save

Filed Under: Crafts & Creations, Homemade/Handmade Gift Ideas Tagged With: bookmarks, bookmarks-craft-tutorial, crafting, crafts, eyelet-setter-tool-kit, gift-ideas-for-readers, homemade-bookmarks, homemade-gift-ideas, how-to-make-bookmarks, paper-crafts

How to Make Chocolate Dipped Pretzels

January 21, 2009 By Laura 8 Comments

We thought you all deserved some nice treat ideas.  So we’d like to share some steps on how to make chocolate dipped pretzels!
It’s a fun treat to make and eat!

How to make chococlate dipped pretzels

Last year for our Christmas gathering with some family, we made these pretty pretzel rods drizzled with chocolate.  Our visiting family even wanted to get in on the fun, and make their own! We simply melted chocolate, and drizzled it over the rod, slowly turning it as we did so.  Then we sprinkled on some of our favorite decorative sprinkle balls!

This year, we’ve done something similar (a few times!), but with a TWIST!!  : )

How to make chococlate dipped pretzels
Participating Ingredients.

Get it??  With a TWIST??   (ROFL…..perhaps by myself.  I should probably get up now.)

3 Ingredients!:

  • Mini Pretzel Twists
  • Hershey’s Chocolate Chips
  • Decorative Sprinkle Balls

These are SO easy to make, and your kids will have SO-MUCH-FUN helping!!  Our kids sure do!  Here we go……

How to make chococlate dipped pretzels

Get some water in the bottom portion of a double boiler pan.  You want to put the burner on MEDIUM, and wait for the water to be ‘just about ready’ to boil.  Once it’s to that point, it’s good enough to turn it down to LOW, and put the top portion of the double boiler pan on.

How to make chococlate dipped pretzels

Now pour in the top pan, a small amount (maybe equivalent to a couple of handfuls…but exactness is not that important) of chocolate chips into ONE SIDE of the pan.  You kind of want them in a small pile, so that it makes dipping easier.

How to make chococlate dipped pretzels

Use a spoon, and keep stirring the chips, letting them slowly melt, until the chocolate is really melty and smooth.  Once it is, you’re ready for ……..

How to make chococlate dipped pretzels

….some dipping!!

Bring the just dipped pretzel (or 2, if you can do 2 at once) over to a counter space, and sprinkle your sprinkles onto the wet hot chocolate.

How to make chococlate dipped pretzels

We suggest doing this over an empty container.  They are very bouncy……so otherwise you’d be finding them all over the place  until Easter 2012.   You can also re-use what you catch in the container for other pretzels, over another container.

How to make chococlate dipped pretzels

Simply place them on a wax paper lined cookie sheet – spaced nicely so they don’t touch each other.

Just another photo, because I had to take it.

How to make chococlate dipped pretzels

Repeat this process of dipping, sprinkling and laying, adding more chips to your pan as needed, and giving it little stirs to keep it melty and smooth as you go.

Once a tray is full………

How to make chococlate dipped pretzels

….pop it into the refrigerator. (And begin a new tray, of course!)  Putting them in the fridge will help the chocolate harden.  Generally speaking, they need to be KEPT cool, until they are popped into your mouth, or the chocolate on the pretzels will get melty on your hands. (unlike m&m’s….and we know why.  They do not have that hard candy shell. lol)  (These don’t talk either. Sorry.)

How to make chococlate dipped pretzels

We think they are pretty enough (and tasty enough) to give as little gifts too!  We used these nice little clear bags, found in the stores where they sell chocolate melts, and supplies to make chocolate lollipops, etc. (In our case, our local Michael’s Arts & Crafts) We tied them off with silver twist ties. Who doesn’t love chocolate?  Warning though:  the sweet then salty thing going on, may keep you popping more in your mouth than you meant to!

How to make chococlate dipped pretzels

Sweet, huh??

Save

Save

Save

Save

Save

Filed Under: Homemade/Handmade Gift Ideas, Recipes, Snacks, Treats Tagged With: chocolate-dipped-pretzels, chocolate-treats, food photography, food-gift-ideas, food-gifts, how-to-make-chocolate-dipped-pretzels, party food, Treats

Finger-Painting — A Beautiful Mess

December 13, 2008 By Laura 2 Comments

We’re really good at making messes! Such a beautiful mess this time though. And what fun making it! This time our mess was made in the way of finger-painting!

finger-painting_4

d

finger-painting_3

finger-painting_5

finger-painting_4

Christmas is fast approaching, and believe it or not, this whole mess is another home made gifts craft project.  It’ll be a very useful gift too.  But I can’t say what they’re turning out to be just yet. For now, just enjoy the colors!!  If you are like me, and colors make you happy….you’ll be loving this post.  If not, you’ll wonder what the point was with all these photos, all of which maybe look the same to you.  Because otherwise, I don’t have much else to say tonight.

finger-painting-art

finger-painting_1

finger-painting_2

Some of the kids’ masterpieces on the floor.  They came out so great!

e

Below; one of my favorite shots.

finger-painting-fingers

I’d love to tell you what we were making, but it might spoil someone’s Christmas surprise. I was thinking after Christmas, I may make a post featuring the home-made gifts reveal…with photos of the finished products.  What do you think??  That is, if I’m still blogging on behalf of my family, and our days here.  I’m not sure if I should go bigger and louder in the new year – or shut the blog down altogether.  I’m at a crossroads. It’s all good.  Just not sure if I want to re-focus my energy here.

Anyway….hope all of your Christmas preparations are going smoothly.  And most importantly, that you are enjoying the season. It’s so easy to get lost, and forget what all the fuss is really about. I generally get lost easily…ask anyone. So my motto is….”keep it simple”. SO much more enjoyable and fulfilling, for all of us, when we keep Christmas simple.

Blessings to you. Thanks for dropping by.

Filed Under: Crafts & Creations Tagged With: finger-painting, finger-painting-art, kids-arts-and-crafts, painting

Cocoa and Crafting

December 6, 2008 By Laura 1 Comment

We’ve been doing more crafting than usual around here lately, as Christmas gifts.  I’m way behind in blogging about them, but in thinking about that I realized in a different light….they are Christmas gifts!!  Surprise gifts, of course. Granted, the recipients,,,our extended family….rarely visit our blog. If ever.  But, you know, they MIGHT.  And we really don’t want to ruin their Christmas surprises.  So…..I guess I just won’t post the finished products, until maybe after Christmas, and if anyone concerned visits and guesses what we made, oh well!!

So for one of our first projects a few crafting Sunday’s ago, we were discussing what and how we were going to do what we were going to do.  The plan was to hand sew them, until my husband said,

“Well, why don’t we just bring up the sewing machine and figure out how to use it?”

(me)  “WHAT?  What sewing machine?  We don’t have a sewing machine! ”

(him) “Yes we do.  It’s downstairs in the basement.”

(me)  “We DO?!  Where did we get it?”

(him) “It was your mother’s”

After a moment of stunned silence and a confused stare, I think I ended up on the floor, laughing hysterically.  Outright bafflement hysterics.  WHY you ask??  Because TRUST ME, my mother never sewed a day in her life! In fact, she had one of those trigger gun things that shot plastic things to put a button back on.  And anyone reading this, who knew my mother, is probably laughing at just imagining my mother sitting at a sewing machine.  I loved my mother, God rest her soul.  But she was NEVER the sewing type! She was just not the real domestic kind.  In fact, neither am I, by genetic-nature, that is – believe it or not. My early years as a wife, was on the comical side. I loved this man, but really….did I really have to do all those things they do? I wanted to want to. But…where WAS the WANT to??  Only for him. You know? Love is a crazy thing. I had to grow THAT bone, and I DID! In time.  Granted, it’s still growing.  But I have found deep and abiding joy in things I never knew I could embrace.  In fact, I feel myself really…going back in time, if you will.  My husband has really noticed how I have evolved over the years.  In fact,  he actually called me “my little pioneer woman’” the other day.  And I think I gushed, “Real-lly?” Truth be told, I was beaming with pride. Because I am admiring their ways more and more every year.  Thus…hand making some gifts, I suppose.

So he goes downstairs, and low and behold, he comes up with a SINGER, and dusts it off.  Well I’ll be darned.  There it is.  I tried to remember seeing it before. In a closet maybe?  In my childhood basement? Hmmm.  Just not sure.   Anyway….he got to figuring the thing out, because he’s mechanical like that. And he was suddenly seeming to be MORE than enjoying it.  Can I just say?…..

Men and their toys!!

m

He showed {A} and I how it worked, …..and showed us.  And showed us some more.  He just didn’t want to give it up.  Finally, he let {A} in there to give it a whirl, and I did a few as well.  a

Then {A} happly sat down to do more too.  But Daddy was itching to get in there!  Seeing his hand??  Next thing we know, he tells her “OK, time’s up!!  It’s my turn.  Let me in there.”.  Maybe a little uncomfortable to announce this, but not as eager as he was to have another turn, apparently!! m1hand Oh ,,,,just look at the show-off sewing with one hand. Cute though, isn’t he??

all4

The little ones were helping too, on another part of the project.   They LOVE projects of any kind.  Family crafting is the most fun.  Usually. : )

o

Our little dolly, always willing to roll up her sleeves and get to work.

Maybe you can guess what we made on this day?  Probably.  The great thing is, besides getting one project done, is that we know how to sew with a machine now!  Granted, we’re not pros, but {A} may be before long.  She’s pretty ambitious at that machine on just about a daily basis.  You should see the the little things she’s made already!

Gosh….my girls, AND BOYS, just may get that genetic-domestic bone thing.

Filed Under: Crafts & Creations, Seasonal Crafts and Creations, WINTER Crafts and Creations Tagged With: crafting, crafts, sewing, sewing-machine

  • « Previous Page
  • 1
  • …
  • 24
  • 25
  • 26
  • 27
  • 28
  • Next Page »

We are wicked happy to have you here! We hope you find much inspiration, help, humor and enjoyment here.


Archives


POPULAR POSTS

* * * * * *

SUBSCRIBE to House of Joyful Noise blog! Every new post, delivered right to your email box!


Privacy Policy

Amazon Affiliates

Never at any additional cost to you, we may earn a small commission for our endorsement, recommendation, testimonial, and/or link to any products from our website. Your purchase through our links helps support our family, while sharing with you the products we authentically use and recommend, for various ideas, and letting you know where you can purchase them. Thank you for your support!

[footer_backtotop]

Copyright © 2025 HouseOfJoyfulNoise.com · Genesis Framework by StudioPress