• HOME
  • {A}’s Chipmunk Training Archives

 Homepage

  • The Homestead
    • Home Projects
    • Home Improvement
    • Home Decor
      • Seasonal Home decor
        • FALL Home Decor
        • WINTER Home Decor
        • SPRING Crafts and Creations
        • SUMMER Crafts and Creations
    • Our Chickens
    • Gardening
    • Organization
    • Re-Purposing
    • Furniture Refinishing
    • Budget
  • Crafts & Creations
    • Seasonal Home decor
      • FALL Crafts and Creations
      • WINTER Crafts and Creations
      • SPRING Crafts and Creations
      • SUMMER Crafts and Creations
    • DIY (Do-It-Yourself) Project
    • Kids Arts and Crafts
    • Homemade/Handmade Gift Ideas
    • Holiday Crafts
    • Fan Pulls
    • Free Printable/Downloadable
    • Sewing Projects
    • Giveaways
    • Business Features
  • Recipes/FoodFun
    • Breakfast
    • Lunch
    • Main Dish
    • Sandwiches
    • Appetizers
    • Slow Cooker
    • On The Grill
    • Side Dishes
      • Soups
      • Salads
    • Baking
      • Breads, Rolls and Muffins
    • Snacks
    • Treats
    • Desserts
    • Drinks
  • Homeschooling
    • Elementary Homeschooling
      • Elementary Homeschooling READING
      • Elementary Homeschooling MATH
      • Elementary Homeschooling LANGUAGE ARTS
      • Elementary Homeschooling SCIENCE
      • Elementary Homeschooling HOME ECONOMICS
      • Kids Arts and Crafts
    • Middle School Homeschooling
      • Middle School Homeschooling SCIENCE
      • Middle School Homeschooling HOME ECONOMICS
    • Language Arts
    • Math
    • History / Social Studies
    • Geography
    • Foreign Language
    • Field Trips
    • Games
    • Nature Study
  • The Big Picture
    • Life In General
    • Celebrations
    • Faith
      • Into the Light; The Series
    • Giveaways
    • Reviews & Sponsors
  • Photography & Lettering
    • Photography
    • truck lettering
    • vehicle graphics
    • Newborns
    • Kids
    • Engagement
    • High School Senior Pictures
    • High School Senior Pictures Sneak Peeks

4th of July Celebration Table Printables – Free!

July 1, 2011 By Laura Leave a Comment

Happy long 4th of July Weekend, Everyone!

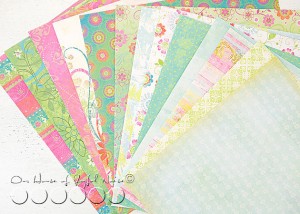
I designed these two 4th of July folded, 2-sided card printables this morning,
for our tables this weekend, and I am happy to share them with you!

free July printables

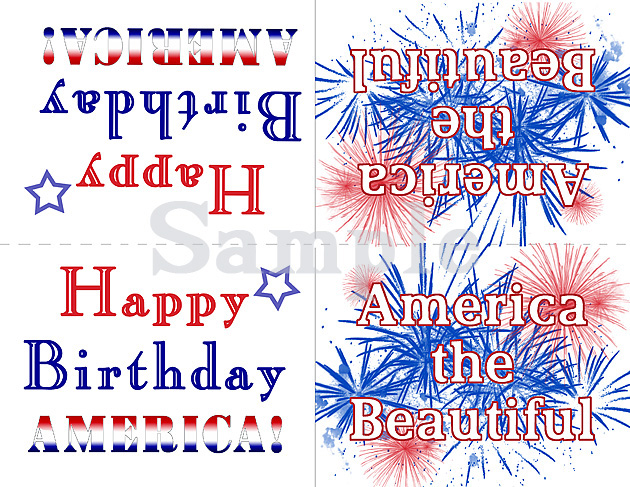
Above is just a web-sized sample for you to see, only.

(Printed version will be sharp looking. ; )

To download the full resolution 8.5″ x 11″, click here! >> You will also find others there you may like.
** But read and follow directions below first!**

Do not make the mistake of just printing out the image that comes up at that link > It is a low resolution image and will print fuzzy.
To print the full resolution image:
1) Click the GEAR WHEEL in the upper right hand corner
2) Select ‘Download Zip File’ from the drop down menu, and download it.
3) Find the folder under your downloads, and open it.
4) Print what you want.

Select the LANDSCAPE orientation, when *printing out.

*For sturdier cards, consider printing on heavier card-stock, rather than ordinary
printing paper, and/or laminating the cards if possible, after cutting.

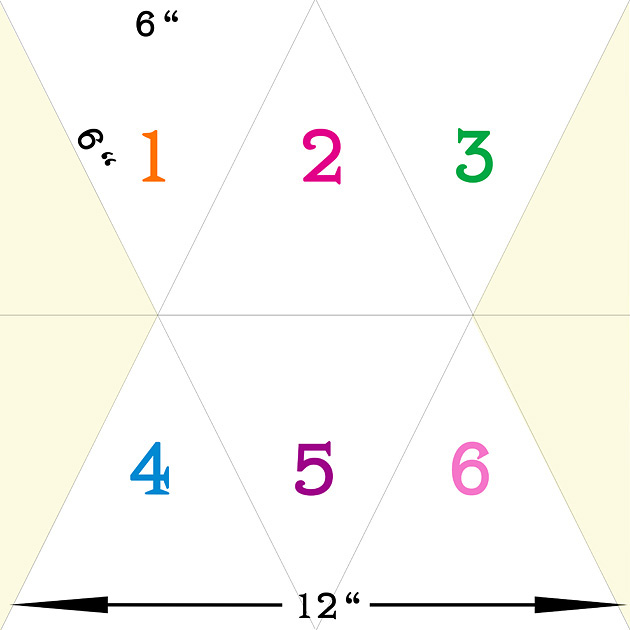
Fold on the dotted line. – – – – – – – – – – –

Cut on the solid line. ____________

ENJOY your printables, AND your long holiday weekend!
Feel free to share or PIN this!

Keep it safe, Peeps!!


Save

Save

Filed Under: Celebrations, Crafts & Creations, Free Printable/Downloadable, Free Printables, Giveaways, Seasonal Crafts and Creations, SUMMER Crafts and Creations, The Big Picture Tagged With: 4th of july free printables, 4th-of-july-decor, free-printables

COOL AMERICANA | Red, White and Blue Detail Ideas for 4th of July Cookout

June 26, 2011 By Laura 8 Comments

We’re talking about red, white and blue detail ideas for your 4th of July cookout bash, today.

americana-red-white-blue-ideas-cookout-5

When the 4th of July falls on a day of the week, that makes for a long weekend, Americans all over the country often either host or attend a good ole’ fashioned all-American cookout! It’s the summer bash of the season, when families and friends get together, have good summertime eats, and make fond memories together that they remember for many years.

If you’re planning on throwing an All-American bash this summer, here’s just a couple of detail ideas, that will color your party Red, White & Blue, and remind everyone how happy they are to be an American, and have loved ones to celebrate with!

americana-red-white-blue-ideas-cookout
If you’ve got a patio table with an umbrella, you may or may not be able to relate to the annoyance, of that pole sticking out of the middle of the table. Ours is black, which is not the most festive of colors in my book. It’s also a hindrance to the photos I’m trying to take, of the spread, or the loves ones gathered around the table.  If you need the umbrella to block the sun, there is no getting rid of that pole!  But I did think of a way to dress it up, and make it an asset to the party decor! I picked up cheap red, white and blue bandanas, and wrapped them tightly around the pole, making the most of the remaining corners to make a nice bow, and pulling the bottom corner to overlap the bandana below it.


americana-red-white-blue-ideas-cookout-1
An AmericanFlag bandana can be wrapped around the handle of pitchers, adding a little more festivity, and added grip to that handle.

And what about red, white & blue striped ice, thrown in some refreshing ice water! I picked up some star shaped ice molds at Michael’s Arts and Crafts, and using red and blue Gatorade, and plain water, the kids filled the molds *1 colored layer at a time, freezing each layer in between.  *TIP: To get even layers, do this pre-test: Fill one a single star in the mold with water, and then suck it up with a medicine dispenser.  Check out the measurement of the liquid that filled the star, and divide it by 3!  That’s how much of each color you’ll need to fill the stars evenly.

You’re welcome. : )


americana-red-white-blue-ideas-cookout-2
Try tying 3 colored straws together, to make another American-style detail. You could use pretty ribbon, but I loved the rustic touch of gardening twine.


americana-red-white-blue-ideas-cookout-3 This was the coolest surprise.  Eventually, as the star-striped colored ice melted, it tinted the water light blue! I loved it!  But to slow the process of your colored Gatorade stars melting right away, be sure you fill a COLD pitcher, with ice-cold water, and then throw in a tray or 2 of plain ice cubes. On top of the plain ice cubes, add your star-striped ice.


americana-red-white-blue-ideas-cookout-4 We also experimented making solid-colored stars with just a little food-colored water.  Consider making plenty, and throwing them in with your cooler of cold drinks, for your guests.

If you ask us, nothing makes a good time better, than hanging out & having fun with people you care about, really great food & drinks, and great all-American music, chatter, & hardly laughter in the air.

Make your 4th of July celebration memorable, with a few simple details.


Save

Filed Under: Celebrations, Crafts & Creations, Holidays, Seasonal Crafts and Creations, SUMMER Crafts and Creations, The Big Picture Tagged With: 4th-of-July-cookout-details, American decor, red-white-blue-cookout-decorating-ideas

Eyeletted Paper Pennants | Room Decor | Craft Tutorial

June 13, 2011 By Laura 9 Comments

eyeletted-paper-pennants-room-decor-tutorial_0001

Sometimes, my crafts come about in all-backwards-sorts-of-ways. This craft, these pretty eyeletted paper pennants, is one of those.
I love how they came out. And lucky for you, I took photos of the whole process.

eyeletted-paper-pennants-room-decor-tutorial-12

See, I happened to be in one of my favorite crafts stores, Michael’s Arts & Crafts, and saw this pad of 12×12 scrapbooking paper, that was nothing short of stunning to me.

I had to have it.

The hesitation was, that I don’t much scrapbook these days.  I will again, one day, begin scrapping like mad very regularly, and catch up on the many years I am behind on.  But in the moment, it seemed foolish to buy the pad of paper to save, for years.   So I bought it with the promise to me, that I would find something to do with the beautiful papers, right away.

eyeletted-paper-pennants-room-decor-tutorial Are they not ever so lovely?  Please take a real moment, to look at that photo. Because on this particular day, it took a little more patience than I had, to arrange them in that perfect fan, you see.


eyeletted-paper-pennants-room-decor-tutorial-1 It’s The Sasha Paper Collection.

What I decided to do with some of the paper, was make paper pennants, with metal eyelets.  My original and only intention, was just to string them in my daughter(‘)s (plural & possessive, lol) rooms, like bunting. No big project, by any means, in the end. But the project will be expanded, as you’ll soon learn.

Now, I did get the pad of designer paper on sale. But still, I as always, I wanted to get the most ‘bang for my buck’.  So this is how I utilized the space of my paper:

eyeletted-paper-pennants-room-decor-tutorial-13

Remember asking yourself back in school, when in your life, you would ever need to use that math?  There it is, People. I figured it out rather quickly, and rather felt genius-like.  Of course, I’m practicing a lot with my 8 years olds triplets, these days.  ; )

I have good craft plans for the pale yellow scrap pieces, by the way.  So all you tree-huggers can be at ease.
(Nothing wrong with a tree-hugger. I’m just sayin’.)


eyeletted-paper-pennants-room-decor-tutorial-2 Oh how I *love* my Fiskar Trimmer, in times like these!!  Zip, zip!!

eyeletted-paper-pennants-room-decor-tutorial-3

Now because I was going to be putting eyelets through these paper pennants, I thought it wise to perhaps, re-enforce them, to prevent them ripping when pulled for any reason. So I just used some photo mounting stickers, and didn’t remove the the backing.

THEN, I added all of the metal eyelets. Which, you may or may not know, can be all kinds of fun!

Do you all know what metal eyelets are?  This is what they look like….see the corners of the pennants:

eyeletted-paper-pennants-room-decor-tutorial-4

Perfect to attach or strong ribbon.  This ferris wheel of patterns, are the ones my oldest daughter chose, for her room, which is a color I like to call ‘Spring Rain’.  (Because I forget the real name of the paint. lol).

eyeletted-paper-pennants-room-decor-tutorial-5

This wheel of designs my youngest daughter (the middle & only girl triplet) chose for her room, which is a soft pretty pink.


eyeletted-paper-pennants-room-decor-tutorial-6
Here are the tools needed for doing metal eyelets, in case you do not know anything about this technique. (I don’t know why I feel like there will be people who have never heard of this?  So perhaps I am over-explaining to a very crafty-wise crowd….)

eyeletted-paper-pennants-room-decor-tutorial-7 But just in case, I’m going to give you a little more info here.  Above, are the 2 main tools needed: the hole tapper, and the eyelet smasher.  A hammer is involved. <Eyebrows bouncing up and down.> Sounds like fun, huh?

I think it is.  : )


eyeletted-paper-pennants-room-decor-tutorial-8 This is what the eyelets look like, post-smashing.


eyeletted-paper-pennants-room-decor-tutorial-9 I was thinking I might do a little eyelet technique tutorial, step by step with photos, if there is anyone who would like to learn?  Eyelets can be used for a wide variety of crafts, including fabric!  It offers an awesome element to scrap booking and card making as well. Your imagination is the only limit. Let me know in the comments, if a tutorial would tickle your fancy.

I’ll do it for even 1 person.  I’m full of love like that.

I’ll even dedicate the tutorial to you, like a song.  ; )

eyeletted-paper-pennants-room-decor-tutorial-10 I used the same sheer ribbon I always have on hand, to string this paper bunting, and I just hung it across {O}’s Mirror for now.


eyeletted-paper-pennants-room-decor-tutorial-11 {A} chose the pale yellow ribbon.  Pay NO mind to the horrid curtain and window with no trim (in these photos).  She has an amazing room, hand-crafted by hubby, and I can’t wait to show you all sometime soon.

  eyeleted-paper-pennants-room-decor-tutorial_012

So, in closing, I have to tell you….with getting 6 pennants, out of multiple designs chosen out of this pad of paper, and the way I got carried away with my happy-hammer, I ended up with WAY more eye-letted pennants than I ever needed, for my original plan!  I have a horrible guesstimation gauge!  Ask my hubby – I can never figure out the appropriate sized container to store dinner left-overs in!  Either way too big, or way too small….never just right.Ever.

Anyway….the question is:

“WHAT TO DO WITH ALL OF THESE EXTRA EYE-LETTED PENNANTS?”

I have a few brainstorms brewing, but I would LOVE *YOUR* ideas!  It’s quite possible there are many of you who will have amazing ideas, I would never have thought of.  So give them to me!  What would YOU do with them?

*(Love this post? How about subscribing to our blog in the sidebar, ‘Liking’ our Page on Facebook, or following me (Laura) on Twitter? Or all 3? 😀 )


Save

Save

Save

Filed Under: Crafts & Creations, DIY (Do-It-Yourself) Project, Tutorial Tagged With: crafts, eyeletted-paper-pennants, eyeletting-tutorial, paper-pennants-tutorial, pennants, pennants-craft, pretty-pennants, room-decor-pennants

Tissued Decorative Storage Tins | Craft

June 7, 2011 By Laura 7 Comments

tissued-storage-tins-craft-21

Sometimes, us creative people, have ideas that come out better in our head, than they do in real life!  Agree? But this project of tissued decorative storage tins was the opposite.  On the one hand, it may have been just a tad more difficult than I had imagined.  Only because I should have remembered how tissue paper and I, can go round and round and round.  We just don’t seem to get along. I normally do not have the patience for the stuff, and end up making the tissue a wrinkled mess. So much so, that I refer to my husband, to put the tissue in gift bags if I can, and he also is so kind, as to do all of my packaging for my portrait photography orders for my clients.   But on the other hand, these tissued tins actually came out way nicer than I expected!  I’d have to say the credit for that probably goes to Modge Podge. Love that stuff!

This idea is one I came up with as homemade gifts for our nieces & nephews, for Christmas 2010, as well as for my God-Daughter {Ju}. (You all know her by now, right?)   I thought they would be cool for them to keep little treasures & trinkets in, in their rooms, or even for my oldest nephew/God-Son to keep change or what-not in in his Jeep.

tissued-storage-tins-craft Here’s all you need!

As well as an x-acto knife or razor blade of some sort (not shown), and possibly a little patience, if you are like I am with tissue paper.  If you don’t need the patience…..well I’m happy for you!  : )

tissued-storage-tins-craft-1 I was so thrilled to find such bold & funky designer tissue paper, at The Dollar Store!…. that I thought was just perfect for the age range of the kids, from elementary school to teens, and for both the boys and the girls as well.  The silver sticky elements I got in the scrapbooking section of Michael’s Arts & Crafts.


tissued-storage-tins-craft-2 I found the tins shown, at Michael’s Arts & Crafts.

They had a variety of shapes and sizes to choose from.

tissued-storage-tins-craft-3

Modge Podge and foam brushes came from the same place.

So this is how this is done:

With your foam brush, you begin by Modge Podging the inside of one tin, and then layer it with the tissue design you would like on the inside.


tissued-storage-tins-craft-4 You really only want to Modge Podge up to the lip of the inside of the tin before laying on the tissue, but let the tissue overlap from there, for now.  Just carefully rip off or cut the excess with scissors.  Then leave to dry.  We’ll get to how to finish it off in a minute or 2.

Now I am telling you right now, there is no way for the tissue to come out perfectly smooth. Most especially on the inside, where you virtually have to stuff the tissue in there.  But do be careful not to tear the tissue or poke a hole in it. However, IF you do by accident, (as I did more than once (yes, the patience with tissue issue…..) it’s not that hard to cover it up, or manipulate the tissue to make the hole not show.  Honestly, it’s just the insides of the tins that are the hardest part of the whole project.

tissued-storage-tins-craft-5 Do the outside of the tin cover, in much the same way.  Again, only Modge Podge to the lip of the lid, then apply the tissue.  Now getting a little (Modge Podge) glue where it shouldn’t be, and the tissue sticking to it, is no big deal. It can be scraped off easily enough once dry.


tissued-storage-tins-craft-6 Just rough trim it with your x-acto blade, and then leave to dry.  If you are trimming first before it really sits to dry, just make sure you don’t drag-rip the tissue.  Your blade will get Modge Podge on it, so you’ll want to try to keep it clean too.

tissued-storage-tins-craft-7 Now you can do the outside of the tin container the same way:  Apply the Modge Podge, and then apply the tissue, smoothing it all as best you can.  Agai…wrinkled are going to happen here and there.


tissued-storage-tins-craft-8 It was really fun to have these co-ordinating designs to work with.  (Pay no mind to my BlackBerry over there.  Always nearby, and forever bLiNkInG!)

Now, in terms of cleaning them up, I found an x-acto knife to be a handy little tool!  I trimmed off the excess tissue, by running the sharp point of the blade, right in the groove of the lips.  If you aren’t sure exactly where or how I mean, just inspect the earlier photo above of the bare tins, and the ones coming up, and think about how the tin is put together.  You can’t have tissue anywhere, where the tin cover and container need to fit together.  Just a little common sense I dug up there. ; )

OK, so after each tissued piece is dry, and you have trimmed the excess tissue off everywhere, you then need to put a coat of Modge Podge over all of the tissue layers, inside and out!  I did second coats of Modge Podge too, letting them dry before coats, and I recommend doing that.  That is what gives the tins a finished look, once they are dried, and keeps the tissue surfaces protected.  Granted, now that the tissue is trimmed and there is tin lips exposed, you want to try and apply the Modge Podge a little more carefully, as to not get glue all over the naked tin parts .  But again, if any gets on the bare tin edges, once it is dry, it scrapes right off like any glue would. Modge Podging the inside of the tissued tins are probably the hardest to do with your foam brushes, only because you’ll see it puddles a little where folds and creases of the tissue are.  It looks a mess at first. But that is ok…..just spread it out best you can, because the Modge Podge really dries hard and clear.  You are using the foam brush to sort of stick down and smooth out any wrinkled tissue as well, as you work.  You’ll be amazed how good it starts to look as the Modge Podge dries clear.

I wanted to personalize them, so I had hubby cut their initials out of sliver mylar vinyl.  Then used the decorative sticky elements, to add a little extra bling.  Finally, I went right over the mylar and the elements on the covers, with another coat of Modge Podge.  Honestly, these came out slick & with a bit of sheen, seeing as though I used the glossy Modge Podge.

I LOVE how they came out, and I am about to show you a whole bunch more of photos, so you really can get the idea. (And, o.k., so I can show them off a little more.)

tissued-storage-tins-craft-9

Bold Black & white for the boys……bright happy colors for the girls.


tissued-storage-tins-craft-10

tissued-storage-tins-craft-11

tissued-storage-tins-craft-12

tissued-storage-tins-craft-13

tissued-storage-tins-craft-14

tissued-storage-tins-craft-15

tissued-storage-tins-craft-16

tissued-storage-tins-craft-17

tissued-storage-tins-craft-18

tissued-storage-tins-craft-19

tissued-storage-tins-craft-20

Like? Love? Let me know what you think!

******


Save

Filed Under: Crafts & Creations, DIY (Do-It-Yourself) Project, Homemade/Handmade Gift Ideas, Tutorial Tagged With: crafts, gift tins, handmade gifts, homemade-gifts, Modge-Podge-crafts, modge-podge-projects, storage-tins, tissue paper crafts

Skeleton Key Accessories

May 22, 2011 By Laura 5 Comments

skeleton-key-accessories

I’ve always thought skeleton keys were pretty cool, even back when I was a kid.  While hunting at a frequented antique/junk stop of mine for old door knobs (for my recent Door Knob Project) I found some door knobs were part of a whole working set, complete with the opposite knob, door plate, locking mechanism, and of course…key holes.  That got me wondering if there might be some old skeleton keys around the place too. So I asked the old man who owns the place.

skeleton-key-accessories-1

By golly he did.  He pulled out this box from under his desk, and dropped it in front of me with a clang.   At first sight, it was looking like I wasn’t going to find much.  But a little digging proved me wrong. I realized that, like vintage door knobs, skeleton keys come in many sizes, shapes and unique styles, as well. I did get a few keys on this day, to start, and I have a few different ideas of what creative things I can do with them.

One idea I put into action so far, was to make a simple necklace or 2 with them.  This particular project here was for {O}, our ‘Resident Accessory Girl”.  So these shown here in this post are a bit little-girlish in fashion, but I’ll give you some great ideas for grown women necklaces in a minute.

I gave {O} one of the keys and a steel wool pad, and let her try to clean it up this key, out on the deck.  She’ll take a task on, anytime.  She’s the kind that wants to be busy, at all times.

skeleton-key-accessories-2
It started out looking like this. We didn’t find it necessary to get rid of all of the rust, as that’s what gives it an aged look, and a bit of charm.  But certainly we wanted to smooth it down enough, to be sure it wouldn’t be leaving rust residue on any clothing. Also, that nasty gauze strip needed to be removed.  Yuck! That thing had me wondering all kinds of hee-bee-gee-bee thoughts.  Nothing fashionable about that scrap!

skeleton-key-accessories-3
Once the key was clean, we looped it onto some very simple satin & sheer ribbon we had on hand, in bright fuchsia pink
!

skeleton-key-accessories-4

{O} did a nice job cleaning the key up, and we thought it looked pretty cute!! I let her know that, when she wore this piece or others like it, out & about, that she can expect the question, “What’s the key to?”, and that it would be a good idea for her to have some answers ready. The expression on her face flashed from realizing I was probably right, to thinking-mode, in quick succession.  She can be so funny sometimes. So far, here’s some answers she came up with:

“Maybe to my heart!”

“To allll of my secrets.”

“That’s for me to know, and for you, to never know!” 😀


skeleton-key-accessories-11 I gave her some different colored ribbons, cut to size and knotted, so that she can change out the ribbon on the key anytime, to co-ordinate with other outfits.

Then I showed her again, how simple it is to tie on the key, and I’ll show you right now too.

skeleton-key-accessories-7  With the lose ends knotted, take the opposite end doubled, and put the loop through the key hole.


skeleton-key-accessories-8  Then take the knotted end, and pull it through the inside of the loop that you just fed through the key.


skeleton-key-accessories-9  Pull slowly….

skeleton-key-accessories-12
….to make sure that it tightens nice & neatly at the top of the key.


skeleton-key-accessories-10 Voila!!  Slip the necklace over your head!

Here’s another technique, for a different look:

Feed the doubled ribbon through the top of the key, using the opposite end with the knot this time, and then put the opposite end’s plain loop through.  Then slowly pull to tighten so that the  end’s knot and tails tighten at the key top.

skeleton-key-accessories-6
You then can also slide on one or more pretty beads, over the doubled ribbon, right down to the knot.  To do this, you do need to use beads with a large enough hole.  I kind of stuffed this one through!

For some more grown up looks, consider using multiple keys, and other types of ribbon in more earth tones or royal colors, or try leather or suede string.  You can also add beads in a mix or match variety of beads made of ceramic, glass, carved wood, etc.  If you are a more experienced jewelry maker, you could work with chains, links and clasps, along with other decorative elements, to really make a vintage-style necklace.

Skeleton keys can actually be incorporated into all kinds of fashion accessories.  Since they do come in different sizes, think in terms of designing as bracelets, belts, zipper pulls, or hair accessories.

I know we plan to make more unique projects using skeleton keys, and I am sure to be sharing them right here, with you!

skeleton-key-accessories-5

We hope you enjoyed this simple little creative idea, for your wardrobe accessory collection.

If you have an other answers for {O} about what the key might be to, or, if you have re-purpose ideas for skeleton keys yourself, please share them with us in the comment section.  We hope to hear your great ideas!


Save

Save

Filed Under: Crafts & Creations, DIY (Do-It-Yourself) Project, Kids Arts and Crafts Tagged With: key-necklaces, repurposing-old-skeleton-keys, skeleton keys, skeleton-key-accessories

  • « Previous Page
  • 1
  • …
  • 14
  • 15
  • 16
  • 17
  • 18
  • …
  • 28
  • Next Page »

We are wicked happy to have you here! We hope you find much inspiration, help, humor and enjoyment here.


Archives


POPULAR POSTS

* * * * * *

SUBSCRIBE to House of Joyful Noise blog! Every new post, delivered right to your email box!


Privacy Policy

Amazon Affiliates

Never at any additional cost to you, we may earn a small commission for our endorsement, recommendation, testimonial, and/or link to any products from our website. Your purchase through our links helps support our family, while sharing with you the products we authentically use and recommend, for various ideas, and letting you know where you can purchase them. Thank you for your support!

[footer_backtotop]

Copyright © 2025 HouseOfJoyfulNoise.com · Genesis Framework by StudioPress