• HOME
  • {A}’s Chipmunk Training Archives

 Homepage

  • The Homestead
    • Home Projects
    • Home Improvement
    • Home Decor
      • Seasonal Home decor
        • FALL Home Decor
        • WINTER Home Decor
        • SPRING Crafts and Creations
        • SUMMER Crafts and Creations
    • Our Chickens
    • Gardening
    • Organization
    • Re-Purposing
    • Furniture Refinishing
    • Budget
  • Crafts & Creations
    • Seasonal Home decor
      • FALL Crafts and Creations
      • WINTER Crafts and Creations
      • SPRING Crafts and Creations
      • SUMMER Crafts and Creations
    • DIY (Do-It-Yourself) Project
    • Kids Arts and Crafts
    • Homemade/Handmade Gift Ideas
    • Holiday Crafts
    • Fan Pulls
    • Free Printable/Downloadable
    • Sewing Projects
    • Giveaways
    • Business Features
  • Recipes/FoodFun
    • Breakfast
    • Lunch
    • Main Dish
    • Sandwiches
    • Appetizers
    • Slow Cooker
    • On The Grill
    • Side Dishes
      • Soups
      • Salads
    • Baking
      • Breads, Rolls and Muffins
    • Snacks
    • Treats
    • Desserts
    • Drinks
  • Homeschooling
    • Elementary Homeschooling
      • Elementary Homeschooling READING
      • Elementary Homeschooling MATH
      • Elementary Homeschooling LANGUAGE ARTS
      • Elementary Homeschooling SCIENCE
      • Elementary Homeschooling HOME ECONOMICS
      • Kids Arts and Crafts
    • Middle School Homeschooling
      • Middle School Homeschooling SCIENCE
      • Middle School Homeschooling HOME ECONOMICS
    • Language Arts
    • Math
    • History / Social Studies
    • Geography
    • Foreign Language
    • Field Trips
    • Games
    • Nature Study
  • The Big Picture
    • Life In General
    • Celebrations
    • Faith
      • Into the Light; The Series
    • Giveaways
    • Reviews & Sponsors
  • Photography & Lettering
    • Photography
    • truck lettering
    • vehicle graphics
    • Newborns
    • Kids
    • Engagement
    • High School Senior Pictures
    • High School Senior Pictures Sneak Peeks

How Much Wood, Could a Woodpeck Peck? : (

July 18, 2012 By Laura 5 Comments

003_birdhouse-woodpecker-damage-150x150

This is the telling of a sad little tale.

001_hand-painted-birdhouse-before-after 
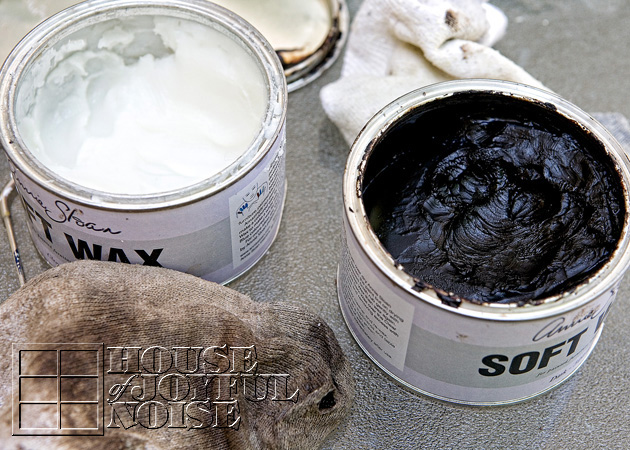
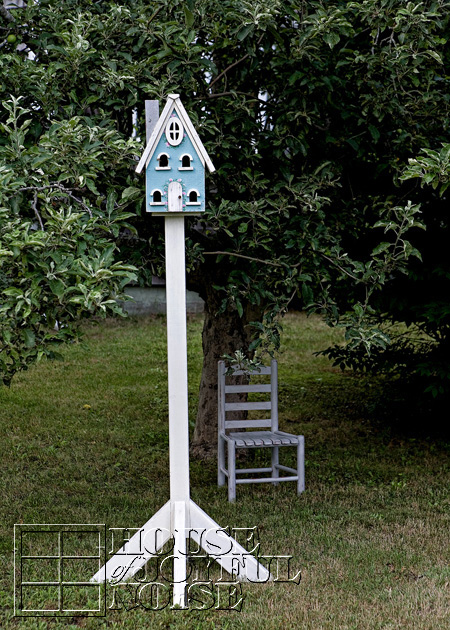
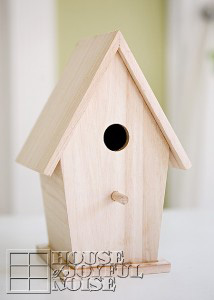
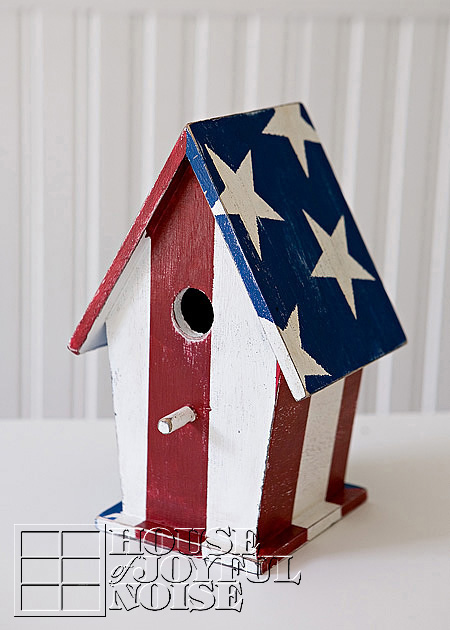
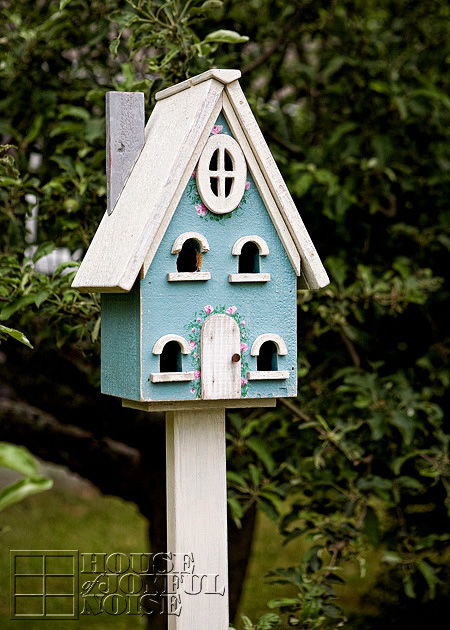
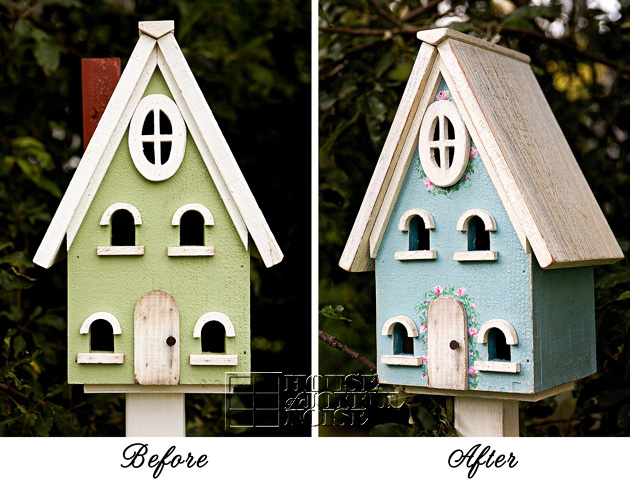
The refinishing of this birdhouse, has been one of my most favorite projects ever.  Between the excitement of using Annie Sloan paint for the first time, the color I fell so in love with, and the YouTube crash course video lesson I watched, on how to paint tiny roses in order to adorn my sweet new birdhouse with, it’s a project I truly enjoyed the process of.

002_hand-painted-birdhouse 
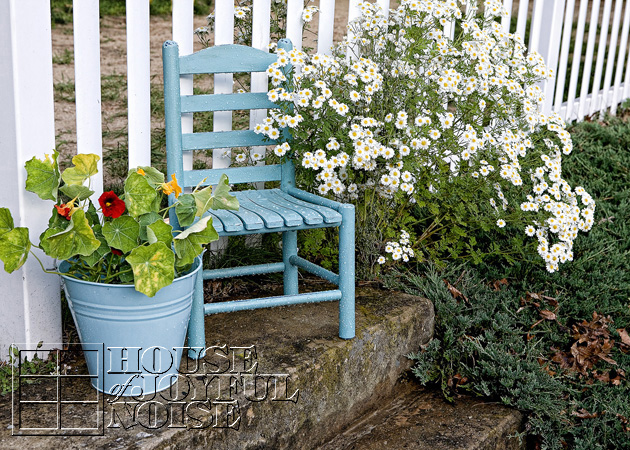
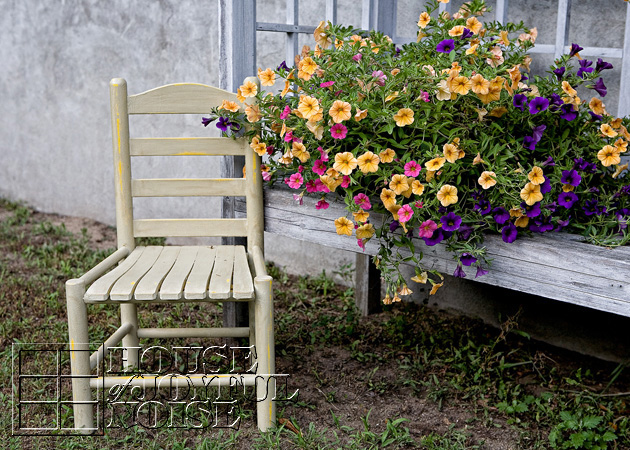
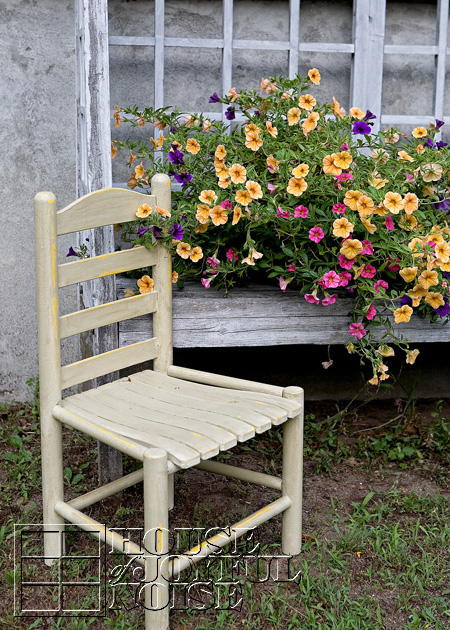
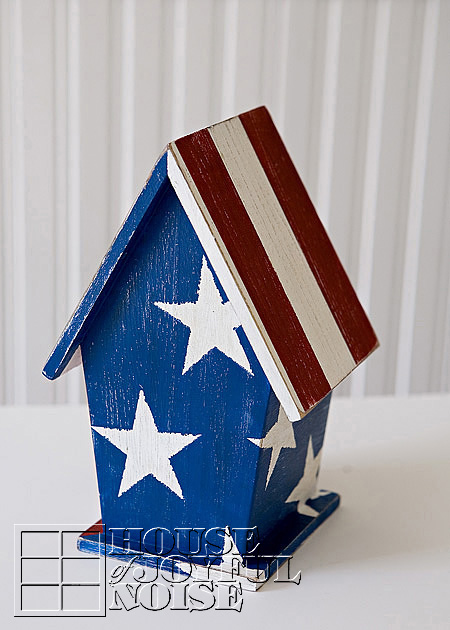
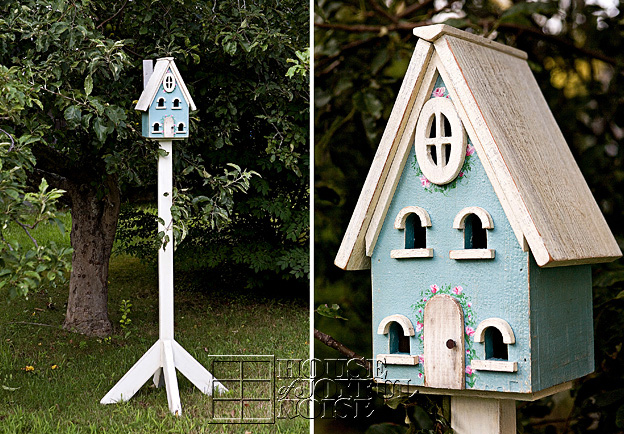
I have to say, it’s held up so well, out there in the weather of all kinds, too.  I did put it away for the winter, but otherwise, it has stood right over on the other side of my garden beds, under the apple tree.  I have  finished projects I’ve done all over my homestead, of course, and I love to see them around.  This birdhouse has truly been a piece that still plays a part in bringing me a bit of joy every day.

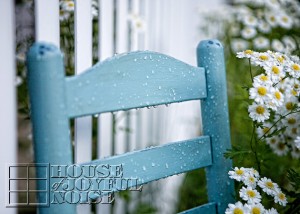
So imagine my sheer panic this one very (very) early morning this summer:  The kids and I were still in bed, and I was still pretty much sleeping.  All of our windows were open a little, and I began to stir out of my sleep with the sound of some repetitive rhythm sound on hard wood outside.  I was confused by it, being somewhere between asleep and awake, and so I tried to bring myself out of the grog I was in, wondering if I was dreaming, or what.  But next thing I know, I hear little feet hit the floor hard, and come booming across the house floor, and my son yelling, “Mama, there’s a woodpecker pecking your birdhouse outside!”

That woke me up! The idea of the damage a woodpecker could do, had me wide-eyes, out of bed, out the front door, down the deck steps and out to the gardens, in a flash.  My abrupt arrival scared the woodpecker, and I watched him fly away. The peaceful silence after the commotion, caught my attention.  Even the birds stopped chirping. As I stood there in my summer nightie, in front of my house beside the street, amidst my gardens, our neighbor friend drove by in his truck to leave for work, and gave me a wave. 
It occurred to me in that moment, that it was a good thing I wear pajamas to bed.

I sauntered over to the birdhouse slowly,  not sure I really wanted to assess the damage done.

003_birdhouse-woodpecker-damage  
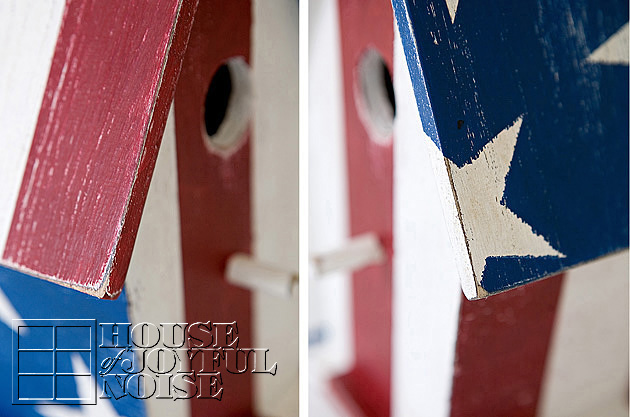
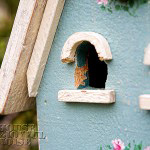
{SIGH}. It looked like the woodpecker figured a hole already there, was a good place to start.
I put a trash bag over the house for the day, not sure what I was going to do about the matter.  But as the day went on, I thought, “What a cool photo that would have been, to get a shot of the woodpecker at the birdhouse.”  That’s what photographers do.  Think through life in images we’d love to get, as moments frozen forever.  So I took that bag off, and had my camera with my 70-200mm 2.8 lens on it, waiting by the open window near my work area in my house. I listened, and I checked repeatedly, for that woodpecker. All day long. But he never came back.  I thought that was the end of it.

004_birdhouse-woodpecker-damage

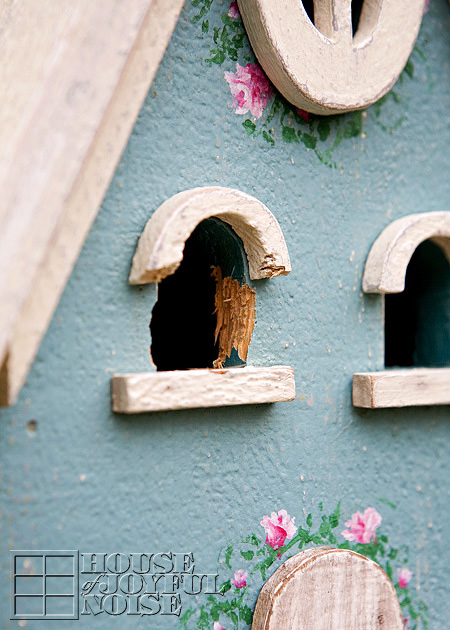
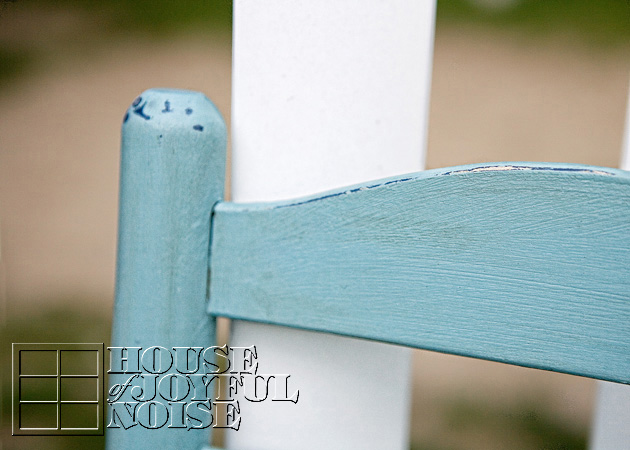
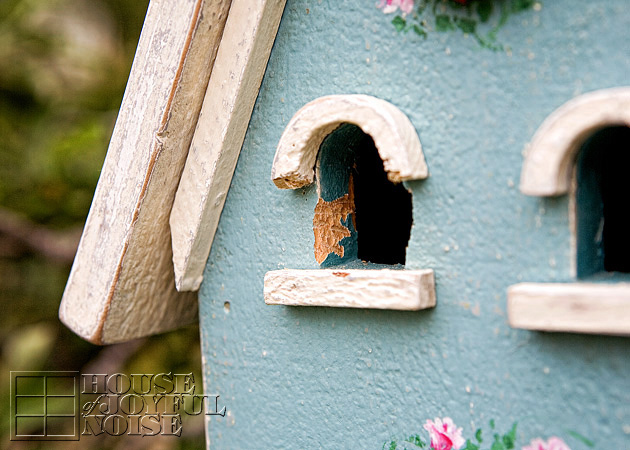
 Until very (very) early the next morning, of course. While we were all still sleeping.  I jumped out of bed again, grabbed my waiting camera, and opened the window. But as soon as I did, he flew away.  My boy and I, having both gotten a good look at the bird, decided it was a Downy Woodpecker. They are the most common in this area, and the description and picture matched.  I was really hoping to catch him flying to the birdhouse, and get him when he just landed on it. Before he got to work again.  Preferably the day before, while I waiting and so ready-window open already and everything.  I should have known it would come back the next morning, at the same time.  So these after-damage photos I show you were taken after morning 2.  In the end, you can see the window opening was pecked on both sides, but it also did damage to the arched trim over the window, which is a much softer wood.

I put the bag back on it, and left it on for several days after that.  Then I took it off, thinking; even a woodpecked birdhouse looked better than a black trash bag on a post. If the woodpecker did come back yet again, I was going to have to consider taking the birdhouse in for good, or, I don’t know…..installing some kind of taser device on it. A security system of sorts. But the woodpecker has not been back since.  For which I’m thankful!

005_birdhouse-woodpecker-damage

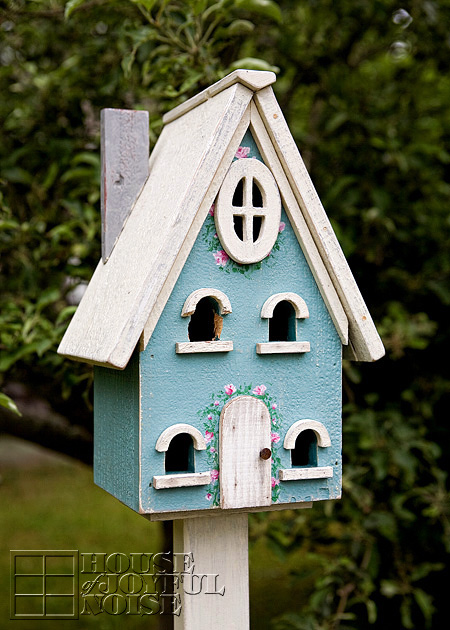
 When I refinished this birdhouse, and it came out so pretty, it really was my little hope, that some sweet little birds would move in.
It just never occurred to me, a woodpecker would come along, and decide the window wasn’t big enough for him.  Silly me.

006_birdhouse-woodpecker-damage

So maybe none of us ever did find out the answer, to the question: How much wood, could a woodchuck chuck, if a woodchuck could chuck wood?
But now we know how much wood could a woodpeck peck, if a woodpeck, could peck wood.
Too much! : (

P.S.  In the last week or so, we’ve actually noticed 2 woodchucks waddling around our property, too.
So if we learn the answer to the first riddle, we’ll let you know. ; )

Filed Under: Crafts & Creations, Home Decor, Life In General, Photography, Refinishing, The Big Picture Tagged With: annie-sloan-chalk-paint, downy-woodpecker, hand-painted-birdhouse, hand-painting-roses, nature photography, woodpecker-pecks-birdhouse, woodpeckers

4th of July

July 4, 2012 By Laura Leave a Comment

1_painted-american-birdhouse

HaPpY 4th of JULY, Everyone!

Since I wanted some photos, to go along with our wishes for you,  I thought today would be a good day to show you where I put my painted American Birdhouse.  It’s out on the potting bench near the gardens!  So now you know! I’ve got a whole red-white and blue theme going on out there, and it’ll be there throughout the month of July.  Then I’ll likely change it up, to some other summer theme.

 The birdhouse has held up very well in weather, despite the sun and rain beating on it.  Again, I credit that to the wax finish. It seems to be a great protector for outdoor wood, in my experience.

2_hand-painted-american-birdhouse-on-potting-bench Have a safe and memorable celebration of our country, with your families and friends!

We’ll see you again soon.


Filed Under: Crafts & Creations, Gardening, Home Decor, Refinishing, SUMMER Home Decor, The Homestead Tagged With: 4th-of-july-decor, american-birdhouse, american-home-decor, fourth-of-july-decor, garden-decor, red-white-blue-decor

3 Little Garden Chairs | Refinishing

July 2, 2012 By Laura 9 Comments

006_annie-sloan-provence-paint-color-300x214

There’s been these 3 little chairs, sitting in our basement for years now.  One of my husband Michael’s clients offered them to him, knowing we had triplets, and thinking maybe we could use them.  They are about toddler size. So he brought them home, and they’ve been in the basement ever since. I’ve never been a primary-colors kind of girl.  I thought maybe I would repaint them or do something with them at some point, for the kids, or maybe as available props for my photography studio.   But, I was just never inspired to ‘have-at’ them.

Until of course, I was.

001 I know these are ugly. Please don’t leave! I promise you, it gets much better! We were hauling out all kinds of things out of our basement that needed to GO, for our yard sale. Michael put these chairs out there, and when I saw them I said, “Hey! We’re not selling these! I could make them into cute little garden chairs!”  Well then….there was my inspiration.  The idea hit me for the first time, and flew out of my mouth. (As most thoughts do, if you must know. But I’m getting better.)  As so as it was, I was finally inspired to do something with these 3 little chairs.

The challenge was the primary colors of paint that was already on them.  Yes, I was going to paint them anyway, but I was NOT going to NOT distress them. And I sure as heck was NOT going to strip them.  They didn’t mean enough to me, to work that hard.  I mean, I love to paint, and to sand, and even to wax.  But stripping off paint? Not so much. So the primary colors underneath were staying, and I was starting to imagine, they were going to look pretty cool when I was done!

I’ll say right here, that I didn’t take photos of every step of the process.  But I think you all know what painting and sanding looks like. I DID take a whole bunch of photos of the chairs all done though! Lots. Those are the more fun photos you all like to see most, right. Because there was no special complicated process. I will tell you just how I did it right now, which was easy as 1-2-3, and then you can see so many photos I had so much fun taking as well, simply to show you.

Since I had 3 chairs, I thought it would be perfect to use the cans of the 3 colors of Annie Sloan chalk paints that I still had: Provence, Versailles, and Paris Grey. So, 1) I painted each one those colors.  It was actually very scattered painting sessions over a period of a few weeks, and my girls helped some too when they wanted to.  2) Then I distressed them to my liking. (That means, a lot of sanding. ; )

002_annie-sloan-waxes 3) Lastly, I waxed them with my Annie Sloan waxes.  It was especially important for them to be waxed, because I knew they were going to be left outside in all kinds of weather. So they needed some kind of protection, to preserve all of my efforts, of making them into cute little garden chairs around our homestead.  I did wax each chair one at a time, from start to finish.  First I did the clear wax all over a chair, let it set up a bit, but before it was completely dry, I worked in some dark wax where I wanted it, to give them a more antiqued, aged look. It kind of has to be done that way, because the dark wax is potent stuff. It only takes a little bit, and if the clear wax is too dried, it is hard to rub off – or even rub around, the dark wax. So that is always the little bit tricky part, as well as wicked messy and sticky and stinky. But I’ll tell you what, this point in my project process really proved even to me, how much I love furniture refinishing! Because it was also sunny and hot this day.  But I was out on our deck working away in the sun, sweating my a*# off (but wouldn’t you know it, it’s still all there!), but singing and rocking out to the music, with that nasty sock on my busy hands, and having a ball!

Or I might of been high on wax fumes. Hard to say. But it was fun! That much I’m sure of.

Not much chatting left. Just a ton of photos, and some tidbits I think you might like to know.

003_chair-antiqued-with-dark-wax Here you can see a couple of things, that really make these chairs beautiful to me. Knowing the primary colors underneath were going to show, I was careful in deciding which paint color was going on which chair. So here is the (Annie Sloan) Provence, on the dark blue.  You can also best see in this photo, the dark wax work, that helps make the chair look more aged.

 And a bunch of photos, where I have this one right now . . . . . .

004_chair-refinish

005_chair-refinishing

006_annie-sloan-provence-paint-color

007_garden-chairs

008_garden-chair

009_repainted-furniture Do you love it? I do!! I love the color, and I love where it is, with the daisies and the white picket fence there.  What I don’t love, is our yard. You may have noticed the lack of real grass. We pretty much just have crabgrass, and fine sand. I don’t much like the cement steps either. But, we have decided to hold off a bit and not invest in our grounds anymore, until we make some other pretty big decisions.  So, we make due, with making ugly . . . pretty, best we can for now.

Next up, is the one that was yellow chair, which I painted Versailles.  It’s out front with the garden beds, next to the covered bench and potting bench . . . . . .

010_little-garden-chairs

011_garden-chair

012_annie-sloan-versailles-paint-color

Again, you can really see the paint underneath, where I excessively sanded, just the right amount. : )  You can also see the dark wax work, which only adds some character to it, to me. And do you see where the paint dripped? Some may think that is some imperfection. But I see it, and it makes me smile and feel happy. Because it reminds me of the memory, that my little girl was helping me paint this chair.

 And lastly, is the red chair, that I painted Paris Grey! I really wasn’t sure where I was going to put this one. So I just stuck it under the apple tree, and it seemed to look like it was at home there. Funny thing is . . . . . . it’s not at our home. (Yikes!)

013_little-garden-chair

The apple tree is not actually ours, nor on our property of course. Just over the line, but we pretend it’s ours. The owner is not usually around at all, and Michael does manage the property. (My excuse to take such liberties.) But she’s coming tomorrow for a week, so we’ll see if I get my hand slapped, or she kicks it back to our side, along with the birdhouse. And if I get arrested or anything, I’ll surely let you know. Because we’ll need to collect some bail!  (You all would help me get out. Right?!  Say yes.)

014_garden-chair

Care to sit for a spell, in the cool shade of the apple tree?

015_annie-sloan-paris-grey
See? I really go to town, with my sand paper!  This one even has a little broken piece. Again = love.

 I always say . . . . . . it’s the little things, that make me so happy.

016_three-little-garden-chairs Thanks for taking a stroll around my gardens with me. (We literally, walked around the garden beds.) I always love when you visit us here, so please come again. We invite you to join us on Facebook too.


Save

Save

Filed Under: Furniture Refinishing, Furniture Refinishing, Gardening, Home Decor, Photography, Refinishing, The Homestead Tagged With: aging-furniture, annie-sloan-chalk-paints, annie-sloan-wax, cute-garden-decorations, distressing-wood-paint, garden photography, garden-decor, garden-decor-ideas, how-to-antique-furniture, little-garden-chairs, making-furniture-pieces-look-antique, painting furniture, photography, re-painting-furniture, refinishing-chairs, refinishing-furniture, still-life-photography, triplets, weather-proofing-furniture

Polka Dot and Plaid 4th of July Printables, for Celebrations/Cookouts

June 18, 2012 By Laura 6 Comments

Free printables for you!

2_pennants-4th-ofjuly-free-printable1

2021 NOTE – WE’RE SORRY, BUT THE FILES TO THESE PRINTABLES ARE NO LONGER AVAILABLE.  🙁

I have been having fun designing some 4th of July printables to share with you, to add a fun red, white and blue themed touch to any cookout or celebration you may have planned, with family and/or friends. (Or, you can even print the cute Bitty Pennants out and string up in your home!) These are the little details that make hosting a gathering so fun to plan, and also the details that impress your guests, and make them smile. So I hope you like them! I tried to design them with simple direction right on them, to show you how easy they can be to prepare.  But I will give you some printing tips, at the end here as well, after you look at the previews of the printables in this post.  But first . . . . . .

*IMPORTANT NOTE:  *Do NOT save the images of the printables you see below,but rather use the download links after the images at the end, for the full size printables.  What you see here are just low resolution previews, and not suitable for printing.

1_pennants-4th-of-july-free-printable

2_pennants-4th-of-july-free-printable

I must say, I think these Bitty Pennants are adorable!  I gave them some tabs, so they can be folded right over some thin ribbon or string, and then just secured with a little piece of tape.  If you choose to download the pennants, please note that you will need both Part 1 and 2.

cupcake-wrappers-free-printable These wrappers, designed for cupcakes, could possibly also be used around the bottom of those short clear acrylic cups, filled with fruit treat ideas like these.

red-white-blue-dish-name-cards-free-printable How cute would these little cards be, sitting tent-like on your food table in front of each dish, letting guests know what’s on the menu?

4th-july-free-printable Lastly, these cards I actually designed last year, but decided to offer them all to you again. They are a bit bigger cards, and print as a full 8.5 x 11 sheet. All you need to do is cut on the solid line, and fold on the dotted. You can hang them to spin on strings, put them tent like on the tables, or slide them under a glass table top. They are like birthday cards for America, and really remind everyone the reason for celebrating, and the gift that our freedom is.

Printing suggestions:  I recommend printing any or all printables at least on some good cardstock, as opposed to regular printer paper.  Be sure for each download you choose of the links below, that you choose the correct orientation for printing, as well as your highest quality printing setting!  Also, if you’d really like to get vibrant colors closer to what you see on your computers, try printing on matte photo paper.

With that, here are the download links, for the actual full-size printables. Just click on the link, and when the image comes up, right click, and ‘Save Image As’, to where you will be able to a location where you will find them on your computer. (Again, do not save and print the images above, or they will look terrible, and waste your ink and paper.)

Bitty Pennants-Part 1

Bitty Pennants-Part 2

 Cupcake Wrappers

Dish-Name Table Card Tents

America’s Birthday Cards

I hope you enjoy these, as well as your celebrations of fun, food, family and friends!

HAPPY BIRTHDAY, AMERICA!

4th-fourth-of-july-free-printables *******End of Post*****
This long single image below for Pinterest pinning!  : )


Save

Save

Filed Under: Celebrations, Crafts & Creations, Free Printable/Downloadable, Free Printables, Home Decor, Seasonal Home decor, SUMMER Crafts and Creations, The Big Picture Tagged With: 4th of July, 4th of july free printables, 4th of july party decor, 4th-of-July-celebrations-decorations, 4th-of-july-cookout-decorations, american party decor, free-printables, red-white-blue-decor

Painted AMERICAN BIRDHOUSE – Tutorial

June 11, 2012 By Laura 27 Comments

Summer holds a whole lot of good things, and for us, it really kicks into high gear in the beginning of July, with back to back celebrating of the 4th of July, and our oldest daughter’s birthday!  Then the summer rides out with a little more down time, just chilling on the beach, making day trips, and hanging out chatting and laughing around the camp fire at night. So about this time in June, we’re getting excited for all of the fun to come, just around the corner! The gardens are planted, we’re reaching the end of our school books, and we can just feel the summer vibe coming on the sea breeze!

What really gives me so much joy, is helping make my home and gardens, reflect the seasons and holidays!  Around here, about mid-June through July, it is all about red, white and blue!  Our family’s homestead is that much more enjoyable, with the little bits of decor I add, and it just puts the happy in my heart, to see it.  But the greatest joy in it all for me, is planning and creating all of those little things around our home. Like this American Birdhouse I am sharing with you all today. Honestly, day or night, you can turn the music up loud, put some art tools in my hands, and COLOR ME HaPpY!!

So I’ll just tell you how I did this. While I didn’t photograph every step of the action, I can tell you what I did, and give you some photos I took of what the birdhouse looked like after those steps.


To start, I picked out an unpainted wooden birdhouse at Michael’s Arts and Crafts. There were a few styles to choose from, but this one would best work with the paint-job layout I had in my head.

I primed it with some grey primer I had on hand, and then I painted it white with acrylic paint. Because of the grey primer, it did take 2 quick coats of white to cover. This paint dries fast, which I love, so I can keep the fun rolling.

Next, I asked my husband, Michel, to cut some stars and stripes out of vinyl for me, the next job he ran, to use as masks. I wasn’t sure of the size I wanted to work with for either the stars or stripes, so he cut out 2 sizes of each.  Sticking some cut pieces on the house helped me decide which size I’d like better, and I went with the fatter stars and stripes.  NOTE: Just to confuse things, Michael used some scrap vinyl he had, that happened to be red and blue…to put on my white house. I know….it looks done already, huh? I would have preferred white masking, but c’est la vie….it was just a mask. Don’t let it confuse you-as it was trying to confuse me. It was going to be way better looking when I was done with it, but the colored vinyl did give me a good preview of the final layout!

So here it is, with the masking still on, and all painted in.  Looks like a hot mess to me! It did take more brain power than I had planned on burning, trying to think in opposite terms here:  “Ok….where the red and blue mask is, it will be white….and I am painting the white I see, red and blue. Right?….Wait……”. Ugh. See? White vinyl would have taken less thought for me.

 But I managed, believe it or not, to not screw it up much.  Although everyone was instructed not to talk to me or ask me questions whilst paintbrush in hand. I’m good, but I’m not that good. ; )

So here is what it looked like after all of the masking was peeled off.  Revealing that I really did it right!

It’s looking pretty good already, huh? But it was still not done yet!

 My vision was an older looking American Birdhouse. So I finally really attacked it, with my sand paper! I go to town, distressing.  I don’t know what it means, but I suspect distressing my creations gives me an unnatural level of joy.  Sometimes, I need someone around, to stop me. For me, this is when many things I make, really come to life, and become what I created them to be.

So, after Michael took away the sand paper, I did just a few more little things:  1) I dusted it all off with a soft rag.  2) I rubbed on a good coat of clear wax, and let that dry.  3)  Then, ever so tentatively, I added some dark wax too. I am so careful with that stuff, because it is powerfully staining!  I carefully and minimally applied it, to age it exactly to a specific, pinpointed year. (Ha ha…I have no idea what year, really….I’m just kidding. lol)  I’m not sure if you can even tell how much it was aged in these photos, with the effect of the dark wax, but it really was the final touch of perfection, for me to call it d-o-n-e.

And here it is! . . . . . .


This is the front and it’s left side, obviously. But I tell you this for you to notice, how the stars wrap around from one side, diagonally, all the way to the other.  And the stripes do the same thing.

So I am about to show you all sides . . . . . .


 Of course, I would love to show you close-ups of the detail in my distressing . . . . . .


It truly is what makes this an American Beauty, to me!

 I just love how it came out. Do you? You can bet your American bottom, I’ll be Pinning this baby!

Coming up soon here on the blog, I’ll be showing you where I put this, to be displayed for awhile this summer.

Tell us, do you had any special summer decor to your home this time of year?  We hope you have a moment to tell us about it, or say hello, before you ski-dattle! If not today, thanks so much for coming by! We’re always glad you did.


Save

Filed Under: Crafts & Creations, DIY (Do-It-Yourself) Project, Home Decor, Tutorial Tagged With: american-crafts, american-home-decor, american-projects, birdhouses, crafts, decorative-birdhouses, july-decor, july-home-decor, painting-birdhouses, painting-projects, patriotic crafts, red-white-and-blue-crafts, red-white-blue-decor, stars and stripes

  • « Previous Page
  • 1
  • …
  • 9
  • 10
  • 11
  • 12
  • 13
  • …
  • 28
  • Next Page »

We are wicked happy to have you here! We hope you find much inspiration, help, humor and enjoyment here.


Archives


POPULAR POSTS

* * * * * *

SUBSCRIBE to House of Joyful Noise blog! Every new post, delivered right to your email box!


Privacy Policy

Amazon Affiliates

Never at any additional cost to you, we may earn a small commission for our endorsement, recommendation, testimonial, and/or link to any products from our website. Your purchase through our links helps support our family, while sharing with you the products we authentically use and recommend, for various ideas, and letting you know where you can purchase them. Thank you for your support!

[footer_backtotop]

Copyright © 2025 HouseOfJoyfulNoise.com · Genesis Framework by StudioPress