• HOME
  • {A}’s Chipmunk Training Archives

 Homepage

  • The Homestead
    • Home Projects
    • Home Improvement
    • Home Decor
      • Seasonal Home decor
        • FALL Home Decor
        • WINTER Home Decor
        • SPRING Crafts and Creations
        • SUMMER Crafts and Creations
    • Our Chickens
    • Gardening
    • Organization
    • Re-Purposing
    • Furniture Refinishing
    • Budget
  • Crafts & Creations
    • Seasonal Home decor
      • FALL Crafts and Creations
      • WINTER Crafts and Creations
      • SPRING Crafts and Creations
      • SUMMER Crafts and Creations
    • DIY (Do-It-Yourself) Project
    • Kids Arts and Crafts
    • Homemade/Handmade Gift Ideas
    • Holiday Crafts
    • Fan Pulls
    • Free Printable/Downloadable
    • Sewing Projects
    • Giveaways
    • Business Features
  • Recipes/FoodFun
    • Breakfast
    • Lunch
    • Main Dish
    • Sandwiches
    • Appetizers
    • Slow Cooker
    • On The Grill
    • Side Dishes
      • Soups
      • Salads
    • Baking
      • Breads, Rolls and Muffins
    • Snacks
    • Treats
    • Desserts
    • Drinks
  • Homeschooling
    • Elementary Homeschooling
      • Elementary Homeschooling READING
      • Elementary Homeschooling MATH
      • Elementary Homeschooling LANGUAGE ARTS
      • Elementary Homeschooling SCIENCE
      • Elementary Homeschooling HOME ECONOMICS
      • Kids Arts and Crafts
    • Middle School Homeschooling
      • Middle School Homeschooling SCIENCE
      • Middle School Homeschooling HOME ECONOMICS
    • Language Arts
    • Math
    • History / Social Studies
    • Geography
    • Foreign Language
    • Field Trips
    • Games
    • Nature Study
  • The Big Picture
    • Life In General
    • Celebrations
    • Faith
      • Into the Light; The Series
    • Giveaways
    • Reviews & Sponsors
  • Photography & Lettering
    • Photography
    • truck lettering
    • vehicle graphics
    • Newborns
    • Kids
    • Engagement
    • High School Senior Pictures
    • High School Senior Pictures Sneak Peeks

Lavender Sachets

February 19, 2009 By Laura Leave a Comment

We believe this is the last craft to reveal.  Lavender sachets. It was actually one of the first we made.  Probably one of the least creative, which may be why I saved it for last. lol.

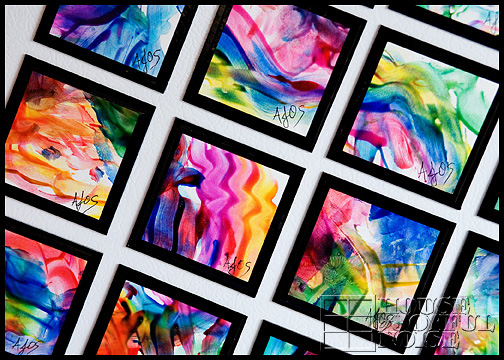
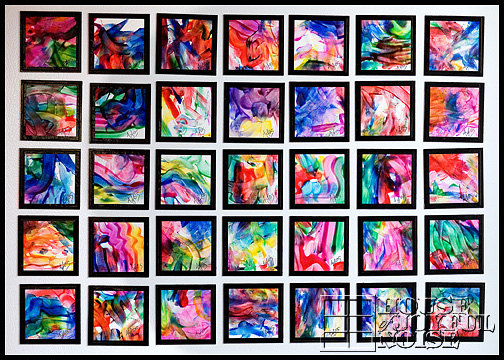
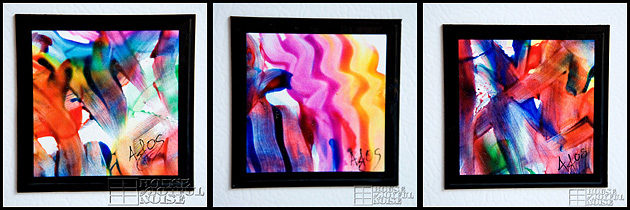
If you all recall this header:

homemade-lavender-sachets

And husband/Daddy, learning how to use the machine and sew, all in about 2 minutes, (and then hogging the machine, because he was having so much fun)……….

m1hand

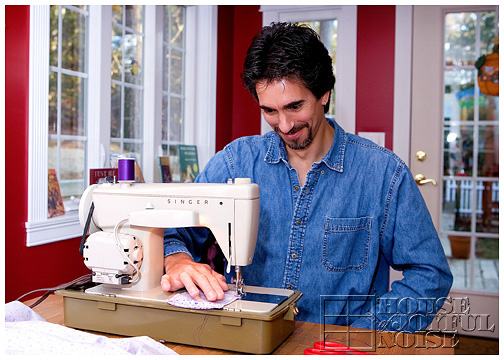
(One-handed showoff)

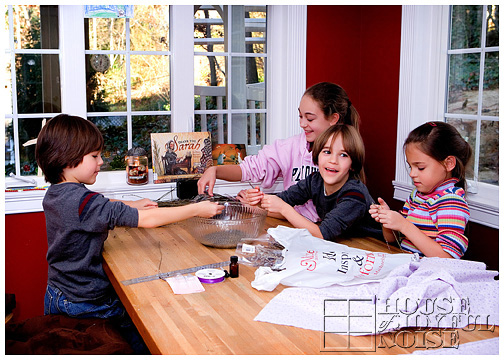
…..while the ‘other kids’ were working at the other end of the table……. all4

He did let {A} get in there for a LITTLE bit….

a

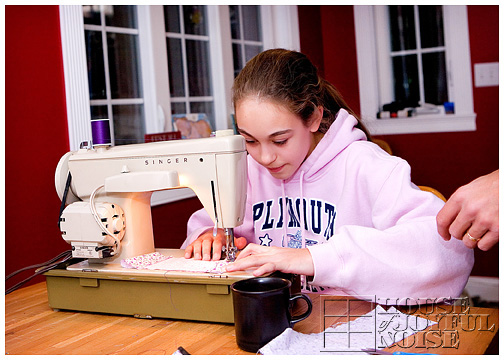
….until he kicked her back out, because he wanted another turn, and couldn’t take it anymore.

m

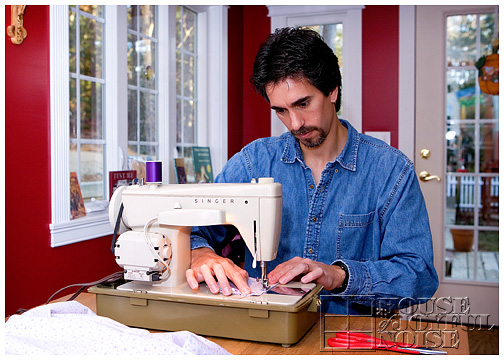
It was definitely a gift-making family affair!

how-to-make-lavender-sachets
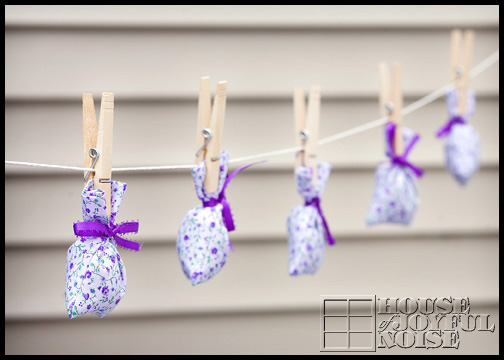
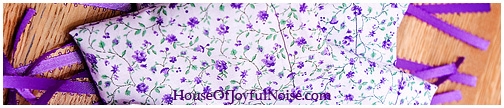
NOTICE how the sachets are hung out to air out!!  It’s a comical little story, really……

We had bought real dried lavender.  That is what the 4 kids in the photo up there are doing….cleaning the buds off the sticks.  WHICH, mind you, smelled NOTHING like lavender, flowers, or ANYTHING NICE.  It smelled like…well, dried weeds.

SO, we had lavender scent oil drops that we had bought, and had planned on adding a drop or 3 anyway. Just give it a little boost in smell.  But from the smell of that bowl of dried buds….it needed LOTS of help. And our sweet little helper was there, ready, willing and waiting, to help….A LOT……..

That is, until we ventured to take that saran wrap off and spoon some in our sewn sachet bags anyway.  HOLY…..the SCENT SURELY SHOWED UP!!  Gees…it was through the whole house, and stuck in our noses for DAYS.   We made all of the sachets, but man….they were SO POTENT!!  Really…just…..a little MUCH.

So I hung them out one day….ALL DAY.  Not sure if that helped, much.   When it came time to package them with other crafts, for Christmas gifts, we triple zip-locked them.

And-you-could-still-smell-them.  Grandma was so kind about how nice hers smelled, with her little telling-giggle.

If it is true, that a lavender scent helps you sleep well, these babies will knock you out for a lifetime!!  They did smell like SOMETHING NICE in the end.  Just a little more than necessary. : )   Update-2016:  These days, I know to use 100% real natural lavender essential oil, as opposed to the concoctions they sell in the store. (We use doTERRA, for all of our essential oil needs.)

It’s been fun, showing you all of our craft-gift ideas this year! Hope you’ve been enjoying it, as well.

Save

Filed Under: Crafts & Creations, Homemade/Handmade Gift Ideas Tagged With: easy-homemade-gift-ideas, handmade-gift-ideas, homemade-Christmas-gift-ideas, lavender-sachets

Mini-Masterpiece Magnets Made by Kids – Gift Ideas from Kids

February 12, 2009 By Laura 8 Comments

magnets kids can make

If you need gifts from your little kids, that they made, for loved ones, these Mini-Masterpiece Magnets are perfect!
It’s basically finger-painting fun, made into little framed pieces of colorful art, to use on refrigerators. Your recipients will love them, and your kids will be so proud they made them, themselves!
We’re teaching you how to make them!

First, just let your kids finger-paint with vibrant colors, on large quality, acid-free art paper.

making-masterpiece-magnets-by-kids_5

making-masterpiece-magnets-by-kids_4

making-masterpiece-magnets-by-kids_2

making-masterpiece-magnets-by-kids

making-masterpiece-magnets-by-kids_3

We call them “Mini-Masterpiece Magnets.”

It was abstract fine art, done our way!  And each one SIGNED by for the artists, no less!!
They all had a hand, in making each one. 😉

These are a fantastic gift idea from kids, that they can make themselves with love, for Christmas gifts and other occasions, for family and loved ones!
They are so fun for the kids to make themselves, and they will make them proud to have their masterpieces on display on anyone’s refrigerator!

Here’s how we made them:

We took those full sheet finger paintings, mounted them on magnetic material, cut them into 3″ x 3″ squares, and then ‘framed’ them with some black vinyl.
It’s that simple!

Then we made up sets of three, put them in those nifty clear bags I love, with a ribbon and a tag that said ‘Mini-Masterpiece Magnet Set’.  : )

We thought they were so colorful and fun, and honestly, it was my favorite hand-made craft gift we made to give as Christmas gifts.  We can only hope others could appreciate all of the colors and happy-emotion of these paintings, to adorn their refrigerators, perhaps to hold up a masterpiece of their own child’s, or a shopping list!

We made A LOT of them, and really…….they were truly hand picked into sets, for each recipient.  They may look all the same to some, but it was a painstaking task for us silly ones, choosing which ones we wanted to give to who, and which we just had to keep!

masterpiece-magnets-by-kids_all

Here’s a closer look at a few of these priceless paintings:

magnets kids can make

Big Mess.  Crazy Colors. Loud Laughs. Huge Fun. = ART MADE WITH LOVE

magnets kids can make

Save this idea for a rainy day craft, or as a Christmas gift idea from your own little Picasso-People.
Our kids had a blast making them, and as an update (2016), they have been loved and enjoyed for many years by all who received this gift from the kids. They’ve been on our own refrigerator for all these years, holding up other pieces of their art, and bringing us smiles from the memories we made, making them.

Thanks for coming by for some more inspiration and ideas!

Save

Save

Save

Filed Under: Crafts & Creations, Homemade/Handmade Gift Ideas, Kids Arts and Crafts, Kids Arts and Crafts Tagged With: art-magnets, Christmas-gift-ideas-from-kids, finger-painting-art, finger-painting-ideas, gifts-kids-can-make, handmade-homemade-gift-ideas-from-kids, kid-craft-gifts, kids crafts, kids-arts-and-crafts, magnets, magnets-kids-can-make

Handprint and Footprint Aprons – Homemade Gifts from Kids

February 5, 2009 By Laura 8 Comments

handprint-footprint-aprons-homemade-gifts-from-kids_00

One of the gifts the kids did for their paternal grandparents for Christmas, was this apron set.   We found the denim aprons right at our favorite place….Michael’s Arts & Crafts.   Then, we just picked up acrylic paints in the colors we wanted.  Their grandparents are both FANTASTIC cooks (they even make their own pastas), and take turns in the kitchen cooking, or cook together.  So we thought this idea of an apron set, with the kids hands and feet prints, would be cute for them. I only took photos the night we did feet, which was first.  The kids had a good time, and never stopped smiling and giggling.

how-to-make-footprint-aprons-homemade-gifts

First, we coated the bottom of a foot really well with paint.  You need to work quickly though, because it starts drying pretty fast.

how-to-make-homemade-aprons-homemade-gifts-from-kids_1

They stepped on the apron with their painted foot, putting their weight on it. Then they lifted their foot off the apron, going straight up!

afoot

ahop2

Then they went hopping off to the tub, to wash their foot.

ahop

Our kids are color coded (from the triplets birth), so their grandparents would know anyway, whose prints were whose.

how-to-make-footprint-aprons-homemade-gifts-from-kids

They all giggled from the tickles,  while their feet were having paint put on – you might notice the firm grip on this ankle, because for some…

stickle

…it was practically torture!!!

But didn’t they come out so cute??

footprint-apron-homemade-gifts-from-kids

handprint-apron-homemade-gifts-from-kids

I wanted to keep them for myself. lol

But, I knew the kids would be HAPPY to do it again sometime.

Now, on to a related topic:   I’m not sure if anyone happened to notice the yellow on our boy’s cheek in this photo we showed above? :

stickle

That’s from a couple of days before.  I was out on a job, and when I came home and walked in, they all came running in to meet me with excitement.  That’s not unusual. But they wanted to show me what their big sister spent quite awhile doing for them….

spuppy

She did face painting for them. I was impressed with her work!!   {S and O} got something on each side of their face.  {S}, above, got that puppy on one side….

sbee

…and a bumble bee on the other.

ounicorn

{O} chose a unicorn, and…..

oflower

…a flower.

jdolphin

{J} just wanted a dolphin.

rainbow-paint-arm

And then {A} did her own arm!

She always has such creative ideas to spend time with them, and they LOVE it!

They are blessed to have her as their big sister.

Well, that’s it for this edition!  Dang….that took me a long time to get together!  lol.  We sure hope you enjoyed it, and perhaps it sparked some inspiration for you, or an idea of your own!

See you soon!!

Save

Save

Save

Filed Under: Crafts & Creations, Homemade/Handmade Gift Ideas, Kids Arts and Crafts, Kids Arts and Crafts Tagged With: denim-apron-crafts, gifts-for-grandma-grandpa, handmade-gifts-from-kids, handprint-footprint-ideas, homemade-Christmas-gift-ideas, homemade-gifts-from-kids, kids-decorating-aprons

How to Make Homemade Embossed Glycerin Soap Bars

January 30, 2009 By Laura 8 Comments

homemade-glycerine-soap-gifts_1
This was one of my personal favorite crafts we made;  Embossed Homemade Glycerin Soap Bars! It was so much fun choosing designs, colors and scents.  Yes, we know most people use soap pump bottles now.  Bars are sometimes considered too messy….but my kids make a pretty good mess with the bottles too, anyway! The thing drips all over the place.  Anyhoo…..if one MUST use the pump bottles, these are pretty enough to just sit in a bathroom and look nice!

So here are the EASY steps to making them.  I tried to combine the photos of steps, in a storyboard format.  So the steps are left to right, or top to bottom. I’ll do my best to explain the steps as well.

You will need:

  • 2lb glycerin soap block
  • soap molds
  • rubber soap embossers
  • soap scent oil
  • soap coloring
  • clear bags
  • bag ties

From Home:

  • a microwave
  • a glass measure cup

Many of these soap supplies can be found all together in the soap supply aisle at your craft store.  We always go to Michael’s Arts and Crafts.

Steps described below photos.

how-to-make-homemade-glycerine-soap_02

1) This is what a the package of the soap glycerin soap block might look like.

2)  It is scored so you can cut chucks easily, with a large knife.

3) You want to cut the chunky cubes into groups of 4.

Next….

how-to-make-homemade-glycerine-soap_03

4) Put 4 cubes of soap into a glass microwavable measuring cup.

5) Microwave for 40 seconds, take out carefully, stir, and see if it is all melted. If it needs to go in again, do so in 10 second intervals, until it’s all completely melted.

6) Stir again.

We used scents and coloring put out by Party Lite.  The oils are called Essential Oils.   They all come in little bottles, in hanging packaging. These are found with the soap supplies at the craft store as well.

So then……

how-to-make-homemade-glycerine-soap_04

7) Add 6 drops of your preferred scent. We used Green Apple.

8)  Add 3-5 drops of a chosen color. How much you add depends on how deep you want the coloring to be.

9) Stir again.

~~~

Embossing Your Soap Bars

They sell these rubber embossed designs, to lay into the bottom of your soap molds! Some soap molds come with a design embossed into the plastic mold as well.

Soap molds come in all kinds of shapes as well;  oval, octagon, rectangle, square, etc.  We went with the squares, as they fit these rubber embossers perfectly.

how-to-make-homemade-glycerine-soap_06

10) Rubber Embossers

11) With a spoon, put some dabs of the hot melted soap in the bottom of the mold.  This helps keep the rubber embosser in place.

12)  Place the embosser on the soap dabs, and gently press down well all over.

Next….

how-to-make-homemade-glycerine-soap_07

13) Start pouring the scented/colored/melted soap into the mold fairly slowly, but consistently.

how-to-make-homemade-glycerine-soap_08

14) Fill nearly to the top.  We just leave any bubbles. They mostly dissipate on their own.

how-to-make-homemade-glycerine-soap_09

As we filled each mold, we placed them on a cookie sheet lined with wax paper.

They need to set for….awhile?  lol.  We always just let them set for a day or so, or overnight, to be sure they were turned solid.  But we’re not sure how long it really takes.

how-to-make-homemade-glycerine-soap_10

how-to-make-homemade-glycerine-soap_11

As they do start to set, you will see the soap start to get less crystal clear.

~~~

The next day they’ll be set for sure.

All you need to do is work them out of the mold.  They don’t pop or slip right out, but it’s not that difficult with a little effort.  The goal is just to try and not mark up your beautiful soaps.

Once they are popped out, you just peel off the rubber embosser, and admire your COOL design on the soap! Try not to get finger prints all over them too. Especially the tops.

how-to-make-homemade-glycerine-soap_12

We just packaged the soaps with the proper size of clear bags, found in the candy aisle of the crafts store, and the fancy silver twist ties came with the bags.

how-to-make-homemade-glycerine-soap_13

“Made With Love”.  My favorite design.  Although the dragon fly and the ornate tile ones were close seconds.

how-to-make-homemade-glycerine-soap_

That’s it for this craft!!  Easy, huh?? And so PRETTY!  We think they made lovely gifts.

Trust me, they come out so nice, and smell so good!!  I love the clarity of glycerin soap, but there are other kinds of soaps you can make too. I am sure the directions are a little different though.  Naturally, with this soap making process we showed you here, there are certain steps you will not want your children to do alone;  such as any of the steps that involve the hot melted soap, or chopping with the big knife! But they can count out 4 soap cubes and load the measuring cup up, choose and add drops of scent and coloring, pop out the soaps and bag and tie them, etc.

We do hope you try making some yourselves sometime!!

STAY CLEAN NOW!  : )

Save

Save

Save

Save

Filed Under: Crafts & Creations, Homemade/Handmade Gift Ideas, Tutorial Tagged With: arts and crafts, crafts, easy-homemade-gift-ideas, embossing-glycerine-soap-bars, homeade-gift-ideas, homemade-glycerine-soap-bars, how-to-make-glycerine-soap-bars, soap-crafts

Homemade Bookmarks – Craft Tutorial

January 26, 2009 By Laura 5 Comments

crafts-copy

Hi People!

This is the first of a handful of installments, that finally show you what we were making as we crafted during the pre-Christmas season.  Now that all of the gifts have been given, we can share, and not be concerned with ruining any surprises.  But we hope that some of you may gather an idea or 2, by us posting these projects, to put on your idea list for crafting and/or gift giving of your own, next Christmas or anytime.

We tried to think of gifts we could craft, that most anyone could use. Universal, sort of gifts.  We think we did pretty well in the end.  These gifts are simple;   Simple to make (as the kids did a lot of it, with instruction and/or assistance), and simple in concept.  We did not invent any of these things, but simply put ‘our touch’ to them.  Should any of these projects appeal to you, we’re sure they’ll come out as your own as well.  So many of you are SO creative, that you will likely make them even better, or put a new twist of your own on them, that makes them unique for you.   Whatever you do, have fun!!  Remember, even if everything doesn’t come out perfect, the fact is that they were made with love!  If your recipients can’t appreciate that, then….well,… I won’t say.  But they should.  lol.  Otherwise, you might consider  ‘indian-giving’.  Ha haha!

So let’s get to it! :

You may or may not recall, that one of the headers to a crafting post was this:

homeamde- bookmarks_00

Showing any more than that would have given the project away.  But we were making…………

BOOKMARKS!


homemade-bookmarks_2

We know we love books, and we love to read.  Many people are the same.  Even if they are not big cover-to-cover kind of readers,  one may find a bookmark handy to keep their place in a recipe book, a how-to book, a magazine, a journal, their Bible…and who knows what.  So we hoped these would come in handy, in some way, for our recipients.  We did know that many do love to read, in our case.

I did not think to take step-by-step photos, since photos would have given it away.  But we think you’ll get the gist by looking at the photos of the finished bookmarks, and reading the following information.

Here’s how we made them:

Directions

First, we needed some card stock.  We found these handy pads of beautiful designed card stock in, in the scrapbooking aisle of Michael’s Arts & Crafts.  They are actually meant for making greeting cards, but they worked out to be just what we were looking for, and a good size too.  They looked like this:

homemade bookmarks

One thing we REALLY loved about these card stock pads, was that each ‘card’ was 2-sided!!  It had a different, but coordinating, design on the backside! So that means we had 2-sided bookmarks!!  Very cool. We were excited about that.

So we cut these cards into bookmark size, and marked the centers of exactly where we wanted a hole for the ribbon.

Some supplies we already had on hand that we used are:  thin satin ribbon, a Fiskar cutter (used by many scrapbookers, that make cutting straight as easy as gliding the blade).   Also, eyelets that look like this:

eyelets-brads

And an eyelet tool setter kit, which I already had on hand too, from scrapbooking with eyelets.  That looks like this:

eyelet-setter-tool-kit

It might look scary, but every piece is pretty self-explanatory as to what it does.  Included are 3 size whole punchers tips (which 2 you can see right over the l and k of tool kit, and the other is already screwed onto the handle piece, 3rd in from the right).  All you do is choose the correct size tip for the size eyelets you are using, stand it up on the card stock right where you want a hole, and tap with the hammer.  Next, put eyelet through the hole, hold it in while turning over the card, and get the ‘splaying’ tool. (I may have made that word up.  Not sure.  But it spreads the backside of the eyelet out to hold into the card.  So roll with it.)  So you put the ‘splayer’ into the eyelet back, and hammer!  This takes some real hammering, so be sure you are careful and use cardboard or something.  I used a self-healing cutting board.

Now take a piece of cut ribbon, doubled over, and  put the 2 ends together through the eyelet, and then through the loop of your ribbon.  To finish the bookmarks off, we used a corner rounder, which is also found in the scrapbooking section.

That’s it! 

No doubt, you’ll want to keep a few for yourselves too.  We did!  So Happy Reading!

All of the supplies used can be found at any Michael’s Arts and Crafts, or most any other good craft store.

If you have any questions, just let us know!!  I am always happy to clarify!

I am also used to needing to.   lol  : )

homemade bookmarks

Save

Save

Save

Save

Filed Under: Crafts & Creations, Homemade/Handmade Gift Ideas Tagged With: bookmarks, bookmarks-craft-tutorial, crafting, crafts, eyelet-setter-tool-kit, gift-ideas-for-readers, homemade-bookmarks, homemade-gift-ideas, how-to-make-bookmarks, paper-crafts

  • « Previous Page
  • 1
  • 2
  • 3
  • 4
  • 5
  • Next Page »

We are wicked happy to have you here! We hope you find much inspiration, help, humor and enjoyment here.


Archives


POPULAR POSTS

* * * * * *

SUBSCRIBE to House of Joyful Noise blog! Every new post, delivered right to your email box!


Privacy Policy

Amazon Affiliates

Never at any additional cost to you, we may earn a small commission for our endorsement, recommendation, testimonial, and/or link to any products from our website. Your purchase through our links helps support our family, while sharing with you the products we authentically use and recommend, for various ideas, and letting you know where you can purchase them. Thank you for your support!

[footer_backtotop]

Copyright © 2025 HouseOfJoyfulNoise.com · Genesis Framework by StudioPress