• HOME
  • {A}’s Chipmunk Training Archives

 Homepage

  • The Homestead
    • Home Projects
    • Home Improvement
    • Home Decor
      • Seasonal Home decor
        • FALL Home Decor
        • WINTER Home Decor
        • SPRING Crafts and Creations
        • SUMMER Crafts and Creations
    • Our Chickens
    • Gardening
    • Organization
    • Re-Purposing
    • Furniture Refinishing
    • Budget
  • Crafts & Creations
    • Seasonal Home decor
      • FALL Crafts and Creations
      • WINTER Crafts and Creations
      • SPRING Crafts and Creations
      • SUMMER Crafts and Creations
    • DIY (Do-It-Yourself) Project
    • Kids Arts and Crafts
    • Homemade/Handmade Gift Ideas
    • Holiday Crafts
    • Fan Pulls
    • Free Printable/Downloadable
    • Sewing Projects
    • Giveaways
    • Business Features
  • Recipes/FoodFun
    • Breakfast
    • Lunch
    • Main Dish
    • Sandwiches
    • Appetizers
    • Slow Cooker
    • On The Grill
    • Side Dishes
      • Soups
      • Salads
    • Baking
      • Breads, Rolls and Muffins
    • Snacks
    • Treats
    • Desserts
    • Drinks
  • Homeschooling
    • Elementary Homeschooling
      • Elementary Homeschooling READING
      • Elementary Homeschooling MATH
      • Elementary Homeschooling LANGUAGE ARTS
      • Elementary Homeschooling SCIENCE
      • Elementary Homeschooling HOME ECONOMICS
      • Kids Arts and Crafts
    • Middle School Homeschooling
      • Middle School Homeschooling SCIENCE
      • Middle School Homeschooling HOME ECONOMICS
    • Language Arts
    • Math
    • History / Social Studies
    • Geography
    • Foreign Language
    • Field Trips
    • Games
    • Nature Study
  • The Big Picture
    • Life In General
    • Celebrations
    • Faith
      • Into the Light; The Series
    • Giveaways
    • Reviews & Sponsors
  • Photography & Lettering
    • Photography
    • truck lettering
    • vehicle graphics
    • Newborns
    • Kids
    • Engagement
    • High School Senior Pictures
    • High School Senior Pictures Sneak Peeks

A Snowman Christmas Tree Ornament / Tutorial

December 3, 2012 By Laura 32 Comments

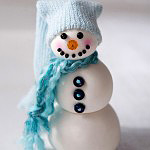
Winter used to be my least favorite season, here in New England.  But I have chosen to embrace it, for there is no doubt that there is beauty in every season, and things that I love in all of them, too.  For winter, snowmen are one of those things, to me!  I’ve just always loved them. So I thought it would be fun to make a snowman Christmas tree ornament.

  It was not only more fun than I expected, I think it came out absolutely adorable. So I’m going to show you how easy it was to create!

Here’s the simple supplies that you’ll need:
Crayola Model Magic, in White.
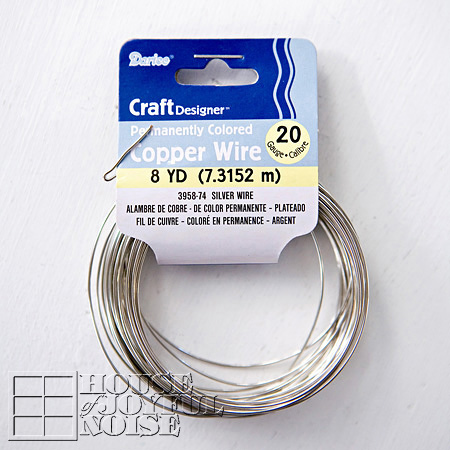
Craft wire: 20 gauge or so
Wire cutters
An old sock for the hat
Yarn – Homespun Style. (I used Lion Brand, in Waterfall)
(The sock & yarn will be your snowman’s clothing, so you’ll want to pick co-ordinating or matching colors that you like.)
Embroidery thread (*optional accent for buttons)
Black beads for the eyes
An orange bead for the nose
Flathead pins, small, like used for tailoring
Pinkish chalk
A tiny brush for the chalk.
E-6000 or a good glue, may come in handy.
Black and Orange permanent Sharpie Markers


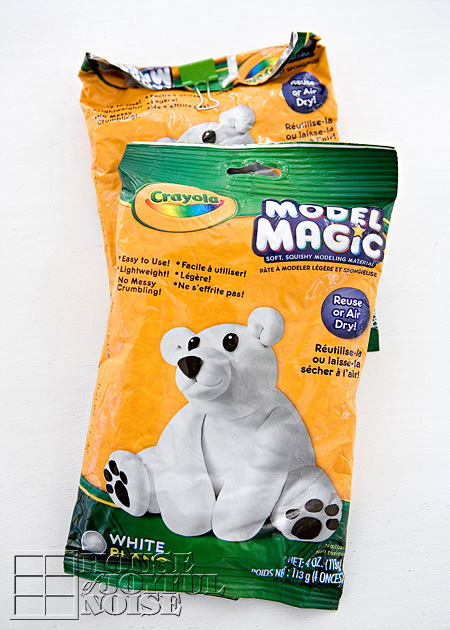
This is the Crayola Model Magic. It’s ‘modeling material’.  It’s lighter and softer than clay. And yes, it’s for kids, I guess.
Have you seen it? Have you ever played with it? It’s great stuff!
–

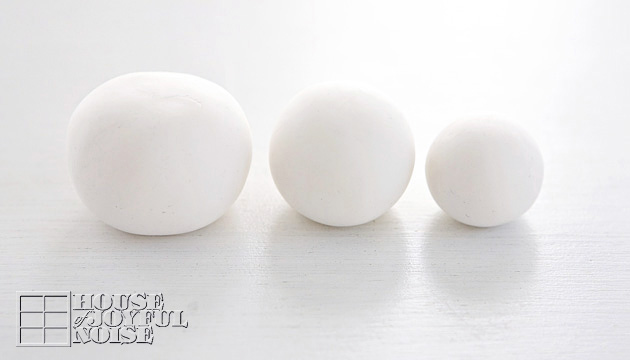
Take a chunk of the Model Magic into your hands, and roll three balls each smaller than the other. These are the body parts of the snowman: lower body, middle, and head. So size accordingly. My bottom body ball is about 1-1/2″.  Now I’m sure you’re dying to, but don’t build a snowman yet!!  You’ll put them all together in a couple of steps.


Cut about an 8 or 9 inch piece of wire.
Straighten it out as best you can, and then bend it into an L-shape, folding at the middle.


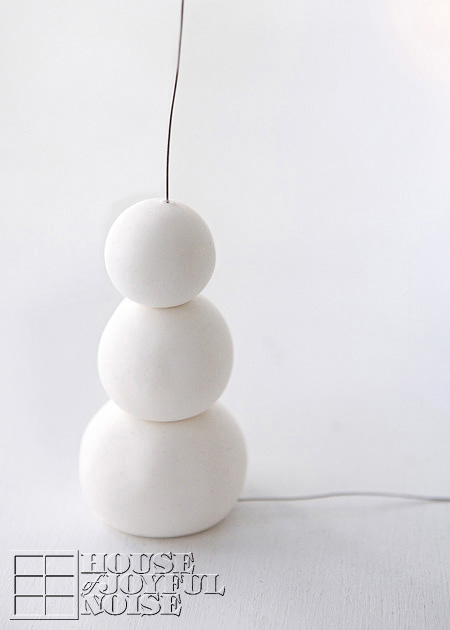
Now, thread the wire up through the center of the big ball first. then middle size, then head, really trying to keep it though the center of the ball and piling them neatly, as shown in the photo above.  Why are we using the wire? Well, the modeling material actually sticks together pretty well. But the wire, which will be cut again in the coming steps, serves two purposes: It gives the whole snowman core stability for years of use and packing and unpacking, and we’ll also be making a loop at the top to hang the ornament from at the top.
–


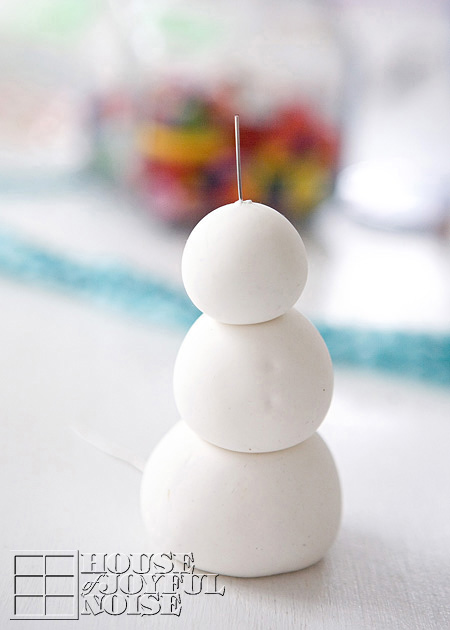
Using your wire cutters, cut the wire at the top leaving an inch or 1-1/4″ or so.
–

Then using the nose of the pliers, twist the wire into a loop.
There is still the long wire off of the bottom, but let’s leave that for now. I felt like it just helped the snowman stand up while I was working on him.
Let’s make his hat now. Shall we?

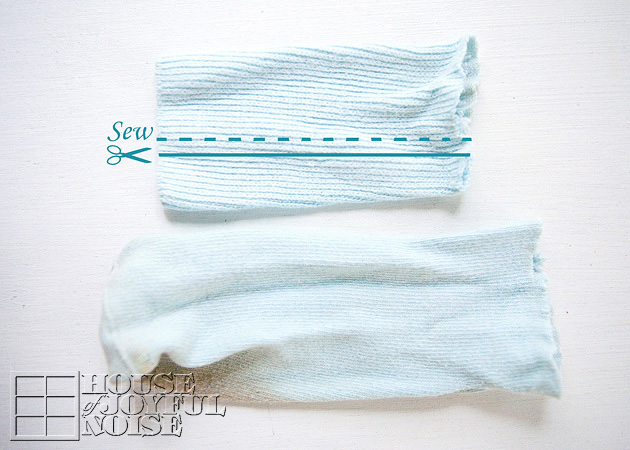
Cut the ankle part of your sock off of the foot. The ankle/ribbed part of the sock will be the hat. Lengthwise, cut about 1/3 off, as shown in photo.  This makes the hat narrower, as you need.  You can check for sizing on your snowman head first before you get sewing.  Now, fold it the opposite way to get ready to sew it closed along where you just cut, because you’ll want to sew it inside out so the stitches later will be on the inside.
Now you all may use a sewing machine if you’d like. But I just stitched it by hand quickly.


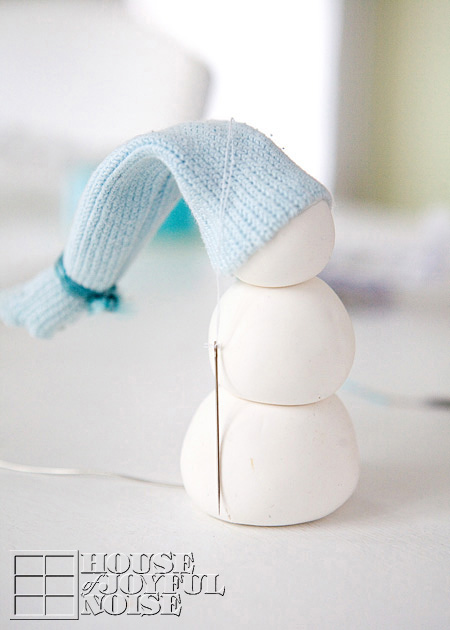
I tied off the cut end of the hat, with a matching piece of yarn.  And put the finished edge over the head.
But first, I put some thread through the wire loop, and then threaded a needle with both ends of the thread, to pull it up through the hat, so it can be hung on the tree.
And I also did something else before putting the hat on . . . . . .


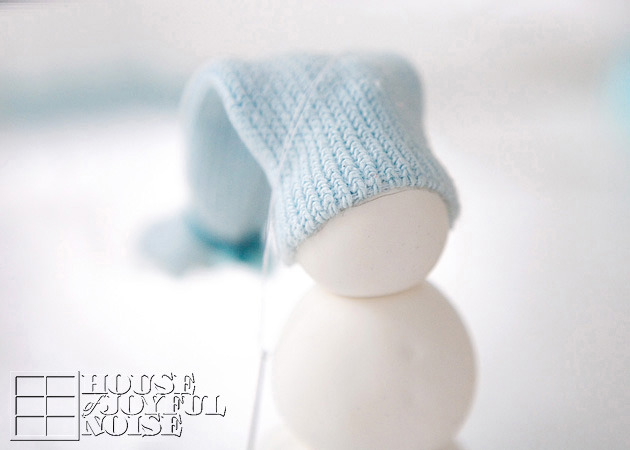
Do you see that light pencil line right under the hat brim?  Right above there I put a dab or few of E-6000 (you can use any glue), before carefully pulling that hat over the head. Just to secure the hat, so it doesn’t keep slipping off the head while being handled over the years.
The needle can be taken off now, and just tie the ends in a knot. As I said, you’ll use the thread loop to hang it on the tree.

Face time!

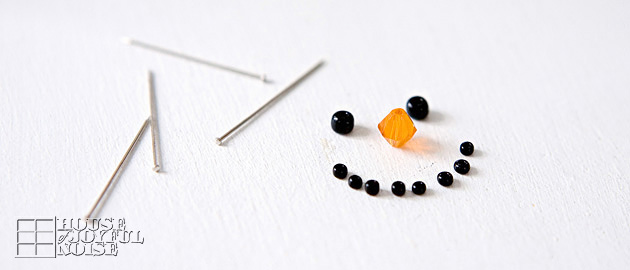
Call me an over-planner, but I laid my face out in beads on the table first. Hey, it’s the distance of our features, and the curve of our smiles,that make us uniquely looking like US.
Same thing with snowmen! They are individuals too!  What a perfect orange bead, for a pointy nose, huh?

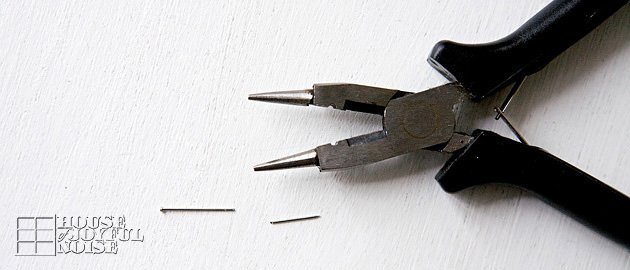
For every bead you have, cut a flat head pin to shorten the unnecessary length.


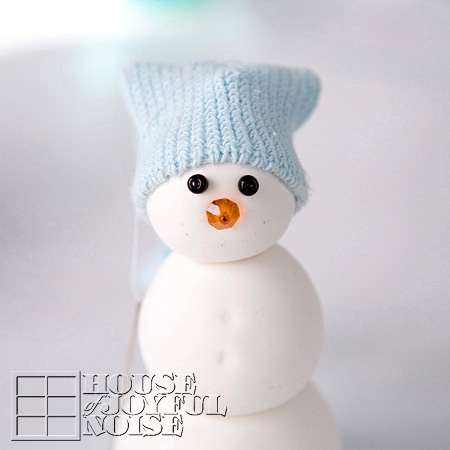
Again I laid out in pencil dots, exactly where I wanted each bead, to form his face.
Much like Mr. Potato head, just put a pin through a bead, and stick it into the snowman head.
(Mr. ♪ Snowman ♫ head ♪ , I-love-you! ♪)

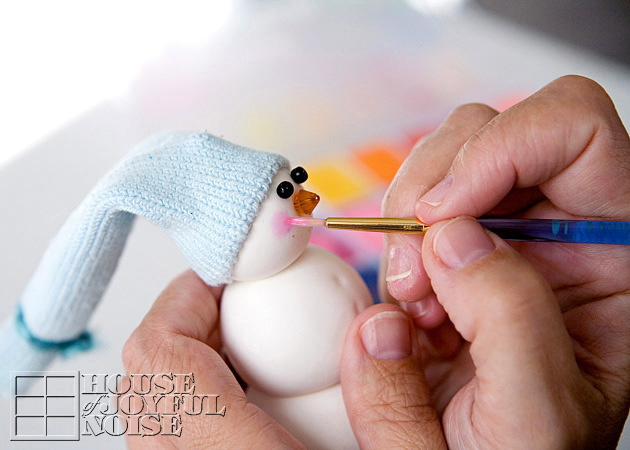
I waited on the mouth, so it wouldn’t be in my way to apply some pink blushing cheeks!

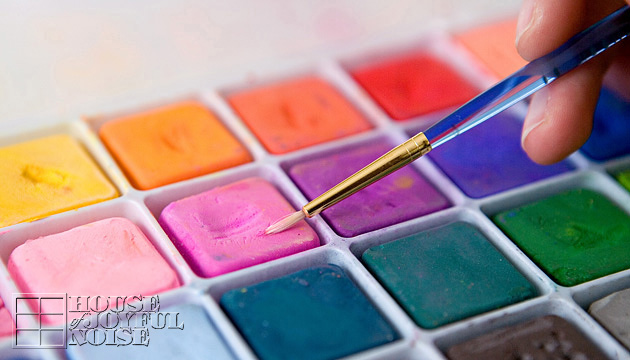
You can use any pink colored chalk dust. I just happened to have this chalk palette, and used a tiny pointed brush.

Have you ever heard the saying, that you can always tell someone’s age, by looking at their hands?
Right.  I’m like, 106.


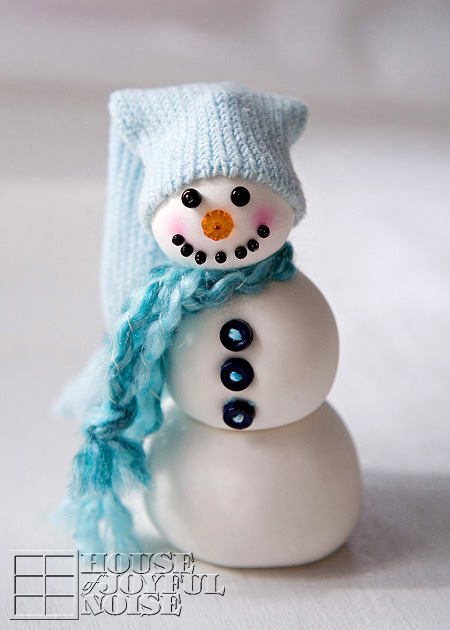
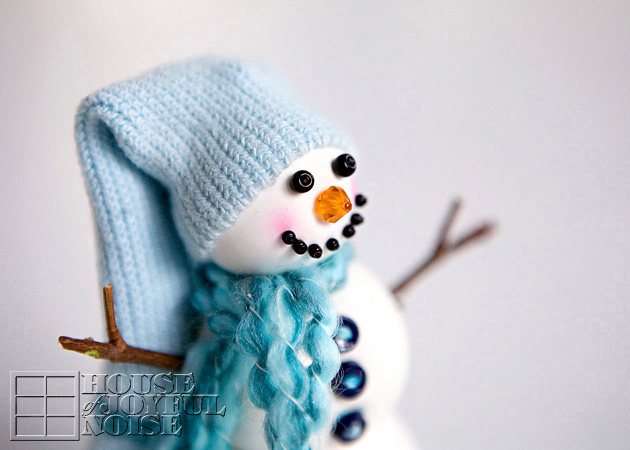
The mouth is all added.
Now here’s another tip:  The flat-head pins are silver, right?  So, my snowman looked like he had braces! Nothing wrong with braces. But it wasn’t the look I was going for. So I used a black permanent Sharpie marker, to color it. And an orange Sharpie for the nose. Worked well enough for me!

Buttons:  I used some teal colored embroidery thread, to thread my buttons. Then, because my holes were filled and I couldn’t put pins through them, I just used a dab of my E-6000 again, and just pushed them right into the soft modeling material.
Scarf: 3 equal length pieces of the homespun yarn, knotted on both ends, and tied around his neck.

Once you’re done crafting your snowman, or sooner, you can take your wire cutters, and cut the wire extending way out from under the snowman. Leave the L shape, so your snowman doesn’t slide off.  But it doesn’t need to be so long. Cut it short enough so it’s hidden underneath.

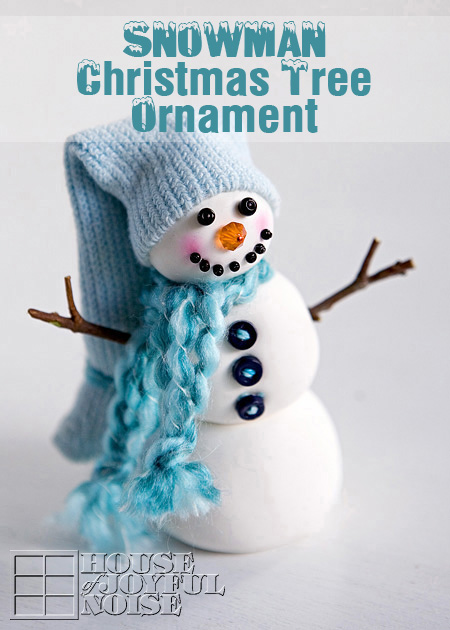
So how does he look?

Cute, right?
I added little stick arms, because seeing snowmen with no arms gives me a little anxiety.
I mean….HELLO!  What if he had an itch?

Let’s try him out in the Christmas Tree.


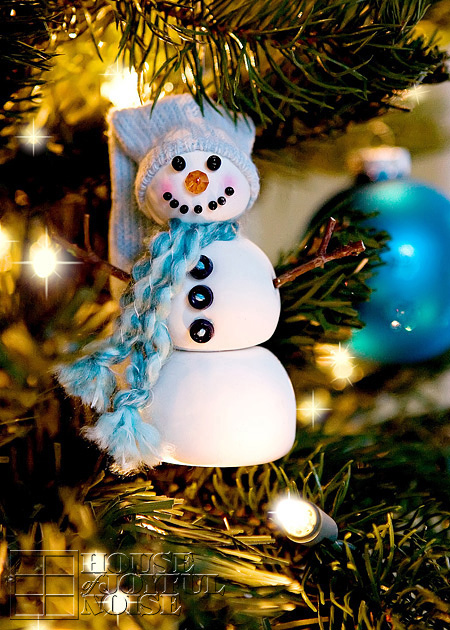
I think he looks right at home!
And he is.

Another cute idea if you’re ambitious: You could make a whole family of snowmen, and put them all together on a tabletop.

I hope you enjoyed seeing my ornament, and how I made him.  It really was fun, just like building a snowman really is. Without the cold. ; )
You can do this!
What do you think?
* * * * * *


Please come follow me here and there:

Save

Filed Under: Crafts & Creations, Holiday Crafts, Seasonal Crafts and Creations, Tutorial, WINTER Crafts and Creations Tagged With: Christmas decorations, Christmas-crafts, Christmas-ornament-crafts, Crayola-Model-Magic, Crayola-Model-Magic-crafts, handmade-Christmas-ornaments, handmade-Christmas-tree-ornaments, holiday-crafts, snowman-crafts, snowman-ornaments, snowmen

Christmas Advent Calendar Idea for the Home

November 25, 2012 By Laura 9 Comments

        As I type this post, it’s the end of the weekend following Thanksgiving, and the last weekend of the month of  November.  For many families, this is the weekend their home gets decorated for Christmas!  While it probably would have been nice to share this idea with you just a little sooner, I personally prefer to get past Thanksgiving, before I can (or even want to) focus on Christmas.  That being said, there still are several days to spare before the first of December is here, so you still have time to do this simple and beautiful idea, for a Christmas Advent Calendar in your home.  This idea is something I created  two years ago, and I thought I’d share it with all of you, in case it’s something you’d like to try for your own kids.


If your a frequent visitor here at our blog, you may have seen us decorate our french doors like this before.  Using door length ribbons, and placing a decorative element on the ribbon strand in each window, I call these ‘fancy strands’.  I’ve made them for the season of spring, and also Halloween. So this project started out with the same single intent of dressing up our French doors, in this case for the festive season winter, but immediately turned into the idea of using it as a home Christmas Advent Calendar for the kids. For us, December and the the Christmas Advent Calendar is not so much about the countdown until Christmas Day, but celebrating the whole season each day.  This idea made every day really fun for our kids.

You don’t need French Doors in your home, to adapt this idea!
You can do the same thing using other areas or parts of your home. Some suggestions are using regular doors, a large wide window, the banisters of the stairs in your home, or even a wall.  Look around your home and find your options, and then just make it work for you!  In addition, you can create this using any theme or colors. You may want to use red and green ribbon, with paper gift elements, or gold ribbon and ornament shapes.  The theme and look of it is part of the creative fun.  I wanted mine to work throughout winter. When Christmas was over, we simply peeled off the numbers on the windows, and the strands stayed through February or so.

I’m going to tell you how I made this Advent Calendar so simply.


The snowflakes were fun to make. I actually did not just buy them this way.  The white paper snowflake alone, are die-cuts I bought packaged loose, in the scrapbooking area at Michael’s Arts and Crafts.  To give them some sparkle and make them more beautiful, I also found sticky some snowflake-ish elements of glitter and rhinestones, and put them together to make my own specially designed snowflakes. So easy and fun, creating each one!

I chose blue ribbon for my winter theme, and placed a single 1-piece length from the top to the bottom (underneath) of the door, down each row of window frames of my doors.
I measured the height of the doors, and made sure I bought enough ribbon spools for 6 whole full lengths. We have 30 window panes, so plenty for the 25 days until Christmas.


To number the Calendar for the days of December, we cut small white vinyl numbers, and simply put them on the glass besides the upper-right of each snowflake.
However, if you are creating your advent calendar elsewhere in your home, the number can certainly be put ON the paper elements.
On front side of the snowflakes, it’s just pretty.
But on the backside, it was designed to serve a purpose.


When attaching the snowflake to the ribbon, I was sure to put two dabs of glue; one at top of the snowflake, and one on the bottom, leaving a space without glue in between.


Did you notice the little slip of paper slid under the ribbon? There was one for each snowflake, and each little slip expressed something different for that day.

Again, we’re simple folks. Our holidays are kept pretty simple too, and our days of any season are focused on faith and our family. For Christmas, it’s about pondering and celebrating Jesus’ birth, the time we spend together being creative, making things for others, and generally just having fun together as a family.

So our slips of paper behind each snowflake reflected those kinds of things.  Some were a surprise activity for the day: maybe a task for serving others. Some were a small treat, and others were a Scripture to remember and reflect on. A good variety of that kind of thing. Again, you can come up with what you want for your family, throughout the month of December, as you prepare for Christmas, and enjoy the season.  


Just type up a list in small print on your computer, skipping a line in between, print it out, and cut them into strips to fit behind your elements.

The kids took turns taking out the slip and reading it to the others each morning. That way they knew what was in store for the day.
It really takes very little to get our kids all excited. You would not believe the fun we have each year, just driving around neighborhoods checking out people’s home Christmas lights and displays, with our cocoa and snacks!


The big snowflake represents December 25th – Christmas Day.

I thought it all came out very pretty, and of course the strands themselves are reusable again every year.
It takes no time at all to cut out some new little numbers, and apply them.  The slips of paper can be used again if they re saved as well.
Mix them up, add new ones, or create a whole new set. I like to keep our kids on their toes.


This Christmas season, make the most of every day with your family, and keep the spirit and love of what Christmas is truly all about, alive in your hearts and homes.
We hope you find this idea inspiring. Thanks for coming by.

* * * * * *

Please come follow me here and there:


Save

Filed Under: Crafts & Creations, DIY (Do-It-Yourself) Project, Holiday Crafts, Home Decor, The Homestead Tagged With: advent-calendar-craft, advent-calendar-for-the-home, advent-calendar-ideas, advent-calendars, Catholic-blogs, Catholic-families, Christmas-advent-calendars, Christmas-craft-ideas, Christmas-decorating, December-home-decor, door-advent-calendars, home-advent-calendar, homemade-advent-calendar, how-to-make-an-advent-calendar

Thanksgiving Place Card Holder Turkey / Free Personalizable Place Cards Printable

November 17, 2012 By Laura 9 Comments

I’m so happy to offer you some free printable designs I created just for you:
Thanksgiving Place Cards

 as well as an adorable turkey craft to hold the cards, or as beautiful added detail to your table, if you’d like.

Thanksgiving is only days away.  If you are still scrambling to add a little ‘fancy’ detail to your Thanksgiving table setting, here’s an idea for you.  This idea is one I came up with for my own Thanksgiving table setting from last year that I never got a chance to share with you all.  Our guests loved them, and hopefully you will too.

Turkey Place Card Holders

I think they are just simple, yet classy and beautiful looking.  They are easy to make, and require minimal supplies.  It’s so easy, there is no point in even showing you how to make them, when I can simply tell you in a few words:

I got a net bag of plain, natural pine cones at Michael’s Arts & Crafts.  They are for crafting and decor. I recommend not using the pinecones from any kind of potpourri, because they can be so strongly scented, and really clash with the otherwise enjoyable aromas of your Thanksgiving dinner.

The feathers were also bought at the same craft store, and come loose in a clear, flat cellophane bag.

The kids and I simply put some glue right between the last two rows of blades, on the backside of the second to last row. Then we simply stuck the feathers onto the backside there, starting in the middle and working our way outwards to the sides,being sure they were facing forward, and fanning nicely as we worked across. That was it!  These particular feathers are very fine, so it took just a little patience.  But I chose them because I loved the colors in them. We used toothpicks to be able to maneuver the feather into the position we wanted on the still wet glue, without using our fingers and getting glue all over them.

I made them to be place card holders, so I needed to make some of those too . . . . . .
. . . . . . and I’m going to share that customize-able printable with you too, so you can have your own personalized settings like this.
I printed them out on sheets of card stock that a variegated warm beige color to it, rather than bright white.

  Of course you also have the option of putting the place card on the table, beside the turkey, as seen in the photo above.

We also did something special on the inside of these place cards
; and so this is another idea or suggestion for you:
In light of Thanksgiving, and being most thankful for the blessing of those we love, the 6 of us in our family wrote a little something on the idea of each person’s card, expressing something about that person that we love or are thankful for.  It was an unexpected surprise for those joining us around the table this holiday; my father, brother, and a family friend. And I’ll tell you what; they all cried, finding more inside, and reading it!  The kids wrote the sweetest things.

If you would like to add a more whimsical flair to your turkeys like these, for just the kids or for everyone, you could add some googley eyes on white cardstock, and an orange waddle with felt, foam or construction paper.  I just happened to love the more subtle indication of a little turkey.
–

Free Thanksgiving Place Cards Printable

O.k., here is the customizable/personalizable place cards printable I promised you, but you must get it using one of the links to the downloadable file (you choose) below . . . . . .

PSD FILE:  This version is still in layers.  If you use Adobe Photoshop or any other program that works with PSD files, you can add in each persons name, to personalize each card. The color for the font is hexcode #6f3014, and the font style I used is Cecily.  I forget the font size, but if all I just mentioned didn’t go over your head. I’m sure you’ll figure it out. Ha ha.
-or-
JPG FILE:  This version is flattened, and ready to print as is. You can simply write in each person’s name with a marker.
Specs:  8.5 x 11 printable – Use same size card stock; I’m suggesting a light and warm or compatible color, perhaps that goes with your table setting.

And now for a little Giddy-Diddy:

If you love this idea . . . . .
Just SHARE it however you do!
But most of all please know this year . . . .
We’ll be giving THANKS for YOU!

* * * * * *

Please come follow me here and there:


Filed Under: Crafts & Creations, FALL Crafts and Creations, FALL Home Decor, Free Printable/Downloadable, Holiday Crafts, Home Decor, Kids Arts and Crafts, Seasonal Crafts and Creations, Seasonal Home decor, The Homestead Tagged With: crafts, free-printables, holiday-crafts, November-crafts, pinecone-crafts, place-card-holder-idea, printable-Thanksgiving-place-card-holders, Thanksgiving, Thanksgiving-crafts, Thanksgiving-free-printable, Thanksgiving-place-card-holders, Thanksgiving-table-decor, Thanksgiving-table-setting-details, turkey-craft

A Small Gift of Thanks | Thanksgiving Printable

November 5, 2012 By Laura 3 Comments

Thanks_

(2012)  We’ve had this blog going for over four and a half years now.  Some of you have been following from the beginning, some of you joined us somewhere in the middle along the way, and some of you are new friends.  It’s been slow-growing!  The number of our readers have probably grown more than ever this year, and that’s likely because I (Laura) have put more time into it.

No matter when you happened to join us, we want you to know we truly appreciate every one of you. For your friendships, your visits, your comments, your sharing, and your encouragement.  We just love creating, all kinds of things as you know.  It’s in our blood.  But being able to share it with you all, adds a whole new element of joy to it, for us.  Especially when any one of you find your own self inspired, and get doing some creating of your own!

With the Thanksgiving season upon us, we just thought it was another fine opportunity to say thank you. And to offer you just a little token of our thanks. It really is just a little thing, today. Still, we hope you love it.  I designed this printable with my photography, and a Scripture quite fitting for the season of gratitude.  There are two sizes, and many ways you are welcome to use it.  I’ll share some ideas below.

*Please note that to PRINT these, either with your high quality printer or at your photo printer’s, you’ll need to download the full resolution file from the links I provide you with below. To use the images for any web purposes, you can simply save the images below, right from the post. The image IN this post cannot be printed, as they are not sized accordingly. (In other words, they would be very poor quality printed.)  And if you don’t know these things and didn’t read this, you’ll be wondering why it came out so bad, and probably blame your printer.  ; )

WEBONLY-Thanksgiving-Scripture-quote
To Use on Web
: You can save the image above to your computer, for use on your Facebook to share, as your computer screen saver, to send to others as a Thanksgiving Card wish, or any other web use you can think of.
To PRINT or have printed as a 5×7 photo, download the high-quality image at the following link, and be sure to print at best quality as well:    5×7 Link for Full Resolution Image
(Use Download Button there, after clicking through the link.)
You can have it printed as 5×7 photo, frame, and place on your Thanksgiving table, or around your home as a Thanksgiving decor accent.  You can also use the photos to mount onto 5×7 blank cards, and send them as beautiful custom Thanksgiving cards in the mail, with your message written inside.  Or get crafty with it!

WEBONLY-SMALL_Thanksgiving-Scripture-quote2
To Use on Web
: You can save the small image above to your computer, for use as your phone background, to put in the sidebar of your blog as a Thanksgiving greeting/decor,  or any other web use as this small image that you can think of.
To PRINT or have printed as a 3″ x 2.143″ photo, download the high-quality image at the following link, and be sure to print at best quality as well:  3 x 2.143 Link for Full Resolution Image 
(Use Download Button there, after clicking through the link.)
You can have several of these small versions printed on one sheet, if you’d like.  Or print as a single small image, to create a magnet, or make tags to attach to Thanksgiving (host?) gifts such as baskets, or a bottle of wine.  Just punch a hole in the corner, and tie on with ribbon. Or come up with something crafty and creative with this small version.

Again, please go to the links provided to use the image for any printing purposes.
For web uses, you are welcome to save the images above to your computer.

They are all yours! Hope they help you spread the love and thankfulness in your hearts, this Thanksgiving season.

. . . . . .

Come follow me here and there:

Save

Filed Under: Crafts & Creations, Free Printable/Downloadable, Holiday Crafts, Photography Tagged With: Collosians-4:2, Thanksgiving, Thanksgiving-free-printable, Thanksgiving-gift-tag, Thanksgiving-Scripture-quote, Thanksgiving-table-decor

Halloween Craft | A Dripping Paint Pumpkin

October 8, 2012 By Laura 42 Comments

000_

 Last year for the Halloween/Hallowtide season, I went bat **** crazy (no Halloween-pun intended ;), with the decorating, inside and out.  I did a huge photo-galore post on it, and it’s a popular one, come that time of year again. There is some real creativity there, for you to see. This year, however, I didn’t need to do much of anything, because I have all of last years stuff! So I’ve mostly just been doing little fall-fun crafts, and baking. I did however, decide I wanted to do a little pumpkin project I thought of, and I thought I would show it to you all, and tell you how I went about it.

001_faux-pumpkin
I started with a medium sized faux craft pumpkin.  You absolutely can use a real pumpkin if you’d like, but obviously it will not last beyond this season. So if you want your pumpkin craft for keeps, than faux is the way to go!

I also covered my table as always, to protect it, with a cheap party table cloth, of which I always have a bunch on hand from the Dollar Tree store.  Unless they get real messy (and it sure will this time), you can use them over and over.  Of course old newspaper or something else disposable will do.

002_halloween-faux-painted-pumpkin-craft I cut out an appropriate sized BOO! for my pumpkin, out of vinyl.  I don’t know why, but I have always loved the whole BOO thing, for this time of year. Probably because it’s so . . . . . . childish. Elementary. You know, not a serious scare kind of thing, because I’m really not into that.  Anyhoo, you can use any kind of graphic or word(s) you’d like for this project.  Use your imagination and put some of your own style into it. Or, you can copy my BOO, and I won’t BOO-HOO about it.

003_halloween-faux-painted-pumpkin-craft
So I properly positioned my vinyl design and applied it to my pumpkin. Now you’ll notice it’s got wrinkles in it all over the place. That’s ok!  My husband is a professional master with vinyl (for real), but I’m not so much.  Of course it’s harder to apply to curving surfaces but anyway, but also, I wasn’t extra careful either because this is just a mask! I am using the vinyl to protect the pumpkin for where I do not want paint, and will later be peeling the vinyl letters back off. So any wrinkles did not concern me.  I just made sure I went over every area of the vinyl with a lot of pressure with my squeegee.  (As seen in the next photo.)

004_halloween-faux-painted-pumpkin-craft
What I did want to be concerned with, was doing my best to close any gaping holes that formed at the edge of the vinyl where wrinkles were.  Because I didn’t want paint to get under there.  If you do this project, you really want to do your best to seal down the vinyl edges. Especially at the top!  Chances are paint is going to get under the vinyl somewhere, but the better you have those gaps closed off, the less clean-up on the pumpkin later.  You’ll see what I mean in a little bit.

005
Black was the only color paint I’d be using, and I had two partial bottles in my storage. So I just mixed them up together in a glass measuring cup, because the spout on the cup would be coming in handy.

006_halloween-faux-painted-pumpkin-craft To begin the painting process though, I used a flat brush and painting out the top.  I imagine a foam brush would work fine enough as well.

After I had painted out the top all the way around, it was time to get messy. Thank goodness for the table cloth.

007_halloween-faux-painted-pumpkin-craft
I just started pouring paint onto the pumpkin, right out of my cup, starting on the black where I had already painted black, and about the level where gravity would take over the paint. Because getting the paint dripping is the whole goal here.

008_halloween-faux-painted-pumpkin-craft
And it was working for me. : )  Now….depending on the consistency of your paint, you may want to add water to it just a drop or 2 at a time, to thin it a little of you need to at all. But really just a drop or 2 at a time, and test it, because you do not want it too thin and runny.  I really loved the look of my pumpkin right there in this photo!  lol. The 3 dimension of the paint was giving me new ideas!  But, for my original project plan here, I needed the paint to cover my lettering, and yet still have a drip look to it.

009_halloween-faux-painted-pumpkin-craft
So I really got the drip factor going. You see how messy this is getting? Oh . . . you haven’t seen anything, yet. LOL.  As cool as this looked, I knew peeling the letters off with even this amount of paint, would leave it unable to read.

010_halloween-faux-painted-pumpkin-craft
So I just kept adding paint, and helping it along to drip, with my brush when needed.  The paint tended to puddle on top of the pumpkin too, so I helped that out and down. And, as the paint dripped onto the table, I kept moving the pumpkin back out of the paint-puddle.  I really wanted the dripping to be evident after the word, which didn’t leave me a lot of room. So I was sure to have the drips starting from higher all around the word, on the sides of the pumpkin.

Basically at this point, I had to leave the paint to dry a little. Not bone-dry.  But dry enough to be able to peel out the lettering.

011_halloween-faux-painted-pumpkin-craft
Just awhile later, I did peel out the vinyl. I used the tip of an x-acto to do that.
Now, you can see it’s a bit of a mess.  It’s obvious where the paint did indeed get under the vinyl and onto my ‘negative space’ word.  But no worries:  I just used damp q-tips to clean it off.  It took a few q-tips in some areas, and sometimes a little scrubbing with it, but it worked well enough.

012_halloween-faux-painted-pumpkin-craft
Much
better, don’t you think? Not perfect, but cleaner lines.  There is still something that bugged me though . . .

013_halloween-faux-painted-pumpkin-craft This little spot is where the paint over-dried at the vinyl edge, so when I peeled off the letter B, a little paint peeled off right there.  So to fill that area in, I could have just touched it up with paint. But I didn’t. I just used a permanent black Sharpie marker to fill it in there.  And while I was at it, I went around any areas on the insides of the letters, where it could have used a cleaner line edge. I cheated. Oh yes I did.  All over the place.

And I had to paint the stem a better brown; because whatever that color was that it came as, was not working for me!

It never did become perfect, and that was o.k. with me. Because I am working on embracing imperfections since, let’s face it….I can be a hot mess some days. And there is only so much time in a week!

014_halloween-faux-painted-pumpkin-craft
So I called it DONE, and put it on simple display, with a little bale of hay and little sugar pumpkins from my mother-in-law, and I think it came out rather cute.
So BOO!
What say YOU?!


Save

Filed Under: Crafts & Creations, FALL Crafts and Creations, Holiday Crafts, Tutorial Tagged With: craft-pumpkin-craft-project, creative-pumpkin-ideas, Halloween, Halloween-crafts, pumpkin-decorating-ideas, pumpkin-painting

  • « Previous Page
  • 1
  • 2
  • 3
  • 4
  • 5
  • …
  • 8
  • Next Page »

We are wicked happy to have you here! We hope you find much inspiration, help, humor and enjoyment here.


Archives


POPULAR POSTS

* * * * * *

SUBSCRIBE to House of Joyful Noise blog! Every new post, delivered right to your email box!


Privacy Policy

Amazon Affiliates

Never at any additional cost to you, we may earn a small commission for our endorsement, recommendation, testimonial, and/or link to any products from our website. Your purchase through our links helps support our family, while sharing with you the products we authentically use and recommend, for various ideas, and letting you know where you can purchase them. Thank you for your support!

[footer_backtotop]

Copyright © 2025 HouseOfJoyfulNoise.com · Genesis Framework by StudioPress