• HOME
  • {A}’s Chipmunk Training Archives

 Homepage

  • The Homestead
    • Home Projects
    • Home Improvement
    • Home Decor
      • Seasonal Home decor
        • FALL Home Decor
        • WINTER Home Decor
        • SPRING Crafts and Creations
        • SUMMER Crafts and Creations
    • Our Chickens
    • Gardening
    • Organization
    • Re-Purposing
    • Furniture Refinishing
    • Budget
  • Crafts & Creations
    • Seasonal Home decor
      • FALL Crafts and Creations
      • WINTER Crafts and Creations
      • SPRING Crafts and Creations
      • SUMMER Crafts and Creations
    • DIY (Do-It-Yourself) Project
    • Kids Arts and Crafts
    • Homemade/Handmade Gift Ideas
    • Holiday Crafts
    • Fan Pulls
    • Free Printable/Downloadable
    • Sewing Projects
    • Giveaways
    • Business Features
  • Recipes/FoodFun
    • Breakfast
    • Lunch
    • Main Dish
    • Sandwiches
    • Appetizers
    • Slow Cooker
    • On The Grill
    • Side Dishes
      • Soups
      • Salads
    • Baking
      • Breads, Rolls and Muffins
    • Snacks
    • Treats
    • Desserts
    • Drinks
  • Homeschooling
    • Elementary Homeschooling
      • Elementary Homeschooling READING
      • Elementary Homeschooling MATH
      • Elementary Homeschooling LANGUAGE ARTS
      • Elementary Homeschooling SCIENCE
      • Elementary Homeschooling HOME ECONOMICS
      • Kids Arts and Crafts
    • Middle School Homeschooling
      • Middle School Homeschooling SCIENCE
      • Middle School Homeschooling HOME ECONOMICS
    • Language Arts
    • Math
    • History / Social Studies
    • Geography
    • Foreign Language
    • Field Trips
    • Games
    • Nature Study
  • The Big Picture
    • Life In General
    • Celebrations
    • Faith
      • Into the Light; The Series
    • Giveaways
    • Reviews & Sponsors
  • Photography & Lettering
    • Photography
    • truck lettering
    • vehicle graphics
    • Newborns
    • Kids
    • Engagement
    • High School Senior Pictures
    • High School Senior Pictures Sneak Peeks

How to Build a Wood Stove Bench – Part III – Finished

July 8, 2009 By Laura 1 Comment

How to Build a Wood Bench

For those of you who have been following our blog for awhile, you’ll know how this post is a little late coming.  The project was done quite awhile ago – we just didn’t get to posting the last part of the project.  Not sure if anyone has literally been following this project to build a bench of their own anyway.  If so….we’re sorry!!

For the rest of you, who may be new to our blog here, or missed these project posts before, we can catch you up with links, and a brief explanation:   We were using a silly footstool at our wood stove over the winter, to sit upon as we loaded wood into the stove, or poked the fire some.  Eventually, I had mentioned that I thought Michael should build us a real rustic bench enough times, that he got to sketching.

Here are Parts I and II of this project:

How to Build a Wood Stove Bench – Part I

How to Build a Wood Stove Bench – Part II

So, where were we?   Oh yes.   Michael had completed building the bench, and it just needed to be sanded some, primed, and painted.  (And I prefer….sanded a little again, for that older look.)

The primer we used was a mixed color that, actually, was not quite the color we were going for.  I wanted a medium brown that had some gray in it.  But it came out looking more like…..medium gray-brown with some purple in it?

How to Build a Wood Bench

It was a Sunday when we had gotten this primer.  Michael had them mix it up at the little local hardware store.  By the time we popped open the can, the store was closed.  We had gotten the primer that day, for our unfinished farm table we had gotten for the sun room.  I was eager to do the project that day, so we used the primer anyway, and it turned out to be fine.

Like the bench, we were painting the table white anyway, in the end.  The reason the primer color mattered any, was because I like to sand the corners and edges of the piece of furniture, to give it a worn old look.  Most times we sand right down to the wood anyway, but in parts the primer does show.  But it is so subtle, you couldn’t pinpoint the color.

So, after a quick sanding of the bench, Michael got to priming.  It wasn’t important to us to have it super smooth, so if it would be to you, you’d want to put more time into that, until it is as smooth as you’d like it all over.  We pretty much got right to priming.

How to Build a Wood Bench

Once it was primed all over, and the primer had dried, he filled in the screw holes some with filler, and got to painting it white.

How to Build a Wood Bench

I helped, with a brush of my own, in between taking photos. : )

How to Build a Wood Bench

Once it was painted all over, dried, and got a second coat dry, Michael sanded the edges and corners some, to make the bench look older and worn, as I had told him I wanted.

How to Build a Wood Bench

And when he was all done, I did it again. : )  He just wasn’t aggressive enough for me. I wanted it OLDER and MORE WORN than he had accomplished.  But ….it’s a preference thing.

How to Build a Wood Bench

That’s better!!  We did the same with our farmer’s table in the same room, so they kind of go together.

So now, the bench was finally done, just in time for……………SPRING??  lol

But, we did have a few very cold and rainy days and nights in early spring, that we got a cozy fire going.

How to Build a Wood Bench

How to Build a Wood Bench

So much better than the footstool….don’t you think??  That thing was barely accommodating to the backside of myself.

Remember, you may not need a wood stove bench, but a bench like this can be used in any room of the house.  For taking off and putting on shoes in a mudroom.  By a window for some light reading.  In the bathroom for putting down your fresh clothes and towels.  Or outdoors under a tree, on your deck, or by an outdoor fire pit! I’m sure if you’re needing a rustic bench, you know the perfect spot for it at your home.

We hope you enjoyed this home project, however sporadic. Sometimes, we’re just pleased with ourselves, that we finished a project, even if it did take longer than we had originally planned!

Save

Save

Save

Save

Filed Under: Crafts & Creations, DIY (Do-It-Yourself) Project, Home Projects, The Homestead Tagged With: build-a-bench, build-it-yourself-wood-bench, how-to-build-a-wood-bench, wood stove bench, wood-bench-plans

Our Baker’s Dozenth Birthday – Our Oldest Kiddo

July 7, 2009 By Laura 3 Comments

{A} turned 12 years old on Sunday. She’s our oldest kiddo. And our baker.
We thought we’d share with you a bit about her day, while more importantly, documenting this special day for her, when she’s older. aspancakewishduo Her birthday morning started out as all birthday mornings do around here…..with the birthday pancakes, of course.  Daddy always makes birthday number pancakes, usually by cutting out the numbers.   But this time he surprised us all, with yet another twist of his pancake creativity.

bdpancake

If you’d like to use this idea for a special birthday celebration in your own family sometime, how he did this is too easy to believe.  He just took a sharp razor, and very gently cut the numbers through just the very, very top of the pancake, and peeled off the surface of the numbers.  That’s it!! Easy.

If you’re wondering, once in awhile our kids do have butter and syrup on their pancakes. But most times they love just eating them with strawberry yogurt.

I remember the night of laboring with {A} very clearly.  Getting to the hospital, through the fireworks traffic was no small task.  Of course, being a first time mother, panting through what sure felt like intense contractions to me, I was sure she was coming out any second. I always laugh at that memory, as I learned with the passing of time, that I wasn’t feeling much of anything yet, compared to what was coming! One LONG night of labor, with contractions that intensified and multiplied by the hour! A pure, natural, drug-free labor rewarded me well at 10:08 a.m. , with the most beautiful and sweetest little face I had ever seen in my life.

scard

She truly kick-started our journey of parenthood that day, and we could never have imagined the ride she would take us on.  The transformation of watching her grow, learn, grow, shine, grow, create, grow, give, grow, dream, grow, plan….and grow some more, has been amazing to witness.  She’s a tad taller than I am already!

ocard

{A} truly is a dreamer.  She plans out her life, in detail, cultivates her skills almost daily, and those dreams and plans grow all of the time.

scard

She loves to bake. She is baking in our kitchen way too often, and I’m telling you,  it’s not jiving with my clothing sizes!  But oohhhh….. she is such a wonderful baker! She loves to research recipes, experiment with them and put her own twist on them to make it more her own. She has been collecting recipes and writing a cookbook in her laptop computer for probably a year now.  She is also a HUGE fan of Bakerella.….and asks if there is a new post on a daily basis.

So it was easy to figure out the kinds of things I knew she would be thrilled with to receive as surprises on her birthday…..

cookbook2

Baking cookbooks…….

cookbook1

and most anything……

…and everything…..

beforegift

…to do with BAKING!!

caketips

She was really excited to see the cake decorating tips set!  That’ll take some practicing for sure!  (Oh darn….what ever will we do with all of those cupcakes!!  We just love cupcakes. And her Daddy really-(really)-loves-cake!)

I found some really fabulous baking cookbooks at the book store, on the discount shelves!  I was thrilled with that!  I actually went in to see if I could find a copy of Black Beauty, and {O} spotted and suggested the cookbooks!  What a great idea that little one had! Just beautiful books.

cookbookcover1

This one, above,  has a great section in the beginning on all kinds of bake ware information.  Photos of what various pans or tools look like, what they are called, and what they are used for.  Then there is also photo-illustrated examples  of various baked goods on ‘what went wrong’.  These display common mistakes with baking, what they look like, and how to avoid them next time.  Very educational for the baker enthusiast!

cookbookcover2

This is a great book too!!

She has just been pouring over these cookbooks since Sunday, and has even let the little ones join her in reading about them, deciding which ones look extra good, and which items to try and bake first.

Despite all of the baking that goes on, we are a pretty health-conscious family.  (It’s true!) Even {A} is always checking the amounts and kinds of fat involved, and how many grams of sugar.  We don’t eat much processed food at all, and really attempt to have a healthy daily diet.  Thankfully, the kids are all great eaters, and have never been especially picky.  But I must admit.  The more {A} has gotten into baking, the more goodies we’ve all been eating.  Not every day by any means.  But, more than we ever used to.

We all always choose what kind of cake we want on our birthday, and she did the same this year.  So it’s probably no surprise, she insisted on baking her own cake, herself.

blowingcandle5

For once, it wasn’t actually from scratch, but I was pleased with what she chose:  Duncan Hines Blueberry Streusel cake.  Made with whole wheat!  It actually tasted wholesome and healthy.  It was very good.  And as of today, it’s GONE.

There’s no doubt that this girl is really passionate about anything she is interested in.  She goes above and beyond delving into anything that tickles her fancy.   Whatever she decided to do, we know she’ll succeed, and we know she’ll be happy  She just has a light about her, that I can’t imagine will ever go out.  I think part of it comes from her deep, spiritual faith, that is pretty astounding at her age.  It’s certainly the core of who she is, and maybe that’s where that light comes from.  Whatever it is, I just pray she keeps on shining.  And may that light ALWAYS be BRIGHT and HOT enough, to keep baking  some goodies  for us now and then!    : )   That would be SWEEEEET!

apron

Happy Birthday, Darlin’!   Shine On!!

So on birthdays in our family, no one ever works or has school, and we spend the day together doing something fun together, per request of the birthday person (or people, in the case of the triplets. lol).  This birthday just happened to land on a Sunday.  We also always have (number) pancakes, and cake of choice.

So our question to you is:  Do you have any birthday traditions in your family?  If so, what are they?

Save

Save

Filed Under: Baking, Celebrations, Recipes, The Big Picture Tagged With: Baking, birthday pancakes, family-birthday-ideas, gifts-for-someone-who-loves-to-bake, kids-baking, sibling-love, siblings, triplets

A Garden Visitor – A Busy Bee

July 5, 2009 By Laura 1 Comment

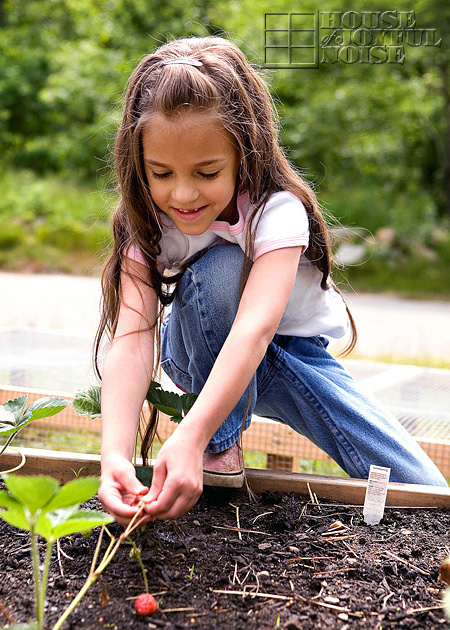
The other afternoon, Little {O} and I were working around the gardens, pulling weeds and pinching off dried bits of flower parts, when we noticed we weren’t alone.  There was a bumble bee, working right along beside us.  It was amazing watching him work, seemingly oblivious to our presence.   So graceful, as he floated around.  It was but  moment, before I couldn’t take it anymore. I asked {O} to keep an eye on him, while I ran into get my camera.

He was all over the place, as was my exposure, as he went from light flower to dark, and back again….I could hardly keep up with my settings, and I didn’t have a macro lens either.  So…technically far from the best shots they could have been, but it sure was fun taking them!

busybee_stroke

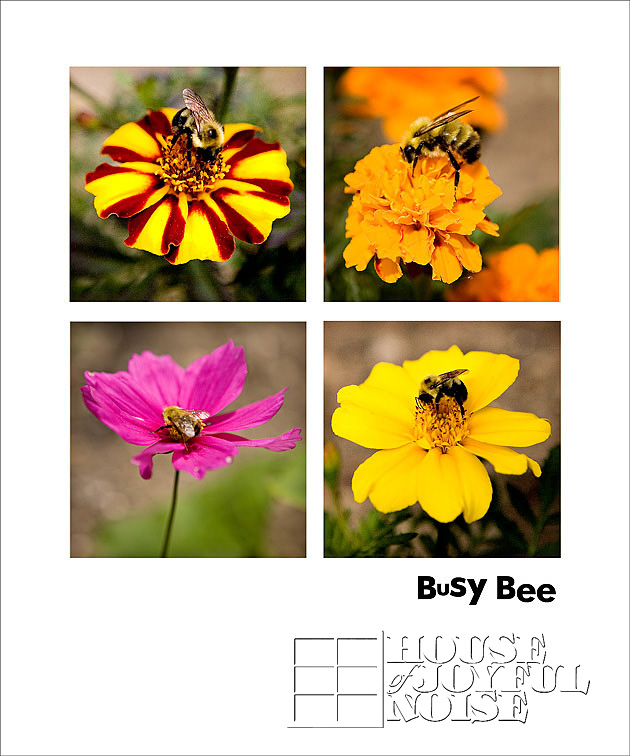
 These are the moments, when I’m just so fascinated with the brilliant details of God’s beautiful work.
We thought we’d just share the moment with you, and we hope you enjoyed it, too.

Save

Filed Under: Gardening, The Homestead Tagged With: bees, bumble bees, Gardening, insect-flower-photography, insects-in-gardens, nature photography

Sail Plymouth – 2009

July 5, 2009 By Laura 3 Comments

  Sail Plymouth 2009

This weekend, our town held a 3 day event called the SAIL Plymouth 2009 Festival.

The festival was kicked off with the Welcome Sail of the Amistad & Peacemaker ships into Plymouth Harbor, on Thursday night, to their docking location by Plymouth’s Mayflower II.  To learn more about the history of these ships, you can click here.

Sail Plymouth 2009
On Friday night, in honor of our visiting ships, they had a Parade of Boats!  It sounded like a fun and exciting event, and we thought the kids would really, really enjoy it.  So we joined the crowds of people along the Plymouth Waterfront, to watch.  I’m not the best night-time photographer yet, but I dentid my best to capture the beauty of these decorated boats, for the event.

The kids were SO excited.  It really was a perfect and beautiful night for the event.  The kind of summer nights we just eat up!

Sail Plymouth 2009

Sail Plymouth 2009

 Here’s a good handful of some of the boats in the parade.  The boat owners were to do their best to make their boats look the most festive, by using lights, music or other noise makers, etc.  They were judged by 3 judges, one of whom was Peter Arenstam, author of  ‘Nicholas – A Massachusetts Tale‘, among other titles.  (Nicholas is the first chapter book our 6 year old triplets read, this year, and I very much enjoyed it myself, as I’ve blogged about!  Peter, we learned, is a resident here. )

Sail Plymouth 2009

I really loved this one.

Sail Plymouth 2009

The paddle wheel boat was pretty cool looking too.

Sail Plymouth 2009

Sail Plymouth 2009

Uncle Sam aboard here, cracked us up.  But I did think the American flags, waving off the back, was a very nice touch.

Sail Plymouth 2009

Sail Plymouth 2009

Once some boats reaches the end of the route, they looped back.  So soon we had boats passing by each other.

Sail Plymouth 2009

It was a really nice crowd of people down there, and we really enjoyed ourselves.  When we got home, the kids watched a great display of firework, right from the school room window, as they do every 3rd night of July.  The 3rd of July gets pretty crazy around here.  Not on our road, but there are bonfires, fireworks and parties for miles along the beach shores.   It’s an annual tradition.  Although we do have deeded beach rights to a private beach that we enjoy quite a bit year round, and the beach is within walking distance, this particular night it is just too crazy down there to be a safe or nurturing environment for the kids.   But they were quite happy with the boat parade, and the fireworks they see this night is a just a neighbor somewhere back there, who sets them off every year.  The view is perfect from our school room windows, so the kids pull up a bench and enjoy the show!  Then, it is bedtime, and a very late bedtime for them.

We had a full weekend ahead already, but the SAIL Plymouth Festival continued through the weekend, with a carnival, blessing of the fleets, fireworks (the latter 2 being annual events), and a Farewell to our visiting ships!  It was a summer night to remember, that kicked off a weekend of celebrating for us!

Save

Filed Under: Life In General, The Big Picture Tagged With: Nicholas A Massachusetts Tale, Peter Arenstam, Plymouth MA, Sail-Plymouth-2009

Liberty Shakers! – A 4th of July Craft for Kids

July 1, 2009 By Laura 5 Comments

I thought this 4th of July craft, we call Liberty Shakers, was a great one for the kids to make, so they could have a little something to make some ‘joyful noise’ at  our various celebrations coming up for America’s birthday!

red white and blue July kids craft

  Living in America’s Hometown, our town most always has a huge, big long 4th of July parade through the heart of our downtown area.  But this year, there will be no parade, due another exciting event their holding. (Which is even more exciting, and we’ll be sure to document and share with you when the times comes.)    Anyway, my point is, if there’s a 4th of July parade in your town, your kids will love having these along.  Maybe they can shake them for the fireworks finale too!!

Very young kids will definitely need some assistance making these, but none at all using them!  : )

Here’s what you’ll need for supplies:

 red white and blue July kids craft

  • Bathroom tissue tubes, and/or paper towel tubes cut in 1/2
  • A pile of white copy/printer paper (or any white paper)
  • Clear acetate sheet protectors
  • Small jingle bells
  • Any red/white/blue ribbon
  • Red/white/blue star stickers of any kind
  • Clear shipping tape (not shown, but it was a lifesaver)
  • Fiskar cutter (also not shown-not needed but I use it A LOT for most everything regarding cutting straight paper.
  • *Craft glue – *Note there are glue sticks on the corner. Can I just vent for a second?  I’ve decided I despise glue sticks, because every brand I have ever tried has been lousy.  We ended up using the same brand glue in an Elmer’s Glue style bottle. Elmer’s glue would work too.   But my opinion is, it’s never worth bothering with the glue sticks.  Great concept for kids,  if they actually worked.  Thanks for listening.

Here’s how you make them:

 red white and blue July kids craft

1)   Grab a sheet of white paper and a tube, and placing the tubes end at the edge of the paper, mark off the width of paper you’ll need (where you’ll cut).

 red white and blue July kids craft

2)   The roll the tube in the paper to determine how much length of paper you’ll need, and mark that side.  (Similar to determining how much gift wrap you need to wrap a present.)

 red white and blue July kids craft
3)    Here we are cutting the size of paper we need, determined by our tick marks, using the * Fiskar cutter.

*If you don’t have a Fiskar cutter, but find yourself doing crafts that require cutting in a straight line, this tool is worth it’s weight in gold!  I use it ALL of the time.  They are available at any fine crafts store.  The orange blade piece pops out for easy replacement and it also comes with a scorer piece that pops in!

Now if you don’t have this tool, using a ruler and pencil to mark your lines from your tick marks, and cutting with scissors will work as well, of course.

 red white and blue July kids craft

4)    Put glue at one end of the sized piece of paper you cut > the end that will run lengthwise with your tube.

 red white and blue July kids craft

5) Start rolling the paper around your tube.

 red white and blue July kids craft

6) The end of the paper you are rolling should have the glue already at the end, to seal it to the tube.

7) Now, this next step I do not have any photos of because frankly, it took a little figuring and a lot of assistance on my part.  So there was a little too involved to be photo-taking.  But…..you need to cut some circles out of your white paper , that do not need to be perfect.  But these paper circles do not to be about 1/2 or so bigger than the end of your tubes.   You may want to trace the end of the tube as a guide, keeping your pencil tip away from the edge of the tube.   Then you can cut some small slits around the edge of your circles (toward the center, for easier folding. Because you need to use these circles to close off the end of your tubes.  Placing the circles at the end of the tube, fold over the tube all the way around.  This is one step that the clear packing tape came in very handy. We just cut the right size pieces of tape and wrapped it around to hold the paper closed over the tube end.  Comprendez?  ONLY CLOSE ONE END OF THE TUBE AT THIS POINT!!!

 red white and blue July kids craft
8) Let the kids count out 10 jingle bells, and drop them into the open end of the tube.
Also,  maybe using more or less will make different sound effects, but we did not test that theory, so please do not hold us responsible with that idea.  : )

9)  NOW, you can close the remaining open end of the tube, following step 7) above.

 red white and blue July kids craft
10 ) Next, take an acetate sheet, and cut it in half, using the center ring whole as a marking point.

11) Then cut fringes with either scissors, or your Friskar cutter. You need to stop an inch or so, short of the end!  You do NOT want to cut all of the way.

When you are done, you should have a piece that looks like this below….

 red white and blue July kids craft
So you are going to need this fringe piece for EACH END of every tube you are making.

12)  Again, no photos here, but wrap the fringe piece(s) around the end(s) of the tube(s), with the base on the tube, and fringe ends extending off the end.   And again, clear shipping tape was perfect for securing it.

 red white and blue July kids craft

 red white and blue July kids craft

13)  Decorate the tubes with sticker as you’d like.

14)   To further dress up your shakers, you can use the red, white and blue ribbons in various creative ways.   You can cut long pieces of the ribbon and tape them at ends of the tubes along with the fringes, and/or wrap them around the tubes as bands-again using tape to secure.   For {O}’s, we tied one band, on one end, with a big bow, and long ends, to make it girly-girly for her. : )

15)   Once they are all decorated -they are ready for S H AK I NG!


 red white and blue July kids craft

 red white and blue July kids craft

 red white and blue July kids craft

 red white and blue July kids craft

I love that they kind of look like fire crackers, too.

 red white and blue July kids craft

HAVE FUN, making some ALL-AMERICAN NOISE!!

Save

Filed Under: Crafts & Creations, Holiday Crafts, Kids Arts and Crafts Tagged With: American-kids-crafts, July-crafts, kids crafts, Liberty-shakers, parade-noise-makers, red-white-blue-crafts

  • « Previous Page
  • 1
  • …
  • 70
  • 71
  • 72
  • 73
  • 74
  • …
  • 100
  • Next Page »

We are wicked happy to have you here! We hope you find much inspiration, help, humor and enjoyment here.


Archives


POPULAR POSTS

* * * * * *

SUBSCRIBE to House of Joyful Noise blog! Every new post, delivered right to your email box!


Privacy Policy

Amazon Affiliates

Never at any additional cost to you, we may earn a small commission for our endorsement, recommendation, testimonial, and/or link to any products from our website. Your purchase through our links helps support our family, while sharing with you the products we authentically use and recommend, for various ideas, and letting you know where you can purchase them. Thank you for your support!

[footer_backtotop]

Copyright © 2026 HouseOfJoyfulNoise.com · Genesis Framework by StudioPress