• HOME
  • {A}’s Chipmunk Training Archives

 Homepage

  • The Homestead
    • Home Projects
    • Home Improvement
    • Home Decor
      • Seasonal Home decor
        • FALL Home Decor
        • WINTER Home Decor
        • SPRING Crafts and Creations
        • SUMMER Crafts and Creations
    • Our Chickens
    • Gardening
    • Organization
    • Re-Purposing
    • Furniture Refinishing
    • Budget
  • Crafts & Creations
    • Seasonal Home decor
      • FALL Crafts and Creations
      • WINTER Crafts and Creations
      • SPRING Crafts and Creations
      • SUMMER Crafts and Creations
    • DIY (Do-It-Yourself) Project
    • Kids Arts and Crafts
    • Homemade/Handmade Gift Ideas
    • Holiday Crafts
    • Fan Pulls
    • Free Printable/Downloadable
    • Sewing Projects
    • Giveaways
    • Business Features
  • Recipes/FoodFun
    • Breakfast
    • Lunch
    • Main Dish
    • Sandwiches
    • Appetizers
    • Slow Cooker
    • On The Grill
    • Side Dishes
      • Soups
      • Salads
    • Baking
      • Breads, Rolls and Muffins
    • Snacks
    • Treats
    • Desserts
    • Drinks
  • Homeschooling
    • Elementary Homeschooling
      • Elementary Homeschooling READING
      • Elementary Homeschooling MATH
      • Elementary Homeschooling LANGUAGE ARTS
      • Elementary Homeschooling SCIENCE
      • Elementary Homeschooling HOME ECONOMICS
      • Kids Arts and Crafts
    • Middle School Homeschooling
      • Middle School Homeschooling SCIENCE
      • Middle School Homeschooling HOME ECONOMICS
    • Language Arts
    • Math
    • History / Social Studies
    • Geography
    • Foreign Language
    • Field Trips
    • Games
    • Nature Study
  • The Big Picture
    • Life In General
    • Celebrations
    • Faith
      • Into the Light; The Series
    • Giveaways
    • Reviews & Sponsors
  • Photography & Lettering
    • Photography
    • truck lettering
    • vehicle graphics
    • Newborns
    • Kids
    • Engagement
    • High School Senior Pictures
    • High School Senior Pictures Sneak Peeks

Terracotta Flower Pot Wind Chime | Tutorial

July 22, 2012 By Laura 106 Comments

terracotta-flower-pot-wind-chime-craft-3

Making this flower pot wind chime was a fun and simple project to do with my kids. I was really looking forward to hanging out with them and painting, and I knew I would also love seeing the wind chime in my gardens, where I had every intention of hanging it, when it was done.
While I think we kind of ‘made it our own’, this flower pot wind chime was not at all my idea. I have seen them so many times at crafty website now, and so many style-versions of it, that I’m not sure which style I saw first, or where! Someone must have come up with this adorable idea first, but I’ll be darned if I know who! Whoever did, we thank them for the fun inspiration, to make something (else) to have around, that makes me smile inside, every day.

Here’s the basics on how we made our terracotta flower pot wind chime.
001_terracotta-pots
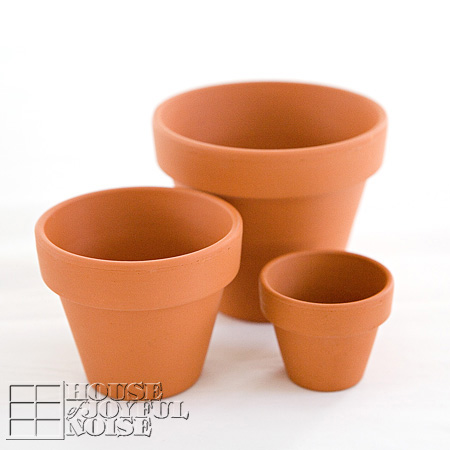
We started with 3 different sized terracotta plants, that have drainage holes in the bottom.
The smallest is tiny, at 1-1/2″ tall. Then the 2 next sizes up: 2-2/3″ and 3-1/2″.
002_synthetic-flat-brushes
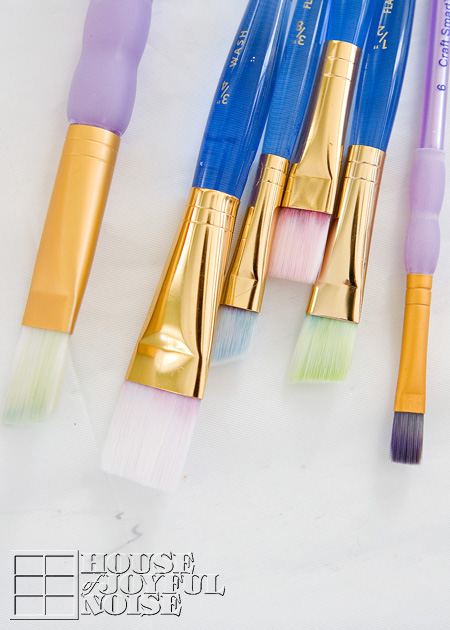
Using our little collection of synthetic brushes, we got to painting our pots.
003_paint-palette
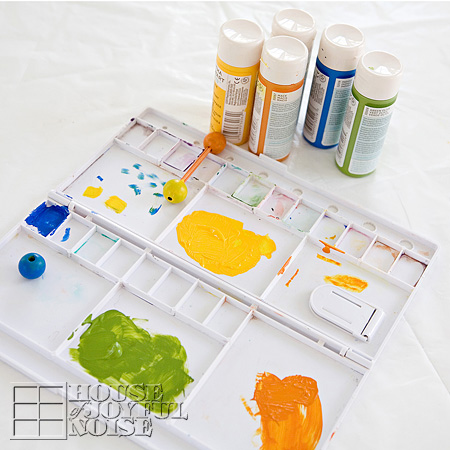
We used Martha Stewart Craft Paints, which are an acrylic paint. We also looked around and found what wooden beads we had in the house, which we wanted to use on our wind chime as well. After choosing our colors of paint and how we were going to paint the pots, we wanted the beads the same colors. One we had already was the correct color-green. The other 3 we had were not, so we painted them correct colors. If you can imagine, painting small wooden beads was not that easy. But we quickly figured out a helpful trick: We stuck 2 toothpicks in the bead holes, to hold them while we brush painted them the colors we wanted them to be. You can see them resting on the palette, drying.
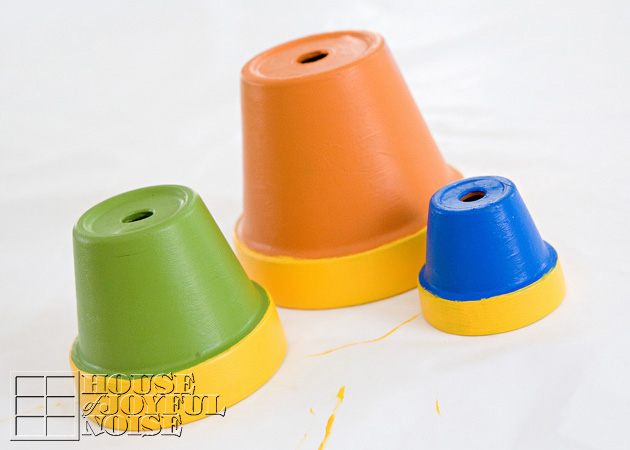
004_painted-terracotta-pots I really wanted to take photos of the kids painting, for me! But they were done and back outside, on the other side of my window, swimming again, before I ever got photos of them painting. But, since they weren’t paying any attention to me anymore, I did clean up the edges of their pot-rim painting, just a little. ; )
005
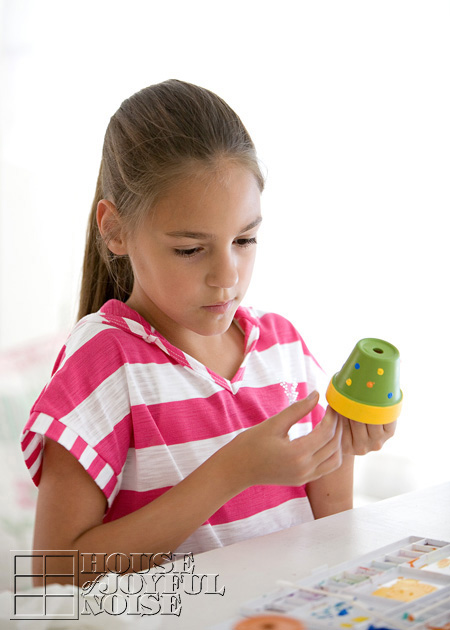
Our original idea, was to decorate our pots with little garden bugs.  Like butterflies, ladybugs, dragonflies, etc. It would have been so cute! Don’t you think? But none of us felt we could paint them that well, that small, and we couldn’t find any stickers or decals of any sort, to kind of Modge Podge them on. So, when it came time to decorate the pots, the boys were busy playing something else, and Alexis was at work. So O (Olivia) and I decided to just polka dot them.  I love polka dots, so I was sure I’d love it as much as the garden bugs idea.
006
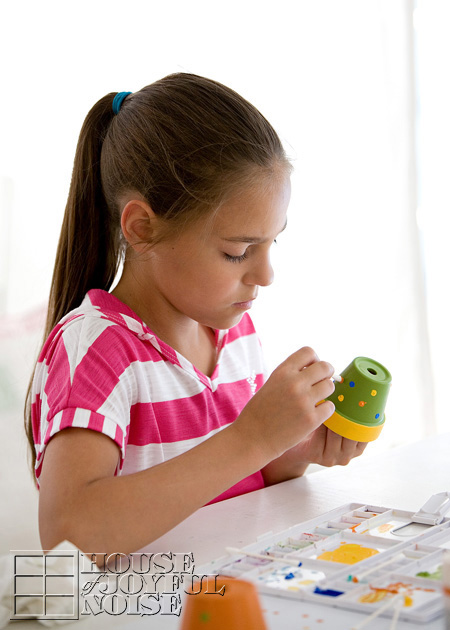
Applying the polka dots could not have been easier. Since we wanted the dots very small, on our small pots, we just used q-tips! We dipped the tip in the paint, and then dotted it right onto the pot! The hardest part was spacing the colors. I always drive myself crazy with that…..not wanting the same colors right near each other, and trying to get even spacing too. But we did a well enough job!
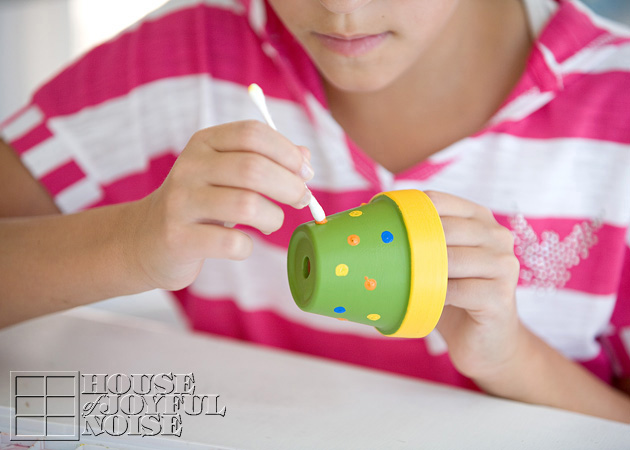
0071 O and I worked together, polka-dotting, and our q-tip trick worked like a charm.

Now, I didn’t take photos of the assembly. But it’s easy enough to explain:  We used jute twine, and strung it through the holes of the pots. We tied big enough knots on the string, to hang the pots on the string as we wanted.  So each knot was inside the pot underneath the drainage hole.
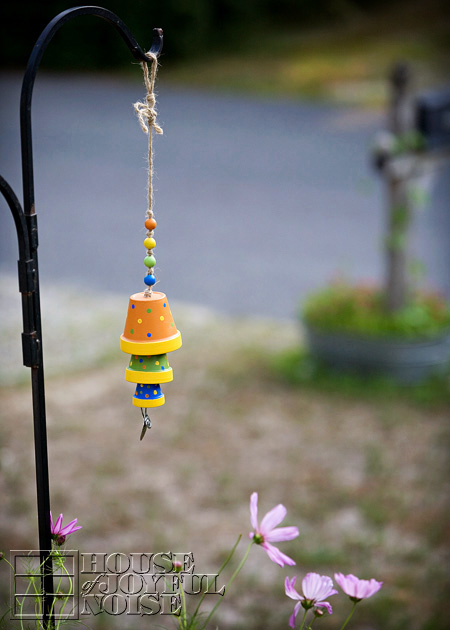
terracotta-flower-pot-wind-chime-craft
Now, some crafters who have made flower pot chimes, opted to have the string come down out of the pot, with a wooden bead on the string (held in place with a knot before and after the bead) to act as the ‘ringer’, that would hit the pot when the wind blows. So they designed it that way, spacing their pots out more.  We chose to use the pots themselves, to be the ringers, so that when the wind blows hard enough, the pots hit each other. That required (visually) setting the pots overlapping each other a little.

As an afterthought too, I decided I wanted to give the chime a quick UV protectant spray coat of clear acrylic.  Since my chime was all already assembled, I just put some tin foil over the spoon, and sprayed it anyway, getting some up into the pots as well. I do recommend spraying the painted pots before assembly, if you wanted to. But no big deal.  It’s an aerosol, so it worked easy enough afterwards.
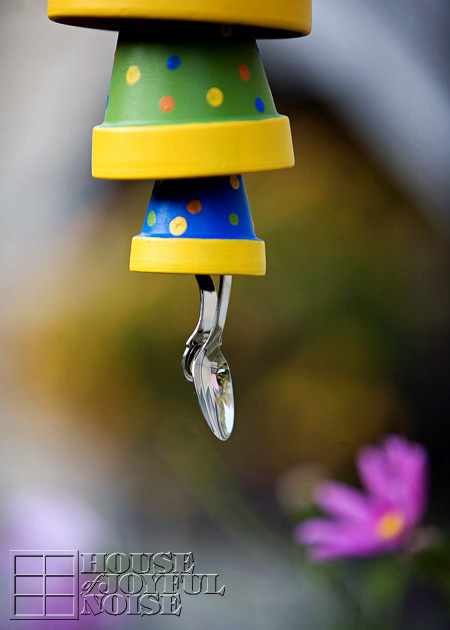
terracotta-flower-pot-wind-chime-craft-1
Aside from the paint design, the other touch that made it more ‘our own’, was that we added a stainless steel baby spoon as the bottom ringer. It really is a special touch, to me, with the memories of giving Alexis her first baby food, and then the triplets coming along, and the 3 little mouths we were trying to keep up with come the spoon- feeding age, with them. We didn’t bother having 3 bowls and 3 spoons, or we’d spend as much time picking up and putting down bowls and spoons, as we did putting spoons in sweet little open-waiting mouths.  Go ahead. Imagine that for a moment. No…..1 spoon, 1 bowl of food….down line of sweet, messy mouths we went. And then started at the beginning again.  Gosh I miss those days.

Wait. How did I end up talking about feeding my babies? Oh yes….the baby spoon, and the happy memories it brings me.
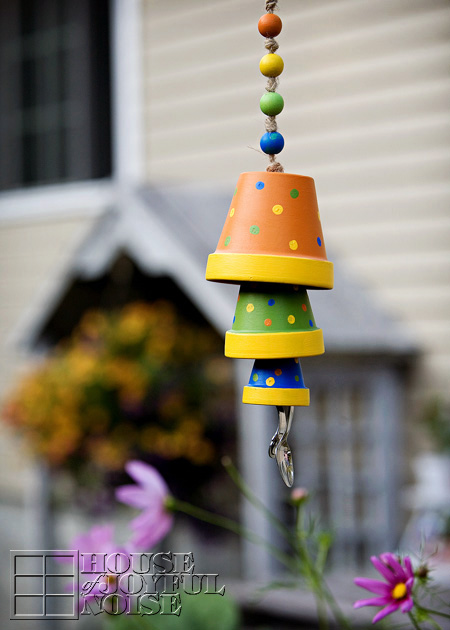
terracotta-flower-pot-wind-chime-craft-2

 So, it was simple as that. Anyone can make an easy and whimsical wind chime, even if you’re not that crafty. It’s a breeze.
Anyway, we’re happy you caught wind of this little fun project, and came to take a look.  Even if you’re just blowing through.

Ok, I’ll stop now.

P.S. Feel free to chime in, in the comments.
(Oh my gosh! Somebody stop me!)


Save

Filed Under: Crafts & Creations, Kids Arts and Crafts, Re-Purposing, Tutorial Tagged With: baby-spoon-chimes, crafts, diy, flower-pot-wind-chime, garden-decor, homemade-wind-chimes, kids crafts, Martha-Stewart-Craft-Paints, Plaid-products, polka-dot-crafts, terracotta-pot-crafts

How Much Wood, Could a Woodpeck Peck? : (

July 18, 2012 By Laura 5 Comments

003_birdhouse-woodpecker-damage-150x150

This is the telling of a sad little tale.

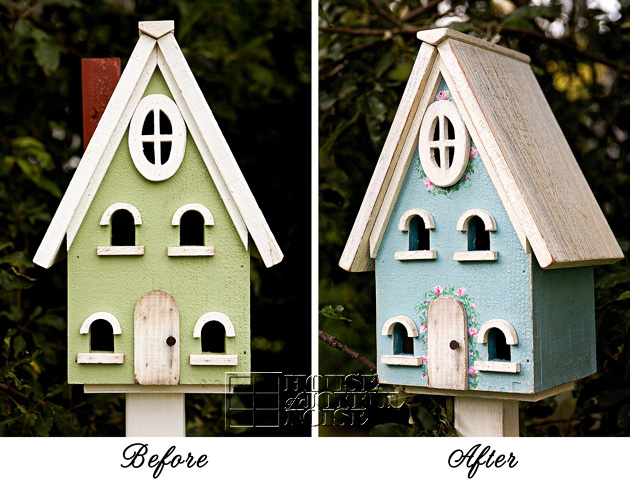
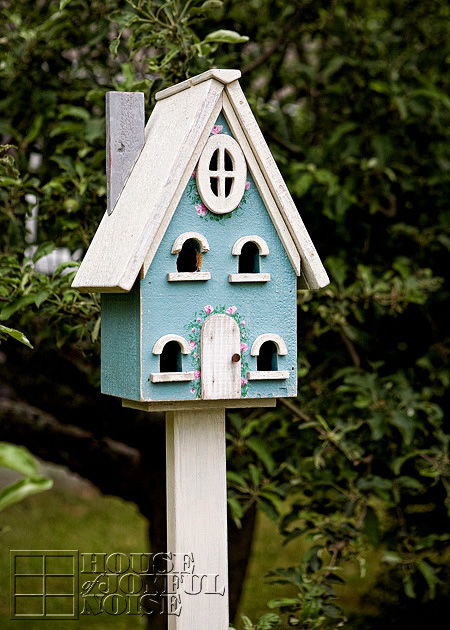
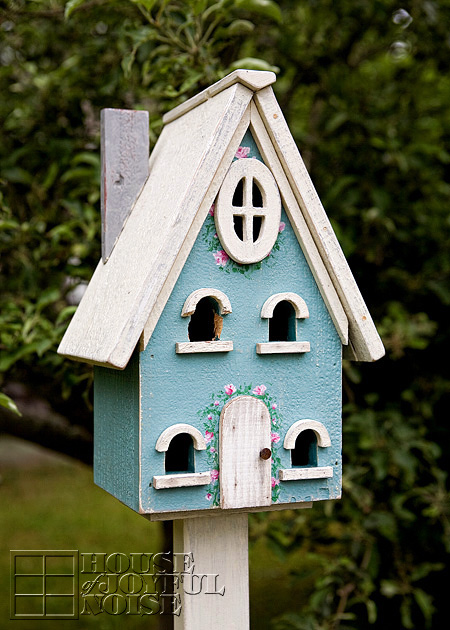
001_hand-painted-birdhouse-before-after The refinishing of this birdhouse, has been one of my most favorite projects ever.  Between the excitement of using Annie Sloan paint for the first time, the color I fell so in love with, and the YouTube crash course video lesson I watched, on how to paint tiny roses in order to adorn my sweet new birdhouse with, it’s a project I truly enjoyed the process of.

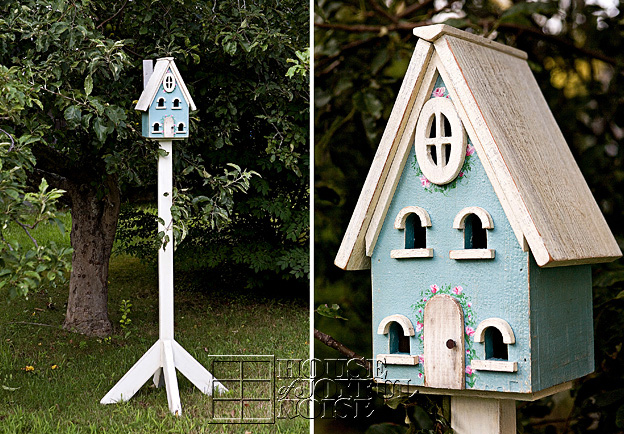
002_hand-painted-birdhouse I have to say, it’s held up so well, out there in the weather of all kinds, too.  I did put it away for the winter, but otherwise, it has stood right over on the other side of my garden beds, under the apple tree.  I have  finished projects I’ve done all over my homestead, of course, and I love to see them around.  This birdhouse has truly been a piece that still plays a part in bringing me a bit of joy every day.

So imagine my sheer panic this one very (very) early morning this summer:  The kids and I were still in bed, and I was still pretty much sleeping.  All of our windows were open a little, and I began to stir out of my sleep with the sound of some repetitive rhythm sound on hard wood outside.  I was confused by it, being somewhere between asleep and awake, and so I tried to bring myself out of the grog I was in, wondering if I was dreaming, or what.  But next thing I know, I hear little feet hit the floor hard, and come booming across the house floor, and my son yelling, “Mama, there’s a woodpecker pecking your birdhouse outside!”

That woke me up! The idea of the damage a woodpecker could do, had me wide-eyes, out of bed, out the front door, down the deck steps and out to the gardens, in a flash.  My abrupt arrival scared the woodpecker, and I watched him fly away. The peaceful silence after the commotion, caught my attention.  Even the birds stopped chirping. As I stood there in my summer nightie, in front of my house beside the street, amidst my gardens, our neighbor friend drove by in his truck to leave for work, and gave me a wave. 
It occurred to me in that moment, that it was a good thing I wear pajamas to bed.

I sauntered over to the birdhouse slowly,  not sure I really wanted to assess the damage done.

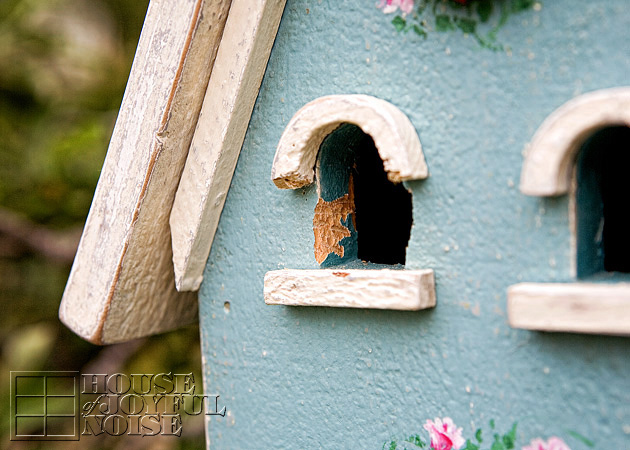
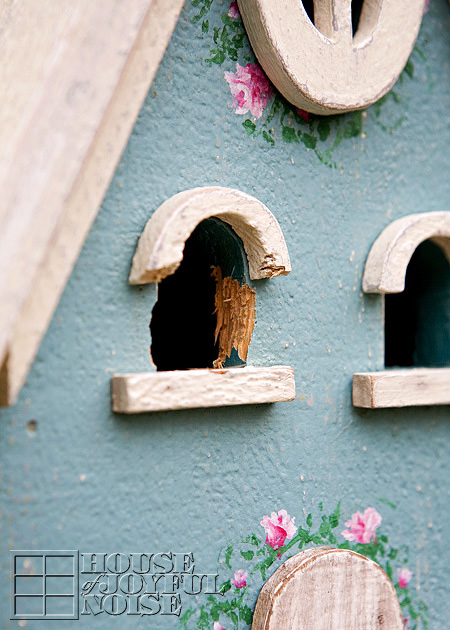
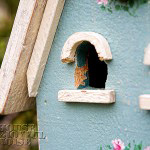
003_birdhouse-woodpecker-damage  {SIGH}. It looked like the woodpecker figured a hole already there, was a good place to start.
I put a trash bag over the house for the day, not sure what I was going to do about the matter.  But as the day went on, I thought, “What a cool photo that would have been, to get a shot of the woodpecker at the birdhouse.”  That’s what photographers do.  Think through life in images we’d love to get, as moments frozen forever.  So I took that bag off, and had my camera with my 70-200mm 2.8 lens on it, waiting by the open window near my work area in my house. I listened, and I checked repeatedly, for that woodpecker. All day long. But he never came back.  I thought that was the end of it.

004_birdhouse-woodpecker-damage

 Until very (very) early the next morning, of course. While we were all still sleeping.  I jumped out of bed again, grabbed my waiting camera, and opened the window. But as soon as I did, he flew away.  My boy and I, having both gotten a good look at the bird, decided it was a Downy Woodpecker. They are the most common in this area, and the description and picture matched.  I was really hoping to catch him flying to the birdhouse, and get him when he just landed on it. Before he got to work again.  Preferably the day before, while I waiting and so ready-window open already and everything.  I should have known it would come back the next morning, at the same time.  So these after-damage photos I show you were taken after morning 2.  In the end, you can see the window opening was pecked on both sides, but it also did damage to the arched trim over the window, which is a much softer wood.

I put the bag back on it, and left it on for several days after that.  Then I took it off, thinking; even a woodpecked birdhouse looked better than a black trash bag on a post. If the woodpecker did come back yet again, I was going to have to consider taking the birdhouse in for good, or, I don’t know…..installing some kind of taser device on it. A security system of sorts. But the woodpecker has not been back since.  For which I’m thankful!

005_birdhouse-woodpecker-damage

 When I refinished this birdhouse, and it came out so pretty, it really was my little hope, that some sweet little birds would move in.
It just never occurred to me, a woodpecker would come along, and decide the window wasn’t big enough for him.  Silly me.

006_birdhouse-woodpecker-damage

So maybe none of us ever did find out the answer, to the question: How much wood, could a woodchuck chuck, if a woodchuck could chuck wood?
But now we know how much wood could a woodpeck peck, if a woodpeck, could peck wood.
Too much! : (

P.S.  In the last week or so, we’ve actually noticed 2 woodchucks waddling around our property, too.
So if we learn the answer to the first riddle, we’ll let you know. ; )

Filed Under: Crafts & Creations, Home Decor, Life In General, Photography, Refinishing, The Big Picture Tagged With: annie-sloan-chalk-paint, downy-woodpecker, hand-painted-birdhouse, hand-painting-roses, nature photography, woodpecker-pecks-birdhouse, woodpeckers

Fresh Strawberries and Chocolate Nachos | Recipe

July 13, 2012 By Laura 1 Comment

strawberry-chocolate-nachos_0-300x214

If you love chocolate covered strawberries, this unique treat might be just for you.  I really do love them, but I also enjoy things that have CrUnCh!   So a few weeks ago, when I just so happened to have picked an abundance of fresh strawberries from our (garden bed) the day before, I stumbled across this very unique recipe treat from Our Best Bites.  The recipe was fresh strawberries, drizzled with dark melted chocolate (chips), over some cinnamon tortilla chips she had previously made.   Now, to me personally, eating cinnamon with chocolate and strawberries did not sound appealing.  But the idea of dessert nachos did! And besides, it’s not all about me. We’ve got a crew to feed around here, and I was sure my husband and kiddos would be amused if I surprised them with dessert nachos! So I decided to try the recipe, minus the cinnamon.

We had all of the ingredients I needed, except for the tortillas, which I asked my husband to pick up on the way home. Although I did tell him to get the small ones, because they be so much easier to cut into chips, pizza-style, he got the great big ones. So, I cut them as I had planned anyway, and they just came out as much bigger chips.

It’s a simple recipe. So here’s what you do . . . . .

Strawberries Prep:  Wash, drain, cull and slice.  Then I put them in a bowl, added just a little white sugar, and gave it a quick mix.

 Preheat Oven: 350 °

Baked Tortilla Chips:  Melt butter, and brush on both sides of tortillas. Sprinkle-dust sugar all over the top side. Cut the tortillas, pizza-style.  Arrange the tortillas triangles on cookie sheet(s), and bake for 10-12 minutes, or until they start to brown and the edges start to curl some.  When they seem done, remove from oven and let cool.

Arrange: tortilla chips over a large plate or platter, just prior to eating.

Melted Chocolate: We strictly use Hershey’s Chocolate Chips, because they are safe for our peanut-allergy son.  But Our Best Bites seemed to use some good high quality dark chocolate chips, and that’s an option too. Pour an adequate amount of chips in a microwave-safe bowl.  Microwave on high for 30 seconds or less the first time. Give it a good stir. *Tip: I always stir chocolate with the butt end of a wooden spoon, because silverware can alter the temperature of the chocolate. You will likely need to microwave the chocolate for 10-15 second intervals, and stirring after each time, until all of the chocolate is melted and smooth looking.

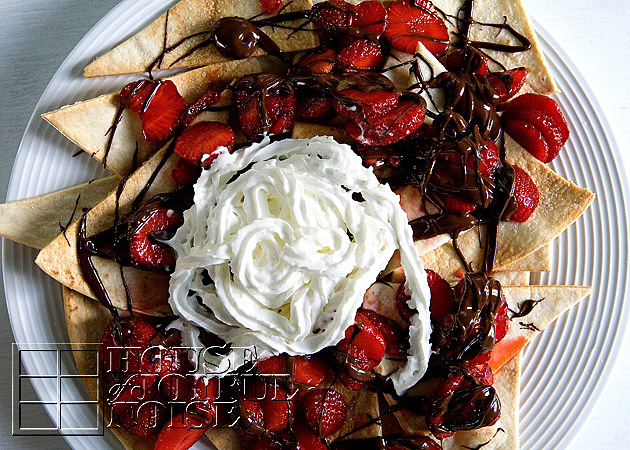
Spoon: Strawberries all over the sugared chips.  Then with the spoon, drizzle the chocolate all over the strawberries.  Add whip cream if desired.

Our Best Bites had much better visual presentation than I did. But ask my family if they cared.

NOT.
So there you have Fresh Strawberries and Chocolate Nachos . . . . .

strawberry-chocolate-nachos

Share & Enjoy!


Filed Under: Desserts, Recipes, Treats Tagged With: chocolate-strawberry-desserts, dessert-nachos, recipes, strawberry-and-chocolate-nachos, strawberry-desserts, strawberry-recipes, unique-desserts

Canning for the First Time | Homemade Strawberry Jam

July 10, 2012 By Laura 4 Comments

first-time-canning-strawberry-jam-1
Just a bit ago, I had shared with you all what a great strawberry season we had this year, and all we have learned in the process of growing them.  Every season from the beginning, it had been my hope and plan, to learn make our own homemade strawberry jam.  The problem was, it never seemed we had quite enough berries ready, at the same time. But then between a bag we froze last year, and some more we froze this year, I was sure it was time to really try making some jam! For the first-time-ever.

Our usual household jam, has always been Polaner’s All Fruit.  Just reading and comparing ingredients with the other jams and jellies on the grocery store shelves, made the choice clear to me. I mean…I wanted all fruit.  So I was thinking I’d try a sugarless recipe to make out own jam.

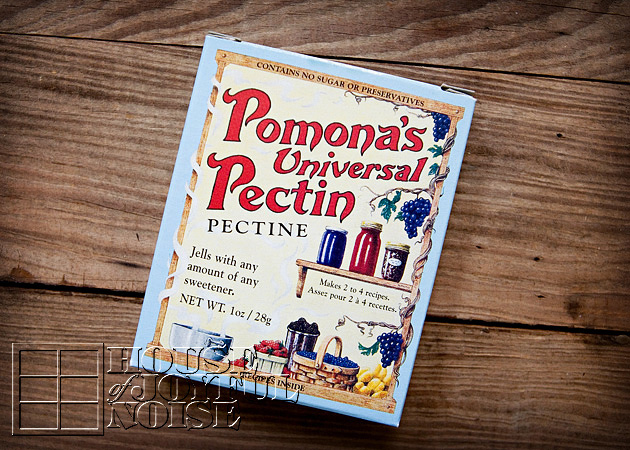
001_pectin Inside the box of Pomona’s Universal Pectin (and calcium powder, necessary ingredients for making jam, I found a paper with several recipes, that I had actually read over a few times, since I bought the pectin months ago.  I kept procrastinating, because in my head, making jam,and canning it and all, seems like a huge and scary task!  And I still had questions.

So I was pretty happy when I noticed a JAMLINE on the recipe/directions paper!

I was like….”Really? There is a number I can call, with any questions I have about making this jam today?”  It was a weekend, so I didn’t think anyone would really answer.  I was imagining some company and all. But to my surprise, a woman and answered. And I could tell right away, she was not an employee in some company, but just a woman in her kitchen, who knows all there was to know, about making jam.  It was the most relaxed and friendliest conversation.  Like calling your Great-Aunt-Someone-Or-Other. We talked for awhile! I wish I actually got her real name. Maybe it was really the Pomona Family! Turns out she was located very near where I grew up in western MA.  Anyway, she answered all of my questions, and I really enjoyed talking to her, as much as I did making the jam! I learned a lot in our chat, and was so glad I called!

I thought I’d highlight some the most interesting things (to me) that I learned:

  •  When I told the woman I was planning to make the “All Fruit” (no sugar)  recipe, because we normally eat Polaner’s All Fruit, she let me know right off the bat, that if that was our usual brand, we were probably going to be UNpleasantly surprised with our own jam.  Why?  Because as it turns out that the reason Polaner’s is so sweet, is because they use a lot of fruit juice concentrate in it. So there actually IS a lot sugar in it, in the end.
  • To give us as something as close to Polaner’s in taste, but still keep the sugar content acceptably low, she suggested I use the  Low Sugar recipe.  So that’s what I did. Well….we did.  Michael was in the kitchen with me.
  • Just to compare the sugar content of the recipe I was going to follow, to the typical jams in the store, my recipe called for 2 Cups of sugar, while the store bought has 6+ Cups in a jar! We were going to use all of the strawberries we had, and make as much as we could.  So we ended up double-1/2’ing the recipe….which added up to 5 Cups of sugar.  Still….5 Cups for 12+ jars of jam was pretty good. I guess.

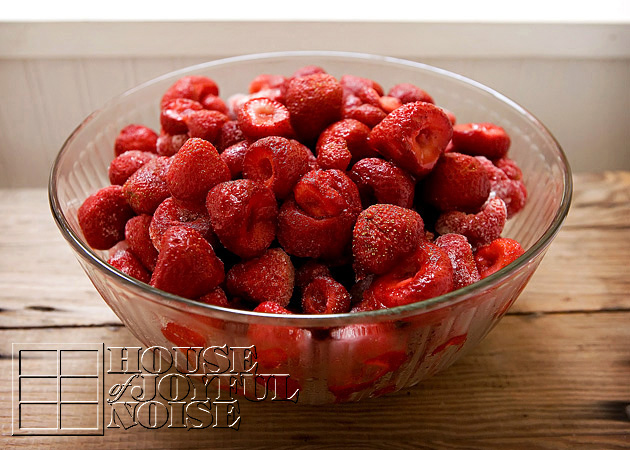
002_frozen-strawberries I used the 2 big ‘picks’ of berries that I had put in the freezer, after washing and hulling.

We mashed, stirred, cooked, stirred some more, filled (the jars) and then boiled them, and then let sit to cool.  After some time we started hearing Pop! Pop!  I was counting the pops, hoping they would all seal properly, so they didn’t spoil during storage.

You can get Pomona’s Recipes Low Sugar Recipe, and all of their jam and jelly recipes, HERE.

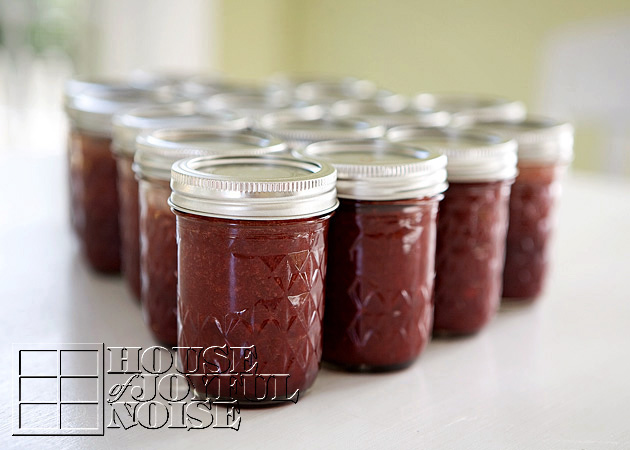
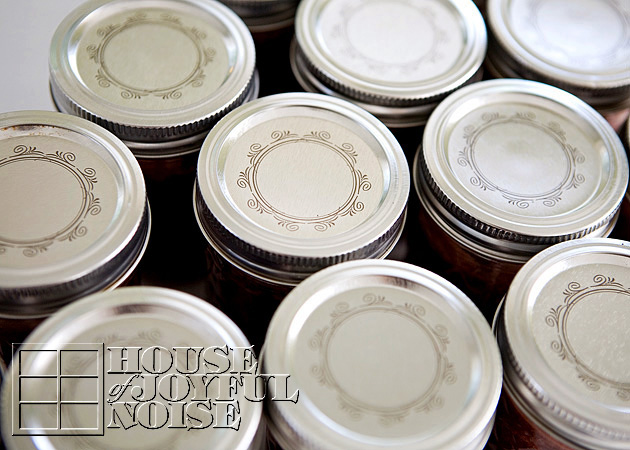
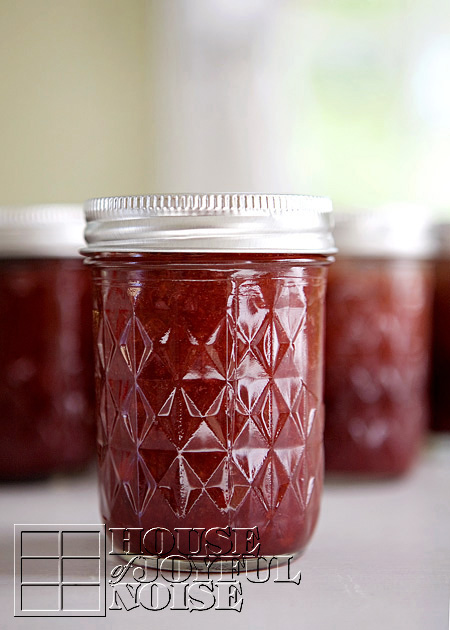
first-time-canning-strawberry-jam In the end we had about 16 jars of our very own Strawberry Jam!  Made in the Richard Kitchen!
I was so ready to design some of my own canning labels.

first-time-canning-strawberry-jam-2 Naturally, we had to try some as soon as we could. So the next morning we opened a jar.  Very good!  Definitely a bit different taste than the Polaner’s we were used to, but we all loved it! The consistency was not as gelled as we had hoped.  Just a little runny—so I’m not sure about giving any of these jars for Christmas Gifts just yet.  I actually may call that Jamline again, and ask they nice woman what we might do better next time.  But we’ll have no problems eating up these jars, and maybe giving some away, anyway.  I already gave my brother one yesterday, and he was so excited to get it.

005_jar-of-jam
So I’d done it.  That little dream of making my own jam someday, with the strawberries I grew myself, had happened. And in retrospect, it was not nearly the big task I thought it would be.  So I am quite sure that I’ll just make our own from now on.  Providing of course, that we always grow enough berries.  Although I’d never have a problem just getting them at one of our Farmer’s Markets if need be, either.  I’m really so thrilled about this little accomplishment, and the idea that it’s one more homemade good, grown and made right here on our own little homestead.  It’s not even jam that I love so much!  It’s the idea, of it all…..just gardening and growing, cooking and canning…wearing an apron, even. You know…I like to be a little ‘Olivia Walton-ish’ when I can.  Taking care of and feeding my family, with all of the home grown love I can put in it.
That’s always the sweetest and best ingredient of all.  And it’s something you just can’t get in a jar bought at the store.

No matter how much sugar they put in it.


Filed Under: Breakfast, Recipes Tagged With: canning, canning-for-the-first-time, homemade-strawberry-jam, low-sugar-jam-recipe, pectin, Pomonas-Universal-Pectin, recipes

4th of July

July 4, 2012 By Laura Leave a Comment

1_painted-american-birdhouse

HaPpY 4th of JULY, Everyone!

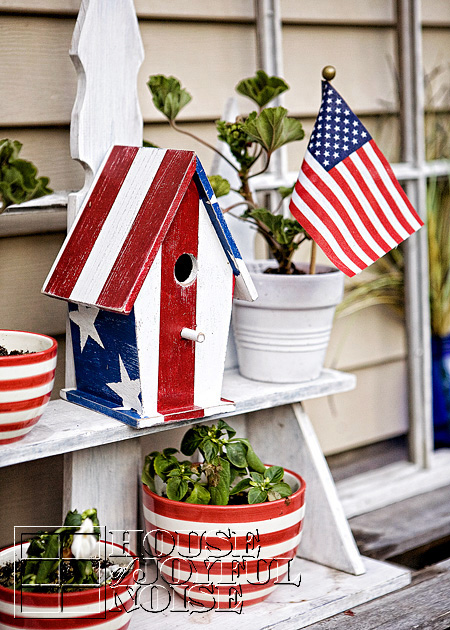
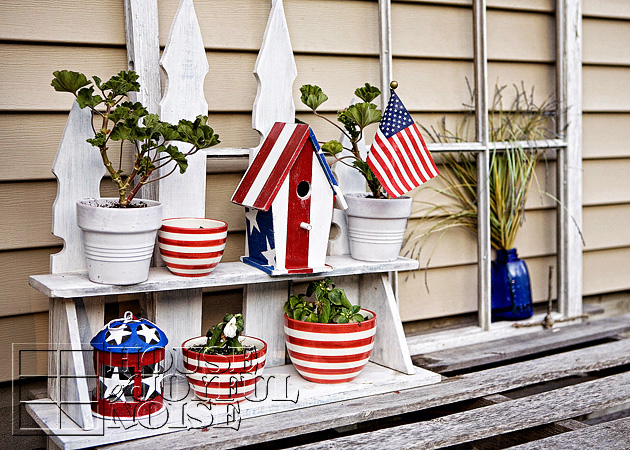
Since I wanted some photos, to go along with our wishes for you,  I thought today would be a good day to show you where I put my painted American Birdhouse.  It’s out on the potting bench near the gardens!  So now you know! I’ve got a whole red-white and blue theme going on out there, and it’ll be there throughout the month of July.  Then I’ll likely change it up, to some other summer theme.

 The birdhouse has held up very well in weather, despite the sun and rain beating on it.  Again, I credit that to the wax finish. It seems to be a great protector for outdoor wood, in my experience.

2_hand-painted-american-birdhouse-on-potting-bench Have a safe and memorable celebration of our country, with your families and friends!

We’ll see you again soon.


Filed Under: Crafts & Creations, Gardening, Home Decor, Refinishing, SUMMER Home Decor, The Homestead Tagged With: 4th-of-july-decor, american-birdhouse, american-home-decor, fourth-of-july-decor, garden-decor, red-white-blue-decor

  • « Previous Page
  • 1
  • …
  • 23
  • 24
  • 25
  • 26
  • 27
  • …
  • 100
  • Next Page »

We are wicked happy to have you here! We hope you find much inspiration, help, humor and enjoyment here.


Archives


POPULAR POSTS

* * * * * *

SUBSCRIBE to House of Joyful Noise blog! Every new post, delivered right to your email box!


Privacy Policy

Amazon Affiliates

Never at any additional cost to you, we may earn a small commission for our endorsement, recommendation, testimonial, and/or link to any products from our website. Your purchase through our links helps support our family, while sharing with you the products we authentically use and recommend, for various ideas, and letting you know where you can purchase them. Thank you for your support!

[footer_backtotop]

Copyright © 2026 HouseOfJoyfulNoise.com · Genesis Framework by StudioPress