• HOME
  • {A}’s Chipmunk Training Archives

 Homepage

  • The Homestead
    • Home Projects
    • Home Improvement
    • Home Decor
      • Seasonal Home decor
        • FALL Home Decor
        • WINTER Home Decor
        • SPRING Crafts and Creations
        • SUMMER Crafts and Creations
    • Our Chickens
    • Gardening
    • Organization
    • Re-Purposing
    • Furniture Refinishing
    • Budget
  • Crafts & Creations
    • Seasonal Home decor
      • FALL Crafts and Creations
      • WINTER Crafts and Creations
      • SPRING Crafts and Creations
      • SUMMER Crafts and Creations
    • DIY (Do-It-Yourself) Project
    • Kids Arts and Crafts
    • Homemade/Handmade Gift Ideas
    • Holiday Crafts
    • Fan Pulls
    • Free Printable/Downloadable
    • Sewing Projects
    • Giveaways
    • Business Features
  • Recipes/FoodFun
    • Breakfast
    • Lunch
    • Main Dish
    • Sandwiches
    • Appetizers
    • Slow Cooker
    • On The Grill
    • Side Dishes
      • Soups
      • Salads
    • Baking
      • Breads, Rolls and Muffins
    • Snacks
    • Treats
    • Desserts
    • Drinks
  • Homeschooling
    • Elementary Homeschooling
      • Elementary Homeschooling READING
      • Elementary Homeschooling MATH
      • Elementary Homeschooling LANGUAGE ARTS
      • Elementary Homeschooling SCIENCE
      • Elementary Homeschooling HOME ECONOMICS
      • Kids Arts and Crafts
    • Middle School Homeschooling
      • Middle School Homeschooling SCIENCE
      • Middle School Homeschooling HOME ECONOMICS
    • Language Arts
    • Math
    • History / Social Studies
    • Geography
    • Foreign Language
    • Field Trips
    • Games
    • Nature Study
  • The Big Picture
    • Life In General
    • Celebrations
    • Faith
      • Into the Light; The Series
    • Giveaways
    • Reviews & Sponsors
  • Photography & Lettering
    • Photography
    • truck lettering
    • vehicle graphics
    • Newborns
    • Kids
    • Engagement
    • High School Senior Pictures
    • High School Senior Pictures Sneak Peeks

Last Minute May Day (Baskets & Delivery) Tips & Ideas!

April 26, 2012 By Laura 9 Comments

tips-ideas-may-day-baskets


May Day is less than a week away.  But if you really want to touch some hearts and make some older folks in your life feel so unforgotten, this is a wonderful thing to do with your children!  It not only has the potential to teach them a bit of History, but it teaches them about kindness and compassion, as well.  What’s more, it couldn’t be more fun and exciting!  


PLANNING YOUR MAY DAY CONTAINERS

    Planning, putting together, and secretly delivering  May Day Baskets, is something we have done with our kids for the past 4 consecutive years, from 2008 – 2011.  Every year, the number of our recipients has grown. It can be done as simply or as involved as you choose, depending on the time or expense you’d like to put into it. While the traditional May baskets years ago were simply filled with wild flowers, picked special just for the recipient, we have really tended to get into the ideas for our basket contents! (Cheap affordable baskets can be found at any low budget department stores, such as Wal*Mart, as well as places like the Christmas Tree Shoppes.)  But you don’t need to.  The thought and fun behind it is not more or less, no matter what you give in the basket. It’s what you give from your heart, to their’s, that matters most.  

    So if just delivering a beautiful bunch of flowers is more the way you’d like to go, here are a couple of other simple container ideas I found on Pinterest:

7eaf7d53e132e11af4a20b3596c1188c

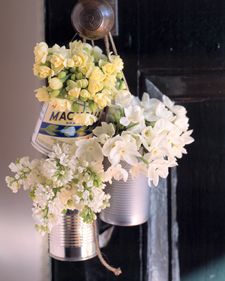
Most everyone has some cans in the house!  Wash them out, get rid of any sharp edges, punch some holes in the side and thread with some lovely ribbon or rope for a handle, and fill with flowers!  If you really want to dress it up, create a label of your own.  Consider having your kids make some drawings, and glue them on!


finishedtussiemussie_225x312-ashx_

Another idea is the traditional way…..making a simply paper cone.  There are beautiful scrap booking papers in any craft store that you can use.  Add some pretty trim, a handle, and the flowers, and you have a beautiful May Day surprise!

   Today, as we share photos from our baskets over the years throughout this post, we’d also like to share some other tips and ideas, in the hopes that you will be inspired to really make some older folks day!  You must know how much the little things mean to them, and this big surprise they find on their doorstep or door handle will be something that talk about for a long time to come.


tips-ideas-may-day-baskets-1
WHO WILL RECEIVE YOUR MAY DAY BASKETS?

May Day baskets were typically delivered to older folks years ago (on May Day of course), so this is a tradition they will well remember and appreciate.  Think of what older folks are in your life, who your children might want to deliver to.   Once you determine how many recipients you’ll have, you’ll know how many baskets (or other forms of containers) you’ll need. Some people to consider:

  • Grandparents
  • Older Neighbors
  • Older Folks you know from Church
  • Other Friendly Acquaintances
  • Anyone you suspect could be lonely or need a smile.

Naturally, for doorstep delivery, you’ll need to know where these folks live! Normally, the idea is for the children to sneak up to the door, hang the basket on the doorknob (or place on the porch where the recipient will see it when they open the door), ring the doorbell, and run like the dickens!! With any luck, they’ll get away without being seen, and the recipient will only find a lovely basket of flowers and/or goodies.

     BUT, another very thoughtful idea is to deliver them in person, to random folks in a nursing home.  Many older folks feel quite forgotten at such homes, with few visitors.  Just seeing your children’s faces will feel like such a blessing to them.  Getting flowers and/or other goodies will do their hearts so good. (And yours too!).  This is a great alternative if May Day turns out to be rainy too.   Consider calling a home to let them know you are coming ahead of time, and ask them to put together (your number) of recipients who do not have loved ones to visit them.

tips-ideas-may-day-baskets-2


MAY DAY BASKET CONTENTS

If you’ve decided to fill your baskets with goodies beyond wild flowers, here are some content ideas we have used over the years:

  • A Tea Bag Variety
  • Hard Candy (Consider sugar-free for possible diabetics)
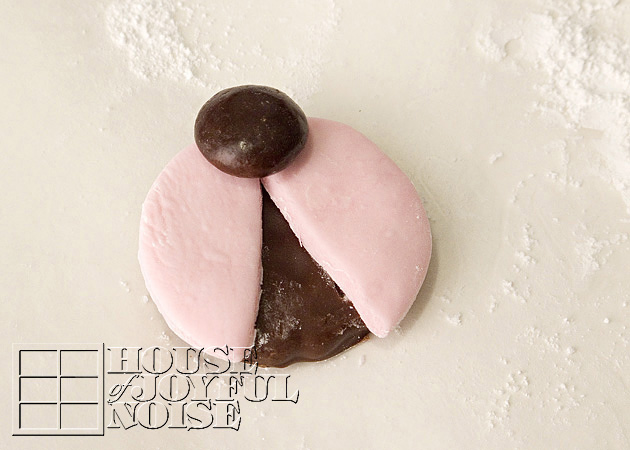
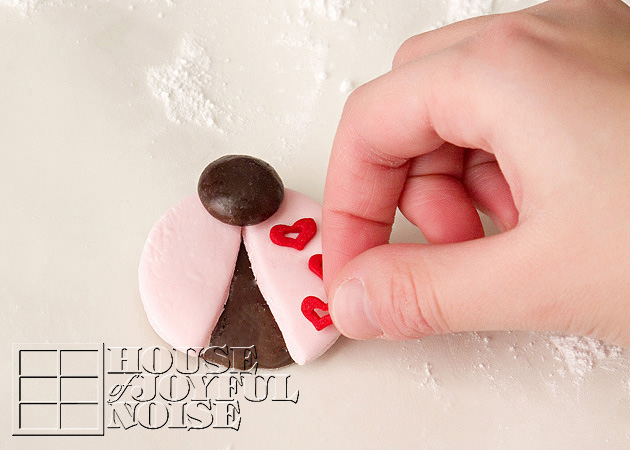
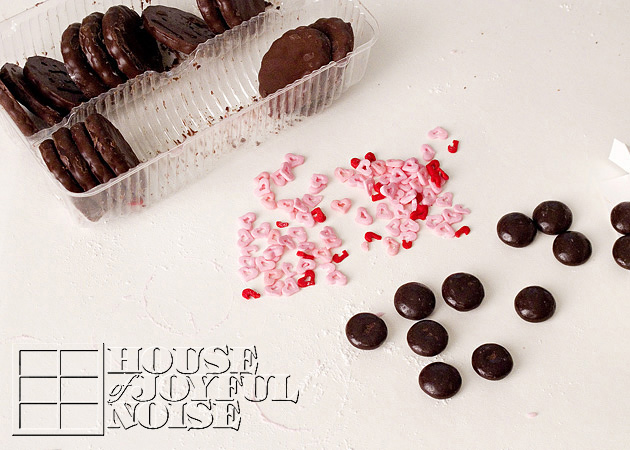
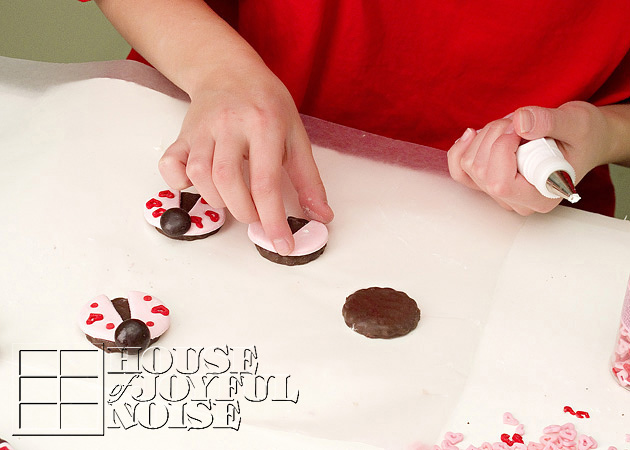
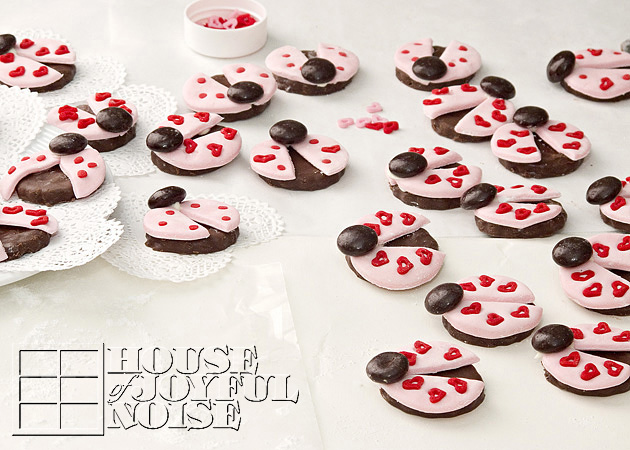
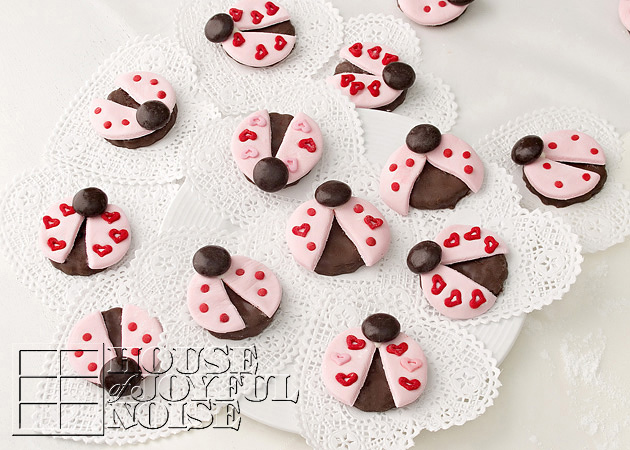
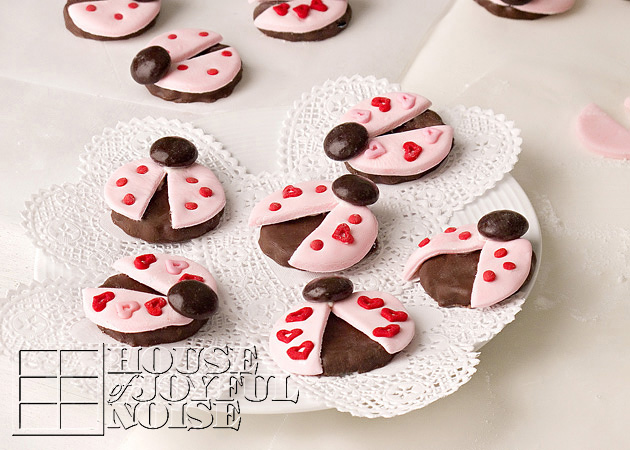
  • Baked Goods from your own kitchen (Mini loves, muffins, cookies, cupcakes)
  • Pocket Tissue Packets
  • Prayer Cards
  • Small Short & Uplifting Story Books
  • Cross Word Puzzle Books
  • Tea Biscuits
  • Flowers
  • A scroll explaining the tradition of May Day Basket Delivery (A great time to educate the kids about this tradition)

Basically, anything that fits in the basket!  What creative ideas can you and your kids come up with?

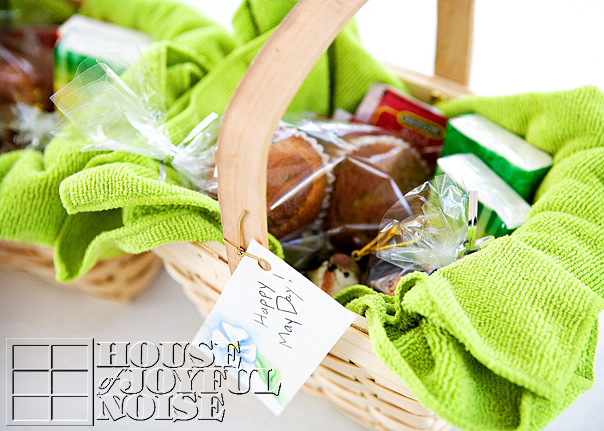
Lining your baskets before filling, is another option.  You can use tissue paper, an open napkin, a cloth napkin, or even a new kitchen dish towel, which is a gift in itself!
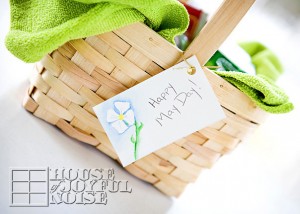
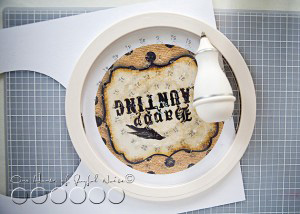
 

BASKET TAGS

It’s nice to have a tag attached, that wishes them HAPPY MAY DAY!  That tends to remove any confusion of why the basket was left. They will realize it is May 1st soon enough, and put it all together. (And them SMILE, no doubt!)   Whether you sign your tag or not is up to you. Sometimes there is concern that the recipients will be frightened, or be afraid to eat the contents.  So if that is a real concern, you can sign them.  But the real fun is to let it be a mystery!  It’s also a wonderful lesson for your children, that we can do kind things for others, and not need to get credit.

    Here is a free printable tag I made one year, that I am happy to share with you:   MAY DAY BASKET TAGS

PLANNING DELIVERIES

This year (2012), May Day falls on a (this) Tuesday.  Since we homeschool, we have always rearranged our school work for the day, and made our deliveries in the morning, usually between 9:00-11:00 a.m.  But if your kids are in school, evening delivery is just as acceptable!

    Before leaving home, plan out your delivery route, according to where your recipients live.  Knowing the order of stops ahead of time makes for smoother deliveries. 

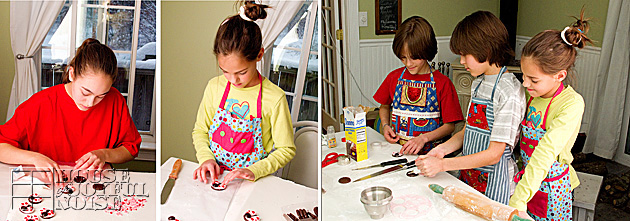
   Also important is to plan ahead WHO will be running up to which doors, and running.  We have 4 kids.  So rather than they all go up to each door, risking injury and getting caught, by tripping over each other, they decided among themselves who would do which homes.  This saved any arguing about the matter in the vehicle too, which could really suck the fun out of it all!


tips-ideas-may-day-baskets-4
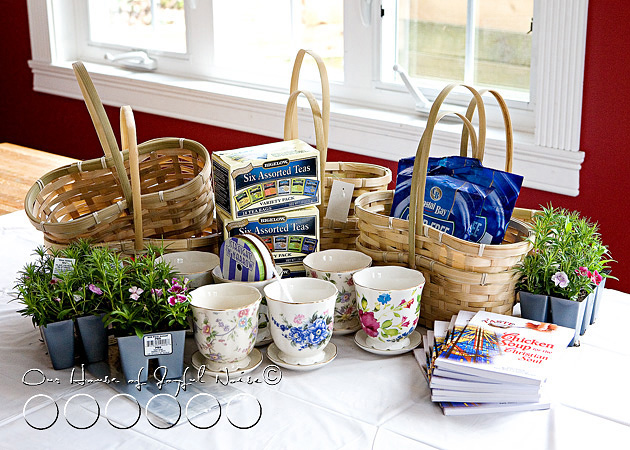
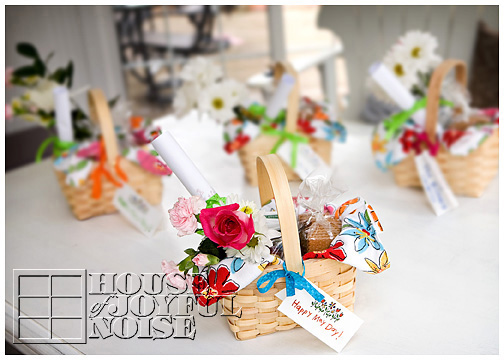
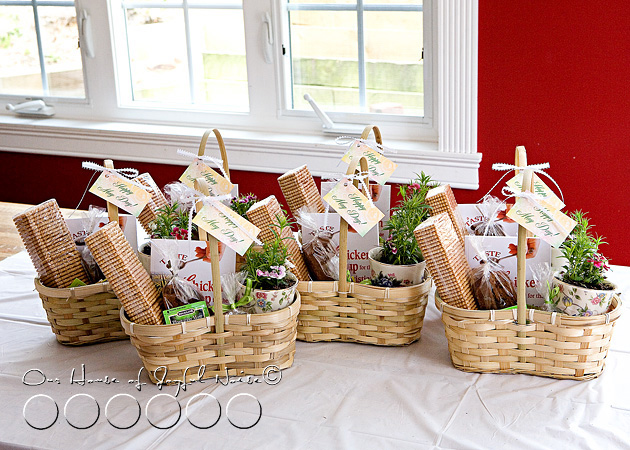
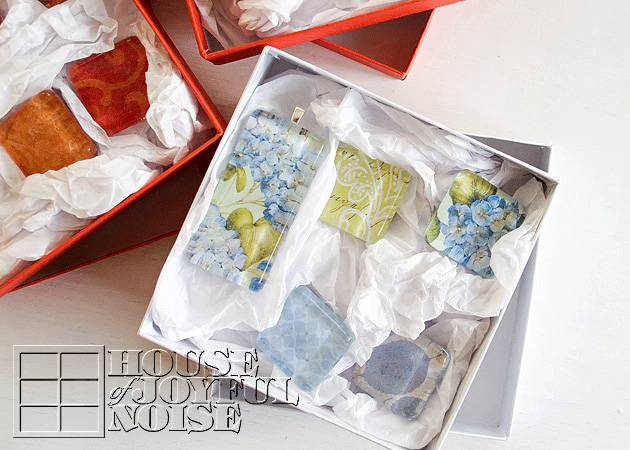
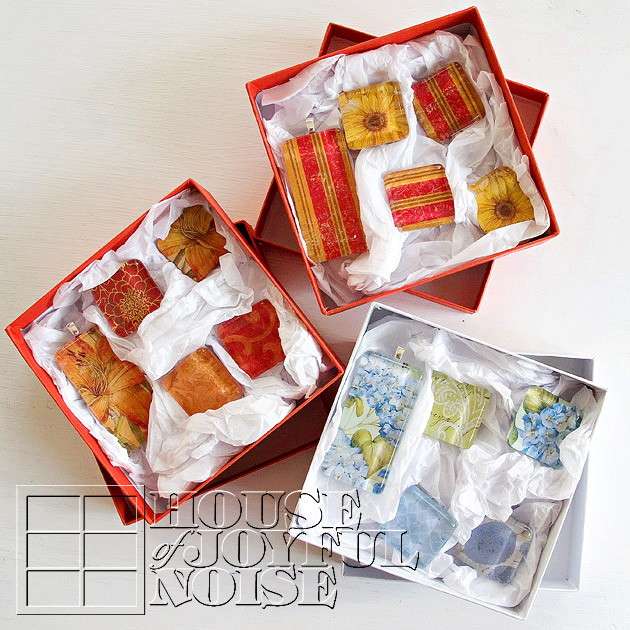
I especially loved one idea we had last year:  Making little flowering window sill tea cup plants.  Along with some perfect size Chicken Soup for the Soul books!  The above photo is all of the basket contents, pre-assembly.  The photo below is them all together.


tips-ideas-may-day-baskets-5

Naturally, every year around May Day, I have taken lots of photos, from basket assembling, to the secret deliveries themselves.  Going through those posts always make me smile.  Especially when the kids were so little! So if you care to, you are free to visit the previous years blog post links, and hopefully dig up some more inspiration, to deliver some love, yourselves.

  • 2008
  • 2009-1
  • 2009-2
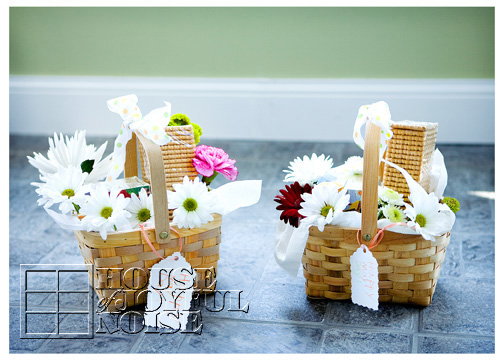
  • 2010-2011 – Did not blog deliveries, but last year’s basket photos are shown above.

     Following May Day last year, we decided it was likely our last year of planning and delivering May Day Baskets.  Reason being, 1) the kids are getting a little too old (and big! for this particular serving in secret, and 2) after 4 years, we’re not such a secret anymore! When you start getting thank you cards in the mail, you know they’ve finally figured you out! ; )  But, the lessons have been good for our children, and there is nothing better than the feel-good-feeling, of giving in secret! Our hearts are always open to new ideas and ways in which we can serve others, as God calls us all to do.  The possibilities are endless, and there are always daily opportunities in our lives, and yours.

  Acts 20:35
“In everything I showed you that by working hard in this manner you must help the weak and remember the words of the Lord Jesus, that He Himself said, ‘It is more blessed to give than to receive.'”

Matthew 25:40
“And the King will answer and say to them, ‘Truly I say to you, to the extent that you did it to one of these brothers of Mine, even the least of them, you did it to Me.’


Save

Save

Save

Save

Filed Under: Celebrations, Crafts & Creations, DIY (Do-It-Yourself) Project, Free Printable/Downloadable, Free Printables, History / Social Studies, Holiday Crafts, Homeschooling, The Big Picture, Traditions Tagged With: Chicken-Soup-for-the-Soul, Holidays, homeschooling, kids-serving, May Day, May day baskets, May-Dak-basket-delivering, May-Day-Basket-ideas, May-Day-basket-ideas-tips, may-day-basket-photos, serving others, tea-cup-plants

Glass Tile Pendants and Magnet Sets | Tutorial | Handmade Gifts

March 25, 2012 By Laura 27 Comments

Glass Pendants and Magnet Sets Craft Tutorial

   
Today we’re going to show you how we made these beautiful glass pendants and magnets. They make such beautiful gifts, for women, as necklaces or magnet sets. I’m sure you could use the same technique to make other jewelry as well, such as cuff bracelets or rings.
You can choose any cardstock print you love, and the necklace pendants can be worn on any necklace chain, ribbon or cord.  So they can be very versatile in style, for you or your gift recipient’s liking.

duo-magnets-pendants    
This was the my first time doing this particular project. But in doing, so I learned lots of tips and tricks along the way, that I’ll be sharing with you throughout this tutorial.  Also, at the end I will share with you the specifications of the supplies, and the resource where you can get them, as I did.  So let’s get started:

001_glass-tile-craft  Here are all of the supplies I used, but I’ll give more details and sources at the end, so you know exactly what to get, and where:

  • 2-sided designer card stock
  • glass tile rectangles
  • glass tile squares
  •  magnets, with adhesive
  • sterling silver plated bails
  • Diamond Glaze Dimensional Adhesive
  • an x-acto blade
  • a synthetic hair paint brush

002_glass-tiles-bails-magnets Here is a closer look, at the beautiful tiles, bails and magnets I started with. 

005_making-glass-magnets All of the tiles, both pendants and magnets, are made by adhering beautiful card stock paper behind the tile, which is then magnified through the glass in such a pretty way. 

So here’s a TIP to start:  Before applying any adhesive, I put each tile on the paper I’d be using, and moved it around and looked at the design coming through, so I could decide ahead of time, exactly where I wanted to place each tile. 

003 Once I decide that, I put a little Diamond Glaze on the center back (flat side) of a tile, and then spread it out with a little brush to the edges, pressing out any bubbles with my brush.  I’d give it a moment to get a little tacky and less wet, and then I’d place and press down onto the paper where I wanted it.

TIP:  Eventually I got tired of squeezing it out of the bottle, so I’d put a small puddle on a coated paper-plate, to work from with the brush. You can do that too, if you want to.

004_making-magnets TIP:  In pressing it down hard enough, to be sure there is no air bubbles, the adhesive smooshes out from underneath the sides of the tile little. You don’t want to leave it, because it hardens like glass!  And you’ll be trimming the excess paper off. So, I used little pieces of twisted paper towels, to clean/wipe the sides, every time.  If you leave it, you will not be able to trim the paper neatly.

Also, I often carefully picked up the paper with the tile on it, and rubbed the back down too, just to be sure it was smoothed out.  Any of the tiles may need to be pressed down repeatedly, as air bubbles tend to sneak in. So just keep checking them until they are drier.

One by one, get all of your tiles adhered to the paper.


006_glass-tile-crafting Once they are all adhered and dried, it’s time to trim.

TIP:  To know if they are dry enough, simply touch the back-side of the tiles where the paper is, and if it is at all cool to the touch or damp feeling, leave them longer to dry.  I honestly do not have any time frames for you on drying time, because I made a LOT of tiles in a craft period spread over 2 days.

But once you know they are dry, trim the tiles out of the paper, very closely to the edge of the tiles. I always cut on my self-healing cutting mat. But you can use dense cardboard (not corrugated), if you need to.

Once all of the tiles are trimmed out, they look pretty done from the front!  You’ll see how beautiful they are already, and you’ll be inspired to make them wearable, or be able to place on a refrigerator.  So they need bails or magnets!

007_making-glass-pendant-necklaces Now I wanted to give the whole back-side of the tiles a coat of Diamond Glaze, as well, brushing just over the edges of the paper as well. The purpose of this is to protect the paper, seal the edges, and make the backs glass-like as well. 

TIP:  Whenever and where-ever you brush on this glaze, you want to use an adequate amount to let it settle to a glass-like surface. If you brush too thinly, just know it will leave a brush marks in those areas. Allow them to dry completely.

If you want to be sure they are thoroughly dry, leave them overnight before the next step.

 From there, I lightly sanded any rough edges of paper I felt, with fine sand paper,  just to make it feel smooth. I wiped off any fine dust from that.

008_making_designer-pendants Once all of the backs were dry, it was time to add the bails to the backs of the pendants.  Basically, I just added a dab of glaze straight from the bottle, onto the center back top of the pendants.

TIP: Be sure to look at the front design, to check that you won’t be adding your bail to the wrong end, leaving you with an upside down pendant! ; )   (I was proud of me for remembering to check that, before I made that mistake.)

009making-glass-tile-pendants Once it has tacked up just a bit, I pressed my bails on just like shown, and then cleaned up what smooshed out, with my brush.

TIP:  As you work throughout this whole process, you may want to clean your brush. The Diamond Glaze is washable, and so so is your brush!  Just wash with warm water (maybe a bit of dish soap if need be), rinse well, and dry.

010_making-magnets
For the magnets, add a small dollop of glaze to the center of the back of the magnets.   It will tack up a bit while you try to pry the magnets apart, and peel the adhesive backing off of one.  Then just press the sticky part down onto the center of the magnet.  Again, clean up any glaze that squished out, for a cleaner looking finished piece.

TIP: If you use too much glaze, the magnet will just slide off center. Just move it back in place. As the glaze tacks up, it’ll stay.  I can see a couple of mine above slid a little, and I missed it.

Another Tip: After all of the pieces were dried, I went back one more time, and added a bit of glaze around the magnets, and around the bails (and underneath the loop), then smoothing with the brush, just for a little more re-enforcement. Whether they really needed that or not, I don’t know.  But I just wanted to be sure the bail would not lift the paper if pressed on, or the magnets would not stay on the fridge and the tile be left in anyone’s hand without the magnet, when moving them!  So I took the time for that extra step.

011_making-pendant-necklaces As I said before, they can be worn on a ball chain as a necklace. But they are so versatile for various outfit styles! Consider wearing them on box chains, suede string, leather cords, or a matching sheer or satin ribbon!

Closer peeks of pendants….

012_glass-tile-pendants

013_glass-tile-pendants

….and the magnets sets….

  014_glass-tile-magnets

015_glass-tile-magnets

016_glass-tile-magnets

017_glass-tile-pendant-necklaces-craft The chained pendants, lying on the table.

018_jewelry-boxes

I found the perfect boxes, to package these gifts in.


019_glass-tile-pendants-magnets I started, trying to fold the tissue paper.  But ummm….honestly, there needs to be a youtube filmage someday, on me and tissue paper, trying to work together.  I have NO = NONE = ZERO patience for it! It took me….seconds, to just crumble it up, and start stuffing it in the boxes!  But you know, in the end, the look kind of worked, with the slick glass pieces!

I was SO excited to finish packaging them up, and get them to the post office! 

020_glass-tile-magnets-pendants I was just thrilled, with how nice they all came out!  Granted, every piece was not absolutely perfect, but they were made with absolute love! That’s what anything homemade, is all about!

In closing, I’d like to give the the specifications and resources, if you’d like to try making these yourself. Because really, it’s quite easy, quite fun, and you’ll be amazed at what beautiful pieces you made all-by-yourself!  What a perfect gift for a special friend’s birthday, or as Mother’s Day or Christmas gifts! Someone, could be impressed with you. ; )

EXTRA TIPS:

CARD STOCK CHAT:  You do really need to use heavy designer card stock for these, as opposed to regular scrap booking paper. The layer of glaze would make regular weight paper very soggy and ripply, very fast. You’d have a hot mess on your hands, quickly.  The heavier stock holds up to the glaze much better. Also, I really loved using the 2 sided designer card stock, because the coordinating papers made really nice coordinating mixed sets of magnets! I had fun putting them together. The brand I used of the card stock were pads by K&Company.

MAGNETS: I got the 1/2″, ‘3 pounds of force’ Neodymium magnets for strength. Of course, I had no idea what that meant. I can tell you, they have some crazy force!!  I had a few comical happenings!  At times, they just kept pushing away from each other. Or, they would just pulling each other and piling up, with no sense of control! Chaos, I tell you! So maybe I got too strong? But it’s better than the frustration of weak magnets!

GLASS TILES:  I got/used 7/8″ Square Pure White Glass Hand-Cut Tiles, and 1-7/8″ x  7/8″ Rectangle Pure White Glass Handcut Tiles

BAILS: Sterling Silver, Standard Small. (There are various styles.)

DIAMOND GLAZE: 2 Oz. Bottle.  – This stuff can be used as a glaze, and also as an adhesive. As you know, I used it for both in this project!  It dries beautifully clear, and glass-hard! So it can also be used dimensionally!  For example, as raised glass dots on a piece, or to add pop to any design!  I can’t wait to work with it some more.

SUPPLY SOURCE:  Well, the card stock pad I got at Michael’s Arts & Crafts.  But everything else….the tiles, bails, magnets and Diamond Glaze, I got on Etsy!  I would start by searching look for a vendor who sells glass tiles, and in particular, search for ‘pure white glass’ tiles. They seem to be superior in quality, in my experience. I did have a specific vendor I could recommend, from whom I bought my supplies from, but she seems to be out of business now.

* That’s a wrap to this project!  I hope you loved what you saw, and find yourself inspired! You can do this!  Please feel free to ask any questions you may have in the comments and I’ll do my best to answer them for you, or just leave some love, if you’d like.  Thanks for coming by!

 Love it?  PIN IT!!

Save

Save

Save

Save

Save

Save

Save

Save

Save

Save

Filed Under: Crafts & Creations, DIY (Do-It-Yourself) Project, Holiday Crafts, Homemade/Handmade Gift Ideas, Tutorial Tagged With: craft-tutorials, crafts, Diamond-Glaze, glass-pendant-tutorial, glass-tile-crafts, glass-tile-magnets, glass-tile-pendants, handmade-necklaces, homemade-gifts, homemade-jewelry, jewelry-how-to, jewelry-tutorials

Valentine Chocolate Covered Spoons

February 8, 2012 By Laura 5 Comments

003_valentine-chocolate-covered-spoon-150x150
Chocolate covered spoons are something we have been intending to try making, for awhile now. There really needs to be no upcoming holiday to make them. But when there is a holiday coming up, it’s another good reason to go ahead and make them!
If you have never heard of chocolate covered spoons, they are just what they sound like they are:  spoons covered in chocolate!  And then prettied up.  They can be used to to stir your coffee, hot chocolate, warm milk, etc – to add some chocolatey flavor to your drink, or make licking your spoon that much more enjoyable!  Meanwhile, if you’ve made a whole batch, they just look pretty sitting in any container in your kitchen.
Chocolate covered spoons can be made as simply or fancifully as you’d like. You’re the designer, with each and every spoon, and that’s the fun of it!  I already had an idea of how we wanted to make some chocolate covered spoons for Valentine’s Day, so that’s what we’re sharing with you in this post.

005_valentine-chocolate-covered-spoons1 Here are a bunch of our spoons, already finished. I thought they looked nice in this simple white gravy boat. We made even more than this though.  We’ll be using some ourselves, but we really made them for the kids to give to their friends. And our oldest made some for her whole basketball team. lol.  I made a simple Valentine card printable, to go with each spoon, and you can get that for yourself HERE, if making these spoons is an idea you’d like to use for your kid’s friends or classmates, too.  It’ll make a unique Valentine, don’t you think?

I did not photograph the step-by-step process, but I think it is simple enough directions to explain.   All you need is some hard plastic spoons, *chocolate to melt, a tad bit of shortening (optional, I guess), and whatever you’d like to decorate the chocolate covered spoons with!   We used Valentine sprinkles and marshmallows for this batch.  But you can drizzle with white melted chocolate after, use sprinkles on other (holiday) colors, cover in nuts…whatever you’d like!

*Because we have a boy with a severe peanut allergy, we cannot use the chocolate melts (like Wilton’s) that are sold in stores in the baking / candy supplies aisles, because they are not guaranteed peanut-safe.  They are convenient though, and melt very nicely, if you can use them!  Since we cannot, we use Hershey’s Milk Chocolate Chips, and so the best we can with those. I believe we can find peanut-safe melts online though, if we planned ahead.

001_chocolate-covered-spoons We got everything out that we needed:  spoons, chocolate (chips), sprinkles and marshmallows, and shortening.  You can melt the chocolate in a mug or a glass measuring cup – just choose something deep. We got a few cookie sheets out, and covered them with some wax paper.  

We began melting about 1/2 cup of chocolate chips at a time, in a mug, in the microwave, with just a 1/2 teaspoon of shortening. (I normally avoid shortening for anything, but a tad bit does help the chocolate melt and stir up smoothly.)   We started at a minute, and then did 10-1secomd intervals, stirring completely in between, until all of the chocolate is melted and smooth. 

Two important tips:   1) You do not want to overheat the chocolate, or it will be ruined. Little by little is the way to go, and add a dab more shortening if you feel it needs it.  2)  I use the handle end of a wooden spoon, for stirring chocolate.  I saw that tip somewhere a long time ago, as it doesn’t heat and cool like metal does.  Stir rapidly, for smooth and shiny chocolate.

002_chocolate-covered-spoons When your chocolate is melted, dip a spoon!  It does take a little patience to wait for each spoon to stop dripping off excess, unless you want to make a big mess.  Then, over an extra the cookie sheet or wherever, sprinkle on your decorations!  For the ones we were adding marshmallows to, we pressed those in first, and then added the sprinkles.  We had fun with our little Valentine variety. Simply rest the handle of the spoon on the edge of a cookie sheet, and the wet chocolate end of the spoon on the wax paper to harden.  As soon as the sheet was full of spoons, we put the sheet in the refrigerator, to further harden.


003_valentine-chocolate-covered-spoon
A couple of other things we have learned:   The spoons really need to be kept in a cool place. Cold, is best. SOME of our spoons, developed white specs on the chocolate the next day.  We know that tends to happen sometimes when the chocolate is overheated any amount.   It could very well have something to do with our needing to use chocolate chips too.  (You know how milk chocolate chips have that white-ish coating sometimes?)  But we did notice, that they spoons we left int he coldest place, are still looking perfect!! Those are the ones we’re giving away! lol.  Regardless……the little change from the smooth chocolate you see will not hurt you or any different.  It’s just prettier to prevent it, if you can.


004_chocolate-covered-spoons To package nicely, we got some skinny clear bags sold in the baking/candy making aisles. They have some for chocolate covered pretzels, and that what we used!  We just cut them down to about 8 inches, and they were perfect!  Then we tied on curling ribbon, and curled!  As I said, I designed a Valentine for each spoon, for these.  But this is a fun project for you (maybe with our kids too!),  and it’s certainly a pleasant treat that will bring a smile to anyone’s face, when given away, or served with a hot drink!

ENJOY!

Save


Filed Under: Crafts & Creations, Drinks, Fun Food, Holiday Crafts, Homemade/Handmade Gift Ideas, Recipes, Seasonal Crafts and Creations, Treats, Tutorial, WINTER Crafts and Creations Tagged With: chocolate-covered-spoons, chocolate-covered-spoons-how-to, chocolate-spoons, edible-crafts, February-crafts, February-treats, kids-recipes, recipes, serve-with-coffee, treats-to-serve-with-hot-drinks, unique-valentines, valentine-ideas, valentines

Valentine Ladybug Mint Cookies

January 24, 2012 By Laura 4 Comments

valentine-ladybug-cookies-12

These adorable Ladybug Cookies I came up with, come right in time for Valentine’s Day, and I promise you, they couldn’t be easier to make! (There’s not even baking involved!) I think you are going to love what they are made with, too!  (You know…besides LOVE.)  I’m talking ingredients.  These cookies are also a sweet idea for a little girl’s birthday party, or to send in with your kids to school, to share with their class.  You’ll look so clever. (You don’t have to tell a soul it was my idea. ; )

Does the word fondant scare you?  Ever heard of the stuff? I know it makes more than a few nervous. But it can actually be a LOT of fun to play with! (Think Play Dough. ; )  Truth be told, in this recipe, we did make and dye our own marshmallow fondant, simply because we knew how, and we think it tastes a little better than store bought. But you don’t have to!  Rolled and ready fondant is available in craft and baking supply stores, and even comes in colors! I know Wilton sells ready-made fondant, but I heard a brand called Satin Ice, tastes better. I see that the Satin Ice brand is available to order online. I’ve seen it in a container so you probably roll that out yourself. I have not tried it yet, but I will.  But if you’d like to learn how to make your own marshmallow fondant like we did, we have a tutorial coming up on that.  For today, we’re just going to show you how simple it is to put together these cookies, with some light pink fondant all ready to go!

valentine-ladybug-cookies Participating Ingredients: 

      • Keebler Grasshopper Fudge Mint Cookies *(peanut safe)
      • Junior Mints Candy (*peanut safe)
      •  Fondant – in light pink (rolled and ready)
      • Any kind of icing (for piping glue)
      • Sprinkles in Valentine shapes/colors (*peanut safety varies with brands)
      • Confectionery Sugar
      • (Mini marshmallows and color dye seen are for making your own fondant, if you are.)

* One of our boys has a serious peanut allergy, so we are always checking ingredients carefully, for his safety.


valentine-ladybug-cookies-1 We rolled out our fondant on wax paper and a little dusting of confectionery sugar, making sure to roll it thin and even. 


valentine-ladybug-cookies-2 Next, we cut circles out of the fondant.  These will be the wings.  We started with this small cookie cutter, but it turned out to be a little bigger than we wanted the circles to be, as the cookies were smaller than this.  It was the smallest actual circle cookie cutter we had, so we needed to improvise. And so the search began throughout the house, to find something that will cut the circles smaller.


valentine-ladybug-cookies-3 Phew!  Good think we have a drink now and then! ; )  This shaker/mixer top turned out to be just right!


valentine-ladybug-cookies-4 Cut the circles in half, and the wings are done! 


valentine-ladybug-cookies-5 I told you! Easy, right? 


It’s mere assembly, from here on out, Friends.


valentine-ladybug-cookies-6 Put some of that icing in a piping bag, with the smallest tip, and just put a little on each side of the cookies.

(These cookies do tend to come a little stuck together in the packaging, so we made efforts to pipe on the messy sides, leaving the smoothest and nicest part of the cookie at the bottom, where it will show between the wings.)


valentine-ladybug-cookies-7 Put the wings on, as shown above. Like a ladybug’s wings, slightly spread.


valentine-ladybug-cookies-8 Pipe a little dab of icing on the back/flatter side of a Junior Mint candy…..


valentine-ladybug-cookies-9 ….and stick on the head.


valentine-ladybug-cookies-10 All that is left to do, is decorate the wings a little!  We tried to arrange them, like the dots usually on the wings of a ladybug, as we recalled.  You do want to be sure, that you press the decorative sprinkles down into the fondant.  You may even want to add a dab of water? (Didn’t try that).  If the sprinkles aren’t pressed down enough, they’ll fall off when the fondant sets up more.


valentine-ladybug-cookies-11 THAT’S IT!!  How CUTE are these?  How EASY are these? 


valentine-ladybug-cookies-13 You can make a whole bunch, in no time at all.  And it’s fun!


valentine-ladybug-cookies-14 Our kids all got in on the action!  They were on their own (the three younger ones are 9 years old here.).  But even younger ones can put these cookies together with a little help! 


valentine-ladybug-cookies-15

valentine-ladybug-cookies-16 We used the red cots from Confetti Sprinkles too.


valentine-ladybug-cookies-17 If you think about it, you could use some alternative ingredients, to make these cookies similarly as well. Oreo cookies could be cute. Dark brown M&M’s can be used as heads. (They are not peanut safe, for us.) Use your imagination!


valentine-ladybug-cookies-18 Just for fun, can you spot the ladybug, who’s wings were cut too big?


valentine-ladybug-cookies-19 We hope you liked this cute little idea. Share it.  🙂  And thanks for stopping by the House!

Stay tuned, for more thoughts and shares on the way!  Valentine’s Day related, and otherwise.

Save

Save

Filed Under: Baking, Fun Food, Holiday Crafts, Recipes, Treats, Tutorial Tagged With: Baking, ladybug-cookies, ladybug-theme-ideas, ladybugs, marshmallow fondant, Valentine-cookies

Tips, Tricks and How-To’s to Our Halloween Decor – Crafts

October 16, 2011 By Laura 2 Comments

09_-300x214

I hope you all had the chance to join us, for our Halloween Decor Tour, in which we shared with you all of the festive touches I made, to put a little Halloween in the air, indoors and outdoors!  The post tour naturally consists of a ton of photos, or else how else could I show you all?  That, and my small chit-chat, made the post plenty long enough.  So I promised to share how I made some of the decor, in a separate post in the Crafts & Creations section soon. And here we are.

So I’ll start with the fact that, all of the signage design work that you see in this post (and the tour), that is similar in style and all ties together so beautifully, is part of the Halloween Party Complete Collection, which I purchased from Frosting & Ink Social Designery’s Etsy Shop.  Please note that everything that I printed out, I did so on textured white card stock. That really adds a nice touch. I also was sure that my printer printed the actual colors, being sure my settings did not allow the printer to choose the colors. (Yes, I am a color snob. I demand accuracy. )


001_halloween-parking-sign

One of the features I was most excited to show, was indeed the biggest hit with our readers!  That would be my Witch Parking Sign.  ; )

–

02_
To start, I printed out the sign from my Halloween Party Complete Collection on a piece of 8.5″ x 11″ textured white card stock.  The actual design was 7.5″ x 10″, so there was an inch of white paper to trim off, all the way around. For anything rectangle or square, I want a perfectly clean straight edge.  So I always use this….

011_fiskar-trimmer

….my Fiskar Trimmer for cutting paper or card stock. But using scissors, or an x-acto blade and a metal ruler on a mat, would also work.

Now for the sake of saving you from having to keep scrolling up, I am going to show you the photo of this sign again. (Because I’m thoughtful like that. : )  You need to be able to refer to it and see it as I talk here.

001_halloween-parking-sign

I wanted to mount my paper sign on a piece of old looking wood, so I asked Michael to please cut a piece of thin plywood about 10.5″ x 13″, and to try and make the edges look jaggedy, like old broken wood. To get that effect that you can see above, he used a saber saw.  Then he stained it dark grey.

Now I needed to mount the paper sign, onto the wood sign.  I had every intention of really using the sign, right at the head of my parking space outside.  So it needed to not only be applied permanently, but the whole sign needed to be weather-proofed, sealed and protected, as well.

–
03_modge-podge-outdoor

To do both the job of applying the paper sign to the wood, and sealing and protecting the whole thing I used Outdoor Modge Podge!   I applied a layer of glue to the back of my paper, as well as a coat on the front of the wood sign.  Then I placed them together with the design perfectly in place, smoothed it all out being sure there were no bubbles, and let it all dry overnight.   When it wasn’t so tacky to the touch anymore, I applied another coat over the whole sign (front and back), and let dry completely, again.   When that dried, I applied one more coat, and let it all dry again.  I paid special attention to be sure I was sealing the edge of the paper, to the wood sign. Any moisture getting in between when outdoors, would ruin it.

*Note – With a past project quite similar to this one, where I was applying paper to wood, and then adding final coats, I did not allow the coats to dry enough in between applications.  I didn’t want to, you know… wait. It didn’t turn out well, People. The paper was bubbling here and there because it wasn’t dry enough in the first place, making the paper soggy and rolling up, and it was just a mess. So leaving it to dry even 24 hours or so between coats sometimes, is necessary. Having patience, or not, shows in the final piece.  Rushing things, and hoping for the best, may not end well. Don’t do it.

–

004_halloween-bottle-accent I had this bottle displayed on my garden potting bench already. It was a cool indigo blue, but had faded in the sun.  So I decided to spray paint it matte black, and make a little Halloween necklace for it, by stringing buttons in colors that together, say Halloween to me: orange, black, green, and purple.  Different button sizes, and no pattern, rhyme or reason. Just string them on. I’ve made these little wrap necklaces for bottles and vases before, using beads and other elements as well. In doing so, I have used different materials to string on. But one thing I have found especially handy to use, is stretchy fishing line.  It works nice for small necks of things especially, that you may want to wrap around more than once, because if it barely is going to fit, it stretches some to prevent the string from breaking. It’s easy to work with. Of course, for a different look for indoor pieces, you may choose to use raffia, suede string, ribbon, etc.  I put a dead stick in it, and it was perfect!  It’s a small thing, but I really had fun with it, and I like how it came out.
–

05_halloween-front-door-decor-bats

I think the swarming bats around the front doors around Halloween time, was an idea first featured in Country Living Magazine (?) last year, and lots of crafty home-owners all over the country were all over the idea, including me!  I just didn’t get to it until this year. There are bat templates you can download from the internet, if you do a search, and I would guess that others looked and found some to use, as I did.  They can be cut out and used to trace with white chalk onto black material, over and over. Then you simply cut them out.  I looked around for bats that looked right to me, a lot. So in the end, I can’t remember where I actually found one I liked. (Or I’d tell you.) But anyway, I did resize it to have 3 different sizes of bats.

06_

I made the bats out of stiffened felt. I think I got about 15 sheets or so, and got as may bats as I could out of them.  Instead of cutting the bats out of the paper and tracing them, I went about things a different way – because I could, and it just seemed easier.  Michael (my husband) has this perforation wheel, to create a pattern of holes through paper, and then you pounce that pattern onto another material, using chalk dust. So we just perforated the bat patterns on the paper, and then used our school chalk board erasers with chalk dust on them, to pounce the patterns onto the felt.

Scissors + Kids = Bats

Just so you know, my kids love cutting things out, and ask to help. I’m not into child labor. ; )

We stuck all of the bats on the house and door, using duct tape on the back.  Yes, one or 2 do blow or fall off now and then. Maybe there is a better way to adhere them, but duct tape works good enough for me. I don’t even notice if or when any are missing.  Michael does though. He tends to be the bat chaser I guess. LOL. But generally, they stay put pretty well.

–


07_halloween-wreath

This funky black feather wreath itself was wicked easy!
I simply bought it as is, at Michael’s Arts & Crafts! (Where I bought all of the materials I needed, but didn’t have on hand.)

08_halloween-indoor-wreath-decor

The circle sign in the middle, was another design in the collection I bought. Frosting & Ink customizes it with your own last name, before sending you the files! How cool is that?

The middle of the feather wreath was originally empty. Just a hole. So somehow, we needed to find a way to stabilize the sign in the front middle. The feathers were not going to hold it there.  So we simply cut a square out of some leftover stiffened felt, and mounted it on the back with hot glue, covering the wreath hole.  Then we just folded some pieces more stiffened felt and used them as spacers, connecting them with hot glue from the inside of the back support felt piece, to the back of the front design circle.  Simple fix!  It needed to be an indoor wreath, no doubt about that.  But thankfully, we have a glass front door, so we were still able to use it as a front door wreath that shows on the outside, when the brave ones come knocking.  ; )

We hung the wreath by hot gluing a piece of black sheer ribbon to the wreath itself on the back, and then to the top of the door frame. Yes, we did. lol. It comes right off, without damage.

09_cutting-perfect-circles
One might wonder how I cut out all of the circle designs.  There were many circle designs to be cut, and it would surely be no fun having to do so with scissors.  I want my circles perfect, so it was high time I got a good circle cutter. (With a 50% of coupon, of course.)  I got the Martha Stewart Circle Cutter, and I love it!! The blade pops on to the fit-in-your-hand cutter, and the blade swivels, so it makes circle cutting seamless and perfect.

10_halloween-french-doors-home-decor

For all of these little mini-signs (originally cupcake/cake toppers, table signs, etc.), I again used my Martha Stewart Circle Cutter for the round designs, and my Fiskar Trimmer for the square designs. Sticky tabs were used to stick them to the black sheer ribbon strands, that run from the top of the doors to the bottom. Simple and cute!
–

012_halloween-ghosts-fan-pull

Lastly I just wanted to mention how I created little ghosts on my Halloween Fan Pull. The heads themselves are simply formed by t-shirt material cut into squares, and forming it over the round beads. Then I used more clear fishing line to tie off the necks some to create the head better, and the kids drew on faces. This is all done while making the fan pull itself, which I also do using strong test fishing line, doubled. The spider element is at the bottom (center of the line), and then I used a fat needle and the fishing line to quickly string all of the beads on.  When it was time to make a ghost, I simply stuck the needle right through the middle of the square piece of material over the round bead, tied off the head with another piece of fishing line (trimmed down after knotted), and continued to string beads. When all of the beads are on for a fan pull, Michael ties on a little piece of wire and knots it up into a ball, to hook right into the ball chain clasp.  Works like a charm!  >  I hope you comprehend those directions. It’s late now. I was watching  X-Factor (2 hours this night) while doing this post too, on commercials.

I think a good thing to take from this post is, there can a lot of ‘winging it’ with crafting, with just a little fire-thought. Yes, sometimes you find one method works out better than another. But the process is simply figuring out what you are trying to create or do, and what kind of materials you may need or have on hand, to make it all work. (Whatever your project may be.). Just think about how you want something to look, and what you can use in terms of material, to achieve that vision. It’s not about doing everything perfectly, but learning as you go, and picking up a few tricks along the way. As you know by now, I have found fishing line to be pretty handy in my crafting!  There is some pretty strong test line that is durable, and it’s practically invisible, which can be a helpful for some projects too. There are so many tools out there that can make the more tedious parts of crafting (like cutting things out), faster and easier. And then there are lots of things right around your house, that you can use as well. Substitutions and preferences, are all part of the crafting game. If you have fun making what you do, and it makes you and/or others smile (even on the inside) when they see your creations around, then you are a successful crafter!

(Is there anything I missed?  Anything you wanted to know about our Halloween Decor that you had a question about, that I didn’t answer here? Please go ahead and ask, and I’d be happy to do my best to answer.)

* * * * * *


Save

Filed Under: Crafts & Creations, DIY (Do-It-Yourself) Project, Faith/ Catholic, FALL Crafts and Creations, Fan Pulls, Holiday Crafts, Holidays, Seasonal Crafts and Creations, The Big Picture, Tutorial Tagged With: creative-Halloween-decor-ideas, Fiskar-trimmer, Halloween-crafting, Halloween-crafting-tips, Halloween-decorations, holiday-crafting, holiday-decor, home decor, Martha-Stewart-Cutter, Michaels-arts-and-crafts, Modge Podge, Outdoor-Modge-Podge

  • « Previous Page
  • 1
  • 2
  • 3
  • 4
  • 5
  • 6
  • …
  • 8
  • Next Page »

We are wicked happy to have you here! We hope you find much inspiration, help, humor and enjoyment here.


Archives


POPULAR POSTS

* * * * * *

SUBSCRIBE to House of Joyful Noise blog! Every new post, delivered right to your email box!


Privacy Policy

Amazon Affiliates

Never at any additional cost to you, we may earn a small commission for our endorsement, recommendation, testimonial, and/or link to any products from our website. Your purchase through our links helps support our family, while sharing with you the products we authentically use and recommend, for various ideas, and letting you know where you can purchase them. Thank you for your support!

[footer_backtotop]

Copyright © 2025 HouseOfJoyfulNoise.com · Genesis Framework by StudioPress